


Our Verdict
Introduction, Specifications, and Pricing
Enermax is a chassis manufacturer which we have not seen in a while. Last time we saw an Enermax case pass through, it was one of the best they had sent, with the Steelwing chassis in 2017. Before that we had the Ostrog advanced in 2016 which unfortunately did not fare nearly as well. Now we have the Equilence which is a tower much like the Ostrog, and I think it's about time to see if Enermax has continued the trend of improvement with this chassis.
The Equilence comes to market from Enermax with the stated benefits of high-density sound deadening and tempered glass. Everyone seems to be doing tempered glass in various forms these days, so now it's just a matter of seeing if Enermax's formula pays off with a final product that meets market needs.
With many cases these days opting for preinstalled RGB and various lighting enhancements to illuminate a tempered glass enclosure. Enermax boasts their 4mm thick tempered glass as a 'panoramic' experience. Although it's merely a flat glass panel, so we will chalk that one up as targeted marketing to avoid being another me-too product by only having a glass panel.
Enermax also calls out that the tempered glass panel is sealed to the chassis with sound dampening cushioning to help isolate noise. The chassis also comes with a fan controller supporting up to six 3-pin DC fans, which are controlled in three steps via a front panel button. The Equilence supports many fan and radiator fitment options which we will look at after taking a peek at the spec list.
Best Deals: Enermax EQUILENCE Silent Tempered Glass Computer
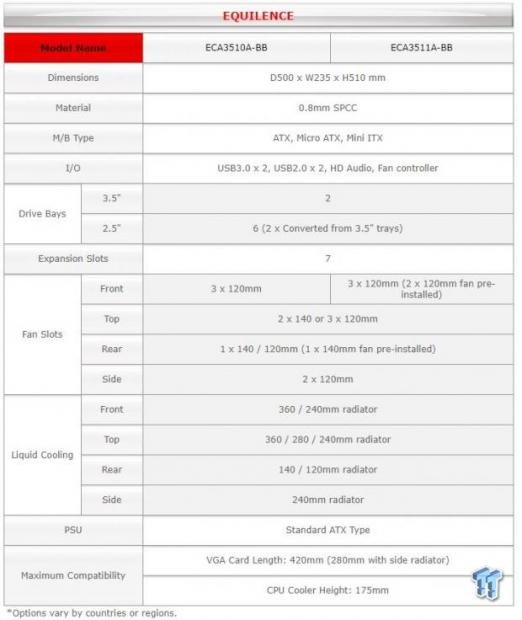
The chassis as previously mentioned is the Equilence, the part number on our chassis is ECA3510, although as you can see by the spec sheet, the ECA 3510 is listed with only a single pre-installed fan. The Equilence we have today has the dual front-mounted 120mm fans in place which means either there was a change or our chassis was mislabeled since the only difference between the two SKUs is the loadout of preinstalled fans. The Equilence comes out of the box measuring 510mm high, 500mm deep, and 235mm wide. This means the Equilence falls well within the mid-tower designation.
Motherboard support for the Equilence is up to ATX, with mATX and mITX of course in the supported field as well. Space next to the motherboard tells me that we could likely fit an EATX board, but it would pretty much close off the gap we used to pass cabled through which we will show in the build section. HDD and SSD fitment is total of two 3.5" drives, while 2.5" drives can natively support up to four, while six total is possible if using the 3.5" trays for SSD's as well.
PSU fitment is only listed as 'ATX Type' which is always an issue for me as companies should list the max PSU length to avoid potential problems in fitting, especially since the adjacent HDD cage is fixed and cannot be moved. The PSU does have a shroud which Enermax amusingly labels as 'PSU-Tunnel design' then appropriately sub-notes it as 'aka PSU shroud' so once again this is just a little marketing fluff to make a PSU shroud inclusion seem like something more. We will look at that as we dig into the Equilence later in the review.
Our Latest Mid-Tower Cases Review Coverage
Cooling fitment is one area where the Equilence has quite a good showing. There are four locations where radiators can potentially be placed; first, we have the standard front mounting which supports 120mm based radiators up to 360mm. The top of the Equilence supports 120 based radiators up to 360mm while also supporting 140mm based units up to 280mm. The rear supports either 120 or 240mm. The side as Enermax calls it is adjacent to the front panel and parallel to the motherboard tray where you can mount 120mm based cooling up to 240mm.
One thing to note with the side location is that there is no ventilation on the rear cable management side panel to help vent air from an installed radiator, which means if mounting a radiator in that location, it will merely recirculate air behind the motherboard tray and into the main chassis. This feels like half of a solution rather than an actual area for cooling components.
You would be better off installing a radiator in the front than in the side location as it would have a much more efficient airflow path. Fan fitment, of course, mirrors the radiator mounting sizes, so no real surprises there. Max CPU cooler height is listed as 175mm which will fit most any current cooler I have seen. Preinstalled fans are two 120mm fans in the front working as an intake, while the rear exhaust is a single 140mm unit.
The Equilence comes to market at $95.00 from Amazon at the time of writing. I will go on record saying that this is going to be a tough fight for Enermax at this price point as there are a massive number of cases that fall into that category with some excellent quality and feature sets. To name a few, the cases that Enermax will have to match or beat to be considered in the price range will be the Lancool One Digital from Lian Li, The Masterbox Pro 5, Fractal Design Define C, Phantecs Enthoo Pro, and the Be Quiet! Pure Base 600. All of these chassis have windows and some good quality and features along with being within 5 dollars plus or minus of the Equilence.
With that sort of pedigree to stand up against, Enermax needs to have made one hell of a case with the Equilence if they want to receive a recommendation for your hard-earned dollar.
Shannon's Chassis Test System Specifications
- Motherboard: MSI MPG Z390 Gaming Edge AC Z390 (buy from Amazon)
- CPU: Intel Core i7 8700K (buy from Amazon)
- Cooler: Corsair H100i Pro RGB (buy from Amazon)
- Memory: GeIL Super Luce RGB GLS416GB3600C16ADC
- Video Card: MSI GeForce RTX 2060 Gaming Z (buy from Amazon)
- Storage: Sandisk M.2 256GB
- Power Supply: Silverstone Strider Platinum 1000W (buy from Amazon)
- OS: Microsoft Windows 10 Home 64-bit (buy from Amazon)
Packaging
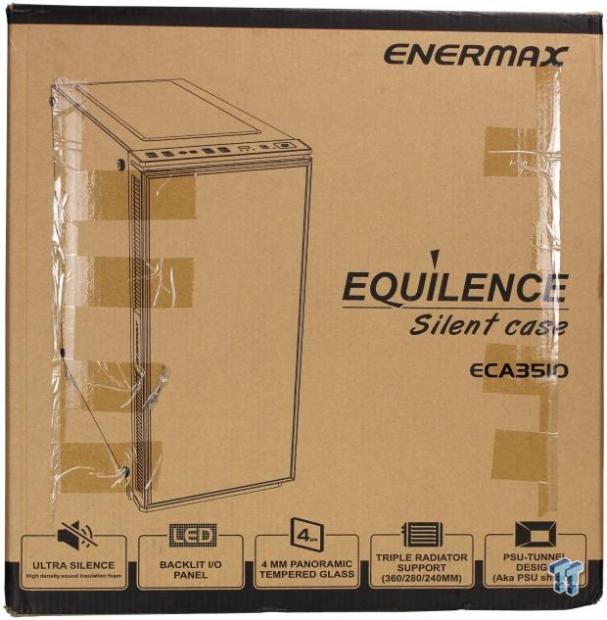
The two opposing large sides of the box are the same, so we will show it once. First thing, let's handle a little housekeeping, the tape strips are due to hard cardboard stabilizing ribs which were attached to the edges of the box to ensure the overseas travel is handled well. The box is brown with black print showing the Equilence, along with its name and some features.
First up is ultra-silence, which coincides with the sound deadening marketing claim we observed earlier. LED-backlit I/O panel is something I have seen on a few cases previously and its neat but would be more helpful if it can be turned off as it can be quite bright 4mm panoramic tempered glass, well its tempered glass, by definition panoramic means 'a wide/sweeping view around the observer or including all aspects of a wide-ranging subject'.
At best, the usage of the term panoramic is verbose and merely stating that you have a tempered glass panel is satisfactory, but marketing is marketing. Triple Radiator support and the way they list it is a bit weird as it lists three sizes under the icon, which in itself is awkward since the dimensions vary for radiator fitment as listed before. Lastly, we have the PSU tunnel design, which is fancy marketing speak for 'we have a PSU shroud too.'
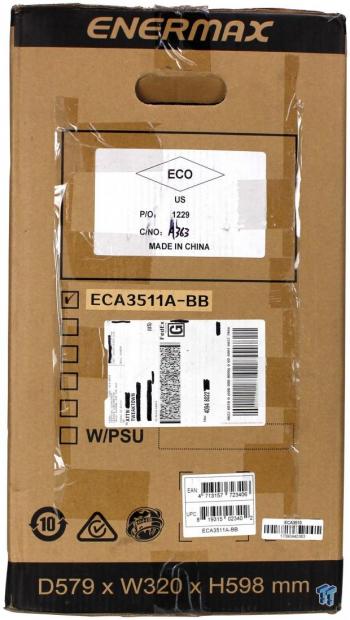
The first thin side of the box is where all of the shipping labels on the box come into play along with some model identifier. Now we see some of the MPN confusion we had previously as the chassis is correctly listed in two places as the ECA3511A-BB. Which is what we have while a sticker to the right of that containing the serial number and on the chassis as well states ECA3510, which means every Equilence must be an ECA3510 with the 3511 model merely getting two more fans in the front vs. the single exhaust of the 3510.
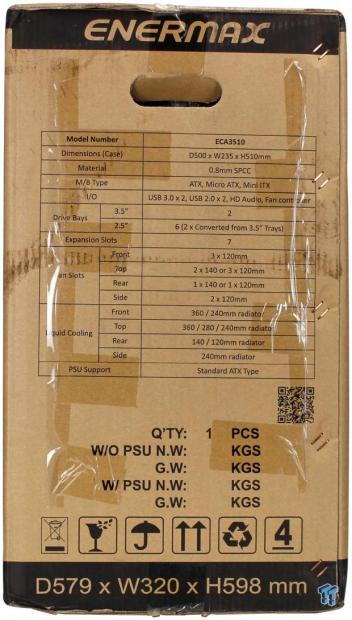
Here on the thin opposing side of the box, we find a spec sheet which mirrors the one we had shown earlier from the Enermax webpage for the Equilence. You will notice that the spec sheet does not show preinstalled fans which means this box is used for all Equilence models and therefore if shopping at a retail shop, be sure to know which part number you are getting.
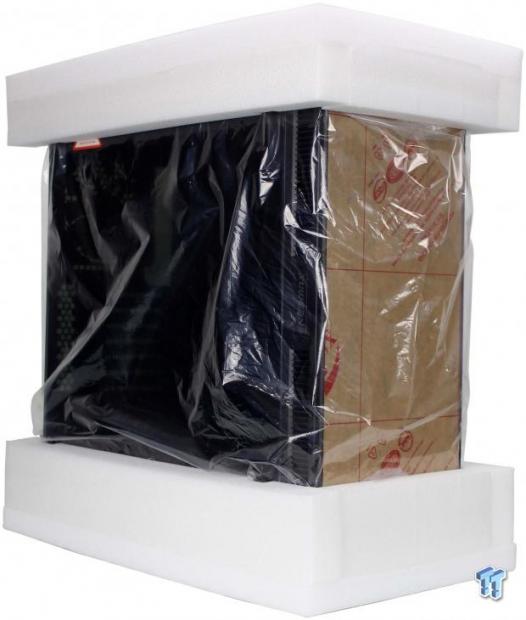
The case once removed is wrapped in a plastic bag, and enveloped on top and bottom with squishy polystyrene style end caps. These cushion the case from shipping damage, and I prefer this material as it tends to be much better at absorbing rough travel where the hard Styrofoam can crumble if it takes impact. The front glass panel has a brown paper over the panel protecting the glass from scratches or abrasions. The large main panel tempered glass comes with plastic film on the interior and exterior to help with damage or scratches to the glass as well.
Enermax Equilence Mid-Tower Chassis
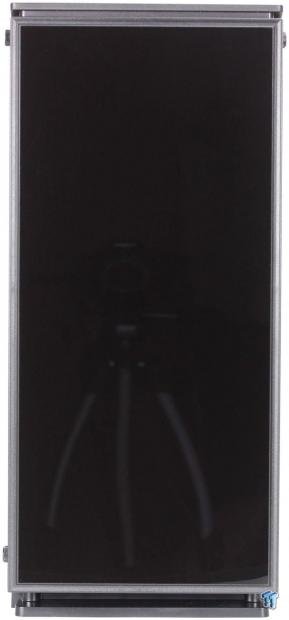
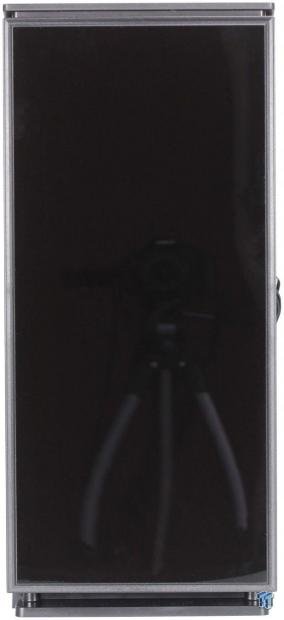
The front of the Equilence is highly reflective glass as you can see from this photo. One thing that surprised me was that I could not see through it, which I came to find out was due to the glass being backed by sound deadening foam which means even with LED-lit fans, they will not show through the front panel as we had seen on some other cases. The glass is framed in a surround of plastic which makes up the remainder of the front panel.
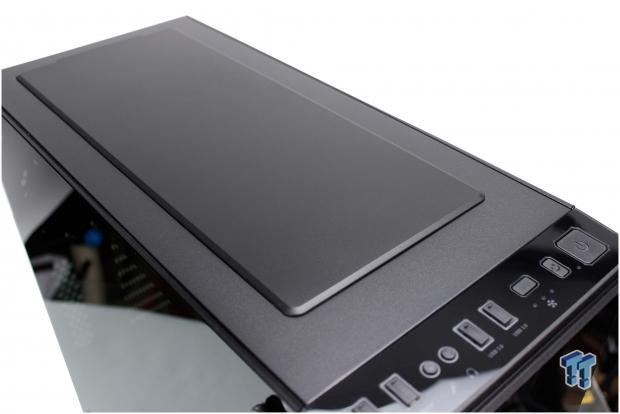
The top of the Equilence is vented, but it comes default with a cover which is magnetically affixed and backed by sound deadening material. With the cover in place, the Equilence has an admittedly cleaner look.
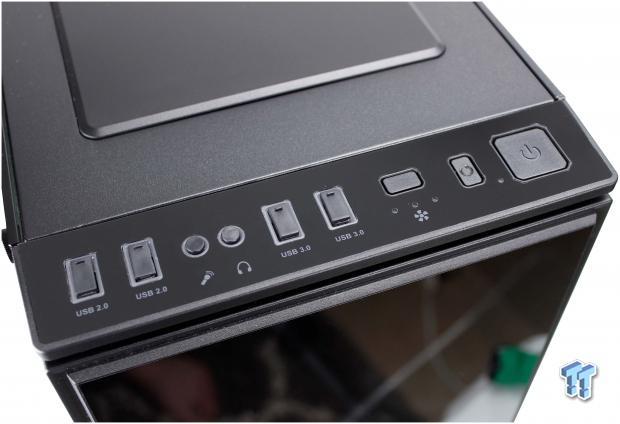
The front panel on the Equilence is at the top of the front panel as is standard for most chassis. From left to right, the layout is as follows.
- Two USB 2.0 Type-A ports
- Headphone and Microphone 3.5mm analog jacks
- Two USB 3.0 (USB 3.2 gen 1) Type-A ports
- Fan control button (3 speeds)
- Reset button
- Power button
This layout is fairly standard except for the fan control button. The buttons and ports all have an illuminated surround.
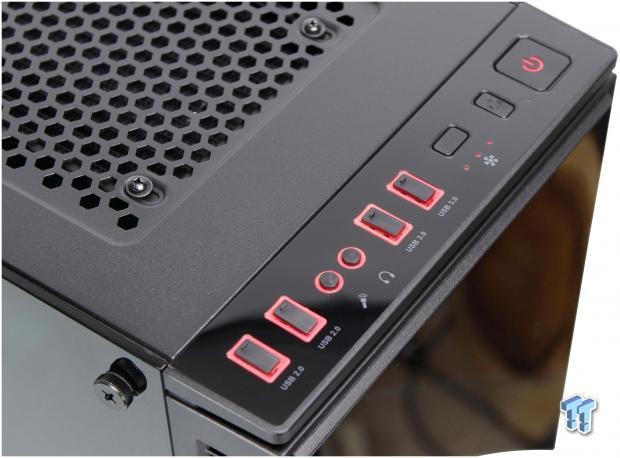
Here we have one of our built shots to show the illuminated surrounds for the buttons and ports.
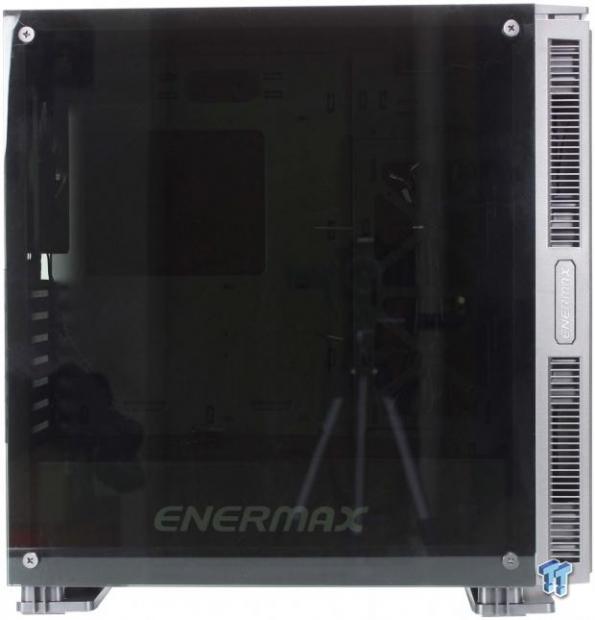
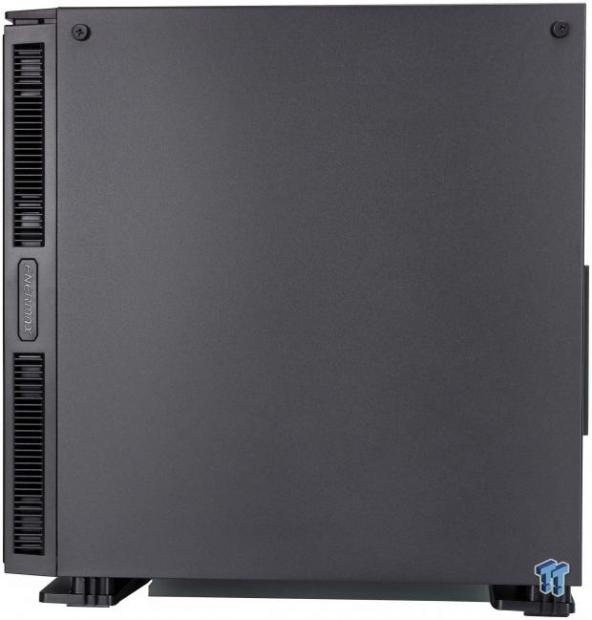
The main panel is tempered glass, as I mentioned previously which as you can see now is quite dark smoked. One thing to note is that the film on the window left some marks that almost looks like water droplets which settled on the glass and no matter how hard I tried to clean them with glass cleaner and the sort, they persisted.
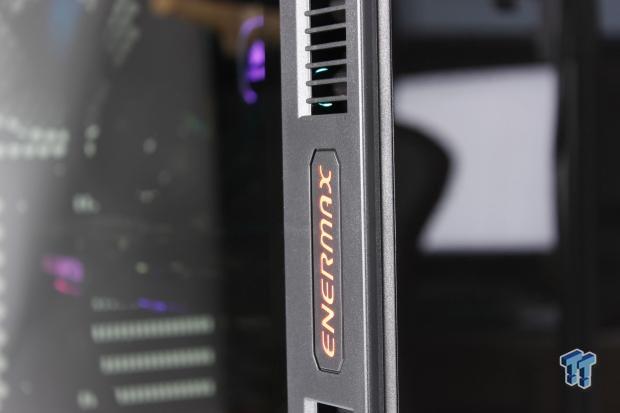
The panel is held in a pretty standard fashion with four large knurled thumbscrews at each corner to secure the panel. Toward the front, we see the ventilation on the front panel, which is where the Equilence ingests air for the front-mounted cooling fans. In the middle of the ventilation, we also see the Enermax name, which is backlit similarly to the I/O surrounds we showed earlier.
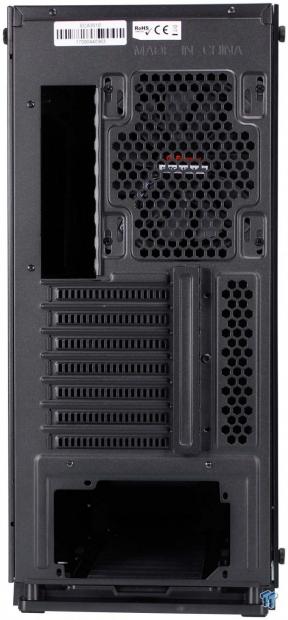
The rear of the Equilence is a quite standard fare. From the top, we see the motherboard I/O opening, along with the fan mounting directly adjacent to it. The rear fan mounting as you can see occupied by a single 140mm preinstalled Enermax fan and the Equilence does have a vertical adjustment to the fan mounting position to ensure you can adjust it to fit your placement needs.
There are seven total expansion slots with ventilation adjacent to it, no vertical GPU mount for the Equilence. The expansion slots are externally accessible and have a flip-up cover which can be removed to access the screws easily. Lastly, the PSU mount is standard and fits one way with the PSU fan facing downward.
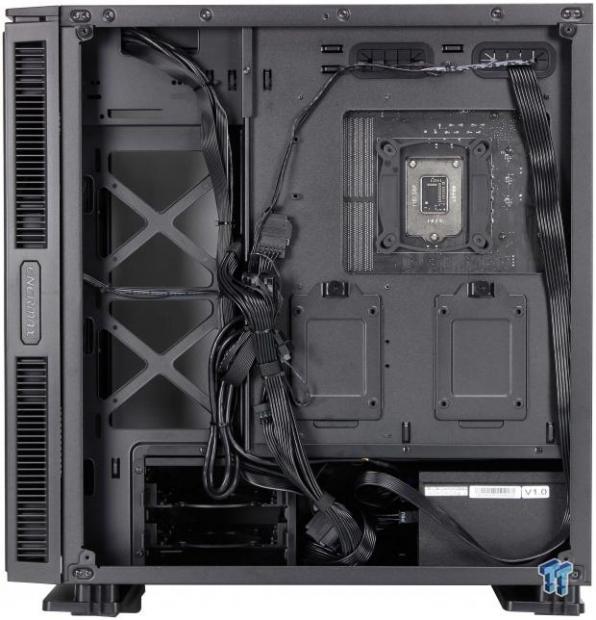
The cable management side of the Equilence employs a solid steel panel with two thumbscrews which affix it at the top. The panel when the thumbscrews are removed, pulls away from the chassis at the top and lifts off the lip across the bottom, similar to a regular swing open panel but vertically. We also see the ventilation on the front panel again and another illuminated Enermax logo.
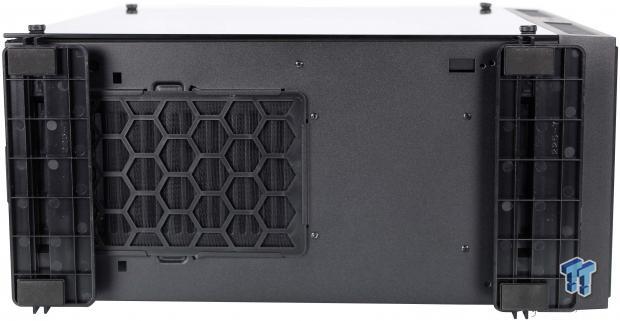
The bottom of the Equilence is mostly solid with an opening in the PSU area, which allows airflow to the PSU fan. There is a slide-out dust filter which can be removed from the rear and keep the PSU inlet from ingesting any large debris.
Inside the Enermax Equilence
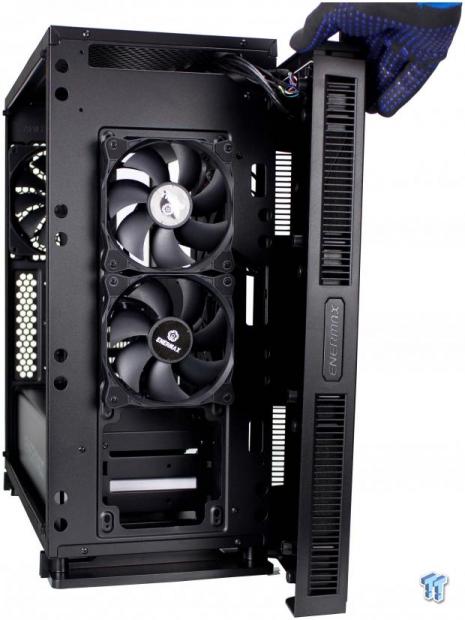
The front panel pops off with a decent hard pull, and it is affixed with plastic clips like we have seen before and they do their job to keep the panel tight to the chassis. The entirety of the front panel switches and lights are all affixed to the front panel so what you see here is about as far as you can go with the panel before you need to start pulling the wire harness out of the Equilence to get the panel away further. As we mentioned previously, the front glass is not able to shine light thru due to sound deadening being applied to the rear of the glass which I feel is a missed opportunity for Enermax and the Equilence.
Now to the real problem I see, thus far we have only observed a single dust filter, and it was on the bottom of the Equilence which is for the PSU. When removing the front panel, we found that the side air inlets where the bulk of your system's air will be ingested into the Equilence are entirely unfiltered. This may not seem like a big deal, but as you see, the vents are ultimately see-through, which means no mesh or filtration here. This means your rig if you build in the Equilence will be far more prone to dust ingress and therefore will be at a more constant state of needing cleaning, and if you care about dust well, you're going to have a bad time.
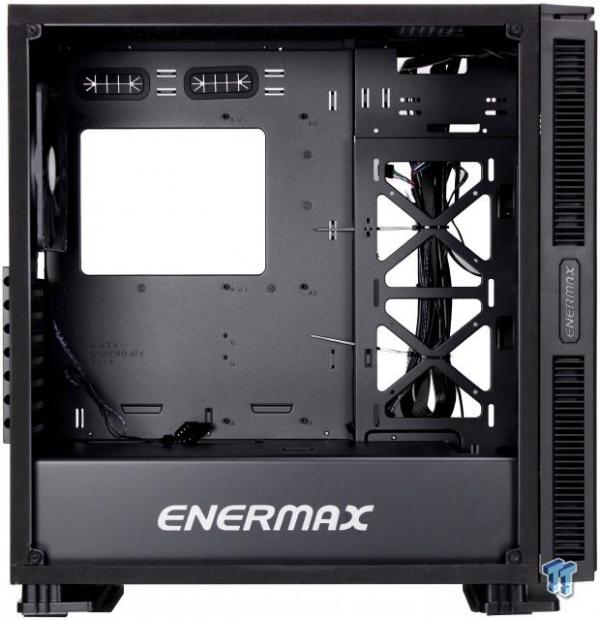
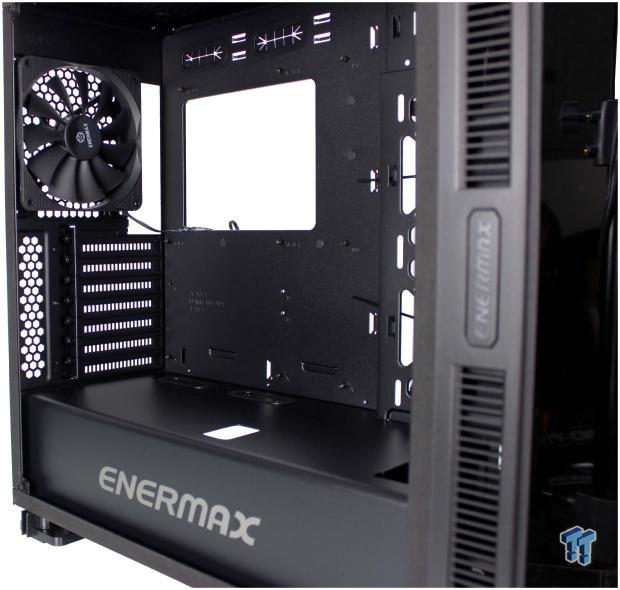
The inside of the Equilence shows a pretty massive expanse waiting to be filled. The CPU cutout area is large and should easily meet the needs of most any CPU cooler backplate. The area to the right of the motherboard is where you can mount dual fans or radiator or even dual SSD's which means Enermax left it quite open in case you do install a cooling device here. This is a double-edged sword as now you have a gaping hole which can quickly make life difficult for cable management as there's not much room to hide wires here. There is plenty of room for all components, and as you can see, it looks like an EATX board should fit in theory while it would mean cables would have to likely be routed through the cooler mounting area to the right.

The front portion of the case, we now get an opposing view of the outlet side of the front fans. You can also make out the sound deadening mounted to the front window panel. The Equilence comes with two 120mm fans preinstalled as you see here and they are already running to the internal 3-speed fan controller. Up to 360mm radiators can fit here as the radiator and fans can pass through the wider opening in the PSU shroud upfront.
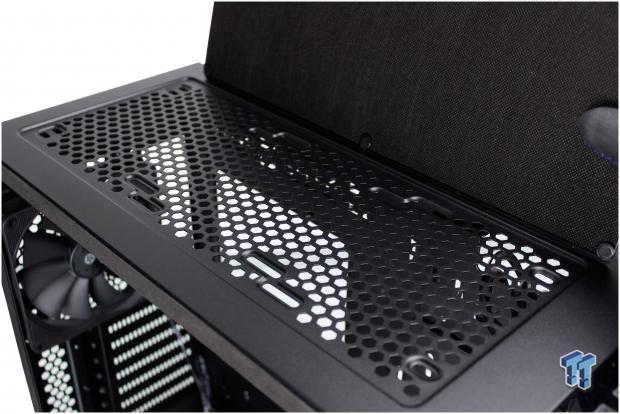
Here we have the top section with the magnetic panel removed and tilted 90 degrees so you can see both the ventilation and the cover. As stated previously, the top panel cover is magnetically affixed, and they are some quite strong magnets. The panel has sound deadening, which likely helps absorb noise from the internal components when in place. The top mounting we find again is unfortunately unfiltered which means that if you are running and fans or top mount radiators dust or other debris can fall into the larger ventilation openings, so you will want to be careful if the chassis is on the floor.

The lower section of the main chamber employs the PSU shroud or PSU tunnel as Enermax calls it. The shroud has two grommeted holes for the front panel and USB/Audio or other connections to pass through for cleaner cable routing. There is also a hole which is more outward, which is not grommeted and can pass through GPU power cables for a more tidy and streamlined look. The Enermax logo is emblazoned on the shroud, but with the dark tempered glass, it can be harder to see depending on internal lighting.
Inside the Enermax Equilence Continued
The rear of the Equilence shows now the opposing side of the rear pre-installed 140mm fan. The fan is DC type just like the front fans, but this one also has a pigtail 4-pin PATA/Molex connector which I would prefer they included an adapter for this rather than have it as a fixed part of the wiring. As mentioned before there are seven slot covers and they are externally accessible and have a cover over the screw area. I am happy to see that each slot cover has its own retaining screw, which makes it easier to remove the ones you need without the rest cascading down as you try to hand yoga them into place.
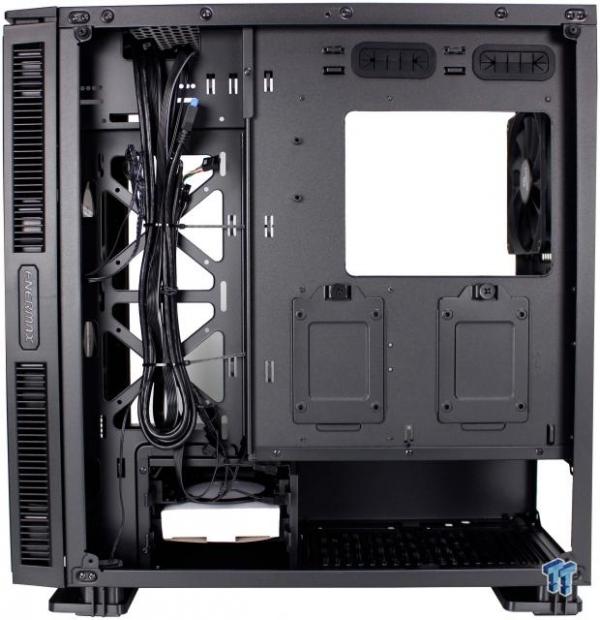
The cable management section of the Equilence is rather tidy with dual SSD trays mounted to the motherboard tray. The main front panel cable array is fixed to the open airflow frame to the left, and for appearance purposes, we will have to route that to the gap between the two panels to ensure it has a cleaner look when complete. There are many cable tie points along with a set on the airflow panel toward the front and the motherboard tray as well to ensure there are ample locations to zip things into place as you manage your build. I feel like there are plenty of tie-down points, but you will have to be creative with cabling to ensure none show in the x-framed front airflow area.
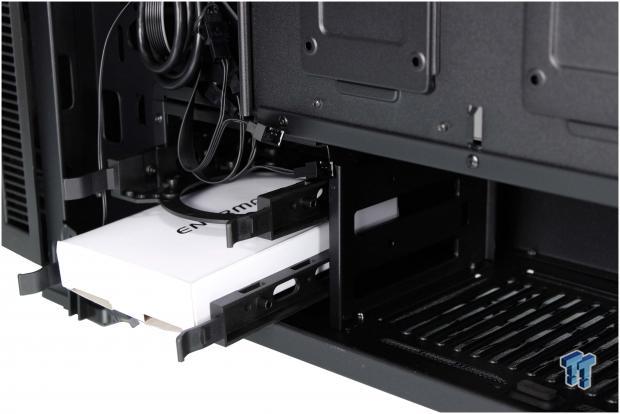
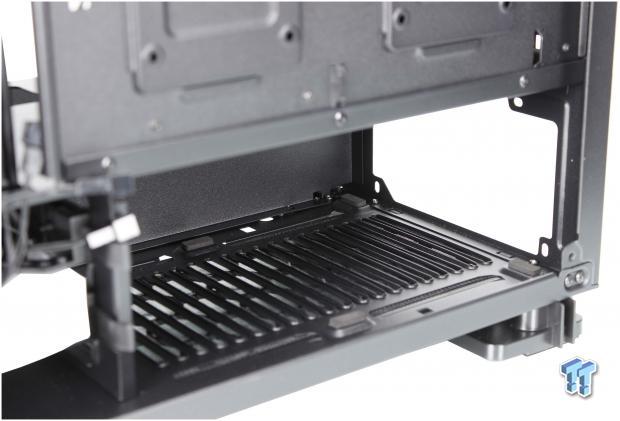
The drive cage in the Equilence is where we look next, and it is below the PSU shroud and is fixed into place, so it is not removable. The trays for 3.5" HDD are tool-less for 3.5" drive installation but like most require screws if using these for 2.5" drives. The metal quality is thin, to say the least as you can see our HDD cage arrived damaged or bent at the top near where it connects to the chassis, and while I would love to blame shipping for this, the rest of the case is square which means this came across from the factory this way.
The PSU area is of course below the PSU shroud and directly next to the fixed HDD cage we just looked at. It employs rubber feet for the PSU to rest on, and the airflow filtered opening is vast enough for the largest supply that will fit here. We recently swapped to a Silverstone Strider 1Kw supply which is a scant 140mm and made installation a simple task.
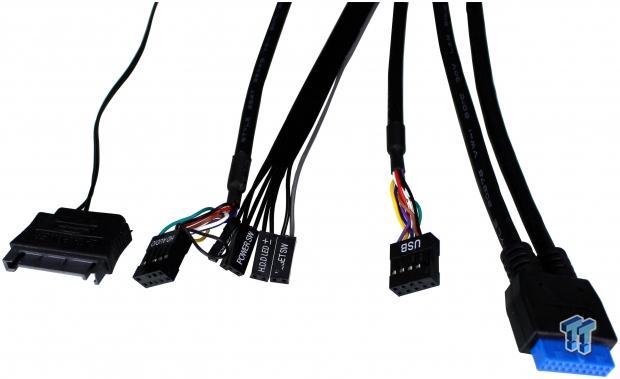
The front panel cables are relatively standard for what you would expect. Going from left to right, we have the following.
- SATA power for the fan controller, lighted I/O and side logos.
- HD audio connector to feed front panel 3.5mm jacks
- Front panel connections for HDD/Power LED and Power/Reset switches
- USB 2.0 9-pin connector to supply the front panel USB 2.0 Type-A connectors
- USB 3.0 (USB 3.2 Gen 1) 19 pin connector to feed dual Type-A ports
Not pictured are the six 3-pin DC fan connectors which run from the front panel fan controller.
Hardware & Documentation
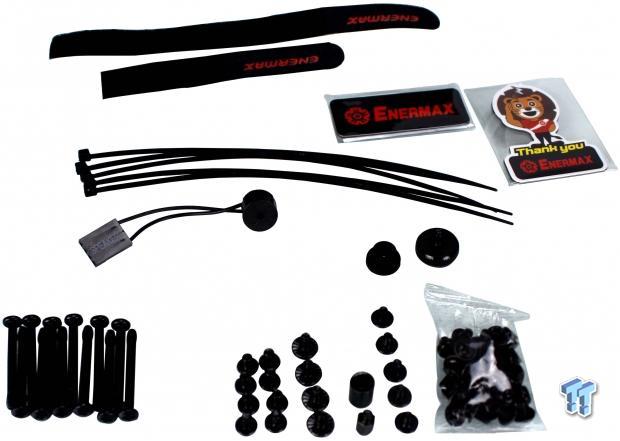
The accessory pack is robust for the Equilence. It has screws to mount fans to the front panel holes which are elongated since they thread directly into the front of the chassis. Also, SSD and motherboard mounting screws are included. PSU mounting screws and a single standoff along with relevant Philips tool for installation is included.
Then we have a postcode speaker in case your motherboard does not have a speaker but a header. There is an extra side panel thumbscrew and rubber mount in case you lose one form the glass panel or the solid cable management panel. There are also two magnets with an Enermax Lion and one just the Enermax logo, Zip ties, and two differently sized Velcro straps.
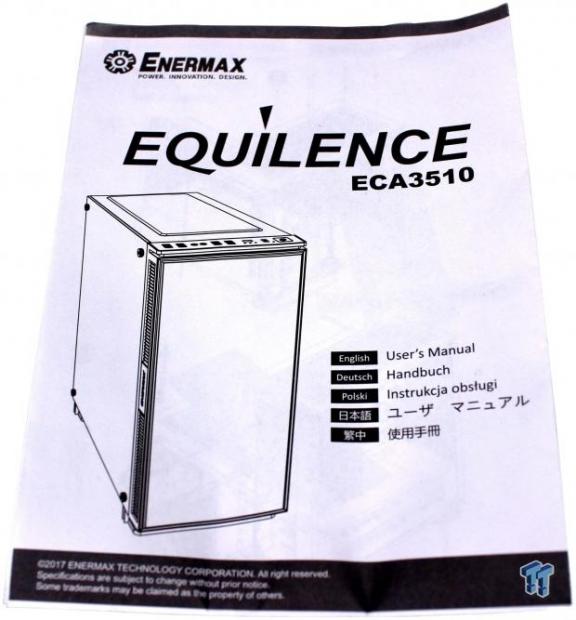
The Manual is a multi-fold style large page. The manual consists of multiple images explaining how to install various items, but one thing I do wish it included is a screw guide so I could count the screws and ensure I had what I needed and I knew at a glance what each screw type was used for rather than relying on trial and error.
Case Build & Finished Product
The front of the Equilence when built looks no different than when out of the box even if you had RGB lighted fans in the front as the front glass panel is backed by sound deadening, therefore, omitting one of the largest appeals of having a glass front panel.
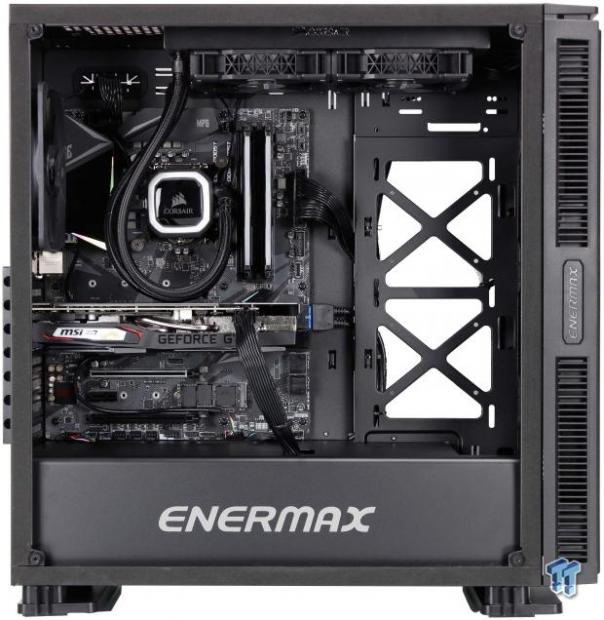
Here we have the build completed, and cable managed. The first thing I would like to point out is that the build went in really well and smoothly, although cable management was quite a chore due to the front-most area being pretty open. Even with all of my trying, you can still see cables peeking across, but even with the most valiant effort, this was my result.
While the result is in no way terrible, I would like to see better in this sense as you can see the board fit with plenty of room and verifying further that an EATX board should fit without much issue. Speaking of fitment GPU length should be a non-issue as well. The raised front-most section gave a unique opportunity to avoid having grommeted holes in favor of this stepped area where cables can be connected to the motherboard without needing to pass through a designated port.
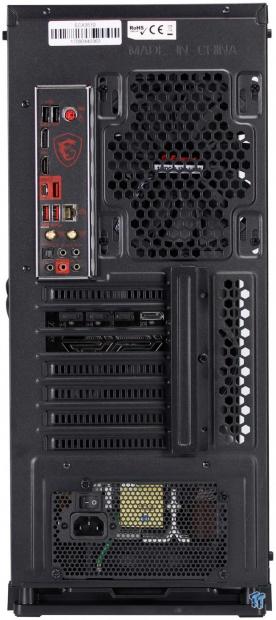
The rear of the rig changes only to include the cutouts and expansion slots being filled with the relevant components. One thing to note is that based on the limited top slotting for top mounting our AIO had to slide forward a bit as the tubes coming off the radiator toward the rear which is the preferred orientation for optimal cable routing and presentation. In the case of a build like ours, you would have to change things up a bit with a top-mounted radiator and likely would favor the tubes being more forward-mounted than what I built. Otherwise, you must move the radiator forward a bit as the tubes contact the rear fan in this orientation if trying to be directly over the board.
The cable routing for the Equilence was not horrible, but it also was not easy street. Anxiety while managing cables, in this case, is real as I found myself actively thinking about the openings toward the front and trying to avoid errant wires finding their way into sight. I finally did settle on good enough.
Another point of contention is the 4-pin PATA/MOLEX connector coming off of the rear fan lead which does not make much sense being this chassis has a 3-pin fan controller, and the front-mounted fans do not have the same pigtail. Managing that extra connector which is bulky, required tucking it under the rest of the bundle to keep the cleaner appearance but had it only not been there from the onset would be much better.
Now, this is not all doom and gloom, the cable management was possible, keep in mind that while you usually can tuck wires in that front most area and zip them into place out of the way, here you cannot. Also note that our PSU is 140mm if you have a 160mm+ PSU, the area in front of the PSU will disappear very quickly and can inhibit your capabilities of tucking excess PSU cable length there, just something to keep in mind.

The built PC powered on looks quite nice as the smoked glass hides most anything you do not want to be seen. As you can see, the RGB lighted components shine through, but without LED strips shining into the cavity, you are not going to see much. The one real downside, I must bring up again is the front glass being covered by sound deadening.
Most people getting a case with front glass will install lighted fans whether it be a ring or RGB blade or some mix of the two so that you can see them shining through the front. This case shows nothing as it's covered with sound deadening, and I'm not sure how much noise that material absorbs with the wide-open side venting in place.
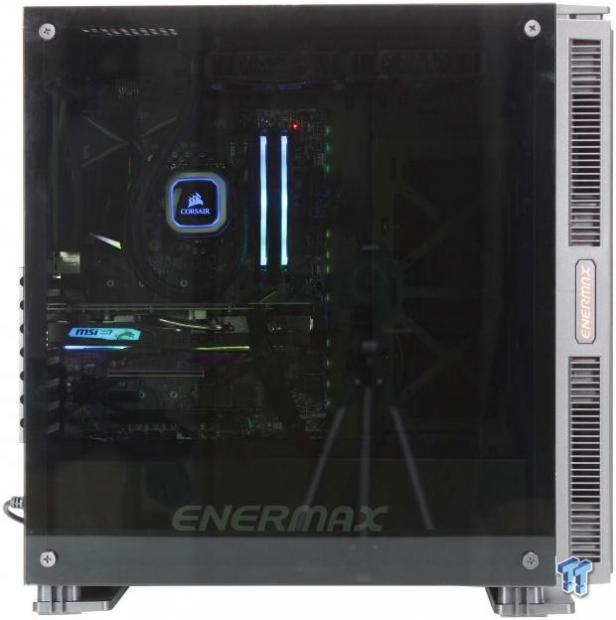
Here we see the chassis straight on. Keep in mind that we have studio light blasting the side with a massive amount of light, and we still can barely see the internal components. So I guess the moral of this story if you are not lighting the case internally the cable management won't matter nearly as much as you cannot see them.
Final Thoughts
Enermax has been a mixed bag as far as cases, same as I mentioned at the onset of this review. It's tough to quantify everything Enermax does as they have evolved as a company. While they made some significant improvements when we looked at the steelwing, I feel like the Equilence is a pretty big slide backward depending on how you look at cases.
The absence of filtration on the inlets means that much more air gets through which resulted in very good CPU thermal results to the tune of approximately 2C over ambient better than the H510i which we felt did very well in our recent review. We saw similar with our GPU thermals as they were a bit lower, which makes sense due to the airflow not being impeded at all by filtration.
First up, let's explore what we liked about the Enermax Equilence. Firstly, the tower is stable and doesn't flex or feel like it would fall apart, getting knocked around a bit. The glass is dark enough to hide any imperfections or issues for wiring which may be present. The gap in the rear is good enough to fit most cabling, especially if you spread it out a bit to give yourself more room. The flip-down rear cable management panel means you can push it to shut if cables are slightly too thick and it can still be closed without laying on the case. The all TG look on the front and side makes for a slick-looking final build, especially being a blacked-out case.
While I would love to say that everything is great and close the review, based on my previous comments, I'm sure you can figure that I have some less than stellar feeling about the Equilence after digging into it. Firstly the absolute lack of dust filtration of any sort except for the PSU is going to cost some points. Enermax invested the money to light the top I/O and their logo on both sides of the front panel while that money could have been diverted to proper filtration and possibly even less than the cost to add the tooling for the light-up I/O and logo.
The alternate 'side mount' where you can add fans or radiators is a neat idea, but Enermax missed a critical step in having ventilation mesh or holes in the rear cable management panel which would allow air to escape from that location. Instead, the air recycles into the main chassis chamber. The bending of the HDD cage while the main chassis was square as can be, tells me that there is some inherent weakness in the base chassis design.
The rear fan having a 4-pin PATA/Molex connector pigtail instead of an adapter is silly when the chassis comes with a 3-pin fan controller. The front panel omitting a see-through glass panel which would advance the aesthetic for those installing LED fans, as this would make for a cool visual as we have seen on several cases in the past.
The 95 dollar price point is going to be a tough spot for the Equilence, and without a doubt there are many cases beyond the ones we initially listed in this range that would make suitable choices which also have some of the features omitted here, and even do a better job of approaching the build and layout from the onset.
Unfortunately, as it stands, I cannot with good conscience recommend the Enermax Equilence as this specific case has too many things working against it at the price point to support it as a tangible solution for a case in 2019. If we see the Equilence enter the $69 territory, I could see it being far more reasonable.
Shannon's Chassis Test System Specifications
- Motherboard: MSI MPG Z390 Gaming Edge AC Z390 (buy from Amazon)
- CPU: Intel Core i7 8700K (buy from Amazon)
- Cooler: Corsair H100i Pro RGB (buy from Amazon)
- Memory: GeIL Super Luce RGB GLS416GB3600C16ADC
- Video Card: MSI GeForce RTX 2060 Gaming Z (buy from Amazon)
- Storage: Sandisk M.2 256GB
- Power Supply: Silverstone Strider Platinum 1000W (buy from Amazon)
- OS: Microsoft Windows 10 Home 64-bit (buy from Amazon)
 Lian Li B4-mATX Review: a compact mATX SFF case with excellent airflow and premium features
 Ocypus Sigma F36 BK ARGB Cooling Fan Review: high airflow and unified design in one frame
 PCCooler CPS RZ820 Display Review: a flagship-level CPU air cooler with an LCD screen
 MOAIPLAY ORA PRO G1 850W ATX 3.1 PSU Review: high efficiency and 10-year warranty for $119.99
 NZXT H6 RGB+ Compact Dual-Chamber Chassis Review
 Profit is now PlayStation's #1 goal as it shifts away from pure MAU growth
 RadeonTuner enables unofficial FSR 4 driver injection in games with RDNA 3.5 iGPUs
 Sony deleting over 500 movies from PS5 libraries is a reminder that you don't really own anything in the digital age
 Apple wants to buy memory from CXMT, a Chinese company that's currently blacklisted by the US government
 Analysts predict another massive memory price increase in Q3 2026, and another in Q4
 Sony President says live service games are still a big push for PlayStation's first-party studios
 Microsoft disputes claims that GTA 6 pre-orders on PS5 are out-selling Xbox 8-to-1
 Vanguard no longer has to run at startup thanks to Riot's new On-Demand mode
 A new battery restoration method can bring lithium-ion batteries back to 95% of their original capacity
 Vietnamese repair shop received an RTX 5090 with its 16-pin connector blown clean off
 GIGABYTE GO27Q24G Gaming Monitor Review: Glossy OLED Gaming at 240Hz
 MSI MPG 322UR QD-OLED X24 Review: A Brighter, Tougher 4K 240Hz QD-OLED for $1099
 UGREEN NASync DXP4800 GT Review: powerful 4-bay NAS with AMD Ryzen and dual 10GbE ports
 Dell XPS 14 (2026) Laptop Review - Premium Quality, Impressive Performance
 Speed Racer (2008) 4K Ultra HD Blu-ray Review: a stunning remaster of the cult classic
 How to fix Wi-Fi Adapter Not Working on Windows laptops: troubleshooting tips
 Hisense U7SG 4K TV: Modern Entertainment for the New Age
 6 underrated Microsoft Word features worth using to boost your productivity
 Level Up Your PC Gaming with these Fantastic ASUS Prime Day Deals on GPUs, Motherboards, and More
 GIGABYTE Wants to Kickstart Your New Gaming PC or Upgrade with These Limited-Time Deals
 7 Windows settings to change right after installation for better privacy, security, and performance
 I stopped Windows 11 notifications from interrupting me with Do Not Disturb, Focus, and a priority list
 I read the Windows Backup app screen carefully, and it does not back up what most people think
 Low Sound Volume on Windows 11? How to fix audio issues and restore normal volume