
The Bottom Line
Introduction, Specifications, and Pricing
When I first saw BIOSTAR's press release for their "Racing" series of motherboards, I was a little intrigued by their RGB LED usage. Their images of the LED "glow" seemed a little photoshopped, but then again, capturing LED output is not a walk in the park either. After turning the board on for the first time and engaging the RGB LEDs in the VRM heat sink, my jaw dropped.
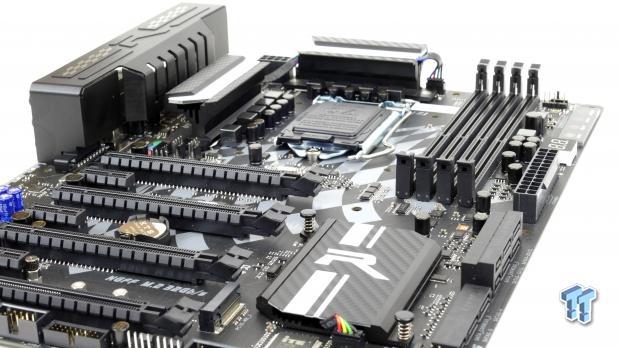
Ladies and gentlemen, BIOSTAR has implemented RGBs into their VRM heat sinks the proper way. I have been a computer hardware enthusiast for over a decade, and ever since the beginning, I have wanted to light up my rigs. My issue is I do not want the light to shine; I want it to glow. The Z170GT7 offers this "glow" and at a very affordable price. Let us begin the journey into the Z170GT7.
Specifications
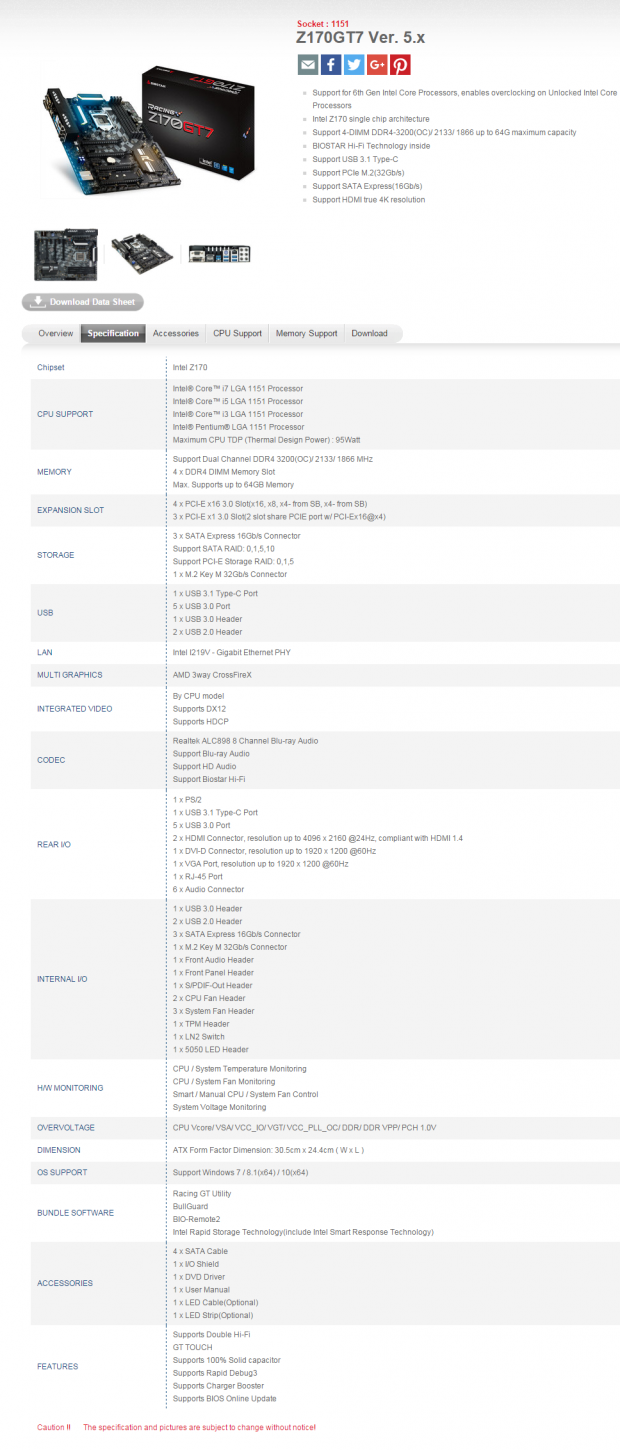
The BIOSTAR Z170GT7 has many high-end features such as SATA Express, M.2 (32Gb/s), USB 3.1 Type-C, 1Gbit Intel NIC, and support for up to 3-way CrossFireX. The motherboard does not support SLI.
Pricing
The BIOSTAR Z170GT7 is available from many large retailers for roughly $130.
UPDATE: The MSRP of the BIOSTAR Z170GT7 is $159.
Packaging and Z170GT7 Overview
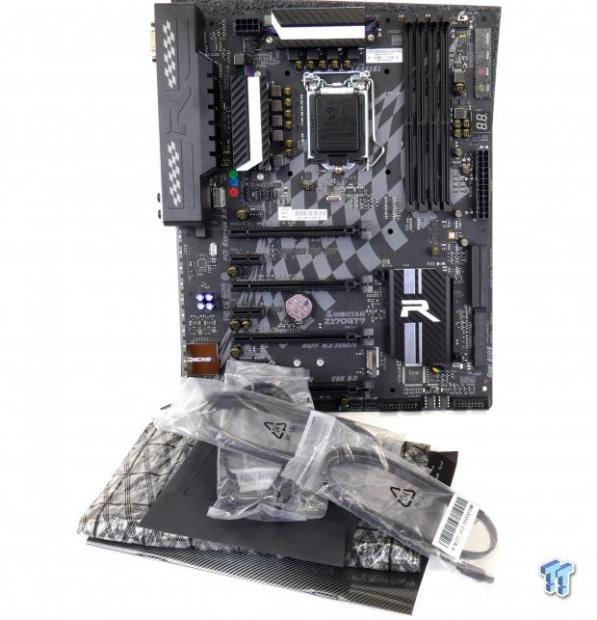
The Z170GT7's box is unlike anything I have seen from BIOSTAR in the past. It has a sleek design, feels high quality, and has a window so you can see the motherboard. Packaging is done well; the motherboard is protected inside a box.
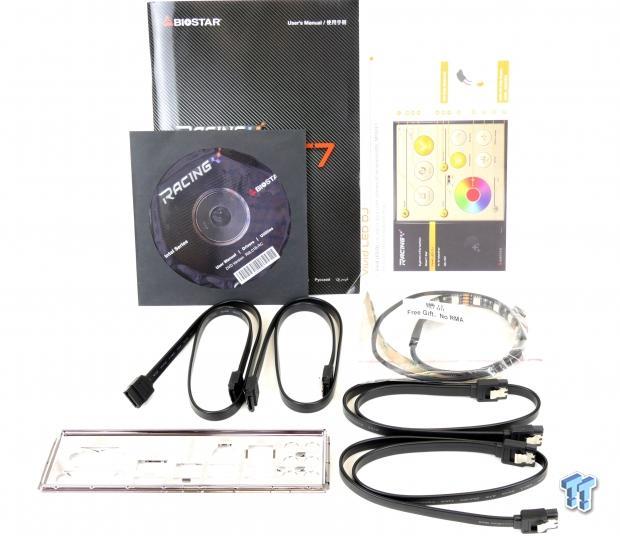
There is a good number of accessories: 4x SATA 6Gb/s cables, IO shield, and driver DVD with manuals. My sample came with a "Free Gift" in the form of an RGB LED strip. I am not sure if all packages come with the RGB LED strip; it might be regional.
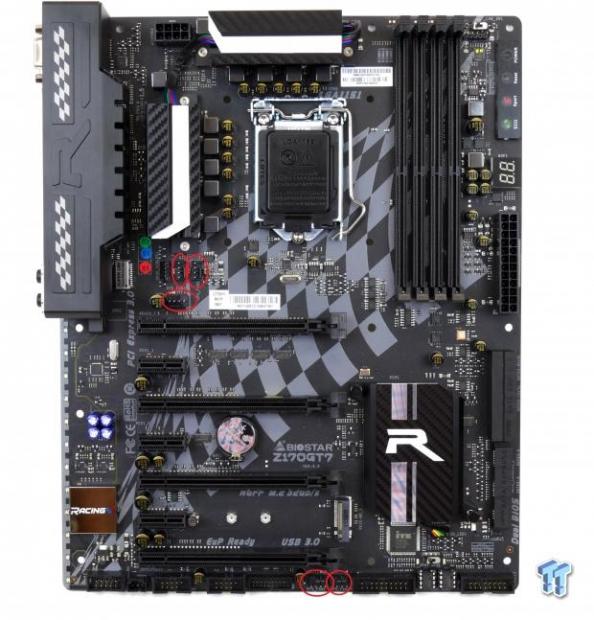
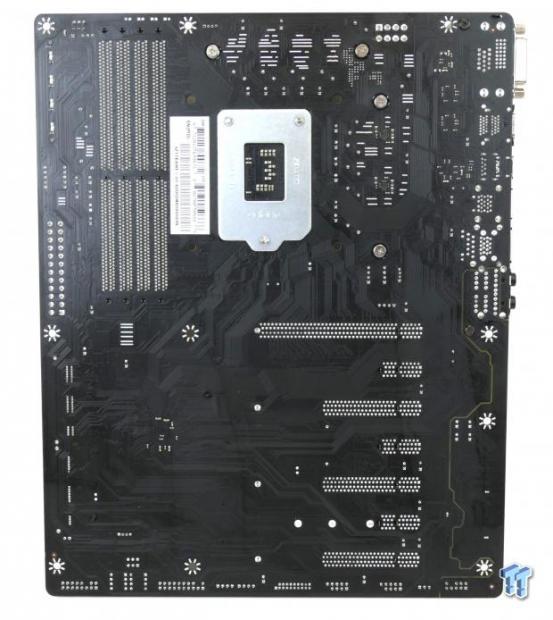
The BIOSTAR Z170GT7 has five fan headers circled in red; each fan header can be controlled in the UEFI with a good number of customization parameters. BIOSTAR's fan control is surprisingly good in the UEFI. The motherboard looks very nice in person. I am not the biggest fan of the silk screen racing flag on the PCB; I just pretend it isn't there since it is dark enough in color to blend into the darkness of the inside of my case. The motherboard's PCB does have a matte finish.
I applaud BIOSTAR for going with their unique design regarding colors, RGBs, and carbon fiber décor. The RGB LEDs on this motherboard in the heat sinks is very classy and sleek. I am not so much a fan of the bright RGBs that form a vertical line near the audio section; I would have preferred them beneath the motherboard to keep with the glowing theme.
The PCH heat sink also has an RGB LED, but you cannot customize it, instead of changes from green to red depending on the CPU temperature. The back of the motherboard is bare except for some cooling solder strips behind the VRM. That is perhaps the cleanest motherboard backside I have ever seen.
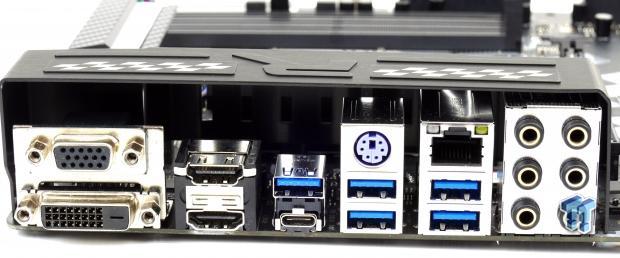
The IO panel on the Z170GT7 totes five USB 3.0 ports, a USB 3.1 Type-C port, 1Gbit Intel LAN, gold plated audio TOSLINK, PS/2 keyboard, HDMI, DisplayPort, DVI, and VGA.
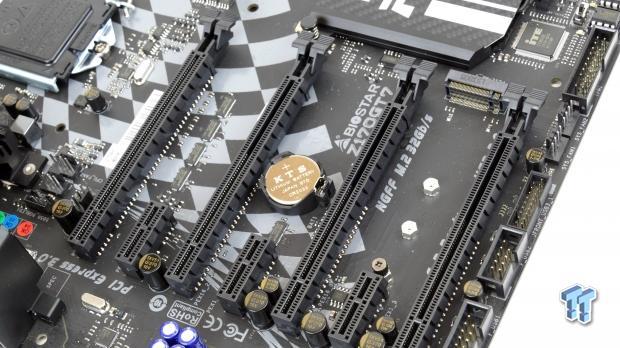
The PCI-E layout is not as straightforward as you might think. The first two full sized 16x slots are wired to the CPU and can operate at 16x/0x or 8x/8x. The first PCI-E 1x slot and the last PCI-E 16x slot (electrical 4x) are hard wired to the PCH. The bottom two 1x slots and the third 16x slot (electrical 4x) share bandwidth, so you either run the 3rd 16x slot at 4x with the two 1x slots disabled or you run it at 2x with the two 1x slots enabled. There is a table that easily explains this in the manual.
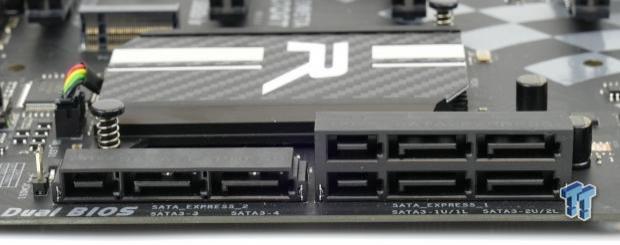
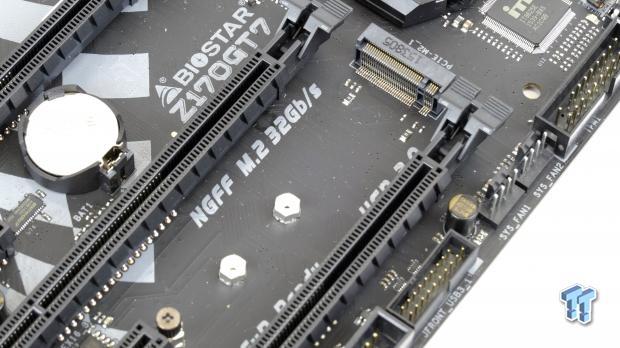
BIOSTAR provides the ability to turn all the SATA6Gb/s ports from the PCH into three SATA Express ports if the user wants. Otherwise, they will be normal SATA6Gb/s. The M.2 slot is a 32Gb/s slot, and it does share bandwidth with SATAExpress1, so you will lose that slot if you use the M.2 slot.
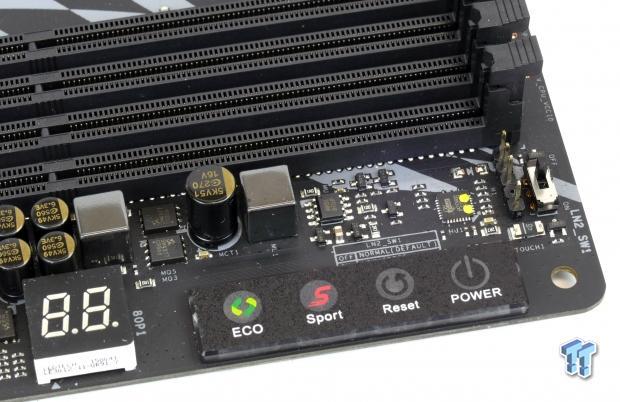
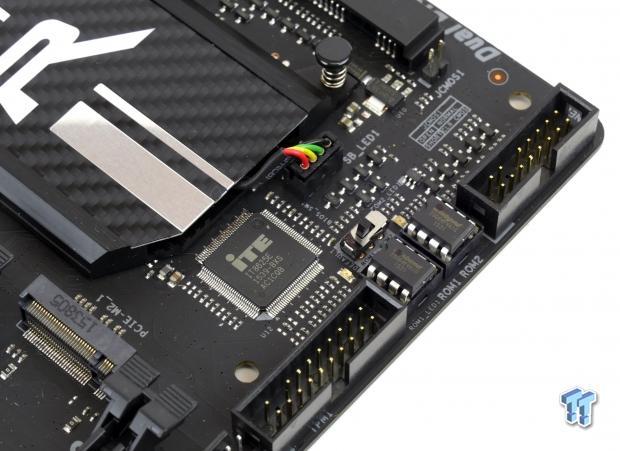
BIOSTAR provides their capacitive touch panel on the Z170GT7. While it doesn't have as many options as the one found on the GAMING Z170X, it does offer Power, Reset, Sport (OC), and Eco (down clock). I was very happy to find a POST Code display; it doubles as a CPU temperature readout when you enter the OS. There is an LN2 switch that can be used to down clock the CPU core and cache to 8x on-the-fly. The Z170GT7 even has dual BIOS ROMs with a physical switch.
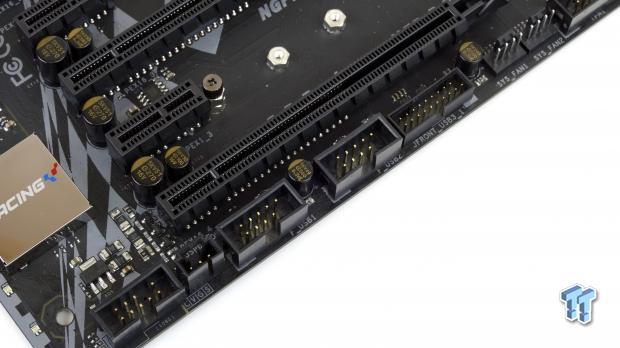
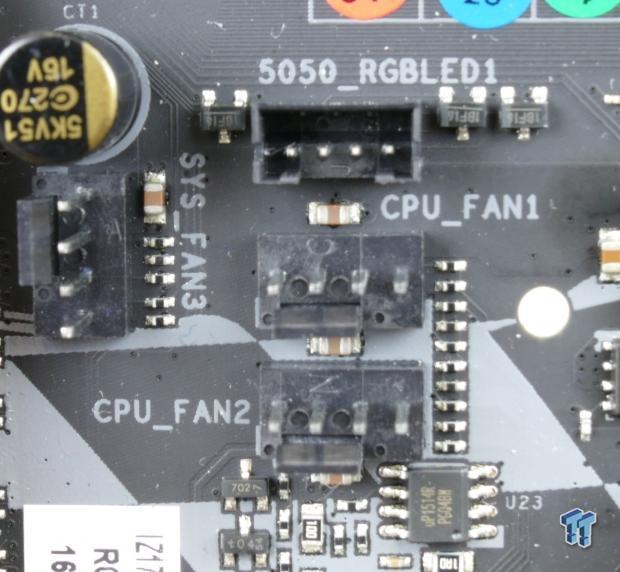
BIOSTAR didn't forget to include a USB 3.0 internal header, but its location is a bit far for many front panel cables. There are also two USB 2.0 internal headers. BIOSTAR added a 5050 RGB header; it works in harmony with the motherboard RGBs.
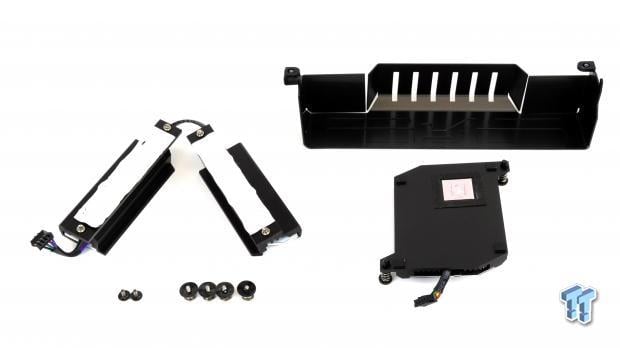
Heatsinks for the motherboard VRMs are held down by screws while the PCH is held down by pushpins. I was surprised to find that the IO panel shield is metal rather than plastic.
BIOSTAR Z170GT7 Circuit Analysis
Circuit Analysis
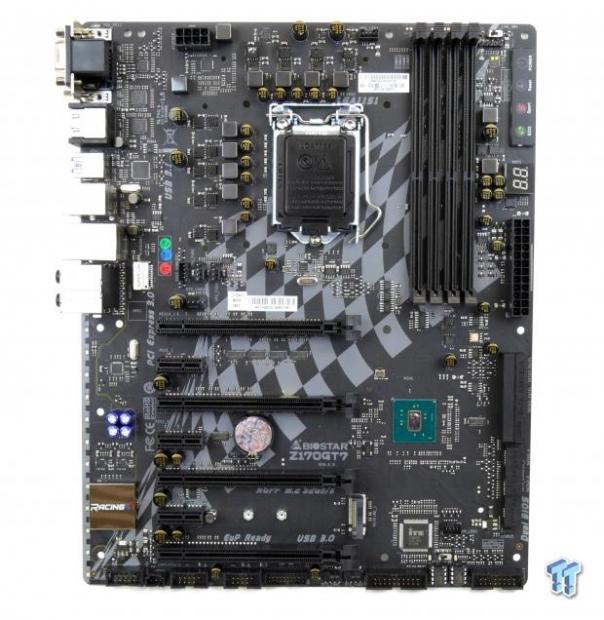
Let's examine the parts that make up the Z170GT7.
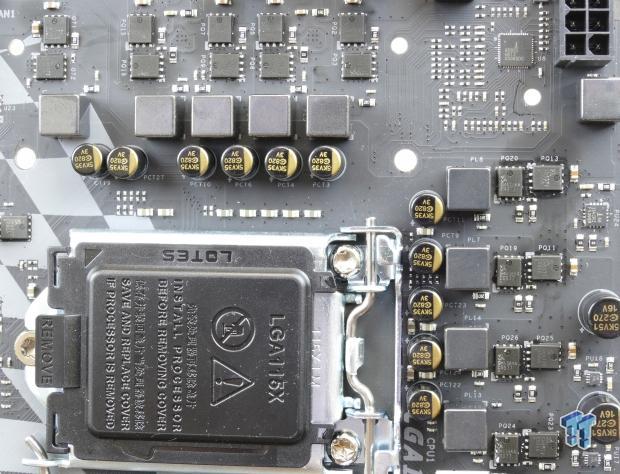
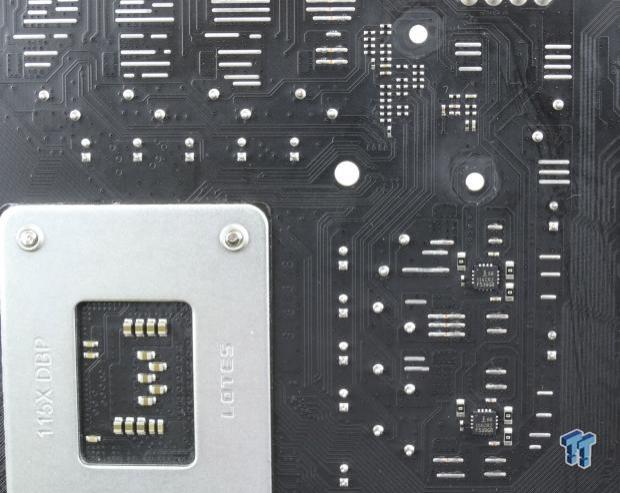
The VRM on the Z170GT7 is a 6+2 phase design. The first six phases come from three doubled PWM phases. The iGPU phases each has their own PWM line. BIOSTAR added some solder strips on the back of the PCB. I remember these from years past; they are supposed to help lower temperatures.
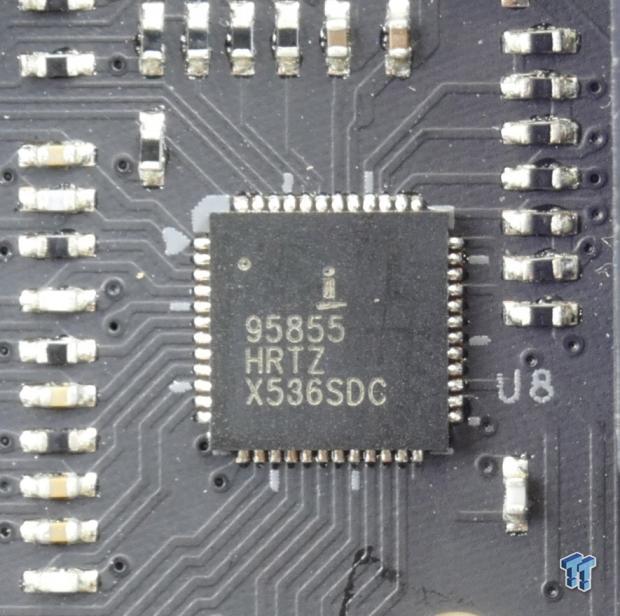
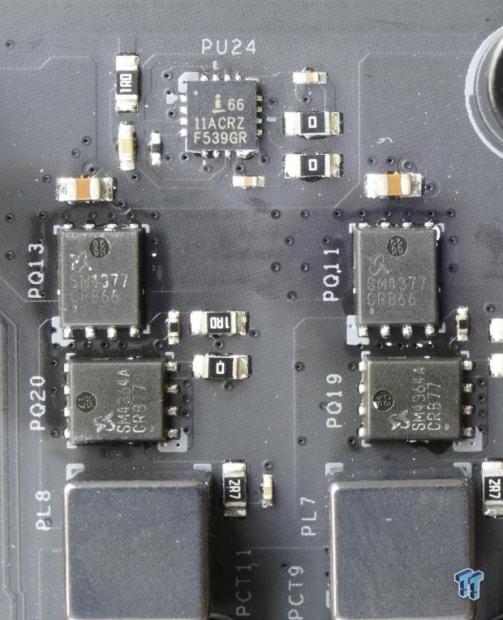
The ISL95855 is an IMVP8 complaint hybrid model which can support up to 3+2+1 phase output. The first three phases are doubled by three ISL6611A doubler/dual driver chips. Each phase consists of a high-side PowerPAK (Sinopower SM4377) and a low-side PowerPAK (Sinopower SM4364). The iGPU phases each have an ISL6208 driver. The VCCSA and VCCIO come from the combination of a single phase uPI UP1514 controlled phase and a linear regulator.
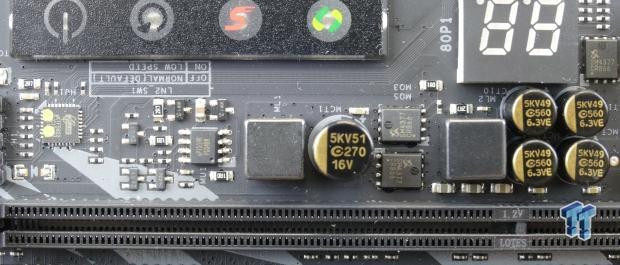
The memory VRM uses a uP1514 single phase PWM (same as VCCSA) and two Sinopower SM4377 PowerPAKs. You might also notice the eLAN eKTF5832, which is an 8-bit microcontroller specifically designed for touch panels such as the one located right above it.
BIOSTAR Z170GT7 Circuit Analysis Continued
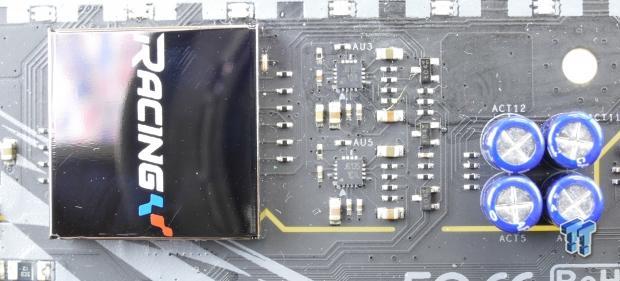
The audio on the Z170GT7 is centered around an ALC898, which is a high-quality codec. While the ALC1150 is popular, the ALC898 offers higher SNR on all outputs rather than just the headphone output like on the ALC1150 (ALC1150 headphone output is higher than the ALC989). Two sense amplifiers are located to detect and provide the proper audio for your device. BIOSTAR does include PCB isolation for the analog audio as well as non-polarized electrolytic audio capacitors.
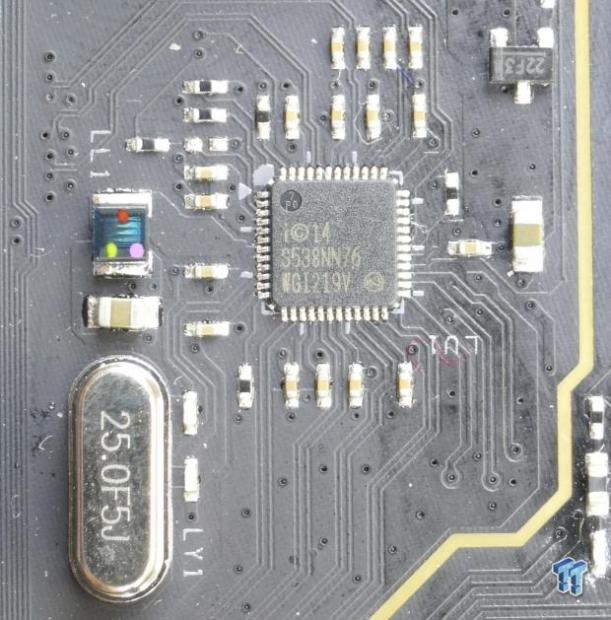
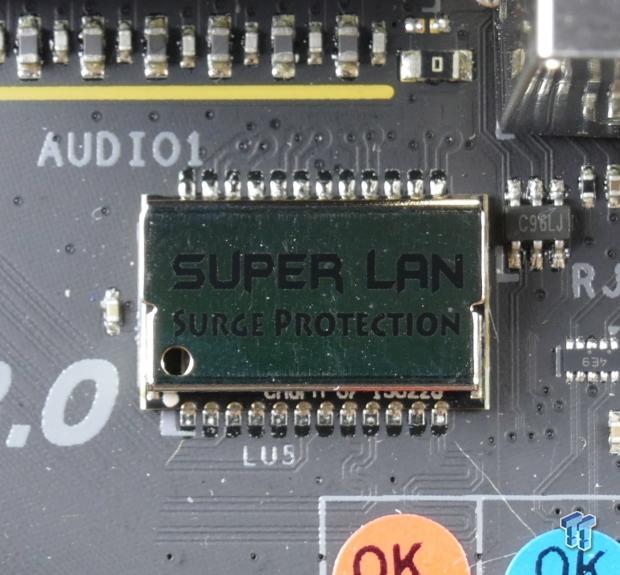
The Z170GT7 has an Intel i219v PHY used to provide Intel 1Gbit LAN. To add extra protection to the LAN port, a dedicated LAN specific surge protector is included.
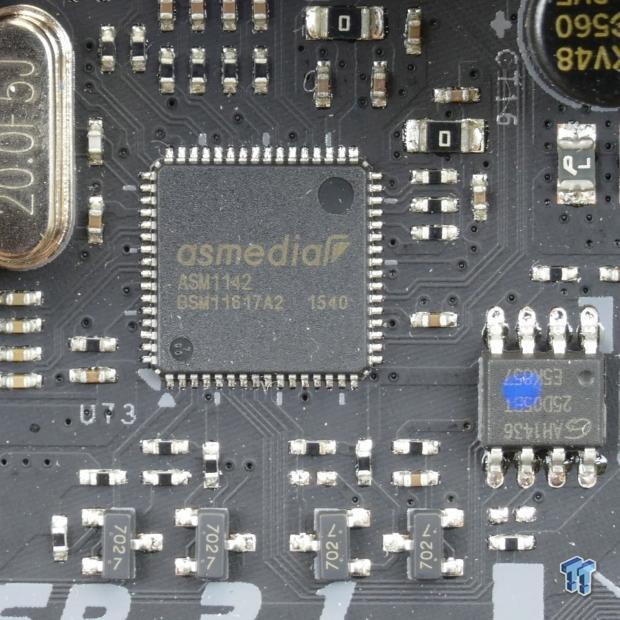
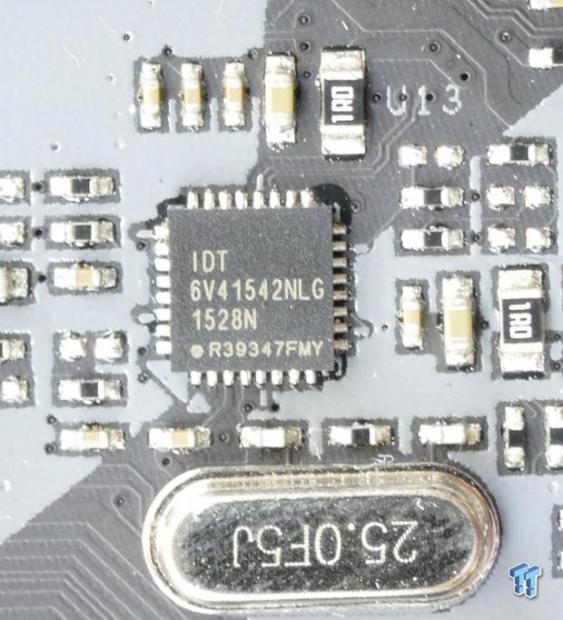
For USB 3.1, BIOSTAR went with the ASMedia 1142, it provides the single USB Type-C connector on the backpanel IO. I did not find a USB PD chip, so don't expect higher output than 2A. I did find a dedicated clock generator for BLCK overclocking, the IDT 6V41542NLG.
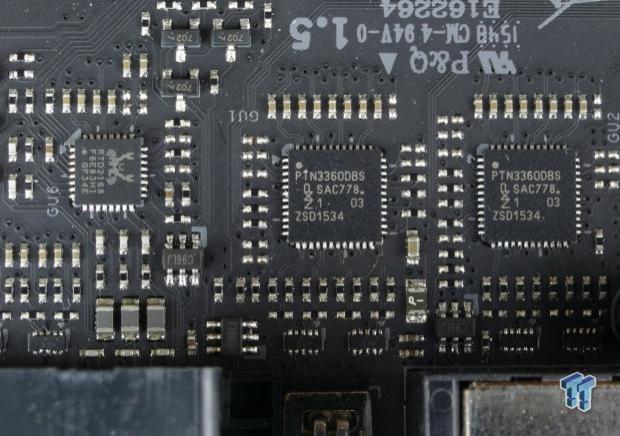
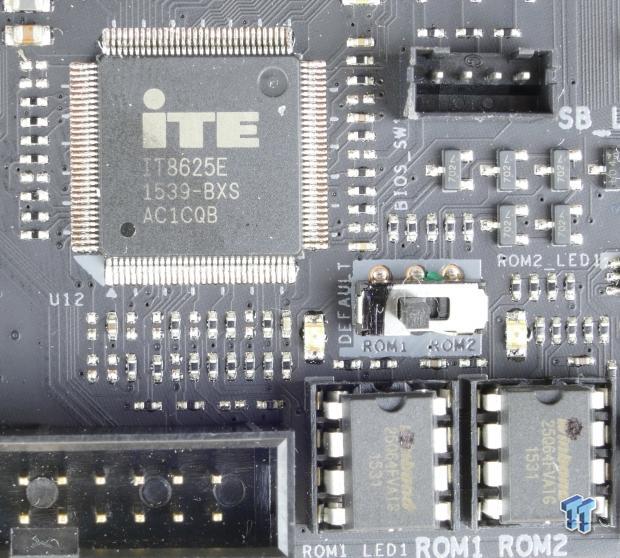
Since Intel has removed VGA/D-SUB from the native display outputs of the CPU's iGPU, BIOSTAR was forced to add in a Realtek RTD2168 to convert digital video into VGA for the back panel VGA port. Two NXP level shifters turn digital video from the iGPU into an output that is compatible with HDMI and DVI. The main SuperIO in charge of fan control and system parameter monitoring is the IT8625E. Two 64Mbit (8MB) BIOS ROMs provide UEFI redundancy in case of corruption from overclocking.
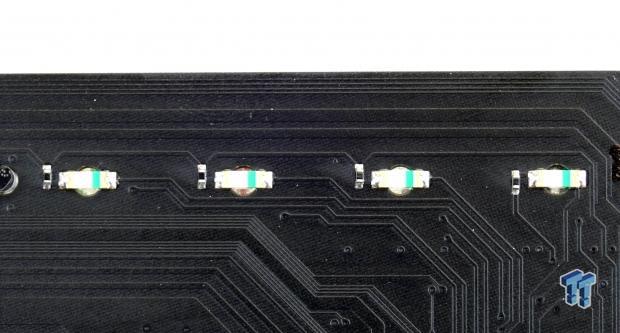

Not all the LEDs are RGBs, some of the are just normal LEDs such as the ones pictured above which reside below the touch panel on the upper right corner of the motherboard. For PCI-E quick switching, BIOSTAR is using the ASMedia ASM1480.
BIOS and Software
BIOS
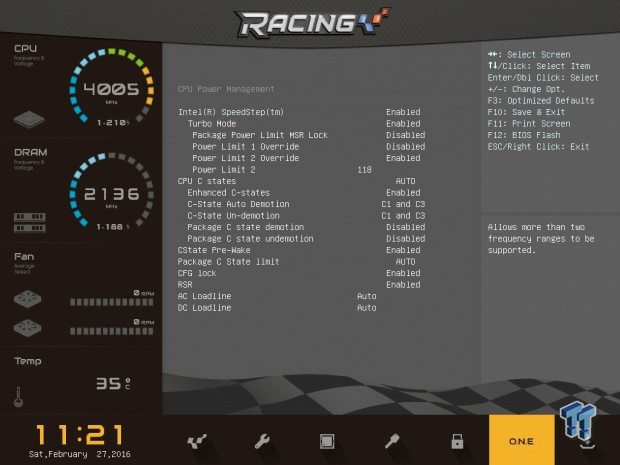
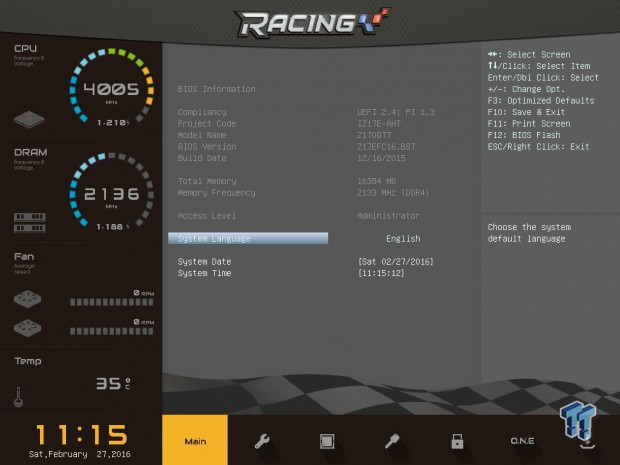
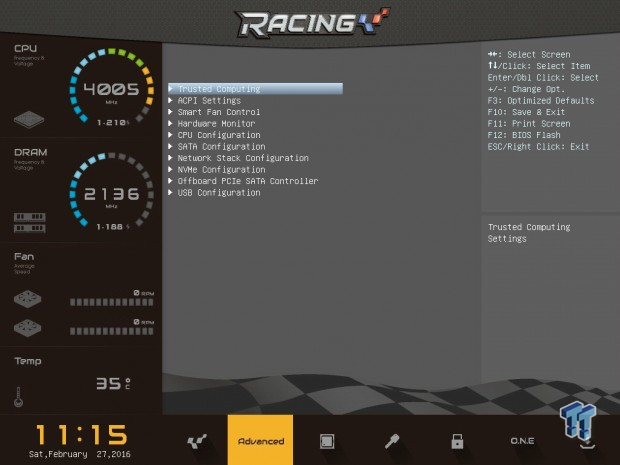
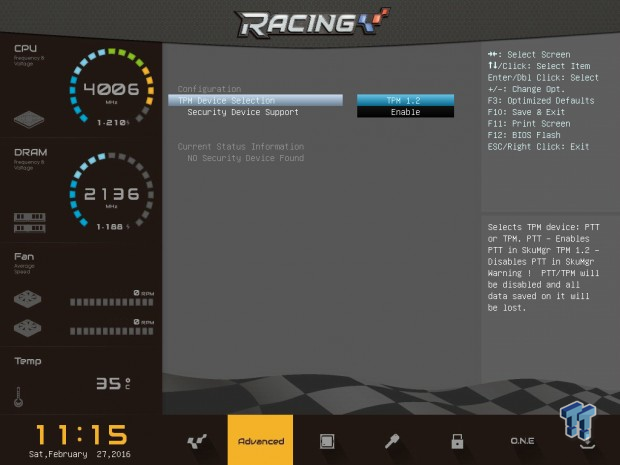
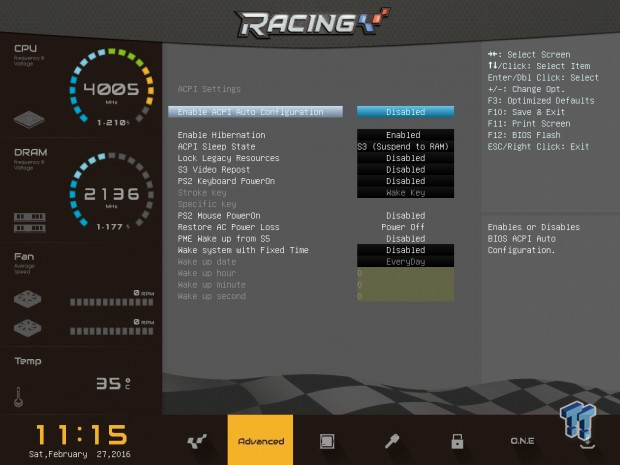
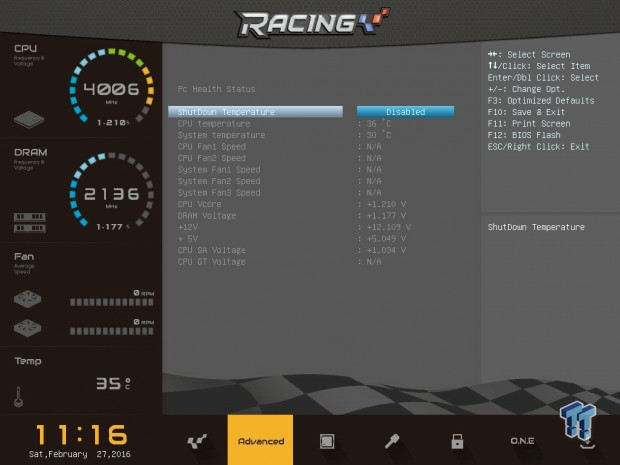
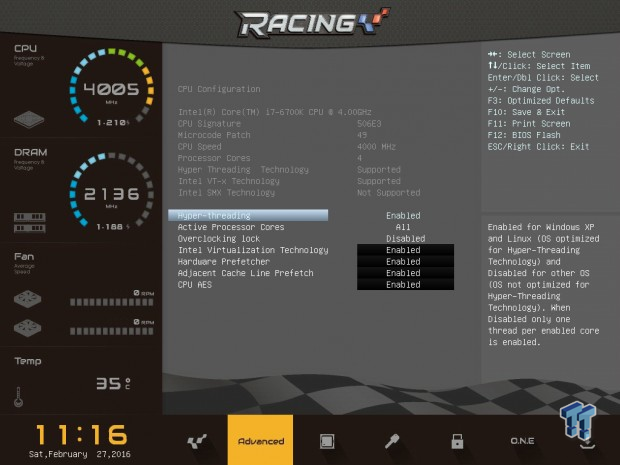
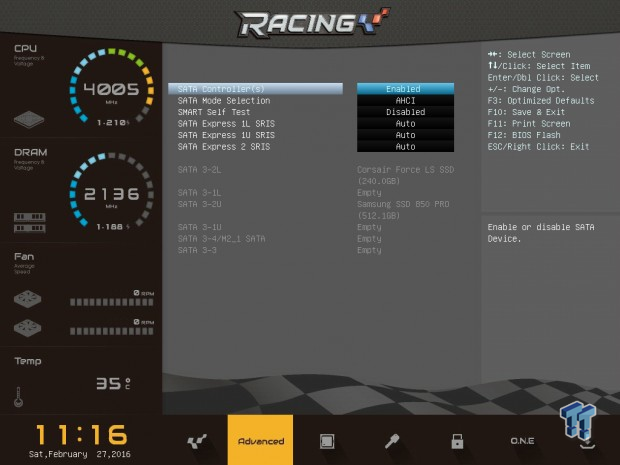
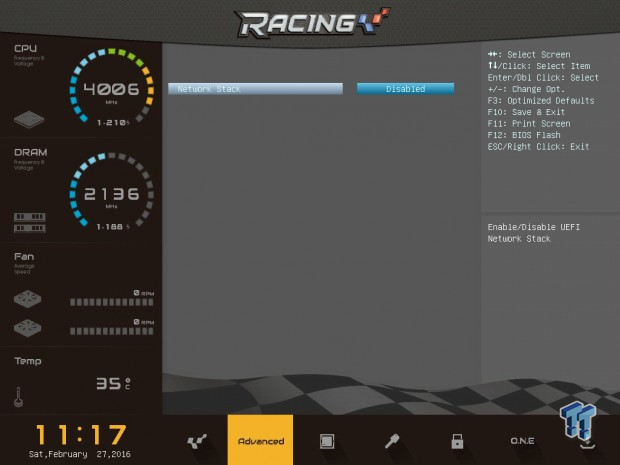
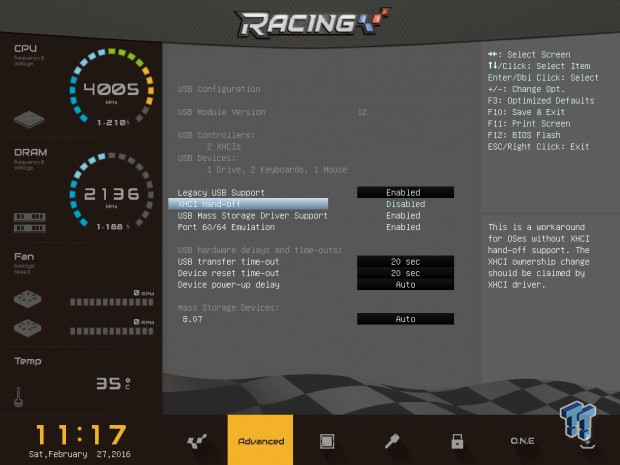
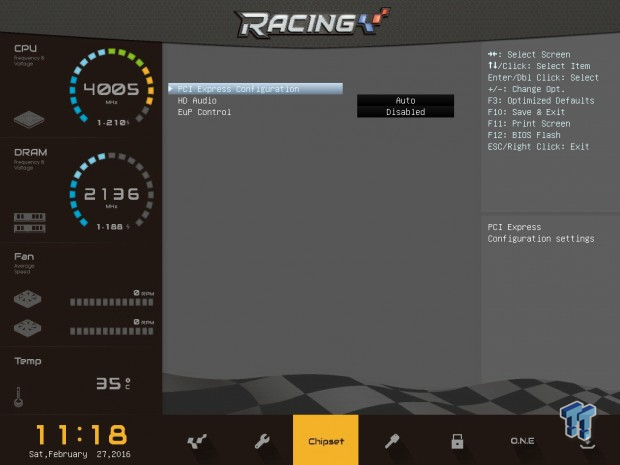
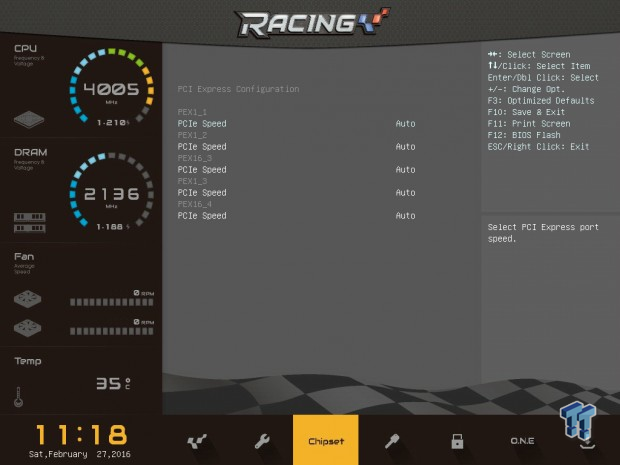
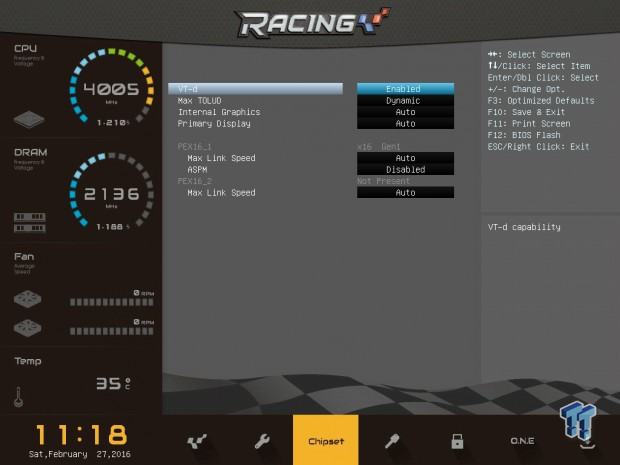
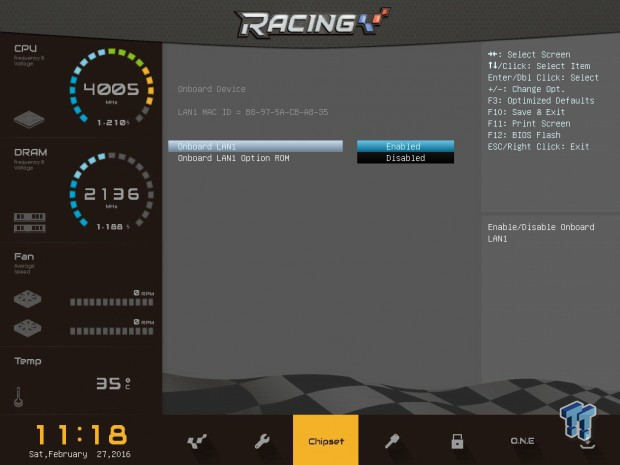
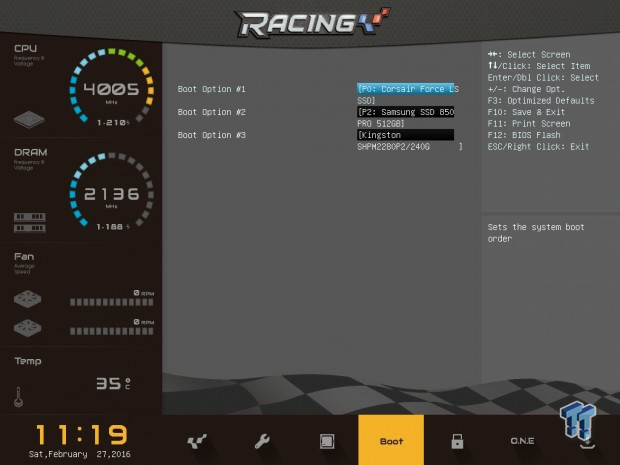
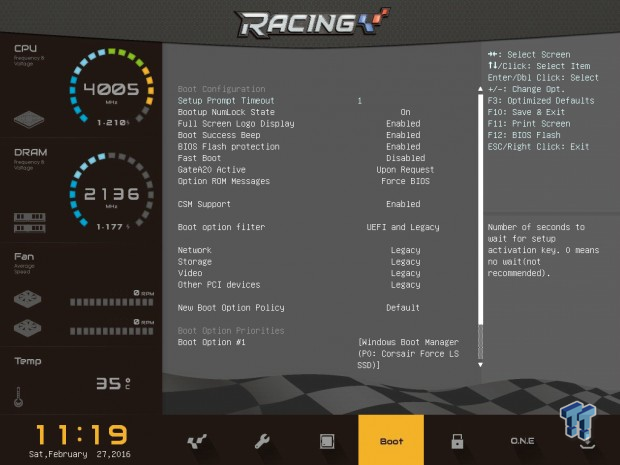
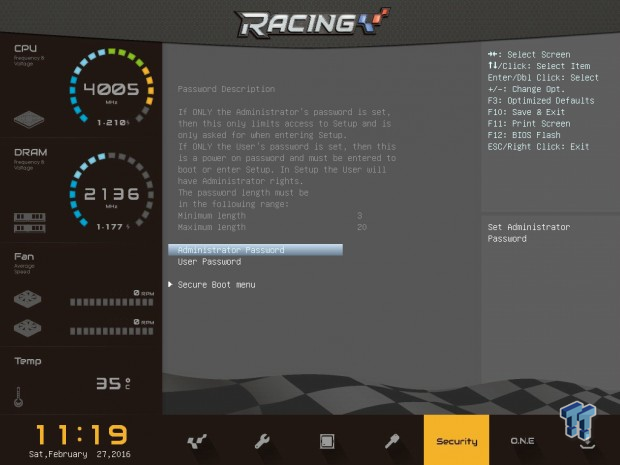
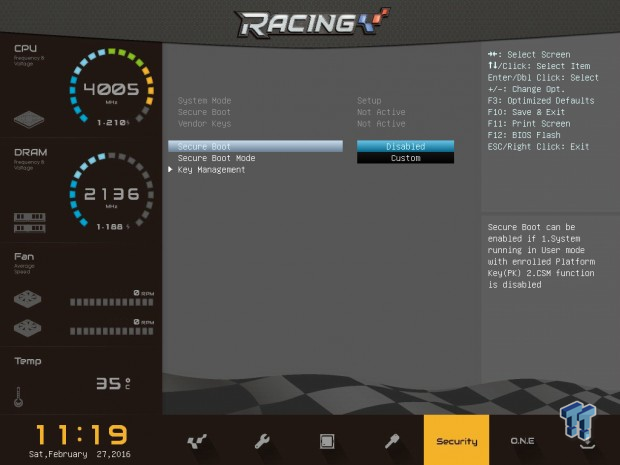
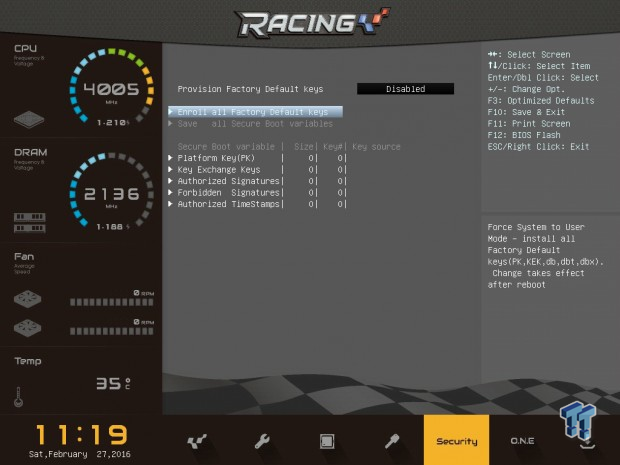
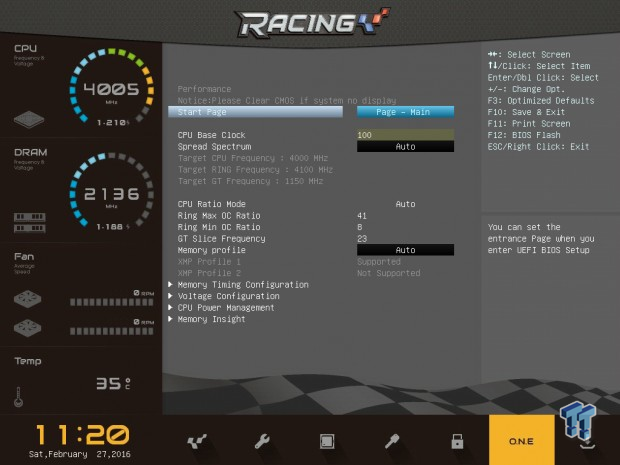
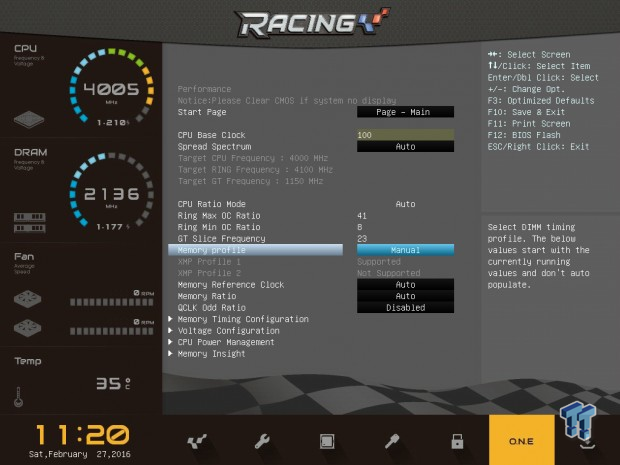
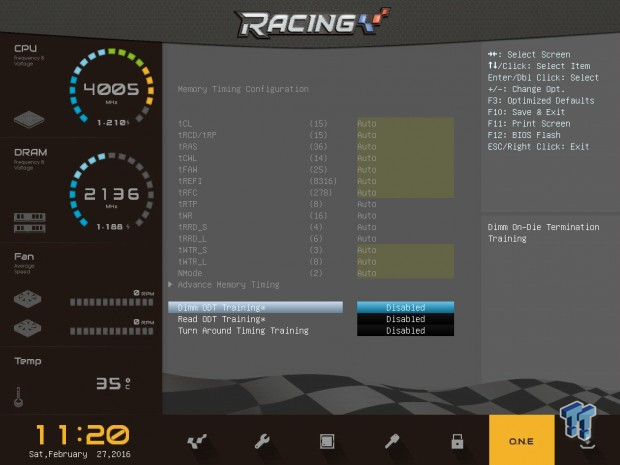
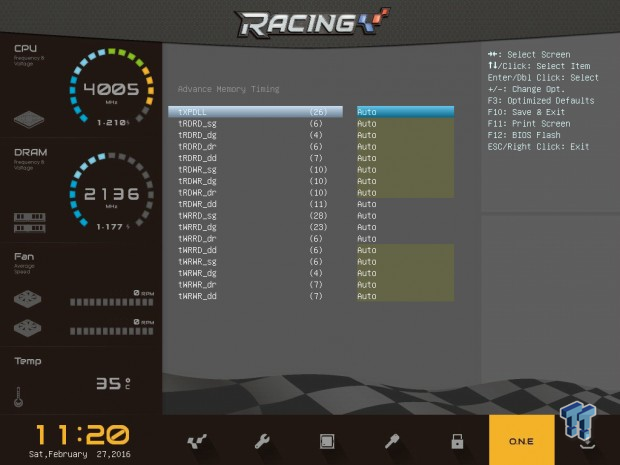
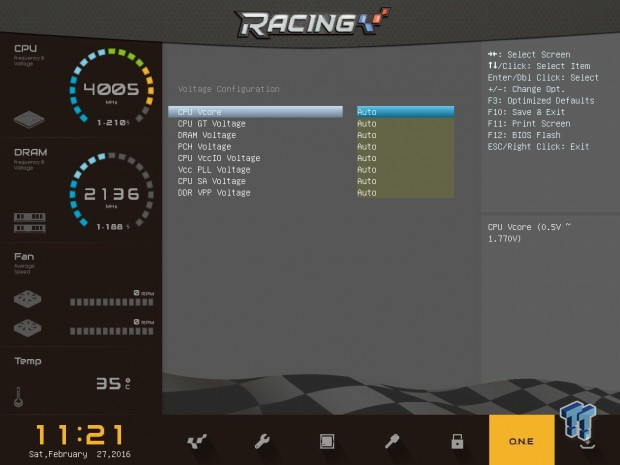
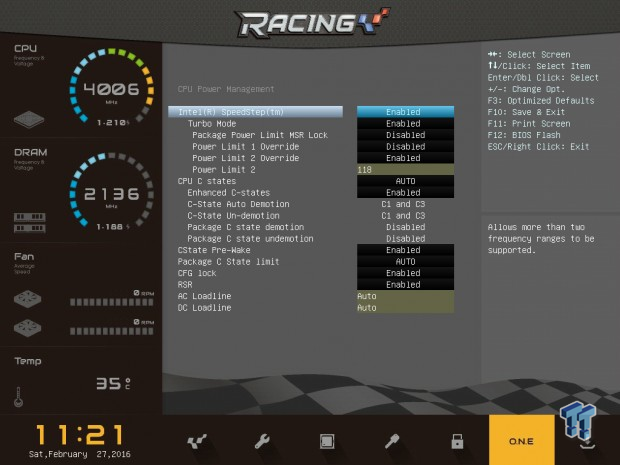
It seems that BIOSTAR went back to the drawing board for their Z170GT7. The UEFI is totally revamped and looks very similar to offerings from the bigger motherboard vendors. I will say that this BIOS is significantly improved compared to that of the GAMING Z170X, and is on par regarding features and ease of use when compared to much more expensive motherboards from larger vendors.
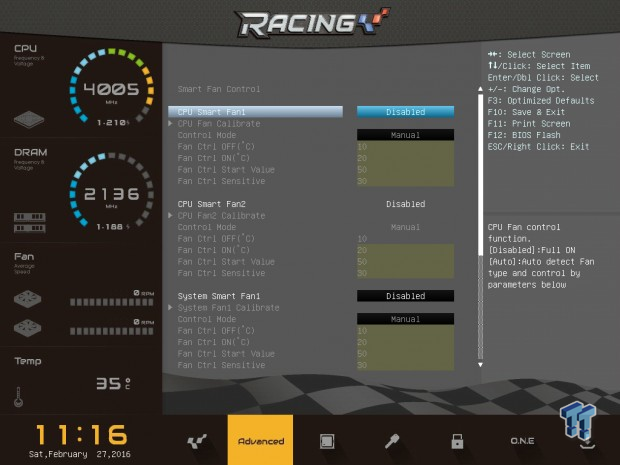
Fan control in the UEFI is quite advanced. It offers presets for each fan as well as options you might not think you would find in such an inexpensive product. I was thoroughly impressed with what BIOSTAR has done. They even have screen capture working well.
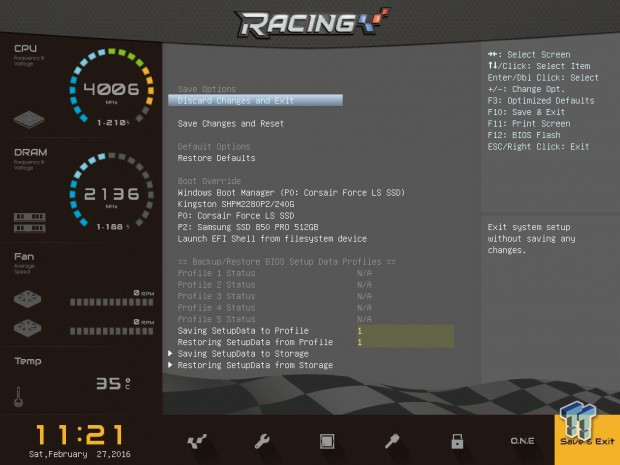
The only thing missing are presets for LLC. While you still have control over the internal AC/DC LLC, it is better to use their built-in auto-LLC that kicks in when overclocking.
Software
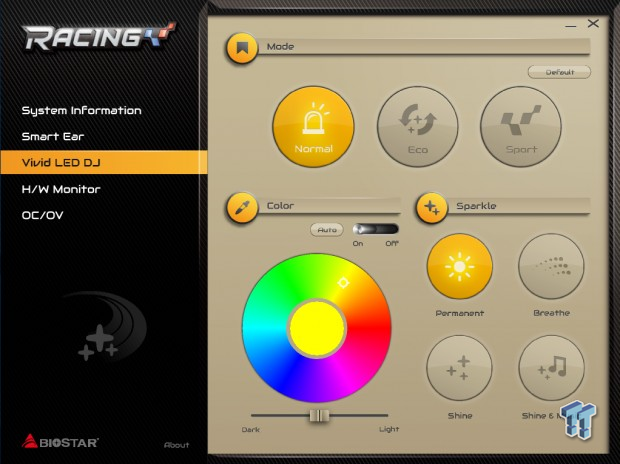
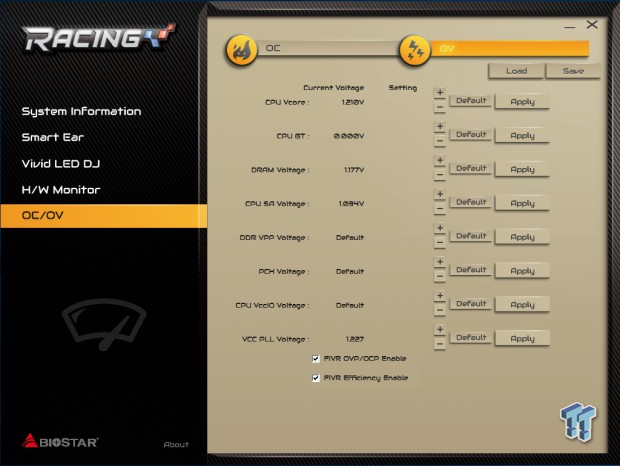
BIOSTAR's new RACING application is a useful AIO product. It offers control over the RGBs and is the only way to control the color of the RGBs. You will need to launch this program for the RGBs to engage. The software also provides fan control and overclocking options including voltage changes.
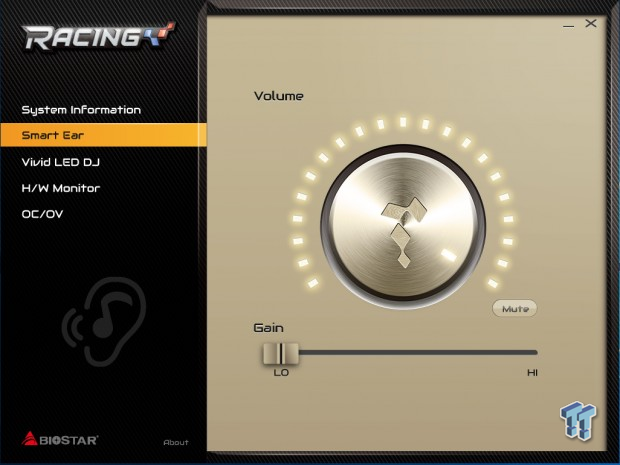
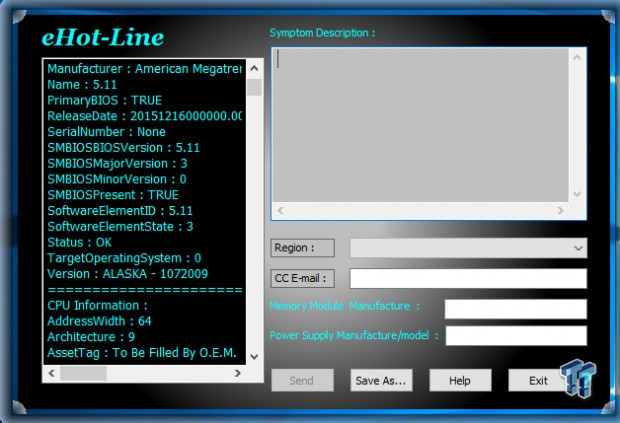
The program also provides gain control and a volume knob. It is flashy, but it's not very buggy and doesn't seem to eat up system resources. The eHot-Line application is there for people who want to send tech support their information.
Test System Setup
Steven's Motherboard Test System Specifications
- Motherboard: BIOSTAR Z170GT7
- CPU: Intel Core i7 6700K - Buy from Amazon / Read our review
- Cooler: Corsair H110i GT - Buy from Amazon
- Memory: Corsair Vengeance LPX 16GB (2x8GB) 2666MHz - Buy from Amazon
- Video Card: NVIDIA GeForce GTX 980 - Buy from Amazon / Read our review
- Storage - Boot Drive: Samsung 850 Pro 512GB - Buy from Amazon / Read our review
- Storage - SATA6G Drive: Corsair Force LS 240GB - Buy from Amazon / Read our review
- Storage - M.2 Drive: Kingston HyperX Predator 240GB PCIe x4 - Buy from Amazon
- Storage - USB Drive: Corsair Voyager GS 64GB - Buy from Amazon / Read our review
- Case: Corsair Obsidian 900D - Buy from Amazon / Read our review
- Power Supply: Corsair AX1200i - Buy from Amazon / Read our review
- OS: Microsoft Windows 10
- BIOS: 5.11
- Drivers: Intel INF: 10.1.1.7, Intel ME: 11.1.1.1162, ASMedia USB 3.1 Driver: 1.16.24.1, NVIDIA Graphics: 353.82, Audio:6.0.1.7629, Intel LAN: 20.2.4001
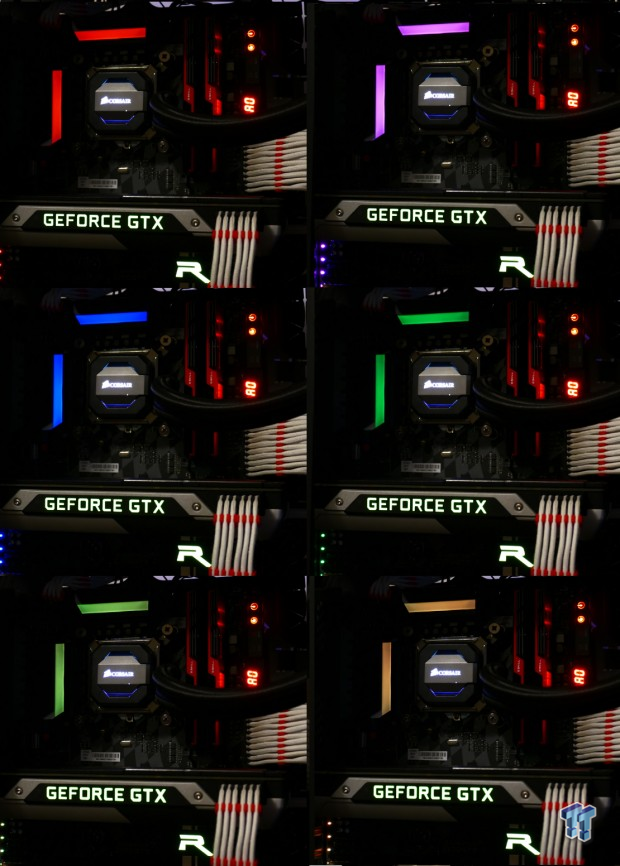
The hardest part of making this review was taking pictures of the diffused light from the VRM heat sink's RGB LEDs. I spend the better part of an hour try to capture exactly what I saw. Many times the LED brightness overwhelms the camera's sensor. The photo above is what I feel is the most accurate representation of how the RGB LEDs inside the VRM heat sinks come out. It looks better in person, but you can see how the RGBs are evenly diffused and create the motherboard color theme instead of clash or blend in.
The new test bench is designed to test every aspect of the motherboard and IO. I have designed it so that the motherboard sits in a case and is cooled by fans always-on at a constant rate to keep the conditions similar in all tests. I have cut out part of the case behind the motherboard so I can get thermal images of the back of the PCB where the VRM heat spreads. System and CPU power measurements are now digitally logged.
I am also using a Netgear Nighthawk X4 AC2350 for our network (including wireless AC) tests. The latest M.2, SSD, and USB technologies are also being utilized to test the maximum potential of the motherboards that are tested.
Overclocking
Overclocking Results
CPU Overclocking
This test applies 1.4v VCore measured, and then I try to get the highest possible validation frequency. The Z170GT7 does 5GHz just like most other motherboards.
On the Z170GT7, I was able to run 4.8GHz core, 4.2GHz cache, and DDR4 2666MHz as a stable overclock. This board is easy to overclock, but I highly recommend you use the money saved from buying the motherboard and buy a digital multi-meter to manually measure the VCore.
I measured the VCore manually at the output capacitor of the CPU VRM; I measured at many different levels so you can reference them. CPU-Z isn't accurate on this motherboard, and the automatic LLC pushed the voltage much higher than what you might have set. As a rule of thumb, I would set the voltage 0.1v lower than what you want to accomplish. If you mess around with the AC/DC LLC settings, I would use a digital multi-meter.
Compatible Memory Overclocking Kits
Test 1: 4x8GB (32GB) Corsair Vengeance LPX 2666MHz C16
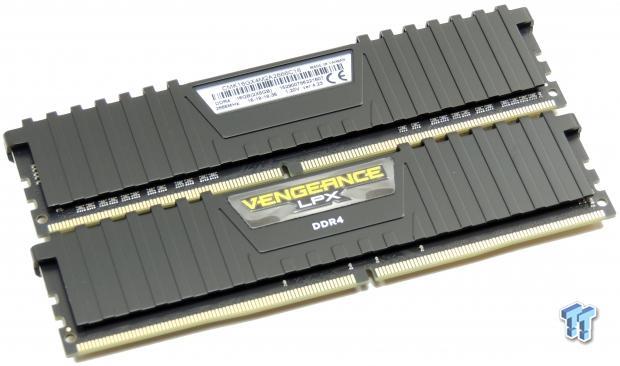
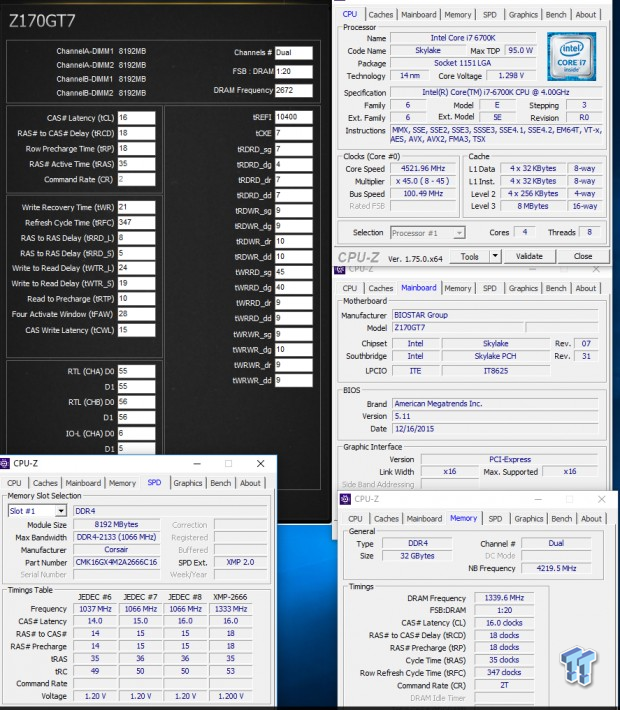
The board was able to boot up on four of these sticks at XMP without issue, but it could not boot up any higher speed kits. The motherboard could get a BIOS update that would improve upon this, and there is a memory compatibility list. I would recommend going with a kit off the list or going with the Corsair kit above.
CPU, Memory, and System Benchmarks
CINEBENCH 11.5
wPrime
AIDA64 AES and HASH
AIDA64 FPU
AIDA64 Memory
PCMark8 Home Test
3DMark: Cloud Gate
3DMark: Fire Strike
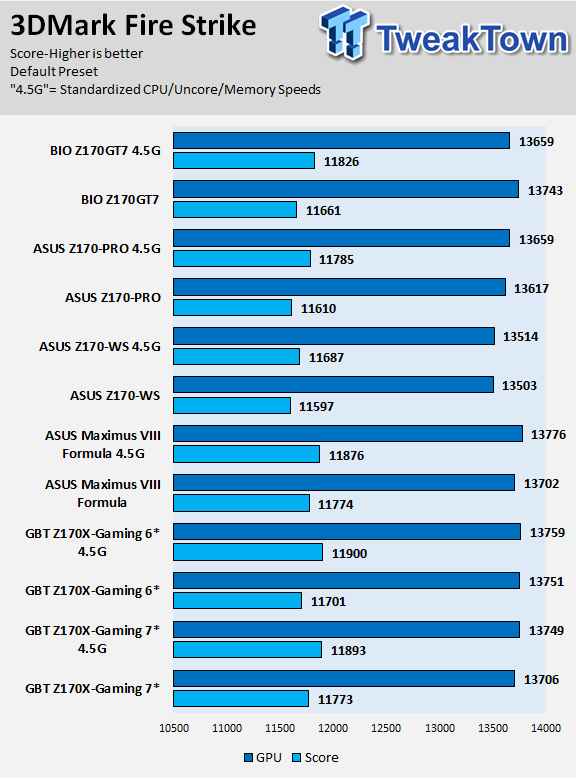
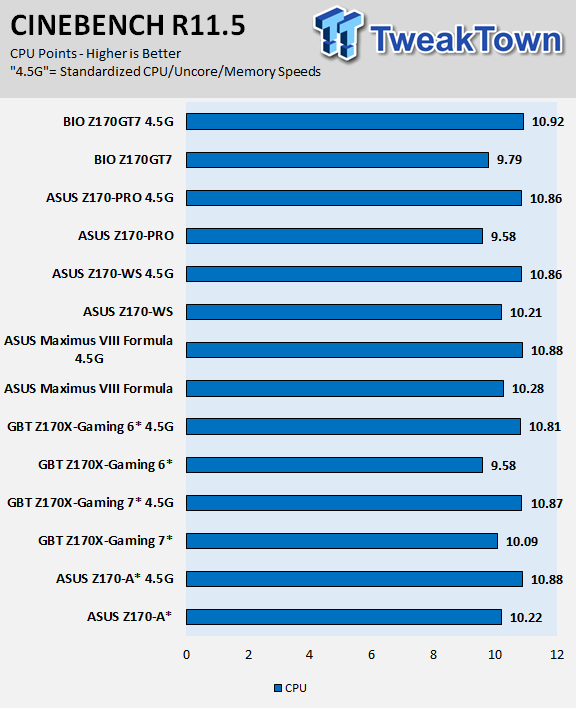
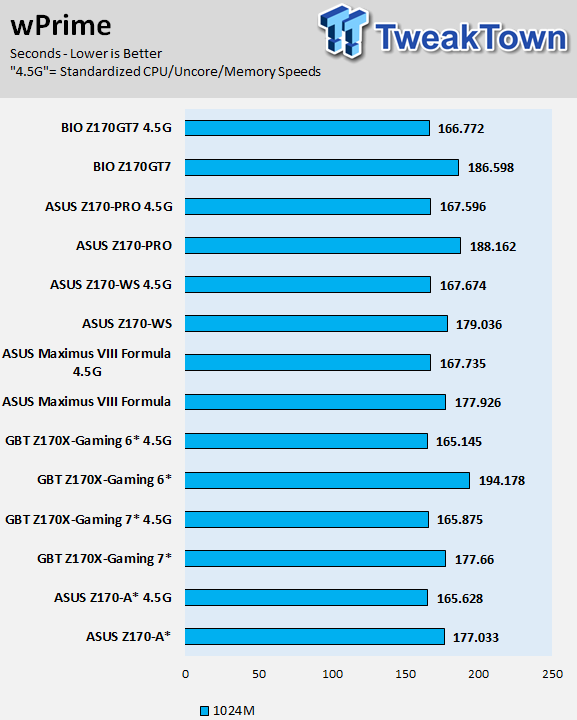
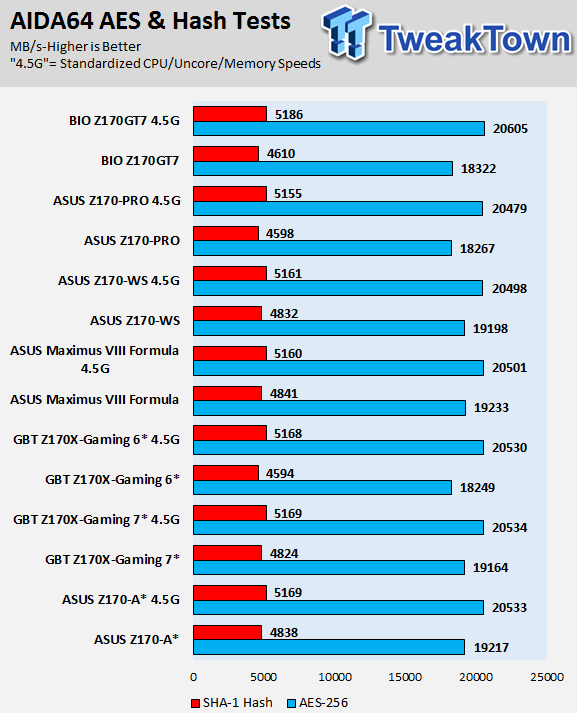
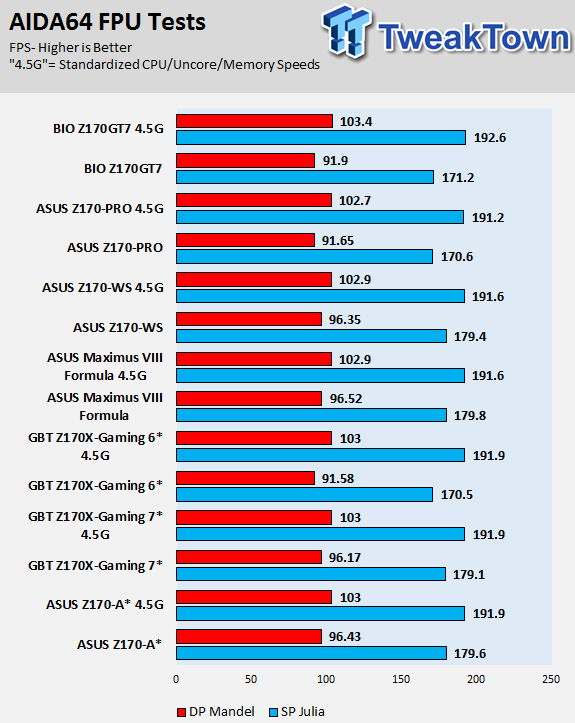
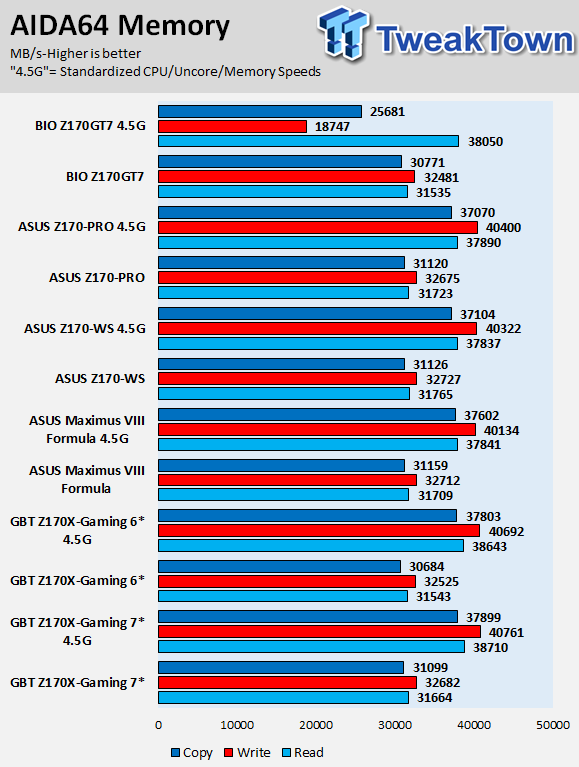
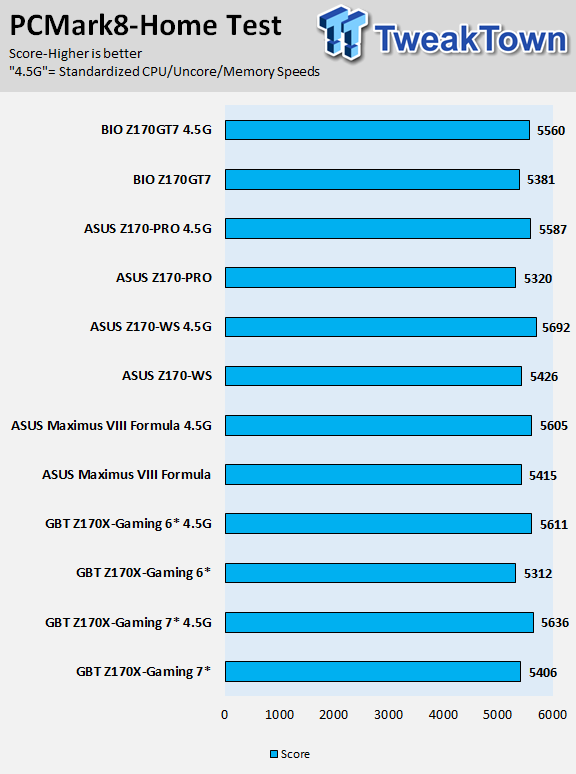
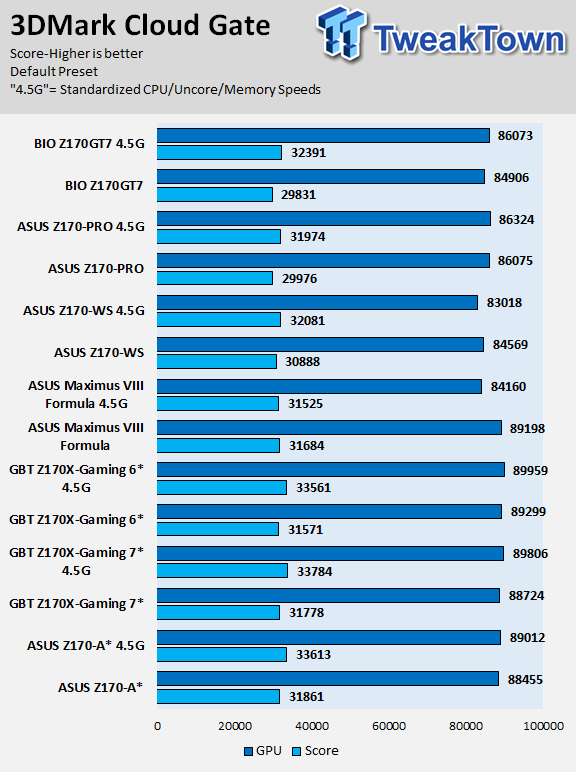
BIOSTAR's Z170GT7 does not have multi-core enhancement out of the box, so it is running at Intel specifications. I should mention that the BLCK is a little overclocked out of the box, so you must decrease it in Windows through their program if you want 100MHz perfect instead of something like 100.50MHz.
When I standardize everything, the BIOSTAR motherboard runs a bit quicker in some cases, but something was going on with the memory performance. Internally I think BIOSTAR has set the system up to produce very good read speeds, but copy and write speeds take a hit because of it. It only occurs with XMP and is not there when you manually tune the memory or at stock.
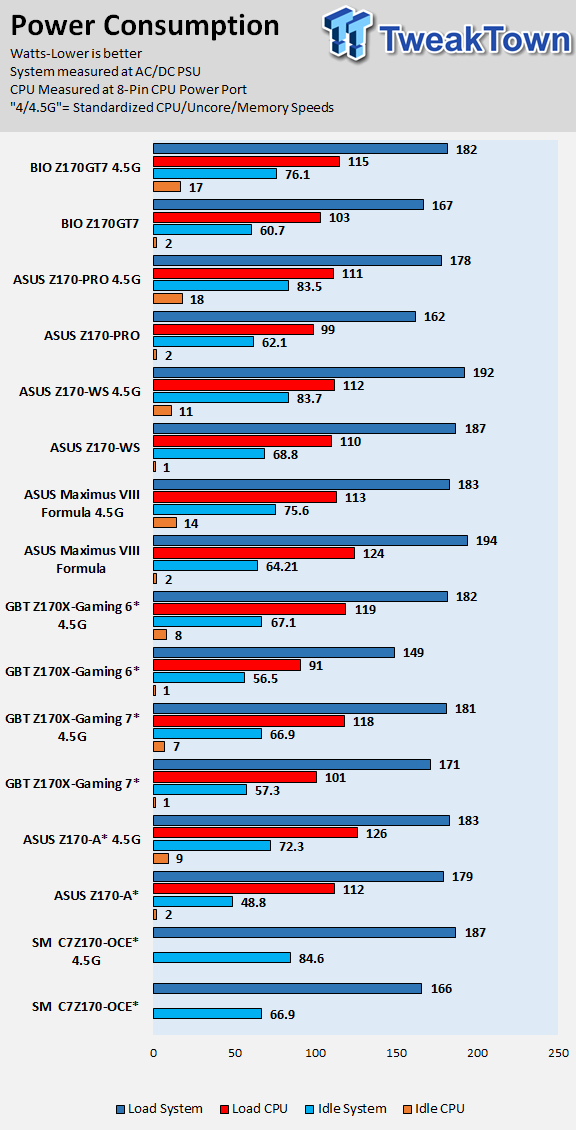
Some motherboard reviews put a lot of weight into motherboard CPU, memory, and GPU benchmarks, but for me CPU, memory, and GPU benchmarks on motherboards should be more about finding anomalies, and I do that at standard settings (4.5G in graphs).
System IO Benchmarks
CrystalDiskMark SATA6G:
CrystalDiskMark M.2:
CrystalDiskMark USB 3.0:
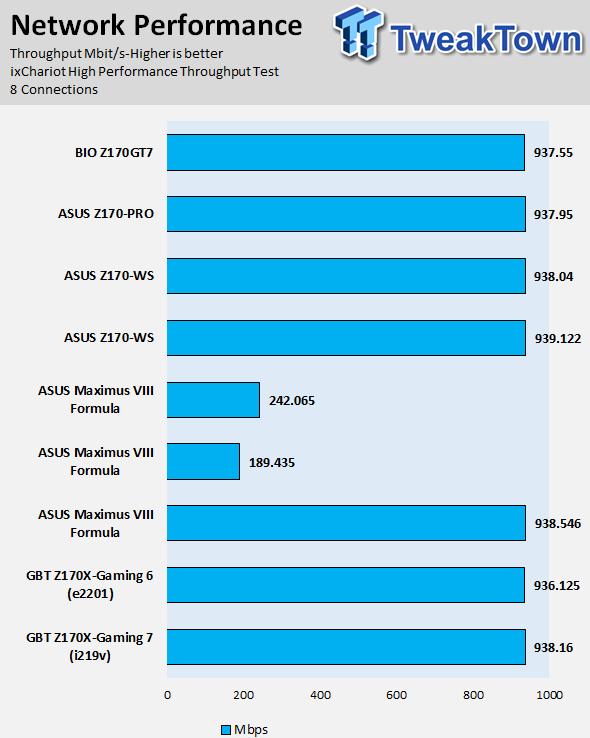
ixChariot Network Throughput:

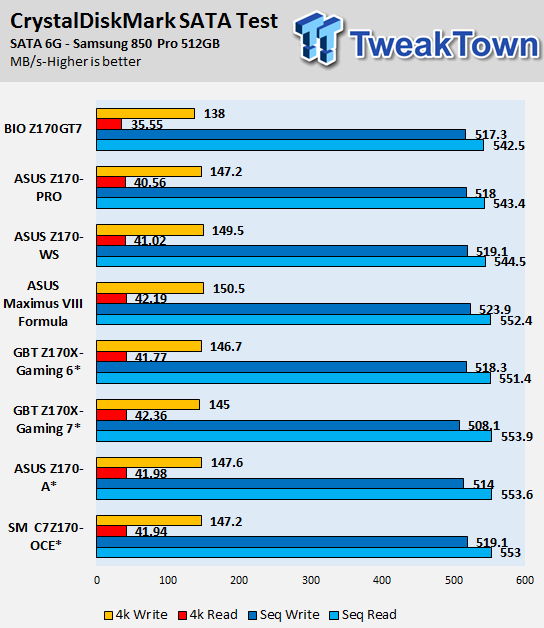
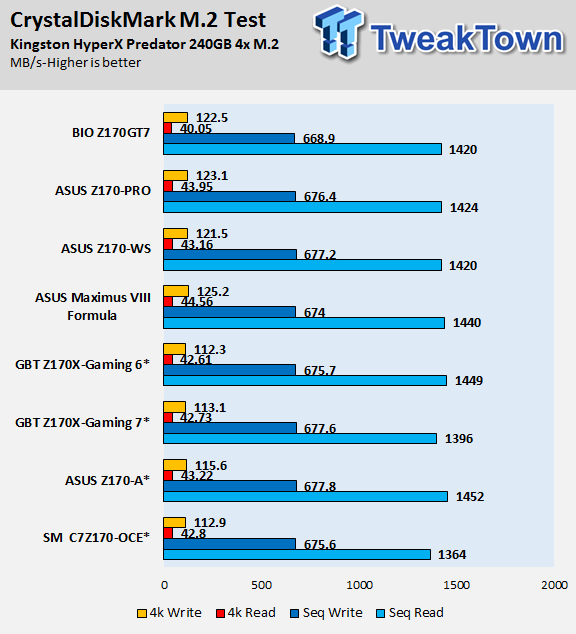
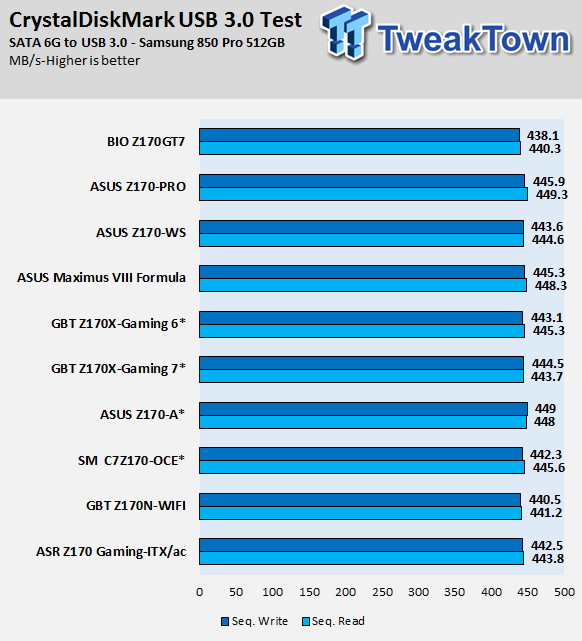
Storage, USB, and networking performance isn't the best but also isn't the worst; performance is exactly where you would expect it to be since so much is integrated into the Intel PCH.
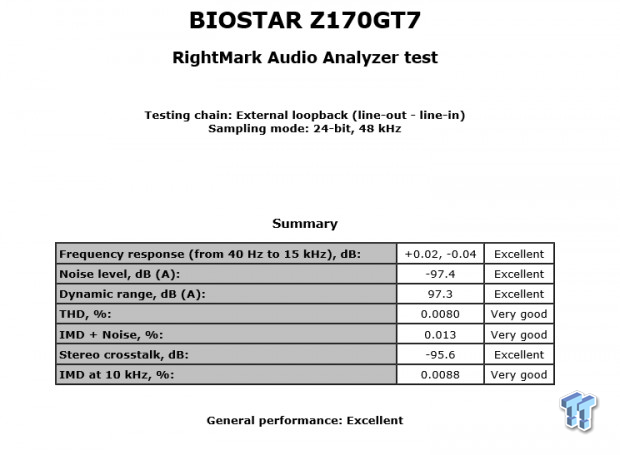
Audio RMAA 5.5:
I disable all audio features, set the correct bitrates, and then test the audio with a loopback test.

Sound Judgment by Ear: Very good and clear audio. There are five ratings for audio: 1. Problems, 2. Okay, 3. Acceptable, 4. Very good, 5. Excellent
Thermal Imaging and Power Consumption
System power usage is measured at the AC/DC PSU (the Corsair AX1200i) which I have connected to another system to measure the test system, and as a backup, I have a wall meter to verify. The CPU power is measured through the 8-pin connector, which is hooked up to a hall effect IC, which measures current and puts out a voltage in proportion to the current. That voltage is logged by a National Instruments ADC, which logs the DC voltage level that I then convert into current.

Note on Thermal Images: In the temperature section, we use our Seek thermal imaging camera to capture the surface temperatures of major components on the board. I look at the VRM and then all other things that light up the screen. If there is something to worry about, then I will state it. Otherwise, I will just show the hotter running parts of the board for fun. Unless some component is over 80-90C, then there isn't anything to worry about.
All systems will act differently, so I will look for commonalities, such as how far from the VRM the heat spreads through the PCB and the difference in temperature between the front side and backside of the PCB. Keep in mind, the majority of the heat from the VRM goes into the PCB as it is a giant soldered on copper heat sink. A larger difference in temperature between the back and front of the PCB points towards a more effective heat sink.
Thermal Testing at Stock Speeds:
The image on the left is always at idle, and the image on the right is at load. During ALL TESTS, fans above the VRM that cool the CPU cooler's (Corsair H110i GT) radiator are turned on to high (12v).
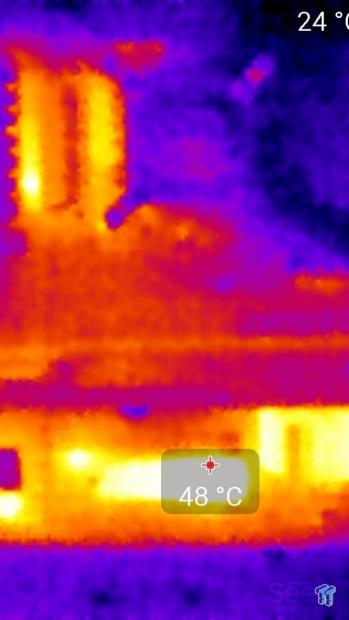
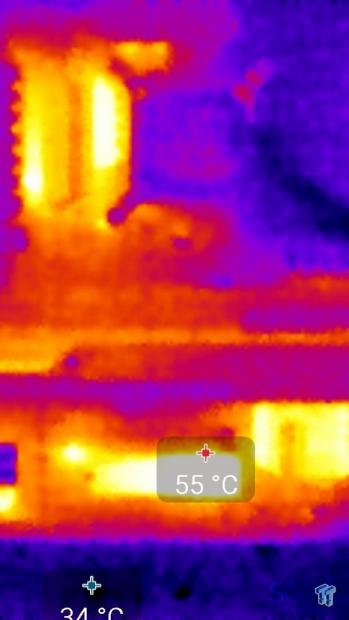
Full frontal.
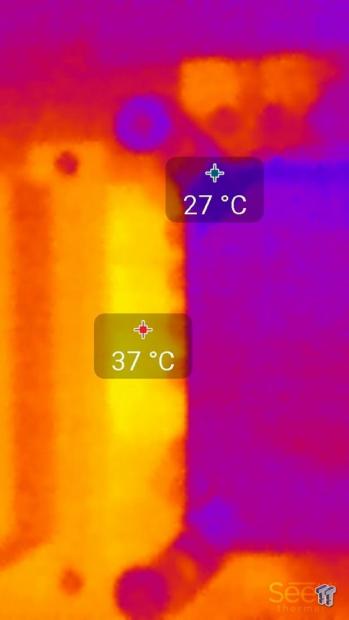
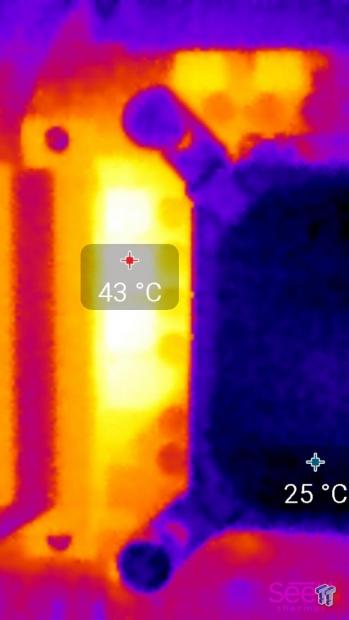
Up-close of the front of the VRM.
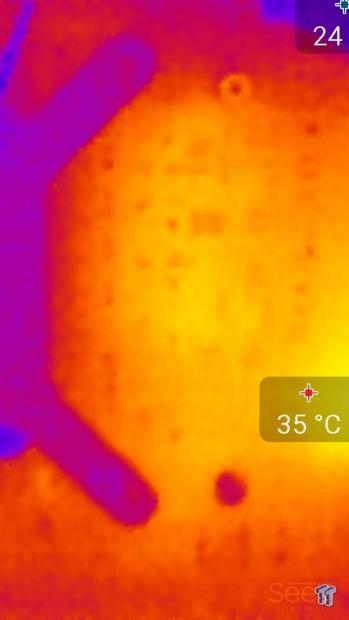
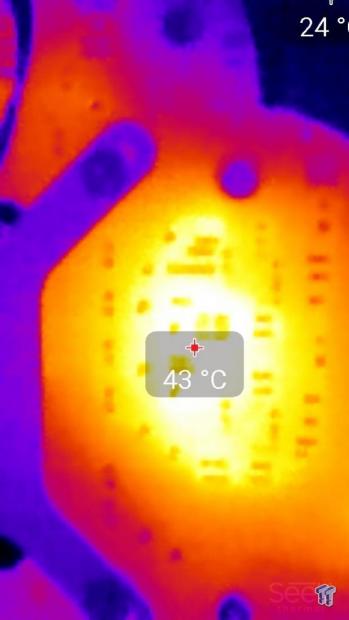
Up-close of the back of the VRM.
Thermal Testing at 4.5GHz Overclocked Speeds:
The image on the left is always at idle, and the image on the right is at load. During ALL TESTS, fans above the VRM that cool the CPU cooler's (Corsair H110i GT) radiator are turned on to high (12v).
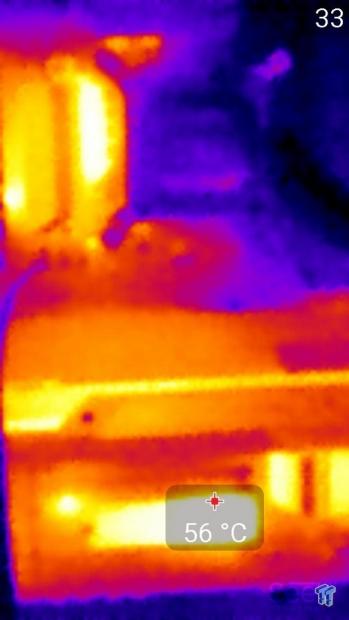
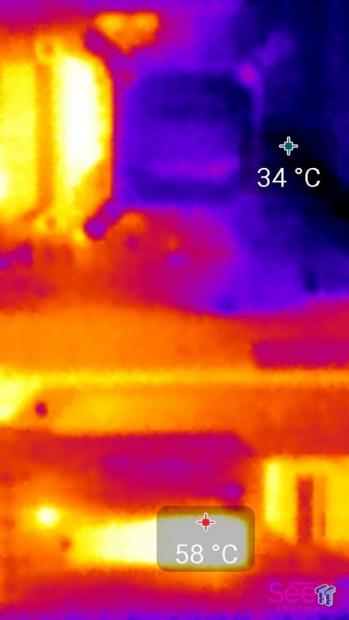
Full frontal.
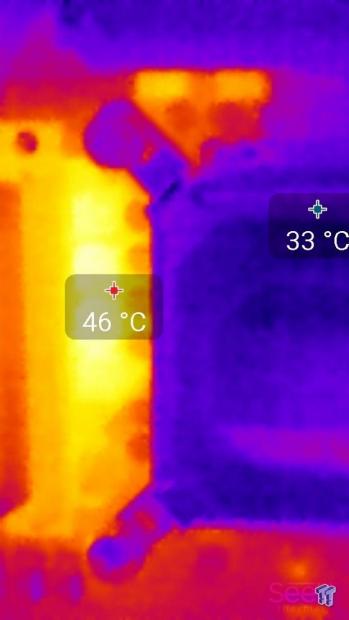
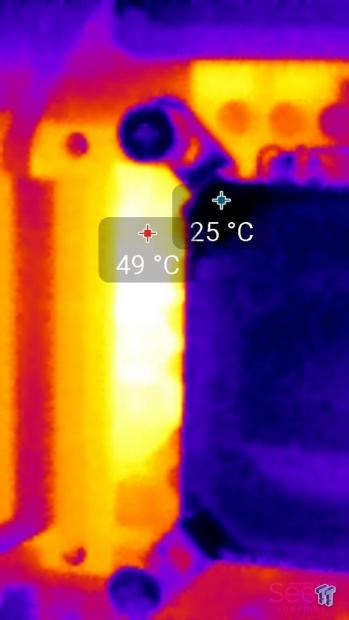
Up-close of the front of the VRM.
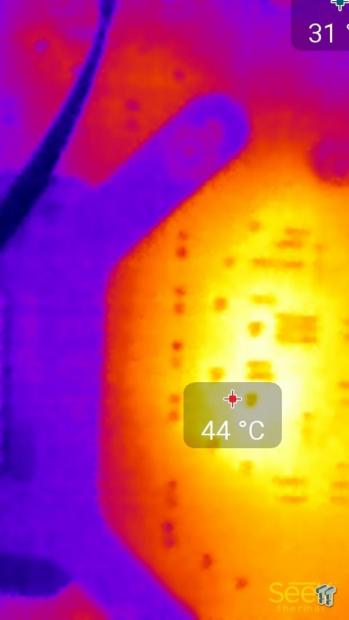
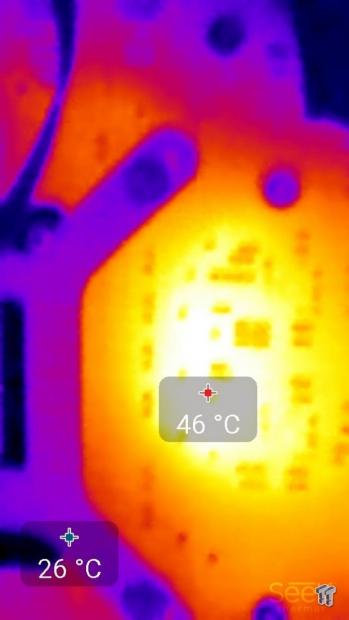
Up-close of the back of the VRM.
The VRM on the Z170GT7 is what you might expect from a $130 motherboard. It does get a bit warm compared to more expensive motherboards, but that is to be expected. Overall, I did not feel like the VRM held the motherboard back, and that is because the Skylake CPUs use very little power, even when overclocked. I would not use the motherboard for extreme overclocking, but it should be able to keep up with air or water cooled overclocks.
Anything under 60C is great, 60-80C is acceptable, and anything above 80C is a bit worrisome (if at stock).
What's Hot, What's Not & Final Thoughts
Here are key points about the BIOSTAR Z170GT7.
What's Hot
RGB LEDs Done Right (In the VRM Heatsinks): I am not a fan of RGB LEDs glaring right in my eyes, and I prefer them to be properly diffused. I shouldn't be able to see where the brightness of one LED ends and another starts, it should be constant. I also should have total control over the RGBs, and I should be able to choose whatever colors the RGBs can output. BIOSTAR executed RGB LEDs to perfection in the VRM heat sinks. I wasn't so crazy about the RGBs around the audio section; I would have preferred them under the PCB to produce a glow. The PCH RGBs can only be controlled by CPU temperature, but that is okay considering they provide an RGB header.
Intel NIC and Overclocking Features: At under $150, I don't expect to find Intel NICs (they are expensive compared to others), and I also don't expect robust overclocking features. The Z170GT7 has an Intel NIC plus surge protection circuitry. Overclocking features include the venerable POST code display, power button, reset button, dual BIOS with switch, LN2 switch, Sport button, and ECO button.
Totally Revamped UEFI: I was very impressed with the UEFI of the BIOSTAR Z170GT7. I felt like I was using a much more expensive motherboard. BIOSTAR did a very nice job of revamping their previous Z170 UEFI.
Unique PCI-E Slot Spacing: The Z170GT7 has a unique PCI-E layout with the first two full sized 16x slots routed to the CPU and the other two PCI-E 16x slots routed to the PCH. You can run both of the PCH slots at the same time at 4x each which increases possibilities when dealing with add-in cards and PCI-E based storage (you cannot HW RAID).
Fan Control: I didn't expect to find detailed fan control in the UEFI, but I was surprised to see individual fan customization options for each of the five headers. Through BIOSTAR's GAMING application you can also change up fan settings in Windows.
Excellent Value: I don't think you can find another motherboard with the same number of modern and unique features combined with a high-quality aesthetic at the $130 mark.
What's Not
No SLI Support: Many of the lower-end motherboards on the market do not support SLI because the licensing fee would add to the price of the product; the Z170GT7 is no exception.
No LLC Presets: While the AC/DC LLC from the internal VR controls is present, it also requires users to set an ohm value between 0 and something in the 6000 range. BIOSTAR didn't provide any LLC options that control the PWM's LLC parameters. If you do not set these AC/DC LLC values, then there is a built-in auto LLC (which is much better than no LLC), but it overcompensates. If you are going to mess with those LLC settings, I would buy a digital multi-meter, so you know exactly what voltage is being fed into your CPU.
RGB LEDs only work with Software: The RGB LEDs built into the PCH are always-on, but those near the audio section, in the VRM heat sinks, and through the onboard header will only turn on when you launch BIOSTAR's application. Yes, you can minimize the application to the system tray.
Final Thoughts
BIOSTAR's Z170GT7 is the best BIOSTAR motherboard I have ever used. In fact, it could be the best sub-$150 motherboard I have ever used. BIOSTAR has done a great job of setting their Z170GT7 apart from the competition with many premium features. At $130, it offers the same feature sets I see from motherboards in the $150+ range, and it offers RGB LED supports I have never seen on such a reasonably priced motherboard.
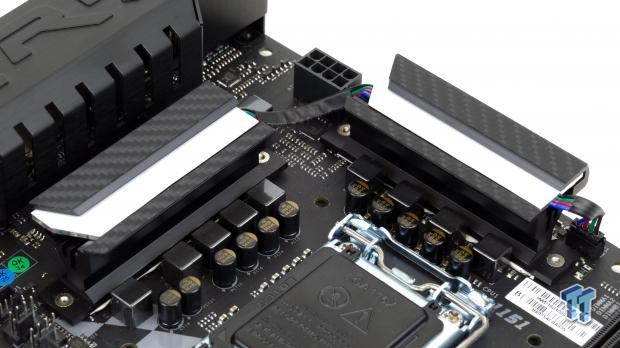
If you cannot tell, I have fallen in love with the VRM heat sink RGB LEDs on the Z170GT7. While many think the market has become oversaturated with RGB LEDs, the truth of the matter is I have not seen them executed exactly to my liking until I turned this motherboard on. In fact, I did not know they could look so nice until I saw this motherboard in person; they create an almost pastel like color range to fit anyone's preference.
Even if this motherboard had no RGB LEDs, it would still be an awesome value for the hardware and UEFI BIOSTAR is offering up. When I first saw the price of this motherboard, I thought it was a mistake. I thought that BIOSTAR was going to charge close to $200 for this product, and even then, it would be a worthwhile option.
UPDATE: The MSRP of the BIOSTAR Z170GT7 is $159.

| Performance (including Overclocking) | 90% |
| Quality including Design and Build | 88% |
| General Features | 94% |
| Bundle and Packaging | 90% |
| Value for Money | 99% |
| Overall | 92% |
The Bottom Line: BIOSTAR's Z170GT7 is not only the most elegant motherboard in its price range, but it also the most feature-endowed. You definitely get a lot for the price.
PRICING: You can find products similar to this one for sale below.
 United
States: Find other tech and computer products like this
over at Amazon.com
 United
Kingdom: Find other tech and computer products like this
over at Amazon.co.uk
 Australia:
Find other tech and computer products like this over at Amazon.com.au
 Canada:
Find other tech and computer products like this over at Amazon.ca
 Deutschland:
Finde andere Technik- und Computerprodukte wie dieses auf Amazon.de
Similar Content
Related Tags
