
The Bottom Line
Introduction, Specifications, and Pricing
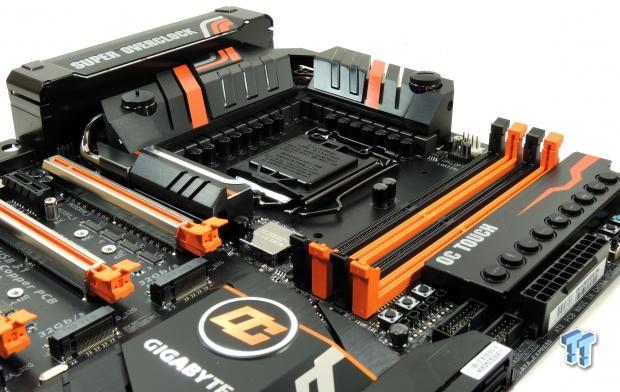
GIGABYTE came out strong at the launch of the Intel Z170 chipset with numerous gaming and mainstream motherboard models, but their overclocking series was missing. Recently GIGABYTE finalized its plans for their Z170 overclocking lineup, and the top dog is the Z170X-SOC Force.
The Z170X-SOC Force is more similar to the Z87X-OC Force than the Z97X-SOC Force, which didn't have a huge VRM and PLX chip for 4-way SLI/CrossFireX. GIGABYTE segments their overclocking lineup into two varieties. The first is a board stripped down of everything not essential, and tuned for overclocking. A perfect example of this was the Z97X-SOC Force LN2 that had only two DIMMs and no mounting holes to expand memory overclocking margins to the maximum. This first variety is aimed at increasing margins at any cost (even everyday functionality), and the Z170X-SOC Force isn't this type of product.
The second variety that GIGABYTE usually launches is their super loaded motherboard with as many overclocking features as possible; these boards usually have the most expansive graphics capabilities and flair. These motherboards usually have some over the top feature while still facilitating practicality and hardcore overclocking. The X58A-UD9 was this type of product, the Z77X-UP7 introduced the overclocking colors and an insane 32 phase VRM, and the Z87X-OC Force is the closest relative to the Z170X-SOC Force. The Z170X-SOC Force is the natural evolution of this product line and GIGABYTE sent over an early sample. The Z170X-SOC Force has a lot to live up to, so let's check it out.
Specifications
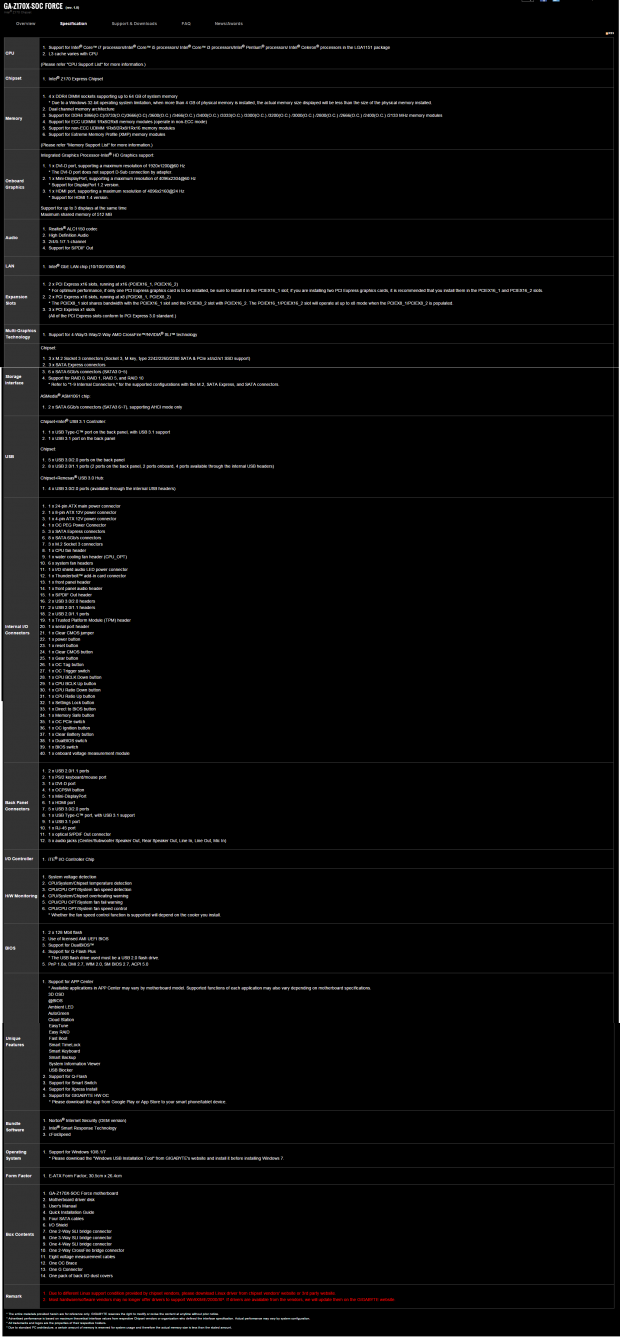
The GIGABYTE Z170X-SOC Force is one of the few Z170 motherboards which supports 4-way SLI, and this is because of the PLX PEX8747, that takes in the 16x PCI-E lanes from the CPU and outputs 32x for graphics. It is one of few Z170 motherboards that have three 32Gb/s 4x PCI-E 3.0 slots, which is the maximum the Z170 chipset supports (with RAID support).
If you use all of the M.2 slots then all of the Intel SATA ports are disabled, so GIGABYTE added a few extra through an ASMedia chip. GIGABYTE also uses the Intel USB 3.1 controller codenamed Alpine Ridge and provides nine USB 3.0 ports on the back and through two internal headers.
Pricing
The Z170X-SOC Force hasn't been released yet but is expected to be $400 USD.
Packaging and Z170X-SOC Force Overview
Packaging and Overview
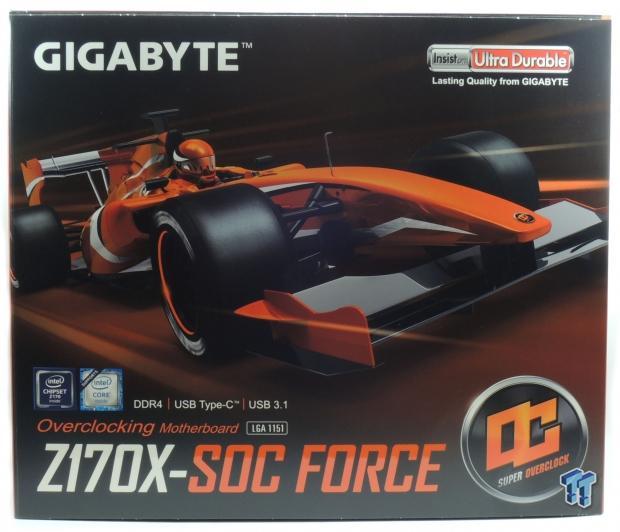
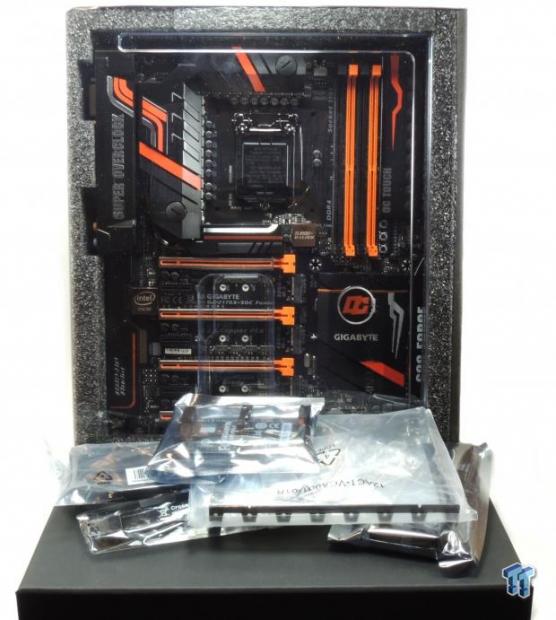
GIGABYTE provides the Z170X-SOC Force with the same over-the-top packaging that I saw when I reviewed the Z170X GAMING G1. Not only are there four boxes arranged at multiple levels, but all components from the motherboard to the accessories are protected from the elements. It is the type of packaging I like to see on a product that costs $400.
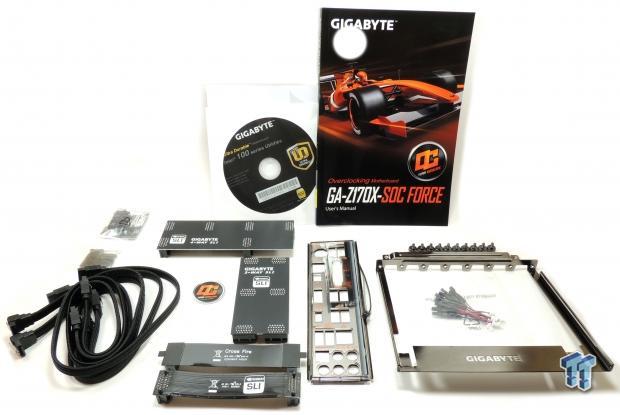
The Z170X-SOC Force comes with a healthy amount of accessories; 4x braided SATA6Gb/s cables, OC-Brace for caseless GPU mounting, 8x voltage read cables, orange LED backlit IO shield, 4-way SLI Bridge, 3-way SLI Bridge, 2-way SLI bridge, 2-way CrossFireX bridge, dust covers for iGPU outputs, G-Connector, manual, driver DVD, and an OC series case badge.
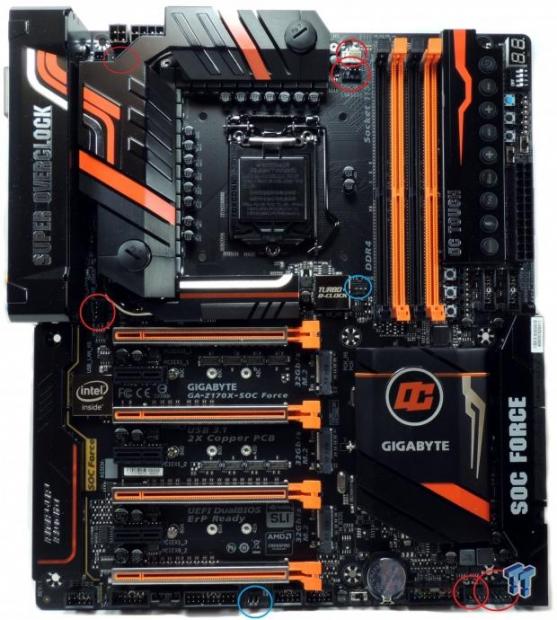
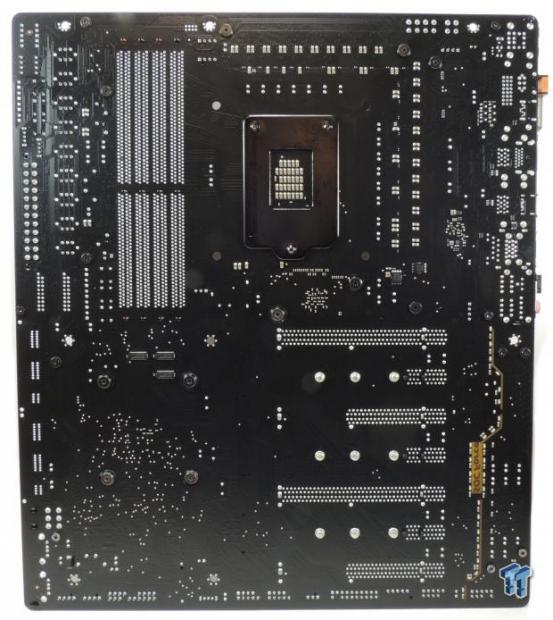
The GIGABYTE Z170X-SOC Force has eight fan headers. The six circled in red are all 4-pin voltage mode headers that can be controlled through the UEFI or Windows. They are voltage mode which means they will control both 3 and 4-pin fans. There are two headers circled in blue, and these are 3-pin headers that operate at full speed at all times (no control) and is useful for subzero overclocking. The back of the motherboard is bare of most components except for some quick switches, a few MOSFETs, and orange LEDs which illuminate the PCB divide for the audio.
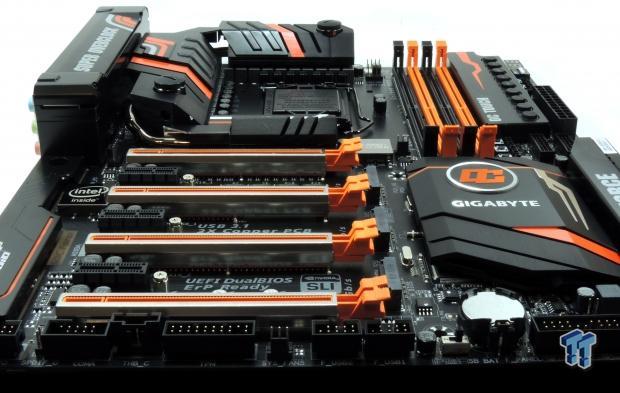
The first thing many notice is that the board has four equally spaced full sized PCI-E slots, and the heat sink in the middle handles the PCI-E lane expansion for 4-way multi-GPU support. The orange and black color theme is one that is pretty much unique to the OC series from GIGABYTE; the good news is that a lot of vendors are making orange colored accessories in light of the popularity of the series. There are also aluminum shields over anything that might be deemed "ugly" so that the motherboard will look great in case mods.
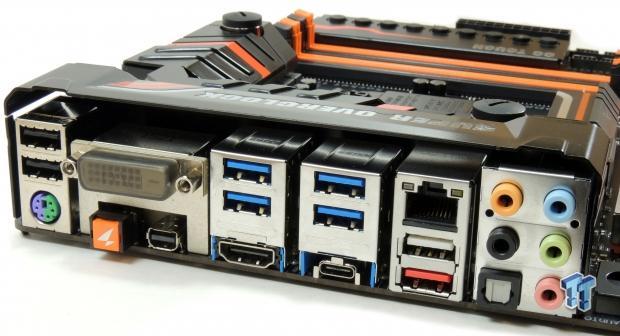
The IO panel features a PS/2 keyboard/mouse port, 2x USB 2.0, DVI, mini-DP, SOC Link button (for external HW-OC control), HDMI, 5x USB 3.0 (single white port is for USB flashback and OC-Link), 1x USB 3.1 Type-C, 1x USB 3.1 Type-A (red port), 1Gbit Intel NIC, and TOSLINK with 7.1 audio outputs.
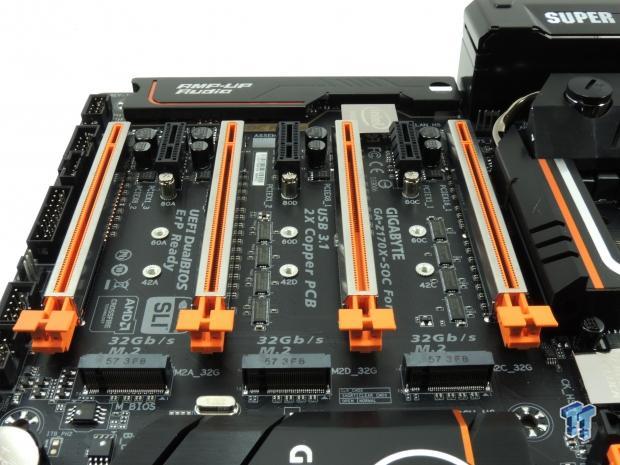
The PCI-E slots are easy enough to identify. The orange 16x slots all have a single piece metal shield to prevent heavy GPUs from hurting the port and in total they provide 32x PCI-E 3.0. GIGABYTE claims that this single piece design is superior to the two-piece design that is on some other brands. The first and third 16x slots are full speed 16x when using one card in each, but if you add a card into the slot below either, they will share 8x with that slot. From top to bottom you can run; 16x/0x/16x/0x, 16x/0x/8x/8x, 8x/8x/16x/0x, or 8x/8x/8x/8x. Each of the black PCI-E 3.0 1x slots is directly connected to the PCH.
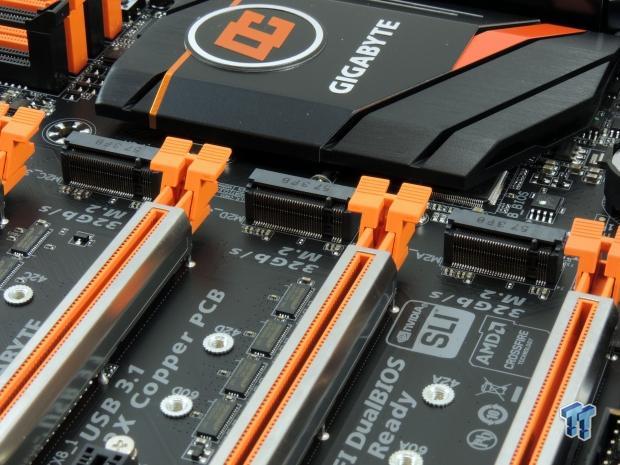
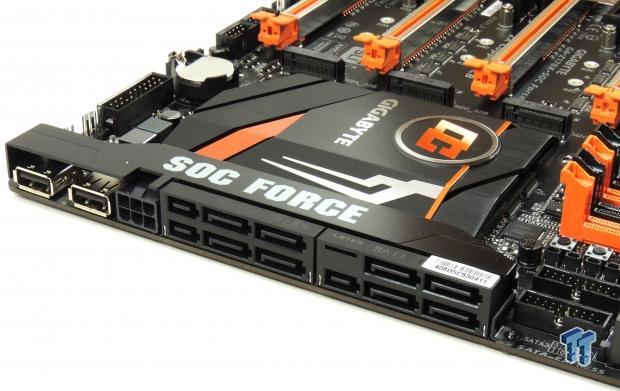
The three M.2 slots can each operate at 32Gb/s. If you use an M.2 SSD, which uses SATA, all 4x PCI-E lanes, or RAID, then you will lose two SATA ports per each M.2 port used. This is how the M.2 slots on the Z170 platform work and you need to reference the manual to see exactly which slots and M.2 drive type will disable which SATA ports. The SATA area is quite busy.
From left to right there are two right-angled USB 2.0 ports for easy access when using a test bench instead of a case, 6-pin PCI-E power socket for extra juice for your GPUs, 3x SATA Express (each SATA Express port turns into 2x SATA6Gb/s when SATA Express not in use), and 2x SATA 6Gb/s from an ASMedia controller. There are two USB 3.0 internal headers located right below the 24-pin power connector. They are positioned for front panel USB 3.0 case connectors.
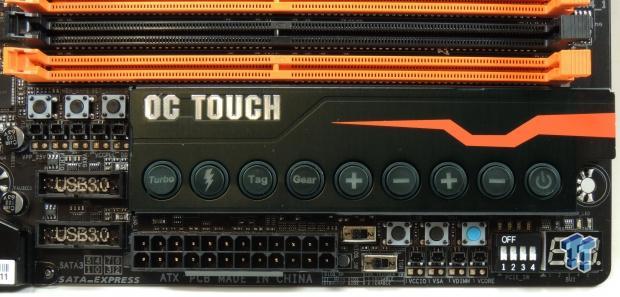
GIGABYTE's OC Touch is one of the main OC features of the SOC Force series. The Z170X-SOC Force has all of the OC Touch features of its predecessors and an added shield to help keep fingers from touching the circuits below (perhaps even to negate the spread of cold. The buttons from the top row from left to right provide; Mem Safe (failsafe memory profile for booting), Settings Lock (applies last known good boot settings), Direct to BIOS (takes you to BIOS on next boot), Turbo (built in GIGABYTE Turbo Profile), OC Ignition (Provides power to fans and ports without turning the CPU system on for water-cooling loop testing and extreme OC conditions), Gear (to control BLCK increments between 1MHz and ~0.1MHz), Multiplier 1x increase, Multiplier 1x decrease, BLCK 1x increase, BLCK 1x decrease, and power button.
On the bottom row there are two switches; the top switch controls which of the two BIOS ROMs is engaged and the bottom one is a Trigger switch that can decrease the CPU and Uncore ratios to 8x on-the-fly. The left-most black button is a CBAT button that clears motherboard power as if you removed the battery and cleared the CMOS, next to it is a typical Clear CMOS button. The blue button is a reset button, and right next to it are PCI-E disable switches that control power to each of the four full-sized PCI-E 3.0 slots.
There is also the handy POST Code display for all your troubleshooting needs. Some people might not like that these OC features are located near the memory that is usually cooled for LN2 overclocking, and GIGABYTE has provided HW-OC, which allows a tethered phone to control the motherboard's OC parameters like multiplier, BLCK, and voltage and provide on-the-fly monitoring and adjustments just like the buttons.
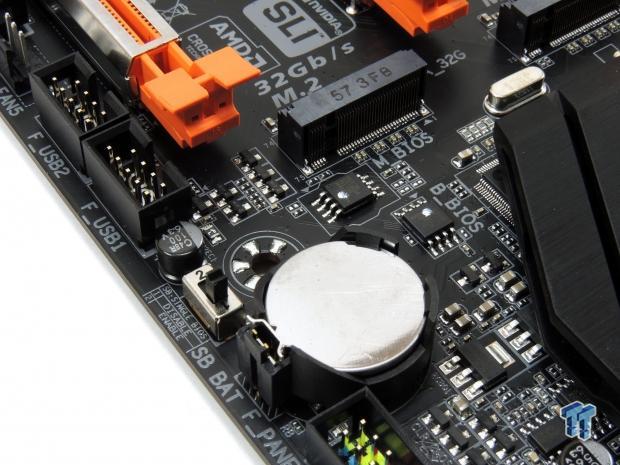
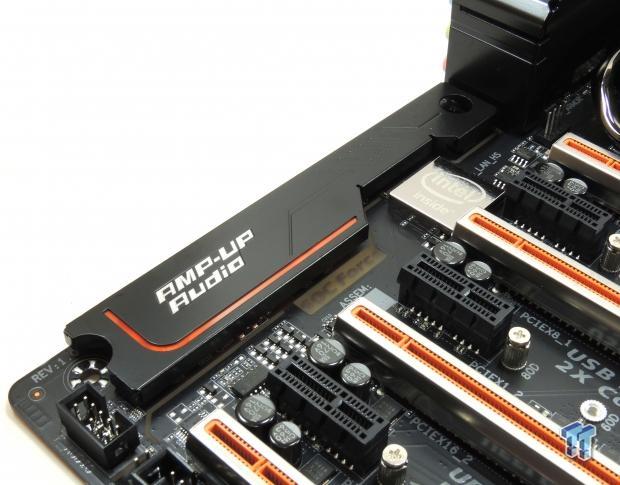
The Single BIOS Mode switch allows you to disable the dual BIOS functionality for quicker overclocking recovery. The audio section has a shield over it, and the PCB divide has SOC Force written into it for a cool effect when the motherboard is powered on.
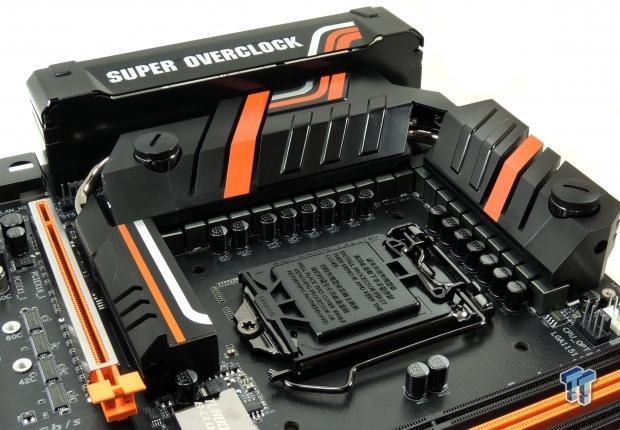
The VRM is a big one, with more than 20 phases in total. The VRM heat sink is connected by the heat pipe to the heat sink that cools the PLX bridge chip that expand PCI-E lanes. The heat sink has built in water cooling that uses a copper pipe connected to nickel plated threads.
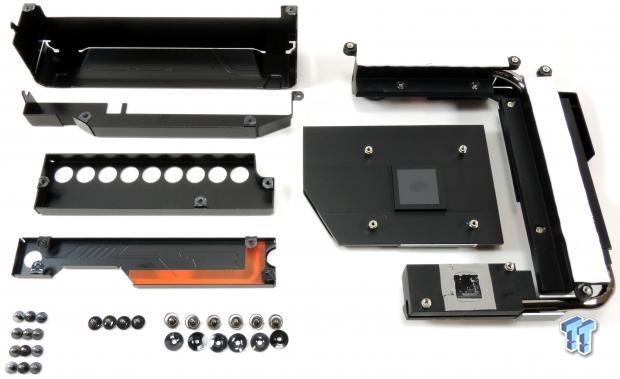
GIGABYTE has provided shields and heat sinks for almost everything. The IO shield, OC Touch area, SATA area, and audio all have their own brushed aluminum shields. The heat sinks are all screwed to the motherboard, and while the VRM and PCH use heat pads, the PLX chip gets thermal paste.
GIGABYTE Z170X-SOC Force Circuit Analysis
Circuit Analysis
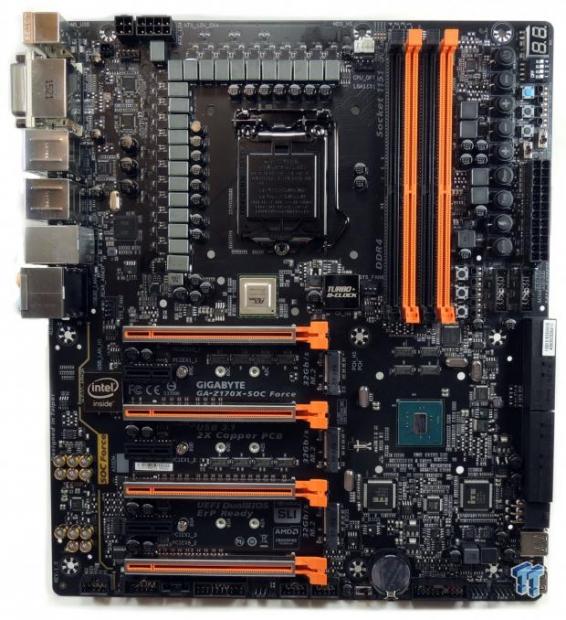
The Z170X-SOC Force is looking nice without the heat sinks, and you can see how much silicon you get for the money.
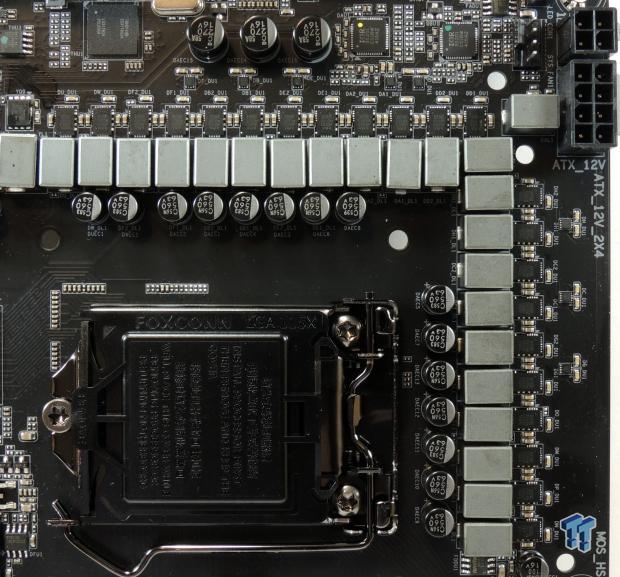
This motherboard carries a 16+4+1+1 phase (VCore, VCCGT, VCCSA, VCCIO) VRM. It is rare that we find such high phase count VRMs on the Z170 platform, and it is overkill even in this case. What is impressive is that GIGABYTE maintains high-quality power stages even with high phase count and extends them not only to the iGPU but also to the VCCIO and VCCSA. CPU power is controlled by three separate digital PWMs and GIGABYTE's custom 10K black capacitors from ChemiCon are used.
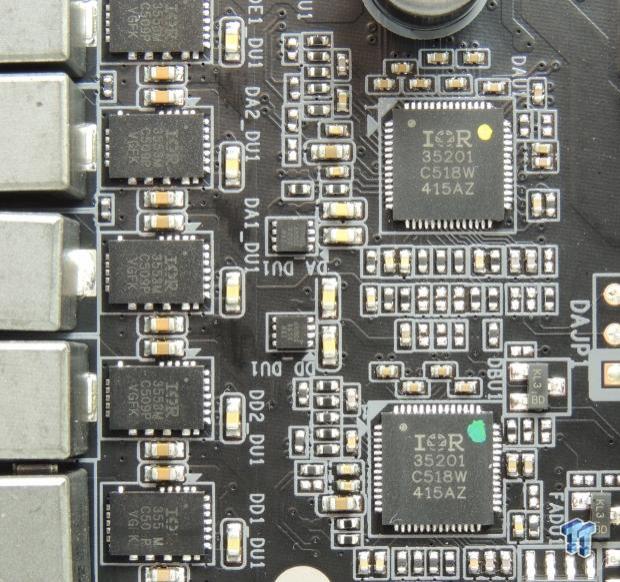
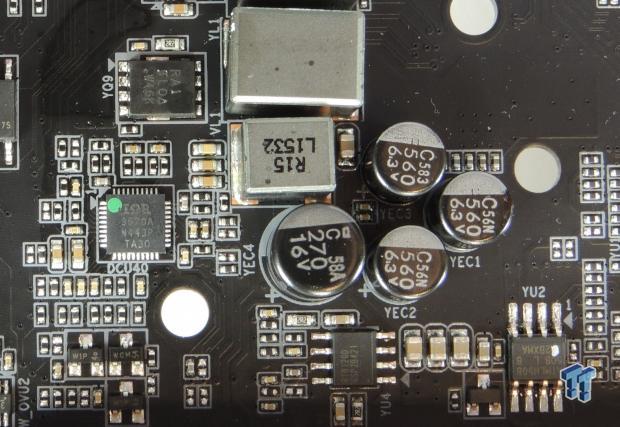
There are two International Rectifier IR35201 6+2 (or 8+0 mode) digital PWMs. The IR35201 is the preferred PWM for extreme overclocking. The first one is providing 8 phases, each to an IR3599 phase doubler, which outputs two phases. Each of those two phases goes to an International Rectifier IR3553 40A integrated power stage, for a total of 16 phases. The second IR3201 provides 4 phases directly to four IR3553 for the iGPU (VCCGT).
An International Rectifier IR3570A (3+2 phase digital PWM) provides two phases to two IR3553, one for the VCCSA and one for VCCIO. The PEX8747 is an 8W monster bridge chip that takes in 16x and outputs 32x of PCI-E 3.0, and it gets its own single phase VRM powered by a Richtek RT8120D and some Vishay Siliconix SiRA12 and SiRA18 PowerPAK MOSFETs.
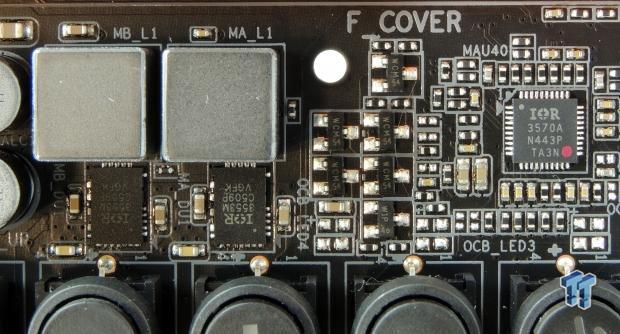
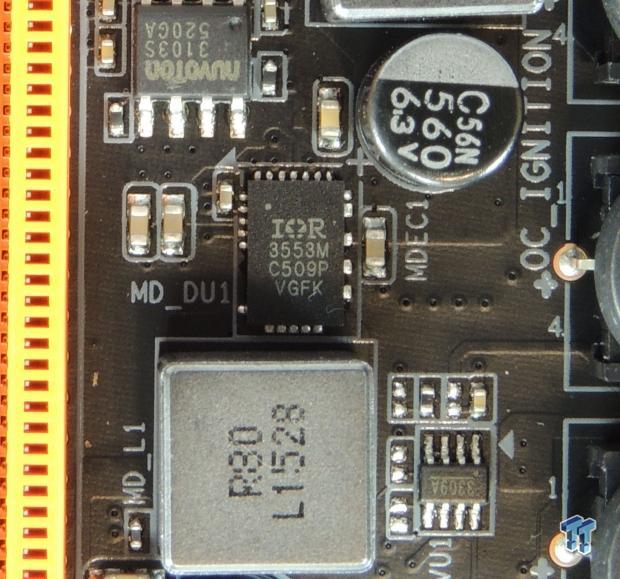
The DDR4 gets its own IR3570 that provides 2+1 phases for the DDR main rail and the DDR VPP. Both the DDR4 main rail and the DDR4 VPP rail get IR3553 40A integrated power stages, two for the main rail and one for the VPP. This is overkill for DDR4, and should facilitate any DDR4 power requirements.
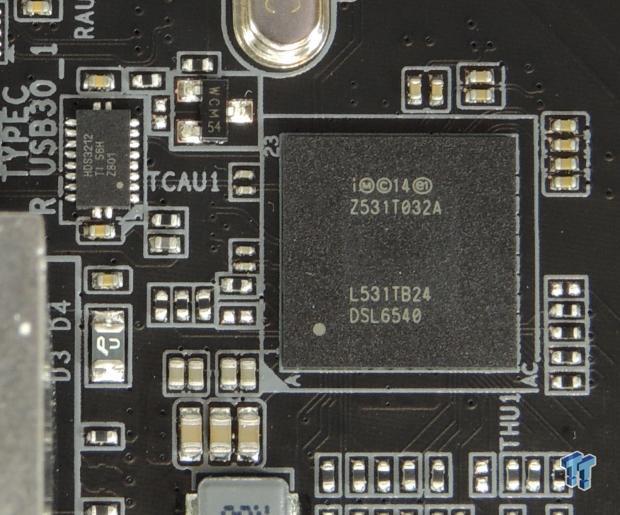
Intel's Alpine Ridge controller is used here. It supports ThunderBolt 3.0 when the chip is properly configured, but, in this case, it is configured for USB 3.1 only. The Intel chip is labeled DSL6540, and a Texas Instruments HDS3212 is used for the Type-C port and provides USB Power Delivery support.
GIGABYTE Z170X-SOC Force Circuit Analysis Continued
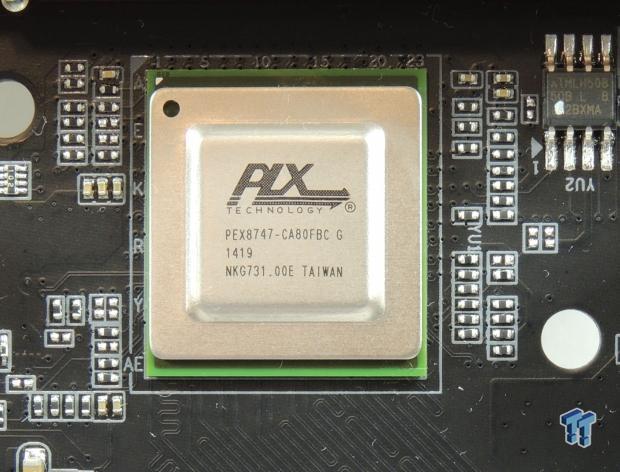
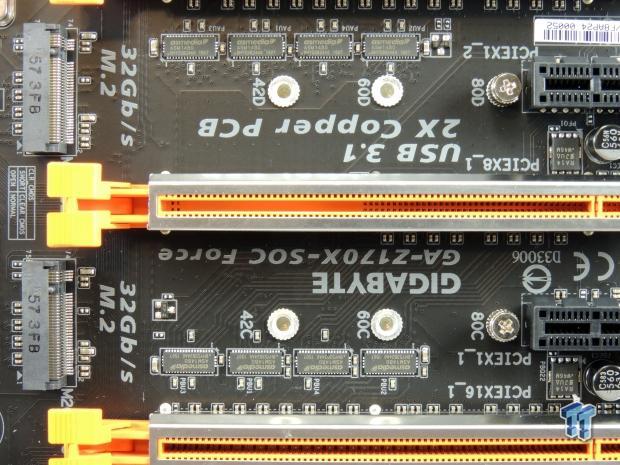
Avago Technologies bought PLX Technologies, and the PEX8747 is now in their portfolio. It provides 32x PCI-E 3.0 from the 16x the CPU provides for graphics. This allows for 4-way SLI/CrossFireX and is the only way to run 4-way SLI on the Z170 platform. It does produce 8W of heat and needs to be cooled by a heat sink. The 8x ASMedia ASM1480s are PCI-E 3.0 quick switches, and they switch 8x from the first and third slots to the second and fourth to facilitate more GPUs.
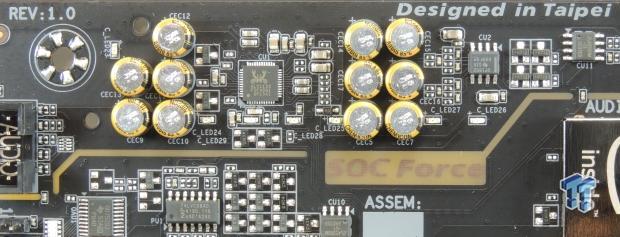
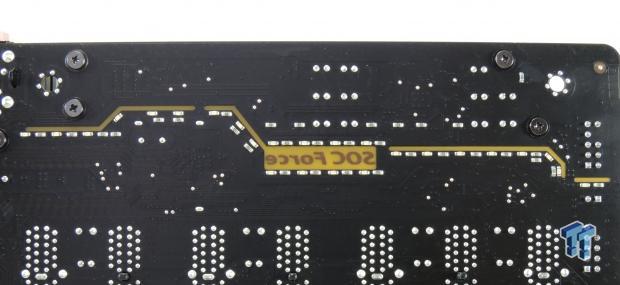
The audio section consists of a Realtek ACL1150 codec, 11x Nippon Chemicon Gold Series electrolytic audio capacitors, and a Texas Instruments OP1652 audio amplifier. There are 7x topside, and 25x underside orange LEDs that really illuminate the audio section, and the SOC Force logo is clearly visible from afar. A Texas Instruments GC75232 is used to support COM port capabilities.
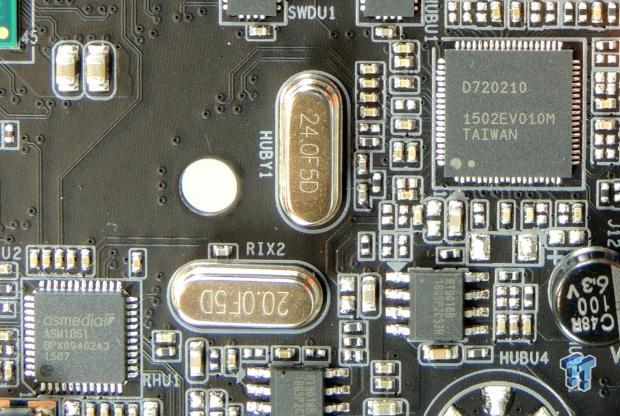
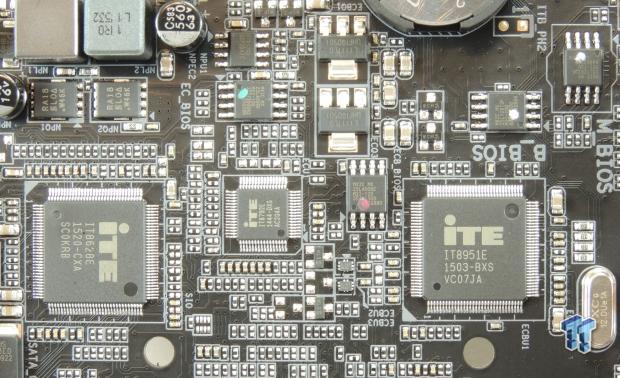
An ASMedia ASM1061 is connected to a single PCI-E lane from the PCH and provides two SATA6Gb/s ports. An NEC/Renesas D720210 USB 3.0 hub provides 4x USB 3.0 from a single USB 3.0 port from the PCH. As we see on other top of the line overclocking motherboards, there is a main Super IO controller and multiple secondary and/or tertiary embedded controllers. The iTE IT8628E provides main SuperIO capabilities such as voltage and temperature monitoring, fan control, and PS/2 on the IO panel. The iTE IT8792E provides more fan control, hardware monitoring, and OC features. There are two 128Mbit/16MB BIOS ROMs, and an iTE8951E provides Dual BIOS + functionality that includes USB BIOS recovery without requiring the CPU to power on.
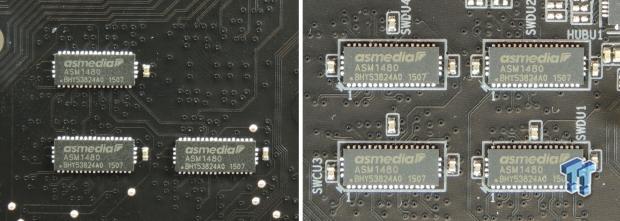
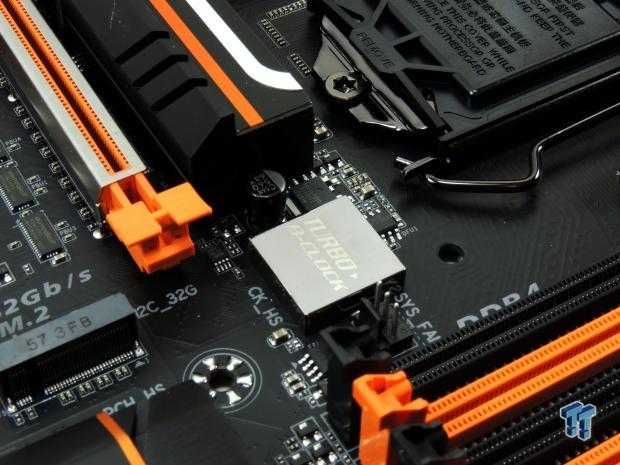
Seven ASMedia ASM1480s are PCI-E 3.0 quick switches that move around SATA and M.2 bandwidth so that the board can support and even RAID three 32Gb/s M.2 slots. The Intel NIC is covered by a metal shield, as is the BLCK clock generator used for high BLCK frequency overclocking.
BIOS and Software
BIOS
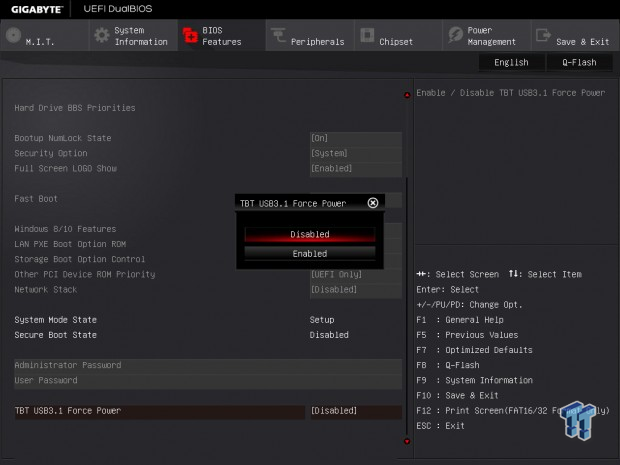
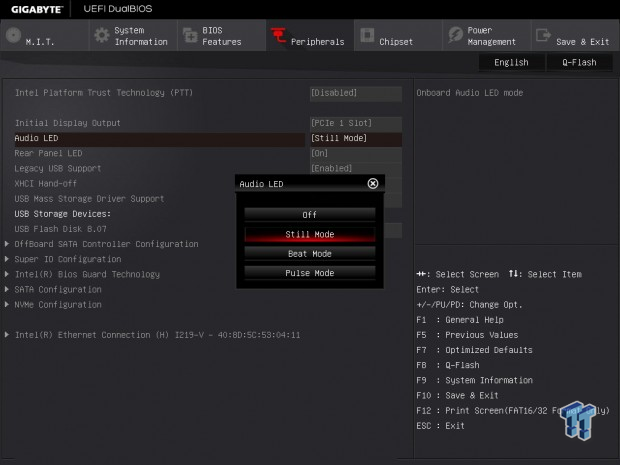
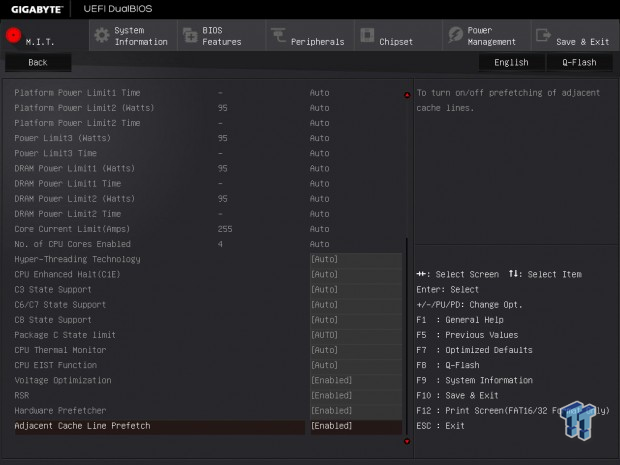
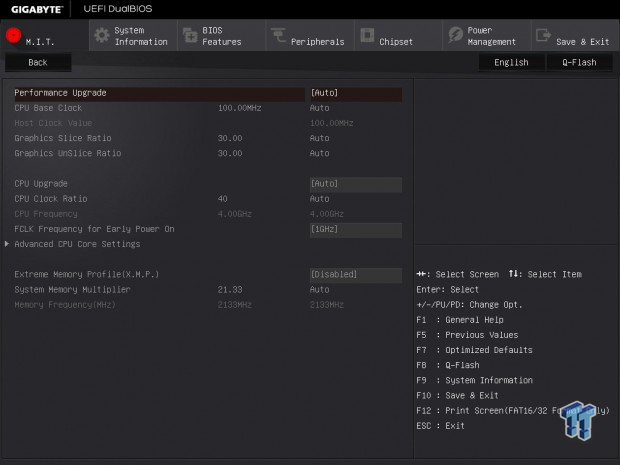
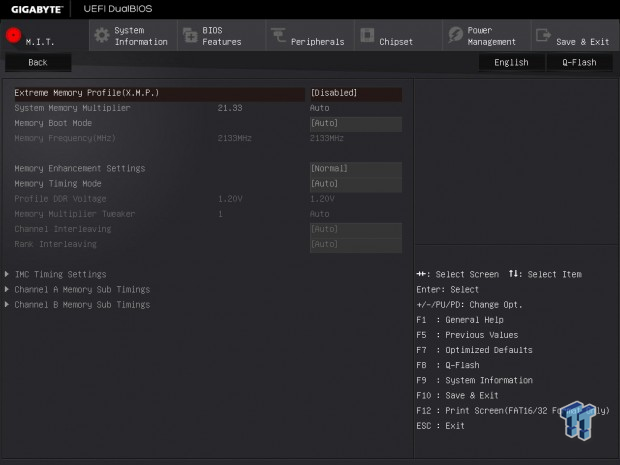
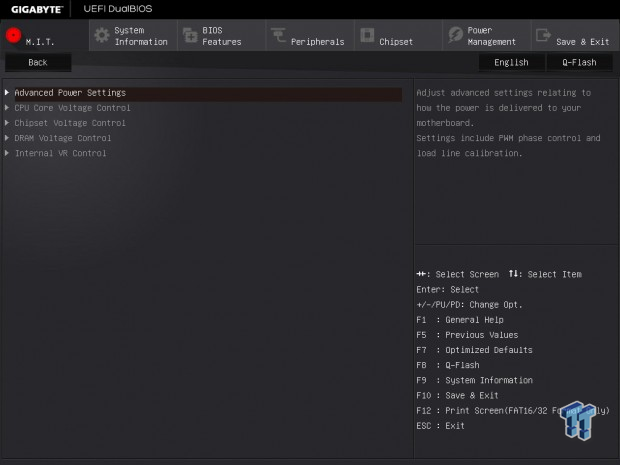
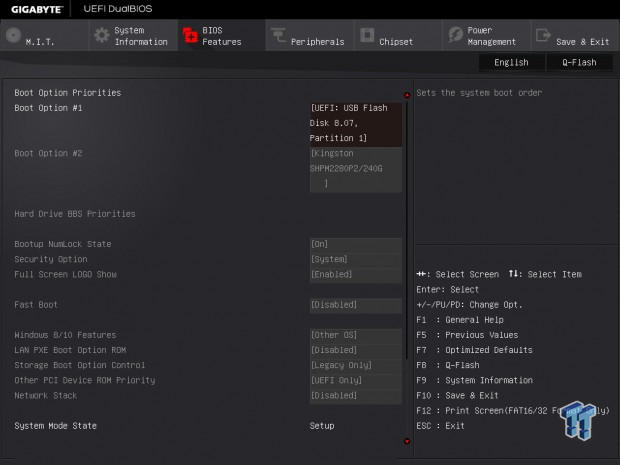
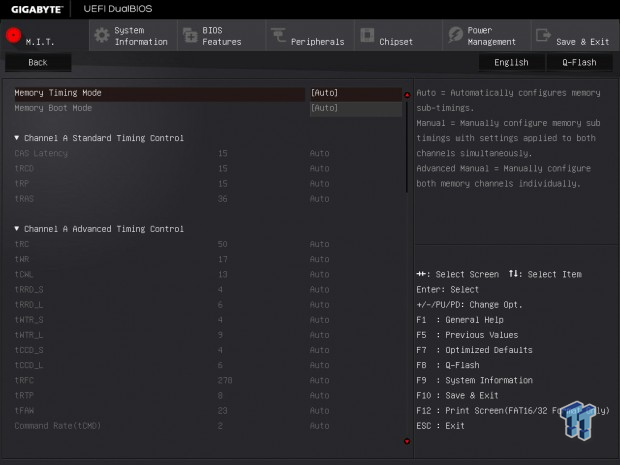
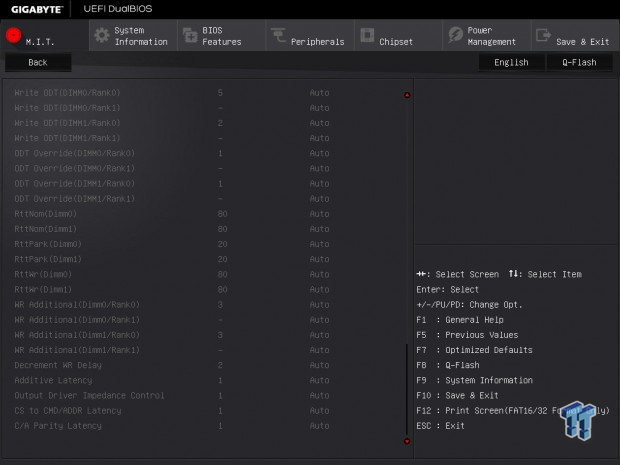
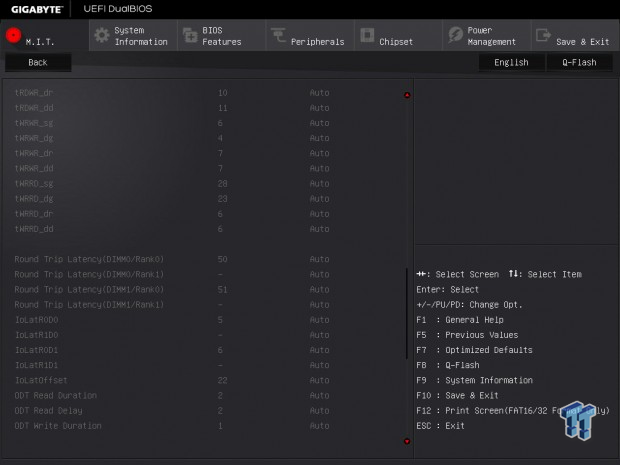
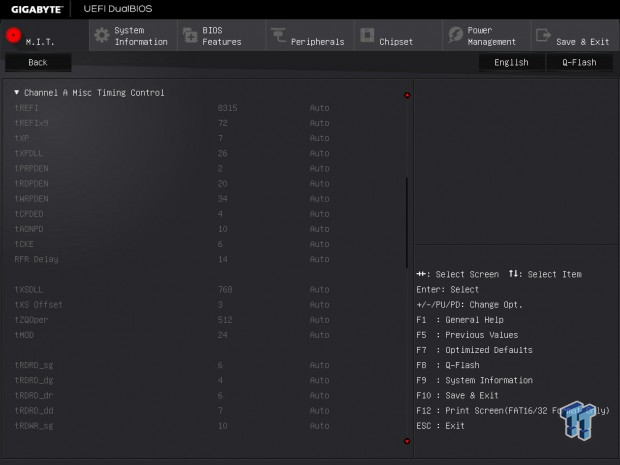
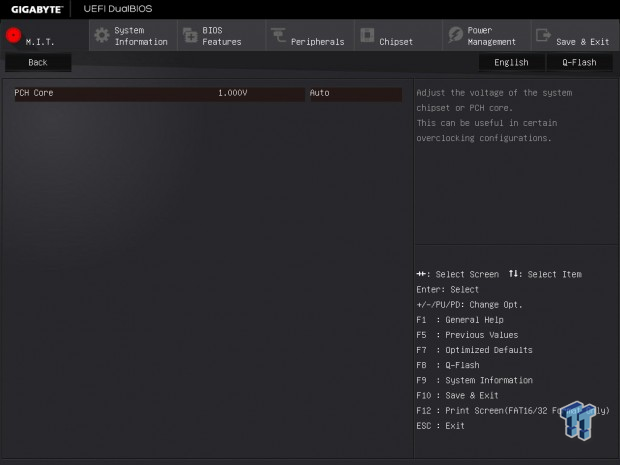
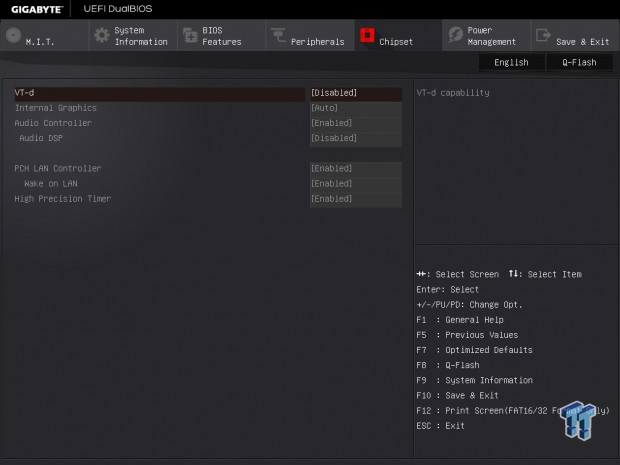
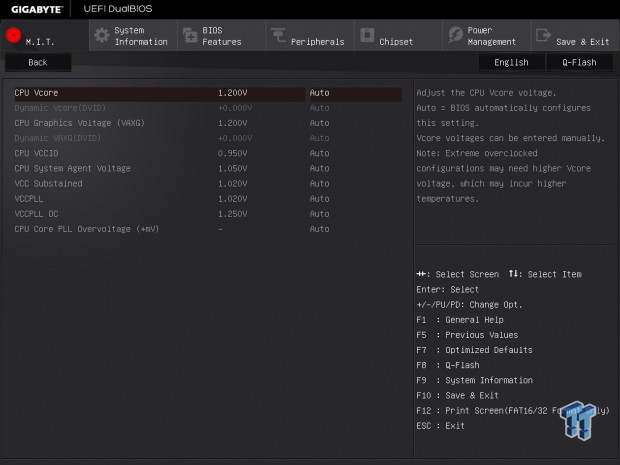
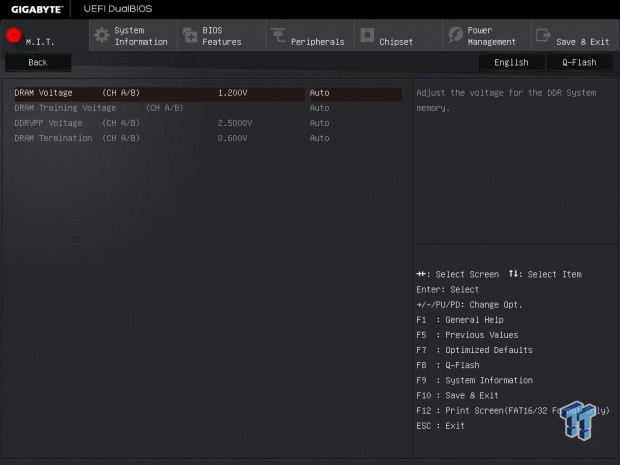
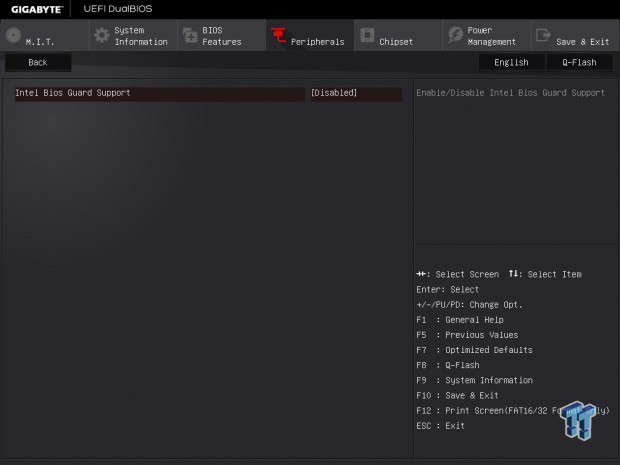
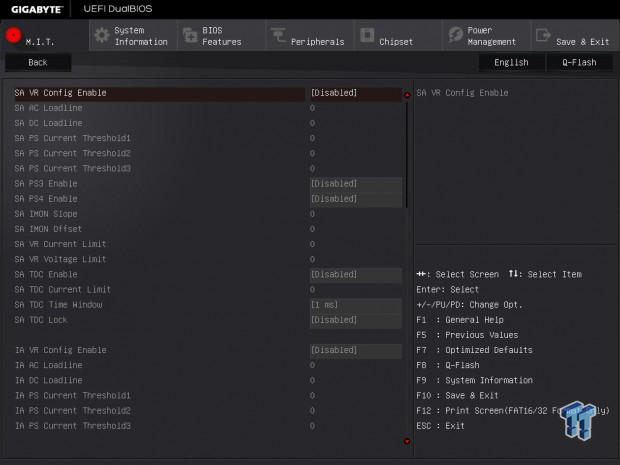
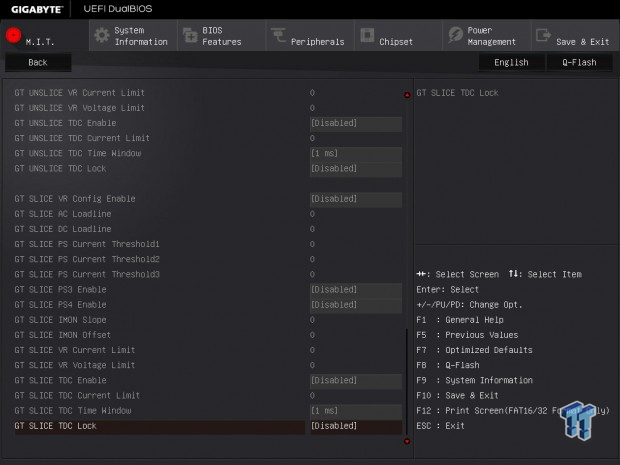
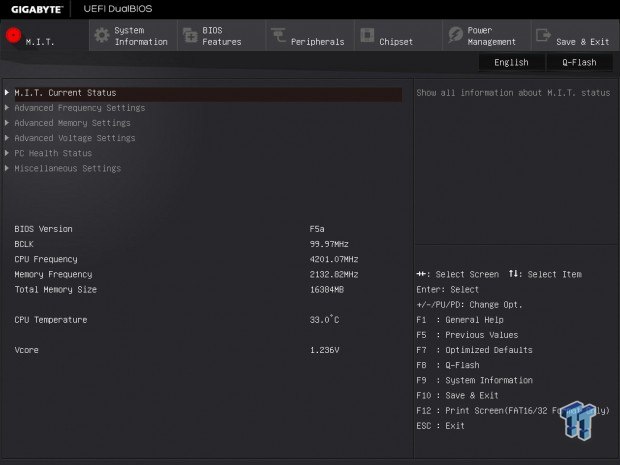
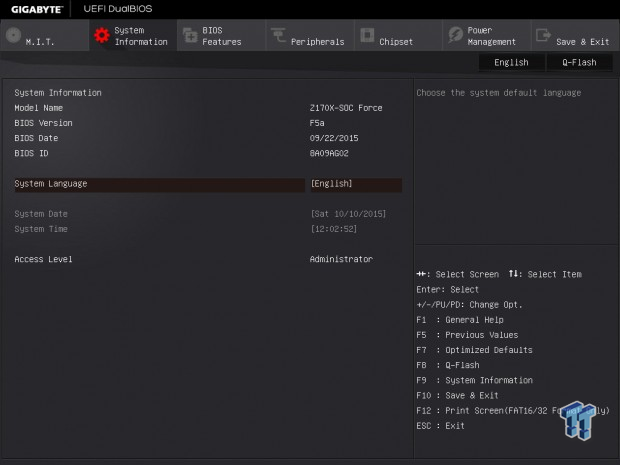
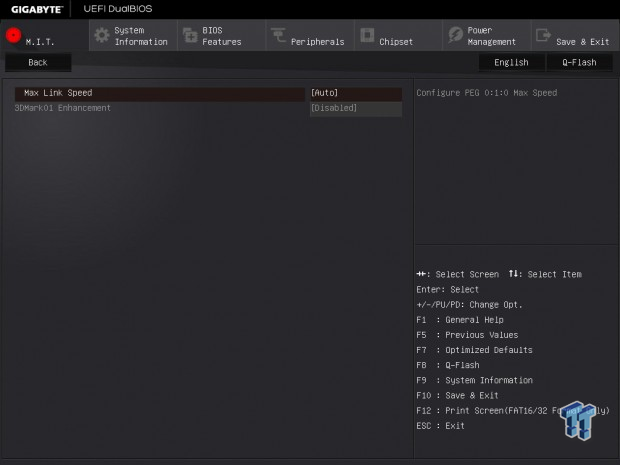
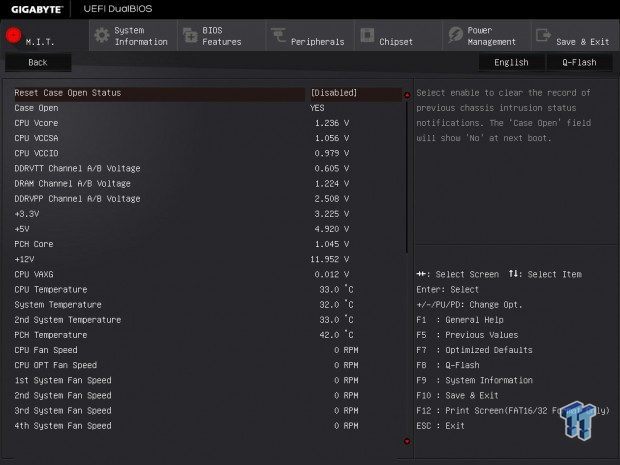
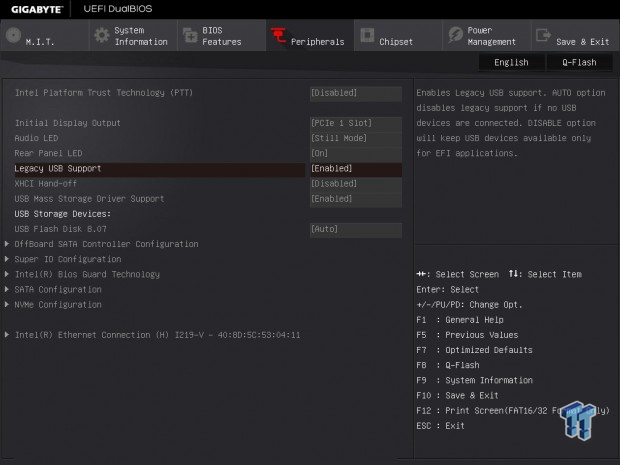
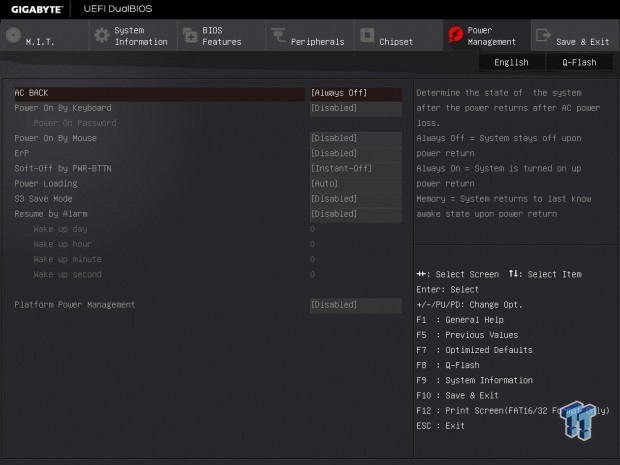
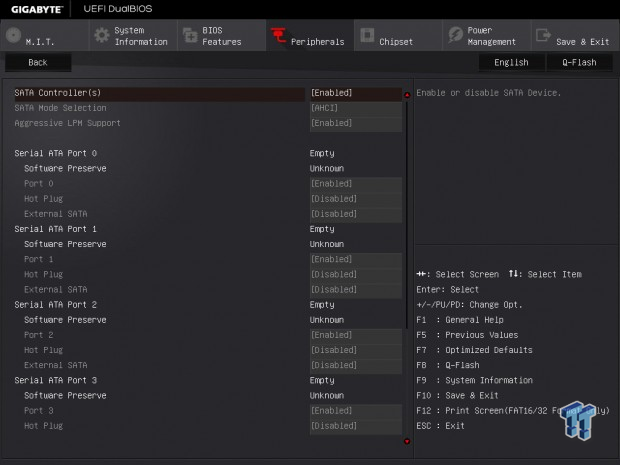
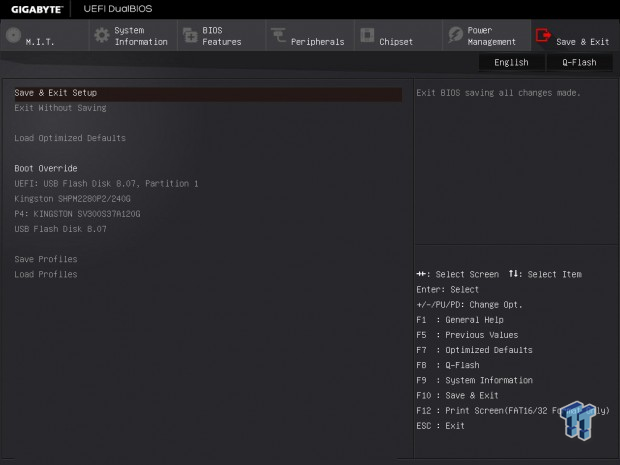
It seems that GIGABYTE has done away with multiple BIOS modes and has stuck to the advanced mode that has everything you need for overclocking and configuring system settings. All the OC features you might need are provided, and you can type in values. Fan control is also provided, and you have a few preset options to choose from as well as a manual mode.
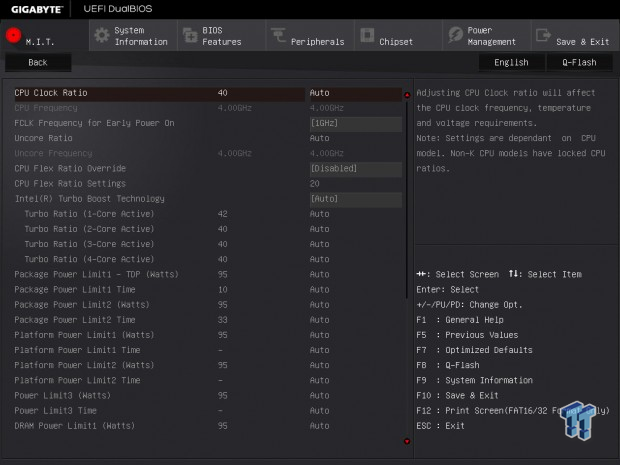
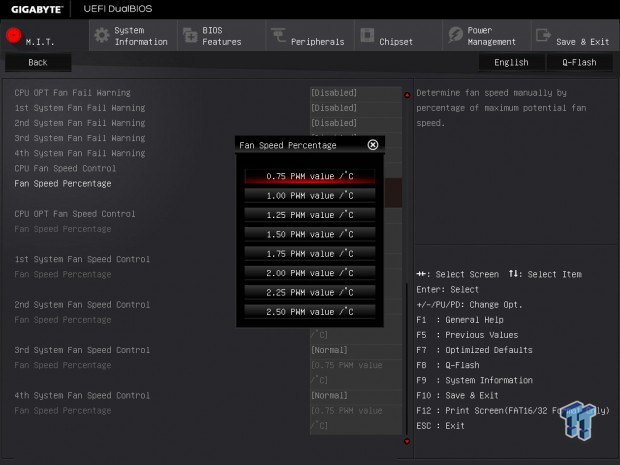
The manual mode is useful if you want to set the PWM slope manually, but you are locked into fixed slopes instead of variable ones with critical temperature points that some other brands provide. If you want those variable points and more fan control options, GIGABYTE's SIV (System Information Viewer) provides that functionality.
GIGABYTE's UEFI provides everything you might want including the FLCK clock that many people have been chatting about lately. There is also an endless list of PWM tuning and IMC control parameters available.
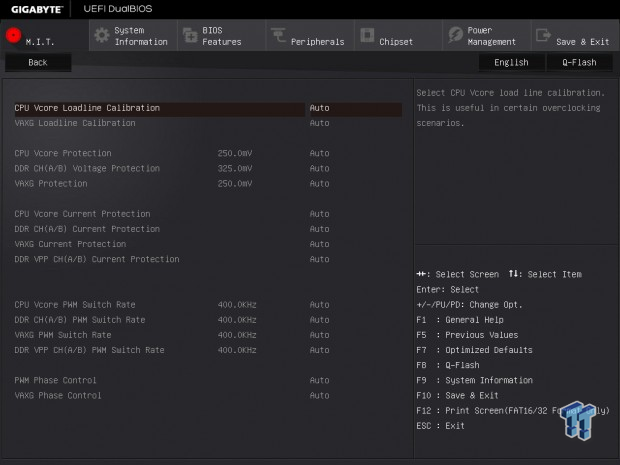
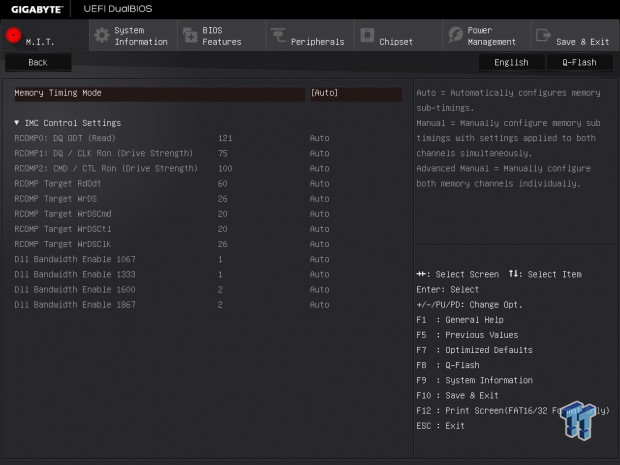
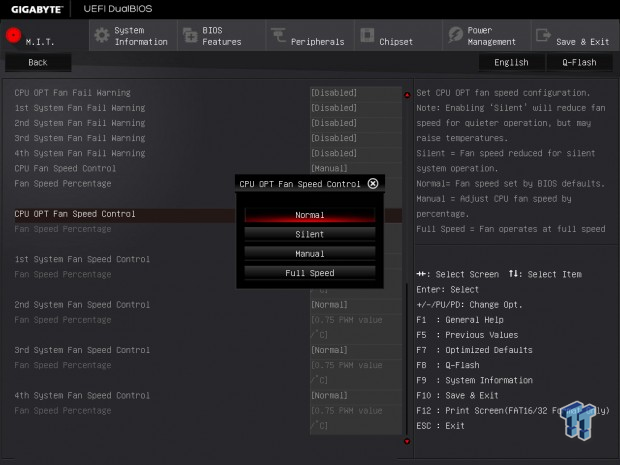
Software
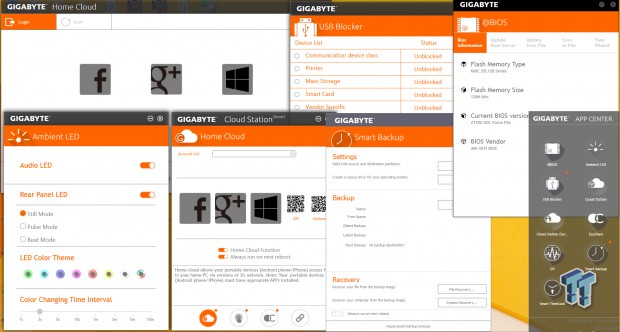
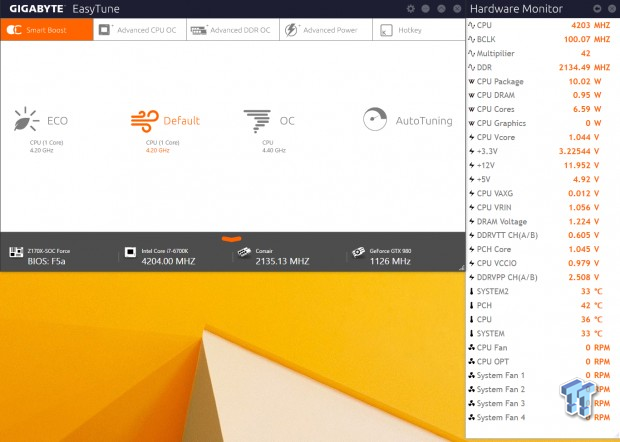
GIGABYTE provides a lot of software accessible through their APP Center. This includes EasyTune, System Information Viewer, @BIOS, Ambient LED, Home Cloud, Smart Backup, USB Blocker, Smart Timelock, Smart Backup, and HW OC, which I will cover below.
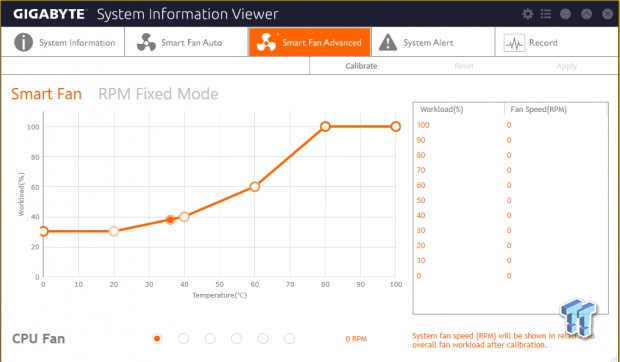
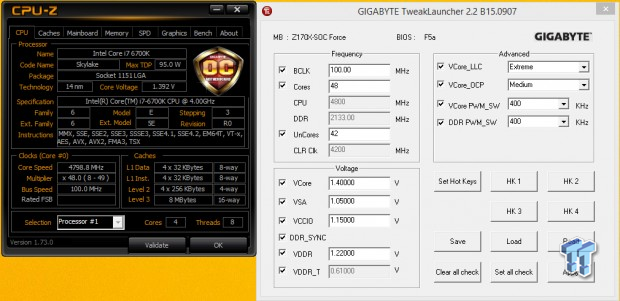
You can see SIV's fan tuning options above as well as the custom CPU-Z skin and GIGABYTE TweakLauncher, which provides quick and easy in-Windows OC tuning.

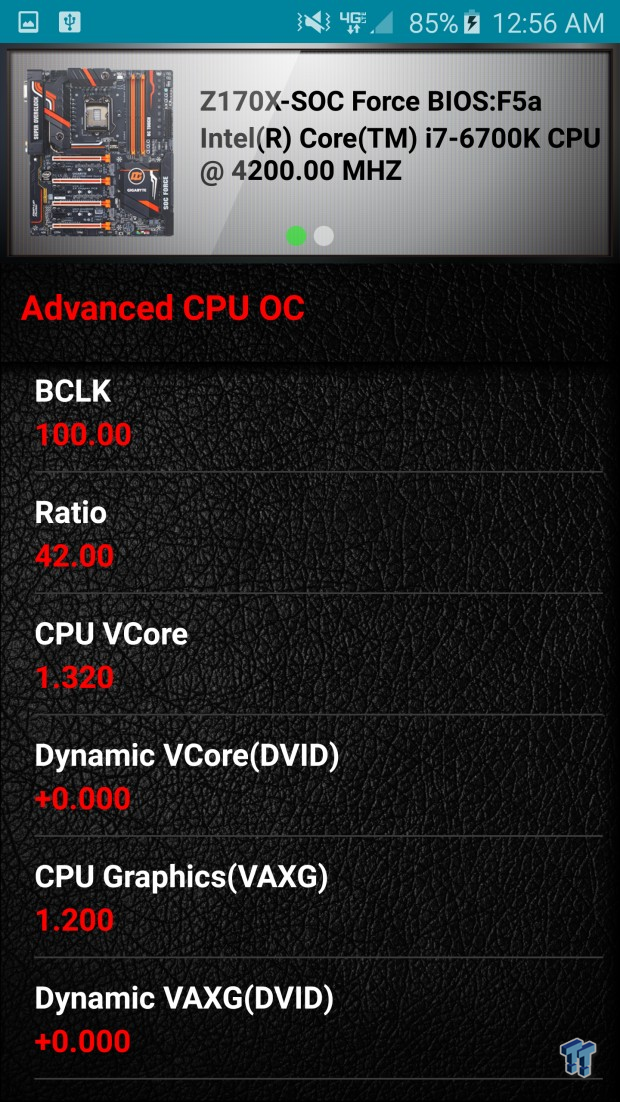
GIGABYTE's new HW-OC program allows for on-the-fly system monitoring and control through a tethered Andriod or iOS device. You need to read the instructions in the manual to properly setup the connection between the phone and motherboard.
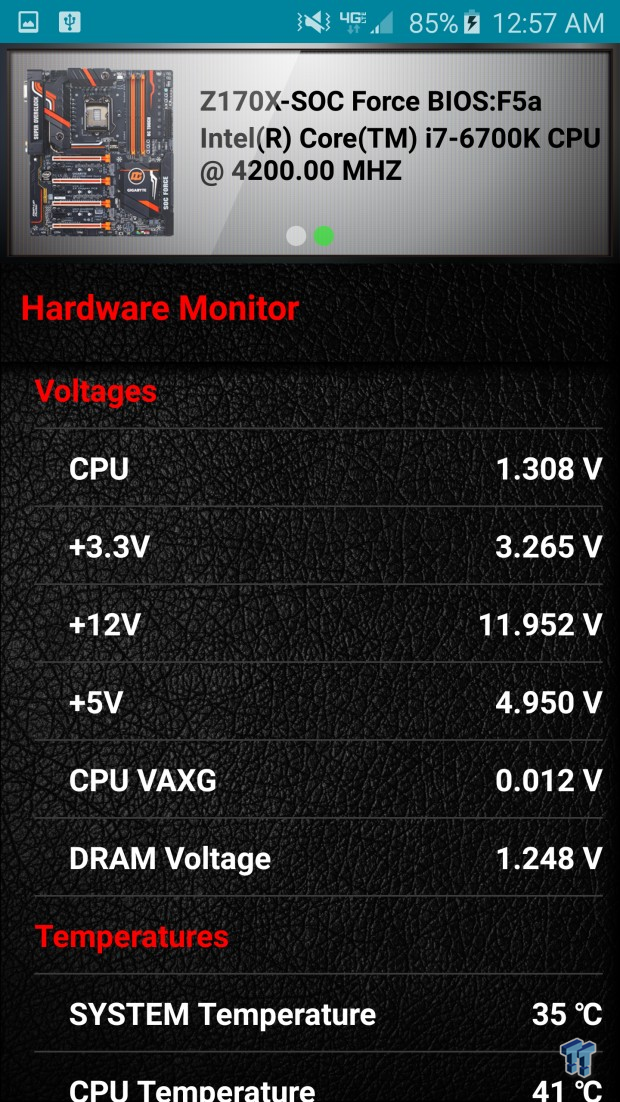
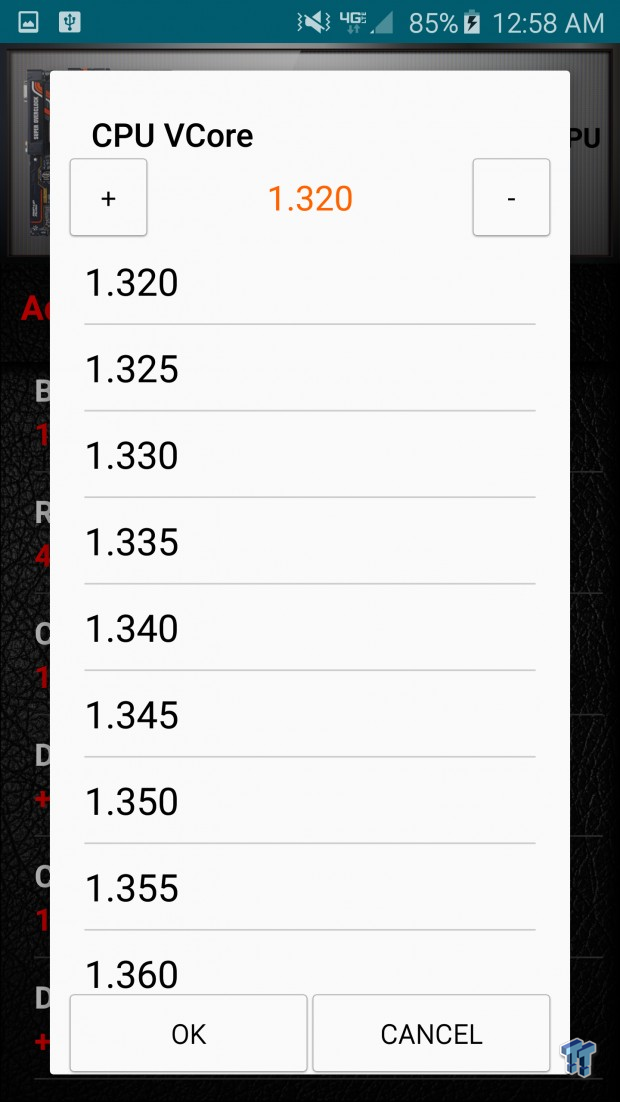
You need to plug into the white USB port and press the SOC Link button on the back of the motherboard in the proper order to make a connection, but once it is made you can make on-the-fly OC adjustments. I tested it out, and it works quite well.
Test System Setup
Steven's Motherboard Test System Specifications
- Motherboard: GIGABYTE Z170X-SOC Force
- CPU: Intel Core i7 6700K - Buy from Amazon / Read our review
- Cooler: Corsair H110i GT - Buy from Amazon
- Memory: Corsair Vengeance LPX 16GB (2x8GB) 2666MHz - Buy from Amazon
- Video Card: NVIDIA GeForce GTX 980 - Buy from Amazon / Read our review
- Storage - Boot Drive: Samsung 850 Pro 512GB - Buy from Amazon / Read our review
- Storage - SATA6G Drive: Corsair Force LS 240GB - Buy from Amazon / Read our review
- Storage - M.2 Drive: Kingston HyperX Predator 240GB PCIe x4 - Buy from Amazon
- Storage - USB Drive: Corsair Voyager GS 64GB - Buy from Amazon / Read our review
- Case: Corsair Obsidian 900D - Buy from Amazon / Read our review
- Power Supply: Corsair AX1200i - Buy from Amazon / Read our review
- OS: Microsoft Windows 8.1 Enterprise - Buy from Amazon
- BIOS: F5a
- Drivers: Intel INF: 10.1.1.9, Intel ME: 11.1.1.1162, Intel USB 3.0 Adaptation Driver: 10.0.0.42, NVIDIA Graphics: 353.82, Audio: 6.0.1.7560, ASMedia USB 3.1: 3.1.6.0000, Intel LAN: 20.2
This is the new test bench, and it is designed to test every aspect of the motherboard and IO. I have designed it so that the motherboard sits in a case and is cooled by fans always on at a constant rate to keep the conditions similar for all tests. I have cut out part of the case behind the motherboard so I can get thermal images of the back of the PCB where the VRM heat spreads. System and CPU power measurements are now digitally logged.
I am also using a Netgear Nighthawk X4 AC2350 for our network (including wireless AC) tests. The latest M.2, SSD, and USB technologies are also being utilized to test the maximum potential of the motherboards that are being tested.
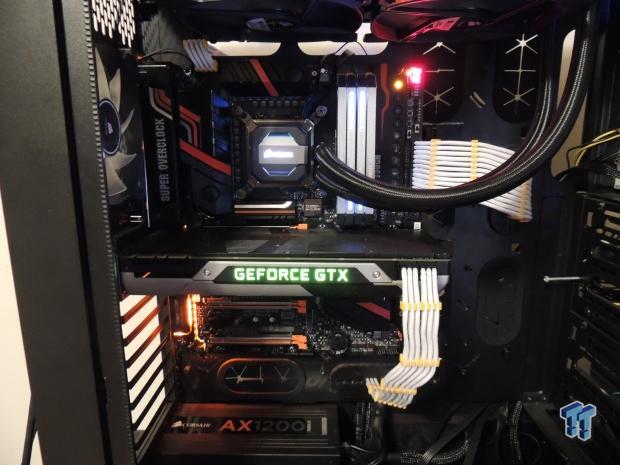
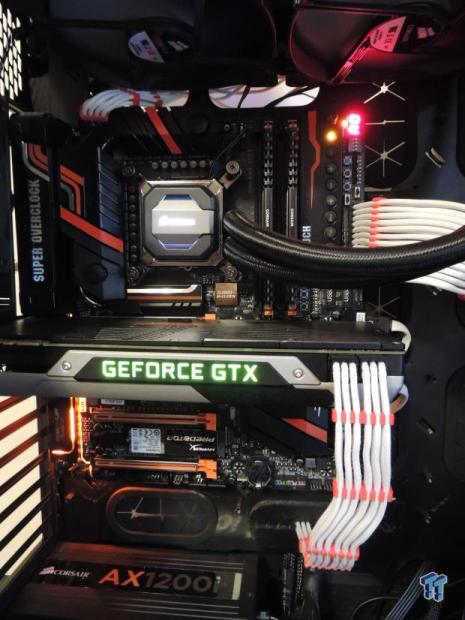
I tried both red and orange cable combs, and I would say that most orange and some red accessories will match the color theme of the Z170X-SOC Force. The motherboard looks quite amazing in person, and below you can see the theatrics from the orange LEDs in both the IO panel and audio PCB area.
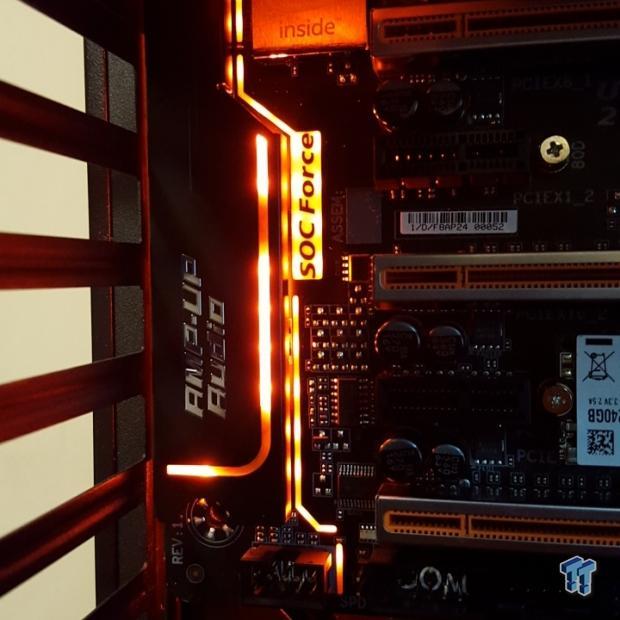
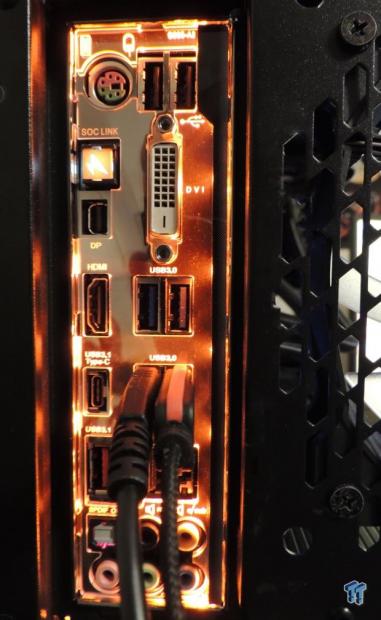
There are 32 orange LEDs in the audio area that illuminate the audio PCB divide, SOC Force label, and back of the motherboard. There are more LEDs built into a special IO shield that illuminate it evenly.
Overclocking
Overclocking Results
CPU Overclocking
CPUID recently released their latest CPU-Z version that brings some major changes to the much-loved software. One of these changes has made it harder to get validation at lower stability levels, so it becomes much more troublesome to validate 5.2GHz at 1.5v with every board. While CPU-Z has changed, many motherboards (not this one) don't have LLC. I have to set a higher voltage to compare all these boards at the same voltage. I have decided to reduce the CPU VCore to 1.4v applied (I will measure real VCore at the output capacitors), and see how high I can validate. On most boards its 5.0. I have also decided to add real voltage levels compared to what is set for all motherboards, if they don't have voltage read points I will mark where I got the readings from.
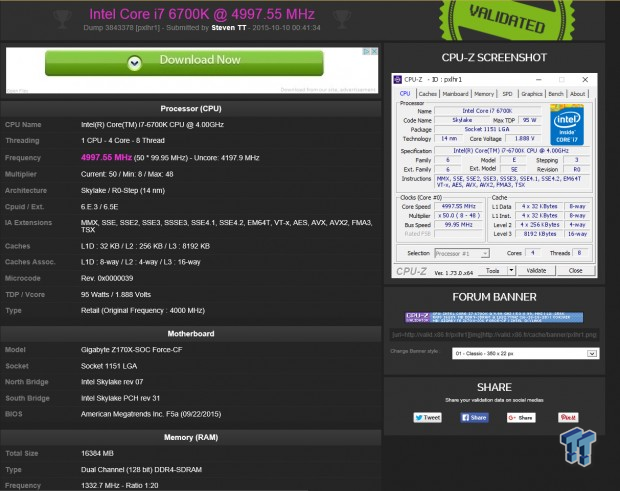
The Z170X-SOC Force is doing 5.0GHz just like other high-end boards. CPU overclocking is pretty much confined to the CPU these days, so I should be hitting 5GHz on the majority of motherboards, some might be lower, but not the Z170X-SOC Force. CPU-Z misreads VCore, and I used the OC buttons to change the multiplier.
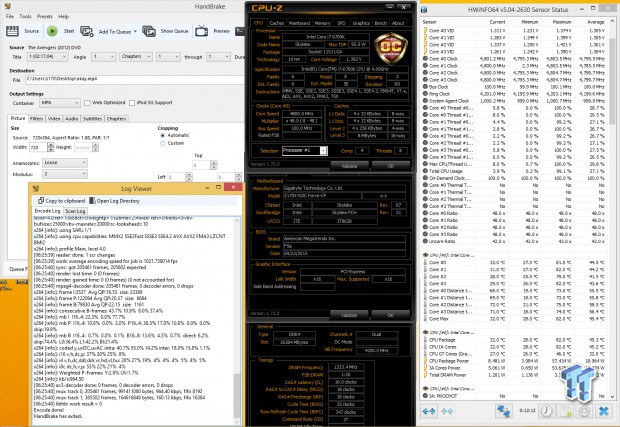
I tested stability at 4.8GHz CPU, 4.1GHz Uncore, and 2666MHz on the memory with 1.4v on the VCore.
I am using HandBrake to transcode a 2GB video, and it is very telling since it pulls all cores to the maximum frequency and load. Handbrake is good for a quick stability check, plus I get a log of the encoding speed and the number of errors. It is very easy for the queue not to finish all the way and just error out, and 1-3 hours of AIDA is about equal to this HandBrake test, so I am replacing it.
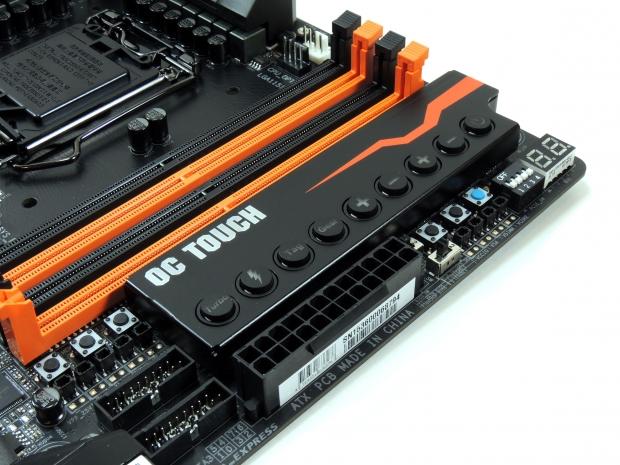

There are many voltage read points provided on the Z170X-SOC Force, you can measure every important voltage at the pads or by using the connectors that are quite handy. If you have eight different digital multimeters, then you can measure eight voltages at the same time because of the provided connectors. I also tested LLC through manual measurements.
Overclocking motherboards usually have one type of LLC that increase voltage under load and others that allow for small drops, this is because LLC isn't static, and an increase at 1.3v at 4.5GHz might be a slight drop at 7Ghz at 1.9v. The Z170X-SOC Force might have some of the best LLC I have seen using the second level, "Turbo" and its "Extreme" setting is perfect for higher voltage/current scenarios.
Memory Overclocking
Test 1: 4x4GB (32GB) Corsair VENGEANCE LPX 2666MHz C16
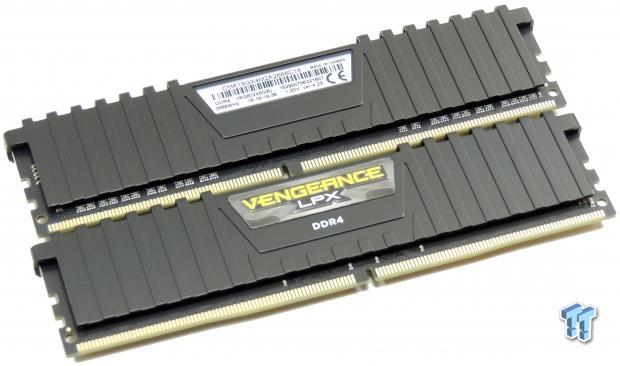
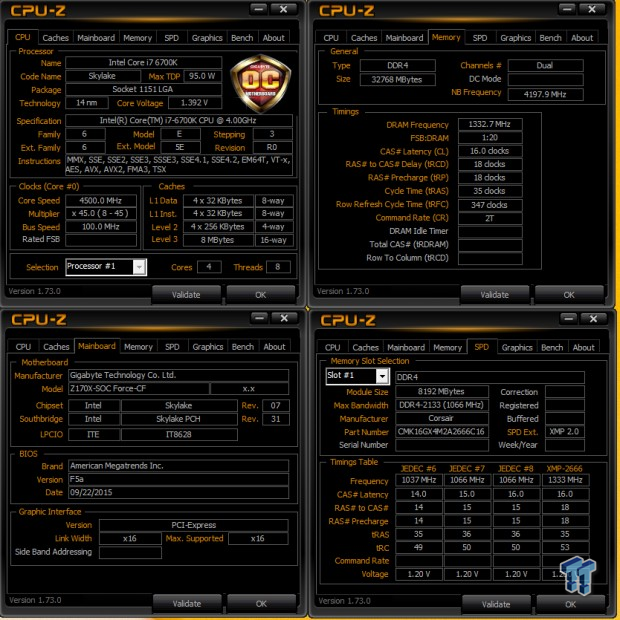
The Z170X-SOC Force passed this test with flying colors. To be clear, this is two kits of 16GB Vengeance LXP memory not meant to be run together in most situations.
Test 2: 4x4GB (16GB) Corsair Dominator Platinum 3200MHz C16
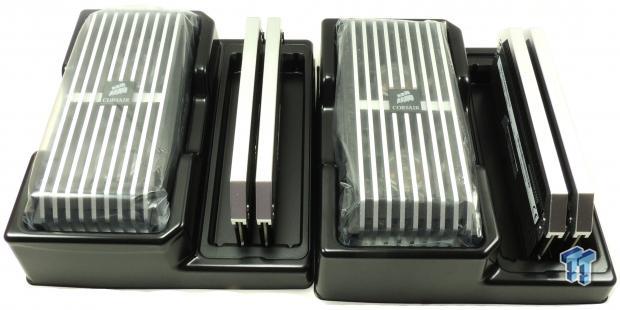
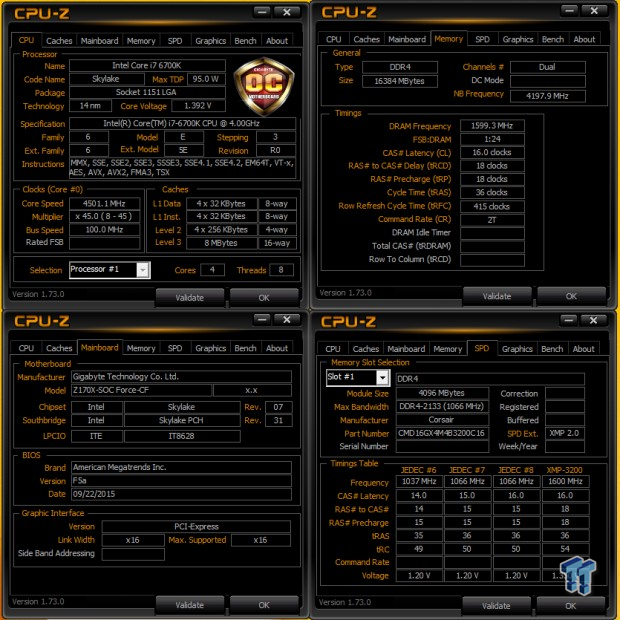
This kit meant for X99 works just fine on the board, which is expected for a Z170 overclocking motherboard.
Test 3:2x4GB (8GB) G.Skill Ripjaws V 3600MHz C17
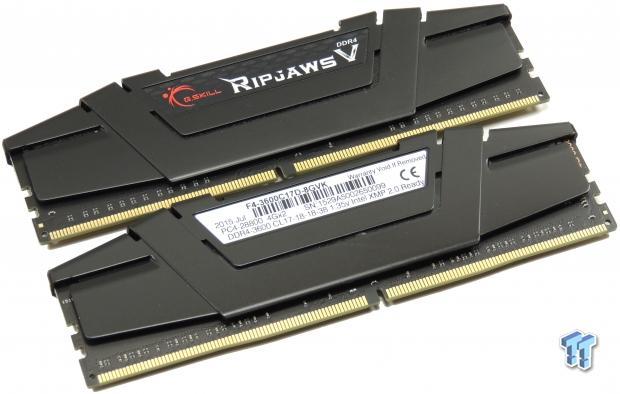
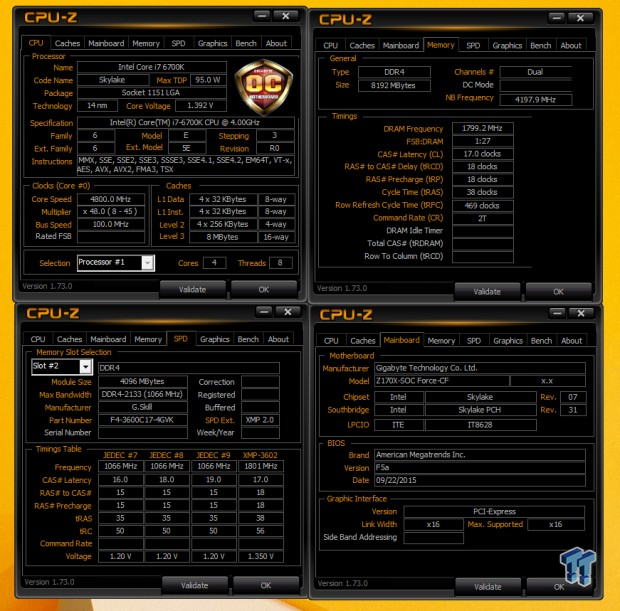
This kit doesn't work on all motherboards. Usually, only overclocking models can even boot this kit by just enabling XMP. The Z170X-SOC Force runs this kit at 3600MHz without batting an eye, all I needed to do was enable XMP and save and exit the BIOS.
CPU, Memory, and System Benchmarks
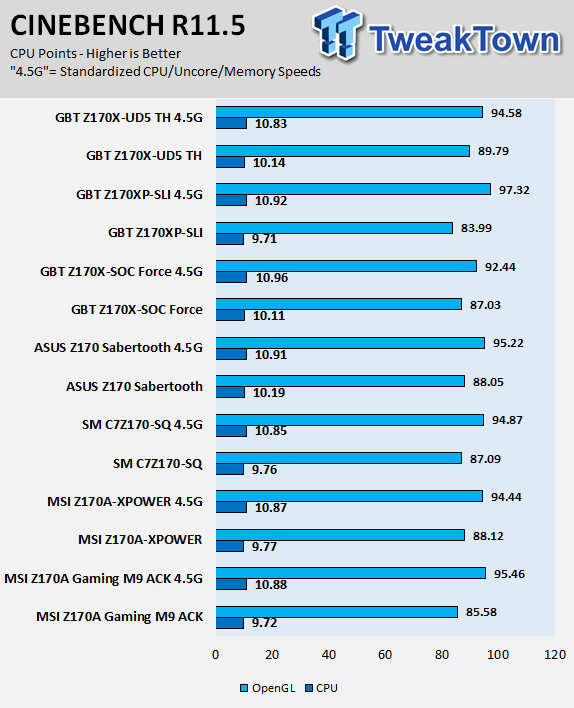
CINEBENCH 11.5
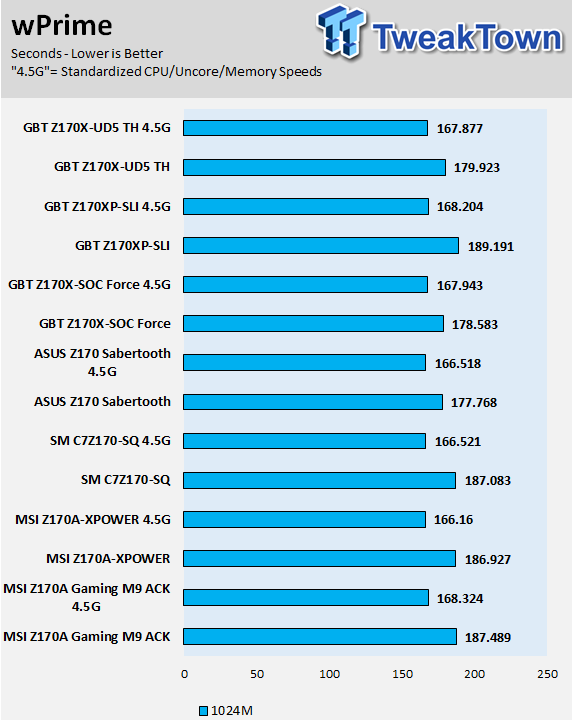
wPrime
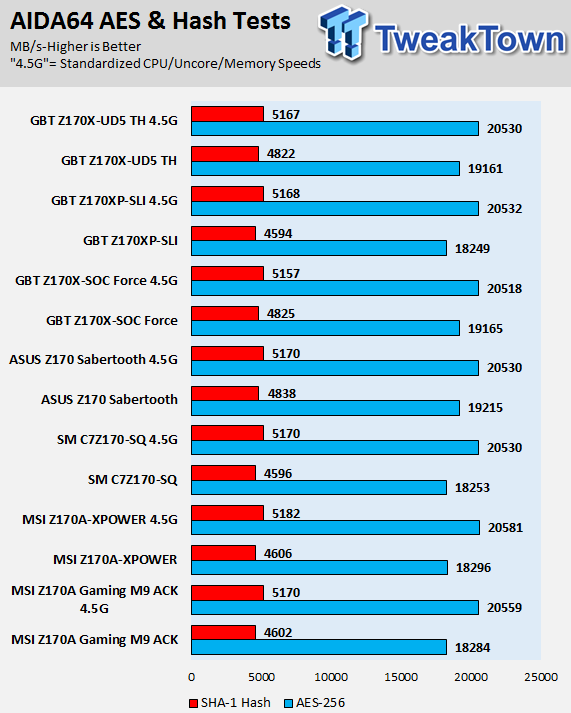
AIDA64 AES and HASH
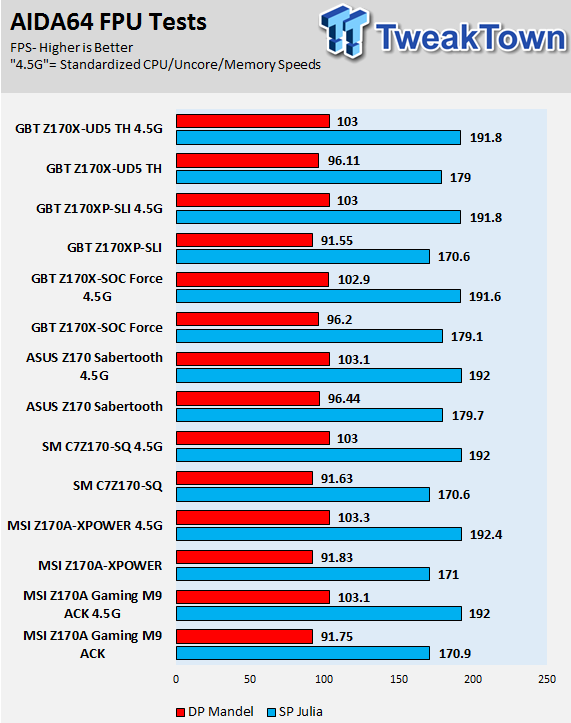
AIDA64 FPU
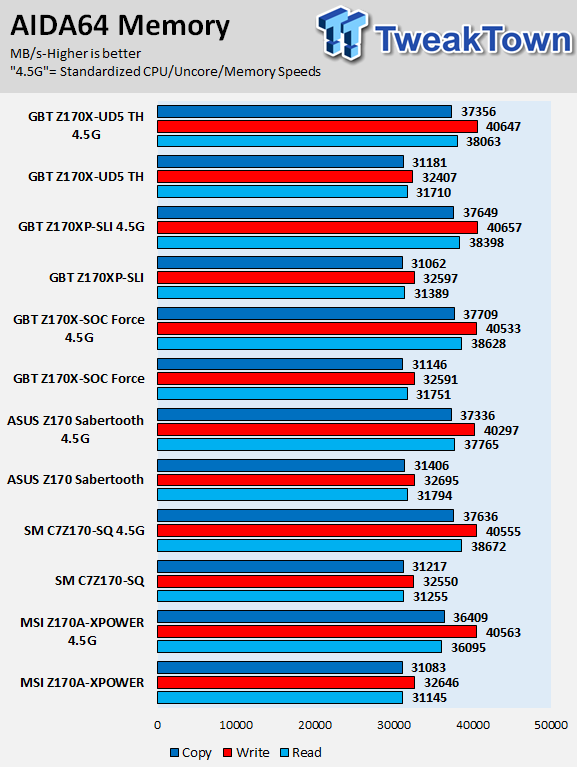
AIDA64 Memory
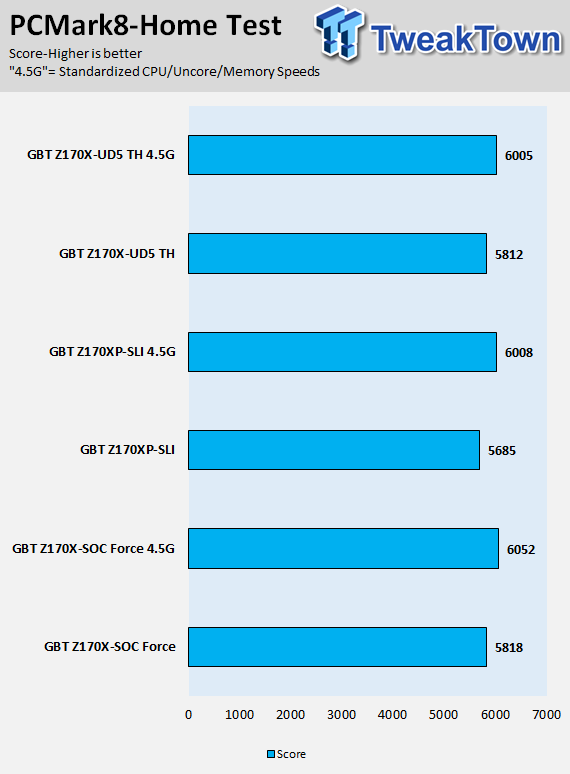
PCMark8 Home Test
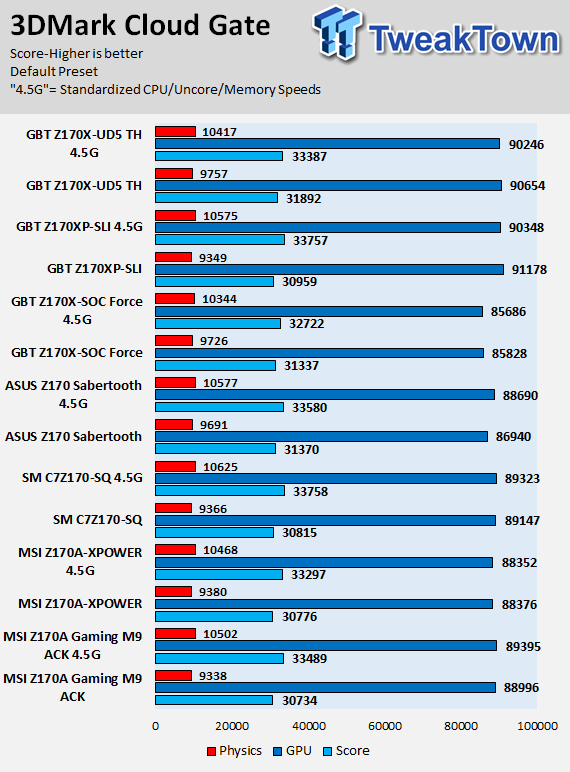
3DMark: Cloud Gate
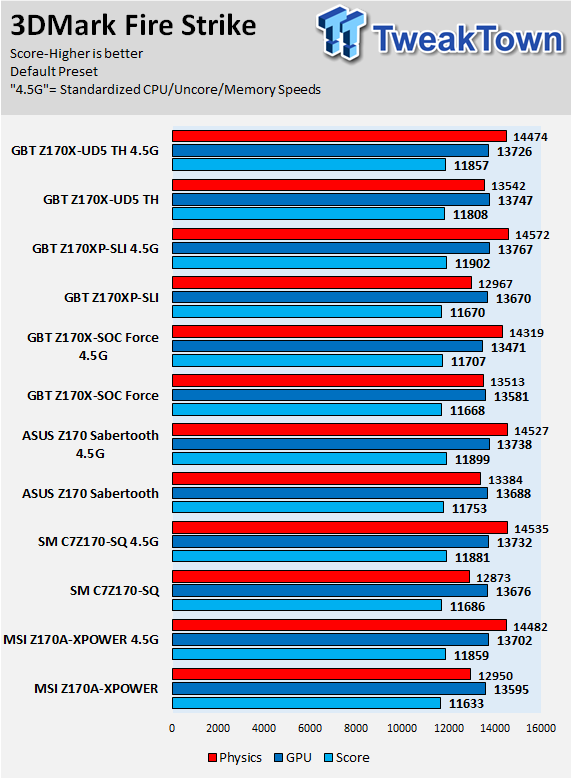
3DMark: Fire Strike
3DMark: IceStorm
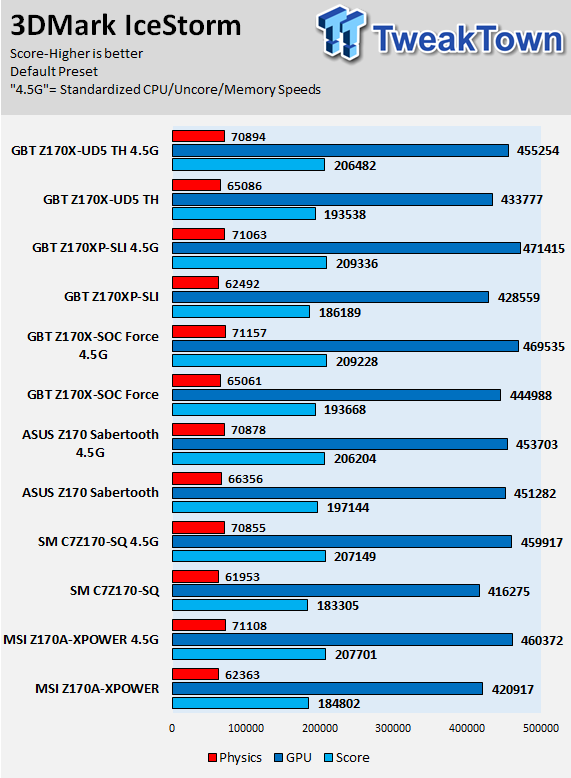
GIGABYTE's Z170X-SOC Force seems like it has some sort multi-core enhancement enabled, but even after I standardized speeds, CPU performance is very strong. The other thing that is important to note is that single GPU performance isn't the best, and that is because while the PLX chip expands lanes, it also increases latency a little.
There isn't a noticeable difference in real-life scenarios, but in benchmarks, single graphics might score lower than a standard motherboard. For benchmarking, this board is built for 3-way and 4-way multi-GPU configurations, where I would venture to guess it is quite strong. It is also only one of a handful of motherboards that can run 3-Way and 4-Way SLI on the Z170 platform.
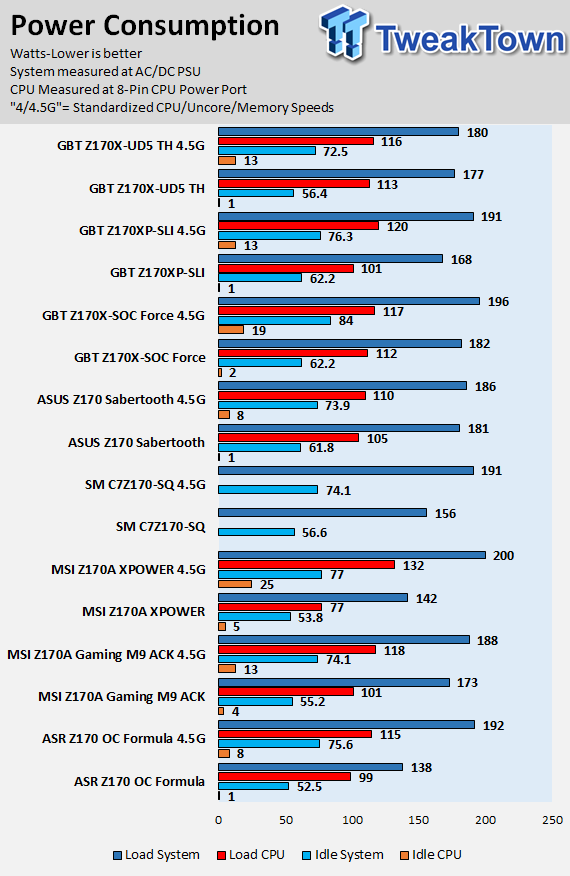
Some motherboard reviewers put a lot of weight into motherboard CPU, memory, and GPU benchmarks, but for me CPU, memory, and GPU benchmarks on motherboards should be more about finding anomalies and I do that at standard settings (4.5G in graphs).
System IO Benchmarks
CrystalDiskMark SATA6G:
CrystalDiskMark M.2:
CrystalDiskMark USB 3.0:
ixChariot Network Throughput:
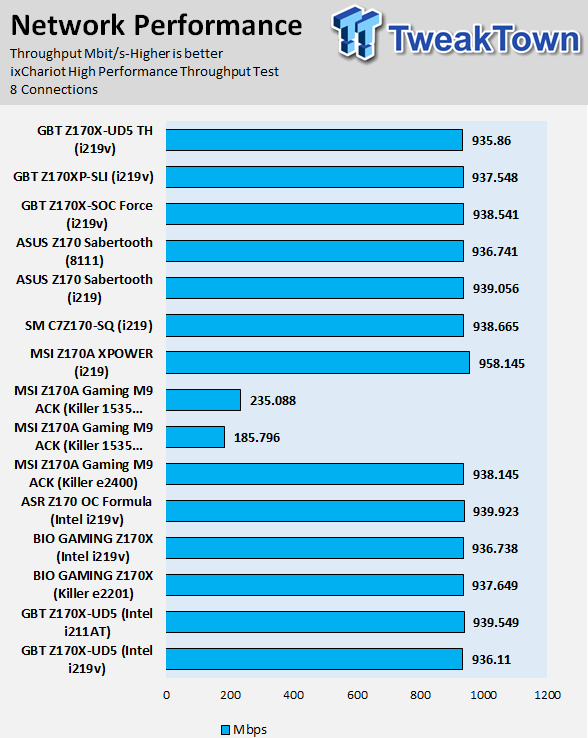
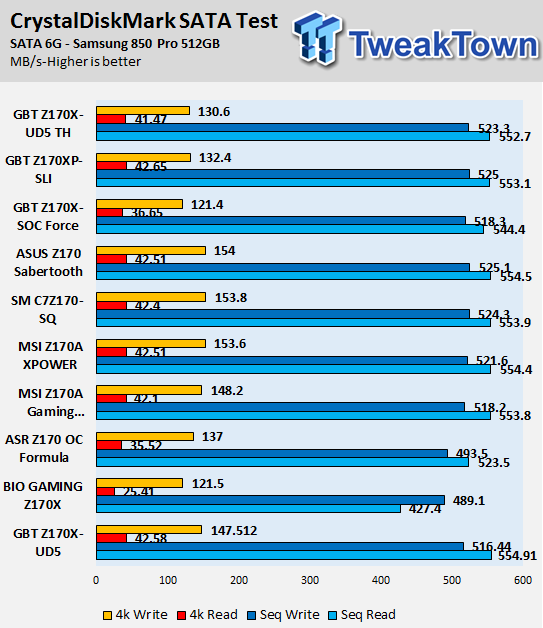
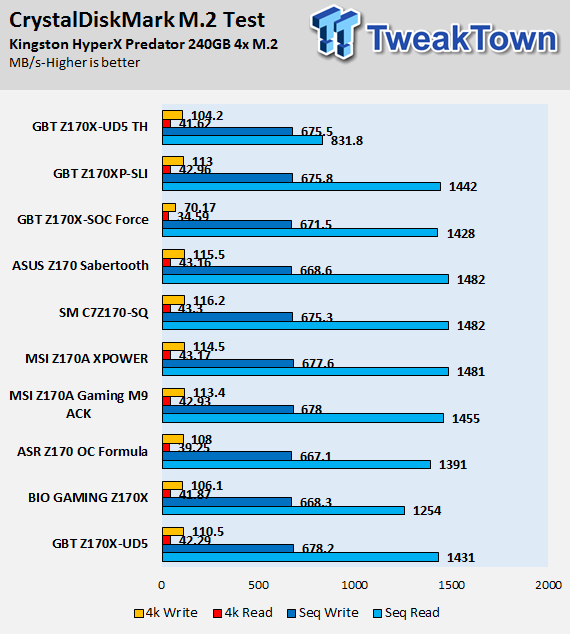
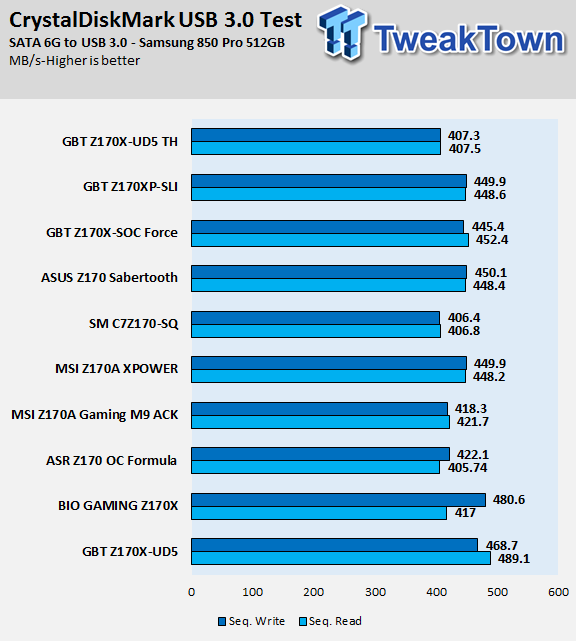
The Z170X-SOC Force's storage performance is acceptable, but not very spectacular. The three M.2 slots share bandwidth with SATA ports, and this means for bandwidth to reach the SATA ports or M.2 slots it must first go through a quick switch which adds a little latency. It won't make a difference in real-world usage, but it is detectable in benchmarks.
The board does have an advantage for some benchmarks like PCMark because it is also one of only a handful of motherboards that support three 32Gb/s M.2 slots which can be RAIDed. Whether or not the DMI 3.0 bus can allow scaling is something to consider, but you can add redundancy and speed (RAID 5) or expand capacity and speed (RAID 0) with the latest and greatest M.2 4x PCI-E 3.0 drives, which is an awesome feature.
Audio RMAA 5.5:
I disable all audio features, set the correct bitrates, and then test the audio with a loopback test.
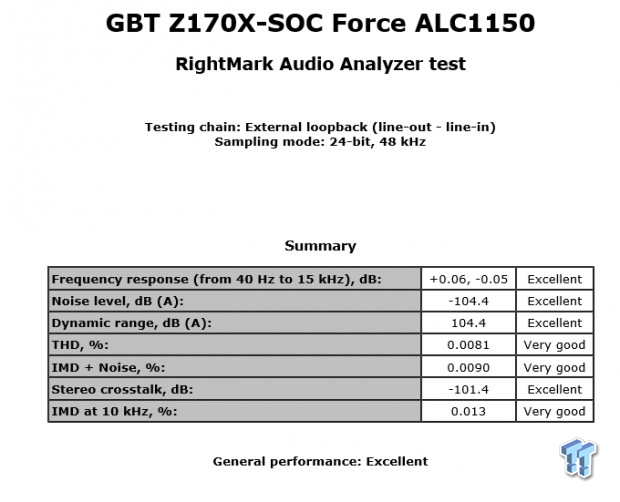
Sound Judgment by Ear: Very Good to Excellent. There are 5 ratings for audio: 1. Problems, 2. Okay, 3. Acceptable, 4. Very good, 5. Excellent
Thermal Imaging and Power Consumption
System power usage is measured at the AC/DC PSU (the Corsair AX1200i) which I have connected to another system to measure the test system, and as a backup I have a wall meter to verify. The CPU power is measured through the 8-pin connector, which is hooked up to a hall effect IC, which measures current and puts out a voltage in proportion to the current. That voltage is logged by a National Instruments ADC, which logs the DC voltage level that I then convert into current.
Note on Thermal Images: In the temperature section, we use our Seek thermal imaging camera to capture the surface temperatures of major components on the board. I look at the VRM and then all other things that light up the screen. If there is something to worry about, then I will state it. Otherwise, I will just show the hotter running parts of the board for fun. Unless some component is over 80-90C, then there isn't anything to worry about.
All systems will act differently, so I will look for commonalities, such as how far from the VRM the heat spreads through the PCB and the difference in temperature between the front side and backside of the PCB. Keep in mind, the majority of the heat from the VRM goes into the PCB as it is a giant soldered on copper heat sink. A larger difference in temperature between the back and front of the PCB points towards a more effective heat sink.
Thermal Testing at Stock Speeds:
The image on the left is always at idle, and the image on the right is at load. During ALL TESTS, fans above the VRM that cool the CPU cooler's (Corsair H110i GT) radiator are turned on to high (12v).
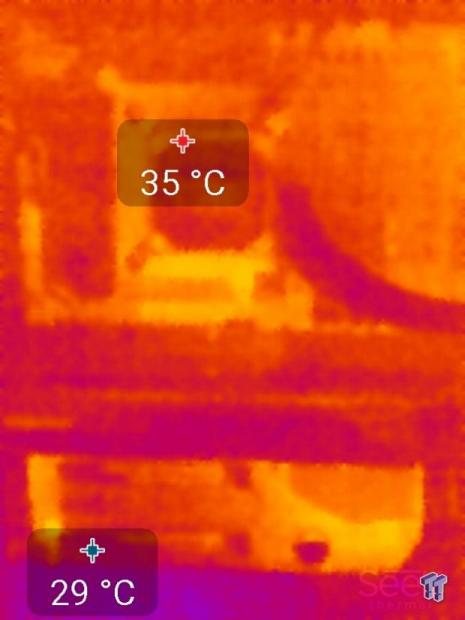
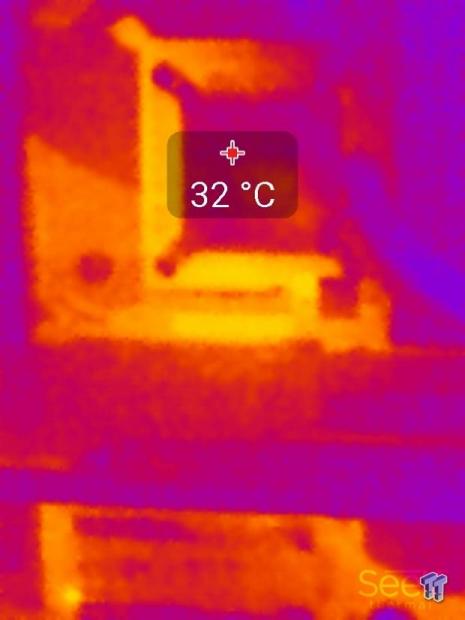
Full frontal.
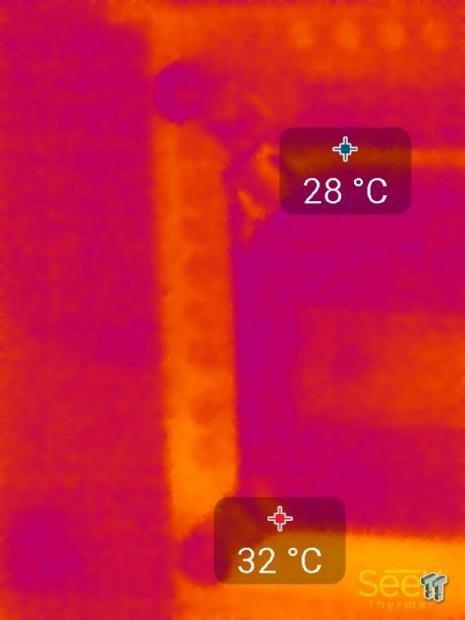
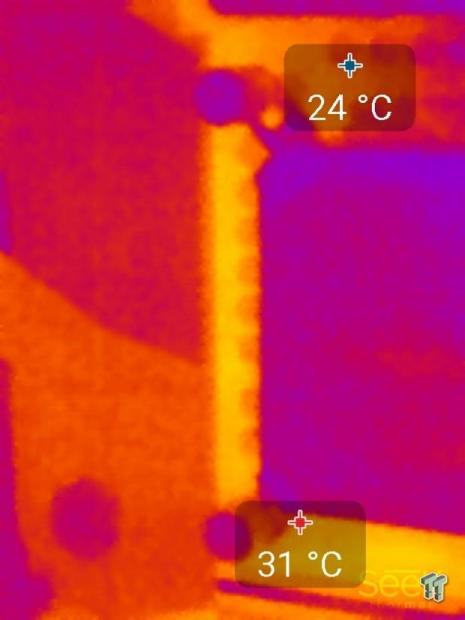
Up-close of the front of the VRM.
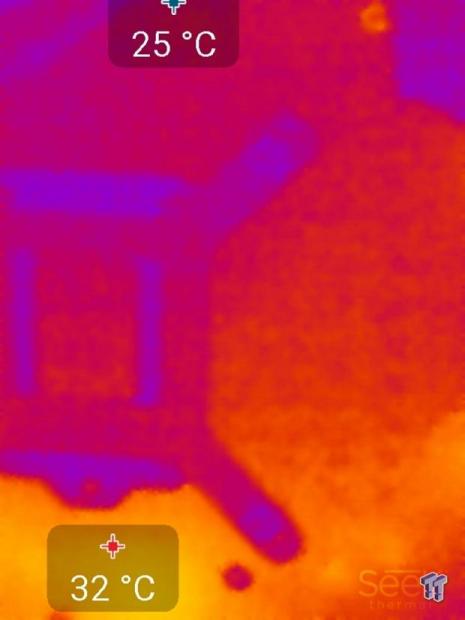
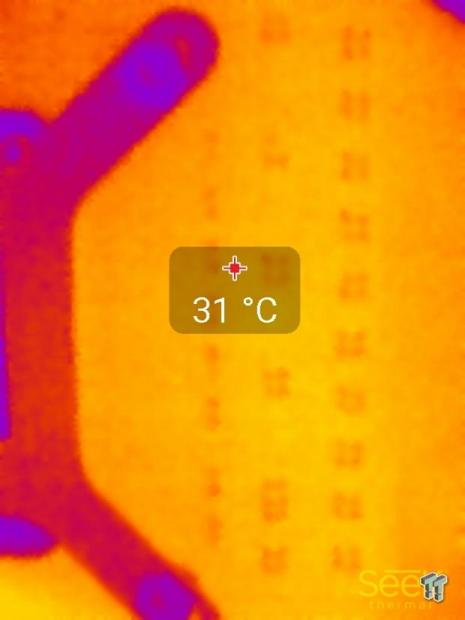
Up-close of the back of the VRM.
Thermal Testing at 4.5GHz Overclocked Speeds:
The image on the left is always at idle, and the image on the right is at load. During ALL TESTS, fans above the VRM that cool the CPU cooler's (Corsair H110i GT) radiator are turned on to high (12v).

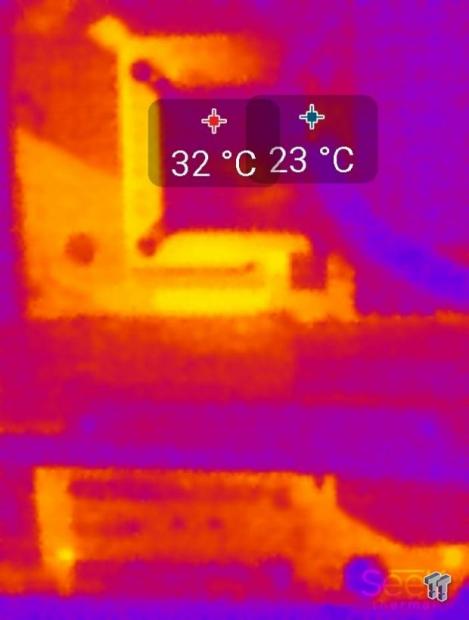
Full frontal.
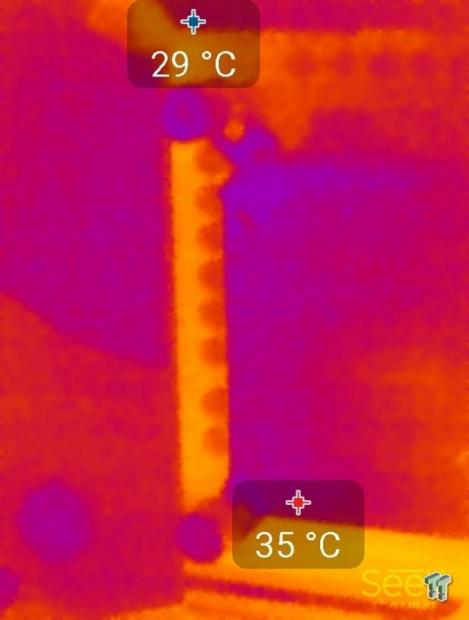
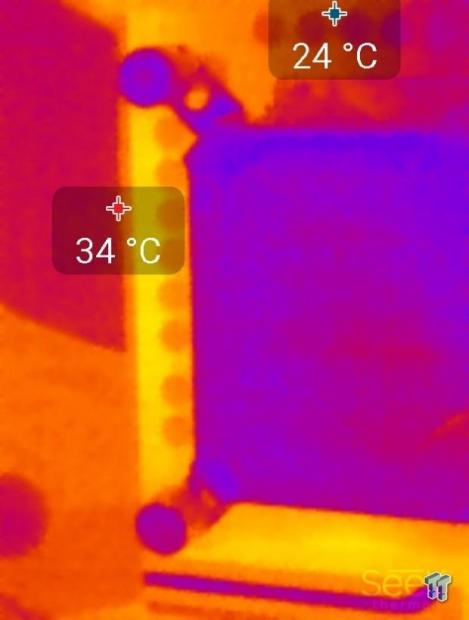
Up-close of the front of the VRM.
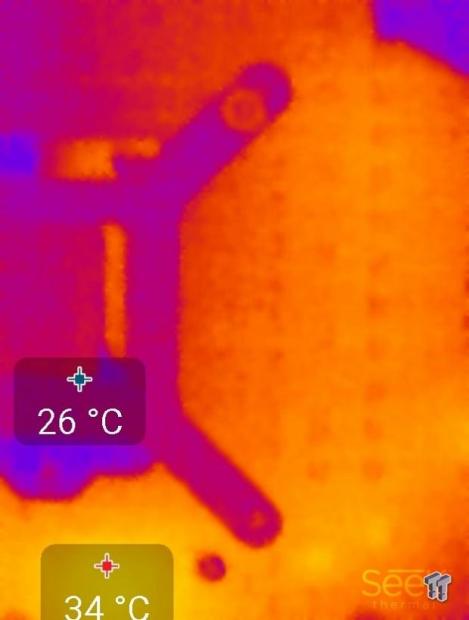
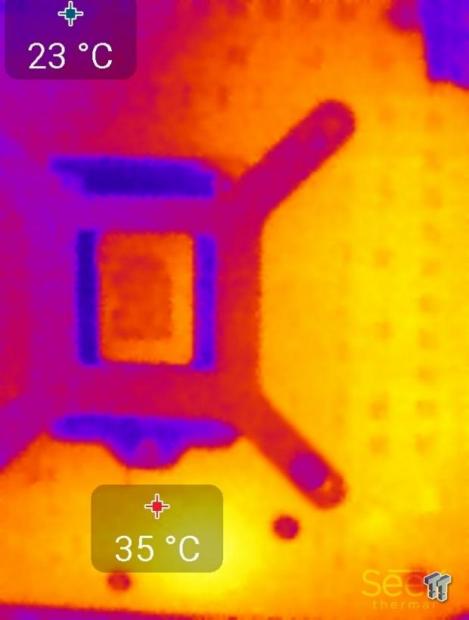
Up-close of the back of the VRM.
The VRM on the Z170X-SOC Force is one of the best equipped on the Z170 platform. That being said, it is also total overkill. There isn't a need for 16 VCore phases, but you can see that even at load heat is well distributed so that there are no hot spots.
At idle many of the phases are disabled. The PEX8747 does add a significant amount of heat to the VRM heat sink and PCB and the Alpine Ridge controller adds heat to the PCB right behind the VRM. Regardless of these two major ICs, VRM thermals seem to be better here than on the Gaming G1 even though the two boards use the same VCore VRM.
Anything under 60C is great, 60-80C is acceptable, and anything above 80C is a bit worrisome (if at stock).
What's Hot, What's Not & Final Thoughts
This is where you can fast forward to the final section of the review, and get a quick recap and points on the GIGABYTE Z170X-SOC Force.
What's Hot
Loaded with OC Features: The Z170X-SOC Force might just have the most buttons, switches, and ports I have seen on an overclocking motherboard. Not only does it have the record breaking number of buttons and switches that the Z97X-SOC Force provided, but it adds an extra one called SOC Link which allows for external on-the-fly overclocking by tethering through a phone (SOC LINK/HW-OC). I tried out the OC features, including the buttons and HW-OC, and everything works as it should.
While the OC features are welcomed by overclockers, some of the features can help avoid headaches for those using multiple video cards and water cooling. When you have multiple video cards installed with custom water blocks, it is pretty hard to remove them, but the Z170X-SOC Force has features to avoid headaches. There are DIP switches to disable individual PCI-E slots to determine if a single card is bad, OC Ignition allows for running pumps (leak test) without powering up critical motherboard systems, and CBAT makes it so that you never have to remove the CMOS battery (usually under GPUs) again to totally clear the CMOS memory.
4-Way SLI and Three M.2 32Gb/s Slots: There are less than five Z170 motherboards on the market that support 4-way SLI and less than five Z170 motherboards that support three full speed M.2 slots, but the Z170X-SOC Force is the only motherboard to have both. The Z170X-SOC Force is designed to take the crown when it comes to crazy connectivity features, if you want the ability to run 3-way SLI, 4-Way SLI or CrossFireX at 8x per slot, and you want to run three 4x PCI-E 3.0 M.2 drives then this is the board you want. While three of the latest M.2 drives will saturate the 4x DMI 3.0 bus, there are other benefits to RAID 0 including expanded capacity, and there is always RAID 5 which offers slightly higher speeds and redundancy.
High-Quality VRM: We all know that high-quality components tend to run cooler and thus last longer, and the Z170X-SOC Force carries a very high-quality VRM. The PEX8747 (PCI-E lane bridge) and Alpine Ridge controller add a decent amount of heat to the motherboard PCB, and the high-quality VRM parts ensure that the motherboard's VRM won't overheat. The VRM runs very coolly because of its high quality 8/16 phase design along with the latest in digital PWM technology. The VRM is also well tuned, minor rails are all using 40A power stages, and LLC is some of the best I have seen so far.
Excellent Overclocking: The Z170X-SOC Force overclocked everything I threw at it with ease. Four DIMMs/32GB memory at 2666MHz, four DIMMs/16GB at 3200MHz, and two DIMMs/8GB at 3600MHz are no match for this overclocking motherboard. I expect all overclocking motherboards to hit these marks, and the Z170X-SOC Force does so without anything other than just enabling XMP. The CPU also overclocks quite well due to the strong VRM and great LLC, and tuning options are widely available.
What's Not
High Cost: The Z170X-SOC Force should come in close to the $400 mark making it one of the more expensive Z170 motherboards on the market. While it does carry 3-way and 4-way SLI capabilities, a hefty VRM, Intel USB 3.1, the most OC features, and well-placed orange LEDs, it is still a steep price to pay considering the top CPU for the platform costs under $400. Many people will not use all the features and ports the Z170X-SOC Force offers, so if you don't need the features then the price might be too steep.
Expansion Has its Caveats: I mentioned earlier that some of the performance scores about single GPU usage were lower than other Z170 motherboards, and that is because of the PLX bridge that expands lanes. There is also the fact that all Intel SATA and M.2 slots have to go through quick switches which also reduces their scores a little bit in benchmarks. While many users won't notice any negative impact in real life, there is an impact in benchmarks such as PCMark and 3DMark if you treat it like any other Z170 motherboard and install only single M.2 drive and GPU. Bottom line; the more you install, the more benefits you shall see.
Final Thoughts
The Z170X-SOC Force is built to be the largest, and most equipped overclocking motherboard GIGABYTE has to offer for Skylake, and it lives up to its legacy. The Z170X-SOC Force is the result of a long line of predecessors that filled in the same price range and feature set, and while there aren't many people who might make use of all its features, many people still look at it as their dream motherboard. The aesthetics of the Z170X-SOC Force are possibly the best of any OC series motherboard from GIGABYTE thus far.
Its overclocking features save time and Aspirin, but just like every motherboard, it does have its downsides. A high price might be prohibitive to many consumers, and the expansive feature set might not be the best if underutilized. The Z170X-SOC Force is aimed at two different segments of the enthusiast population; those who want crazy amounts of GPUs and M.2 storage, and those who want strong overclocking features and performance. The Z170X-SOC Force is currently one of the better options if you are going to go for Z170 multi-GPU world records on HWBot, or if you want to build a super equipped gaming rig with the latest in storage technology.

| Performance (including Overclocking) | 93% |
| Quality including Design and Build | 95% |
| General Features | 97% |
| Bundle and Packaging | 95% |
| Value for Money | 85% |
| Overall | 93% |
The Bottom Line: If money is of no concern and you want 3-Way or 4-Way SLI, three Ultra M.2 slots, and a plethora of OC features, then look no further than the GIGABYTE Z170X-SOC Force.
PRICING: You can find products similar to this one for sale below.
 United
States: Find other tech and computer products like this
over at Amazon.com
 United
Kingdom: Find other tech and computer products like this
over at Amazon.co.uk
 Australia:
Find other tech and computer products like this over at Amazon.com.au
 Canada:
Find other tech and computer products like this over at Amazon.ca
 Deutschland:
Finde andere Technik- und Computerprodukte wie dieses auf Amazon.de
Similar Content
Related Tags
