Introduction, Specifications, and Pricing
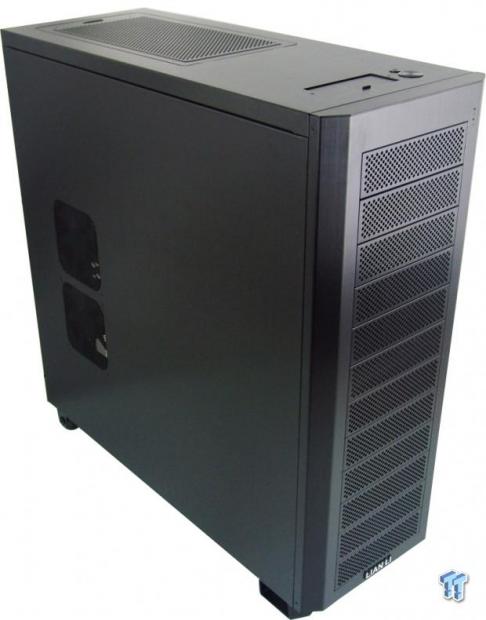
It has been a while since we have seen anything from Lian Li since they took on a new sampling policy that is a little less free with the amount of samples that go out to media. We did receive this chassis a couple of months ago, but the demand on us is high at all times, and we are sometime two to three months deep in samples; for the delay in getting this reviewed, we apologize.
However, seeing a couple of their larger cases last year has left an impression that Lian Li is sticking with exteriors that have worked for them for years. However, they seem to have finally gotten a grip on what it takes to allow for wire management to be done correctly. That had been a major sticking point to most of our early builds with Lian Li, but it seems the gripes we once had are now a thing of the past.
We were shipped one of their latest full-tower chassis designs to have a look at, and in it are some really cool features. There is that new wire trail design they had worked with in the past, but even that idea has been improved upon since last we saw it. This chassis also offers wheels in the back, so you can slide this chassis around rather than having to lift the chassis to move it. This is also the first time, I believe, we are looking at a Lian Li chassis that is 5.25-inch bay covers from top to bottom, and if not, it's the first to have them all clip in rather than being screwed into the chassis. There is a lot more to see, but we need to save some of the meat for the rest of this review.
The chassis we are speaking of is the PC-A79 full-tower case that we are about to see today. This chassis incorporates what we have already addressed as well as taking on more than the basic ATX motherboard. We will find room for water cooling, modularity in the design, as well as all of the sleek brushed aluminum, inside and out, that makes Lian Li cases so sought after in the first place. As we said, Lian Li has been making vast improvements to sort of catch back up to the market; it's time now to see what time has done for this PC-A79, as we get down and dirty building and testing our system in it.

The long narrow chart provided by Lian Li covers all aspects of what the PC-A79 has to offer. First, we see it is a full-tower design that stands 618mm tall, 230mm wide, and 596mm deep. There are two color choices as well, one being made of all natural brushed aluminum under the Silver naming and the one that we will be testing has an exterior that has been anodized black. Of course, just like with any Lian Li chassis, this one is also made of aluminum for the frame, supports, and drive bays, but also the exterior is completely aluminum keeping up with that high-end elegance that has been associated with the Lian Li name for years.
Inside of this chassis, we find the front offers twelve 5.25-inch bays, but nine of them are taken up with 3 three-bay cages that will allow for nine 3.5-inch drives or eight 2.5-inch drives to go into the front of the chassis. In front of these, drive bay racks also each have a 120mm fan for a total of three inducing air into this chassis. The motherboard tray will house anything from Micro-ATX on up to, and including, HPTX motherboards just like the DS6 we just looked at. This case weighs in at just over twenty-one pounds empty.
Around the rest of the chassis, Lian Li has stocked the chassis with three more fans other than what was in the front. There are two 120mm fans in the left side and one 120mm placed in the rear as exhaust. There are also options in the roof of this chassis to install either a pair of 120mm fans or 140mm fans, but nothing there are no fan mounts on the floor as there are drive options placed there.
With something made completely from aluminum, as well as offering a very full feature set, we also expect the pricing to be higher than if this were made of steel. Considering the price of the DS6 was over $200, and despite the PC-A79 not being sound proofed, we still expect this chassis to cost considerably more, and it does.
No matter where we were able to find this chassis, we found that you will need to spend in excess of $300 to obtain this chassis. That definitely places this well out of the reach of most, but then again, that is what makes Lian Li cases so prestigious in the first place. Even so, with such a high price set for this case, we will be going over it with a fine tooth comb to ensure you are getting what you pay for.
PRICING: You can find the Lian Li PC-A79B for sale below. The prices listed are valid at the time of writing but can change at any time. Click the link to see the very latest pricing for the best deal.
United States: The Lian Li PC-A79B retails for $407.85 at Amazon.
Packaging
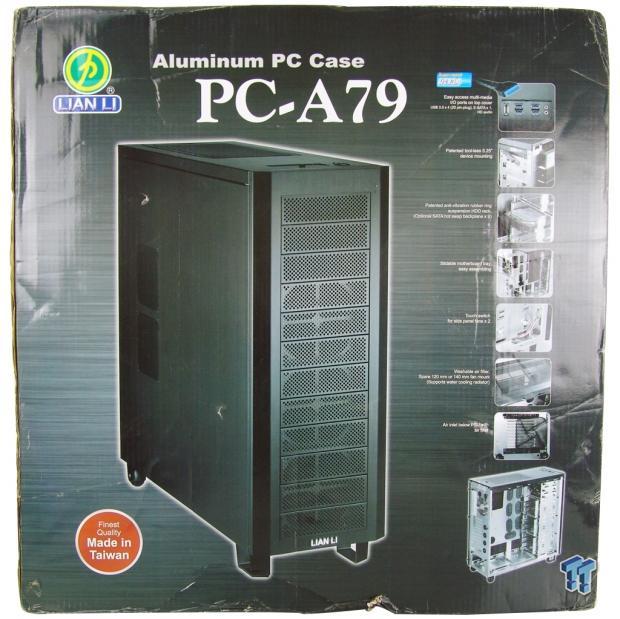
On what we will call the front of the packaging, we find the company and chassis naming above a large image of the chassis below it. Off to the right, we find seven features shown and also a look at what the silver version looks like.
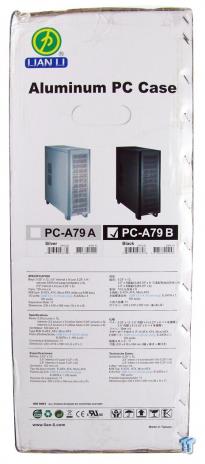
On this side, we find both versions of the chassis above their accompanying check box indicate which is inside, and we plainly have the PC-A79B inside. At the bottom, we see three versions of a condensed specs chart.
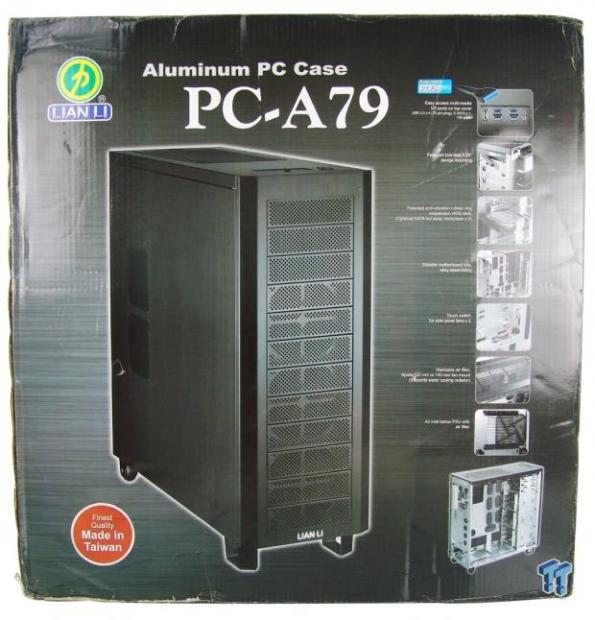
The other larger side is a direct copy of what we saw on the front. Pointing out some of the features, they show the front I/O, tool-less mechanisms, anti-vibration drive mounting, removable motherboard tray, power connection for the side panel fans, top options and dust filter, and the dust filter at the bottom of this chassis.
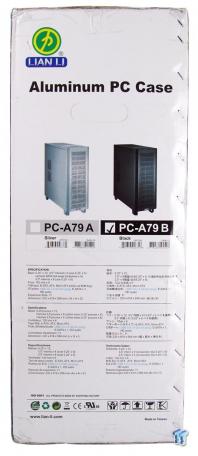
The last side of the package is also a direct copy of its opposing panel, which you can see above.
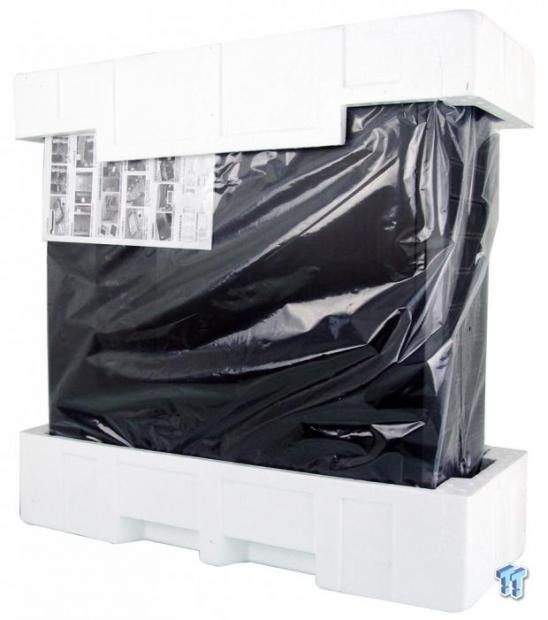
Lian Li also chooses to ship this larger chassis in the tried and true Styrofoam and plastic liner method. With a much lighter chassis to ship, even though the box looked like it bumped or rubbed everything it passed to get to us, the chassis inside arrived in perfect condition without any damage to anything.
Lian Li PC-A79 Full-Tower Chassis
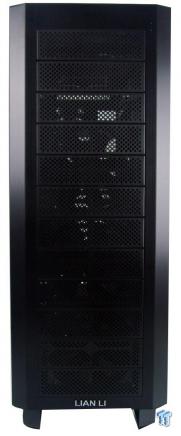
The front of the chassis offers a thick brushed aluminium trim ring that is the front bezel, and it can easily be snapped off the chassis to gain access to the bay covers. These mesh covers run from top to bottom, twelve in all, and will simply slide in and out as tiny bumps in the steel hold them in place.
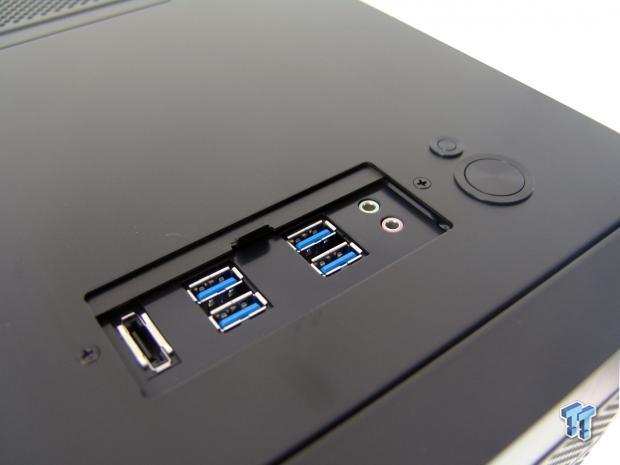
As the front connects to the rest of the chassis, at the top we find a slide cover over the front I/O panel. Once opened, we found the e-SATA port, the four USB 3.0 ports, and audio jacks. Off to the right of this cover, there is the larger power button and smaller reset button for this case.
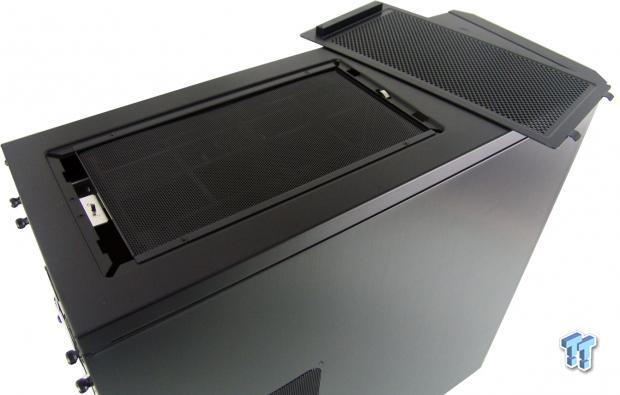
The rest of the top panel offers this removable top section that allows access both to remove the dust filter still sitting over the top of the chassis and access to mount fans once that filter is also removed.
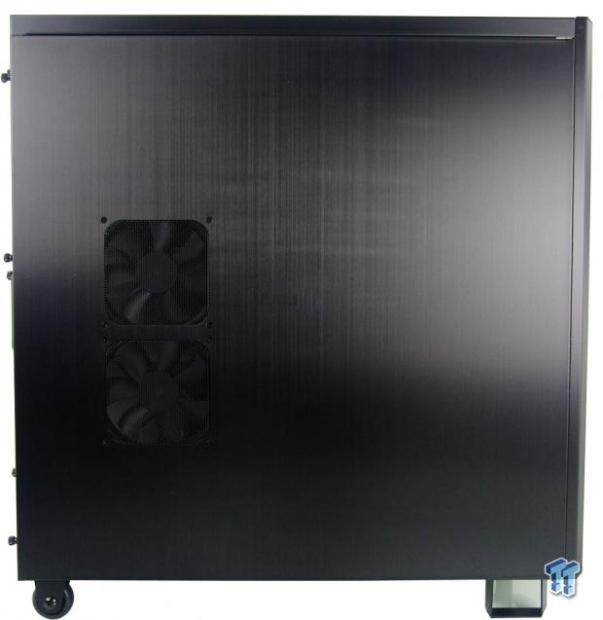
The left side of the chassis has the brushed pattern running from top to bottom, and the only thing to break up that look are the stacked pair of fans already installed into the panel to blow on the video cards that will be behind them.
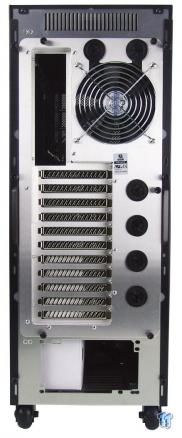
The back of the chassis is left in its natural state but offers an exhaust fan cutout that will allow for AIOs to hang outside of the chassis. There are eleven vented expansion slots with four holes and grommets next to it if needed for water cooling, and the PSU installs at the bottom below the removable tray section.
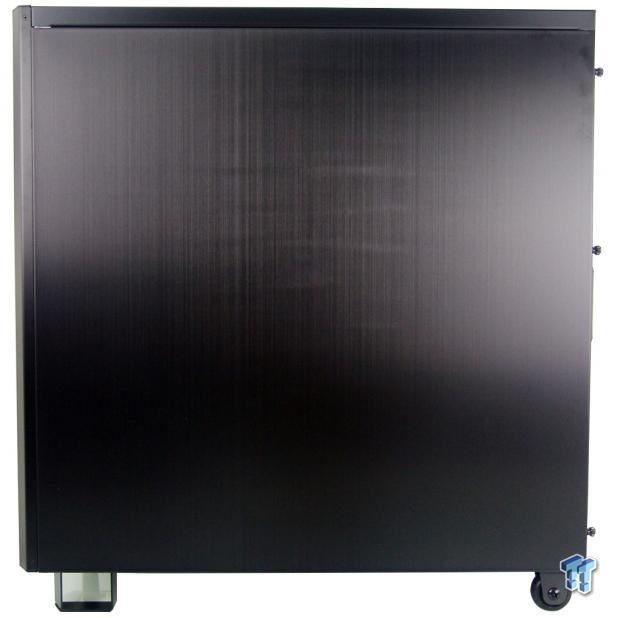
The right side of the chassis, much like the left side, is a very large expanse of black brushed aluminium. This side does not have anything to break up the sleek elegance that this material choice offers.
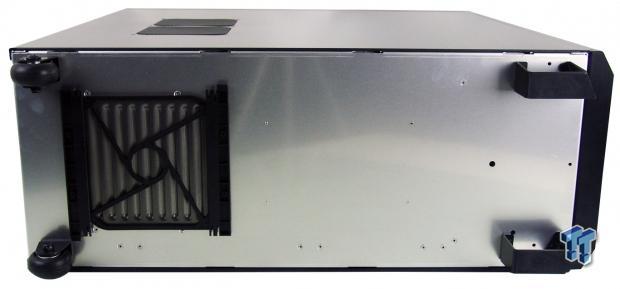
Under the chassis, we find more natural aluminium, this time with only louvers stamped into it under the PSU. The back of the chassis offers casters with soft wheels that roll easily, and the front has large chunky platforms to rest on that also have rubber applied to the bottom for traction.
Inside the PC-A79
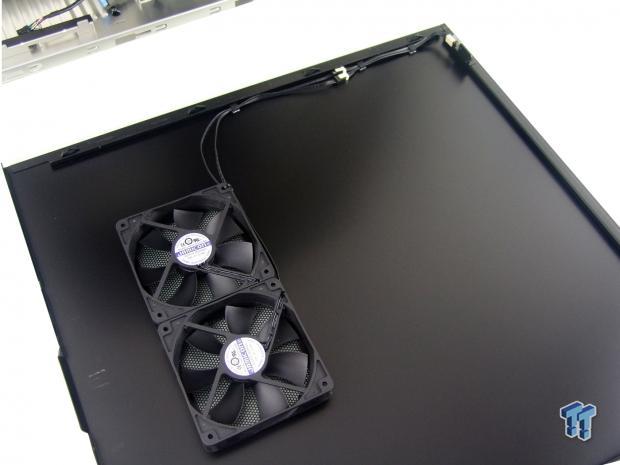
First, we should show the pair of fans inside of the left door panel and how well they are wired to keep this from being damaged. As the wire moves from the fan to the connection, we see a Y-splitter that is connected to both fans and terminates in a four pin clip that connects to another inside of the chassis.
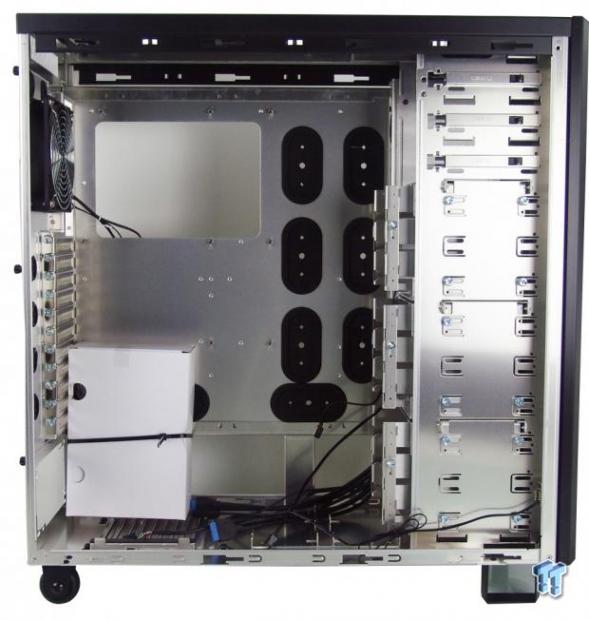
As we peek inside for the first time--we already found the paperwork outside--we see the hardware strapped to the bottom of the motherboard tray. We also see the wiring is laying on the bottom of the chassis, but it is placed behind the tray for transport.
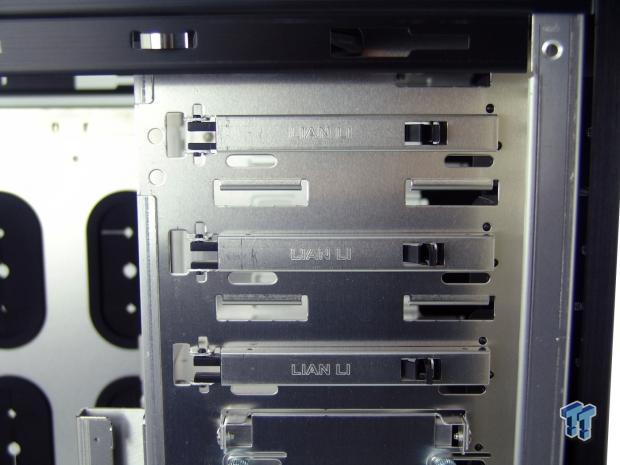
There are four tool-less latches to hold in drives to the top four 5.25-inch bays on this chassis. The other side will require screws, but, unless you plan to travel with this chassis, the clips are solid enough for basic usage.
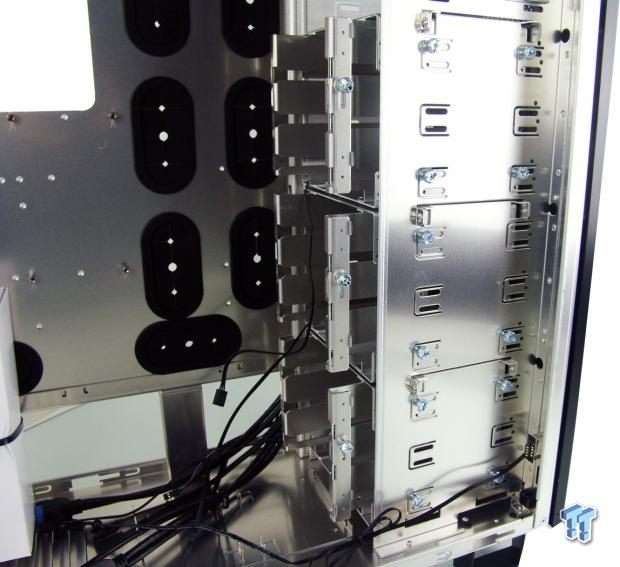
The lower nine 5.25-inch bays have these three racks installed. Each has a fan and can house three 3.5-inch drives. These bays also use grommets to slide the drives in and have the slide bar locking system to keep them from coming out when not intended.
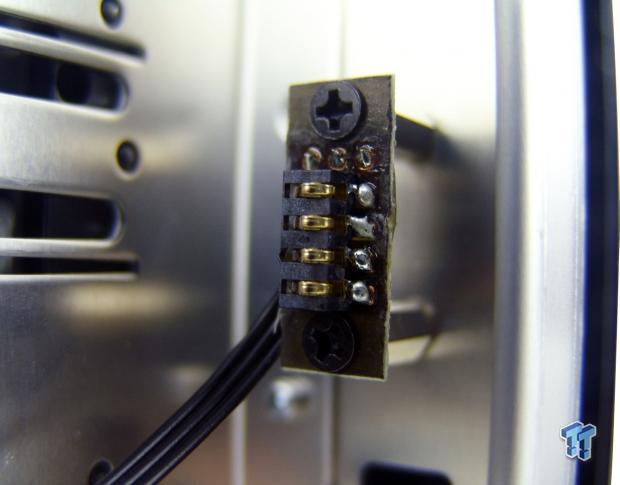
This connection is what powers the fans in the door and can be found low on the front rail of the chassis. This is so every time you want inside of the chassis you don't accidentally yank on the fan wiring; instead, the door is free to come off even with power to the chassis.
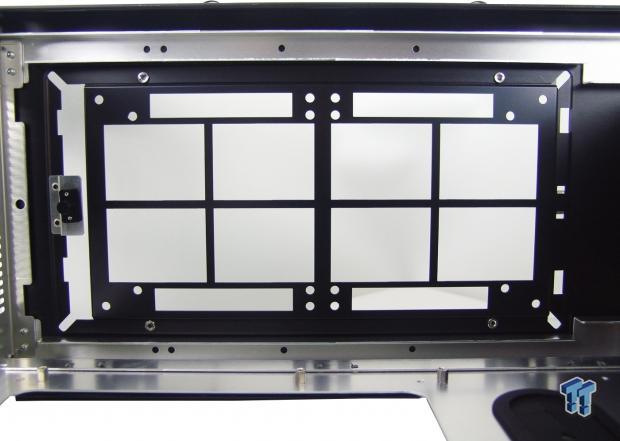
Looking out of the top of the chassis, we see that Lian Li has left just enough aluminum to be structurally solid. This allows either 120mm fans or 140mm fans to have very free exhausts as the air flows right out the top.
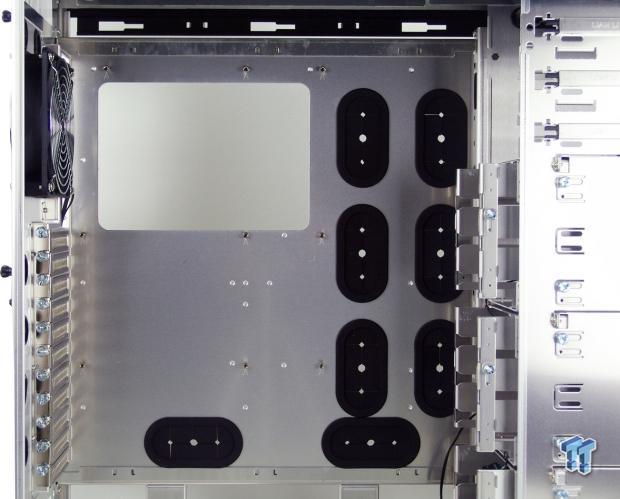
This motherboard tray will, of course, slide out, but we can see a good distance to the top of the chassis for radiators. We see one large CPU access hole and eight management holes with grommets but nothing yet as far as wire tie points.
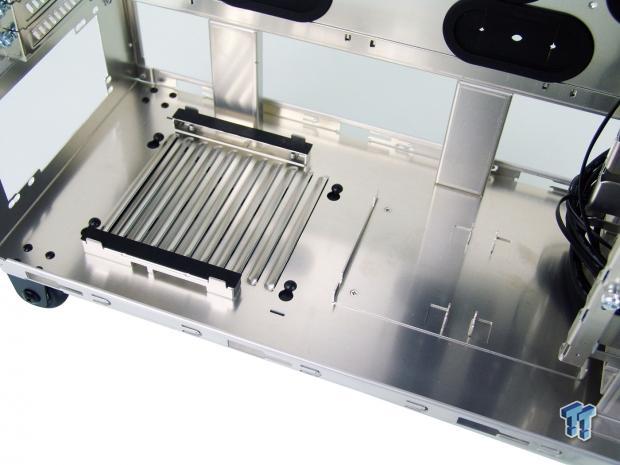
The floor of the chassis has rails with rubber strips on them to support the PSU. In front of that, there is a plate screwed to the floor that will allow for a pair of 2.5-inch drives to slide in using the grommets and screws provided in the hardware.
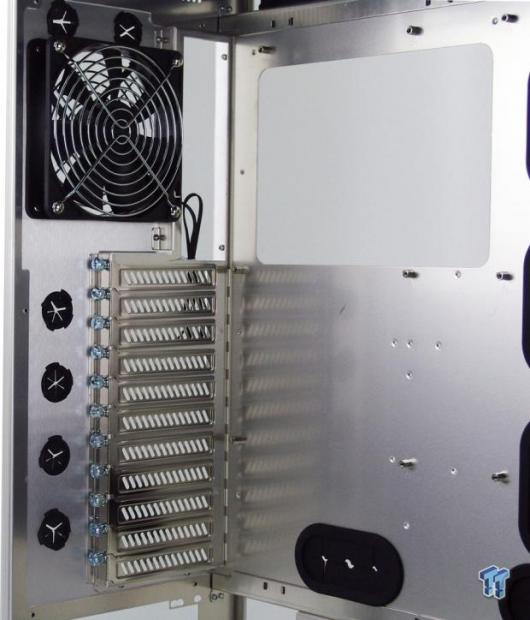
The back of the chassis houses the exhaust fan with a 3-pin connection for power, and we can also see the bright blue thumbscrews used to secure expansion cards and these covers.
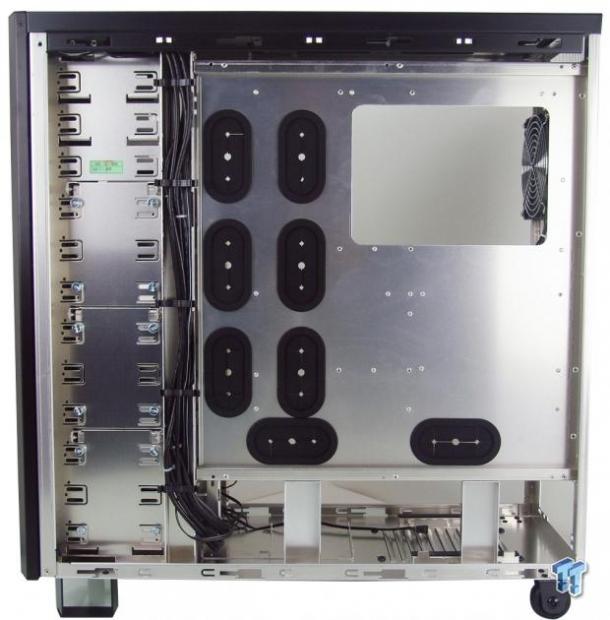
Behind the tray, we now see why there aren't extra tie points; the plan here is to run them in the groove down to where they need to go and then shoot across the back to make the connection after going through one of the grommets. There is room to run extra wiring from top to bottom as well, and that is something that Lian Li has been getting better with.
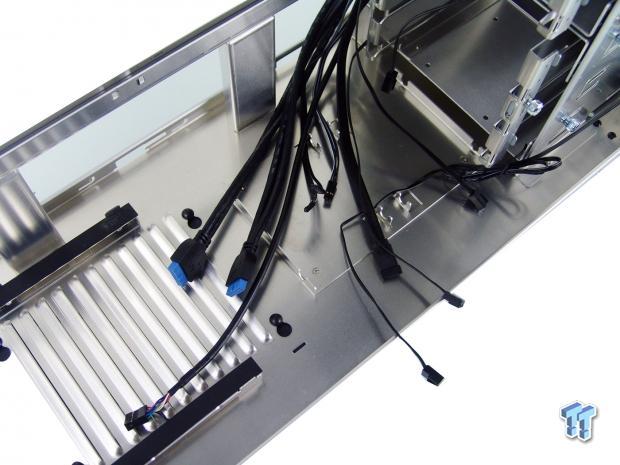
As for the wiring, there are a bunch of 3-pin fan connections to make, the front switch and LED wiring, two USB 3.0 connections, the HD Audio connection, and the e-SATA connection. All come in black sleeves.
Accessories and Documentation
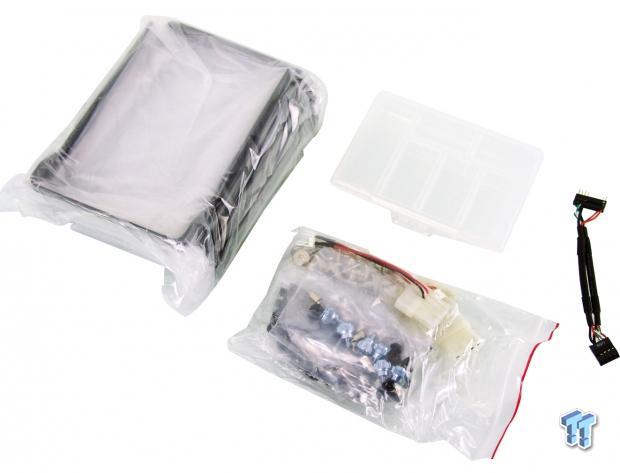
The large box full of hardware, when emptied, delivers a stack of steel brackets, a bag full of hardware, a parts sorter box, and a native USB 3.0 to USB 2.0 adapter.
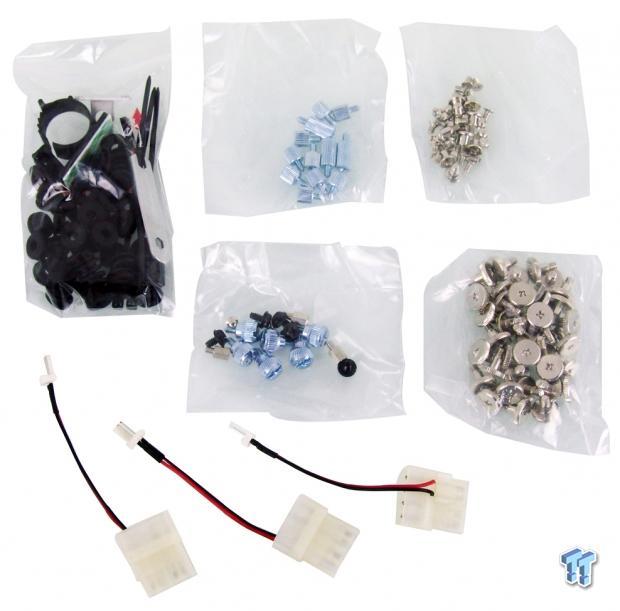
Breaking down the hardware a bit, we can now see multiple bags. There is a bag with grommets, a motherboard speaker, wiring loop, a standoff wrench, the motherboard screws, and 2.5-inch drive screws. In the middle is a bag of extra goodies like thumbscrews, standoffs, and PSU screws. The 3.5-inch drive screws are in the bag next to it. At the bottom, we find the three 3-pin to 4-pin Molex adapters for some of the fans.
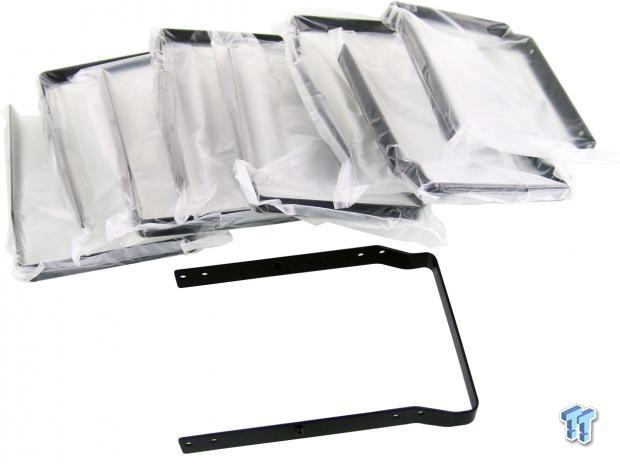
Come to find out, these steel brackets are actually handles for the 3.5-inch drives. When using the grommets and screws, install this to the drive first, and it makes sliding them in and out of the cages much easier.
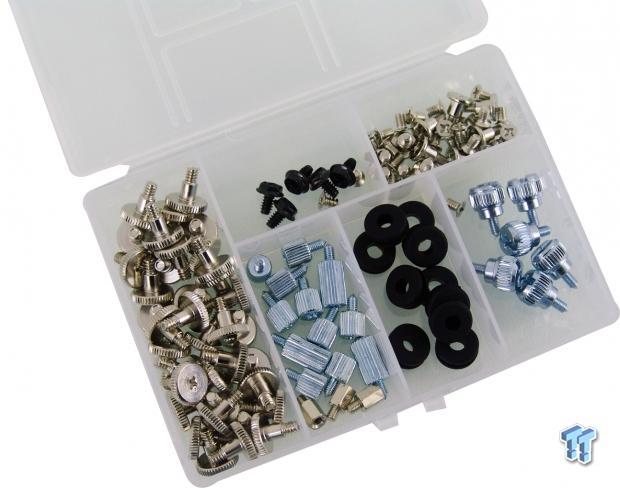
Since everything is bagged up, we went ahead and opened some of the bags to show how the sorter works. This way, when the build is completed, you have a handy place to put all the extra bits for later.
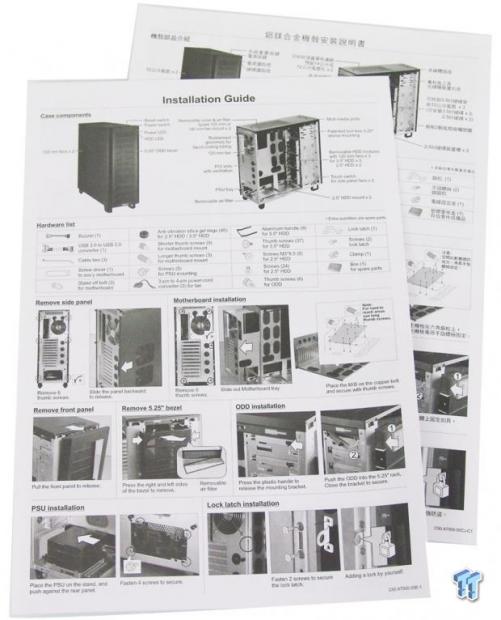
Lian Li supplies two versions of the manual, one of which we believe is Chinese, and the one on top is multi-lingual, including English. Some of the black and white photos offered lost a little in the copying process, but there is still enough detail left in the images that, once the text is read, it is easy to figure out what to do for all of the build process.
The Build and Final Product
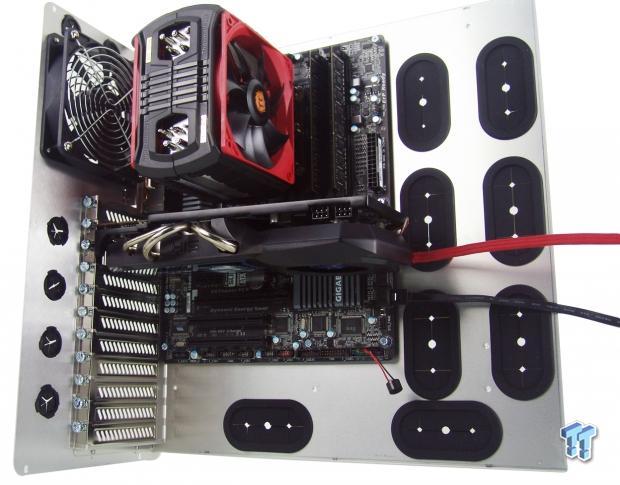
To get the build under way, we removed the motherboard tray and went ahead and mounted up everything we could before sliding it back into the chassis. We could also have connected the wiring as well, but this is much easier to slide in without them, and there is plenty of room to do it inside.
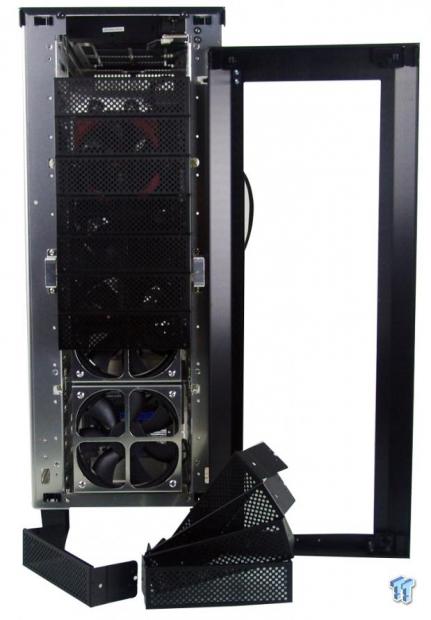
The wiring is all contained in the chassis and allows the front trim ring to come off clean. It is then we gain access to the removable bay covers, and we took out one at the top for the DVD drive, and we removed some at the bottom to show the fans there as well.
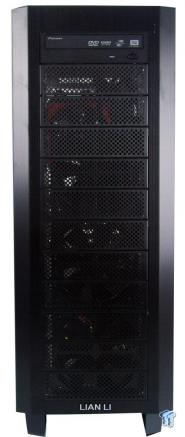
With everything all back in place, and the DVD drive installed at the top, the mesh is one solid, unbroken section and allows the ventilation, and the looks, not to be changed much at all.
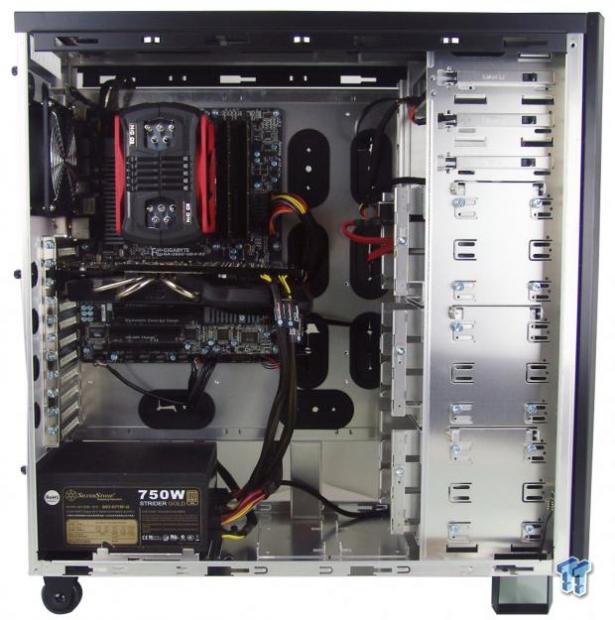
Once the tray was slid in and mounted to the rest of the chassis, we wired it up and slid in an HDD near the top of the racks. We were able to hide what wiring we wanted to, and the chassis leaves a lot of optional space for water cooling bits when using an ATX motherboard.
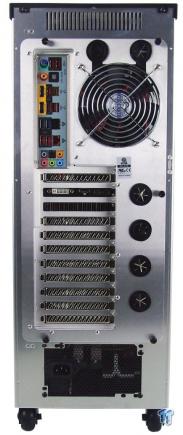
Everything is as we would expect beck here. The dust shield snapped right into place, and it seems we may be video card deficient for this chassis, but the one lone card slid in easily and is very secure under the thumbscrews. The PSU also installs with nothing worthwhile to discuss.
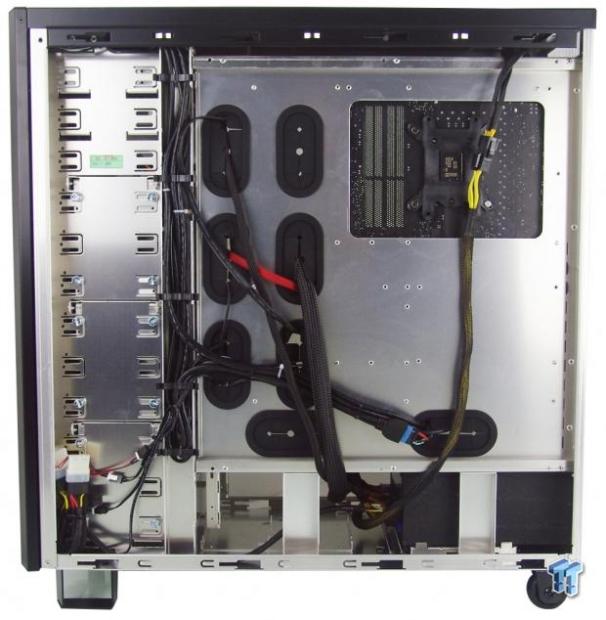
Behind the tray, you can run the wiring anywhere you want to. With various notches cut in the side of the main wire trunk, they can come out where they are needed and connect to the board. The PSU wiring just runs out the large gap at the bottom and runs behind all the framing and still causes no issues with the side panel.
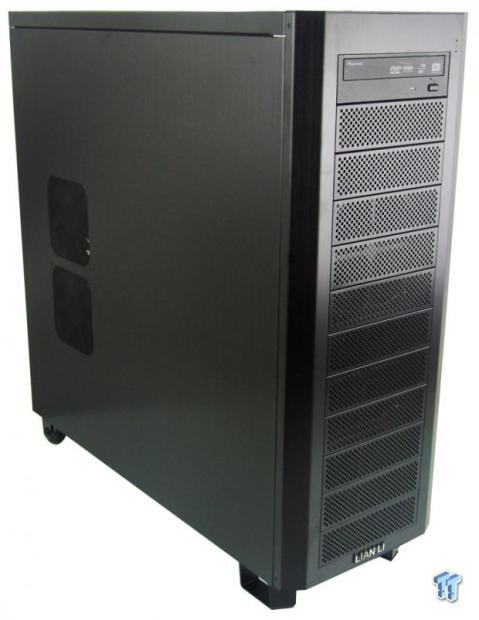
Once we had everything ready to go and just about ready to kick off the testing, we snapped this image of the PC-A79. There is a ton of brushed aluminum to look at, and the chassis just screams sleek elegance from the moment you first see it to when it is ready to go as we are now.
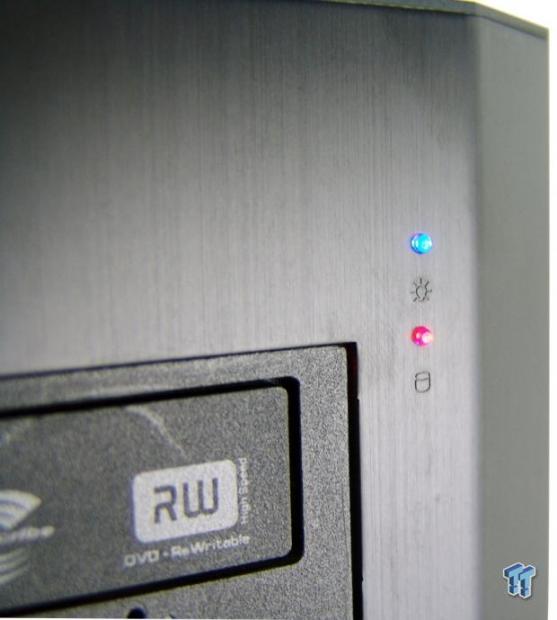
Besides the obvious hum of the fans inside the chassis, which were running with 12V to them and pumping out 47 dB of noise from the chassis, the other way to tell if it is on is by looking at the top right corner of the front bezel. It is there that there is a blue LED that is always-on when the system is powered, and the red LED below it is on only when the HDD is in use.
Final Thoughts
Lian Li has shown that while still sticking to their guns and producing sexy aluminum cases that everyone at some point in their PC life wants to buy, they are also figuring out how to compete with the rest of the market on the interior, too. It is really hard to screw up the looks of massive panels of black anodized aluminum, and you will be hard pressed to find anyone to tell you it is ugly. Lian Li continues in a tradition of exterior design that has been copied by so many others over the years, but those copies have yet to dethrone the originator of this concept.
Specifically with the PC-A79, it is the adjustments made to the wire management system, the tool-free clips on the bays, the fact that hard drives simply slide in and out, the hidden front I/O panel, and the slide out tray. The list really does go on and on with reasons to love this chassis.
If there really is anything to pick on this chassis about, we could go into the fact that it is large and you will need a fair amount of room to house this chassis. However, this is much lighter than something like the DS6, and Lian Li has made life easy with casters on the back of the chassis that allow you to lift slightly at the front of the chassis and just roll this into place. It has dust filters, it has plenty of fans and optional fan locations, it is water cooling capable, and, if you remove the front cages, you can even slide in 120mm width radiators if you somehow modify a way to mount it there.
They also allow for external water cooling potential, and even the rear fan cutout will allow for an AIO to be installed outside of the rear of the chassis. Thing is, in the end, there really is not a down side other than the audible level of the fans when allowed to run full speed. They do supply adapters for those with no other options, but a fan controller is suggested since the air flow is so good in this chassis. We recommend this not only for finite control of the fans, but also to find that "magic" spot where the noise is much lower and thermal results are still at a comfortable level.
As we said earlier, the price point of the PC-A79 being slightly over $300 is going to take this chassis out of a lot of hands right out of the gate. Thing is though, when considering the cost of a dual socket system, multiple video cards, a 1.5kW PSU, water cooling components, and various other additions, the price is just a drop in the bucket.
While there are users out there who have to see what is going on at all times through a large window, and most also like much more aggressive styling, Lian Li delivers a sophisticated version of an HPTX chassis that offers plenty of room for parts and modularity to do as you wish, all packaged in a sophisticated chassis that could go anywhere. The PC-A79 from Lian Li is a big step up for them and is a chassis that a lot of users will find to be the next big chassis for their builds.
PRICING: You can find the Lian Li PC-A79B for sale below. The prices listed are valid at the time of writing but can change at any time. Click the link to see the very latest pricing for the best deal.
United States: The Lian Li PC-A79B retails for $407.85 at Amazon.



 United
States: Find other tech and computer products like this
over at
  United
Kingdom: Find other tech and computer products like this
over at
  Australia:
Find other tech and computer products like this over at
  Canada:
Find other tech and computer products like this over at
  Deutschland:
Finde andere Technik- und Computerprodukte wie dieses auf