
The Bottom Line
Introduction, Specifications and Pricing
Zalman is one of those names that seems to be just about as old as the PC hobby itself when it comes to aftermarket products. In our time in writing reviews, we always see them popping up from time to time with something new. In that time, we have come to realize Zalman is all about, and that is delivering products that not only do what they are intended for, but do so with an individual form and flair that is uniquely Zalman, and usually something outside of the box compared to what everyone else is doing.
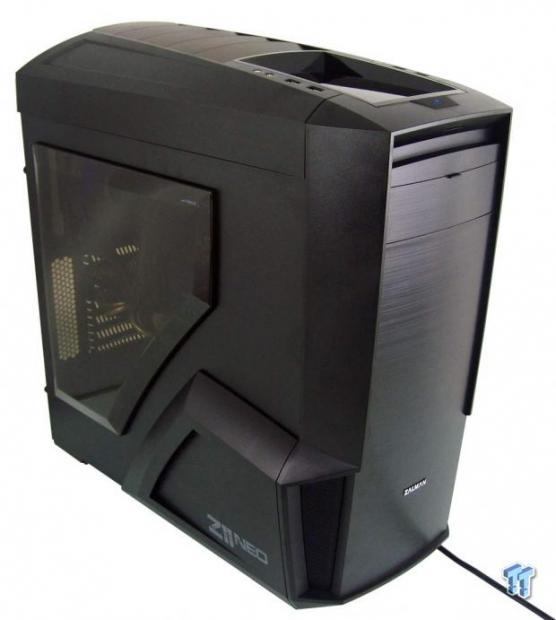
While we have only seen two cases from them previous to this latest sample, looking back to them now, even here the looks and appeal is done in a way that is against the average offering, making the product easily distinguished. If we are recalling correctly, we do believe we saw this chassis a couple years back at CES, but not exactly in this finished form. While initially our view was that it was slightly brutish and has a feel of a wide bodied sports car, as we see it now, we find it to be more refined, decently laid out, and well appointed for a chassis released in today's market.
Taking the naming and some of the styling from the Z11 Plus released some time ago, this highly refined and redesigned look at the Z11 Neo we have today shows that Zalman is too trying new things to offer customers something new and exotic. What we are about to see is a mid-tower chassis, with sports car aggressiveness in its styling, a new idea on intake air supply, all inside of a very aesthetically appealing package that delivers in most aspects of chassis design that customers are looking for.
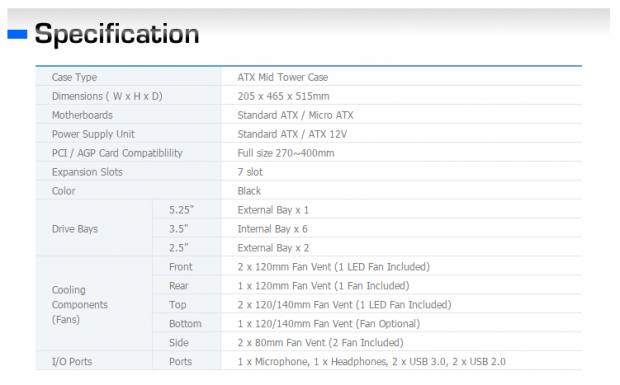
Zalman provides a chart that starts off with the classification of the Z11 Neo as a mid-tower chassis. It then offers the 205mm width, its 465mm of depth, and the 515mm of overall height. It then goes on to show the ATX and Micro-ATX motherboard compatibility, and that it uses a standard ATX power supply. At this point, we are directed to the video card clearance of 270mm with the HDD bays intact, and up to 400mm if it is removed. We also then see that the rear of the chassis offers seven expansion slots, and it comes in one color choice - black.
On the inside, we find out that there is one 5.25" bays that are available in the bezel via a drop away door that slides up to cover the device in the bay. Technically, there are three 5.25" bays, but the lower pair do not go through the bezel and offer 2.5" bay adapters. As to 3.5" drive storage, there is a pair of cages, stacked on top of each other than can hold up to six in total, and either or both cages can be removed. We covers the pair of 2.5" drive locations, but there is yet another stamped into the motherboard tray, just below the cooler access hole.
The cooling offered in this chassis is more than we typically see in cases today. The front of the chassis can hold a pair of 120mm fans, but as shipped, there is one blue LED lit clear fan installed. The top of the chassis also offers two 120mm fan locations, but the rear one here also offers a blue LED lit clear fan. The back of the chassis holds the last of the three installed fans, and here there is a 120mm fan, but it is not LED lit this time. The floor of the chassis, just in front of the PSU, also offers the last typical 120mm fan location. Also, with the use of a ducting system in this design, we also find one 80mm fan in the front lower corner of each side panel to actively force more air into the chassis.
The do tell us that the front I/O panel offers HD Audio jacks, a pair of USB 3.0, and a pair of USB 2.0 connections, but there is no mention of the materials. This chassis has a frame, duct work, and side panels made of steel that are painted inside and out with black textured paint. Zalman uses ABS plastic for the top of the chassis, and mixes things up with a heavily textured surrounding, a shiny plastic cubby, and translucent fins. The front of the chassis is also made of plastic, but offers a brushed metal look and a sleek style that many should appreciate.
Looking around for the Z11 Neo, we find it to be pretty widely available, so that is a good start. Pricing ranges a fair bit depending on where you look though. We see pricing as high as near $110, but from more reputable locations, pricing does decrease. We found the Z11 Neo at Amazon for $77 at the time of writing, which is a solid price for what you get. At this point, we should get up close and friendly with the Z11 Neo and see if Zalman has your next chassis to buy.
Packaging
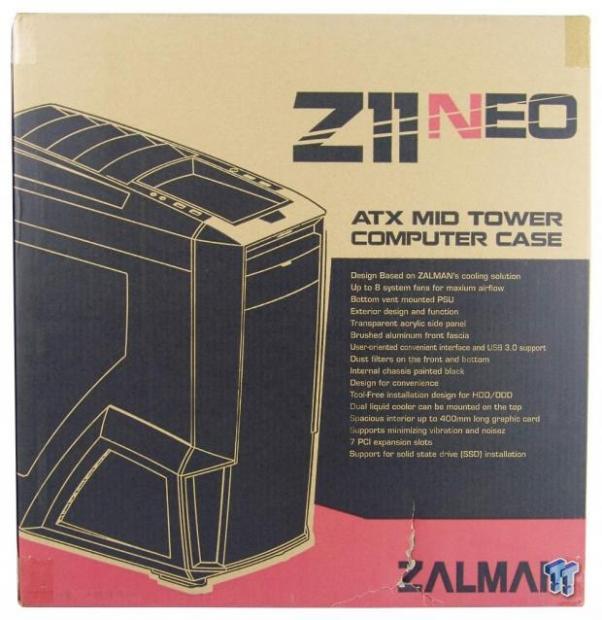
We are sent a plain brown cardboard box with printing on it to let us know what we have inside. In black, we see the rendering of the chassis, and to the right, a description of what that is, and a long list of features it includes. Along with the red at the bottom to highlight the Zalman name, we also find a bit of it used in the Z11 Neo at the top.
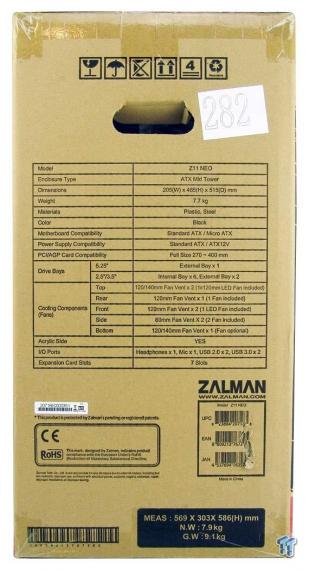
Rotating things to the left, we then run into this panel where they are now offering the same identical specifications chart we just discussed. Outside of that, there are a few bar codes, and the packaging dimensions and weight.
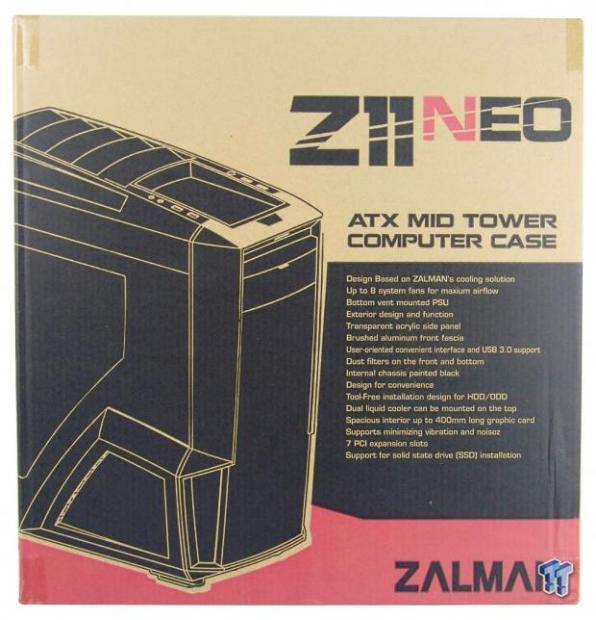
Moving now to the other larger panel, we find it is identical to what we saw two images previous to this, sans the cut near the bottom. It again shows off the chassis design, offers features, and gives us all of the naming.
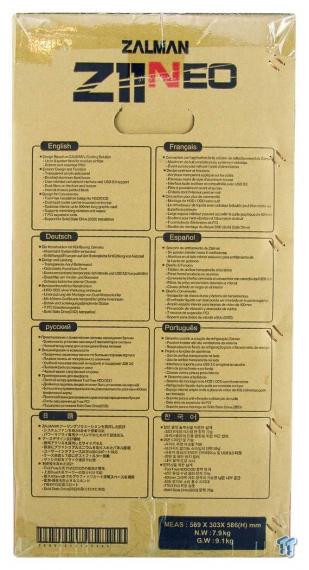
The remaining side of the box then offers condensed lists of features in many languages. Here it touches on things like amount of fans, design aspects, and moves to things like tool-free features, roominess, and what can be installed.
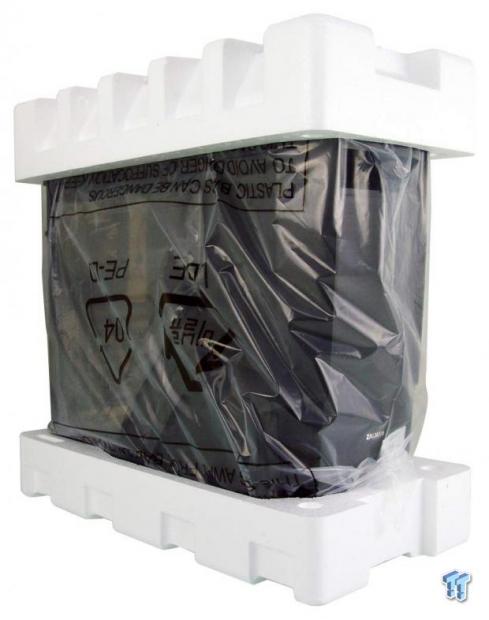
Going with what works best, Zalman ships the Z11 Neo with large Styrofoam end caps to fight against major contact with the box, and a liner under it to protect the finishes. They have also made sure the outside of the amber tinted window is also covered in plastic, just in case. This specific Z11 Neo has shown up in perfect form and is ready to get on with the business at hand.
Zalman Z11 Neo Mid-Tower Chassis
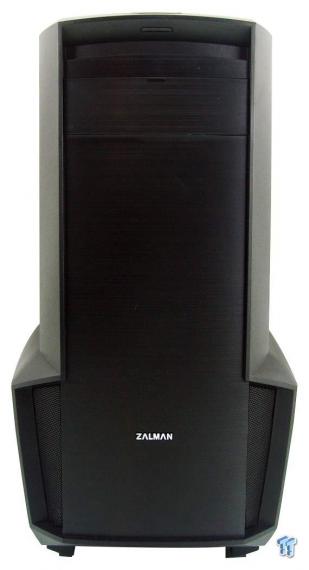
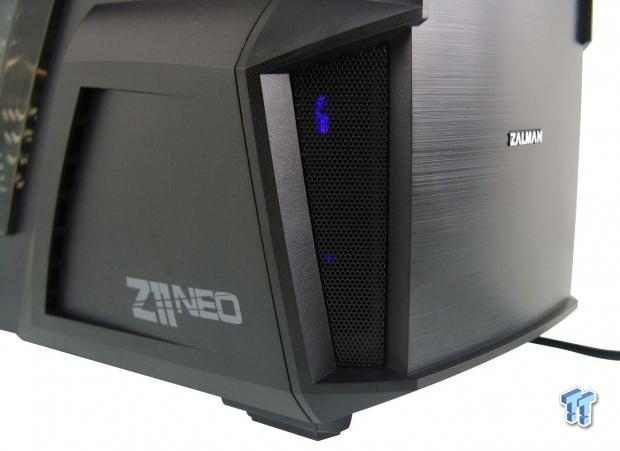
At the top front of the Z11 Neo, the chassis is rounded and looks finessed into shape, and as you move down, the brushed metal look of the bezel, to either side of the Zalman name, it looks like it has been give cowl induction scoops.
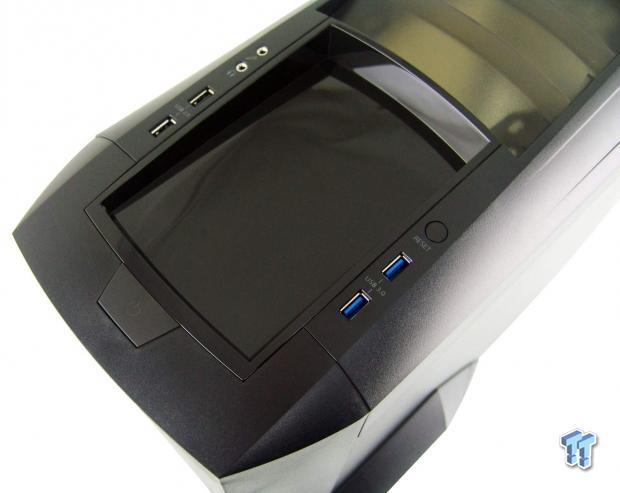
The front I/O panel is found at the top of the chassis, and is split by the accessories tray in the middle. There is a large power button in front of it, USB 2.0 and HD Audio to the left of it, and USB 3.0 and a tiny reset button to the right.
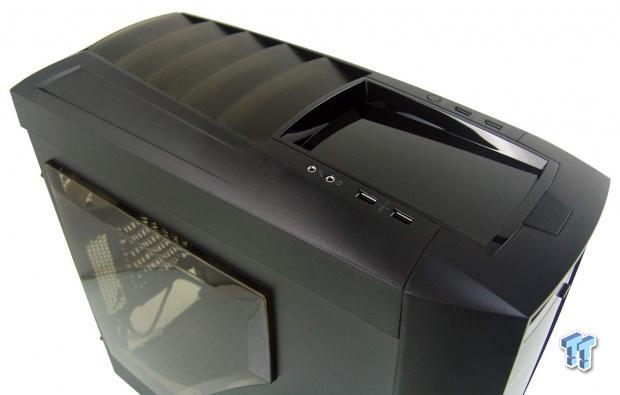
The top and front are curved similar to say the 600T, but as the top panel goes back, we notice scallops offered on the sides of the translucent vent panels. The back is also curved, and you will soon see the mesh offered there.
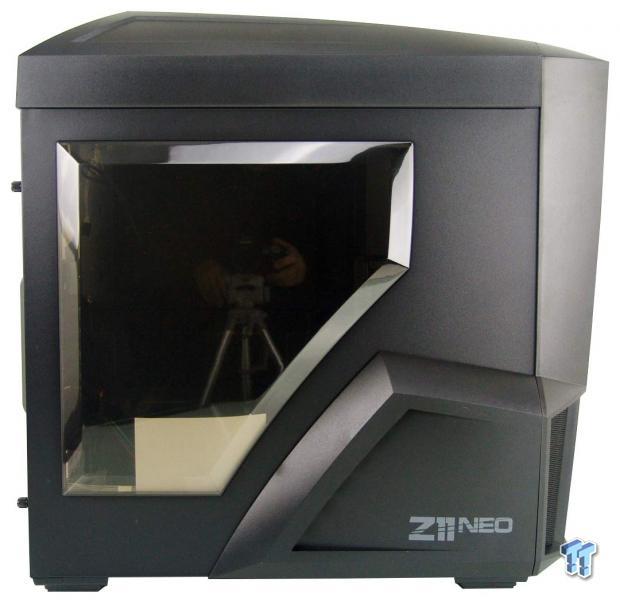
The left side of the chassis shows off the angular design of the front bezel and top panel, and there are large scoops at the bottom with aggressive lines and the Z11 Neo painted on this side. There is also a jewel cut amber tinted window that is mostly square, except where it needs trimmed to allow for the scoop.
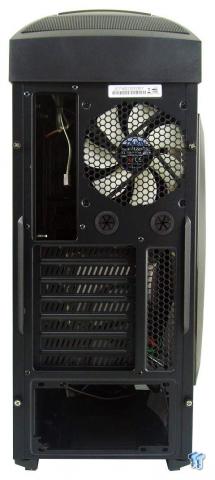
The top of the chassis is thick and does offer a bit of mesh, but just below that, we find the rear I/O, 120mm exhaust location, and a pair of grommets for water cooling. We do see there are seven expansion slots with mesh next to them, leaving room at the bottom for the PSU.
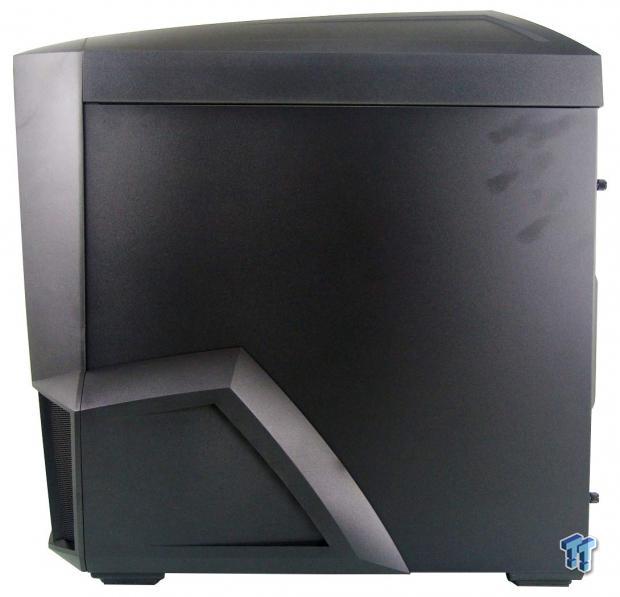
The right side of the chassis is dressed down a bit without the name and the widow to see this time. However, this shows how well the panels fit the frame, and also that the scoop on this side is identical to that on the left.
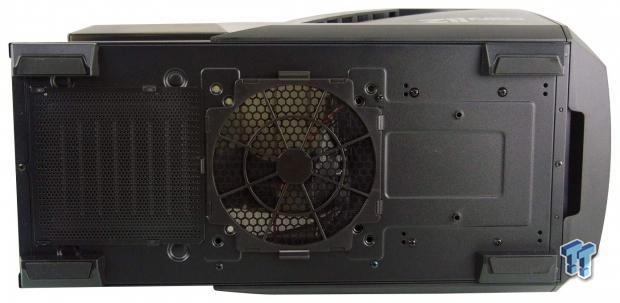
To support the chassis, there are chunky plastic feet with rubber pads under them. The PSU is covered with a thin plastic dust filter, and the optional fan location offers one made of mesh with a thick plastic frame. We also see screws at the front that will allow you to remove the HDD rack base if needed.
Inside the Z11 Neo
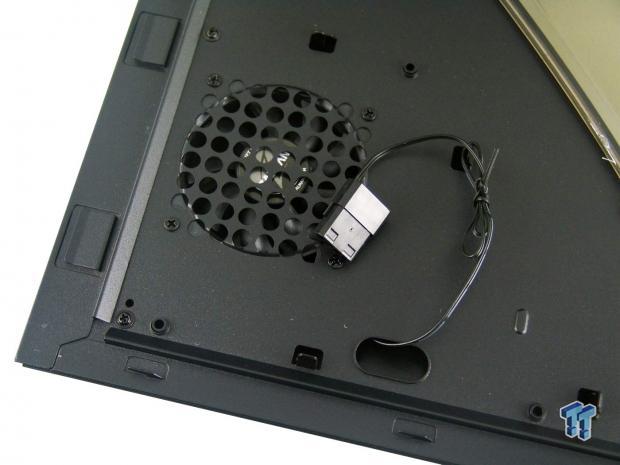
At the bottom front corner of either side panel, we see that the duct work is backed with an 80mm fan to force more air in since the front is mainly blocked off. We also see that these fans require a Molex power lead to power them.

After removing the thumbscrews and side panels, we get a view inside. The wiring has been tied up and has hung itself on the expansion slots, and the paperwork and hardware are resting on the floor of the chassis up against the HDD rack.
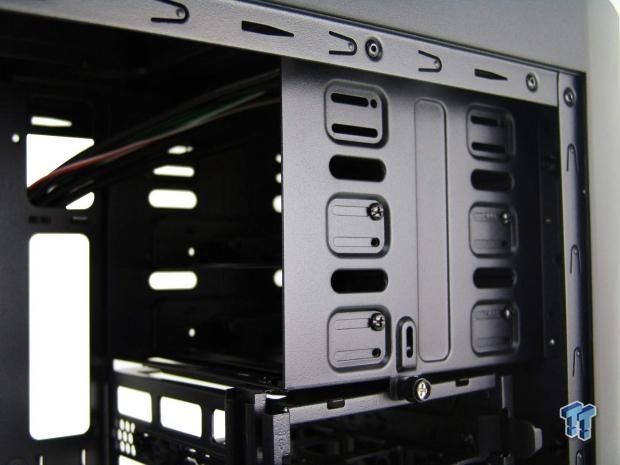
With only one door on the front bezel, only the top bay is 5.25" drive or device capable. Since the lower pair do not exit the bezel, Zalman has supplied bay adapters in here to install storage drives if need be.
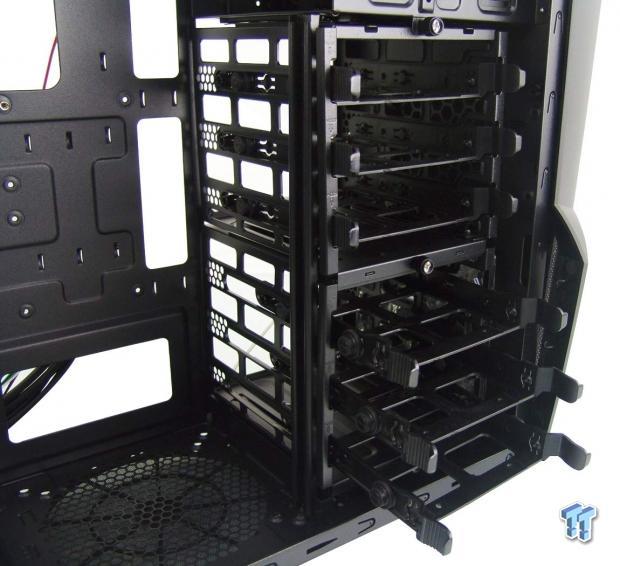
The lower section of the front of the case is then taken up with the HDD rack. There are three thumbscrews on the face to allow users to remove the top or bottom sections of three trays, or they can also come out entirely.
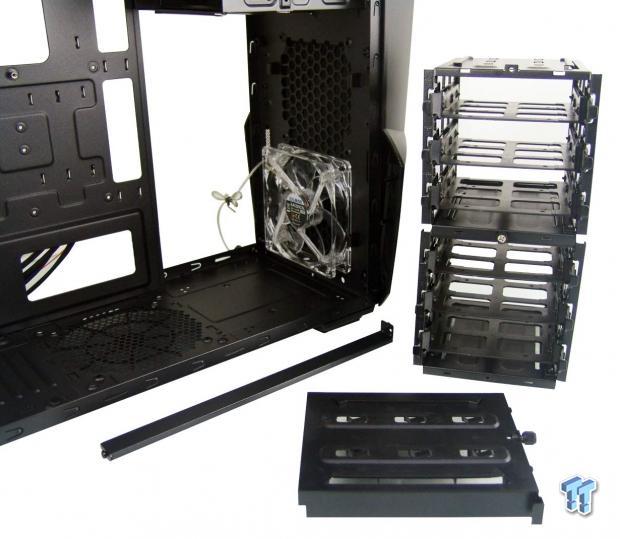
To open the front of the chassis up for water cooling or longer video cards, remove the thumbscrews and slide the cages out. Then removing the screws in the floor, you can get the base removed, and one end of the support bar. The other end of that bar has a screw in the bottom of the ODD bays.
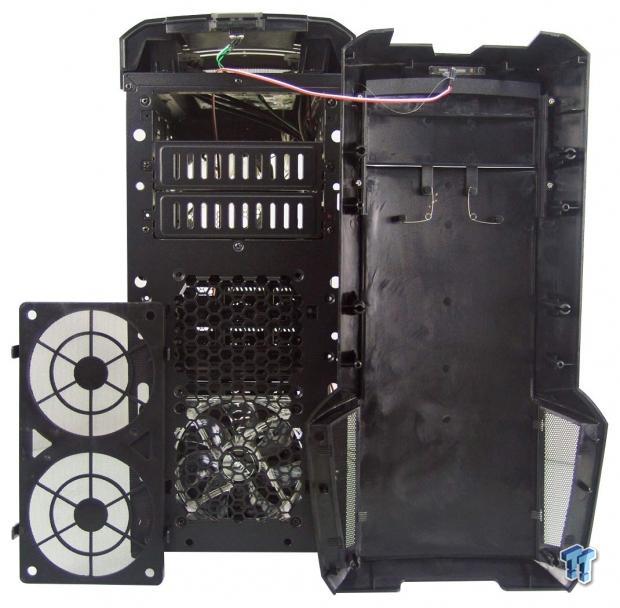
To get the next image, we found the front bezel had to come off, so we figured we would show it now. You can see the springs in the bezel for the door that lowers, and that the HDD LED wire is permanently attached. This is also how you add fans to the front, but the slip in dust cover has to come off first.
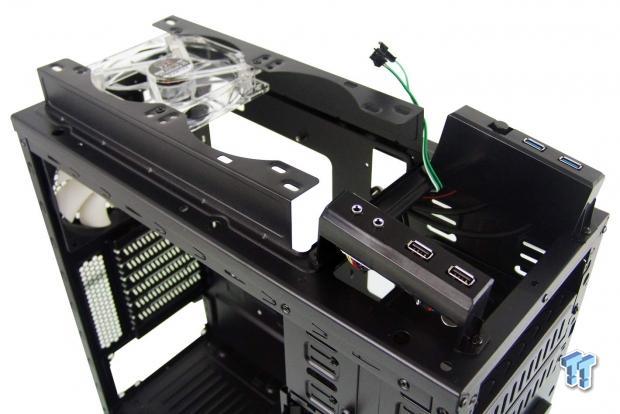
The top of the case is not completely wire free either. The green wires at the back are clipped to the top and are for the power button and power LED. While the I/O panel stays on the chassis, behind it, we see how to add or replace the fans here in the steel side rails.
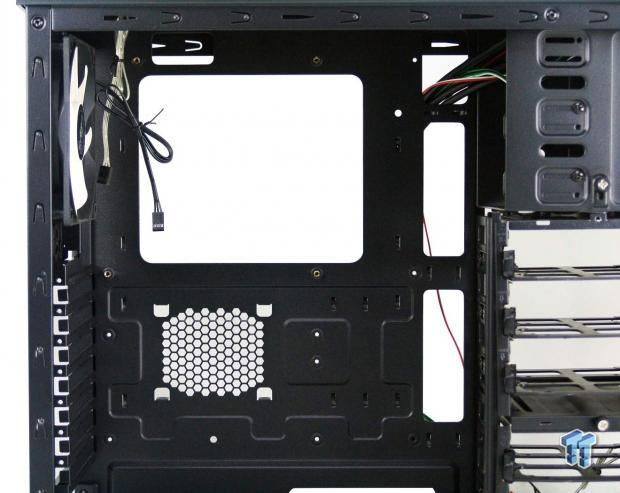
The motherboard tray has a large access hole, and four larger wire management holes around it, sans any rubber grommets. It will house either ATX or Micro-ATX, and we also see there are plenty of wire tie points stamped into it as well.
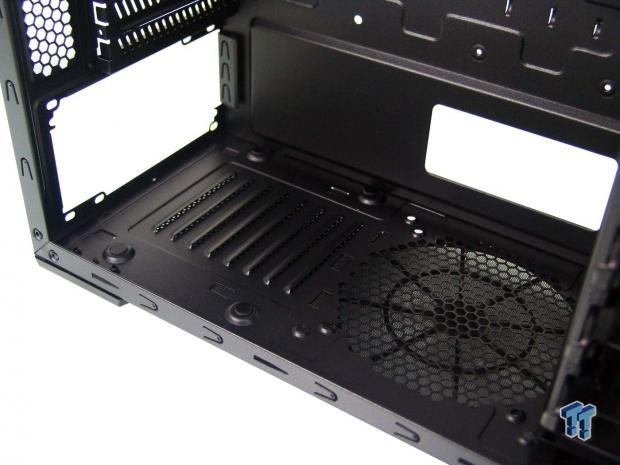
The floor of the chassis offers the optional fan location just behind the HDD cage, but use of longer PSUs set on the louvers and rubber pads at the back may interfere with the use of it.

The back of the chassis offers a black framed and white bladed fan as the exhaust, but we would have liked another LED fan here. We also see that the expansion slot covers are break away style and screws for these slots are in with the rest of the hardware.
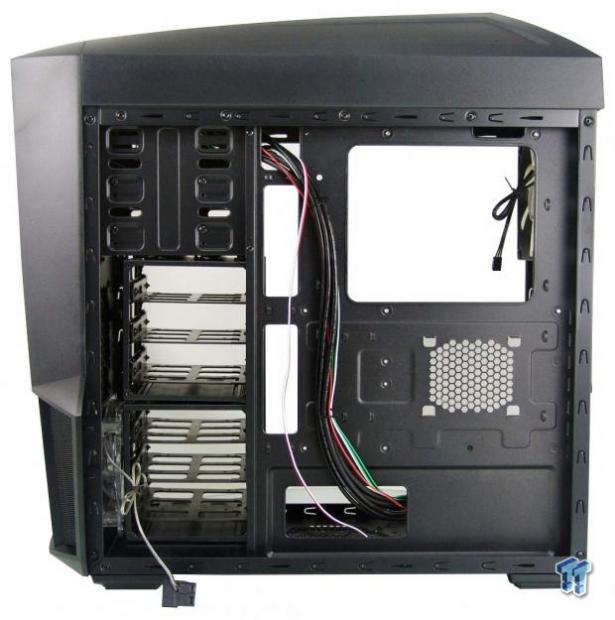
Behind the motherboard tray there is plenty of room for wire management, and below the access hole, we can see a spot to place an SSD. To the left, there is a support rail to cross with wiring, but to wire the HDD cages, there is plenty of room to tuck away SATA cables and PSU wiring.
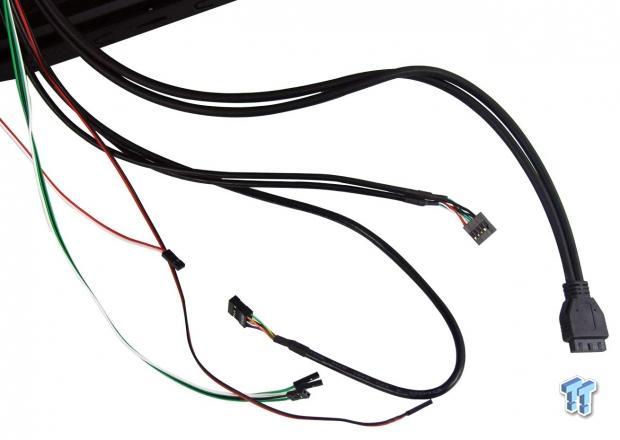
While we do wish all of the wiring was black, at the same time, there are no complaints with the length. The front panel wiring are the thin colored ones at the left, and the HD Audio is the longest, and the USB 2.0 and USB 3.0 leads are long enough to get anywhere on the motherboard.
Accessories and Documentation
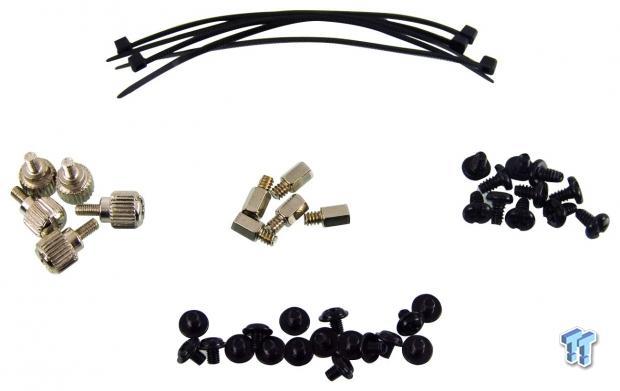
In the hardware bag, we found many goodies. There are five zip ties for wiring, M3 thumbscrews, standoffs, a bunch of 6/32 screws, and a handful of M3 screws for the motherboard and SSDs.
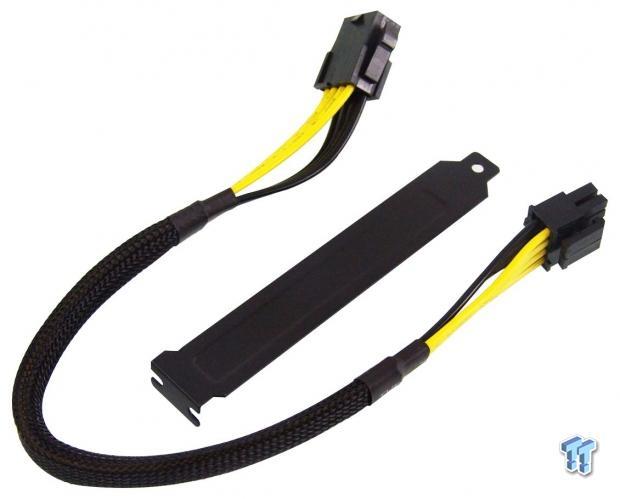
Also, inside of the same larger bag, we find that Zalman sends a single solid steel replacement expansion slot cover for the back of the chassis, and they also include an 8-pin extension cable for those with a PSU lead that will not get to the top of the chassis.
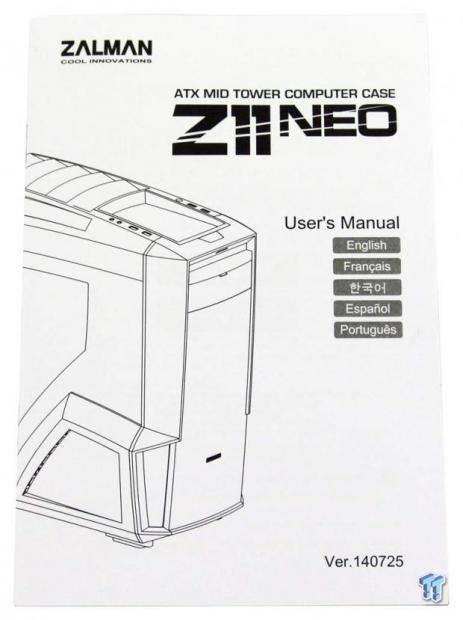
They do send along what they call a user's manual, but it is a guide at best. They do cover the included bits that come in the chassis and what they are for, but the rest of the manual is essentially just showing how and where the components go. To see anything more than that, like cooling options, or water cooling potential, you need to visit Zalman's website to see how that works out.
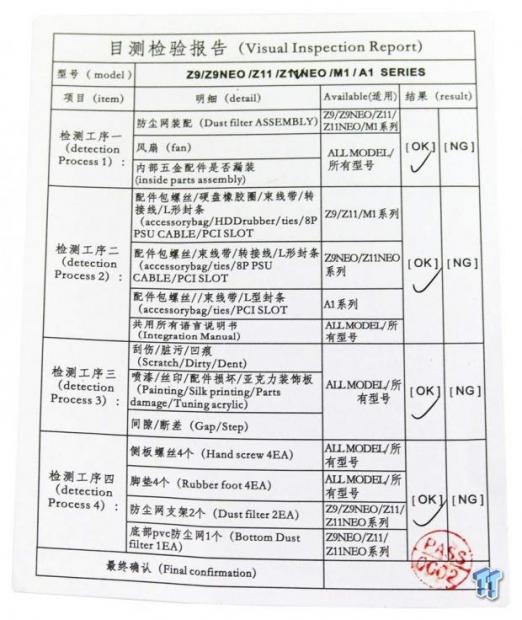
We also found a visual inspection report where someone checked and verified the fan and filter, that the proper accessories are included, and that a visual inspection had been performed and stamped before it ever made it into the box.
Case Build and Finished Product
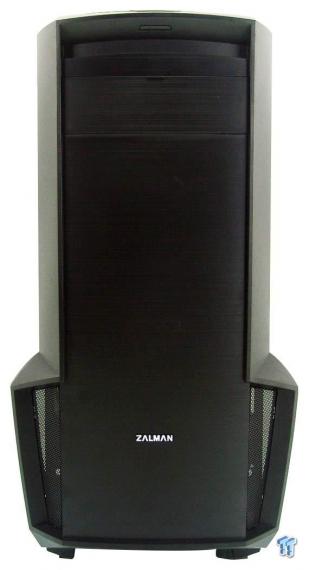
We do not use an ODD in our builds, but we do have one to test stealth doors and covers. We found this cover to work right every time, but we cannot vouch for the longevity of the springs at this time. We do, however, like the aggressive yet sophisticated sort of appeal that the Z11 Neo puts off.
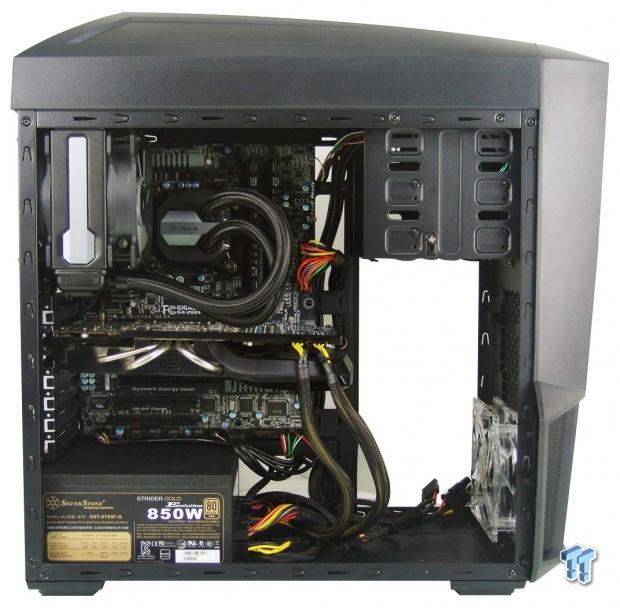
While we did not have to, we already had the cages out, so we left them there. Everything went right into place as expected, there were no hassles installing the AIO, the card went in without forcing the back inwards, and most of the wiring except the Molex lead for the side panel fans is well hidden.
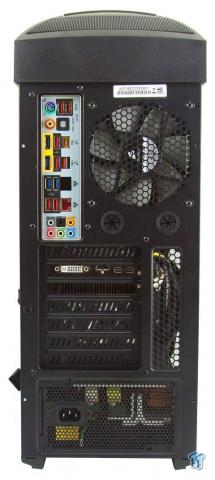
We had no issues snapping the top on and off when needed, and we did remove the rear fan and move it there. The dust shield and the AIO almost fall into place, we addressed the card already, and the PSU fit like a glove with the holes all lined up.
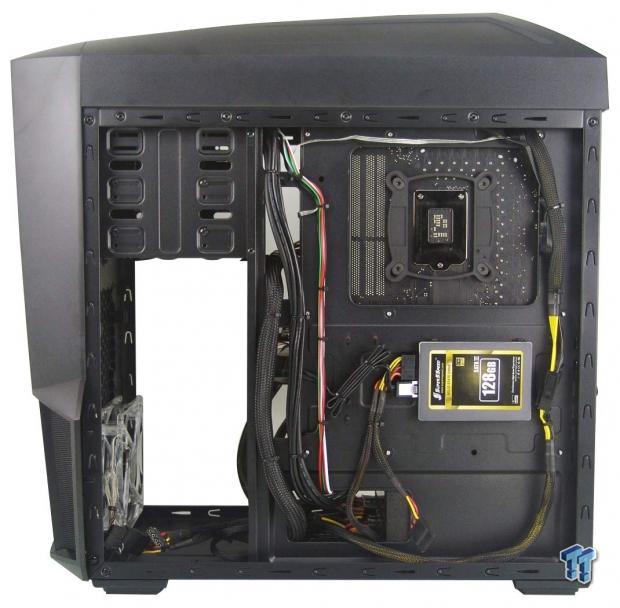
We wired as much back here as we could, and found that we had no issues with the panel fitment after all of this is tended to and held into place. There are also plenty of tie points to clean it all up, and still take advantage of the SSD bay.

As we do, we package everything back up and step back to take it all in. While some may not like the venting and angular design, we really dig the automotive inspired looks of it, and its aggressive lines and angles.
When powered up, the stock fans are audible and deliver 36dB of noise to the room from a foot away. At this time, we find the power button is lit blue, the fan at the front shines through the mesh in the ducts, and the top fan glows through the vents and floods the interior. There is also a tiny slit near the top of the bezel that will flash red occasionally with HDD activity.
Final Thoughts
Being completely honest, previous cases from Zalman may have looked unique on the outside, but when you got inside, it was like looking at a blast from the past for the design and layout. With the Z11 Neo, this has all been addressed, and while it is missing grommets inside, and it does have multi-colored wiring, there is plenty of modularity and up to date offerings to be had. The removable cages are great for water cooling use, and space needed for longer video cards. We also like that while only one 5.25" bay is accessible outside the chassis, it is done behind a stealth panel, and the second and third bays are then offered up with brackets as storage bay options. So, even with all of the HDD rack out of the chassis, you still have three locations for storage, so they won't be missed all that much.
Yes, we know the front is plastic, but that doesn't stop us from liking the brushed metal faux treatment that is only broken up with the chromed Zalman name at the bottom. We like the way it is rounded back from the center, we like the forward lean it has, and we definitely dig the ducts used at either side. Some may think it is childish, but the ducting does work, and there is additional flow added to the mostly blocked LED fan placed as the main intake fan.
The blue LEDs are a nice touch, but we wanted more of them. They are at least placed where they can be seen well, like looking through the ducts or peering down at the top of the chassis, and the use of translucent louvers in the top is also a nice touch to help that top fan really shine. So, while you may think cooling is limited in this design, the way Zalman offers up the Z11 Neo, airflow inside of the chassis is of no real concern; especially when the HDD rack is removed like we had it.
You may very well be able to find a mid-tower chassis that has a couple more features like grommets, a bit more room or compatibility in the water cooling department, or even a chassis that has all of the wiring in black, if those are things that will really bother you. However, the exterior design, and the grapes it takes to do something so outside of the box and the automotive like take on design has us liking this case a whole lot. While the amber tinted window does make this chassis scream for interior lighting for a good view through it, for around $80, the Zalman Z11 Neo mid-tower chassis is indeed worth the investment.
For those looking for aggressive and bold styling, just a hint of sophistication mixed in, and a feature set that will appeal to the masses out there, this chassis is one that is well worth a look and serious pondering when looking for your next mid-tower chassis.

| Performance | 95% |
| Quality including Design and Build | 93% |
| General Features | 94% |
| Bundle and Packaging | 92% |
| Value for Money | 96% |
| Overall | 94% |
The Bottom Line: Zalman stepped out of its tradition and delivered an aggressively styled, yet sleek chassis that has an automotive vibe and ton of cooling. For what they offer in the Z11 Neo, we feel it is very much worth the investment.
PRICING: You can find products similar to this one for sale below.
 United
States: Find other tech and computer products like this
over at Amazon.com
 United
Kingdom: Find other tech and computer products like this
over at Amazon.co.uk
 Australia:
Find other tech and computer products like this over at Amazon.com.au
 Canada:
Find other tech and computer products like this over at Amazon.ca
 Deutschland:
Finde andere Technik- und Computerprodukte wie dieses auf Amazon.de
What's in Chad's PC?
- CPU: Intel Core i7 13700K
- MOTHERBOARD: ASUS ROG Maximus Z690 Hero Eva
- RAM: TEAM DDR5-7200 32GB
- GPU: ASUS GeForce RTX 3090 Eva
- SSD: addlink m.2 2TB
- OS: Windows 11 Pro
- COOLER: Fractal Lumen S36
- PSU: be quiet! Dark Power Pro 1500W
- KEYBOARD: ASUS ROG Strix Scope TKL Electro Punk
- MOUSE: ASUS ROG Strix Impact Electro Punk
- MONITOR: ASUS ROG Swift OLED PG42UQ
Similar Content
Related Tags

