


Introduction
It seems like there are almost countless online tools these days that you can use to generate images powered by AI. You can use popular AI tools like ChatGPT, Midjourney, and Microsoft Copilot, among others. They are all remarkably good at understanding text and converting it into images, saving a significant amount of time compared to the old method of manually creating images. Artists may not like it, but that's the way things are now. The generated images aren't always perfect; the technology is still relatively new, despite being around for several years now. We have all probably seen a third hand, with four or six fingers, and other unusual-looking anatomy from time to time.
The other issues are cost and privacy, as well as the number of times or how frequently you can create images. Many gamers out there or those with mid-range to high-end modern PCs could be using their computer to generate AI images locally on their Windows 11 PC - and it doesn't take a rocket scientist to do it, thanks to a large active community out there with developers creating free and impressive open-source tools for everyone to use. There are many options available online to create AI images for free, so perhaps that's not a significant issue. However, the speed at which they generate images or the number of times you can generate an image is a concern. During busy periods, your free access plan may be temporarily limited, slowed down, or paused.

The primary concern is privacy. You may want to create images that aren't seen by others or stored in the cloud. The prompts you use to generate images will be logged, and your usage and output images will be tied to your account and IP address. There are several reasons why you may prefer to generate images locally on your machine using AI. Besides taking control over image generation and putting complete control into your hands, it's quite a remarkable piece of tech and very cool to see your PC handling the task for you. And when you generate AI images locally, you aren't subject to censorship either, so you can create anything you want - you're only limited by the model's capabilities and understanding.
In this guide, I will walk you through generating text-to-image (txt2img) AI images locally on your Windows 11 PC using Automatic1111 and Stable Diffusion models, without incurring costs and without censorship. We won't be touching on img2img or inpainting in this guide as that's something I'm still mastering myself. We'll discuss fine-tuning image generation with LoRAs, showing example prompts and images, and more. By the end of it, you will be creating finely tuned images right from your machine using text prompts.
What You Need to Get Started
What are the minimum system requirements? You'll want to have Windows 11 installed (Windows 10 should also work, although I haven't personally tried it), and crucially, you'll need an NVIDIA GeForce GPU, as most Stable Diffusion models require CUDA for GPU acceleration. There are options available for using an AMD Radeon or Intel Arc GPU, but this guide will focus on using a GeForce graphics card, since NVIDIA GPUs are far more advanced and supported for this kind of work thanks to more developed CUDA optimizations and implementations.
You'll want a GeForce RTX 3060 with 12GB VRAM or better. Like most things, the better the GPU, the faster your image generation will be. With an RTX 3060 12GB, you'll be limited to lower resolutions and fewer sampling steps, as higher settings will take longer to process. Ideally, you should consider the RTX 4070 12GB or better. The better you go, the faster the image generation and the more sampling steps and higher resolution you can go, without waiting too long for the images to generate. You can technically run older models like SD 1.5 on GPUs with 6-8GB VRAM using --lowvram in the startup configuration, but SDXL needs 10-12GB+. There is also video generation in ComfyUI to consider, which requires even more VRAM, but that's something we'll cover in another guide.
Our Latest TweakTown Guides
- I stopped Windows 11 notifications from interrupting me with Do Not Disturb, Focus, and a priority list
- 7 ways to transfer data from Android to Windows PC quickly and easily
- I read the Windows Backup app screen carefully, and it does not back up what most people think
- Low Sound Volume on Windows 11? How to fix audio issues and restore normal volume
- 8 Critical Warning Signs You Should Never Ignore in Windows 11
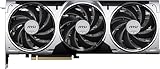
Best Deals: MSI GeForce RTX 5070 12GB Ventus 3X OC
Price Trend:
Prices last scanned 4 hours and 44 minutes ago
7 days ago: $939.99 CAD30 days ago: $939.99 CAD
7 days ago: £850.3630 days ago: £901.65
Note: A1111 does not support SLI or multiple GPUs for a single job, but you can run two (or more) instances of A1111, each bound to a different GPU.
As far as system RAM goes, you'll want at least 16GB, but similarly to the above, the more the better. If you have the budget, aim for 32GB or 64GB. Over 64GB is unlikely to provide a significant benefit, as most of the heavy lifting is handled by the GPU. You would only consider options over 64GB, such as 96GB or 128GB, if you are running intense workloads and other apps simultaneously. The CPU doesn't matter too much in this case, as the GPU handles the heavy lifting. However, as a rough guide, look for a CPU with six cores or more, such as the AMD Ryzen 5 9600X or Intel Core i5-14400. You'll also want to ensure your OS is installed on a fast SSD (1TB minimum) and that it has plenty of space available, as the models aren't small. For example, my Automatic1111 folder is almost 100GB, and that's with a modest number of models.
Here are the minimum system requirements which I recommend in a handy table:
| Item | Details |
|---|---|
| CPU | AMD Ryzen 5 9600X or Intel Core i5-14400 |
| GPU | NVIDIA GeForce 3060 12GB |
| RAM | 16GB |
| SSD | Fast + 1TB |
| Power Supply | 600 watts (or more) |
| OS | Microsoft Windows 11 |
Installing Automatic1111
Alright, now it's time to get into the fun stuff. The first step in generating AI images is to install Automatic1111, which we'll refer to as "A1111" moving forward. A1111 is a Stable Diffusion web-based GUI that allows you to generate AI images. While there are several options available (such as the also very popular ComfyUI), I have found Automatic1111 to be the best for text-to-image generation, and it's also one of the most popular.
You have several options for installing A1111, but the easiest is to use the one-click installer, which eliminates the need to install Python or Git. Firstly, ensure you have downloaded and installed the newest GeForce driver, and all the latest Windows updates are also installed.
- Step 1 - Download sd.webui.zip from this page.
- Step 2 - Once downloaded, extract the contents of the zip file to a folder of your choice, for example, C:\Users\XYZ\Downloads\A1111.
- Step 3 - Once extracted, locate the "update.bat" file in the folder and run it. You will likely be presented with a Microsoft Defender SmartScreen - click "More info" and then "Run anyway". This will update A1111 in a command prompt window.
- Step 4 - If you are using an NVIDIA GeForce RTX 50 Series GPU, run "switch-branch-toole.bat" to switch to the dev branch. Run that file, then enter "3" and press Enter. Next, press any key to close the window.
- Step 5 - Now open A1111 by double-clicking "run.bat". Again, you'll see the Microsoft Defender SmartScreen - click "More info" and then "Run anyway". A command window will open, and a bunch of files required to run A1111 will begin downloading and installing. This process will take approximately 10 minutes or longer, depending on your internet connection speed. Grab a drink and return.
- Step 6 - If everything worked, a new tab will open in your browser with a URL like http://127.0.0.1:7860. You're done installing A1111.
Tip: If for some reason the tab doesn't open or you close it and want to open it again without reloading A1111, open the command prompt window and CTRL + click http://127.0.0.1:7860.

Downloading a Model
Great, now you're done installing A1111. It's time to discuss Stable Diffusion models. Included in the install of A1111 is the "v1-5-pruned-emaonly" model, which is Stable Diffusion 1.5, created by RunwayML and CompVis, based on the original Stable Diffusion v1 architecture, and trained on 512x512 resolution images. It's not a bad option for beginners, but there are better alternatives available.
The best place to find models (and examples of what is possible), in my opinion, is Civitai. Hugging Face is also a very popular option, too. Civitai is an excellent resource for downloading models and getting inspiration for what is possible in the world of AI image and video generation. ⚠️ Just keep in mind it's sometimes NSFW! ⚠️ There are a vast number of different models, and while some are generally good at most things, others excel in specific areas. Therefore, depending on the type of image you are generating, select a model that best suits your needs. The best way to find a suitable model is to look through the user-submitted image examples and look at what model, prompts, and settings they used.

If you're like me, you'll probably end up settling on a few favourite models after spending time trying different ones and experimenting with various image generation techniques - it's kind of a matter of personal preference. It's easy to get overwhelmed by the number of options available. The best approach is to pick a model and start generating simply; there are no wrong or right answers here.
One model I like that falls into the category of being generally good at most text-to-image generation is CyberRealistic XL (v6 is the latest at the time of writing). It's a "checkpoint trained" model, which means all you need to do is download the model (it's almost 7GB) and place it in your Stable Diffusion model folder in your A1111 install, for example: C:\Users\XYZ\Downloads\A1111\webui\models\Stable-diffusion. Once you have done that, go back to your A1111 tab and, at the top of the screen under "Stable Diffusion checkpoint", click the blue refresh button to generate a new list of available models. Then, select "cyberrealisticXL_v60.safetensors". After a few seconds, the model will load and will be available for use.
Your First Image

Alright, now we are ready for the real fun part. It's time to generate your first AI image locally on your PC. In your A1111 tab, ensure you have selected your downloaded model, as discussed above.

Simply click the orange "Generate" button on the right, and depending on the model you are using, a random image will appear on the right side, as we did not enter any positive or negative prompts. For CyberRealistic XL V6, I got a nice photo of an old car, pictured above. Not perfect, but still cool.
Example Prompts to Try
Okay, so you just generated your very first AI image locally, but it was a random image. Now let's explore the world of prompts. Prompts are, of course, essential for text-to-image generation; without them, the model has no idea what you want. Below you'll see a series of prompts (positive and negative) along with the output generated image. Positive prompts are obvious, what you want to see, and negative prompts are what you don't want to see, and they can help correct issues with images, especially regarding malformed people and so on.
Do keep in mind that ⚠️ some models (including CyberRealistic XL) may produce images with nudity ⚠️ without being prompted to do so. If you want to avoid nudity, add terms like nudity, nsfw, and nude to the negative prompt. Keep in mind: even when using those negative prompts, some models may still generate images not suitable for children! Some models also support weighting like (nudity:2). Putting the prompt in brackets with ":2" at the end tells the model that this prompt is important - the higher the number weight, the more important the prompt, and this can be used with positive prompts too, such as "full body", and keep in mind weighted prompts can be a negative number, too.

Female Portrait

Prompt: masterpiece, best quality, ultra-detailed, 8K, sharp focus, stunning female portrait, cinematic lighting, freckles, expressive eyes, natural skin, DSLR photo, bokeh background, soft lighting, by greg rutkowski, rim lightingNegative Prompt: low quality, worst quality, blurry, ugly, duplicate, morbid, deformed, extra limbs, mutated hands, bad anatomy, poorly drawn face, out of frame, disfigured, grain, jpeg artifacts, text, watermark, signatureCyberpunk Cityscape

Prompt: masterpiece, best quality, ultra-detailed, 8K, futuristic neon cyberpunk city at night, glowing billboards, flying cars, reflections on wet streets, cinematic angle, volumetric lighting, highly atmospheric, digital paintingNegative Prompt: low quality, worst quality, blurry, deformed, poor lighting, distorted, extra limbs, broken buildings, bad perspective, out of frame, text, watermark, logoFantasy Forest Creature

Prompt: masterpiece, best quality, ultra-detailed, fantasy woodland creature, glowing eyes, moss-covered antlers, mystical forest background, cinematic lighting, bioluminescent plants, 3D render style, ambient fogNegative Prompt: low quality, ugly, blurry, malformed, disfigured, distorted anatomy, overexposed, bad proportions, text, watermarkApocalyptic Wasteland

Prompt: masterpiece, best quality, highly detailed, post-apocalyptic desert wasteland, broken highways, rusted vehicles, smoke in distance, survivor with gas mask, dramatic lighting, cinematic scale, wide angle lensNegative Prompt: low quality, blurry, bad proportions, distorted perspective, text, watermark, flat lighting, poorly drawnAnime Girl in School Uniform

Prompt: masterpiece, best quality, anime style, beautiful anime girl, school uniform, long flowing hair, cherry blossoms, soft pastel color palette, cinematic lighting, 4K artwork, by makoto shinkaiNegative Prompt: low quality, blurry, bad anatomy, disfigured, off model, extra limbs, pixelated, out of frame, ugly, text, watermarkFuturistic Samurai Warrior

Prompt: masterpiece, ultra-detailed, futuristic armored samurai, glowing katana, cyber armor, stormy background, concept art style, dynamic pose, 8K, hard rim lighting, digital paintingNegative Prompt: low quality, blurry, deformed, bad anatomy, extra limbs, broken weapon, poorly lit, text, watermarkMajestic Mountain Landscape

Prompt: masterpiece, best quality, ultra-detailed, epic mountain landscape at sunrise, glowing sky, clouds rolling over peaks, cinematic wide shot, sharp focus, volumetric light, nature photography styleNegative Prompt: low quality, overexposed, flat lighting, blurry, low detail, boring composition, watermark, textFine tuning settings
Now you're getting the hang of it, right? You've hopefully by now created some of your own AI images locally and are getting used to how A1111 works. You could stop here and keep experimenting with different models and prompts, but the guide wouldn't be complete.

Sampling Steps
Besides prompts, many settings can be changed to fine-tune the results of your generated images. Let's start with sampling steps. If you find the generation is slow, you can try reducing the number of sampling steps; as a rule, don't go below 20 steps. Conversely, if you have a higher-end GPU, you can try increasing the steps to 40 or even 50. After a certain number of steps (approximately 50), you will begin to see diminishing returns. The more steps, the more time you are allowing the generation process to improve image detail and quality. As a general guide, you should be fine with 30 steps most of the time; however, you may notice an improvement with 40 steps.
Sampling Method and Schedule Type
You also have the option of changing the sampling method and schedule type. For CyberRealistic XL, the developer recommends the DPM++ 2M SDE sampling method and Karras scheduling type. Both are popular and widely used in many different models, but I have also had great success with Euler A and automatic scheduling type. Have a play around with these settings and work out what works best for you.
Seed
You can also adjust the image width and height based on your needs. The seed setting is pretty important. It controls the randomness of the image generation. The default seed setting of -1 means that the generation starts at a random point each time and produces a unique image every time. If you generate an image you like and want to tweak it, click the green recycle icon. It will reuse the last used seed, generating the same image again unless you apply changes.
CFG Scale
Another important setting is the CFG Scale (Classifier-Free Guidance Scale). This controls how closely the model follows your prompt. The default is 7, which usually works well, but you can adjust it up or down depending on the results you're getting. If you lower the number, you're giving the model more freedom - it'll follow your prompt less strictly, which can sometimes lead to more creative or unexpected results. If you increase the number, the model will adhere more closely to what you requested. If the image doesn't quite match what you had in mind, try increasing the CFG Scale slightly. On the other hand, if it matches the prompt but looks unnatural in some way, try lowering it to 6 or even 5 and see if that helps.
Using ADetailer & LoRA models
Now we're getting a little more complex, but the topics of ADetailer and LoRA models are likely ones you will want to use, so let's discuss them.
Using ADetailer
ADetailer is an extension for A1111 that detects faces (or other regions) and automatically enhances them with improved prompts and settings. It utilizes AI detection to identify faces, hands, and other features, and enhances the image quality in those areas. You can set positive and negative prompts specifically for these regions to modify the image, such as "symmetrical face" or a facial expression, like "nervous expression". Keep in mind that ADetailer isn't always accurate - sometimes it overdoes the detail or changes expression unexpectedly. So, have a play around with it and see what works and what doesn't.
ADetailer is not installed by default with A1111. To install ADetailer, click the "Extensions" tab at the top, then click the orange "Load from:" button. In the text box about a quarter of the way down the page, type in "ADetailer", and then click the "Install" button. This will take around a minute to install. Once installed, click the "Installed" tab at the top and then click the orange "Apply and restart UI" button. A1111 will restart and install the new requirements, and the ADetailer extension will be available in the txt2img tab. Click the ADetailer checkbox and make sure there is a tick in it. By default, the 1st detector will be enabled with face_yolov8n.pt.
Now, let's put it to use. For example, let's use our earlier example of the female portrait. On the left side, we have a non-random seed-controlled output with no ADetailer facial recognition used, and on the right side, we have ADetailer face_yolov8n.pt enabled.


See the difference? In the following example, we have ADetailer face_yolov8n.pt enabled for both. The image on the left is just with ADetailer enabled, and the image on the right adds a positive prompt of "nervous expression".

ADetailer is also handy to fix issues with hands and fingers and is worth playing around with, as you can see in the example below:


Using LoRA Models
LoRAs in A1111 are small add-on files that let you change the look or behavior of the image without switching models. You can use them to apply a specific art style, character, outfit, pose, or even fix things like hands or faces. Copy your downloaded LoRA .safetensors file into your C:\Users\XYZ\Downloads\A1111\webui\models\Lora folder. Then restart A1111 - it only loads new LoRAs at startup.
Remember (and this is one thing that took me a while to realize when I first started) that you should match LoRA models with the base model you are using. For example, when using CyberRealistic Pony as your base model, you need to find LoRA models with the same base model as Pony. For best results, try to use LoRAs trained on the same base model as your checkpoint (e.g., Pony, SDXL). You can experiment with mismatched LoRAs, too - they may still work, but might give unpredictable or strange results. When searching for LoRAs on Civitai, search for what you want, and on the left side, select the filters. Choose "Pony" as the base model and "LoRA" as the model type - this will ensure you only see compatible LoRAs.
LoRA models work by layering on top of your base model, and you activate them by adding a tag to your prompt, like this: <lora:Elsa_from_Frozen_Pony:1>. In the example below, on the left is an image without the Disney Frozen Elsa LoRA, and on the right is one with the LoRA.
Prompt: Elsa, cartoon, 3d rendered, score_9, score_8_up, score_7_up, score_6_up, score_5_up, score_4_up, princess, braid, happy expression, pale skin, snowy landscape, portrait, <lora:Elsa_from_Frozen_Pony:1>

You can see in the example above that the model has a hard time generating an image representing Elsa from Frozen and while it's actually a really good generation, it's not exactly what we were after. However, with the specialised LoRA model active, we get a result that's quite close to representing Disney's Elsa from Frozen rather well. Again, there are numerous different LoRA models available, and new ones are being added or updated constantly. Explore Civitai and you'll be amazed by the amount available.
Tips and Tweaks & Wrap-Up
You're almost a pro now! Let's wrap this up with a few little extra goodies.
Keep A1111 Updated
Every time before I start A1111, I open the update.bat file to check if there are any updates. There aren't usually, but it's always a good idea to run it to ensure you have the latest updates.
Image Browser
One extension I like is the image browser. It allows you to load all your previously generated images and quickly view the settings you used. One handy feature is the "Send to txt2img" button, which sends all your settings for that generated image to the txt2img tab, allowing you to reuse those settings or make minor changes to the image using the same seed.

To install the Image Browser, click the "Extensions" tab at the top, then click the orange "Load from:" button. In the text box about a quarter of the way down the page, type in "image browser", and then click the "Install" button. This will take around 15 seconds to install. Once installed, click the "Installed" tab at the top and then click the orange "Apply and restart UI" button. A1111 will restart, and the Image Browser will be available.
Optional Tweaks
At the developer's GitHub page, you can find a list of optimizations. Most people won't need to use these, but if you have a slower GPU, some of them may be useful, especially enabling xFormers.
I hope you enjoyed the guide and have fun generating images locally on your PC! 😀
 I stopped Windows 11 notifications from interrupting me with Do Not Disturb, Focus, and a priority list
 I read the Windows Backup app screen carefully, and it does not back up what most people think
 Low Sound Volume on Windows 11? How to fix audio issues and restore normal volume
 8 Critical Warning Signs You Should Never Ignore in Windows 11
 AMD's RDNA 5 Radeon GPUs will launch in mid-2027, per new leak
 GTA 6 price seems to have leaked, base version to cost €89.99
 Assassin's Creed Hexe is reportedly going to launch earlier than expected
 NVIDIA's open-source NVK Vulkan driver gets experimental DLSS support in Mesa 26.2 for Linux gamers
 ASUS ROG Astral RTX 5090 reportedly causes discoloration on ASUS motherboard after six months
 Nothing has cancelled the CMF Phone 2 Pro's successor, blaming memory prices for making it unaffordable
 Intel Core 3 304 'Wildcat Lake' CPU appears on PassMark, matches the MacBook Neo
 Sony focuses heavily on AI in its recent summary, drops any mention of PC gaming
 Halo remake on PS5 requires two PS Plus subs for split-screen couch co-op
 Enthusiast attempts to install second 12V-2x6 connector on RTX 5090, is rewarded with a hole punched through the PCB
 Speed Racer (2008) 4K Ultra HD Blu-ray Review: a stunning remaster of the cult classic
 MOAIPLAY ORA PRO G1 850W ATX 3.1 PSU Review: high efficiency and 10-year warranty for $119.99
 Navman MiVue Smart True 4K Surround Dashcam Review - Seeing In All Directions At Once
 IQUNIX Magi96 Pro Aluminum Low Profile Mechanical Keyboard Review - Premium Build, Satisfying Sound
 Asetek Forte S-Series Racing Simulator Bundle Review
 Razer Pro Type Ergo Wireless Split Ergonomic Keyboard Review - Built for Comfort and Support
 ASUS ROG Strix Morph 96 Wireless Gaming Keyboard Review - Great Performance, More Affordable
 SAPPHIRE Radeon RX 9070 GRE PULSE OC Review - A New 1440p Challenger Has Arrived
 NZXT H6 RGB+ Compact Dual-Chamber Chassis Review
 This Windows security feature protects Documents from ransomware, but it is off by default
 Windows 11 already has a voice typing tool, and it is the one most people are not using
 Quick Assist is the only remote-support tool I open when a relative calls about their PC
 The PowerToys utilities I keep enabled on every Windows 11 PC, and the ones I turned off within a week
 TweakTown's Best of Computex 2026 Awards - The Best Hardware, Gaming Gear, and AI