


Lost Islands and Wave Breaker
BF4 Naval Strike
Battlefield is one of those franchises that continues to stick true to its origins and always seems to please with every new game that is added to its legacy. Battlefield 4 is no exception, and I think we all know what a fanboy I am of the series.
When the Second Assault expansion was released, I took a few hours of my time to create a high-definition comparison of the Battlefield 3 maps and the Battlefield 4 refreshes.
That post was so popular that I am back again and have spent the last two hours taking 55 high-resolution screenshots of some of the best scenes across the four new maps.
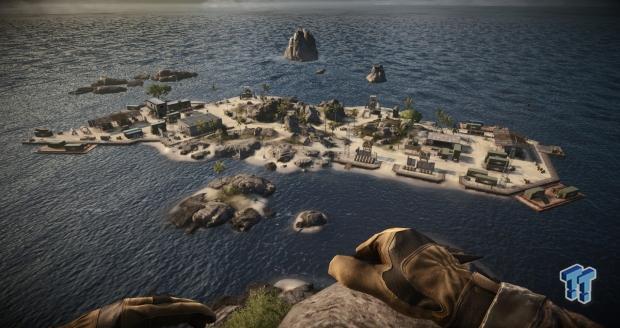
Up first, we are going to take a look at the new Lost Islands Map.
Lost Islands
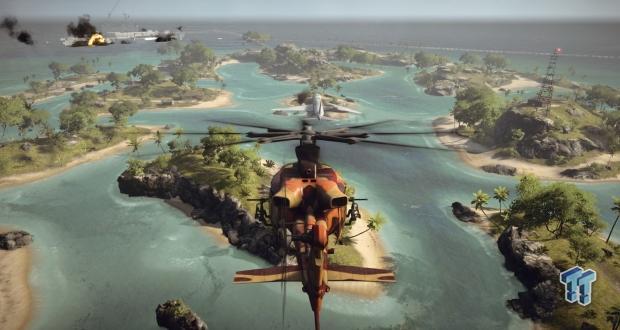
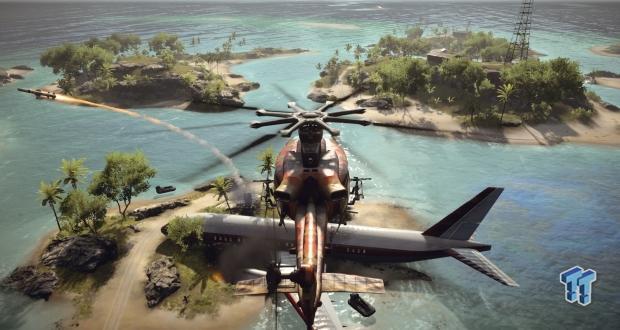
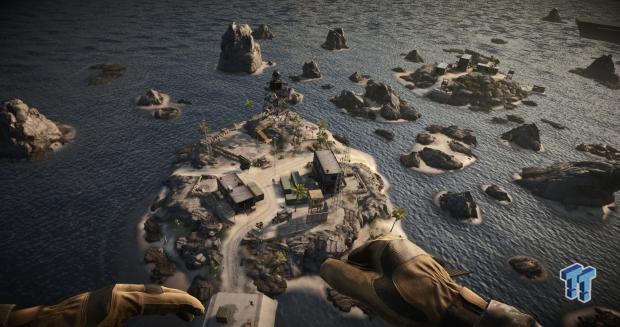
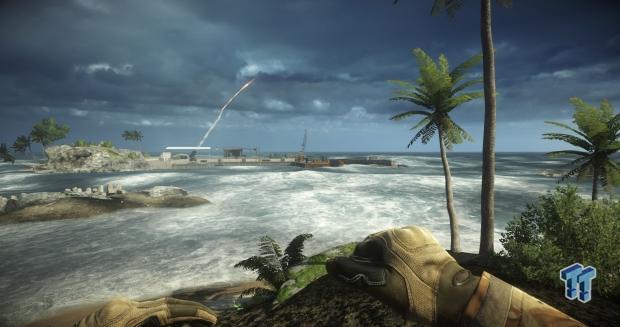
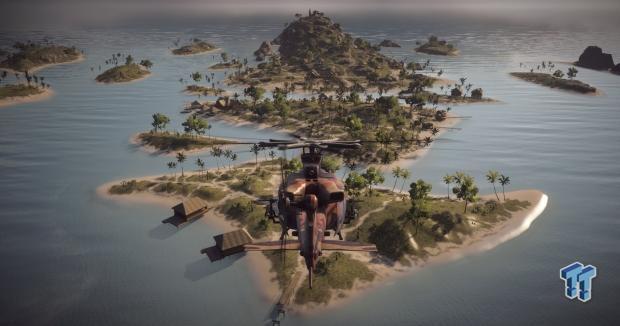
Lost Islands is one of those maps that you know is playing to popular culture, and it features a crashed airliner dead center of the map. There are several islands in this map, and all can be accessed and feature unique vantage points to defend your capture points or hunt down the enemy.
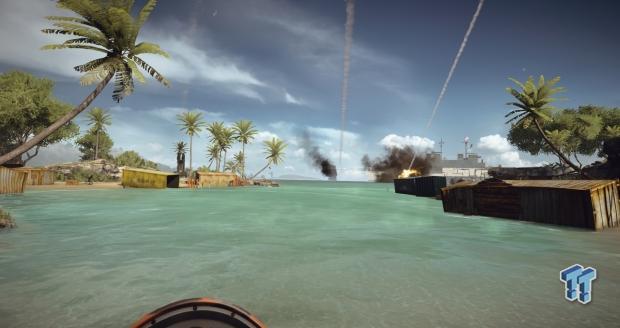
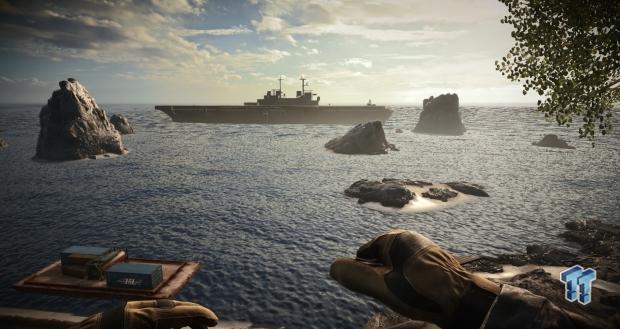
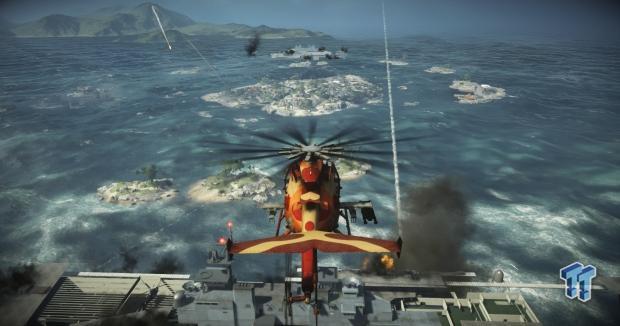
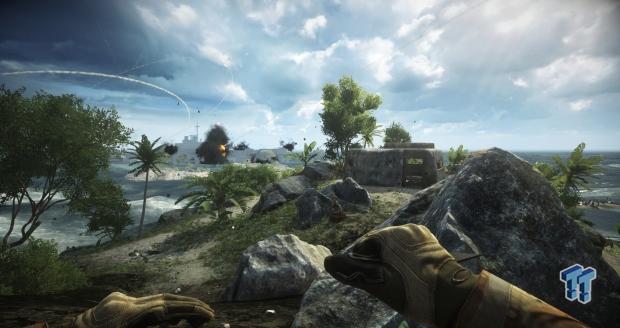
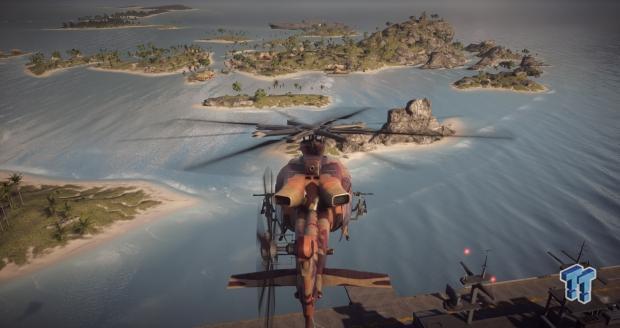
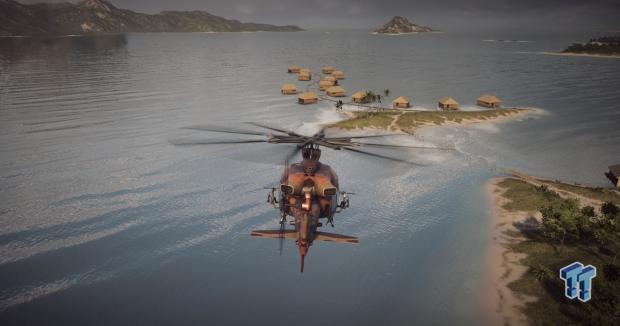
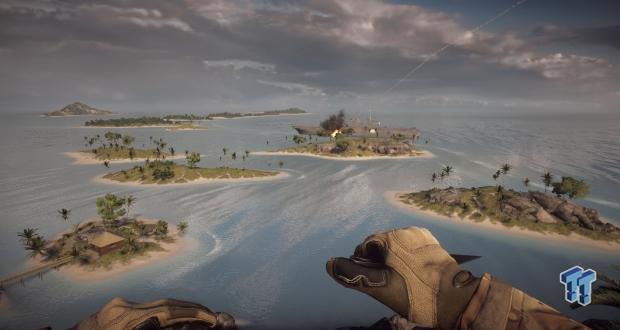
Taking a look from the other side of the map, we can see that the main island sort of forms a barrier that shields the other smaller islands from open ocean access. Here you can see several of the missiles being launched at the rival team's aircraft carrier.

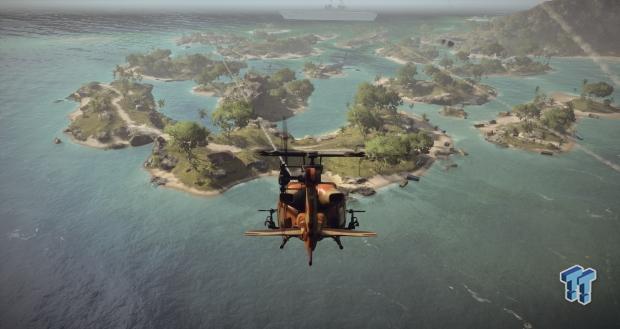
Spinning the chopper around, you can see that the opposing team's aircraft carrier has already been breached and is continuing to take direct hits from the missiles.
Our Latest Editorials Article Coverage
- Inside Our New Gaming Rigs for PC Gaming Deep Dives, Benchmarks, AI, and More
- Analysis: Why the Sony PlayStation 5 Pro console costs $700
- NVIDIA GeForce RTX Interview: Black Myth Wukong, Half-Life 2, DLSS, RTX Remix, and more
- First-Person Shooter documentary review: Chronicle of Carnage
- Serious Sam 4 Interview: Croteam amps chaos to 11
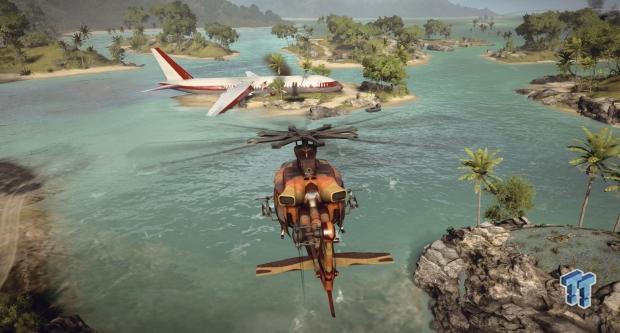
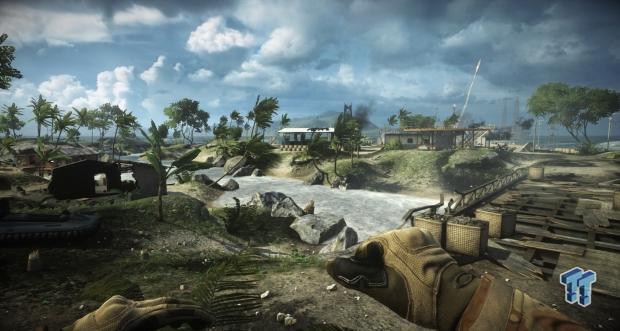
Hovering into the center of the map, we get an up close look at the downed airliner. This airliner features a Levolution action that can be triggered by setting the leaking fuel under the right wing on fire, but more on this later.
From the other side, you can see that one of the plane's engines is on fire and that this center point is a capture point as noted by the missile currently being launched towards the carrier.
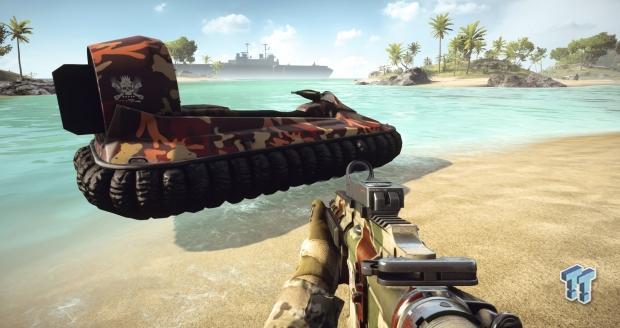
I squirreled here and decided to check out the new hovercraft that Naval Assault has brought into the game. It's barely much more than a jet-ski combined with an ATV, but it is fun to drive around. Check out that wicked logo and camo paint job!
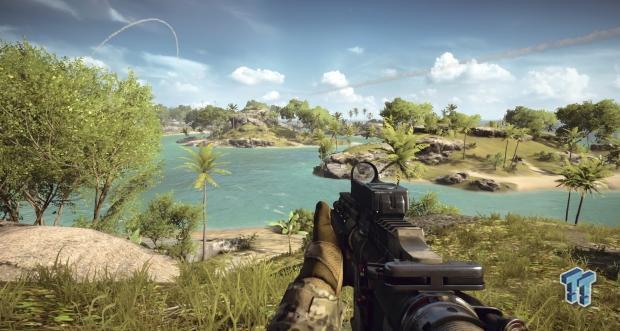
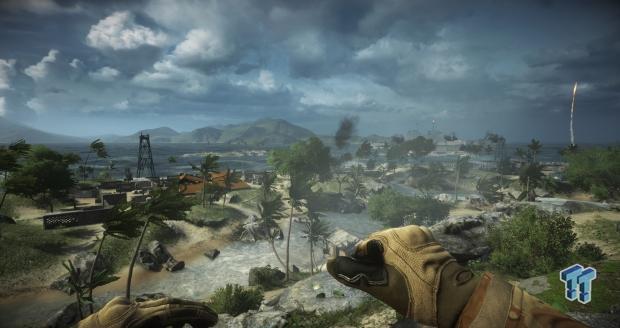
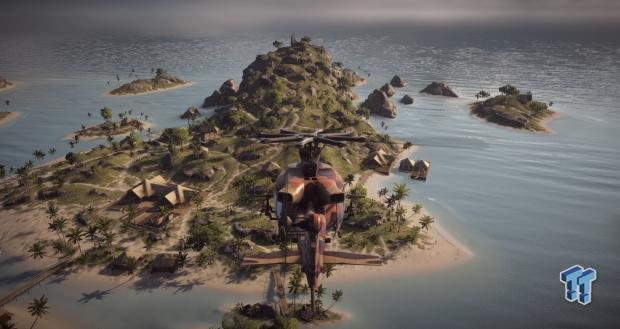
Here is one vantage point that overlooks a lot of the islands. This would be a very good spot to set up camp and shoot some enemies with a sniper rifle. It could also be a good spot to rocket some of the watercraft that will no doubt be buzzing through these waterways.
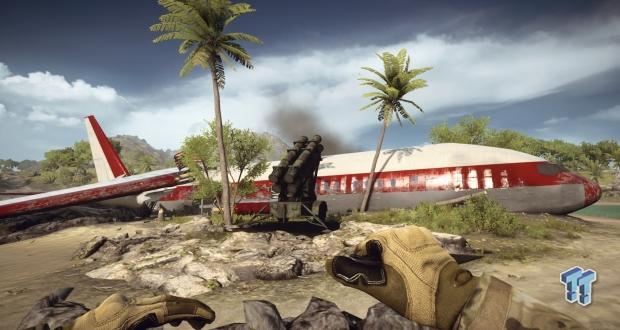
Side trip over, we now find ourselves back at the crashed airliner. Here we can clearly see the flag point and the missile launcher. If one were inclined to toss an incendiary grenade or any grenade towards the underside of the wing seen here, something special might happen.
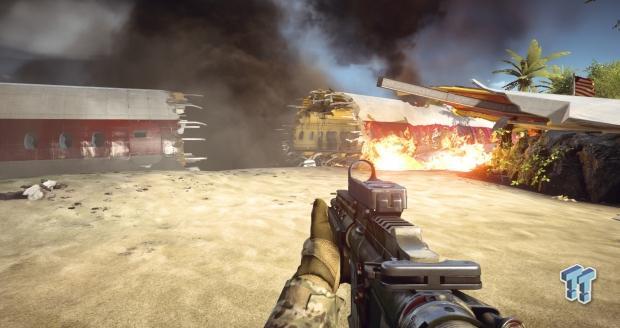
Okay, so maybe that last paragraph was a little overly dramatic, but the wing does explode in a very violent fashion, and the aircraft's fuselage breaks in two, providing some cover for players wanting to protect this flag.
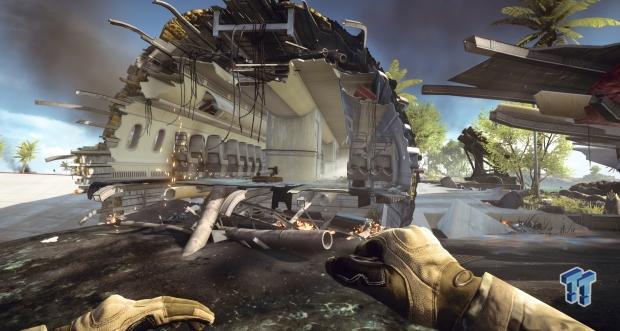
Looking down into the plane's interior, you can see that there are plenty of places to camp, hide out, or evade enemy fire. Unfortunately, this will be the first place I toss a grenade when attempting to retake this flag.
Heading towards the opposing team's carrier, we see that the far side of the island chain is littered with shipwrecked shipping containers. These are some of my favourite places to hide in Battlefield 4, and I am quite pleased that they added some in here for cover.
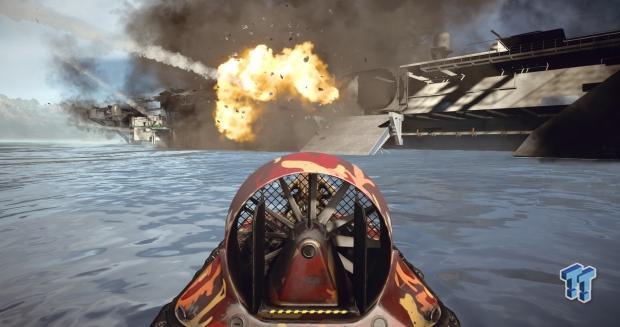
I arrived at the carrier just as one of the missiles slammed into the side. The explosion rocked my small hovercraft and debris began to fall all around. Unfortunately, these missile impacts are more for show than anything else. I managed to hop on some exposed beams in the explosion zone just as another missile hit and no damage was taken at all.
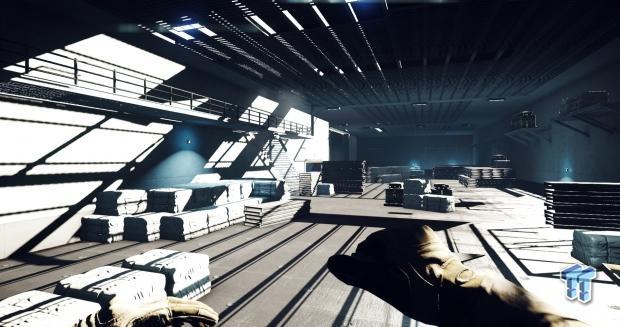
Once inside the carrier, we can see that it is pretty basic and open with a lot of cover to hide behind. Directly to my rear is one of the two M-COM stations that you must blow up to win the game. The rest of the ship is pretty plain as well, so I won't cover it any further.
Overall, Lost Islands is a very well designed map, and the few times I have played on it proved to be very fun yet remain challenging. Flanking your enemies is fairly easy, and sniping is good due to the elevated vantage points spread out across the map.
Wave Breaker
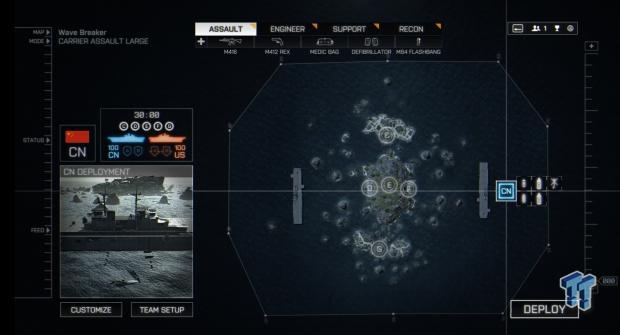
Next up is Wave Breaker, a smaller map that features some awesome outcroppings that force players to access them via boat or helicopter. Capture points C and G should be captured and held early on if you want to ensure that the opposing team's carrier takes the damage needed to cause enough damage for your team to gain access.
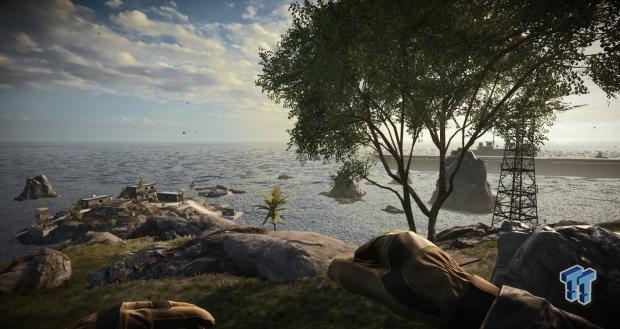
Wave Breaker is one of those maps that is just a pleasure to look at. The design teams at DICE paid special attention to this map based on how beautiful everything looks. The lighting and shadows on this map really make it pop, but the real treasure is on the land.

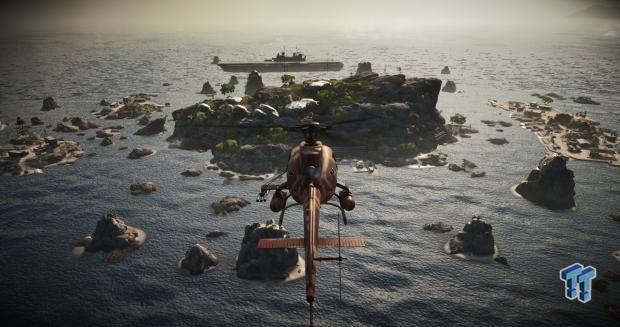
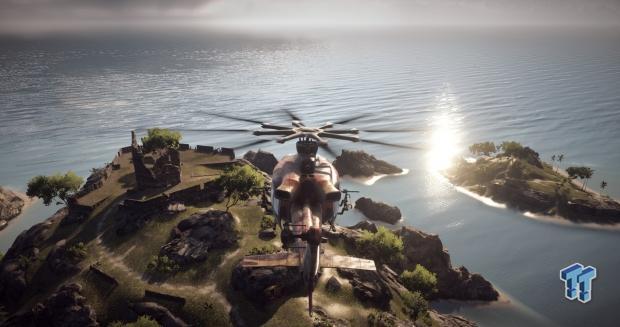
From this angle, we can see the entirety of the island and the four radio towers that adorn it. While the top of this island affords snipers many vantage points to overlook the outcroppings, the real action will take place deep under its surface.
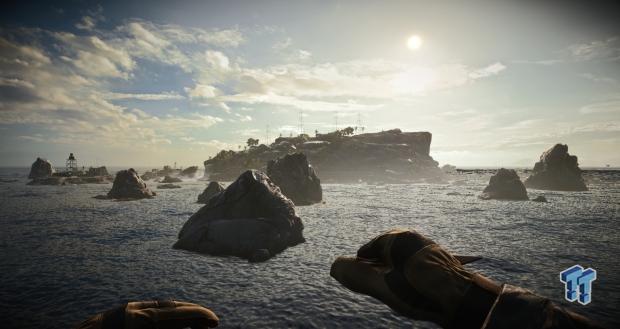
Here is a more artsy shot from the carrier's deck looking towards the island. The lighting on this map really gives the water a real feel to it.
A quick shot of me parachuting onto capture point C. Here you can see several buildings, a Tow launcher, and a missile launcher.
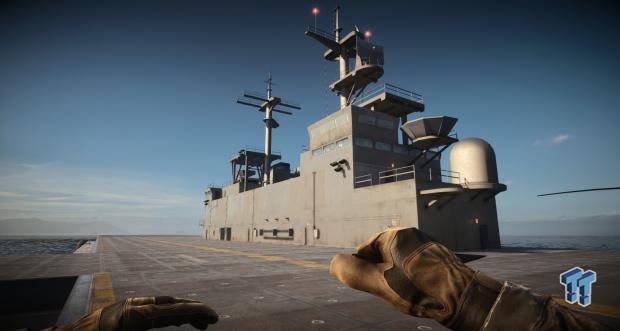
The one thing that really disappoints me is the fact that the carriers have not received any texture updates worth mentioning dating all the way back to Battlefield 2. DICE, if you are listening, please give us some detailed super carriers that are the sizes of small cities. A CQB battle inside a massive carrier would be awesome!
After my rant was over, I headed to the top of the island to check out the vantage points I may be able to use as a sniper's nest in the future. On the low-end, we have several nice spots that would afford a sniper cover while still being able to shoot his unsuspecting victims.
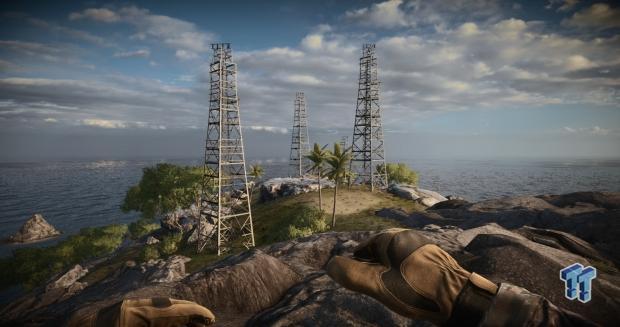
At the other end of the island and looking back, we can see the radio towers. Unfortunately, not much happens up here, so I doubt there will be any major battles taking place.
At the top most point of the big island, we have a very good vantage point over capture point G. Unfortunately, if you must snipe from up here, you are wide open to retaliatory attacks.
Looking back at the opposing team's carrier, the realistic water really shines here.
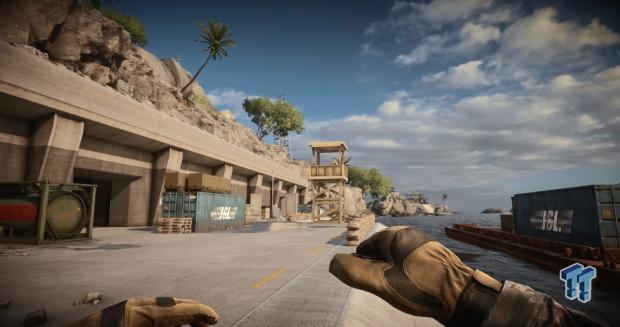
Here is one of the docks that serves as an entrance into the island's interior. There are several large explosive tanks around these docks that could prove to be the undoing of enemies taking cover near them.
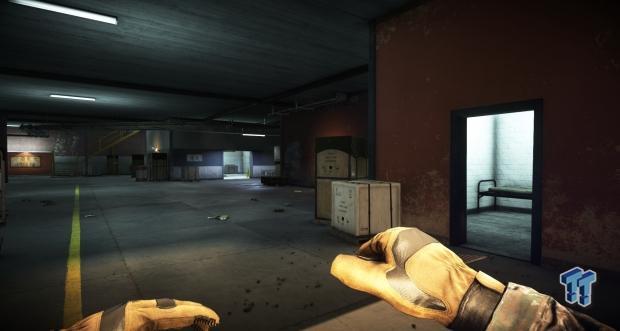
Heading inside, we see several small rooms and a large open area. The interior of the island is littered with these little rooms, but the biggest room is still to be seen.
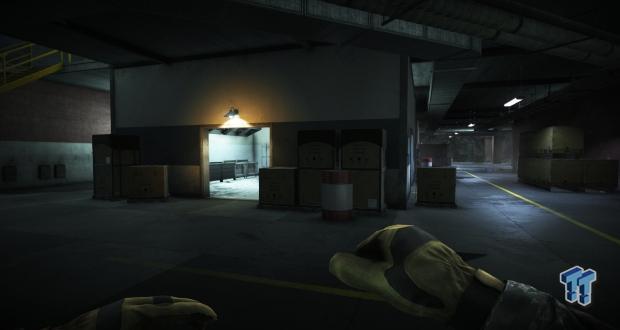
Another shot of the interior, this time looking down a hallway. Make note of the explosive barrels as they come in very handy when you need to flush out a camping enemy.

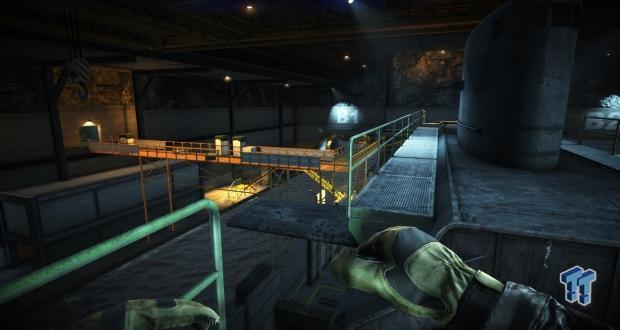
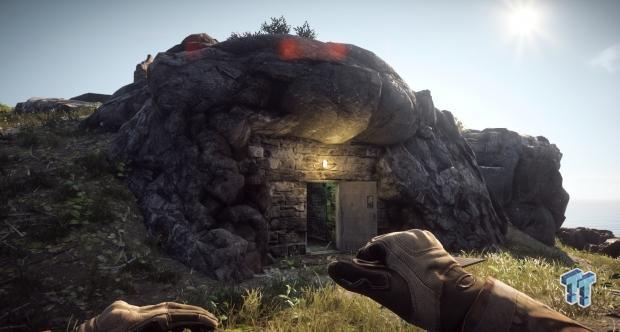
Finally! We have made our way into the island's hidden secret. Here you can see a submarine that is under construction. This is a Levolution item that can be triggered by blowing up each of the supports that are holding it up. The Sub will crash to the ground, killing anyone under it.
Standing on top of the sub gives the player a very good vantage point to exterminate enemies who may be entering from the side. If you are on top of the sub when its supports are blown, you will die.
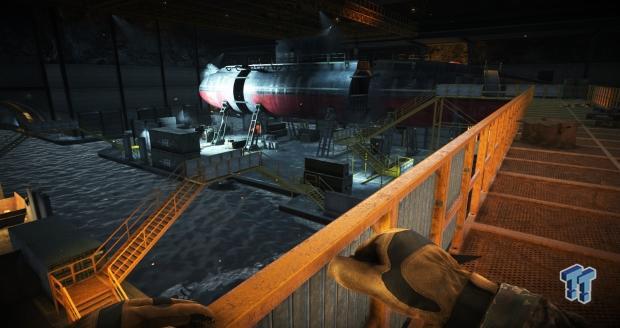
I'm back at my earlier vantage point, and you can see that I have blown up the explosive tanks at the front of the sub, destroying one of its supports. Several charges of C4 are needed to fully bring the sub down.
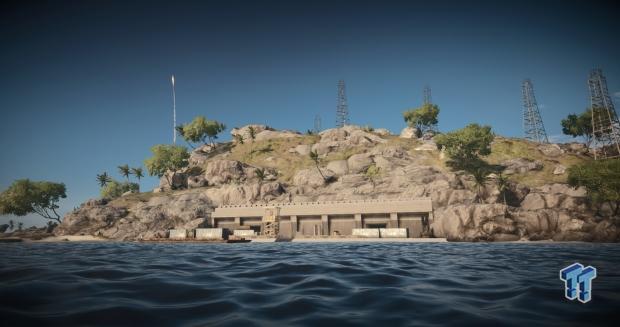
I have now left the interior of the island and am back outside. Here is a shot of the boat dock that we were just at. The cliff side above the dock could provide an excellent area to rocket water craft and choppers. This image brings my visit to Wave Breaker to a close.
All in all, I like Wave Breaker and thoroughly enjoy the gameplay that takes place inside the island. This is where an assault load-out really shines, and a player who is skilled at reviving and healing while fighting hard can really do well here.
Nansha Strike and Operation Mortar
Nansha Strike
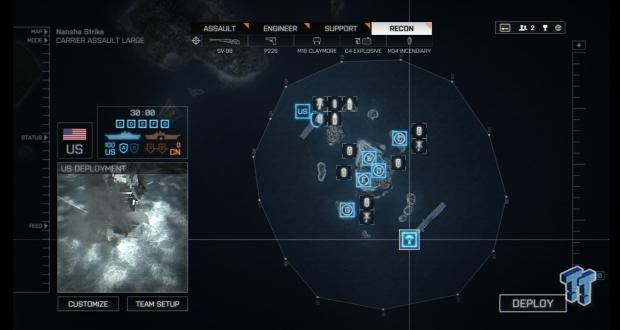
Nansha Strike is a map that was built for those who love vehicle warfare and, more specifically, Naval Warfare. If your team controls this entire map, they have 12 vehicles at their disposal, including three choppers and two attack boats. The map itself is fairly small, but that means that combat heats up fast!
Taking a look from above, the main island is not much longer than one of the aircraft carriers themselves. This is a map where the outcropping islands really come into play.
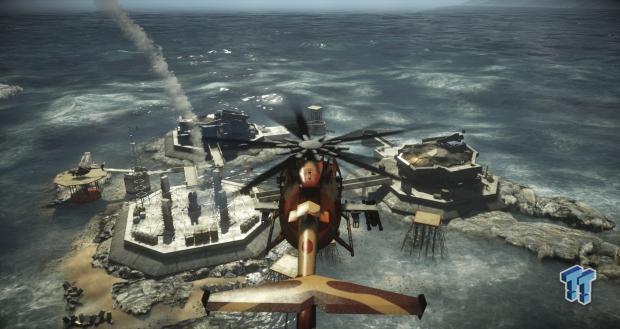
As you can see, this island has already been destroyed by Levolution, and I was unable to find another empty map that had not been destroyed by previous players. This island is one of the key locations to winning the game as it not only offers a missile launcher to destroy the opposing team's carrier, but it gives the team that captures it an additional helicopter as well.
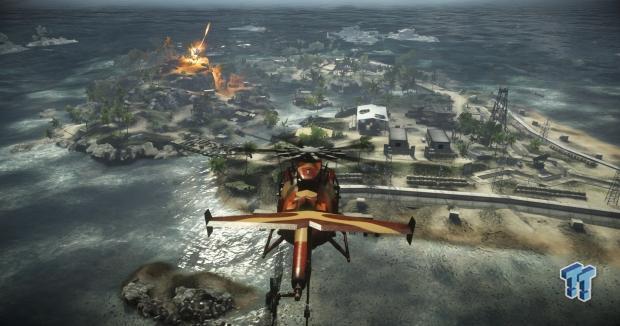
Here we can see the main body of the island with its high point that features one of the missile launchers. There are several structures, embankments, and other items that provide cover, so pay attention to your surroundings here, or you may just lose your dog tags to an enemy's knife.
Looking back to one of the boat docks, we can see that it is a capture point that is accessible from the water and is easily defended from an island a couple of hundred yards away.
Here is a view of the island's interior. You can see that a bridge spans a waterway, so be careful when crossing under as some M2 SLAMs or C4 may be waiting. You can also make out a helipad in the distance, which is sitting near a capture point.
Here I am nearing the top of the highest point on the island. A pill box is located at this hill's point, and it is an excellent place to fire rockets and sniper rounds from. For those attacking this point, the rocks provide excellent cover.
Standing at the tip of the point, you can see an awesome sniping vantage point, but again, all of the buildings were destroyed before I could get images of them standing tall.
Here I am back over on the first island outcropping I imaged earlier. You can see that there is a ton of cover to hide behind when defending or attacking this position, and you can see how easy it would be to steal the chopper from the opposing team.
Doing a 180, we can see one of those beautiful landscapes that Battlefield 4 is famous for providing. For anyone who likes post-apocalyptic scenery, Nansha Strike is the map for you. This ends my coverage of this map, and to be honest, I am ready to move on.
Nansha Strike is a map that I am still on the fence about. The smaller island gets really congested when playing on 64 player servers, but at the same time, that can be fun if things heat up with well-balanced teams.
Operation Mortar
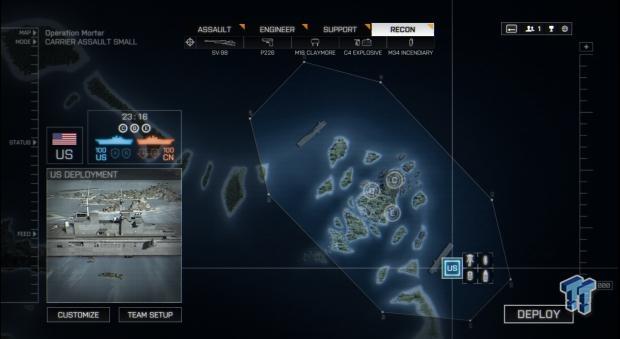
Operation Mortar appears to be everything I look for in what I consider to be a good Battlefield 4 Map. The level itself is quite large and provides both surface warfare as well as close quarters interior fighting. It is quite large, and its peak is one of the tallest points in Battlefield 4.
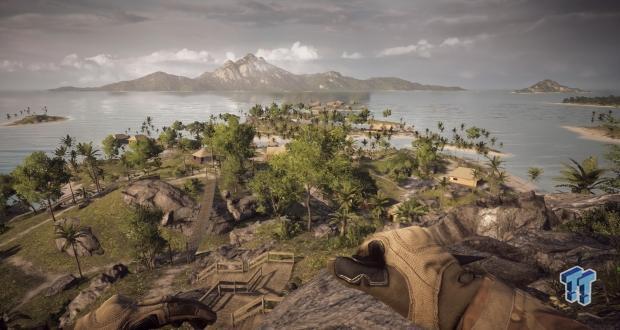
When you first take to the air, the sheer size of this map is breath taking, and you can forget trying to swim back if you happen to crash far away from land.
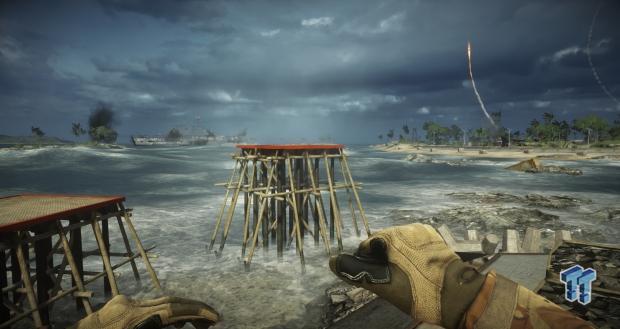
Way down at the South end of the map, we see a small grouping of huts that were once part of the resort that resided here. The bridge leading to these huts has long since washed away, but they are still accessible.
Looking back towards the main island, you get a sense of how large it actually is and how high the climb to the top is going to be. Lucky for me, I have a helicopter.
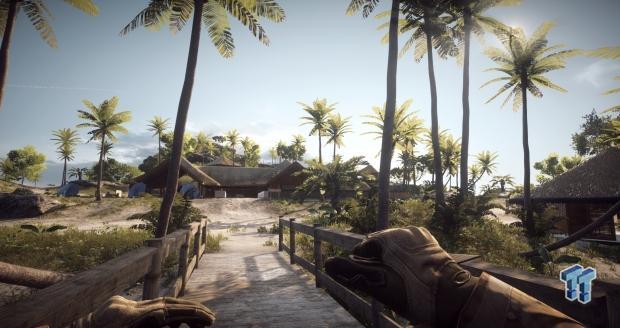
We're getting closer to the top and can now see the main resort lodge and more water-front huts.
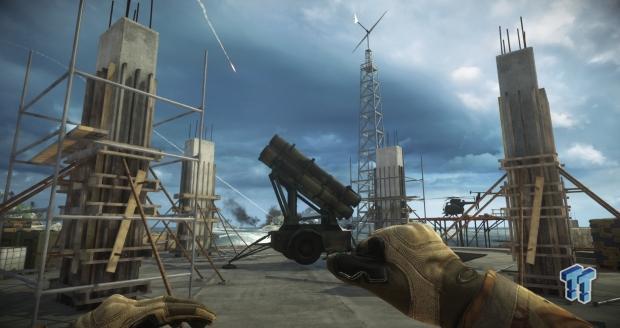
Finally! We have arrived at the top. Here you can see old ruins of what had to be an old monk's temple. At the very tip of this hill is a special weapon not seen in any other Battlefield game before, so let's go check it out!
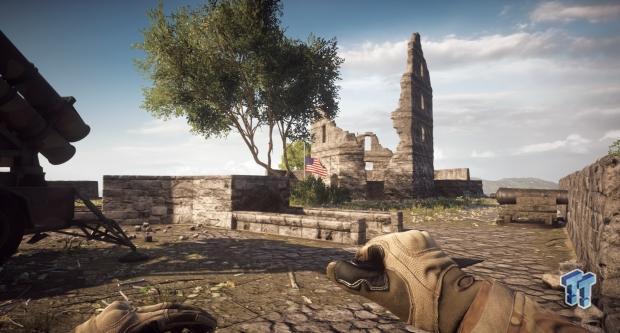
Before we get to the good stuff, here is a shot of the ruins. If it were not for the missile launcher and the American flag, I would have guessed I was on a mountaintop in Skyrim.
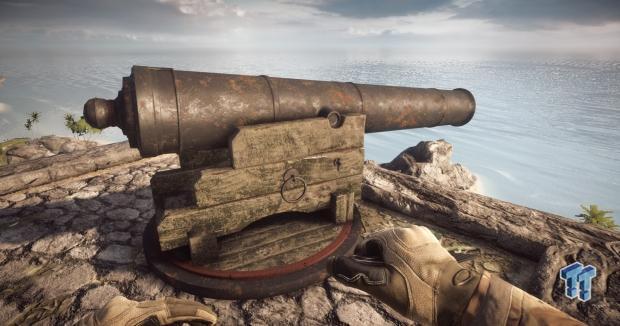
IT'S A CANNON! That's right, DICE has included a fully functional ancient cannon in this map. You can fire this cannon at the buildings below or use it to take out those pesky choppers that keep flying around and killing everyone. For those of you who watched the trailers, you see a player do just that.
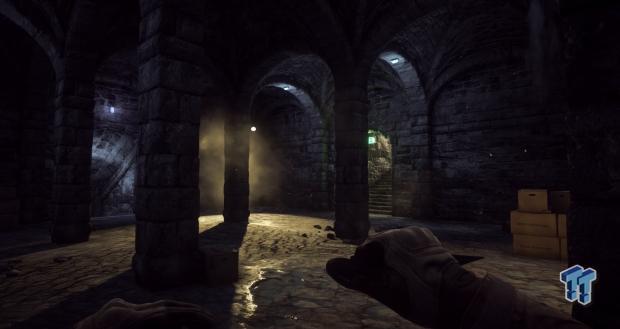
Now that we have visited the cannon (I know right! It's a cannon!), we can head down to the interior of the hill. This is another one of those "am I in Skyrim?" moments.
Now we find ourselves on the other side of the hill looking back towards the main resort area. This is one of those vantage points I love to find to post up with a sniper rifle.
This is an entrance that leads down into the depths of the hill and a very good place to set up a claymore.
Now I find myself on the opposite side of the hill overlooking the opposing team's carrier. There is not much to see here other than a missile impacting the carrier.

Moving back down the map, we can see one of the capture points is located near the open-air building. This is one of the key points to this map, and capturing it and defending it should be paramount to your gameplay strategy.
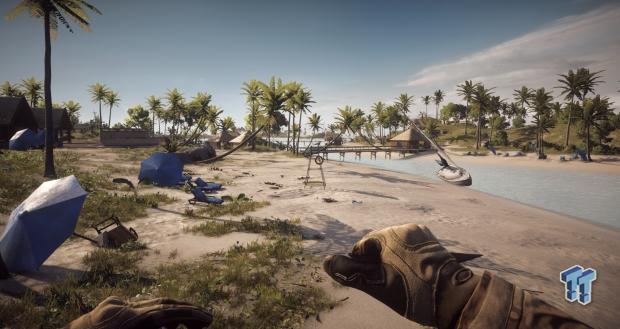
Here is another post-apocalyptic scene that I very much enjoy looking at. I can almost picture the resort guests lounging on the beach listening to the waves crash in!
This will be my parting image to this overview. I want you to sit back, close your eyes, and imagine the beauty that this island must have once held...Forget that, why are you still reading this article? Don't you know that reading anything at all equates to negative kills in Battlefield soldier? Get logged into Battlelog and join the fight this instant!
 Call of Duty: Black Ops 7 Early Access Multiplayer 4K & 1440p Benchmarks
 Borderlands 4 Tested: GeForce RTX 5070 Ti & RTX 5080 Performance With and Without DLSS
 Inside Our New Gaming Rigs for PC Gaming Deep Dives, Benchmarks, AI, and More
 Battlefield 6 Open Beta Map Performance Comparison - Not Every Map is Created Equal
 Battlefield 6 Early Beta: The Good, the Bad, and the Amazing
 Xbox console exclusives can include multiplayer games too
 Assassin's Creed Black Flag Resynced sells over 3 million copies, New Game+ is coming
 Modder plays GTA Vice City and GTA III on a TV inside GTA San Andreas
 Enthusiast puts 11 fans and an AiO on an RTX 3080, gains only 4 FPS
 Spotify removed 75 million AI-generated tracks in 2025 as it cracks down on royalty abuse
 YouTuber claims Sony is using social media bots to push back against backlash over its physical disc announcement
 Apple's first OLED iPad mini could launch as early as October
 Ryzen 7 7700X3D outperforms Ryzen 7 5800X3D with just one stick of DDR5, making AM4 a terrible option for your next build
 Giveaway: Win an ASRock B850 Riptide WiFi and Phantom Gaming PG-850G PSU
 China's CXMT is on track to nearly match Micron's DRAM production capacity by the end of 2026
 SteelSeries Arctis Nova 7 Wireless Gen 2 Headset Review - New and Improved, But Is It Enough?
 AMD Ryzen 7 7700X3D Review - Days of Future Past
 Samsung 990 2TB SSD Review - Ninth Gen QLC at PCIe Gen4 Speeds
 ASUS ExpertBook Ultra (Panther Lake) 14" Business Laptop Review
 ASUS ROG Raikiri II Xbox Wireless Controller Review - Ready to Take Control
 MOZA FMP18 Panel Bundle Review: authentic F/A-18 Hornet cockpit controls for flight sims
 Micron 6600 ION 245.76TB Enterprise SSD Review - Best in Class Programming Speeds
 MOZA MA3F EFCM Flight Control Module Review: authentic Airbus A320 autopilot panel for simulators
 Turtle Beach Stealth Pro II Wireless Gaming Headset Review - Premium Sound, Fantastic Features
 MOZA MGX1000 Instrument Panel Review: a realistic Garmin G1000 replica for immersive flight sims
 I install and update most of my apps with this Windows command now, and I stopped downloading sketchy installers
 Hisense U6SF 65-inch MiniLED TV: High Performance Meets Leisurely Convenience
 I stopped digging through Windows menus after I set up this one folder
 Don't sell your Windows laptop until you do these things
 6 PC cleaning mistakes to avoid for safer hardware maintenance
 Phison and Intel Take Aim at Local AI's Memory Wall with aiDAPTIV
 How to Remap Keyboard Keys in Windows using Microsoft PowerToys
 7 tips to organize your Windows files for faster, easier access
 Intel Arc G3 Extreme first impressions with MSI's Claw 8 EX AI+ - Incredible power for an extreme price
 How to fix Wi-Fi Adapter Not Working on Windows laptops: troubleshooting tips