
The Bottom Line
Introduction, Specifications, and Pricing
Corsair has been making cases for quite a long time now, even if they did set their roots in PC memory. But, Corsairs legacy has become far vaster than simply DRAM over the years.
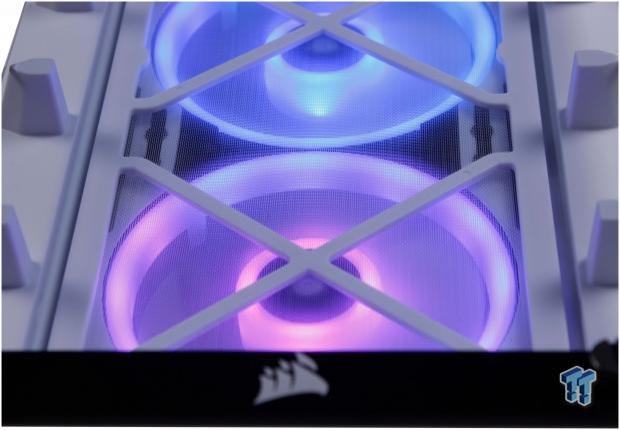
Today we have in the lab, the second of the new iCUE series of 'smart cases' as dubbed by Corsair. The term smart case has always been a bit ambiguous to me, as a smart case in the sense of the iCUE, means to include the Lighting Node CORE which controls only lighting for the six connected ports.
Now in comparison, NZXT has their HXXXi series of smart cases which has a CAM powered smart controller that integrates a fan controller and RGB control into a single package. The CAM unit also has a noise sensor, which means it can do a real-time assessment of chassis noise. It can also possibly tune fan curves for audibility along with monitoring CPU and internal temps to ensure the system stays cool.
The iCUE 465X is designed for users looking for a mid-tower chassis with tempered glass and RGB for a vast open aesthetic. Add to this the RGB control aspect via the integrated LL fans preinstalled. They are wired up to the Lighting Node CORE, and users have an out of the box case with RGB control via iCUE. This will sync to any other iCUE compatible devices such as cooler, peripherals, etc.
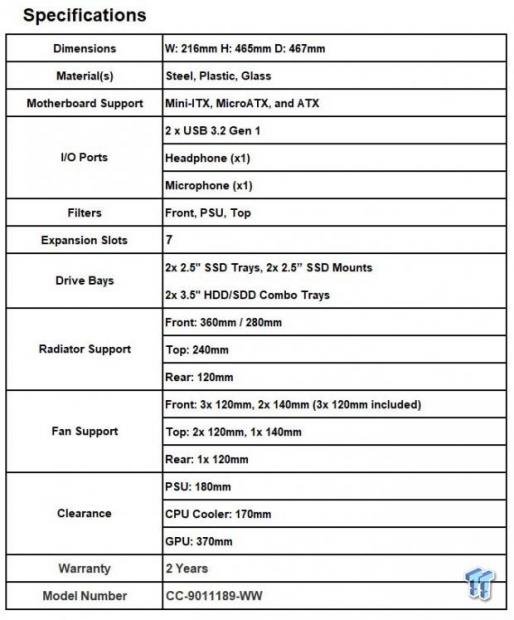
The iCUE 465X which it is essential to note is the replacement for the now outgoing Crystal 460X. It comes in at 465mm high, 467mm long with 216mm of depth. This means it fits into the mid-tower category as advertised. One thing worth noting is that much like the iCUE 220T we reviewed recently, the 465X seems to carry the same RGB memory compatibility issue. The issue is that the total clearance for memory with a top-mounted radiator, you cannot clear memory over standard height, so for Corsairs lineup, you would be looking at DIMMs in the Vengeance LPX range.
This is strange, as I mentioned before, as Corsair made a very defined RGB focus on the new iCUE cases, and they cannot use one of the cool parts that Corsair makes RGB memory. While this case is complete, I really hope corsair takes note as the tooling on the next chassis in this series can be widened just a little bit to give the necessary space to fit the memory or even slightly taller so the radiator will be above the board like we have seen on some other cases as well.
Motherboard fitment for the 465X is from ITX up to ATX. While the 465X may be able to house a slightly larger EATX board, it will likely cover the pass-through cable holes and may cover them entirely making it a much tighter fit. 3.5" HDD compatibility is up to two 3.5" tool-less trays. The 3.5" trays can also house 2.5" drives, and that brings us to the next point. The 2.5" drive compatibility is two 2.5" SSD trays while there are also two 2.5" mounts as well, totaling four. The dual 3.5" trays can also mount SSD's as an option so, if you are not using 3.5" mounting at all, there are six total 2.5" capable mounting locations.
PSU compatibility is listed as up to 180mm' which is not a bad thing as most standard PSUs are between 140-160mm while much higher-end units can eclipse that number. For the type of builds that will fit this chassis, this should be more than fine. The PSU shroud is integrated and not removable and covers the lower portion of the chassis in its entirety with only the front-most top area clearance out to fit larger radiator mounting. The top of the PSU shroud area, precisely above the exact PSU area also has some ventilation large mesh to allow air to pass between the main chamber and the POSU location; this may prove useful for those with cards closely mounted to the power supply shroud.
Cooling fitment on the 465X is rather stout with triple 120mm LL series fans included on the front panel. The front fits three 120mm or dual 140mm fans along with the same for radiators. The top roof can fit dual 120mm fans while a single 140mm will fit here as well. Radiator fitment in the top is limited to up to dual 120mm, but keep in mind the previously mentioned RAM clearance which means if you use a top-mounted AIO or radiator, it will inhibit your usage of taller memory DIMMs. Rear fan fitment is 120mm static and 140mm is not compatible here. CPU air cooler height is up to 170mm, which means many good air coolers should fit fine but the largest on the market will be tight or not fit.
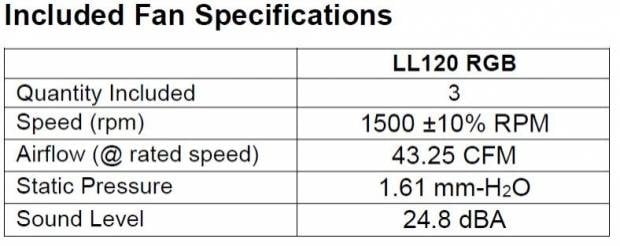
Here we have the specs to the included LL series fans. As you can see, they are spec'd as being relatively quiet at 24.8dBA, and with our testing, even under load, it was hard to make them out over GPU or any other component in a standard room environment. The fans are PWM (4-pin) so keep that in mind as these fans must be connected to your motherboard or fan controller and require a 4-pin connection to ramp properly. If your motherboard happens to have a limited quantity of PWM fan ports, you may need to include a separate 3rd party PWM capable fan hub or controller. This will ensure that all of your chassis fans can run quietly when not needed and provide the proper PWM fan ramping.
The 465X comes to market at a stated price from corsair of $149.99. As we have seen before, this is quite a crowded area with many solid case options available at this price point. There are options such as the Fractal Define R6, Meshify S2 and even the Masterbox MB530P which has a TG front and RGB fans similar-ish with the 465X.
Shannon's Chassis Test System Specifications
- Motherboard: MSI MPG Z390 Gaming Edge AC Z390 (buy from Amazon)
- CPU: Intel Core i7 8700K (buy from Amazon)
- Cooler: Corsair H100i Pro RGB (buy from Amazon)
- Memory: GeIL Super Luce RGB GLS416GB3600C16ADC
- Video Card: MSI GeForce RTX 2060 Gaming Z (buy from Amazon)
- Storage: SanDisk M.2 256GB
- Power Supply: SilverStone Strider Platinum 1000W (buy from Amazon)
- OS: Microsoft Windows 10 Home 64-bit (buy from Amazon)

Packaging
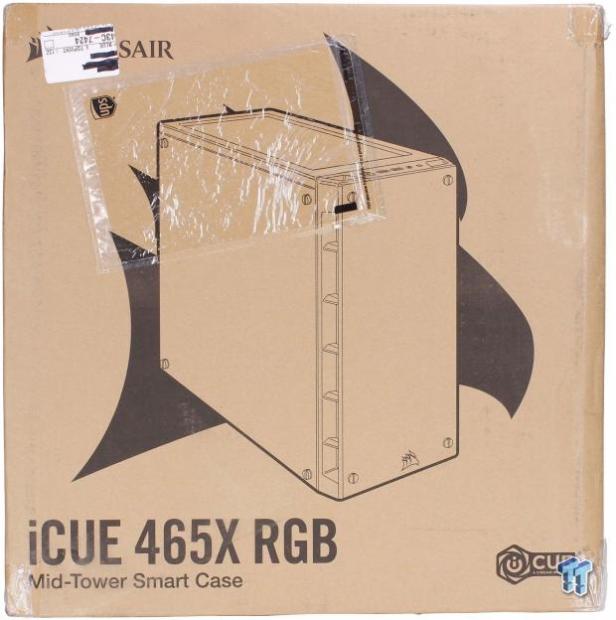
The main side of the packaging or what I will call the main largest side, it has an iCUE 465x ¾ shot black outline drawing sitting over a Corsair logo. The name of the chassis along with the iCUE logo to let you know its iCUE compatible in case you were not aware based on the title.
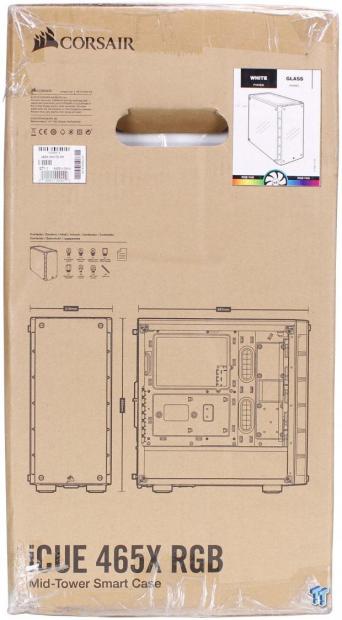
The first of the thinner sides of the box we see some mechanical drawings of the 465X along with a parts list of accessories and fasteners, which is something we usually see in the included manual. Also, the sticker applique shows that the case comes with RGB fans at the top right.
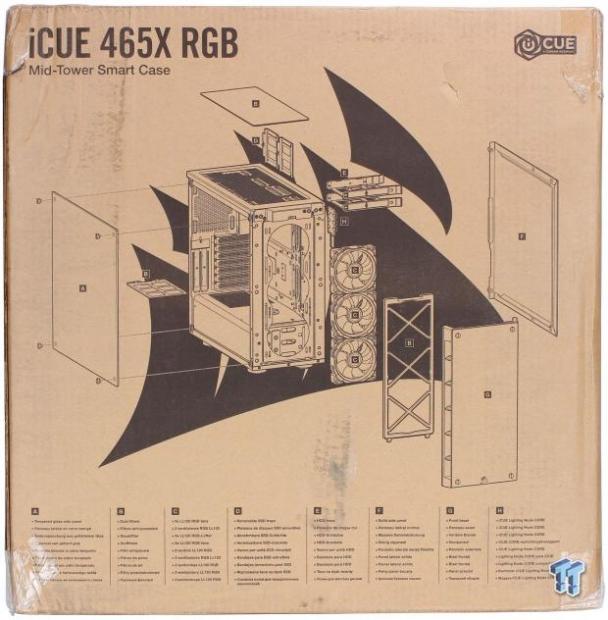
The other larger side of the box features an exploded view of the 465X still above the Corsair logo. The exploded view shows all of the components separated from the chassis as a visual guide of the included parts.
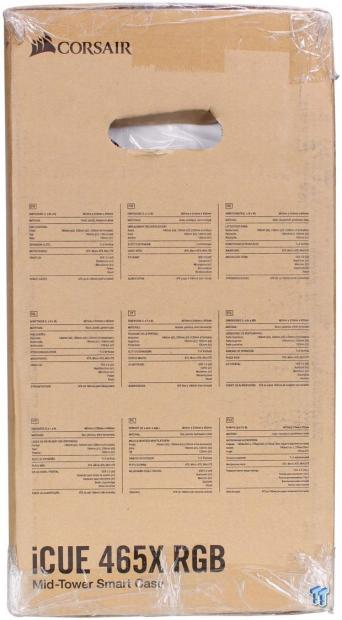
The final thinner side of the box we have a multi-language listing of critical specifications for the 465X chassis. There are nine total languages, including English.
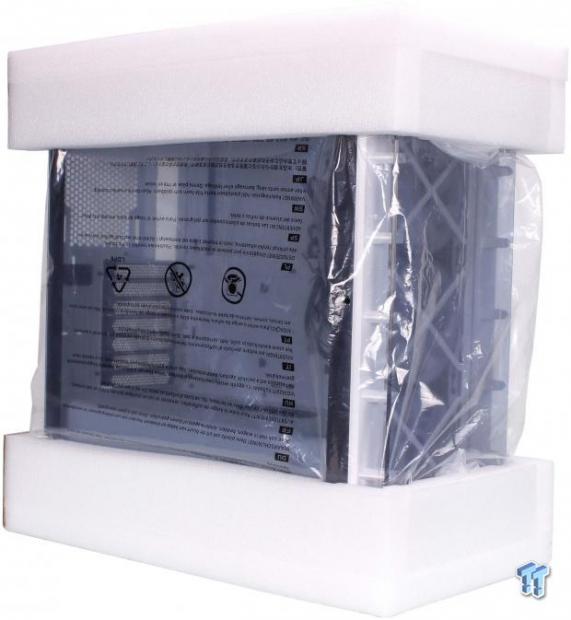
The 465X comes wrapped in a plastic bag and encapsulated in softer foam end caps. Inside the bag, the 465X also has plastic cling film on every glass panel to protect it from damage or abrasion while shipping.
Corsair iCUE 465X Mid-Tower Chassis
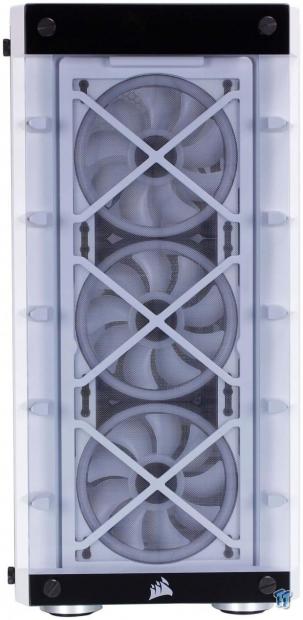
The front of the 465X carries a similar design aesthetic with its predecessor, the 460X. The front glass panel gives you a full view of the triple 120mm LL fans included in the chassis. This is an excellent start as it means aesthetic for the 465X should be awesome if you like the front lighted fans appearance that is. The front panel shares its design for airflow with newer chassis in the crystal series such as the 680X as it has aerodynamically shaped ribs running up both sides and it not only looks cool but may help with the direction of the incoming airflow.
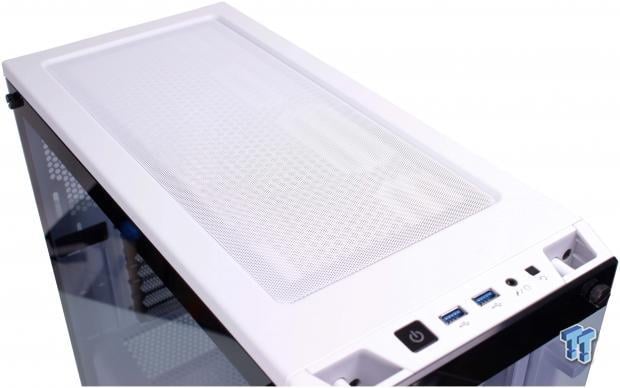
The top portion of the 465X has a magnetic dust filter covering the slotted mounting for top-mounted cooling. We also get a peek at the front I/O which we will check out next.
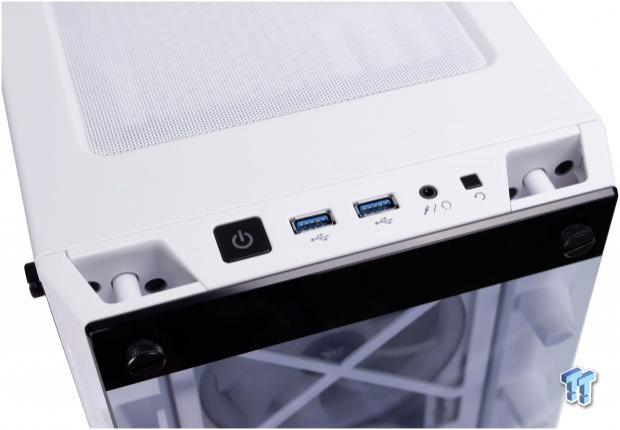
The front panel I/O is well placed at the front edge and thankfully is attached to the chassis. This means that the front panel can be removed and serviced while the I/O stays put and this is very welcome. The front panel I/O is laid out as follows. (Left to right)
- Power button with integrated power LED
- Dual USB 3.2 Gen 1 ports
- Headphone/Microphone combination 3.5mm jack
- Reset button
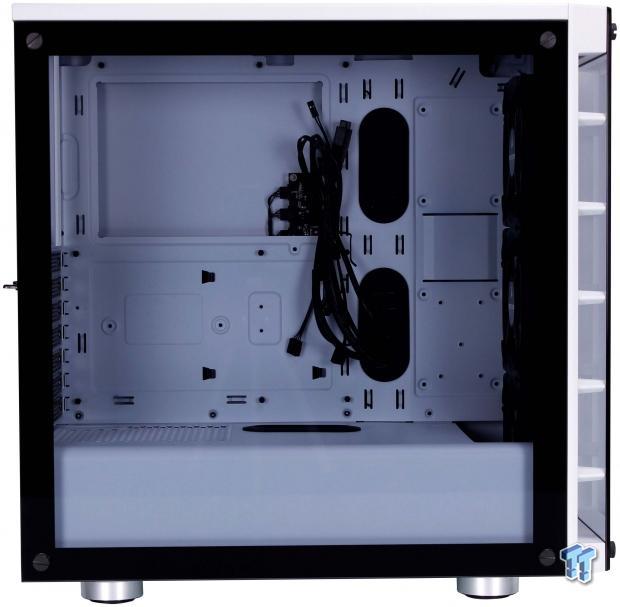
The central panel is, of course, tempered glass as well as you can see here. It is tinted but not super dark, so you can still see the interior. The white interior color also helps the internals pop as I'm sure a black internal chassis would make the window seem much darker. Up toward the front panel, you can now see the aerodynamically shaped ribs with five going up each side. As you can see, this is a massive inlet for airflow, so the front panel is not likely to suffer from troubles with ingestion.
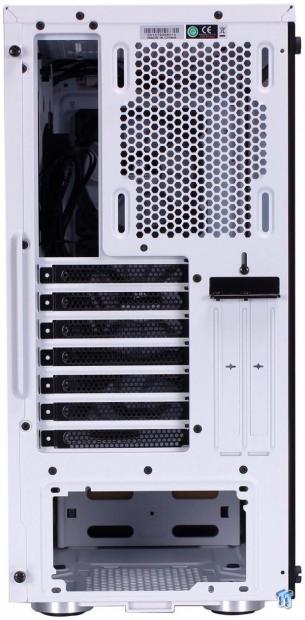
Here on the rear of the 465X, we have a pretty standard rear section. The only thing worth noting is that the distance between the very top of the chassis and the I/O shield cutout, it is pretty easy to see why the radiator when installing in the top of the 465X interferes with the memory and that is due to the top panel being so low.
There are vertical expansion slots for a vertically mounted GPU which you would need to purchase a riser for separately should you choose to mount your GPU in this way. Other than that the rear is pretty standard with a slotted 120mm mounting to allow rear fan height adjustment should you choose to install one. The expansion slot count in the traditional location is seven and the PSU mount is standard for ATX chassis.
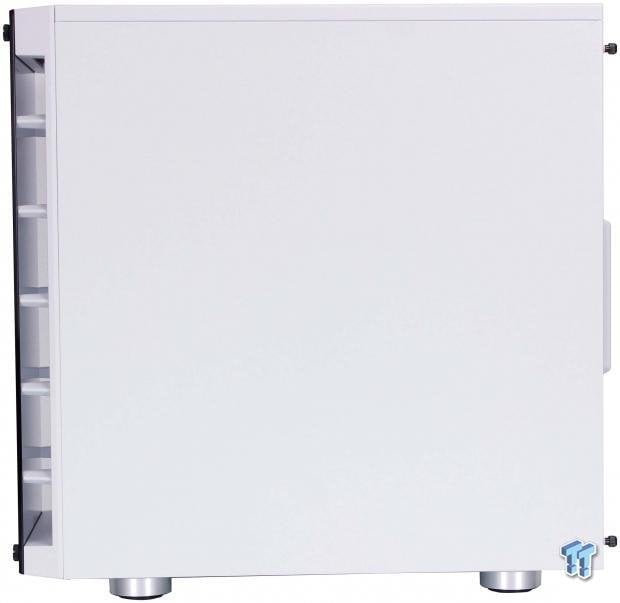
The panel covering the cable management side of the chassis is solid steel. It is, of course, white like the rest of the painted chassis and you can see the front air inlet and aerodynamically styled bits here again same as the main side.
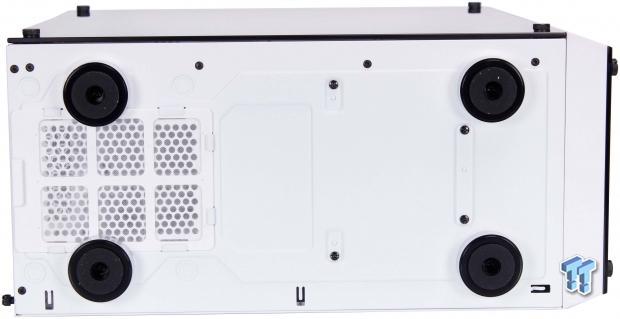
The bottom of the 465X has four round plastic chrome-colored feet. The feet have rubber pads on them to help the chassis avoid skidding on the surface where it is placed. The PSU area has a chassis color white dust filter which admittedly was a bit surprising. That kind of attention to detail is refreshing to see and welcomed for sure. There are also a few Phillip's head screws which fasten to the internal HDD cage mounting.
Inside the iCUE 465X
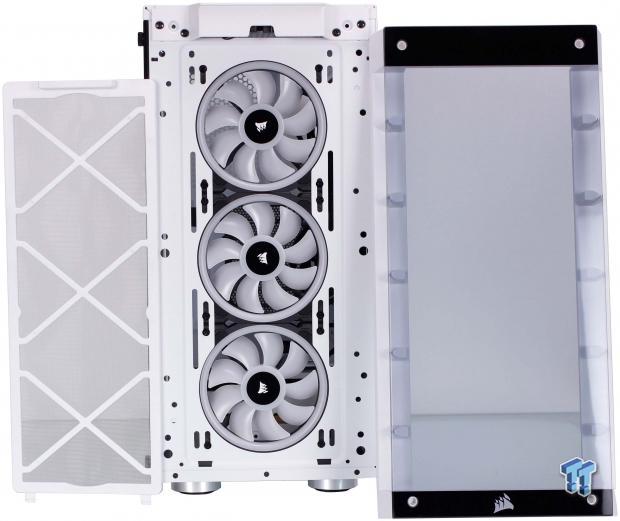
The front panel is affixed with the four thumb style screws that looked merely like aesthetic visual embellishments. In reality, they are long screws which hold the front glass and its plastic base to the front chassis. These screws come out easily, and then the front panel pulls away which I find helpful as it avoids the inherent fear that repeated removals may damage the clips which typically affix a front panel. Behind the front panel is the visible filter which is magnetically attached and tilts away from the top as it has tabs at the bottom. With the filter removed we now could unscrew the front fans should we opt to place them on a radiator or need to swap them or even remove for easier cleaning.

Looking in the main chassis space, we see the motherboard tray area, which now is not as dark due to the tinted panel being removed. We see the two large cable pass-through which have rubber grommets, along with surrounding cable pass trough's for top fan and EPS connectors. The motherboard tray area at the bottom of the PSU shroud also has pass-through cable locations for GPU cables and other front panel connectivity.
There is plenty of room for motherboard and GPU fitment, but obviously if going with a monster liquid cooling setup, this could become cramped but overall for most builds even with AIO CPU and GPU it should have plenty of room to serve your needs. Just keep in mind the limitation on RAM fitment if using a top-mounted radiator as you can see the top mounting standoffs for the motherboard are very close to the top panel.
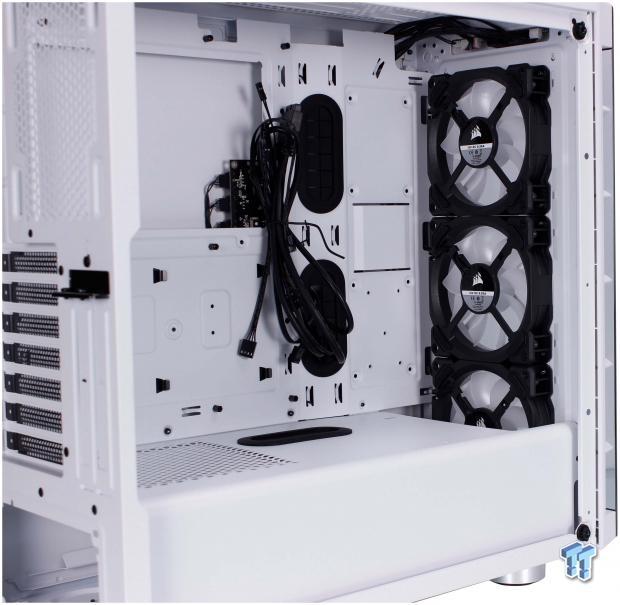
The front area is already populated to absolute capacity with triple LL 120 fans but can be swapped out to any fans you desire in 120mm or 140mm sizing. As stated previously, we can fit up to triple 120mm fans or radiators or double 140mm of the same. Directly adjacent to the fan mounting we see the semi-solid wall running perpendicular to the front panel and the mounting is consistent with SSD/2.5" drive mounting.
These would only have screws visible as the mounts are recessed toward the cable management area which means you would have to see the screws in the chassis compartment and the SSD would be visible only in the rear. Some may see this as a detriment, but for the cleanliness of cable management, I see it as a definite advantage.
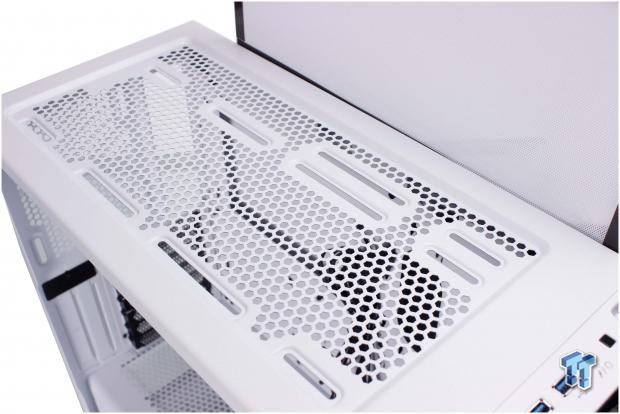
Here we have the top of the 465X with the white filter removed. I want to take a moment to recognize the attention to detail of having the filter white where some companies opt for filtration to be black much like I mentioned on the bottom of the chassis. The same carries here. The top filter, as you can see it is stuck to the chassis somewhat out of shot, is magnetic at the perimeter.
The top has slotted mounting holes for fans or radiators as needed for top mounting. Do keep in mind that with top-mounted radiators you will have fitment issues with many taller DIMMs since the motherboard location is both close to the top panel, and it is not as deep which means there is roughly 35mm from base of DIMM slot to 120mm mounting hole. Keep that in mind as you may opt for fans up top and radiator in the front to ensure you get your pretty RAM if that is important to you.
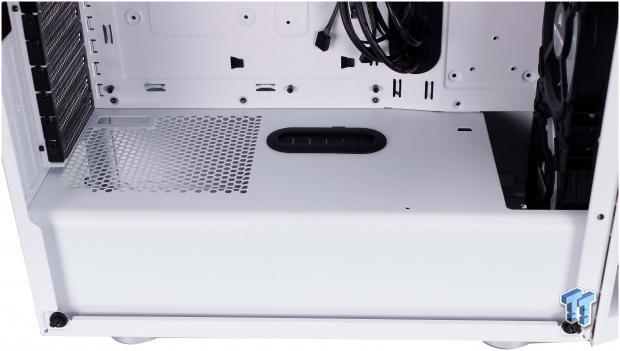
The PSU shroud is fixed in place and cannot be removed. The shroud has ventilation style mesh toward the rear where the PSU would reside, which allows some ventilation here. While I am not sure why they did this, I can assume it would stem from the potential use of a bottom-mounted card that would potentially allow some cooling airflow to be pulled from here. Or, Corsair has seen some users mount their PSU with the fan facing up, which means without proper ventilation, it would likely not have a stable fresh air supply. I would vote the latter in this case as any GPU possibly coming close to the PSU shroud would probably have fan locations where the shroud is solid therefore nullifying or at least partly nullifying the effect.
The shroud only opts for one close to board hole which lines up with where most boards have the HD audio connector. The rest of your front panel cables will likely come from the mid shroud holes with a grommet or the other grommeted hole near most boards SATA ports. I would like to see one or two more cutouts like the one at the far left across the board's edge to make managing the connections to the board even more comfortable to hide.
Inside the iCUE 465X Continued
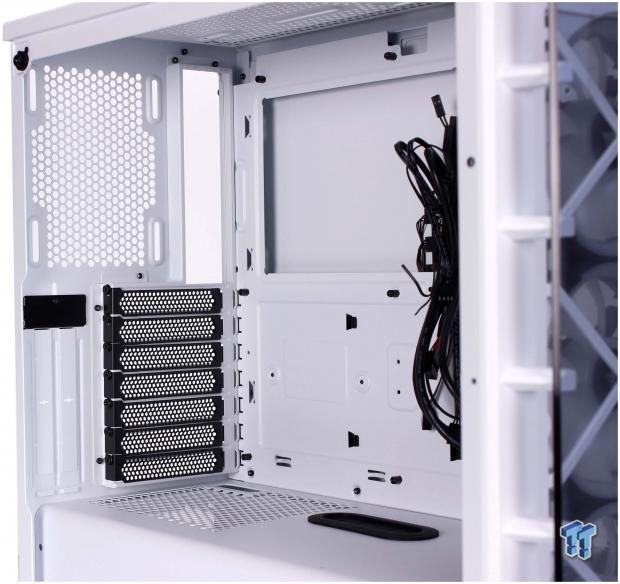
The rear has the slotted 120mm fan location as mentioned previously. The fan location is not populated by default, but the Lighting Node CORE has three additional places for LED headers, so if you get more LL fans, your entire build could be synchronized, at least form the fan standpoint. The rear Expansion slots total seven with black covers and their screws, along with two vertical mounting slots for showing off a GPU.
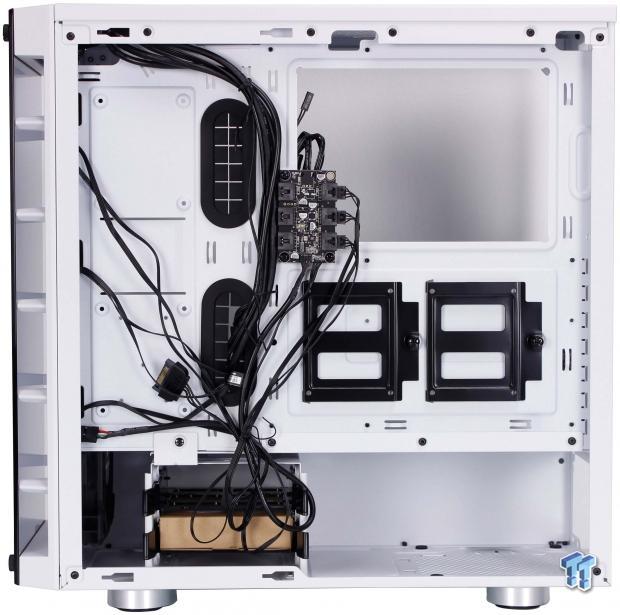
The cable management area is quite well laid out with plenty of tie-down points. I like that the tie-down points run both sides of the pass-through cable holes with grommets as it helps keep cables ted in place and out of the way when routing. There are four 2.5" drive locations, two solid mounts to the left and two trays on the motherboard location. Mid image, we can see the Lighting Node CORE. This admittedly adds a bit to the cable mess with cables going to fans, USB and SATA power.
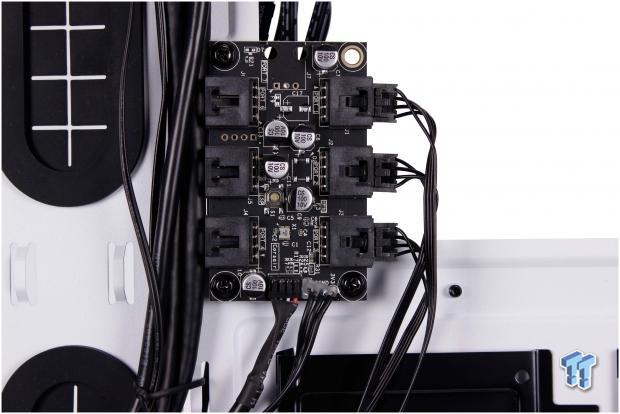
Here we take a closer look at what makes up the Lighting Node CORE. The unit is simply a Lighting node device without the plastic shell. As you can see, the three installed fans are routed to the controller while there are three ports which can be used for up to three more fans. One thing to note is as this controller is not the standard lighting node, it does not have a port for addressable LED strips.
The small button mid-board is something Corsair has done on some peripherals and other devices as well. When you hold the bottom, it will change the mode for the controller, making it a storage device which can be seen by windows explorer and you will find the firmware file. This can be beneficial if you need to manually flash your Lighting Node CORE as you can drop the firmware file in place for manual flashing.
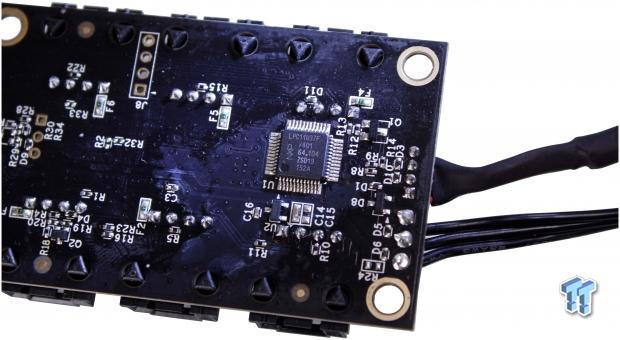
Here we have the back of the Lighting Node CORE, and it is mostly SMD resistors and capacitors. The one notable exception is the brain of the unit which is an NXP LPC11U37F 32-bit ARM Cortex microcontroller. This is similar to chipsets you find in most any RGB device such as peripherals and even GPU RGB LED Control. This is what communicates with the iCUE software to give you the lighting control.
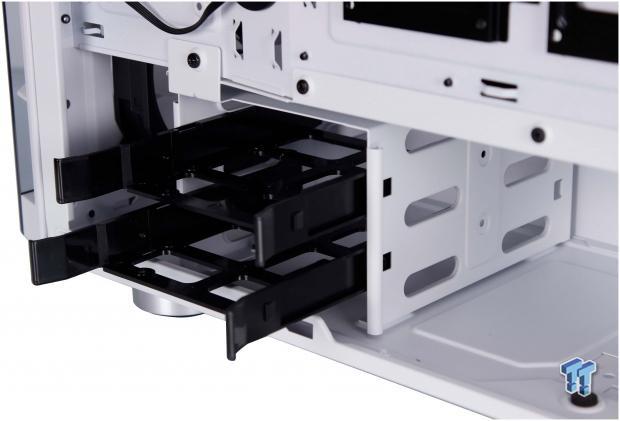
The HDD cage, as previously stated, has dual 3.5" trays which can also support SSD/2.5" drives. 3.5" mounting is tool-less, while the 2.5" mounting would require screws to mount the drives mid tray. The main cage and trays can all be removed for more room here should you not need them and this is nice in case you have a legacy, and large non-modular PSU adds you could now tuck cables away down here with a large area of the room to accomplish this.
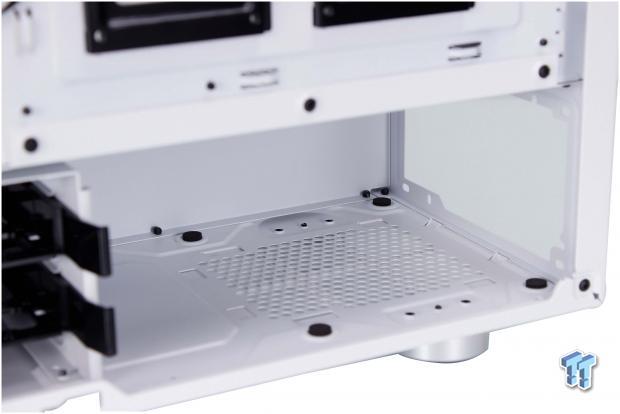
The PSU mount is located in the standard lower rear location. The PSU area has rubberized foam tabs which the PSU can rest on to allow vibration absorption and avoid potential metal to metal contact which can scratch your PSU. You can also see the filtered inlet at the bottom with its mesh-like opening. As mentioned previously, the HDD cage in front of the PSU mounting location can be removed for larger PSUs or even for just more room for routing and installation of cables, but from our experience, it was not necessary.
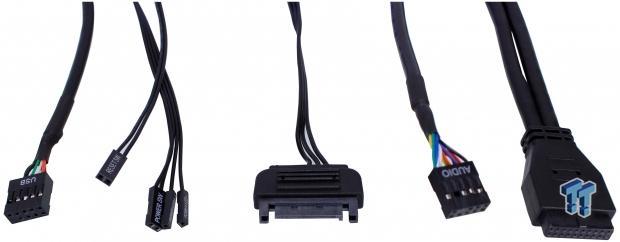
The front panel cables for the 465X are simple and do the job. From left to right, it includes the following.
- USB 2.0 10-pin connector (for Lighting Node CORE)
- Power/Reset and power LED connectors
- SATA Power lead (For Lighting Node CORE)
- HD audio connector
- 20-pin USB 3.2 Gen 1 connector (For front panel Type-A ports)
This is everything minus the triple fan headers which power the front fans and need to be connected to your motherboard or an add-in fan controller.
Hardware & Documentation
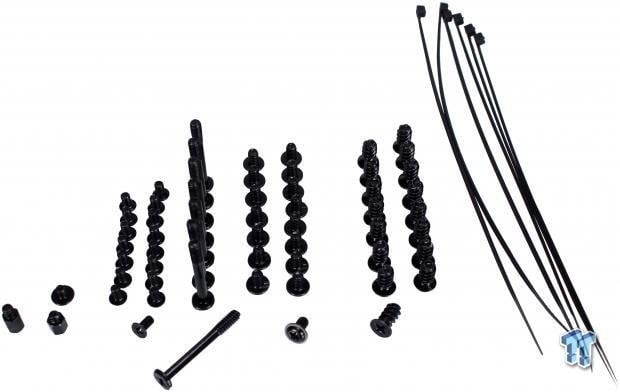
The accessory assortment is as follows. (From left to right)
- 1x Standoff
- 1x Lighting Node CORE Standoff and screw
- 16x motherboard and HDD screws
- 8x Long Fan Screws
- 16x ODD/SSD Screws
- 16x fan screws
- 6x zip ties
As you can see there is an extra Lighting Node CORE standoff and screw should you decide to move it to the alternate SSD mount lower location for easier cable management or simply mounting and design preference. For our testing and build, I left it in its original photographed area.
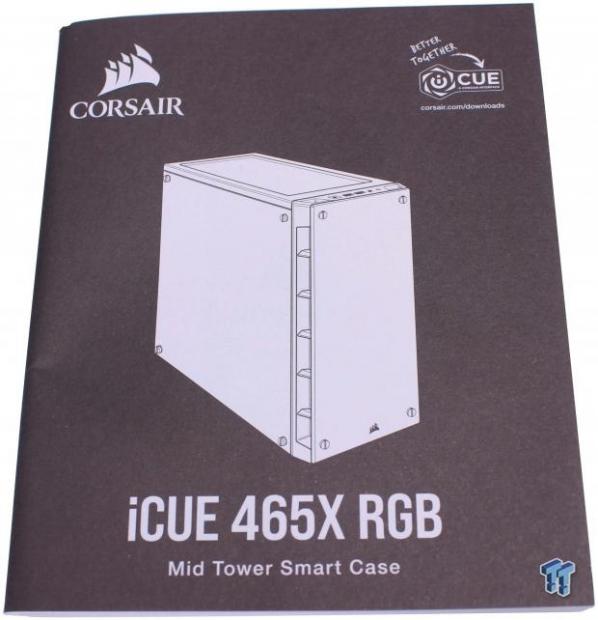
Corsair included a full book style manual for the 465X, and it contains several languages along with basic build instructions.
Case Build & Finished Product
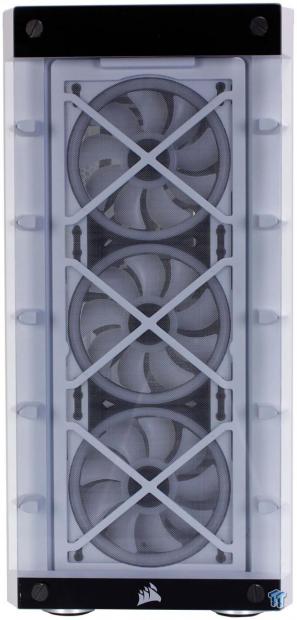
The front of the 465X when build looks the same as before, but if you peer closely you can make out that there are now, components fitted internally so not as much light gets through to see through the fans.
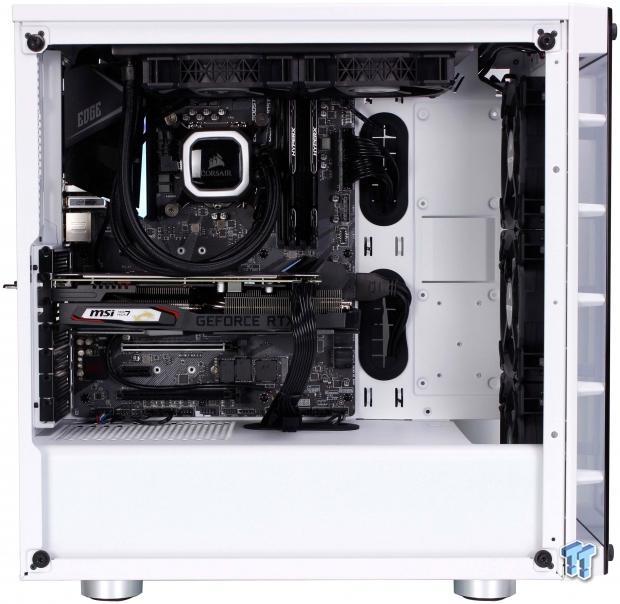
Here we have an inside look at the installed components. As I figured we have a decent amount of room forward of the GPU and motherboard. This could be used for many purposes, including liquid cooling components or other things depending on how crafty you feel in creating something custom modded.
As you can see with the AIO mounted in our standard testing location at the top we had to swap from our standard testing set of RGB memory to a more standardized profile set such as the Kingston HyperX Fury to clear the AIO. Other than that the only fitment issue we observed was with the motherboard so close to the top if you have an AIO there you may want to pre-run and connect the EPS 8-pin for the CPU. This is of course, unless you enjoy employing a special level of hand yoga to get it in place.
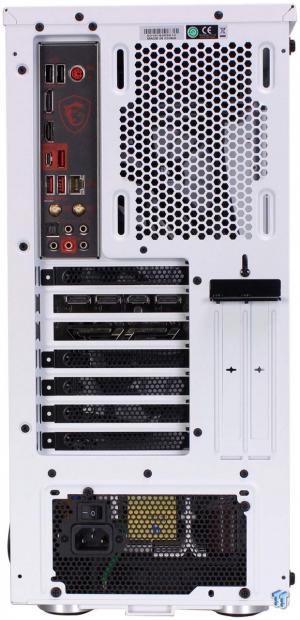
Here is the rear I/O. Same as it was before but with everything installed now. As you can see we have the motherboard I/O shield and board in place. The GPU is taking the topmost motherboard PCIe slot, and the PSU is installed below. We did not install a rear fan as we tend to test chassis with included fans and only install fans if the case comes ala carte with no fans such as In-Win is quite popular in doing.

The cable management area we were able to keep quite scant thanks to the modularity of our Power Supply. Also, the 140mm case length of our PSU means we have more room in front of it to tuck excess cabling to avoid it being messier behind the panel. One thing to note is we did remove the Lighting Node CORE and routed the cables under the PCB to give it a cleaner run along with the main chassis wiring bundle.
The inclusion of an RGB controller and several connected devices always makes for more mess, but with the included cable management loops these were managed quite easily. There is enough of a gap back here that I did not need to lay on the case to get the panel on since this is not a swinging door style attachment. Something the 465X does quite well is the cables if appropriately done can be easily routed as you see here still allowing full usage of the SSD trays and even HDD's if you put them in before fastening the 24-Pin main ATX connector in place.
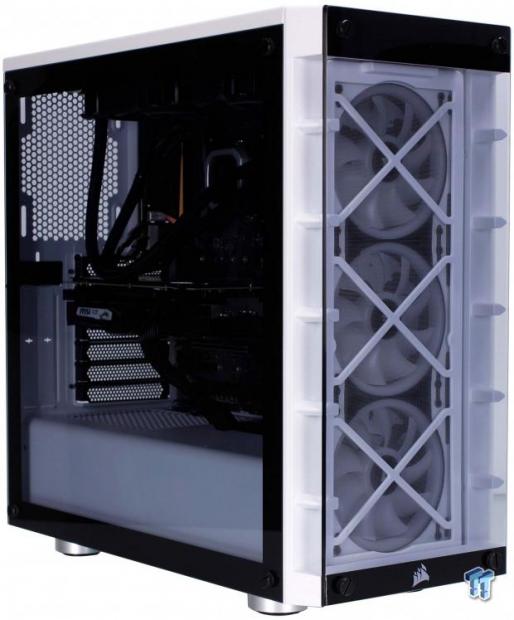
Here we have the system assembled and sealed up ready for the first fire. The opaque nature of the glass means that the internals while quite visible have a bit more darkness than we observed previously. This darkness is good as it can help hide some small wires that otherwise may stand out like a sore thumb in your showpiece build.

Here we have the 465X powered up, and you can now see the RGB LL fans in a full rainbow spectrum which is the default profile. This, of course, can be adjusted with the cases namesake iCUE software. The fans and the entire system is quiet, with no significant noise to cause complaint. Even when under load it was not easy to discern the chassis fans over any other installed component running.
Corsair iCUE 465X Software
The Corsair iCUE software experience
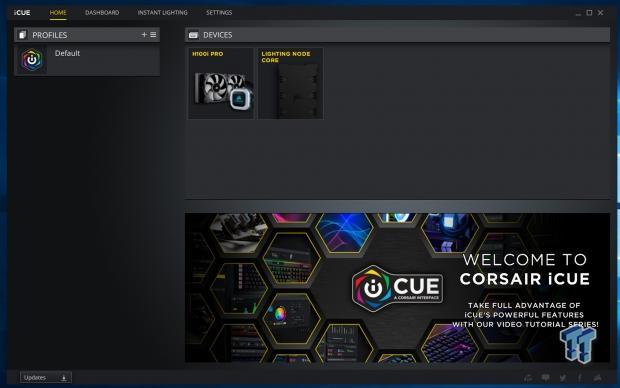
Here we see the main iCUE interface. The iCUE software allows syncing of corsair devices, fans, coolers, and peripherals. As you can see here, we have the H100i PRO and the Lighting Node CORE listed. These devices can be synced with lighting effects going across all installed Corsair devices.
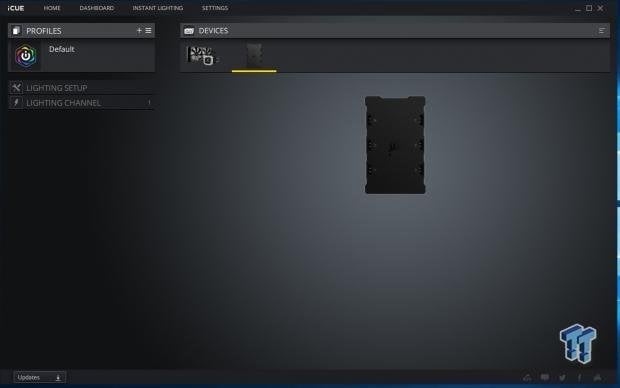
Here we see the graphical representation of the Lighting Node CORE. It shows a plastic external case, which means there will likely be units you can purchase retail that will not be just PCB with connections. Unlike the Lighting Node PRO which has dual LED ports, that then go out to an RGB LED hub from Corsair. The Lighting Node CORE, in essence, is a Lighting Node PRO with a single RGB port going to its own RGB LED HUB which is the six-port splitter that directly attaches to the fans.
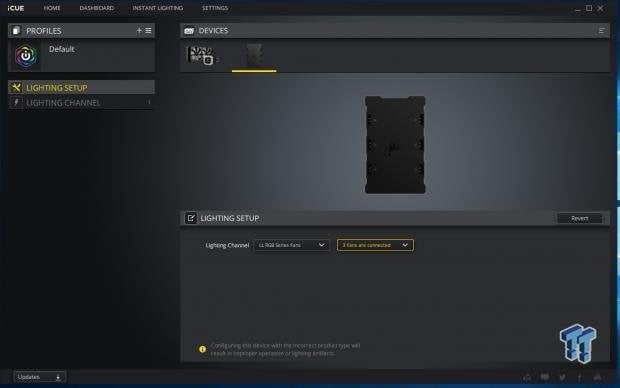
Initial setup has you specifying within iCUE the lighting channel which is single and selecting the type of fans you have installed along with the qty.
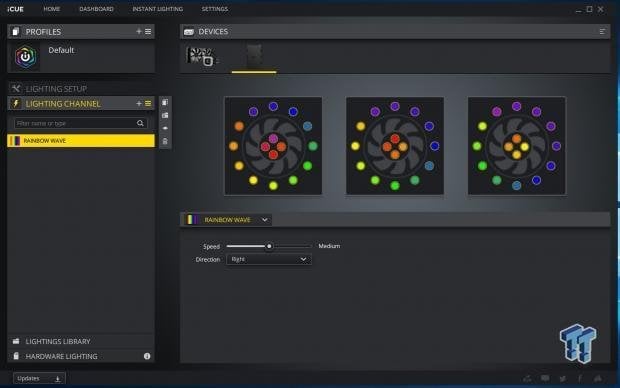
With the lighting configured for the installed fans, we now can set lighting modes. There is a multitude of lighting modes within iCUE with the ability to download profiles made by users of iCUE for even more possible effects patterns.
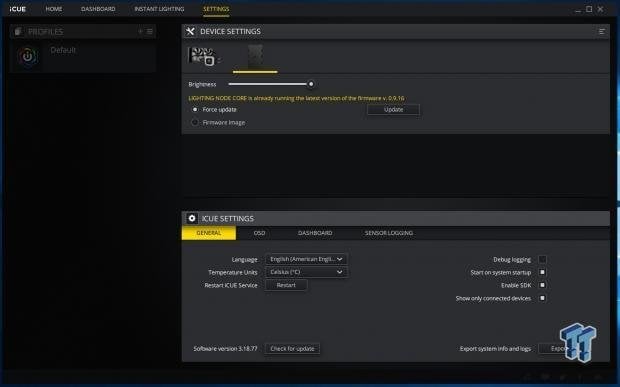
Lastly, we want to look at the device settings. Here we can see once again the H100i and the Lighting Node CORE. Here is where we can adjust display information along with flashing the firmware. We showed the button previously to do this manually, but in most cases directly through iCUE, it should work just fine. The manual way of flashing was for if you cannot flash from software for some reason.
I think this about wraps it up, let's take a look next at our final thoughts and how the iCUE 465X from Corsair performed.
Final Thoughts
When I first received the iCUE 465X, I was admittedly confused due to the name since iCUE is a software product for all devices, and it felt weird having a case with a series name of a software product. When digging deeper, I found what I assumed was the cause, which is the integrated iCUE device.
I am still not sold on the smart case' idea as it is cool, but there are so many RGB software ecosystems now that it's hard to have just a singular unit. Corsair does an excellent job of making most of the things you would need for a PC build especially with their recent foray into custom liquid cooling with Hydro X, which means you could have iCUE control almost every aspect of your build except for the motherboard and GPU.
The testing was what you would expect. The iCUE 465X kept thermals of the CPU at a T over ambient of 45.4C with an ambient of 24.33C Ambient and 41% RH. The GPU we saw a T over ambient of 37.2C. This is well within passing and did not show even coming close to CPU throttling territory on our 8700K.
Now here is where I explain what I liked about the iCUE 465X from Corsair. There is admittedly a lot to like about this case. Coming off the heels of the iCUE 220T which unfortunately did not fare too well in our build and testing, I feel like the base chassis of the 465X has a lot more going for it in regards to potential concessions which may be needed to build in.
The 465X comes with LL fans, which in itself are quite a value as they come in around $30 each in retail. A triple pack like we see here would normally retail for around $79.99 from Amazon. This includes the Lighting Node Pro which is basically the CORE unit we have included, but with a fancy plastic housing. So, let's estimate the rough BOM for the triple LL120 with a bare PCB Lighting Node CORE would be around $69.99. That's a sizable chunk of the 465X's MSRP.
The chassis comes with a lot of fitment capability, and lots of cooling can be installed for a full open loop, or even just a large front-mounted 360 rad to service your cooling while top-mounted fans fan help ventilation. This will omit the RGB RAM issue mentioned earlier. The ease of access to the front fans by attaching the panel via four long thumb screws is excellent as the panel pulls away easily with no clips to break.
Things to not like about the 465X is not a very long list. The main one I'm sure you already saw coming is the RAM fitment issue. Corsair is a company which I fondly remember when they came about strictly as a RAM manufacturer.
Over the years they have expanded to virtually everything, and the fact that they have a chassis which cannot have a top-mounted radiator (a feature they list as capable) without using their RGB RAM is weird and feels wrong. I hope that Corsair's chassis team takes this feedback and works to improve future models because there should always be a focus on what you make and ensuring it will work. Especially with a case directly built around the idea of RGB from the start.
Coming in at $149.99 MSRP, I feel like the 465X will make a happy home for many gamers and enthusiasts custom rigs. It will be a tough fight as anyone not stuck with the idea of front RGB fans can easily select a Fractal case with some excellent features as well, but the TG and RGB aesthetic of the iCUE 465X and the value of the included components make it a pretty sweet deal for a case that comes out of the box ready to spit unicorn rainbows into your eye holes.
All in all, Corsair made a very potent successor to the Crystal 460X with the iCUE 465X. I am very interested to see to what extremes people build in the 465X and how they work around the RGB RAM fitment issue to build insane full RGB rigs.
Shannon's Chassis Test System Specifications
- Motherboard: MSI MPG Z390 Gaming Edge AC Z390 (buy from Amazon)
- CPU: Intel Core i7 8700K (buy from Amazon)
- Cooler: Corsair H100i Pro RGB (buy from Amazon)
- Memory: GeIL Super Luce RGB GLS416GB3600C16ADC
- Video Card: MSI GeForce RTX 2060 Gaming Z (buy from Amazon)
- Storage: SanDisk M.2 256GB
- Power Supply: SilverStone Strider Platinum 1000W (buy from Amazon)
- OS: Microsoft Windows 10 Home 64-bit (buy from Amazon)

Performance |
92% |
Quality |
92% |
Features |
85% |
Value |
90% |
Overall |
90% |
Corsair pulled off a nice chassis in the iCUE 465X. It comes out of the box with showcase level RGB LL fans and a Lighting Node CORE to kick start your color synchronized build. With only the RAM fitment issue to keep in mind as you design your build.

Similar Content
Related Tags

