


Our Verdict
Introduction, Specifications, and Pricing
Its been just slightly over a year since the last time we took a look at a Lian Li chassis. I guess the question today will be, are they on the right track or is the new Lancool One Digital we are looking at today merely another mid-tower?
Some may be a bit confused as Lian Li has always been a name known to quantify quality and craftsmanship, making cases that are simple in styling but functional. Lian Li hit a bit of a rough patch for a few years where cases coming thru were less than stellar, and today we're going to see if they are knocking it out of the park.
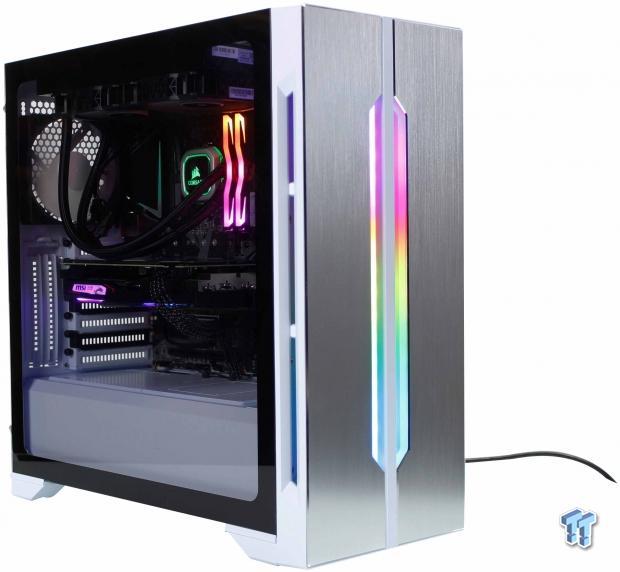
The Lancool One Digital is a compelling case when looking at the surface. It is an ambitious mid-tower with a splash of RGB, tempered glass, and a lot of features that should make for an excellent platform for your build. It can be seen as not just a gamer-centric case but even touching on the enthusiasts as well.
Some of the main features touted by Lian Li for the Lancool One Digital would be of course what makes it digital, the ARGB front panel illumination. Also, the seamless tempered glass main panel which secures from the rear. Type-C connectivity with full USB 3.2 Gen 2 speeds and features. Vertical GPU capability and of course, extensive cooling capabilities.
At first glance, I think the magnetic filtration around the case and lots of fan and radiator mounting points hold the most promise for me.
Best Deals: Lian Li Lancool One Digital (White) Brush Aluminum
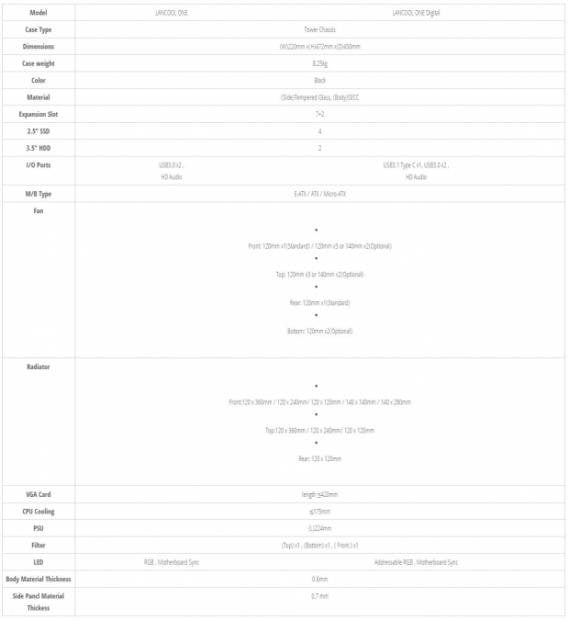
The chassis is the Lancool One Digital, which offers ARGB front panel LED's vs. the regular Lancool One which does not. The chassis comes in at 472mm height, 220mm width, and 450mm depth. This places it firmly into the mid-tower designation.
The supported motherboards are up to E-ATX and down to mATX, although since the mounting of the four main is the same ITX should fit as well even though it's not listed. PSU's well you can install any PSU you feel like as the fitment can run up to 224mm which I don't think I can remember I have seen a PSU at that length.
Our Latest Mid-Tower Cases Review Coverage
The largest I have seen is a custom Leadex supply by Superflower rated at 2000W made for XOC and it was just reaching 220mm. So, with that, it's safe to say your PSU or whichever one you plan on installing will fit the Lancool One. HDD support is via a cage with fitment for two 3.5" drives while 2.5" SSD fitment rounds up to four.n
Cooling is quite expansive with triple 120mm or dual 140mm fitting both front and top. The PSU cover is listed to support dual 120mm fans. The rear exhaust fan port also fits up to a 120mm fan. Radiator fitment is all 120mm based with up to 360mm front and top.
Rear supports a single 120mm radiator. Preinstalled fans are two 120mm with one being inlet on the front panel, while the other is in the rear exhaust position at 120mm as well. The preinstalled fans are 3-pin DC style and not PWM. Maximum CPU cooler height is listed as 175mm which means that pretty much any air cooler I have seen to date would fit the Lancool One Digital without issue.
The Lancool One Digital is listed at the time of review at Amazon for $96.38, which is a tough price point to fall into as there are so many compelling cases to compete with. Some of the front runners in my mind would be the NZXT H500i, the Masterbox Lite 5, the Masterbox NR600, and the In Win 101. I'm sure others are depending on what you see as crucial in a case. But either way, Lian Li will have to bring their A-game if they plan to leave with high honors.
Shannon's Chassis Test System Specifications
- Motherboard: MSI MPG Z390 Gaming Edge AC Z390 (buy from Amazon)
- CPU: Intel Core i7 8700K (buy from Amazon)
- Cooler: Corsair H100i Pro RGB (buy from Amazon)
- Memory: GeIL Super Luce RGB GLS416GB3600C16ADC
- Video Card: MSI GeForce RTX 2060 Gaming Z (buy from Amazon)
- Storage: Sandisk M.2 256GB
- Power Supply: Enermax Platimax DF 1050W (buy from Amazon)
- OS: Microsoft Windows 10 Home 64-bit (buy from Amazon)
Packaging
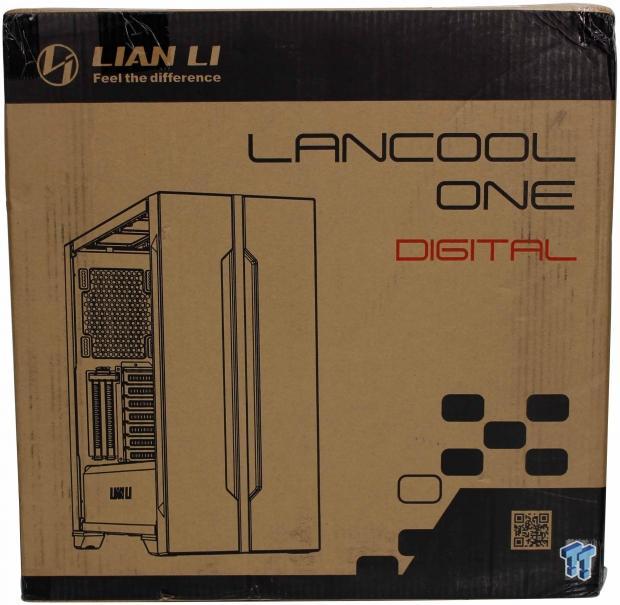
The Lancool One Digital comes in a standard black printed brown box. It comes with an image of the chassis, a QR code to get to the page where you can get the manual and some stylized designs to make the box less of just a box.
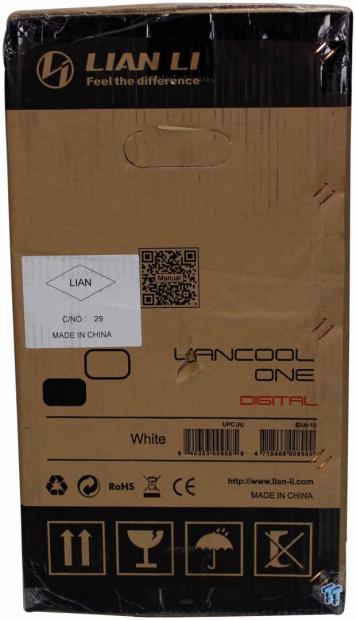
The first thinner side of the box shows the Lancool name again, a QR code leading to the manual and UPC and EAN codes.
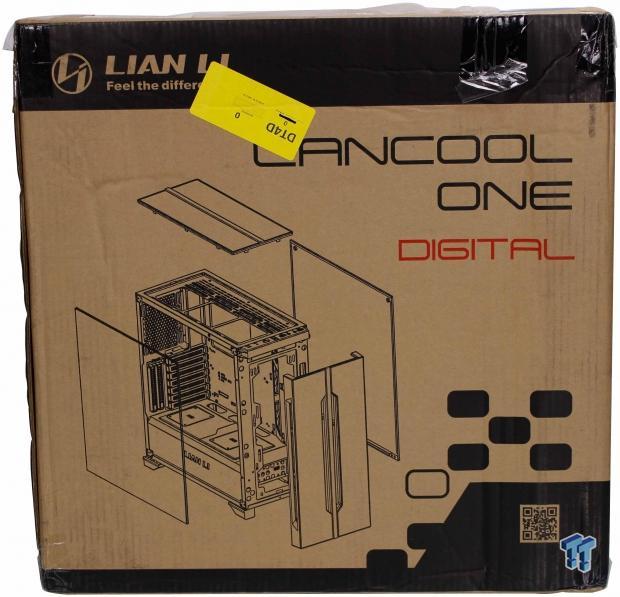
The other large side of the box looks almost the same as the opposing side at first glance. However, this time the case is an exploded view where it shows the two main panels, the top filter and front panel removed.
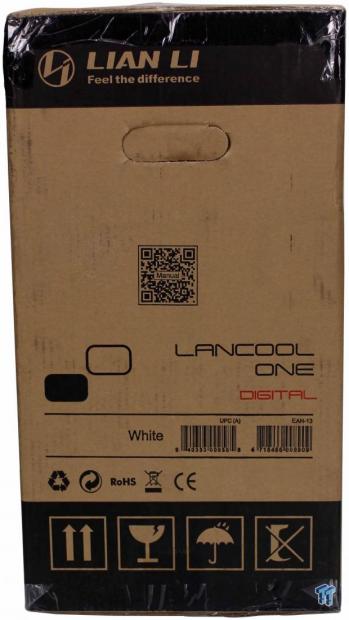
The final skinny side of the box shows the same as the opposing side, so nothing new here. I am a bit surprised that there was no printed spec list on the exterior of the box like we have seen in other cases.
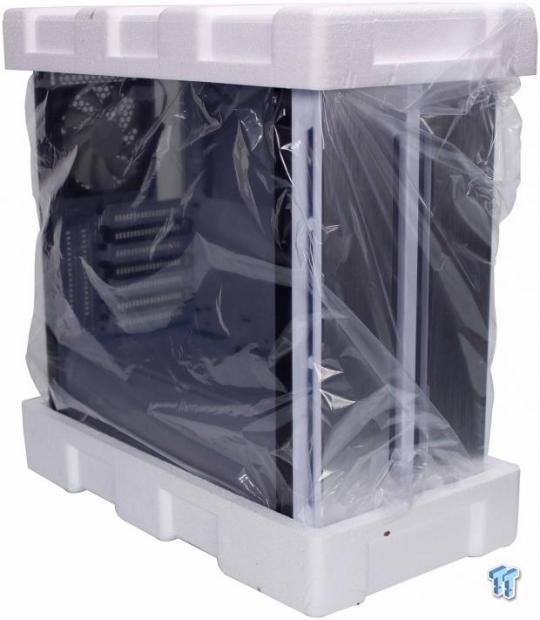
The Lancool One Digital, when removed from the box, is enveloped by the thick Styrofoam end caps and wrapped in a plastic bag below that. The main tempered glass panel has a plastic film to protect it from marring during transit.
Lian Li Lancool One Digital Mid-Tower Chassis
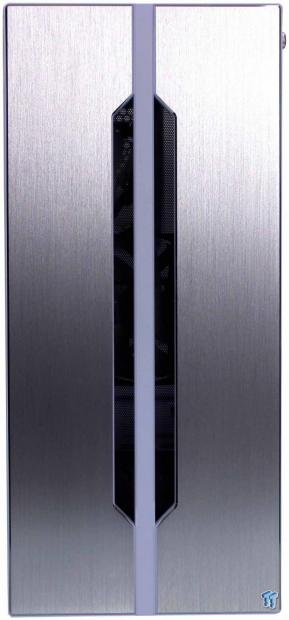
Straight out of the packaging, the Lancool one digital looks like a nice case. The diamond air gap opening in the front panel gives a cool look as the middle beam separated the two brushed aluminum panels on the opposing sides. If you look closely, you can make out the preinstalled fan behind the front filter through the diamond-shaped vent.

Looking at the top, the Lancool keeps the center separating bar aesthetic in play here as the top ventilation splits in the same way with a white center separation. The entire top grille and center bar is a single piece which is magnetically affixed to the chassis for easy removal and cleaning.
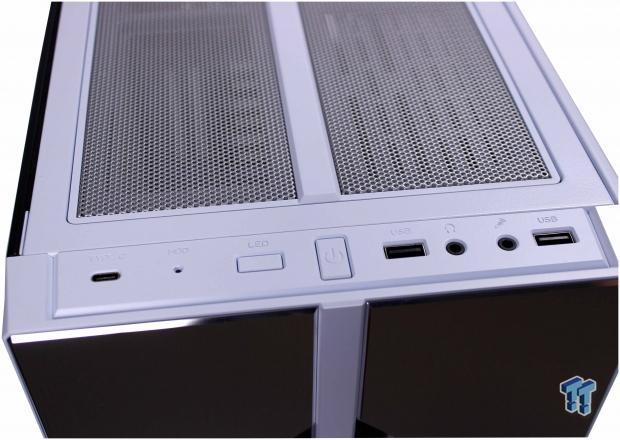
The front I/O as its name implies is on the front of the chassis. Even though it first appeared to be part of the front panel, in reality, it is a separate piece which is mounted to the chassis itself, and therefore the front panel can be removed separately, well at least somewhat. We will look at that soon. The front I/O is fitted with modern connectivity such as. USB Type-C with full USB 3.2 Gen 2 support, HDD LED, LED button to control front panel illumination, Power button, dual USB 3,2 Gen 1 Type-C ports, and Headphone and Microphone analog 3.5mm jacks.
The main panel of the Lancool One is solid tempered glass which is seamless due to its rear mounting configuration. It has captive screws in place which stay on the panel when removed. The surround edges of the panel are blacked out to ensure you do not see the frame and makes for a clean bezel or border look.
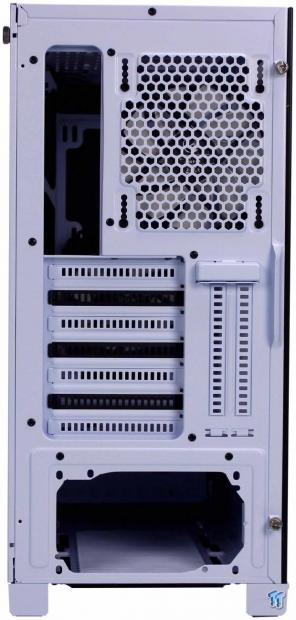
The rear of the Lancool One Digital is somewhat standard for a mid-tower. The motherboard I/O is directly adjacent to the preinstalled 120mm fan which the mounting has five levels of vertical placement. This is useful to adjust the fan as needed to either match your tower air cooler and direct airflow or even clear liquid cooling components.
The expansion slots number 7 which is standard, but there are vertical slots as well in case you want to vertically mount your GPU, however, you will have to buy the extension separately to achieve this. The PSU is fairly standard mounting, and you can see here the TG side panels screws which are captive to the panel.

The cable management side of the Lancool One Digital has a solid steel side panel which is fastened at the top by two large thumbscrew style fasteners. The panel with those screws removed tilts top first away from the chassis then can be removed.
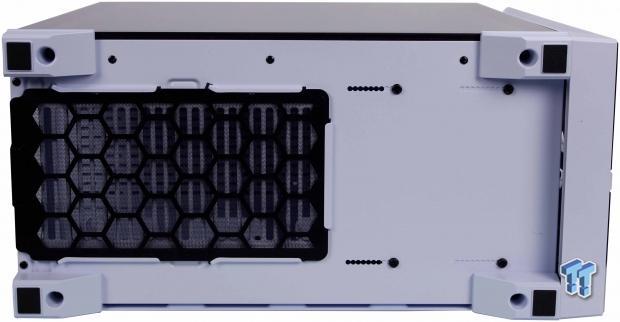
The bottom of the Lancool One Digital is mainly taken over by the extended removable dust filter for the PSU area. This dust filter slides out from the rear of the chassis for easy maintenance without having to tilt your case over to remove the filter. The forward most point has adjustable mounting points again, but this time it's for the HDD cage floor mount.
The total adjustment points are ten steps to allow you to tune your HDD cage placement precisely, or to remove it entirely should you not need it. The feet are on all four corners and are color matched plastic with rubber square pads to keep it from sliding across the surface it is placed on. Also, the front panel overhangs to match the feet height, which also serves as an excellent area to grab and remove the panel.
Inside the Lancool One Digital

The front panel popped off without too much force but was affixed well enough I would not be concerned with it coming off unintentionally. It is a plastic panel except for the aluminum parts attached on the front of it. There is a wire fixed to the ARGB front panel strip which means you cannot take the front panel too far from where you see in the image. The front fan filter is a mesh type with magnetic mounting. This, of course, means that it comes off easily for cleaning. While the front panel supports up to three 120mm fans, it comes out of the box with one mounted in the front as an intake.
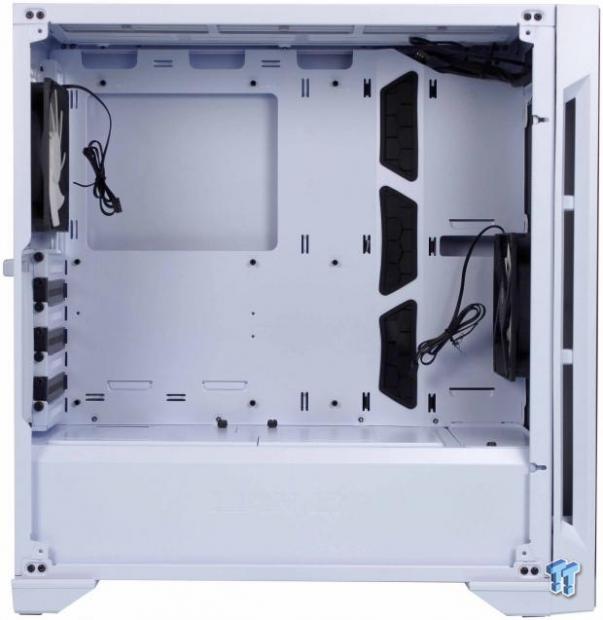
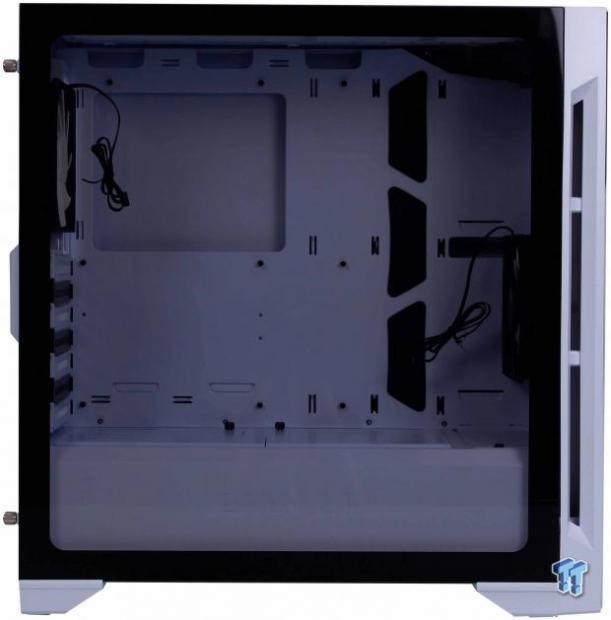
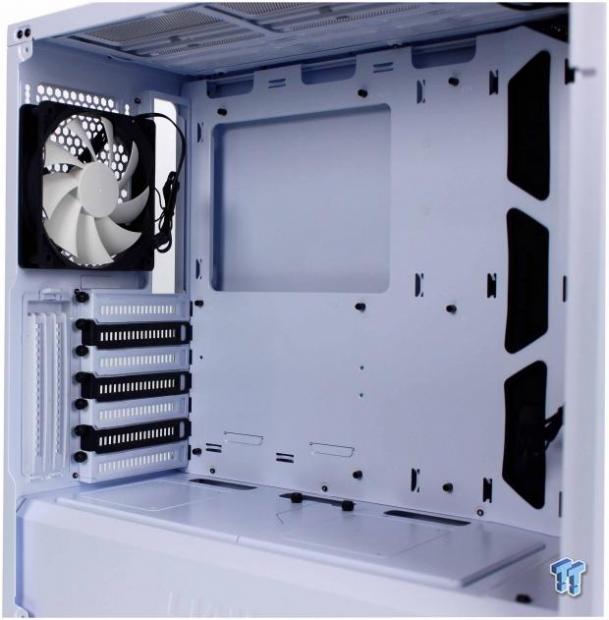
The Lancool One Digital is a blank palette inside with a vast expanse to mount hardware. The ATX motherboard mounting standoffs stop well short of the cable management grommets. I see no issues at all with fitting any modern equipment in this case. It could even make for one very awesome looking liquid cooled rig should you have the ambition and like the styling enough to do so.
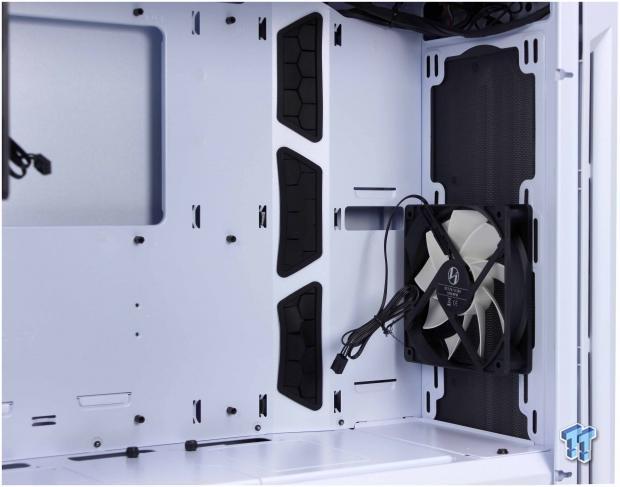
The front as previously mentioned can fit up to three 120mm fans, of course, there is a section of the PSU shroud which will need to be removed to do so, but that's pretty standard. The pre-installed fan is in view here, and it is middle mounted on the front panel. There is not HDD mounting in sight, which is good as it makes for a clean open space. However, I also do not see any reservoir or pump mounting, which means for custom liquid cooling, you will likely be drilling some holes depending on where you want to mount components.

To see the top of the Lancool One, we had to remove the top mesh panel we showed previously in place. IT lifts away but is heavily affixed thanks to strong magnets, so, you do not need to worry about it coming off accidentally unless you drop your entire system or something equally jarring. The fitment here is up to triple 120mm as mentioned previously or dual 140mm fans.
I do like the amount which Lian Li spaced the mounting from the board, which means that 120mm based radiators should clear all but the most extremely tall memory DIMMs or motherboard heat sinks. The mounting is slotted, which is nice as it means we can fine tune fan or radiator placement to look and perform pretty much; however, we see best.
Motherboard fitment should not be an issue, as I mentioned previously. It comes with ATX standoffs preinstalled, so the only time you may need to add standoffs would be for an mATX board. The CPU cooler access hole is massive. There is three cable pass through holes at the boards leading edge which is also fitted with grommets to help hide cable clutter. There are also three top-mounted holes to pass through cables which can help when running AIO or 8-pin EPS cables.
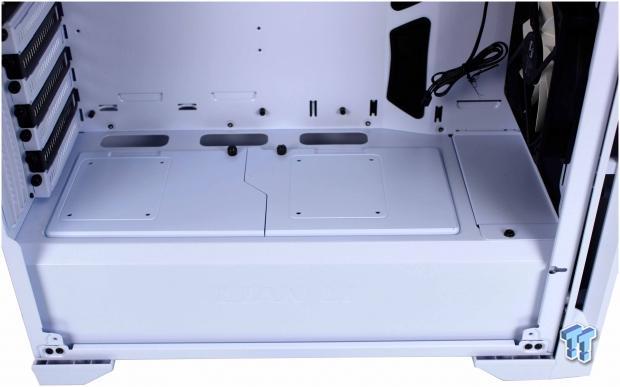
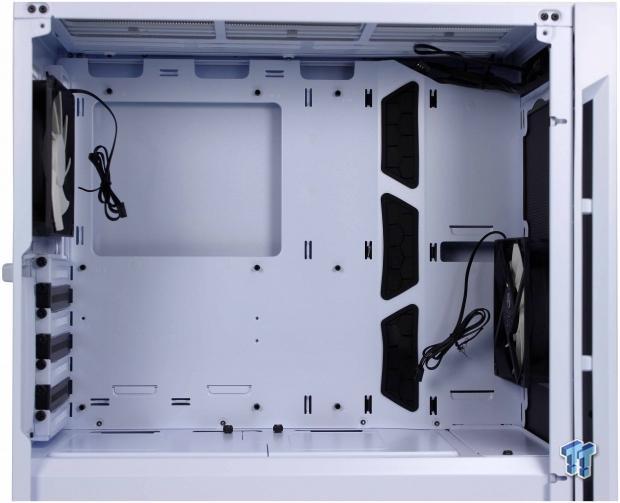
The PSU shroud is solid front to back, which means it hides everything below. The front portion has a removable plate to give extra room for radiator fitment on the front panel zone. The top of the PSU shroud offers three elongated cable pass-through holes which can be used for lower I/O connection along with GPU cable pass-through. There are also dual plates which reach can mount a 2.5" SSD, or they can be removed for airflow.
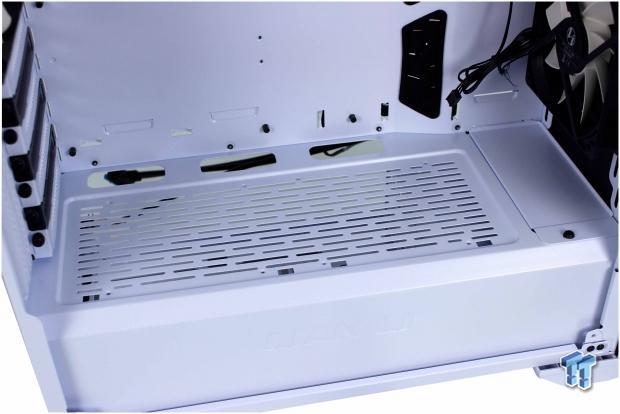
Now we removed the dual SSD mount plates, and as previously mentioned you can now see the sizeable slotted ventilation opening. This will allow up to two 120mm fans to be installed which can push air towards installed GPUs.
Inside the Lancool One Digital Continued
The rear section includes a preinstalled 120mm fan, once again 3-pin DC, not PWM. Only 120mm mounting is available here and has the notched multi-position mounting discussed earlier. Slot covers are attached internally, so, no flip out brackets or mechanisms to affix the slot covers or installed devices. Lian Li opted for contrasting slot covers of black and white which somewhat matches the aesthetic of the black framed white blade fans. Here we can also see that the vertical mounting is covered by a plastic piece clipped in and can be removed easily.
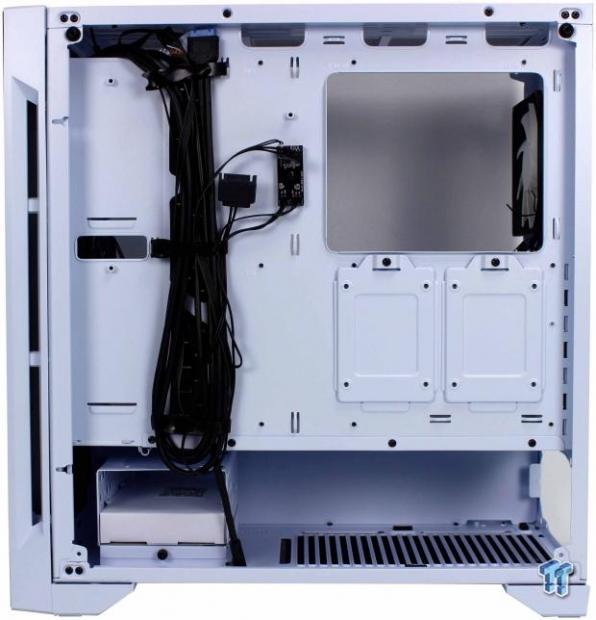
The rear cable management area is clean and well organized at first glance. There are two SSD trays on the rear of the motherboard tray which can be relocated to the two vertical mounting points toward the front panel should that be a better solution for the final build.
The HDD cage can be seen at the bottom, and we will get to that one soon. The Lancool One includes three Velcro tie straps down the main cabling channel which we see holding the standard case wiring at the time of inspection. There is nine more tie down points around the motherboard tray perimeter which should be enough or more than enough to make for a tidy final assembly.
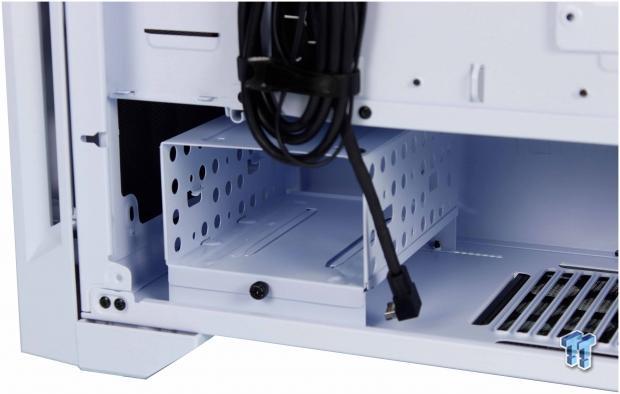
The bottom mounted drive cage does not employ trays and instead opts for stable mounting with screws. An SSD can be alternately installed to the top of this cage should you choose for this versus the standard mounting for 2.5" or should you need another place to tuck one away. The cage is removable with the removal of the single visible thumb screw. Once removed the bottom mounted HDD base screws can be removed and that can be removed entirely should that be desired.
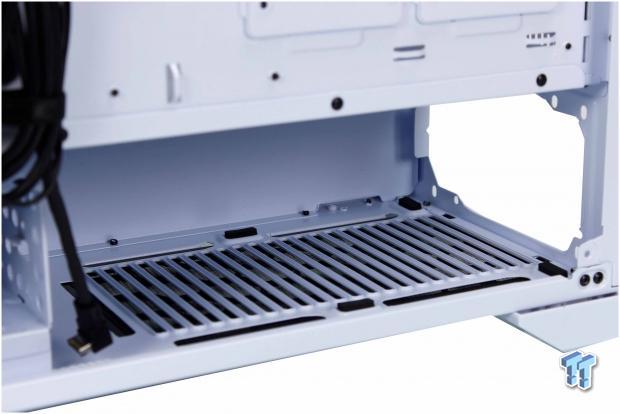
The PSU mounting area is below the PSU shroud, and the PSU must be installed form the cable management side of the chassis. There are rubberized foam feet for the PSU to rest on which should help reduce any vibrations. The slotted bottom area for PSU airflow is also filtered and plenty large to allow ingestion by even the most significant PSU models.
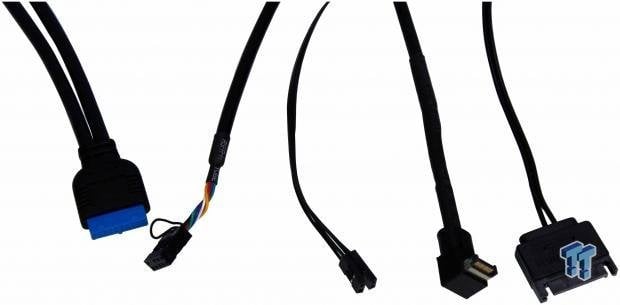
The front panel cables consist of the following. USB 3.2 19-pin serving dual front panel Type-C ports, HD audio connector, Power button, and HDD LED plugs, USB 3.2 Gen 2 Type-C internal plug, and a SATA power connector used to power the front panel ARGB. The cables are mostly black sheathed with only the multi-color wires for the HD Audio connection meeting the eye. The length of some cables such as USB 3.0 is more than long enough, and if installed as we did, you will have to loop it in the cable management tie down to manage the excess.
Hardware & Documentation
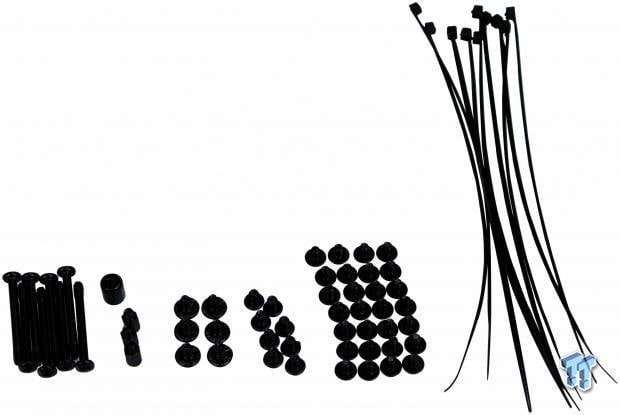
The accessory bag has all of the necessary fasteners to outfit a system. Eight elongated screws for mounting fans on the PSU shroud, three extra standoffs for installation of mATX if needed and they include an installation tool. Next up are six screws for mounting the PSU although four is all that is necessary.
Eight HDD mounting screws which will fill the two available bays in the lower cage. Twenty-eight screws used for motherboard and SSD mounting as they use the same thread. Lastly, there are ten included zip ties which with studious attention to detail could be more than enough for a build in the Lancool One Digital.
One thing to note would be the complete omission of any paperwork, including manuals. For this, we had to head to the Silverstone webpage to download the manual if we needed it, which we did to confirm the screw allocation since the six PSU screws made us question it.
Case Build & Finished Product
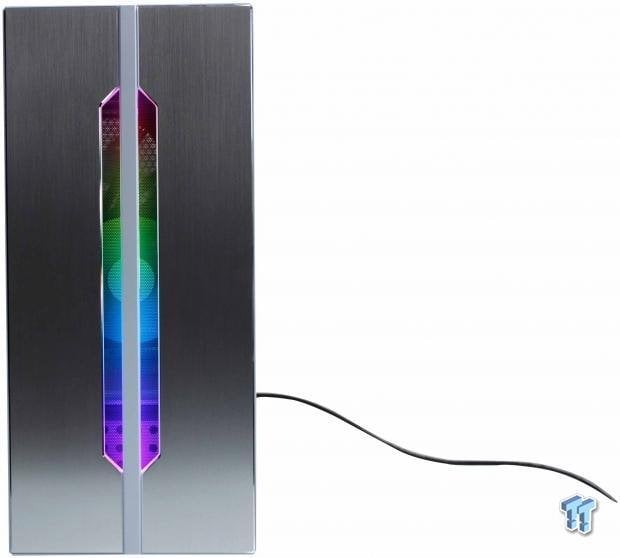
Now that we have concluded our build in the Lancool One Digital, it is time to gaze upon it and see how it came out. Rather than show the panel with the system off, I decided to turn it on, as I feel it's the best way to show the character of the Lancool One. As you can see the center firing, ARGB flows well and has excellent color saturation even with my studio lights blaring on the front trying its best to wash them out.
This is one of the more unique RGB implementations I have seen, and I think Lian Li pulls it off well here as it is nice but not too much. I don't see this case as fitting into an office or even a subdued home theatre, but if you like the lights or opt not to plug them in, the aluminum front panel delivers a quite elegant look.
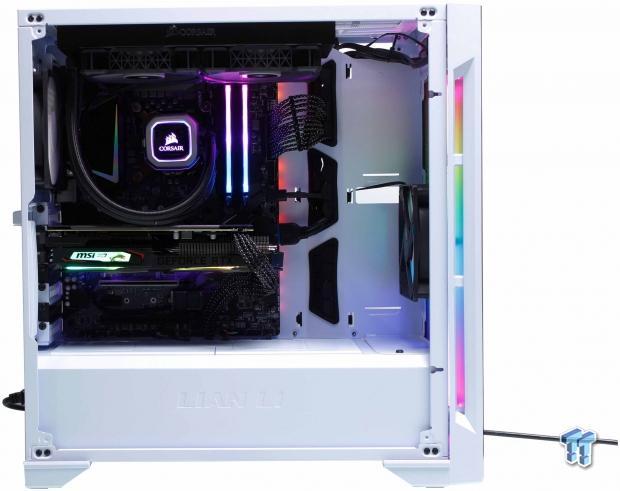
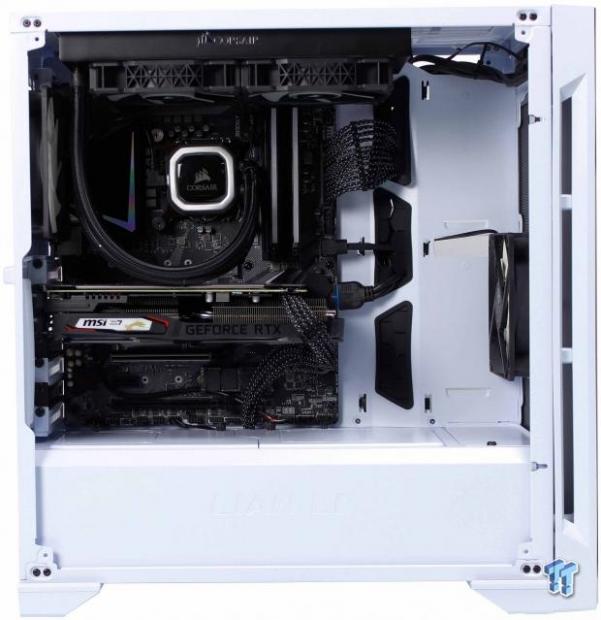
The internals, I think, came together quite nicely. The motherboard went in without a hitch and was easy enough to install I was able to get it in and mounted without even laying the case on its back. The toughest part I think would be sorting which cables should go through which hole for the most efficient routing. Everything went into place, and I cannot think of a single step in the process that was hampered by a design choice of the case.
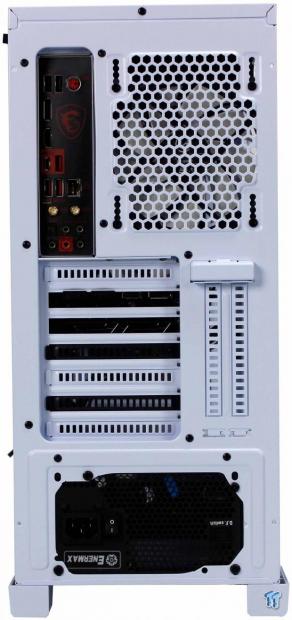
The rear looks about the same as when we first showed it, except for the fact that now the motherboard I/O is filled, there's is a GPU in place, and the PSU is there. Once again, everything went smoothly, and nothing special got in the way here.
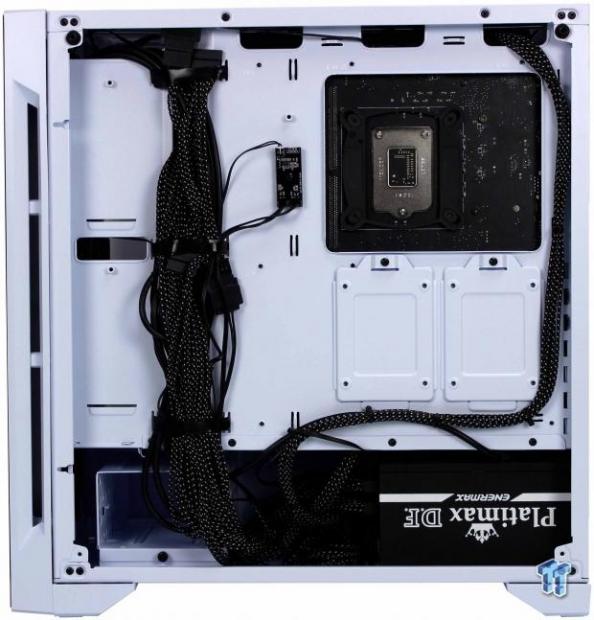
The cable management side of the Lancool One Digital is slightly more used than last time we observed it. The main Velcro tie-down points are used to hold the bulk of the cables, and it does so without any issues to note.
There are so many passthrough holes, I found myself trying different ports to see what would be the best route, and I must say too many cable management options is a good problem to have. The cable tie down points was more than enough for our mainstream build, and I imagine even stuffed with RGB and multiple GPUs it would still be sufficient.
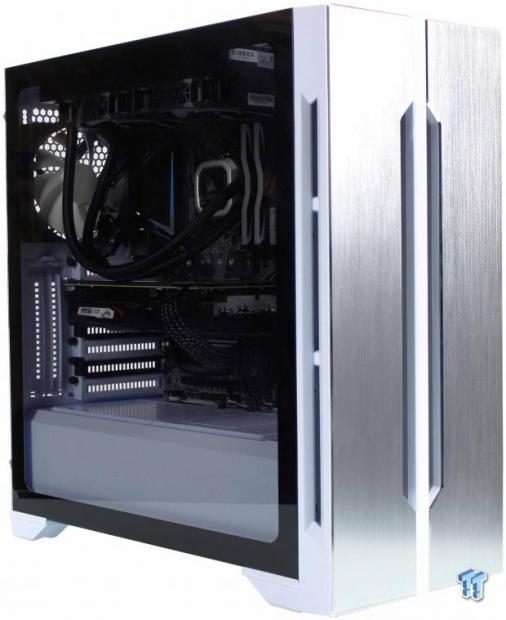
Here we have the built PC with panels affixed waiting to come to life. The glass panel has a light tint to it, just enough that it's not entirely transparent but adds a darker hue with the panel on. The installed components made the case a bit heavier, but due to metal quality and thickness, it was already reasonably heavy.
The system once powered on comes to RGB life, and with our installed components, it brings even more rainbow life to the party. I'm admittedly not the biggest fan of RGB, but on the Lancool One Digital it is done in such a way it looks nice, and I would not necessarily mind this rig being around me in its current state. The included fans although not PWM run just fine with the motherboard ports set for DC, and they are not loud by any stretch as the system sits idle and is inaudible.
Final Thoughts
When I first received the Lancool One, I only had the website to go off of, and it looked like a neat cage but seemed like it could fall into the gamer trap of a cheap case with twinkly lights blasting out your retinas. I am happy to say that this is not the case as Lian Li delivered some excellent quality and an RGB effect that does not make me want to chuck it out the nearest window.
The performance did not disappoint as well, as with our testing, we saw similar thermals to our open-air testbench results. The increase going from open air to the Lancool One was around 1-2C over ambient higher than the same setup on an open-air testbench.
The Lancool One ticked a ton of the right boxes; firstly I would say the overall build quality of the chassis inspired confidence the first time I took off the cable management panel and realized there was not any noticeable flex. The RGB, while I am not a standard RGB guy, is nicely done and accents a build well.
It seems like pretty much any area of ventilation has filters or screens to keep the inside as dust free as possible. The tempered glass mounting, while we have seen it before, is welcome as it makes for a real uninterrupted viewing experience. To Top it off the cooling, mounting options are immense and merit a proper full liquid cooled RGB build, so I will indeed have something to complain about.
The Lancool One does not have a lot of things I can complain about. I would like to see a slightly larger opening in the front of the PSU shroud so that thicker radiators can fit. I would like there to be an included adapter cable with the Lancool One to allow direct connection of the ARGB with your motherboard. Via three pin split connectors like most motherboards employ. I think trays for the HDD would likely be more favorable as screw mounting while reliable eliminates the tool-free nature of this case.
At the sub $100 price point even lower at $89.99 on Newegg, the Lancool One Digital is setup to be an excellent choice for a nice build. With a price creeping into the 80 dollar region the quality of materials and overall fit and finish of the Lancool One places it among the top of the stack which is a beautiful thing to see, and I genuinely hope that future Lian Li chassis follows this trend. Lian Li made a seriously nice and reliable case option for those looking for a good quality case that will not break the bank and even has a little pretty built in.
Shannon's Chassis Test System Specifications
- Motherboard: MSI MPG Z390 Gaming Edge AC Z390 (buy from Amazon)
- CPU: Intel Core i7 8700K (buy from Amazon)
- Cooler: Corsair H100i Pro RGB (buy from Amazon)
- Memory: GeIL Super Luce RGB GLS416GB3600C16ADC
- Video Card: MSI GeForce RTX 2060 Gaming Z (buy from Amazon)
- Storage: Sandisk M.2 256GB
- Power Supply: Enermax Platimax DF 1050W (buy from Amazon)
- OS: Microsoft Windows 10 Home 64-bit (buy from Amazon)
 MOAIPLAY ORA PRO G1 850W ATX 3.1 PSU Review: high efficiency and 10-year warranty for $119.99
 NZXT H6 RGB+ Compact Dual-Chamber Chassis Review
 Lian Li HYDROSHIFT II 360P OLED Curved Liquid CPU Cooler Review
 ID-Cooling FROZN A620 SLK CPU Cooler Review
 GAMDIAS Atlas P6 CG Dual Chamber Mid-Tower Chassis Review
 Black Myth Wukong mirrors GTA V success with 30 million copies sold in less than 2 years
 Steam Controller supply can't keep up with demand, Valve pushes orders to 2027
 Steam Machine shipments spotted, as Valve is rumored to launch the gaming PC next week
 HDMI 2.2 products are coming in 2027 as chip makers begin sampling FRL2 silicon this year
 Solo dev tries to make his own GTA 6 with AI, as he got tired of waiting for Rockstar
 Repair channel buys ASUS RTX 4090 for $222 and finds plastic die with fake NVIDIA markings
 Epic's gen AI use deters partners, Vampire Survivors x Fortnite might get cancelled
 Sony seems to confirm singleplayer first-party PlayStation games will remain console exclusive
 NVIDIA GeForce GTX 1650 modded with 8GB of GDDR6 memory doubles performance in God of War and Unigine Superposition
 Speed Racer (2008) 4K Ultra HD Blu-ray Review: a stunning remaster of the cult classic
 Navman MiVue Smart True 4K Surround Dashcam Review - Seeing In All Directions At Once
 IQUNIX Magi96 Pro Aluminum Low Profile Mechanical Keyboard Review - Premium Build, Satisfying Sound
 Asetek Forte S-Series Racing Simulator Bundle Review
 Razer Pro Type Ergo Wireless Split Ergonomic Keyboard Review - Built for Comfort and Support
 ASUS ROG Strix Morph 96 Wireless Gaming Keyboard Review - Great Performance, More Affordable
 SAPPHIRE Radeon RX 9070 GRE PULSE OC Review - A New 1440p Challenger Has Arrived
 I read the Windows Backup app screen carefully, and it does not back up what most people think
 Low Sound Volume on Windows 11? How to fix audio issues and restore normal volume
 8 Critical Warning Signs You Should Never Ignore in Windows 11
 This Windows security feature protects Documents from ransomware, but it is off by default
 Windows 11 already has a voice typing tool, and it is the one most people are not using
 Quick Assist is the only remote-support tool I open when a relative calls about their PC
 The PowerToys utilities I keep enabled on every Windows 11 PC, and the ones I turned off within a week
 TweakTown's Best of Computex 2026 Awards - The Best Hardware, Gaming Gear, and AI
 Phison E37T SSD Controller Exclusive Preview - The Fastest DRAMless SSD Platform Yet