


Our Verdict
Introduction, Specifications, and Pricing
The chassis brought forth today can be considered the little brother design to the MasterCase 5 which we reviewed back in August of last year. The major feature in this design is that Cooler Master, who is a large proponent of the maker movement, brought forth a mid-tower chassis packed with features, options, and customizability. Even with all of the options that this chassis brought to the market, it was at the upper limit in cost when looking to buy a feature-rich mid-tower case. You had to like the concept to be ready to shell out top dollar for it, and then have the potential of buying more parts to get exactly what your needs required.
This time around, we are still dealing with a mid-tower chassis, but the overall concept has been simplified. There are still a lot of options and customization that can go on in this latest chassis, yet at the same time, there are some omissions which allowed Cooler Master to deliver a much more affordable option to the masses. Along the same lines of the MasterCase 5, this new chassis is intended for makers and brings a design and layout we have yet to see from Cooler Master or anyone else for that matter. This leaves us with a very affordable solution, still quite capable of housing water cooling, larger hardware, and is all done in an attractive exterior as well.
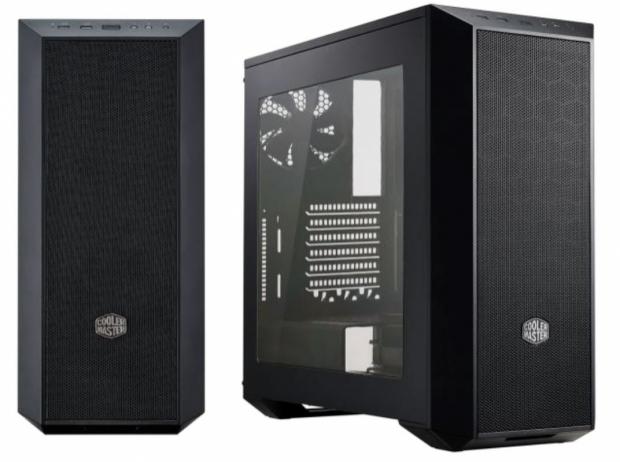
The chassis that Cooler Master is offering now is the MasterBox 5, and as we mentioned, it is indeed a mid-tower design. While this chassis comes in a few flavors, black, white, and with two front panel options, the interior is where this chassis excels. Taking on water cooling, many options for storage, option to or not to have optical bays, a PSU cover, Cooler Master checks all the major boxes where the feature set is involved. With sleek aesthetics and customization at the core of this chassis, we feel that this affordable mid-tower is well worth your attention, and you should continue reading to see one of the best bang for the buck cases we have seen in a few years.

The MasterBox 5 sent to us to review is the MCX-B5S1-KWNN-11, which is a black on black chassis, which also offers the MeshFlow front panel. You do have the option to get this chassis in a black on white version, as well as a black model which provides a pair of optical drive bays. These mid-tower cases are comprised of steel for the main body, using ABS plastic for the frame of the front bezel and the large feet underneath of it. They all stand 500mm tall; they are all 220mm in width, and all are 475mm in depth. All three versions are capable of housing ATX, Micro-ATX, or Mini-ITX motherboards, and sport seven expansion slots in the back.
There is the option to get a pair of 5.25" bays in one of the versions, but it appears that requires the purchase of the cage to do so. All of the cases do offer a cage for a pair of 3.5" or 2.5" drives, and each comes with a single 2.5" drive plate. The nice thing about the storage bays, though, is that the HDD cage can be moved into three locations, and the SSD bracket can be placed in five. The front I/O panel offers the basics with a power and reset button, a pair of USB 3.0 ports, and HD Audio jacks. There are some restrictions to consider when grabbing this chassis. We see near the bottom of this chart that CPU coolers can be 167mm tall, power supplies can be 180mm in length, and video cards are much less restricted at 410mm. One other measurement of importance to most, and that is the space behind the motherboard tray, where the MasterBox 5 offers up 25 to 35mm of room.
Cooling inside of the MasterBox 5 is sufficient. While Cooler Master ships this chassis with only a pair of 120mm fans, one at the front, and one in the back, there are still options left. The front of this chassis can house a trio of 120mm fans, or a pair of 140mm fans, but the rear is only accepting of 120mm fans. There is also a solid top to the MasterBox 5, so no fans can go there, or on the floor for that matter. Water cooling is a bit misrepresented as well. As the chassis is shipped, you can use a 240mm radiator or a 280mm radiator, but Cooler Master offers a bracket to go in the top of the front panel, allowing for a third 120mm fan to be fully supported. Of course, you can also use a single 120mm radiator in the back, if that is desired.
Where the MasterCase 5 took near $125 to obtain, the MasterBox 5 comes in at nearly half that cost. We were able to locate this chassis at both Amazon and Newegg, and at the same pricing as well. They are asking only $69.99 for the MasterBox 5 for both the white and the black versions. Prime members are offered free shipping with the purchase through Amazon, but Newegg shows they require an additional $10.99 for shipping, and no mention of a discount for Premier members. At this price, though, Cooler Master does deliver quite a bit, and in the spirit of the maker movement, delivers this with a layout which has more options than many we have seen in the past. For what you get in the MasterBox 5, we feel the pricing is terrific, and will likely be a non-issue when it comes to the masses buying them up.
Our Latest Mid-Tower Cases Review Coverage
Chad's Chassis Test System Specifications
- Motherboard: GIGABYTE GA-Z68X-UD4-B3
- CPU: Intel Core i7 2600K (buy from Amazon)
- Cooler: Corsair H80i GT (buy from Amazon)
- Memory: G.Skill Ripjaws F3-12800CL6D-4GBXH
- Video Card: ZOTAC GeForce GTX 970 AMP. Extreme Edition (buy from Amazon)
- Storage: SuperSpeed 128GB SSD
- Power Supply: SilverStone SST-ST85F-G (buy from Amazon)
- OS: Microsoft Windows 7 Ultimate 64-bit (buy from Amazon)
Packaging
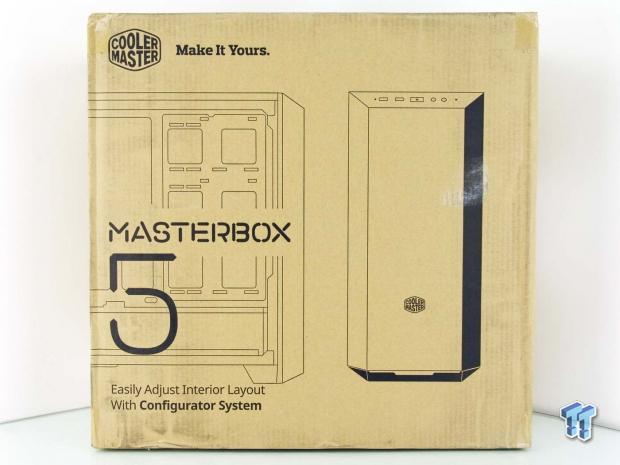
The MasterBox 5 ships in a plain cardboard wrapper using screen printing to deliver the information. The Cooler Master name, and the "Make It Yours" tagline is at the top, just above two renderings of the chassis inside of this box. Near the bottom, we see that the interior is easily adjustable with Cooler Master's Configurator System.

Aside from some permanent marker scribbles and the shipping label, this side simply explains that this is a mid-tower chassis called the MasterBox 5. At the bottom, there is locations and information on the various Cooler Master offices too.

Moving along to the back panel now, we have a description of the Configurator System off to the left and renderings of the front panel options to the right. The lower section of text tells us about the flexible mounting, expansion support, room for cabling, cooling support, and a notation that 360mm radiators need an additional bracket for full support.
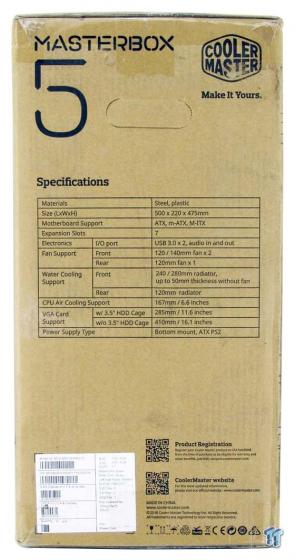
With the branding and naming topping the last panel of the box, the bulk of this panel is used for the specifications chart. Near the bottom, Cooler Master offers a pair of QR codes, one to make registration a snap, and the other to take you to the CM website.

Removing this MasterBox 5 from the box, we find thick Styrofoam on the front and back of the case, instructions and hardware found at the top. Inside of that, the chassis is wrapped in plastic, and the outside of the tinted window is also covered in plastic. The condition of our chassis is superb and shows just how well this tried and true packaging works.
Cooler Master MasterBox 5 Mid-Tower Chassis

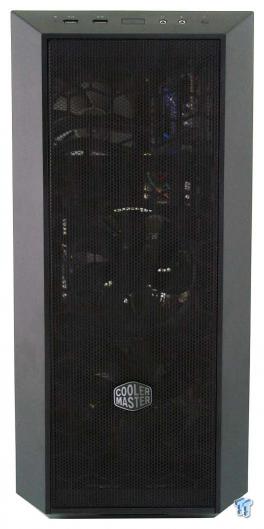
The front bezel of the MasterBox 5 is angled around the edge, where the plastic is used to support the full-length mesh insert. We found that the case badge in the mesh was not secure and is cocked to the left a bit, but we were able to peel it and fix its orientation.
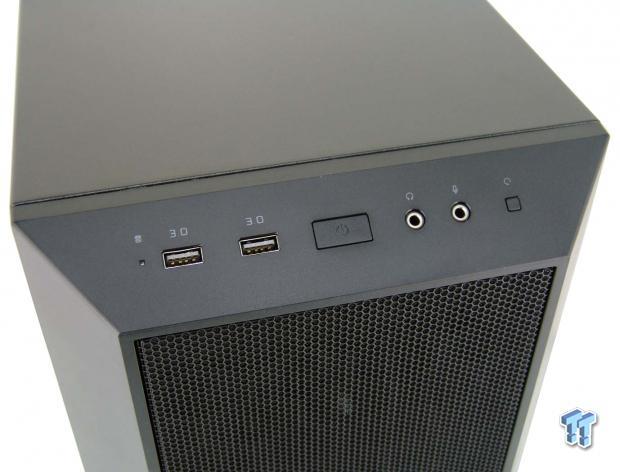
The front I/O can be found at the top of the front bezel, which means the wiring is connected to it. In this panel, we see the HDD activity LED, a pair of USB 3.0 ports, the power button, the HD Audio jacks, and a tiny reset button off to the right.
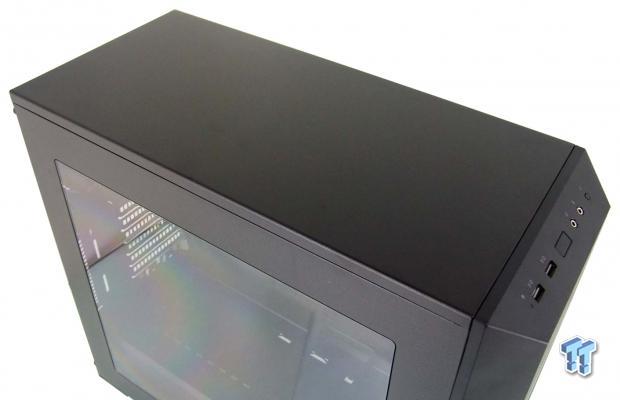
There is nothing at the top of the MasterBox 5 to discuss. The top is a solid expanse of steel with no options for cooling, and it is painted to match the rest of the chassis.

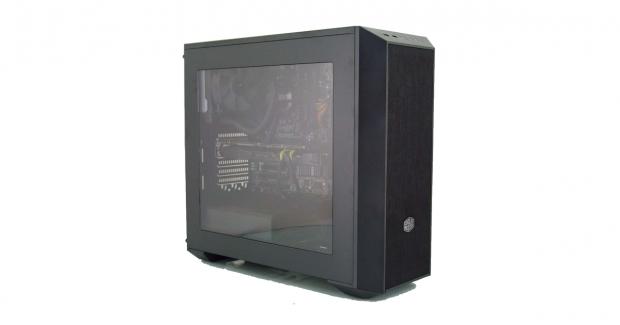
The left side of the MasterBox 5 is almost entirely made of the tinted window. There is a thin edge of steel to support it, and around the sides, we see that the fit is perfect to the other components of the chassis.

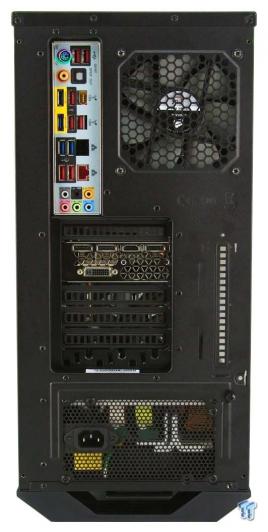
The back of it offers the rear I/O and the exhaust fan at the top, with no option for external cooling support. There are seven expansion slots, one of them being a wire tending bracket, leaving the PSU and dust filter at the bottom.

The right side of the chassis is much like the top was. A solid expanse of steel painted to match the rest. It fits the frame well and offers a finger grip along the back to help remove it.

Under the chassis, we see beefy plastic legs with four rectangular feet made of rubber on the outside edges. There is a dust filter at the back of the chassis below tabs for the PSU cover, and toward the front, there is an optional drive location on the floor, and various holes to adjust the HDD cage in.
Inside the MasterBox 5
After removing the side panels and looking inside of the chassis, we see that all of the front I/O wiring has been tied to the motherboard tray, so it will not damage the window.

The front I/O wiring exits the main chamber at the top, just above the SSD mounting plate. This plate can be lowered to two other locations in this orientation, it can be mounted to the top of the HDD cage, or it can also go in behind the motherboard tray. If you want more of these drive plates, you would need to purchase more of them.
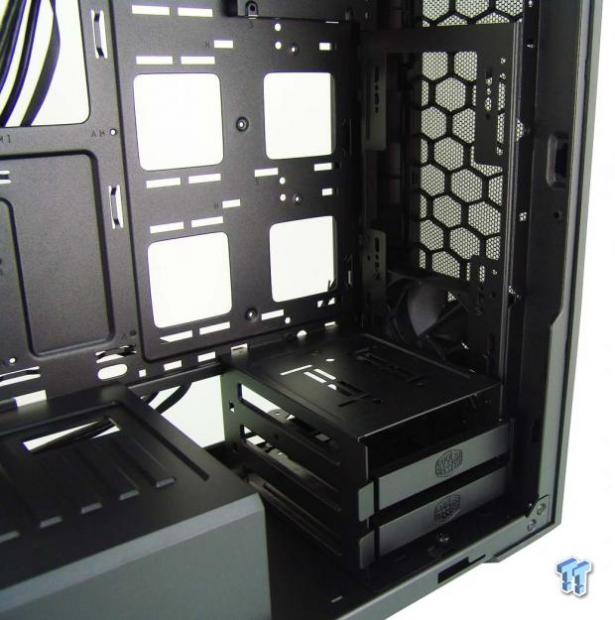
Behind the bezel, we find the fan low in the chassis, just in front of the HDD rack. The fan mounting offered in the side rails only supports two 140mm or 120mm fans and is why you need a bracket to support a third above this.
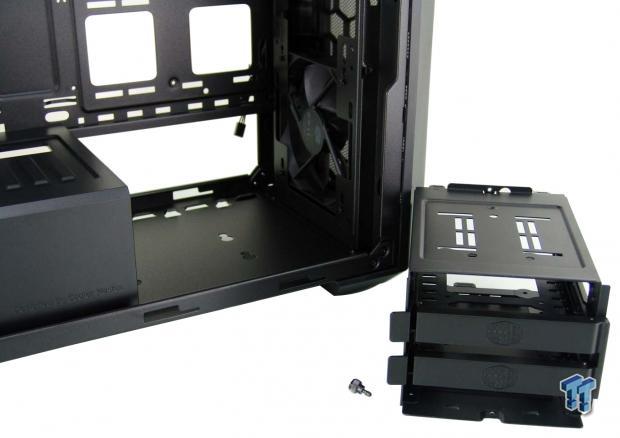
The HDD cage is completely removable, or it can be slid toward the PSU cover in two stages from where it was located from the factory. This also allows you to see the front 120mm fan and its 3-pin power connection hanging by the motherboard tray.

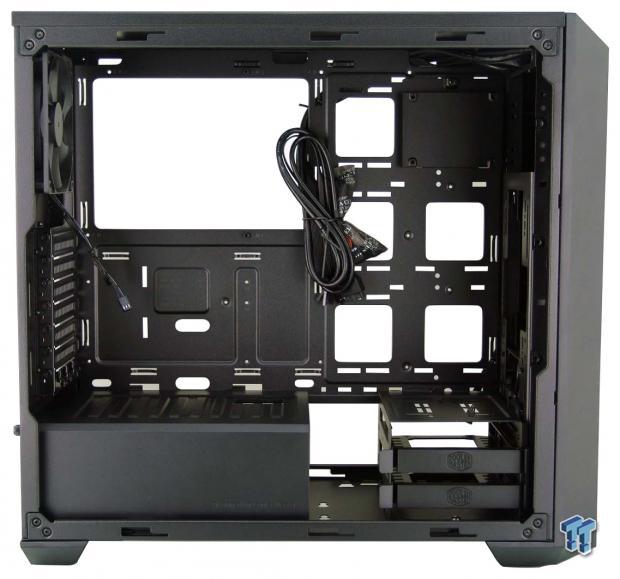
The motherboard tray is opened wide up for access to cooler back plates. It has 11 wiring holes, and more tie point than you will ever need. The tray is also labeled for not only the three motherboard form factors, but it also points out where the drive rack and SSD tray can be placed.
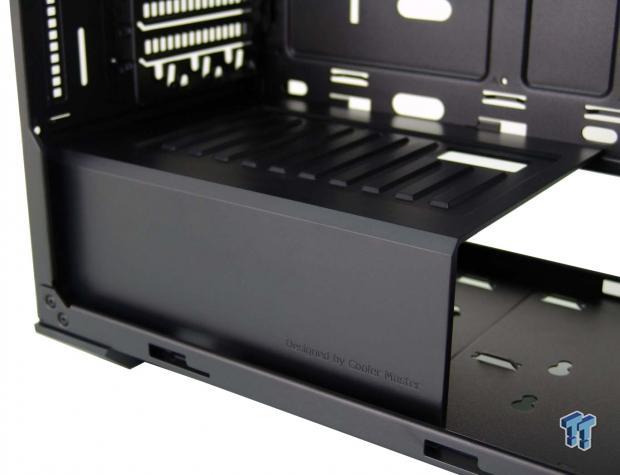
Below the motherboard tray, we find a thick plastic power supply cover. This is why there is a restriction on PSU length, as it does not run the entire length of the chassis as most cases offer. There is a hole at the top to help passing wires through it, and along the frame rail, it has "Designed by Cooler Master" carved into it.

The rear of the chassis houses the second 120mm fan put in the MasterBox 5, and it too uses a 3-pin connection for power. The expansion slots are held in with hex-head screws, and it is easier to see from this angle that the lowest cover is made to tend to the mouse or keyboard wiring.

Behind the motherboard tray, the space offered varies. There is 35mm of room at maximum, but less where the motherboard tray is bent for support and even less as you pass from the lower section to the top. Just below the access hole is where the SSD plate can be installed behind the tray.
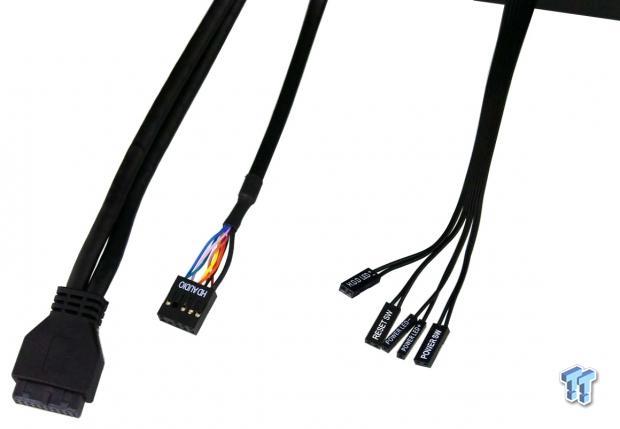
All of the provided cabling from the front I/O panel is black, so it hides easily. In it, we find a native USB 3.0 connection, the HD Audio connection, and the ribbon cable with connections for the front lighting and buttons.
Hardware & Documentation

Rather than fan screws, in the front of the chassis, Cooler Master uses a push pin system. They also send seven standoffs and a socket to go along with the pair of helper standoffs already on the tray. The hex head screws mount the motherboard and the PSU, while the M3 screws are used for 2.5" drive mounting. As for the 3.5" drives, they lock into the tray with pins and are tool-free.

There are ten wire ties offered along with the MasterBox 5 to ensure the wiring can be tended to and run cleanly. There is also a Kensington lock loop supplied, as well as the Molex to 3-pin fan power adapter.

The manual is small but unfolds to show everything you need to know about this chassis and the build process. There is also an insert that accompanies the manual, which explains what Cooler Master will cover for the term of two years.

These three sections of the manual are likely the handiest to help wrap your head around the options contained in this layout. The top shows the locations of the SSD plate, the HDD rack, and the PSU cover. In the middle, we are shown the video card support and motherboard support, while at the bottom, Cooler Master addresses the cooling options.
Case Build & Finished Product
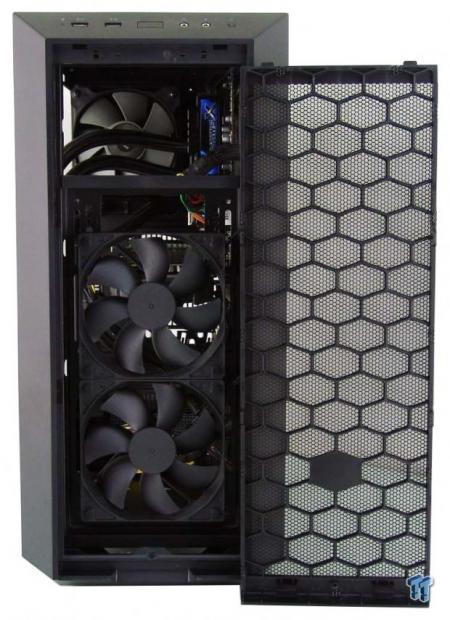
For our needs, we had to remove the rear exhaust fan, so we moved it to the front of the chassis. Since the wiring is attached to the bezel, the mesh panel within it is removable to allow access for mounting things up front.
With the mesh panel back in place, nothing about the aesthetics changes. With the panels off you can see the internal components through the mesh, but this is much less visible once the panels are placed back onto the chassis.
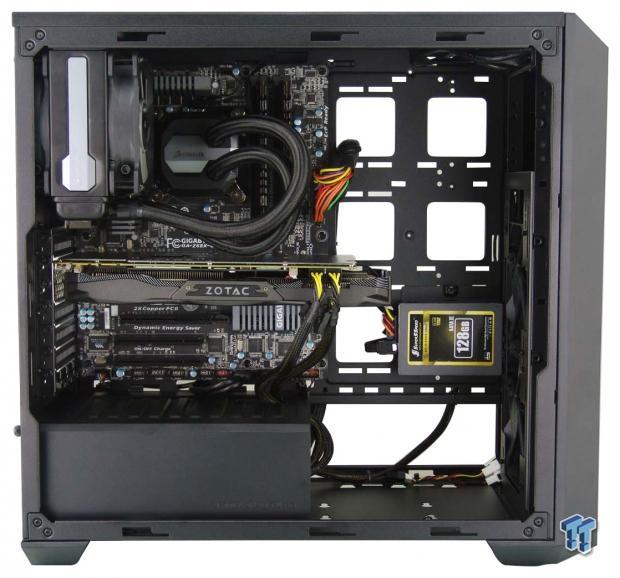
We ended up with this as our layout inside. We dropped the SSD plate down near the bottom, and removed the HDD rack, although it would still fit without issue. The AIO fits without blocking the side panel, there is plenty of room for the video card, but most of the standoffs we got did not fit the screws, we just mocked it up loosely for this image.
The dust shield was tight and took quite a bit of effort to get into place. The video card went right in and aligned properly, as does the PSU at the bottom.

With as much room as this chassis offers behind the motherboard tray, the wiring is just a matter of tying it down to keep it out of view. This can be a challenge with all of the openings in the tray, but we were able to manage pretty well.

Once the panels were back in place, and both fit without any issues, we are just about ready to turn on this system. The side window is ever so slightly tinted, but even at rest, the view through it is light enough to see everything on full display.
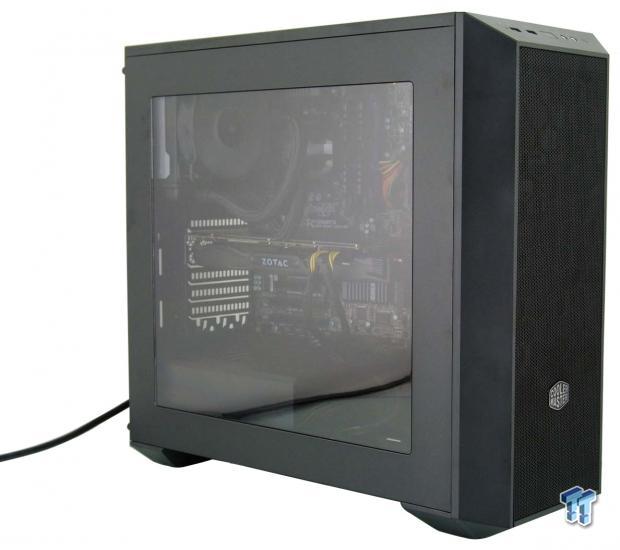
As we added power to the MasterBox 5, we were greeted with a dim white power LED, and the same for the HDD activity LED, when it was flickering. The LEDs on the card and the AIO lit up and are easily seen from the side, and at this point, we took our audio reading, where the fans in the front were delivering 37 dB of noise into the room.
Final Thoughts
The chassis is compact which a lot of people like, and is why mid-tower cases are such a huge success for many companies. It is not the most solid design we have had in our hands, but even with so little to support the chassis with the panels off, it wasn't super flimsy either. We liked the removable mesh inset at the front, allowing access without the need to deal with the front I/O wiring, and we liked the modularity of the bays and the room behind the motherboard tray. It is nice to have a PSU cover, and we also like that the side window is slightly tinted. The external aesthetics are clean and straightforward so that the MasterBox 5 will fit nearly everyone's taste in chassis design.
Usually, even with a pre-release sample, we find that everything is ready to go as is. However, we discovered that the motherboard screws and the hex head screws did not fit the additional standoffs. They fit well with the two already installed in the motherboard tray, but that left us with seven screws which could only be screwed in a thread or two. We do feel that while an SSD and a couple of spinners in RAID do cover most user's needs, without buying more 2.5" drive plates, three drives are all you can fit in here out of the box, and may limit quite a few of their customers. We like that the PSU cover is removable and that there is one at all, but we do wish it were longer, so it would cover the wiring we had to run. We realize they had to steer clear of the HDD rack, but with only two drive trays there, they could have hidden them like in many other designs, allowing for a cleaner finished product with a longer PSU cover. The noise from the MasterCase 5 is neither a hit nor a miss. At 37 dB, it won't make your ears bleed with it close to you in the office, but is not silent like many others either.
The initial pricing of the MasterBox 5 is still worth every penny. While we found some issues along the way, we still feel the Cooler Master is on the right path here. You will be hard pressed to find many cases that are designed like this. Offering many options to install the various drive plates and racks, all of the room inside and behind the motherboard tray simplifies installation and makes your time using the MasterBox 5 a pleasure. While the chassis is somewhat limited in its feature set, at $69.99, we can see this being a huge hit with gamers and system builders alike. While we do wish we could have found spare parts and pricing for optional parts shown to go along with this design, we cannot see Cooler Master charging small fortunes for them.
So, even if you do need a few extra bits to build your dream system in this chassis, it is likely you can stay near $100 and load this chassis up. While not a "Maker" myself, the idea and thought of this movement is easily seen to be of benefit to everyone, and it leaves the MasterBox 5 in a separate category, only to be surpassed by its larger brother, the MasterCase 5.
Chad's Chassis Test System Specifications
- Motherboard: GIGABYTE GA-Z68X-UD4-B3
- CPU: Intel Core i7 2600K (buy from Amazon)
- Cooler: Corsair H80i GT (buy from Amazon)
- Memory: G.Skill Ripjaws F3-12800CL6D-4GBXH
- Video Card: ZOTAC GeForce GTX 970 AMP. Extreme Edition (buy from Amazon)
- Storage: SuperSpeed 128GB SSD
- Power Supply: SilverStone SST-ST85F-G (buy from Amazon)
- OS: Microsoft Windows 7 Ultimate 64-bit (buy from Amazon)
 Montech TG3 Mid-Tower Chassis Review
 Noctua NL-LC1-36 Liquid CPU Cooler Review
 Lian Li B4-mATX Review: a compact mATX SFF case with excellent airflow and premium features
 Ocypus Sigma F36 BK ARGB Cooling Fan Review: high airflow and unified design in one frame
 PCCooler CPS RZ820 Display Review: a flagship-level CPU air cooler with an LCD screen
 AMD Radeon GPU prices set to increase by 10% in August
 Redditor buys an RTX 4080, opens it up to find no GPU die or VRAM inside
 NVIDIA GPU rumors swirl claiming major price hikes of 20 to 30% - or more - are coming, as VRAM costs climb
 AMD's RX 9050 GPU comes up short in first review, but there's a good reason why it lags behind NVIDIA's RTX 5050 here
 Sony confirms it won't reverse disc phase out: 'We're going to cautiously move forward'
 GeForce RTX 50 Series GPU prices are rumored to increase by 30% in the coming weeks, months
 TSMC's 1.4nm process timeline accelerates, with mass production happening sooner than expected
 Diablo 4's next season is bringing back iconic items from Diablo 2 and 3
 Razer Huntsman V3 HE Magnetic 8K keyboards include a Mini 65% model
 Four C's of Xbox's future outlined in new CEO memo
 ASUS ROG Strix X870E-A Gaming WiFI7 Neo Review - A New Enticing Option
 Logitech G316 X 98 Wired Gaming Keyboard Review - Retro-Inspired Board that Falls a Little Short
 Biwin M560 2TB SSD Review - Best Overall Retail-Ready DRAMless SSD
 Logitech G512 X 98 Analog Mechanical Gaming Keyboard Review - An Innovative Two-in-One
 Thrustmaster T.Flight HOTAS 5 MSFS Edition Review
 SteelSeries Arctis Nova Pro Omni Wireless Headset Review - One Headset to Rule Them All
 SteelSeries Arctis Nova 7 Wireless Gen 2 Headset Review - New and Improved, But Is It Enough?
 AMD Ryzen 7 7700X3D Review - Days of Future Past
 I switched my PC to encrypted DNS in Windows 11, and browsing felt more private
 Printer Not Working in Windows? How to fix detection, print queues and drivers
 The Ultimate Guide to Personalizing Your Windows 11 Taskbar
 How to Turn Your Windows Laptop Into a Second Monitor with Miracast and Wireless Display in Minutes
 6 Mistakes to Avoid When Buying a Windows Laptop
 I capped Windows Update's bandwidth with Delivery Optimization, and my downloads stopped choking
 I use this decade-old free tool that finds files faster than Windows Search does
 I install and update most of my apps with this Windows command now, and I stopped downloading sketchy installers
 Hisense U6SF 65-inch MiniLED TV: High Performance Meets Leisurely Convenience
 I stopped digging through Windows menus after I set up this one folder