


Our Verdict
Introduction, Specifications and Pricing
Unless you live under a rock and have never seen what Phanteks has been delivering when it comes to chassis design, you would know that their cases are always slightly ahead of the curve, they are very modular, and all of their cases are designed with water cooling the components in mind. We have also see many iterations of what they can come up with, and the Enthoo series of cases has been one that has never failed to impress us. The only thing that has stopped some buyers from looking to Phanteks for a chassis is that most of what they offer is truly huge, and if you were looking for compact and space savings, they really had nothing to offer.
Well, that is until now. With seemingly everyone making the move to build something much smaller than what most gamers and enthusiast are used to, Phanteks had been missing out on a lot of potential sales. Of course, there was the Enthoo Evolv ATX, but even that was a mid-tower design, and while it can house a Mini-ITX motherboard, that chassis just isn't small enough to cut it for many builders out there. So, how exactly is Phanteks solving this hole in their lineup? They are offering their first attempt at building something with smaller form factor builds in mind, specifically for Mini-ITX users.
The chassis we are going to be looking at today is indeed the smallest chassis that Phanteks has attempted, and the Enthoo Evolv ITX that we have now loses nothing that we are used to seeing in Phanteks cases. They did eliminate ODD bays, and even with a much smaller foot print, this ITX chassis is still very well equipped. There is still plenty of modularity to make the chassis suit your specific needs, option parts for water cooling delivered in the box, and they even came up with a cool slide out rack for the top of the chassis to simplify radiator or optional fan mounting. So, while this chassis may be smaller in stature, it can still run with its bigger brothers and deliver a chassis so well appointed, it may take you a few trips around the chassis to find them all.
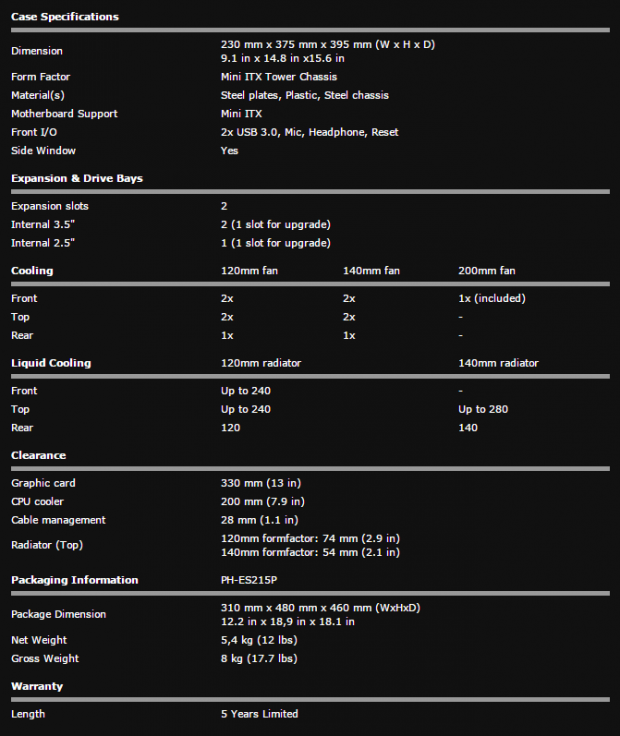
The chart provided by Phanteks starts with the physical dimensions where we find the Evolv ITX is 230mm wide, it stands 375mm in height, is 395mm in depth, and is designed specifically for use with Mini-ITX motherboards. We are then told that the frame and panels are made of steel that are painted black, and bits like the feet and bezel surround are made of ABS plastic. It is also at this point that we are shown the front I/O panel offers a pair of USB 3.0 ports, HD Audio jacks, a power and reset button, and there is even a side panel window in this design as well.
That leaves us to discuss the limitations inside of this twelve pound chassis. There is 330mm worth of room for a video card, but removal of a components is required for such room. There is an astounding 200mm of room for a CPU cooler, even though this case is definitely designed with water cooling in mind. They also show us that there is 28mm of room behind the motherboard tray for any and all wiring you can get to go back there. The last of the limits we see is that for water cooling, the radiators at the top of the chassis can only be 74mm thick including fans for 120mm based solutions, and 54mm overall for 140mm based radiators. And all of this comes with a five-year warranty.
The thing is, even with all this love packed into a smaller foot print, many hours of trial and error to get things just right, the cost to make new stampings for the parts, all of that costs major dollars to get to the point of selling a product. Even though this is not a weak, flimsy, or cheaply made chassis, the pricing we have found will just blow your mind. Both Amazon and Newegg have the Enthoo Evolv ITX chassis listed at the same price of $69.99 currently, and both are sold with free shipping as well. So, while pricing may allude to this being a simpler, less robust design, this simply is not the truth. What the truth is, is that you are getting one hell of a chassis for very little investment, and there isn't anyone out there with a Mini-ITX board looking for a new well equipped chassis that will not appreciate what Phanteks is offering, especially at this amazing price.
Packaging
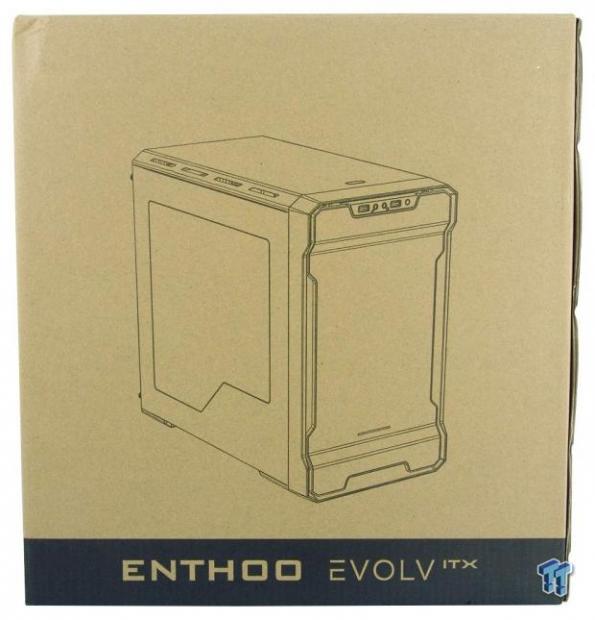
Packaging is kept very simple for the Enthoo Evolv ITX chassis. There is a rendering on the front of the chassis that is inside, and there is the chassis name at the bottom, but not one mention of the Phanteks name yet.
Our Latest Small Form Factor Cases Review Coverage
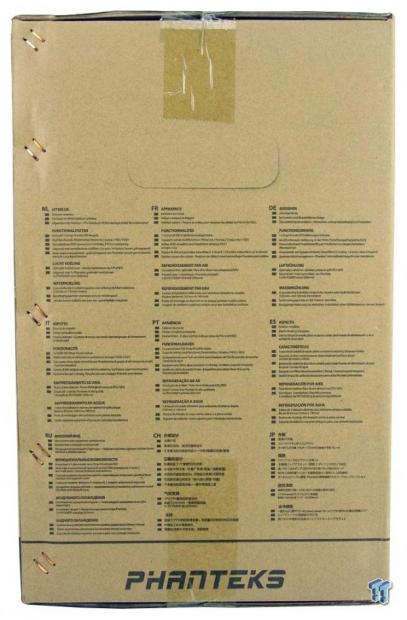
This side of the packaging does sport the Phanteks name at the bottom this time, but the bulk of the panel is taken up with 13 features that should interest you in this case, but none of the nine listings here is in English, it is offered in various other languages.
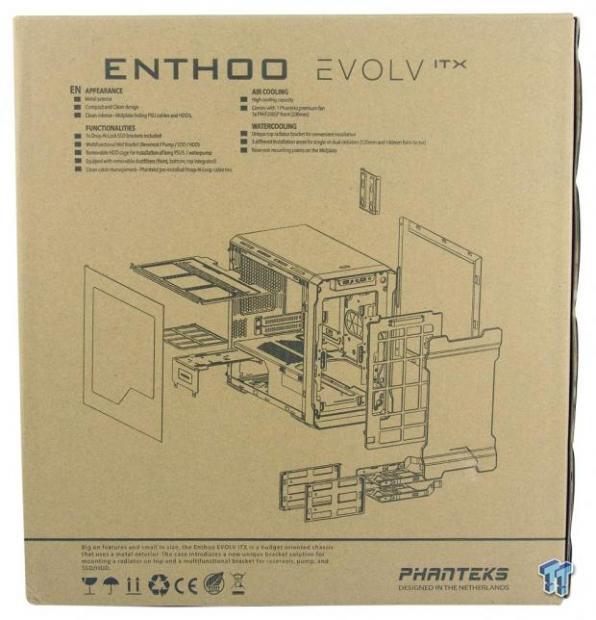
This is because when we get to the back, the same features are now offered at the top just under the chassis naming. Below all of that, there is a large exploded rendering of the Enthoo Evolv ITX that takes up the rest of this panel.
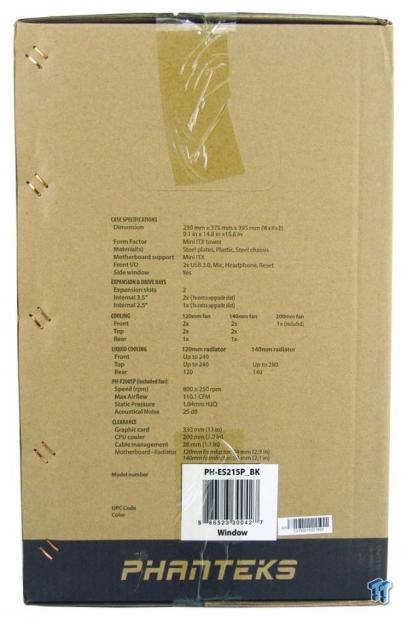
As we make it around to the last panel, we are now offered a full list of specifications, just as we saw it earlier when we covered these. While the packaging is indeed quite simple, everything someone in a store would need to know about what is inside is all there.

Inside of the thick cardboard, we find the chassis is placed into a plastic liner to protect the paint and surfaces, and before this, both sides of the window also had plastic applied. To take the larger hits associated with transit, thick Styrofoam end caps are used. In this instance, everything went perfect and the Enthoo Evolv ITX has arrived in great shape.
Phanteks Enthoo Evolv ITX Tower Chassis
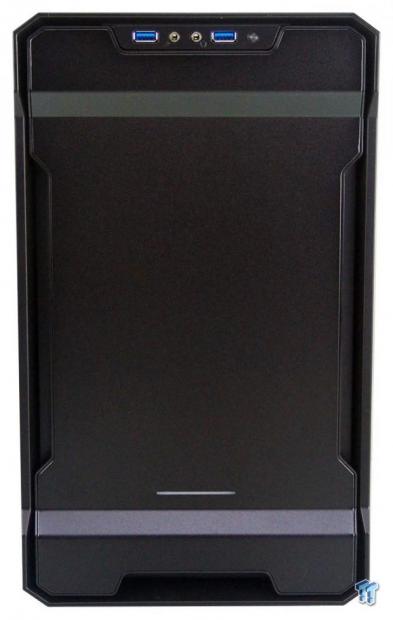
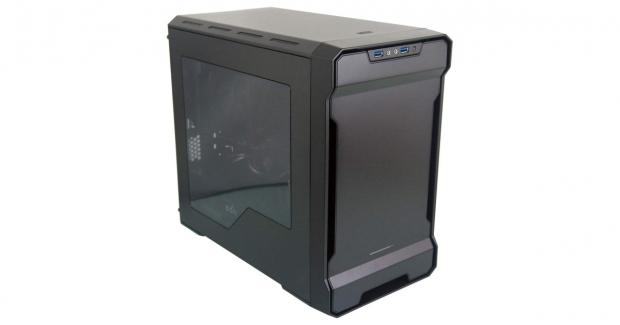
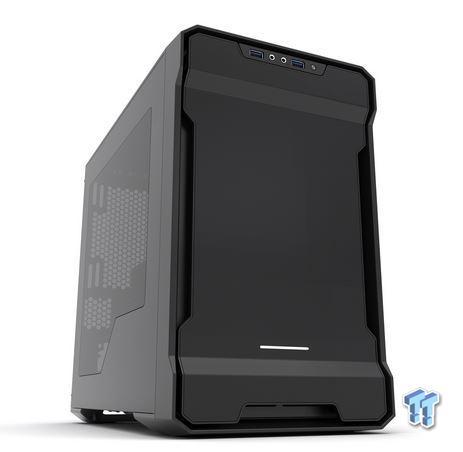
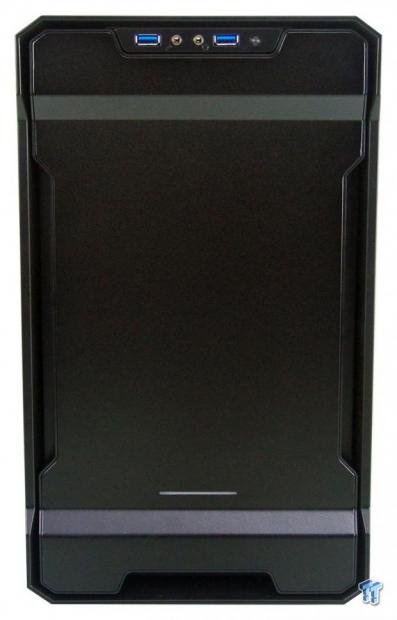
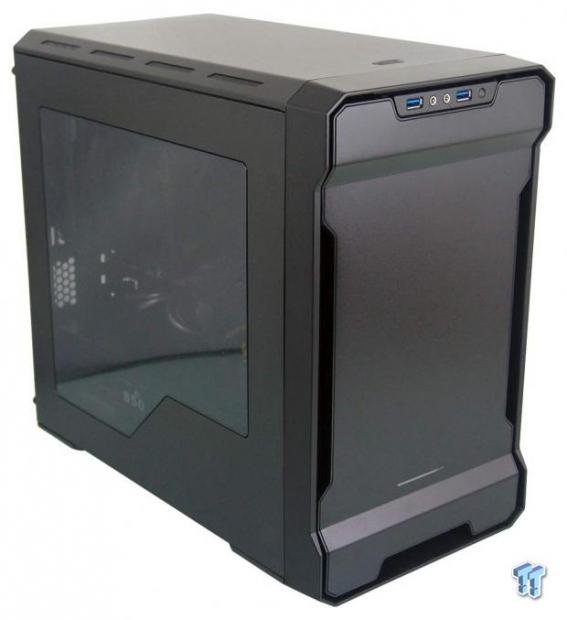
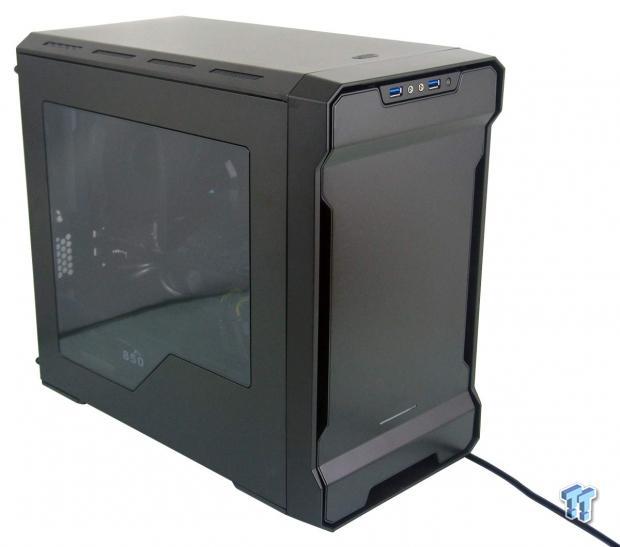
The front of the Enthoo Evolv ITX looks exactly like the ATX version, just much shorter. There is the metal center panel that offers the bends and angles to this fascia, and surrounding it is a thick plastic bezel that cuts the corners and also follows the contours of the steel center bit.
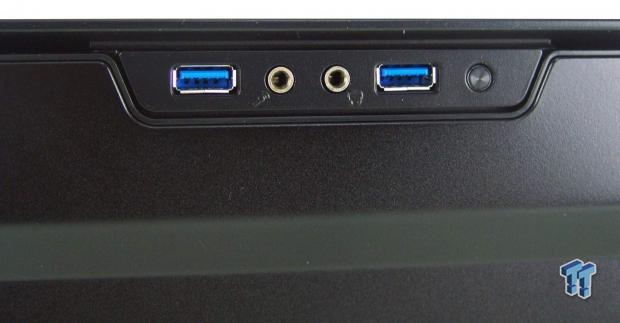
The front I/O panel is at the very top of the front bezel, and the removable steel panel below it is cut around it to leave the I/O panel in place for cleaning. It contains two USB 3.0 ports on either side of the HD Audio jacks, and a tiny reset button is found to the right.
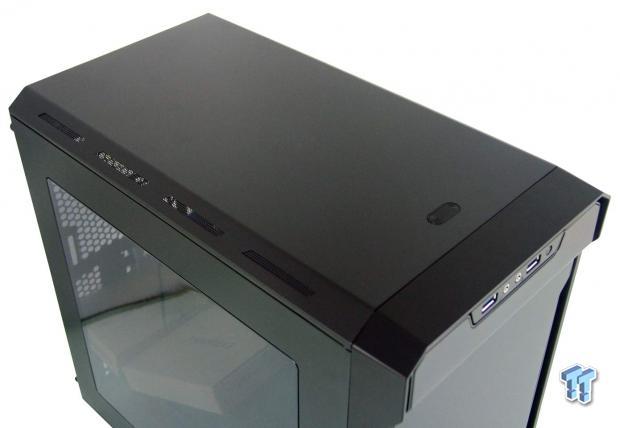
The top of the chassis is angled on both sides and offers angled vented sections along it. The main steel section of the top is a flat expanse of steel, and the only thing breaking it up is the oblong shaped power button near the front of the chassis.
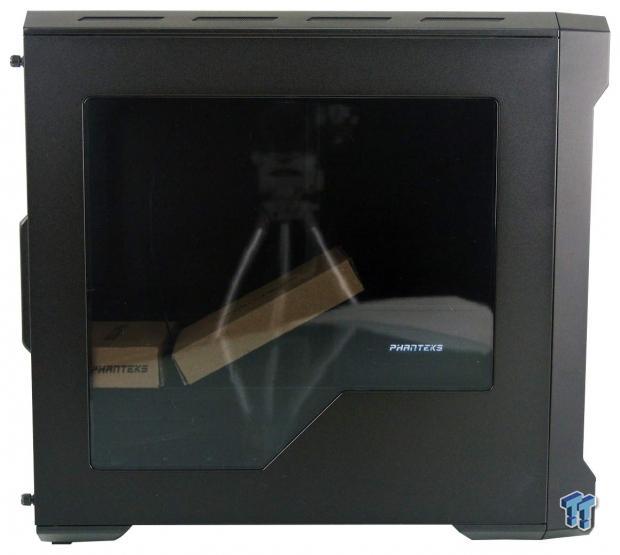
Moving to the left side of the chassis, we see that a large irregularly shaped window is offered taking up the vast majority if the side panel. We can also see the angles at the top and bottom edges, and it is much easier to see the design of the front bezel when looking from the side.
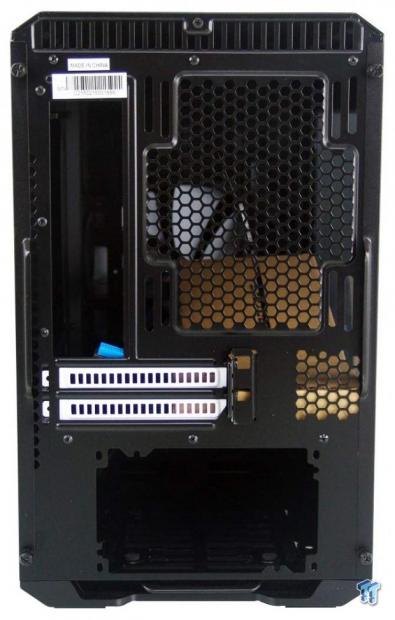
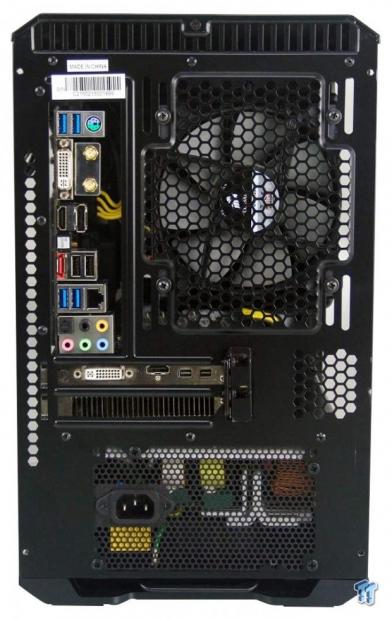
Looking at the back of the chassis gives you the first real scope of size. With the rear I/O and adjustable fan location next to it, the stoutness of this design then only leaves room for two expansion slots and the PSU to go in at the bottom.
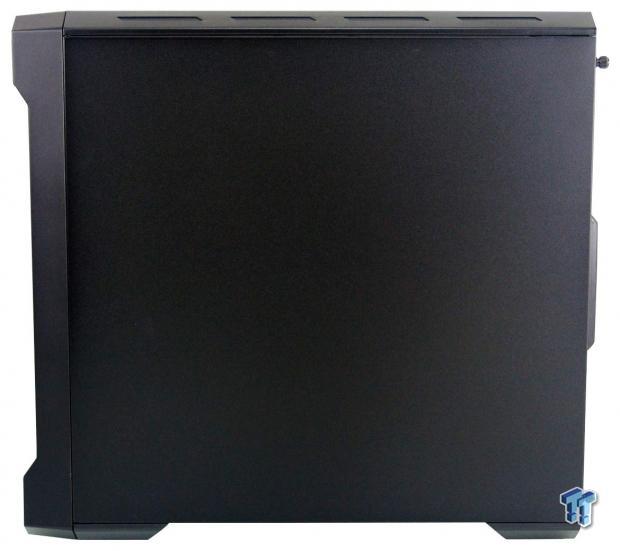
The right side of the chassis is much less dramatic, but we do again get a flat side panel with the same textured black paint the rest of the chassis has. We can also see here as well as the other side, just how well the panel line up and how there is very little to any gap found.
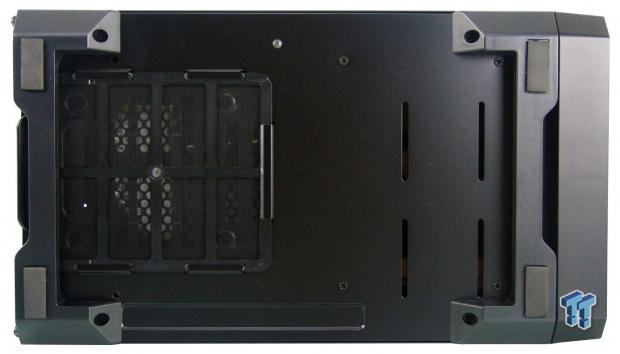
The bottom of the chassis offers thick plastic bars that span the front and back as legs, with rubber pads applied as the feet. There is a dust filter under the PSU at the back, and we see screws near the front to help remove some of the bays inside.
Inside the Enthoo Evolv ITX

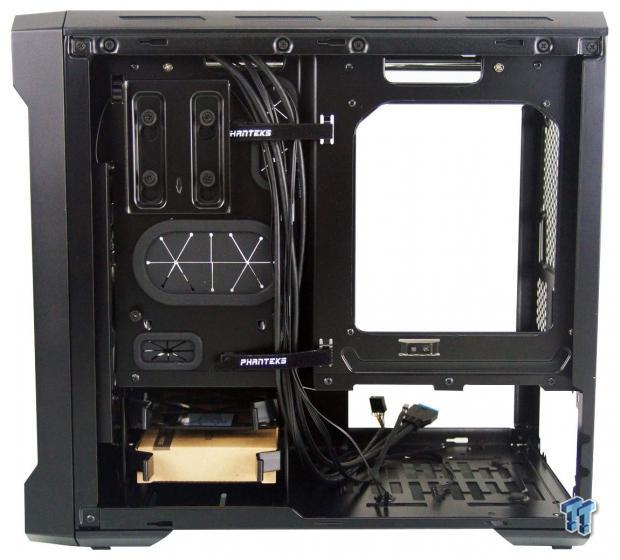
Finding a pair of broken zip ties, we assume that this pair of boxes would have been strapped to the plate on the right. We also see that the wiring is tended to at the bottom of the chassis, making sure it wasn't flopping around potentially scratching the window.
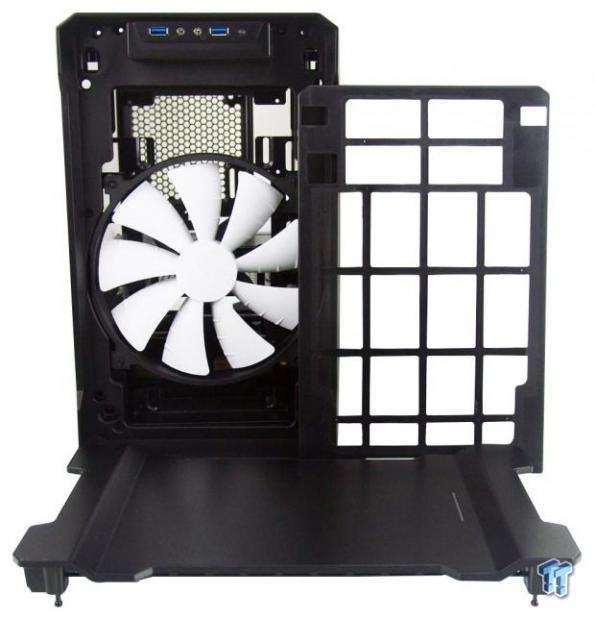
We had to get to this at some point, so why not now? We took the metal center plate off, and it exposes the large dust filter we placed to the right. Removing the filter allows access to remove or replace the front fans without needing to remove the rest of the bezel.

Behind all of that, at the top of the chassis, there is nothing. This is all room left open for water cooling potential. The plate at the bottom does, however, offer grommets to mount a 2.5" drive, and can also be used as a base for a pump or pump and reservoir combination.
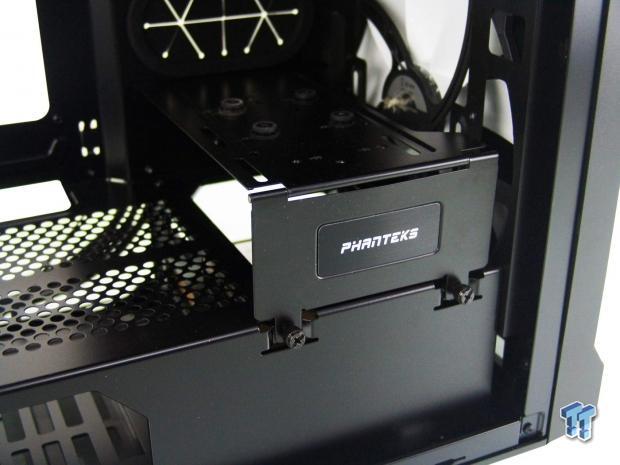
Moving down behind that 200mm fan, we see that the plate sporting the Phanteks name is the one offering the SSD mount is removable as well. Below that, we see the chassis offers a steel cover plate to hide wiring and drive bays.
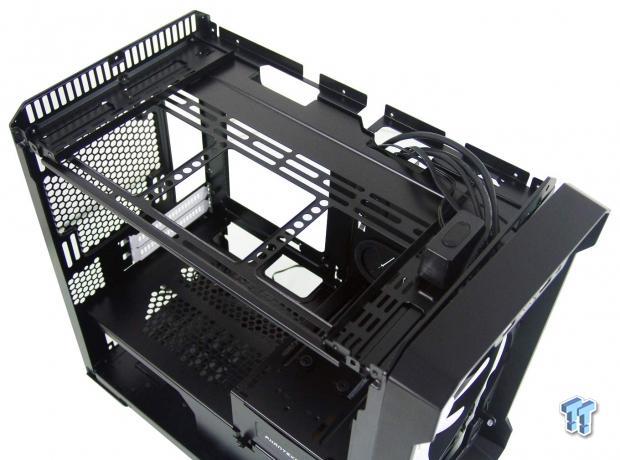
We did have to remove the entire bezel to remove the top, but removing the pair of screws to slide out this tray, we can now see got lost in the rest of the chassis below it. So, instead, we took the top off so that you can see the multitude of options for mounting cooling in said slide out tray.
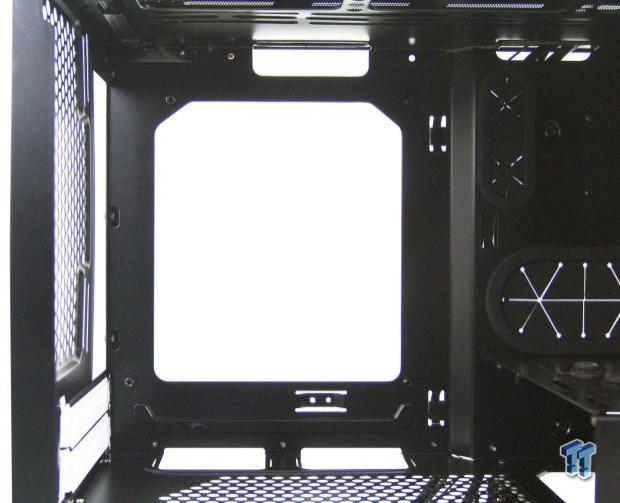
This chassis holds Mini-ITX boards only, but the access hole will accommodate any Mini-ITX board socket location. The right side of the tray is bent out, but wire management is found above, to the right in two places, and below in two large holes.
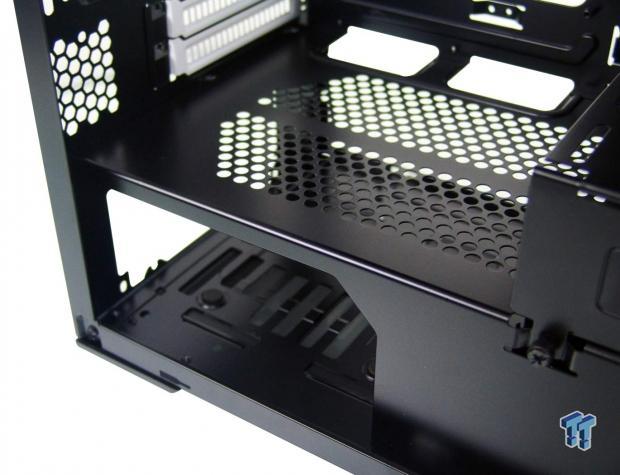
Typically this is where you would slide in the PSU, but with the steel cover in play, that is now done from the right side. We do like that the plate is well ventilated so that dual slot cards can still draw air no matter where the fans may be.
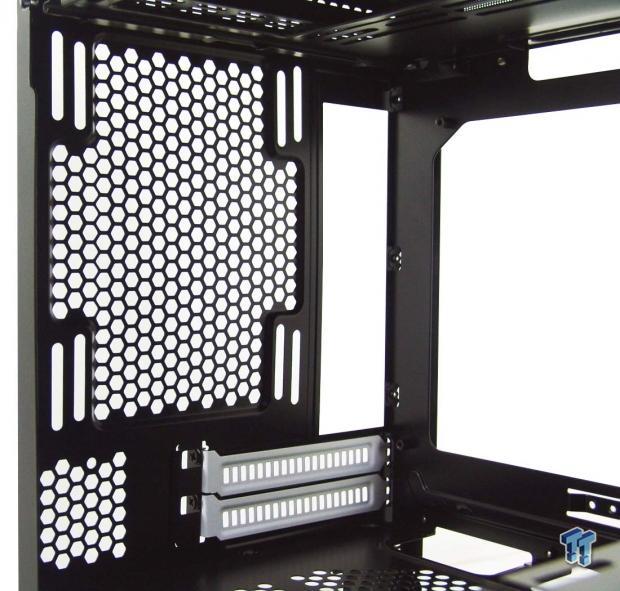
Since there is no fan installed at the back of the chassis, we again can see the four long slots for fan mounting. Below that, we can see the flat head screws currently holding in the pair of white expansion slot covers.
Behind the motherboard tray there is a lot offered here too. The SSD tray at the top left, Velcro straps for wiring, some hardware in the bays at the bottom, and a larger access hole for the power supply to slide in at the bottom.
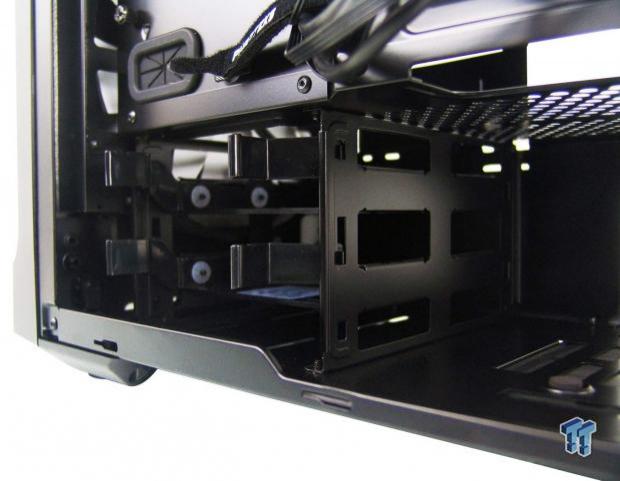
The bays at the bottom are for 3.5" drives, and they use plastic trays that slide out and they are tool-free. Remembering the screws under the chassis, and four above these bays, removing them allows this to come out if desired as well.
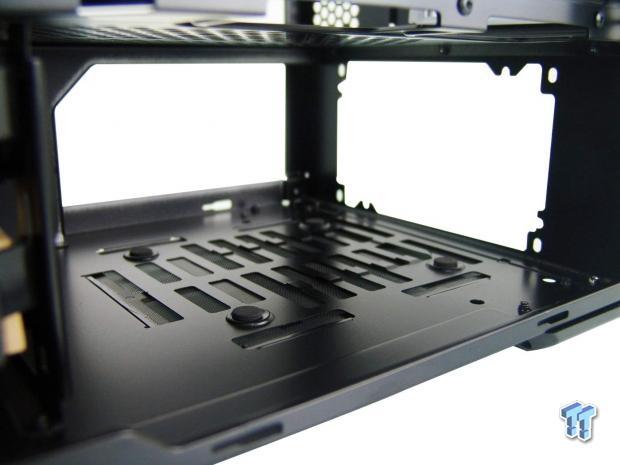
Even if you do remove the bays at the front, look at the lower rail, it has a bump at the same depth, so with or without the bays, you are limited to near 185mm to get the PSU in and supported on the four foam pads, which are used to help reduce vibrations.
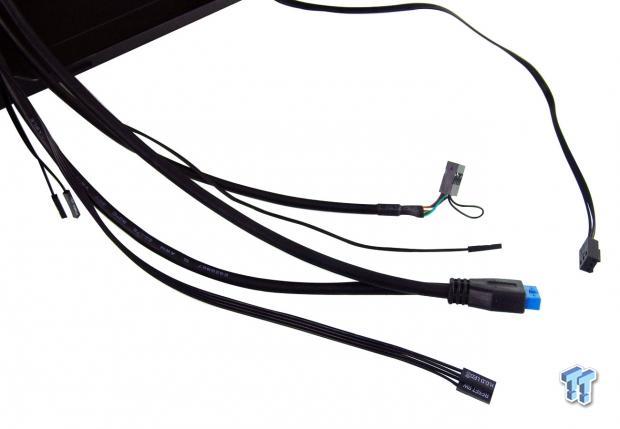
The PWR LED leads are the shortest, but all of the wiring got where we needed it to be. This also includes the reset switch, HDD LED, native USB 3.0, power, HD Audio and 200mm fan power leads as well.
Accessories and Documentation
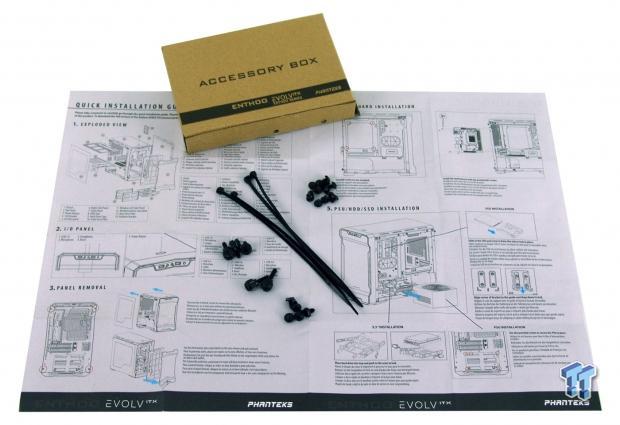
The box we found in the 3.5" drive bays is marked as the Accessory Box, and in it this is what we found. There is a basic guide to getting a build completed inside this chassis. Also in a bag within the same box, we find short thumbscrews, longer thumbscrews, PSU screws, four zip ties, and a few M3 screws at the right.

One of the two boxes that broke free inside the chassis is for this PH-HDDKT_01. This is a hanging cage for a 3.5" drive that can replace the 2.5" version already hanging behind the motherboard tray.
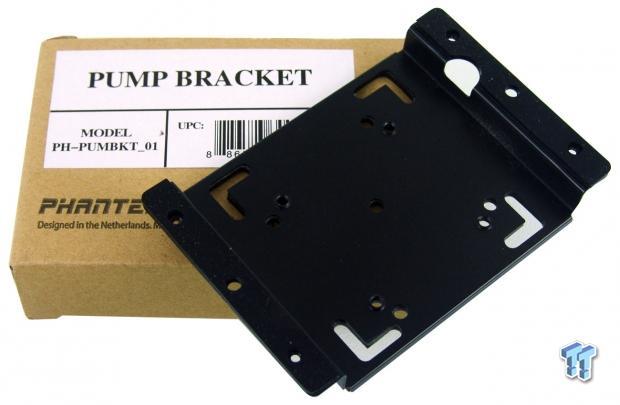
The other box offers us the PH-PUMBKT_01. This is a rubber padded and easily installed pump bracket. This side has rubber on both sides so when mounted to the chassis is makes no noise, and the entire other side has rubber as well to mount the pump on top of for more isolation.
Case Build and Finished Product
We always had a soft spot for chassis designs that look just as good finished as they did out of the box, and this Enthoo Evolv ITX does just that. Just simple lines, slightly aggressive angles, and clean looking.
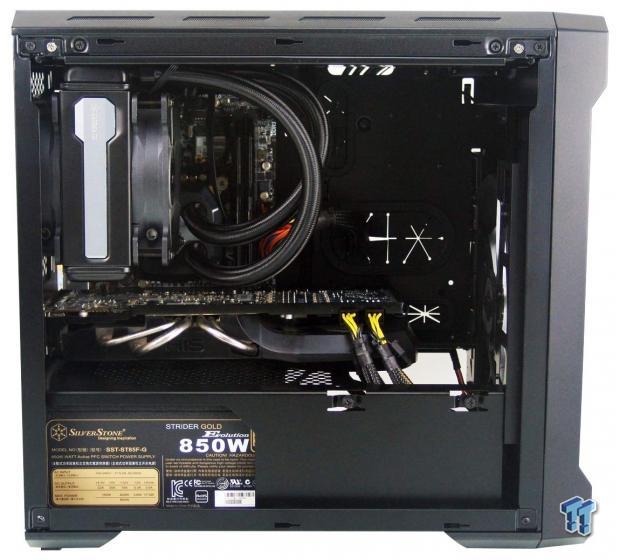
In our build, we pulled the plate to the right, allowing for the longer card to fit. We also buried most of the motherboard with the super thick AIO strapped to the back. We also like that the PSU cover is cut enough to display the sticker, but not open too much to expose the wiring.
While we do not have the dust plate for this motherboard, we did snap one in easily enough just to try it. We took advantage of the rear cooling option, and like the long holes so the AIO did not sit too low for the video card to fit well. As for the PSU, after sliding it in, it aligns well and is ready to be screwed in.

The pair of Velcro straps is all you really need when it comes to wiring this chassis. The front I/O wiring, the PSU wiring, even the SATA cable all run through them and do not cause any interference. Also, keep in mind that if you need the 3.5" bays to the left, you will need a much shorter PSU in this chassis.
Once all the bits are inside, and we got everything back together and are about ready for testing, we realized there is a bit of a tint to that side panel window, hindering a clear view of the interior. If we were to do this again, we would have opted to find some interior chassis illumination to show off the investment inside.
Once powered up, we find the power LED strip at the bottom is illuminated white, and there is a bit of noise coming from the chassis, but it was the Corsair H80i GT, not the 200mm fan at the front, which by itself is near inaudible even at full speed.
Final Thoughts
What do we like about this chassis? It's pretty simple really - everything! From the textured black exterior that we saw opening it up, and to the beefy solid feel of the chassis once in your hands is what started it for us. Then we took in the angles and lines, the simple yet slightly aggressive looks to it, and took in the potential view through the window, our mind started going on about what to do inside. Once actually looking at the interior layout, while conventional looking at first to some, everywhere you look there are finer details to be found. Like a PSU cover that is well ventilated for video cards to be able to still breathe inside, the removable section at the front to allow the card to fit as well.
The ease of installation of everything we put in it, the fact that there is a slide out radiator mounting tray in the top of this case... I mean come on, who thinks of this stuff over there? They are one smart cookie, that is for sure. Then when finalizing the build, realizing the chassis is perfectly set up to hide any and all wiring, routed right to where they are needed most, down to the optional parts, ability to be fully water cooling friendly, and even when it's gutted like what we did to the Enthoo Evolv ITX, it never lost its solid feel.
The chassis does only ship with a single 200mm fan, and we really shouldn't say only, as this fan moves a ton of air inside of this chassis, and the most we heard was through the back of the chassis where our meter showed us a 27dB reading. Beyond that, it is all up to you to pack in the fun. With 74mm of room at the top before conflicting with the motherboard for 240mm radiators, and slightly less for 280mm radiators in the top, cooling a CPU is easy. Then ponder that the front offers another 240mm radiator location, and the PSU cover plate is already cut to allow it to pass through at the front, now we have the GPU covered as well. While you can install a radiator at the rear of the chassis, if populating the front and the top, we are sure a simple fan will do just fine here. Also, when it comes to cleaning, you just have to pop off the front and that filter is accessed, slide out the PSU filter out the back of the chassis, and with that cool slide out tray for the top, you can move it to a more accessible location to remove fans and clean the fins.
While we really could go on and on about what we liked about this chassis, we still have the one thing that will make or break any chassis, no matter the feature set or style, and that is the cost. Putting this all down on paper with what features you are given compared to the market, and adding in the extras and all the very user friendly ideas swimming around in this chassis, we would have fully expected a price in the $100 to $150 range.
While Phanteks has definitely delivered in every aspect of this design, they also completely nailed it with the cost. With this Enthoo Evolv ITX only costing $69.99 currently, you would honestly have to be out of your mind to think that this isn't a huge deal when it comes to Mini-ITX chassis choices. Phanteks has really outdone themselves this time, and our only problem to report is now we feel like we need to buy a system and put this chassis to use full time!
 Lian Li B4-mATX Review: a compact mATX SFF case with excellent airflow and premium features
 Ocypus Sigma F36 BK ARGB Cooling Fan Review: high airflow and unified design in one frame
 PCCooler CPS RZ820 Display Review: a flagship-level CPU air cooler with an LCD screen
 MOAIPLAY ORA PRO G1 850W ATX 3.1 PSU Review: high efficiency and 10-year warranty for $119.99
 NZXT H6 RGB+ Compact Dual-Chamber Chassis Review
 Atari and Universal Pictures partner to create a movie based on Pong, Asteroids, Missile Command, and more
 Microsoft confirms every Windows PC is trackable and how it can lead to your arrest
 Microsoft confirms LG has responded to its monitors silently installing spyware on Windows 11 PCs
 NVIDIA is reportedly increasing the prices of its GeForce RTX GPUs due to rising memory costs
 Snapdragon X Elite laptop runs Cyberpunk 2077 using an RTX 4060 eGPU with the help of an RTX Spark development driver
 No amount of backlash will change Sony's mind on disc cancellation, says ex-Santa Monica dev
 The PS6 controller could eliminate stick drift by using magnetic joysticks
 Xbox confirms free game streaming with ads, clarifies how it'll work and ethos around monetization
 Ex-PlayStation boss can't understand why there isn't a Bloodborne remaster for PS5, but he hasn't given up hope yet
 AMD's Ryzen AI Embedded X100 Series processors are built for autonomous robots and physical AI
 Thrustmaster T.Flight HOTAS 5 MSFS Edition Review
 SteelSeries Arctis Nova Pro Omni Wireless Headset Review - One Headset to Rule Them All
 SteelSeries Arctis Nova 7 Wireless Gen 2 Headset Review - New and Improved, But Is It Enough?
 AMD Ryzen 7 7700X3D Review - Days of Future Past
 Samsung 990 2TB SSD Review - Ninth Gen QLC at PCIe Gen4 Speeds
 ASUS ExpertBook Ultra (Panther Lake) 14" Business Laptop Review
 ASUS ROG Raikiri II Xbox Wireless Controller Review - Ready to Take Control
 MOZA FMP18 Panel Bundle Review: authentic F/A-18 Hornet cockpit controls for flight sims
 Micron 6600 ION 245.76TB Enterprise SSD Review - Best in Class Programming Speeds
 MOZA MA3F EFCM Flight Control Module Review: authentic Airbus A320 autopilot panel for simulators
 6 Mistakes to Avoid When Buying a Windows Laptop
 I capped Windows Update's bandwidth with Delivery Optimization, and my downloads stopped choking
 I use this decade-old free tool that finds files faster than Windows Search does
 I install and update most of my apps with this Windows command now, and I stopped downloading sketchy installers
 Hisense U6SF 65-inch MiniLED TV: High Performance Meets Leisurely Convenience
 I stopped digging through Windows menus after I set up this one folder
 Don't sell your Windows laptop until you do these things
 6 PC cleaning mistakes to avoid for safer hardware maintenance
 Phison and Intel Take Aim at Local AI's Memory Wall with aiDAPTIV
 How to Remap Keyboard Keys in Windows using Microsoft PowerToys