


Introduction
Back in July, we had the opportunity to have the Supermicro C9 Z490-PGW in the lab to put together an overclocking guide where we were able to successfully push our Intel® Core i9-10900K (learn more here) upwards of 5.2GHz all core at 1.35v without issue. It's now time to revisit that Supermicro Z490 and throw together a mid-range gaming build, tune it, and see with a few of our favorite benchmarks and how well it can handle 1080p high FPS and 1440p gaming.
The term "mid-range" is likely going to have a different meaning to you than it does me. Going into this build, my expectations are for this machine to handle 1080p gaming on most AAA titles somewhere between 120-150 FPS on moderate to high settings. This really shouldn't be an issue, but were are still in the middle of a pandemic, parts are hard to find, and product launches haven't gone well up to this point. That said, we won't be tapping the latest and greatest parts for this build, but instead a modest build to meet our goal.
Let's get to the hardware! Details on the giveaway are at the bottom of the page.
The Hardware

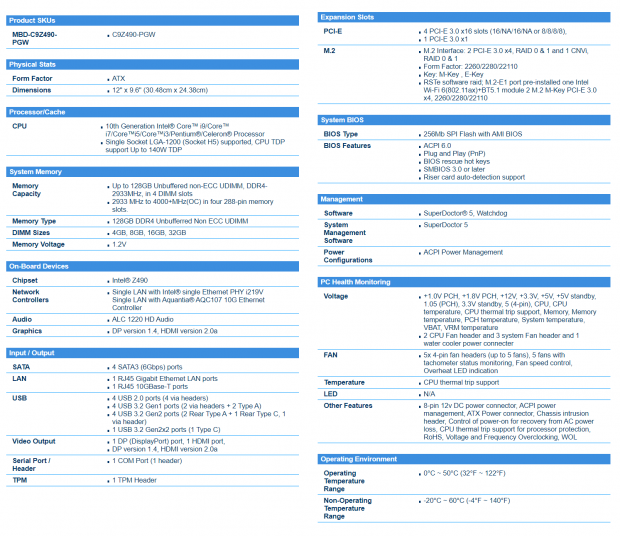
The beating heart of this entire build guide write-up is the Supermicro C9-Z490 PGW motherboard. This board offers some pretty high-end specifications for a gaming motherboard, starting with the Intel® Z490 chipset. A few features that stand out right away are four PCIe x16 slots that can operate in a 16/0/16/0 config or 8/8/8/8 if you need to populate all four. We have support for 2280 m.2 NVMe solutions on two slots and 10Gbe powered by the Aquantia AQC107. Rounding out the specifications, we have the usual USB 3.2 Gen 1 and 2 ports with a small gem hidden away in the details - the USB-C port tucked under the 10Gbe RJ45 on the back panel is USB 3.2 Gen 2x2, 20Gbps capable.


Getting a quick look at the board, we have a simple dark aesthetic with several heat sinks covering the chipset and m.2 slots down below. The CPU VRM area is handled by larger finned stacks to dissipate heat more quickly. PCIe x16 slots are shielded, something that is becoming more and more common on boards designed for PCIe 4.0. The layout of the C9-Z490 is par for the course, 24-pin power sits to the right on the board and 8-pin CPU power at the top left. SATA and front panel connections are angled to the right for direct access from behind the motherboard tray; something system builders will enjoy.
A closer look at the CPU reveals we do have a flagship offering from Intel® on tap for this build guide; the Core i9-10900KF, so a big thanks to Intel® for supplying the CPU!


Both m.2 slots enjoy cooling from integrated heat sinks attached to the motherboard. Both of these integrated solutions come equipped with a thermal pad for installation.


Wrapping up the motherboard, the memory slots also come shielded. This should aid in less cross path interference from components on the motherboard. In the second image, we have the accessories for the motherboard; I/O panel, Wi-Fi antenna, and SATA cables.
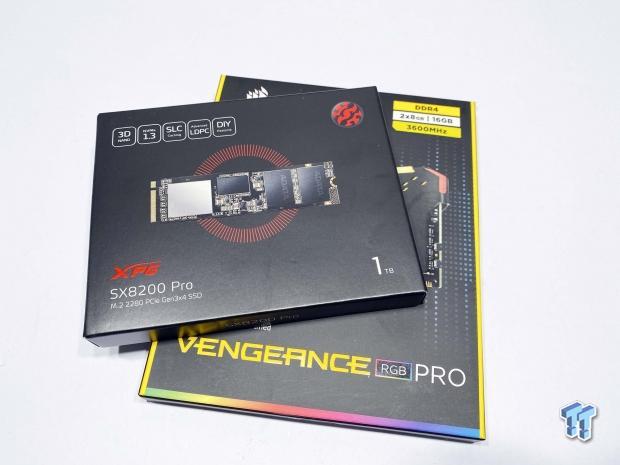
Our next bit of hardware is the SSD and memory. For this, we chose the 1TB variant of the ADATA SX8200 Pro, likely the best NVMe ADATA has ever made and one of the best PCIe 3.0 solutions available for sure. Hidden under the ADATA drive, we have our 16GB kit of Corsair Vengeance RGB Pro. I went with 3600MHz CL16 to keep with the mid-range theme of this build.
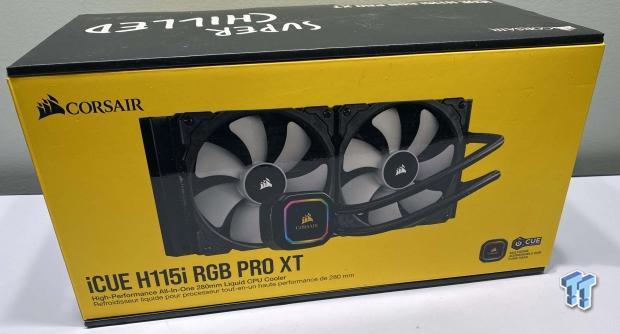
To keep our 10900KF cool, we tapped on the shoulder of Corsair and picked up the iCue H115i RGB Pro XT, a dual 140mm rad or 280mm solution that should have no issue handling the 125W TDP of our CPU.


To power this system, we have the highly regarded 850W High Current Gamer from Antec; an 80Plus Gold rated supply that offers Japanese capacitors, and a fully modular design that's at peak 92% efficient. This is a single rail design offering 70A over the +12v rail and another 20A on both the 3.3 and 5v lines.


EVGA answered the call when we needed a great looking pixel slinger; dropping a legit GeForce RTX 2070 Super Black on our doorstep.
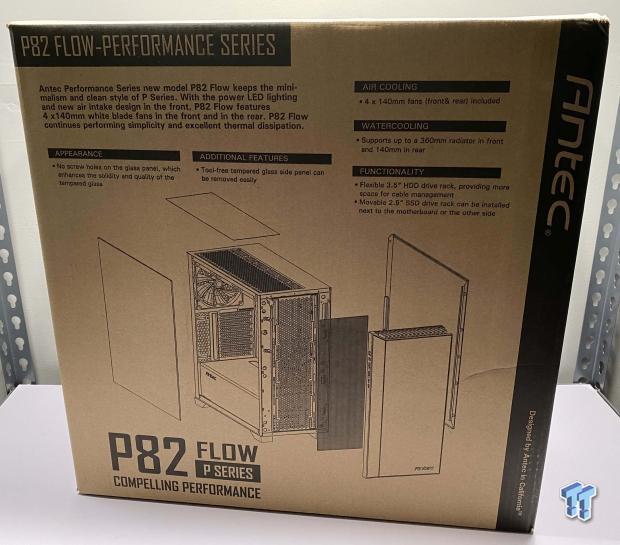
Last, we needed a chassis to put all of these fantastic parts in, and I wanted to go with a platform that would have no restrictions on airflow for the best temperatures possible during long gaming sessions. For this, we chose the P82 Flow from Antec.
The Build
The Build
Before we get into the build, we need to express our gratitude towards the vendors that helped put this system together. These include Supermicro, Intel®, Corsair, Antec, EVGA, and ADATA.
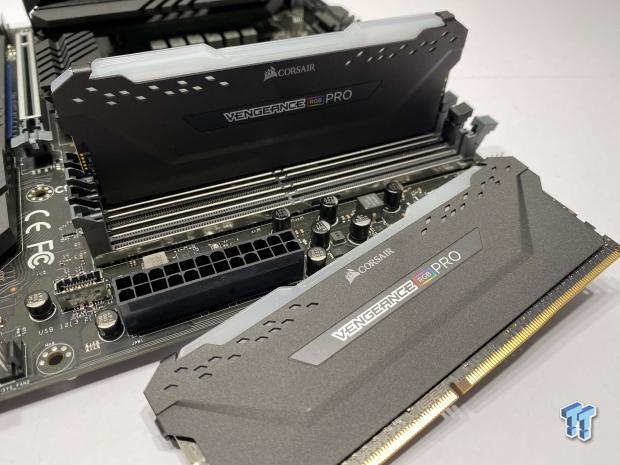
The build starts by installing the Corsair Vengenace Pro into the grey slots on the motherboard, locking in the bottom first, then the top.
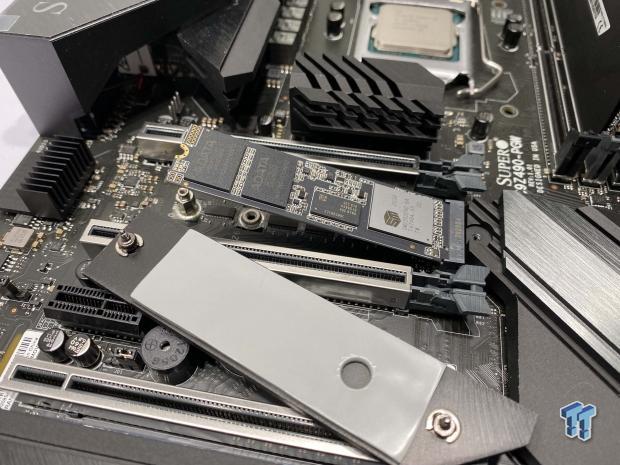
The ADATA SX8200 Pro slides into the top m.2 slot on our motherboard. Removing the film from the thermal pad, we can get the heat sink attached.

I then moved to the power supply and prepped the Antec HCG with 24-pin, 8-pin, and PCIe power as the basics.


I then tucked the High Current Gamer into its place under the motherboard; wires first. We then fastened the back with four screws supplied with the PSU. You can choose now if you want to use hybrid mode with the switch.


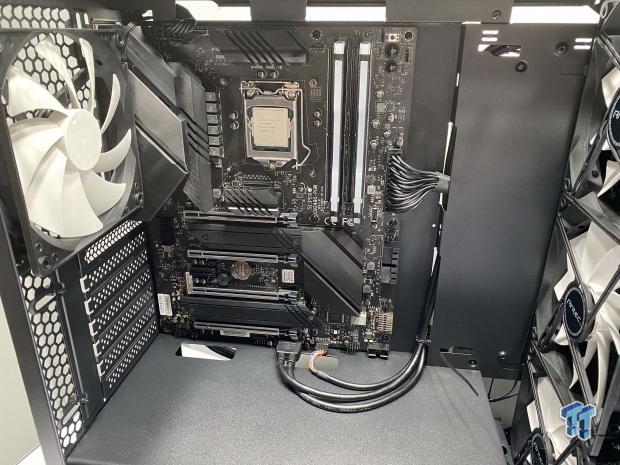
Moving to the chassis, we prepped it to accept our Supermicro Z490 by installing the rear I/O plate and adding three stand-offs to the motherboard tray.
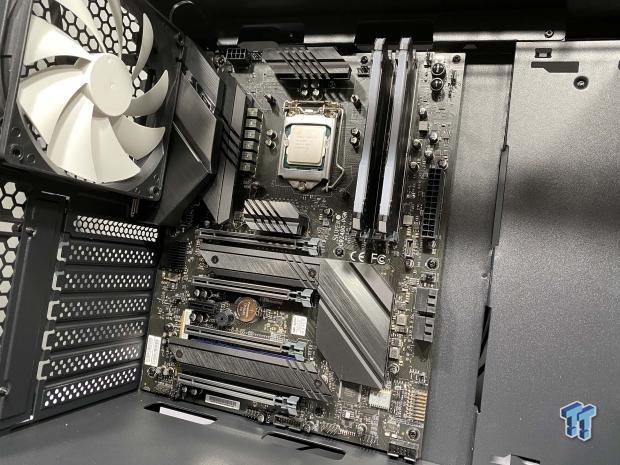
Board installed, we fasten it down as well using all nine spots available. We also flipped the chassis around and installed the backplate and retainers for the CPU cooler from Corsair.
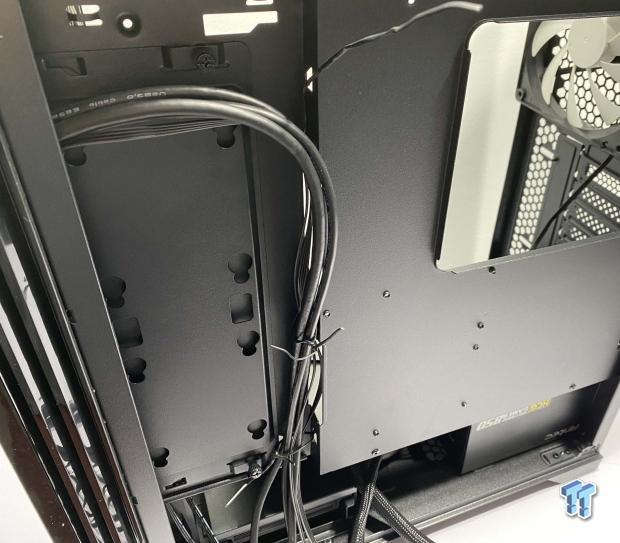
Antec has a channel for securing wiring along this edge. We will use this for most of our wiring as it offers a void between levels to fit some of the thicker wires like the 24-pin cable.
Wiring will always be the first thing that's noticed when someone looks at your build, so we take a little more care in routing cables so that they look good. In this situation, the internal headers for both USB 3.0 and HD Audio were too short to route under the bottom tray. We improvised, running them through the bottom slot on the motherboard tray. The 24-pin cable slid in with no issues, and the 8-pin cable also, no problems making the connection.


Mounting the Corsair AIO proved an issue up top. There was no clearance for fans before running tight against the memory. In this case, we opted to move the front intake fans and mount the rad upfront with fans first to pull air from outside. The OG intake fans now become top-mounted exhaust.
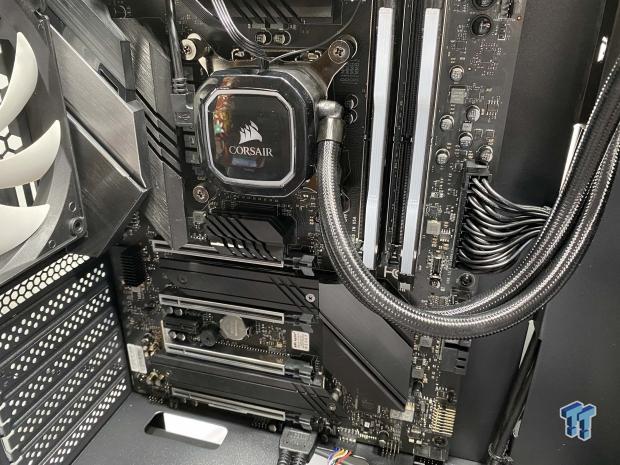
With the radiator mounted up front, I secured the block/pump with the included hardware. TIM used was Arctic MX4.
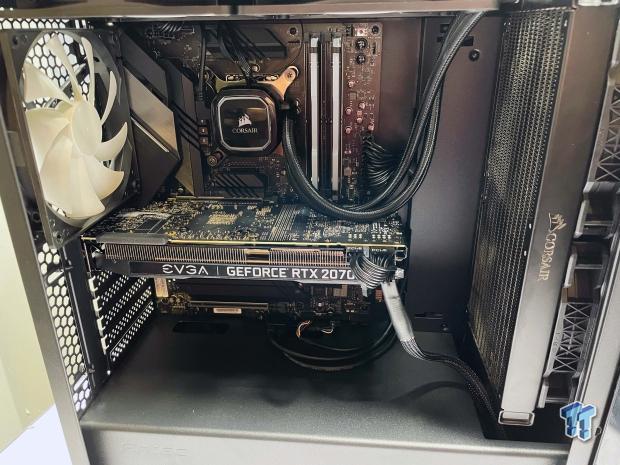
Last, we installed the RTX 2070 Super from EVGA, securing the card's power, ready for the first boot!
First Boot - Configuring the System
First Boot
First Boot


First boot, we head into the UEFI to configure XMP for the memory and let the system run for a few minutes, watching temperatures before we move into installing Windows 10 Pro.
Configuring the System
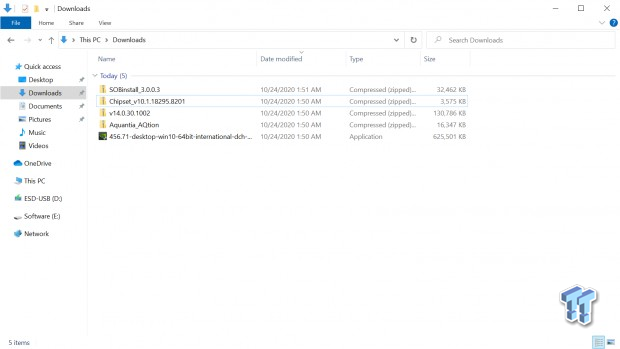
The Windows 10 install took only a few minutes to our ADATA SX8200 Pro. From there, we boot back in and, thanks to the inclusion of the AX200 Wi-Fi 6, jump on the web to download drivers for the motherboard chipset and GPU.
Additionally, we grabbed the iCue software for the AIO and memory along with EVGA Precision X1 for the GPU and ADATA SSD Toolbox for the SX8200 Pro.
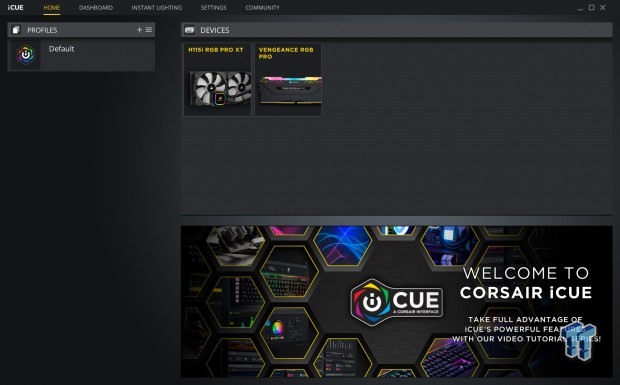
As mentioned, iCue would be set up to control the H115i and Vengeance RGB. With the software, you can configure fan speeds and RGB on the cooler, and RGB settings for the DRAM.
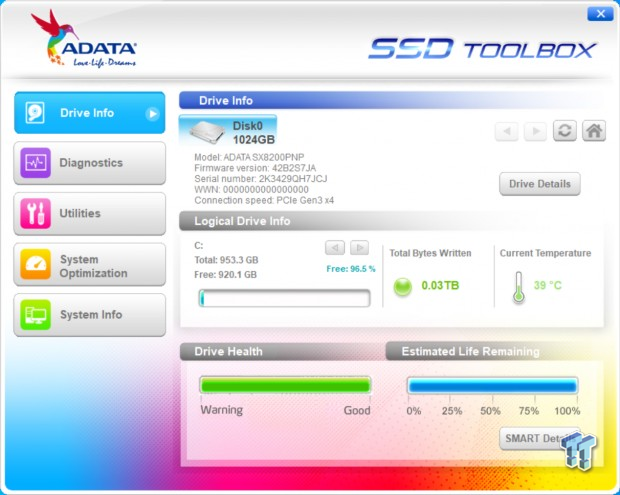
ADATA SSD Toolbox gives you insight into the SSD's life along with tools such as system optimization, which we did run to TRIM the SSD after everything was installed.
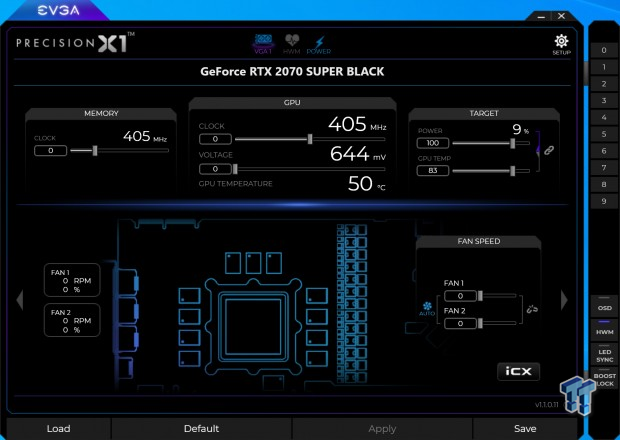
I picked up EVGA Precision X1 just in case we needed to tune / overclock the GPU to reach our performance goal. With the 10900KF for the CPU, we should have plenty of headroom on that side of things.
Tuning and Testing
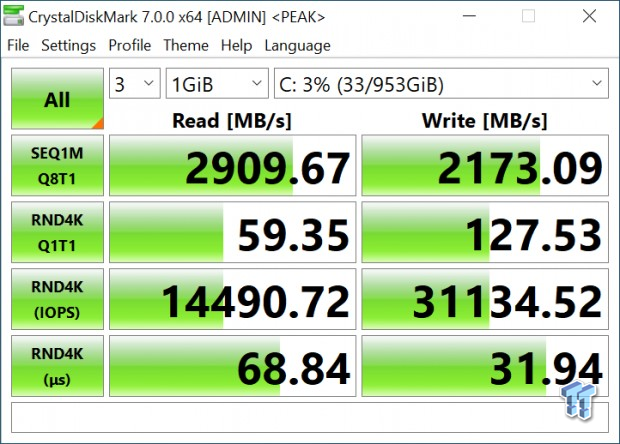
Starting our tuning phase, I wanted to check the SSD performance after the TRIM to see if it was where we expected it to be, and it was ~2900/2100 for sequential and ~60/125 for 4KQ1.
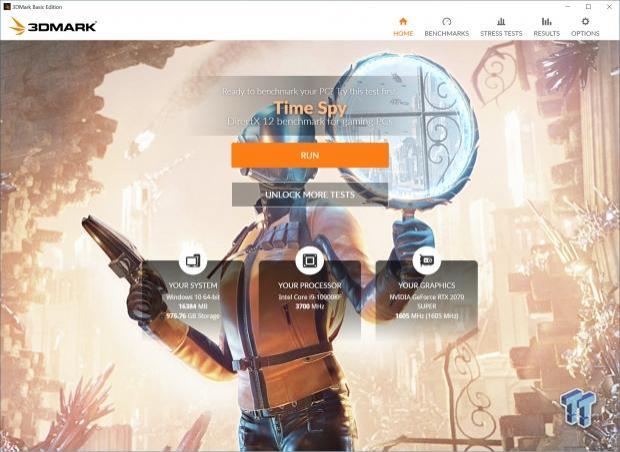
Moving into "gaming" testing, I chose Timespy and Shadow of the Tomb Raider for baseline performance. You can see our system specs are outlined in the screenshot above.
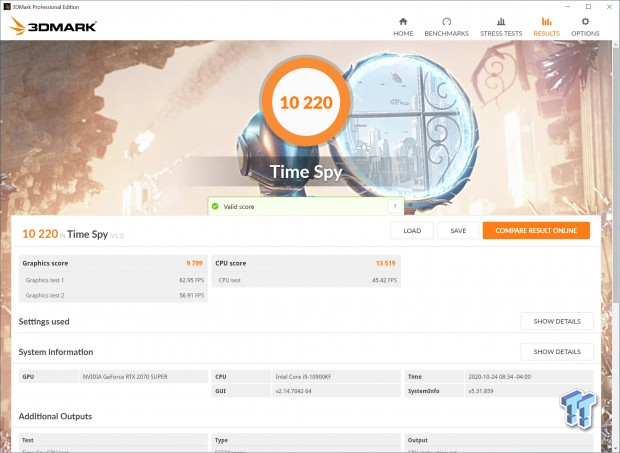
Baseline performance was run on an untouched system; I didn't even do any fan tuning to the GPU. This left us with 10220 on Timespy.
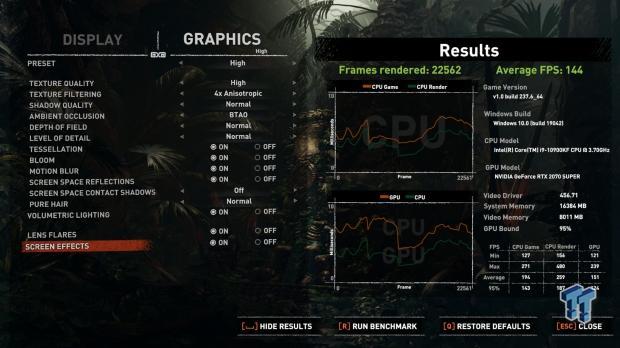
I setup Tomb Raider to our specification; 1080p with the High preset. We are right on par with our goals in this situation, but we will try to squeeze a touch more out by tuning the GPU.
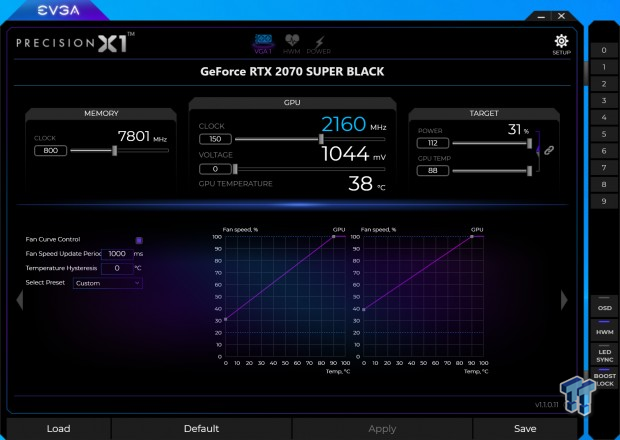
Opening up Precision X1, I started tuning the GPU first by setting a more aggressive fan curve. We then dialed on 800 on the memory to get us to 7800MHz and an extra 150 to the core. The 2070 Super is known to handle +175-180 on some samples, so I thought this was a safe place to leave it. I also tuned the power target, moving it to 112%.

Tuning the GPU netted us about 870 points in Timespy.
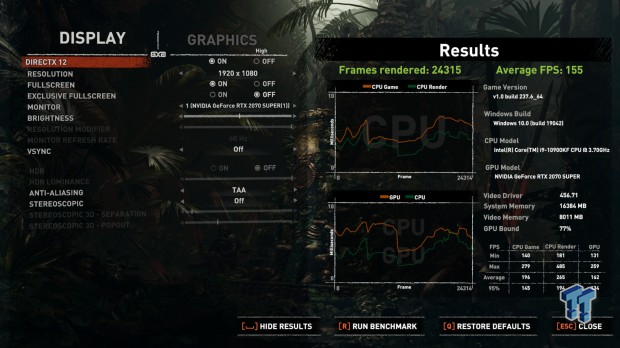
We were also able to pick up 11 FPS in Tomb Raider, a more comfortable average for this system.
Wrapping it up
I've built many systems in my lifetime, and I'm adding this build to my list as a success. I can be honest and say this was my first interaction ever with a Supermicro platform, and the C9-Z490 was a very easy motherboard to build with, and Intel made it even better with the 10900KF.
These two together meant we didn't need to overclock the processor at all to reach our goal of 120-150FPS at 1080p, and I'd hazard to say this machine could handle 1440p as well with solid framerates. That said, for anyone that does decide to build with this Supermicro platform, we have a very in-depth overclocking guide that will aid you in getting the most from your CPU.
The 2070 Super from EVGA did the heaviest lifting but was a solid card to pair with the 10900KF, especially with the current GPU market being so untamed. You can pick these cards up for $250 in some cases, and they are perfect for 1080p.
Rounding out the build, I chose 3600MHz for memory as it's a good medium between low-end JEDEC kits that run up to 2933 and the bleeding edge 5000MHz+ available on the market. Corsair's Vengeance RGB is as reliable a kit you will find and in our system ran without issue. We needed only a few clicks in the Supermicro UEFI to load XMP, and the memory was set. These kits are super cheap right now ~$90, making it a fantastic kit for a mid-range budget build.
The power supply should be one of the most important choices you make, and I went with the High Current Gamer from Antec because it's built and designed in partnership with Seasonic, one of the best names in the game - super reliable and clean power for our build. This pushes us to the Antec P82 Flow, an entry-level option that you can pick up for $70-80. It has tempered glass, which is all the rage, and has clean lines and amazing airflow, so I chose it. This case was fantastic to build in, with plenty of room to move cables and a decent amount of anchor points for cable ties.
Overall this is a solid machine, top to bottom, and there is room for this machine to grow when needed. The inclusion of the Z490 and 10900KF means we could likely take this up a notch with a better GPU. In the immediate future, this machine will push through hours of 1080p gaming like a boss!
For more information, please visit Supermicro.com.
Giveaway!
Want to win this awesome mid-range gaming PC powered by Supermicro and Intel? Read and follow the steps below. Entry is open to people from all countries.
How to Win
- Step 1 - Like our Facebook Fan Page.
- Step 2 - Like Supermicro Gaming's Facebook Fan Page.
- Step 3 - Subscribe to our newsletter. Ensure you double opt in and confirm your subscription. If you are already subscribed, there is no need to subscribe again.
- Step 4 - Subscribe to our YouTube channel. If you are already subscribed, there is no need to subscribe again.
- Step 5 - Like this post at Facebook. You can share it if you wish, but we are NOT asking you to share it.
- Step 6 - Make a comment on the same post at Facebook. Only tag your friends if you deem it totally necessary - tagging friends is NOT a requirement.
- Step 7 - Sit back and hope you are a winner - good luck! Do note, all the above items will be confirmed to make sure you followed the requests, if you get selected as the winner.
Disclaimer
This promotion is in no way sponsored, endorsed or administered by, or associated with Facebook or YouTube. You understand that you are providing your information to TweakTown and not to Facebook or YouTube. Information provided is only for selecting and contacting a winner. Your email address will be added to the TweakTown Newsletter if you decide to add it.
- The giveaway runs from November 3, 2020 until November 17, 2020 at 3:00 pm GMT +10 - no entries will be taken into consideration after that time.
- We will select winner(s) randomly using Fanpage Karma's "Good Luck Fairy" (https://www.fanpagekarma.com/facebook-promotion)
- If you are a winner, you will be asked to provide your full name, address, and telephone number for shipping via Facebook message. These details will only be made available to the company participating in this giveaway. If you do not claim your prize within two weeks, it is forfeited.
- For this weekly prize, anyone in the world can enter. You don't pay the shipping charges, but you are responsible for all taxes and / or duties.
 Atari and Universal Pictures partner to create a movie based on Pong, Asteroids, Missile Command, and more
 Microsoft confirms every Windows PC is trackable and how it can lead to your arrest
 Microsoft confirms LG has responded to its monitors silently installing spyware on Windows 11 PCs
 NVIDIA is reportedly increasing the prices of its GeForce RTX GPUs due to rising memory costs
 Snapdragon X Elite laptop runs Cyberpunk 2077 using an RTX 4060 eGPU with the help of an RTX Spark development driver
 No amount of backlash will change Sony's mind on disc cancellation, says ex-Santa Monica dev
 The PS6 controller could eliminate stick drift by using magnetic joysticks
 Xbox confirms free game streaming with ads, clarifies how it'll work and ethos around monetization
 Ex-PlayStation boss can't understand why there isn't a Bloodborne remaster for PS5, but he hasn't given up hope yet
 AMD's Ryzen AI Embedded X100 Series processors are built for autonomous robots and physical AI
 Thrustmaster T.Flight HOTAS 5 MSFS Edition Review
 SteelSeries Arctis Nova Pro Omni Wireless Headset Review - One Headset to Rule Them All
 SteelSeries Arctis Nova 7 Wireless Gen 2 Headset Review - New and Improved, But Is It Enough?
 AMD Ryzen 7 7700X3D Review - Days of Future Past
 Samsung 990 2TB SSD Review - Ninth Gen QLC at PCIe Gen4 Speeds
 ASUS ExpertBook Ultra (Panther Lake) 14" Business Laptop Review
 ASUS ROG Raikiri II Xbox Wireless Controller Review - Ready to Take Control
 MOZA FMP18 Panel Bundle Review: authentic F/A-18 Hornet cockpit controls for flight sims
 Micron 6600 ION 245.76TB Enterprise SSD Review - Best in Class Programming Speeds
 MOZA MA3F EFCM Flight Control Module Review: authentic Airbus A320 autopilot panel for simulators
 6 Mistakes to Avoid When Buying a Windows Laptop
 I capped Windows Update's bandwidth with Delivery Optimization, and my downloads stopped choking
 I use this decade-old free tool that finds files faster than Windows Search does
 I install and update most of my apps with this Windows command now, and I stopped downloading sketchy installers
 Hisense U6SF 65-inch MiniLED TV: High Performance Meets Leisurely Convenience
 I stopped digging through Windows menus after I set up this one folder
 Don't sell your Windows laptop until you do these things
 6 PC cleaning mistakes to avoid for safer hardware maintenance
 Phison and Intel Take Aim at Local AI's Memory Wall with aiDAPTIV
 How to Remap Keyboard Keys in Windows using Microsoft PowerToys