


Introduction and Specifications
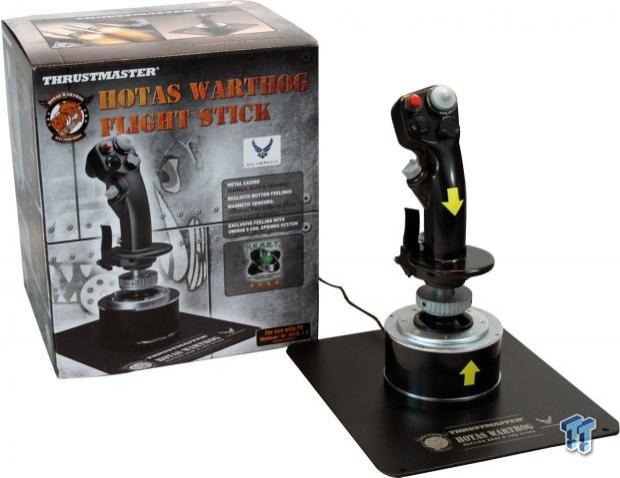
The Thrustmaster HOTAS Warthog flight stick is a replica of the U.S. Air Force A-10C attack aircraft's flight pack, and is licensed by the U.S. Air Force.
Built from the ground up, completely out of metal, this flight stick looks, and feels just like the real A-10C flight pad. The stick includes two, four-direction hat switches, each of which has built-in push buttons; at the time, this was the first stick to incorporate these features.
Each of these buttons, and four-direction hat switches supply realistic pressure to simulate the real A-10C's flight pad. The HOTAS Warthog is a stand-alone joystick that requires no other devices to function.
Specifications
The specifications for the HOTAS Warthog are impressive. Let us take a look at some of the features of this flight stick.
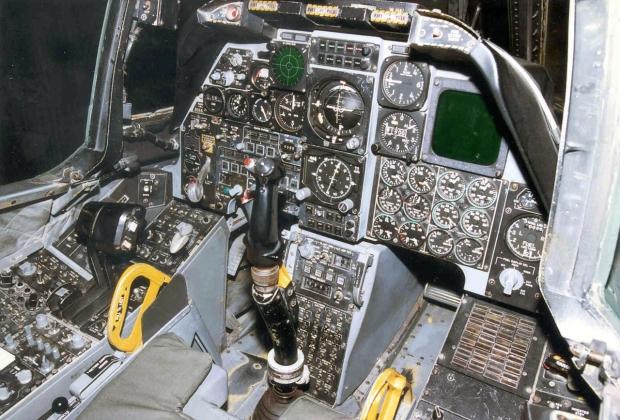
The HOTAS Warthog was designed to be a replica of the U.S. Air Force A-10C attack aircraft flight stick. We searched the web, and found this picture of a Fairchild Republic A-10A Thunderbolt II cockpit. As you can see, Thrustmaster did a very good job of making the HOTAS Warthog flight stick look just like the real thing.
Next we have H.E.A.R.T., or Hall Effect AccuRate Technology. This consists of 3D magnetic sensors (Hall Effect), which allow surgical precision that will not decrease over time. The resolution of this is 16-bit (65536 x 65536 values), and it has a five coil spring system that allows for linear, smooth, and firm tension, without any dead zones.
The flight stick itself is made entirely of metal, and weighs over 6.6 pounds (3 kg). It has a detachable metal base plate, and can be mounted for desk or cockpit-style use. There are realistic pressure on buttons and triggers that mimic the real A10 flight stick. There are ninteen action buttons, with one eight-way "point of view" hat:
Our Latest Game Controllers Review Coverage
- SCUF Valor Pro Wireless Performance Controller Review - A Pro Pad for PC and Xbox
- Turtle Beach Recon Wired Gaming Controller Review
- ATEN Phantom S UC3410 Gamepad to Keyboard Emulator Review
- Microsoft Xbox One Elite Wireless Gaming Controller Review
- SteelSeries FREE Mobile Wireless Bluetooth Controller Review
- 1x 8 way "point of view" hat
- 2x 8 way hats
- 1x 4 way hat with push button
- 1x metal dual trigger
- 2x push buttons
- 2x pinkie push buttons
For a PC interface, the HOTAS Warthog uses a USB connection, and has upgradable firmware. The software for the flight stick is T.A.R.G.E.T. (Thrustmaster Advanced pRogramming Graphical EdiTor) suite. This allows you to test, configure, and program the following:
HOTAS Warthog, MFD Cougar, HOTAS Cougar, T.16000M, and HOTAS Warthog Flight Stick.
The software features different programming levels, from basic to advanced, and also script with drag and drop principles.
PRICING: You can find the Thrustmaster HOTAS Warthog Flight Stick for sale below. The prices listed are valid at the time of writing but can change at any time. Click the link to see the very latest pricing for the best deal.
United States: The Thrustmaster HOTAS Warthog Flight Stick retails for $287.81 at Amazon and the Thrustmaster HOTAS Warthog Flight Stick with Throttle retails for $497.65 at Amazon.
Canada: The Thrustmaster HOTAS Warthog Flight Stick retails for CDN$298.06 at Amazon Canada and the Thrustmaster HOTAS Warthog Flight Stick with Throttle retails for CDN$499.99 at Amazon Canada.
Unboxing
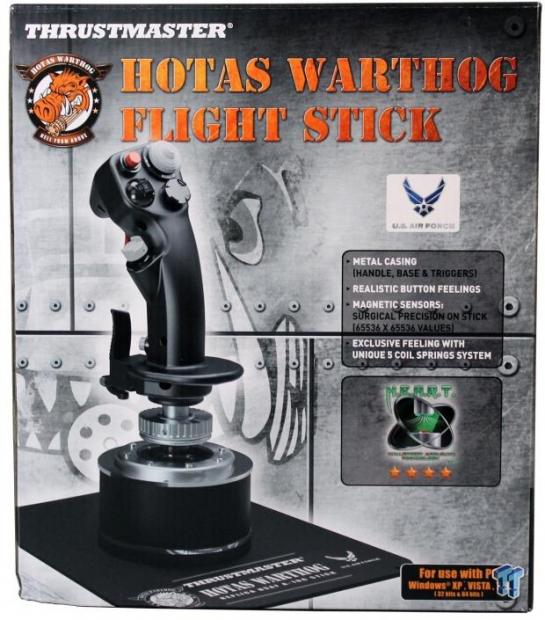
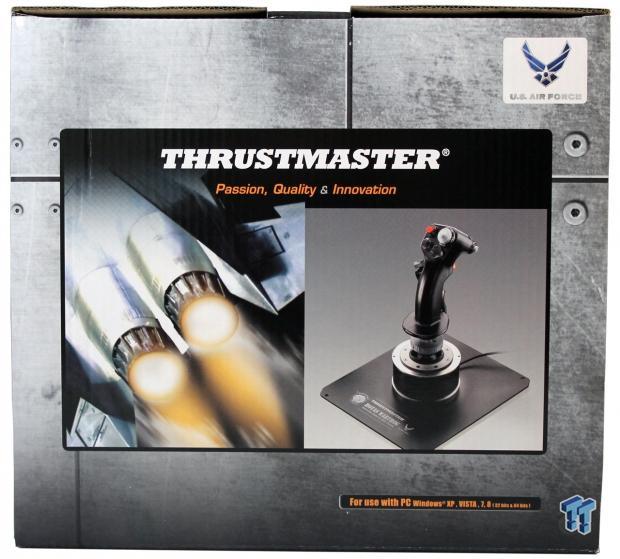
Taking our first look at the front of the retail box for the Warthog, we can see the U.S. Air Force logo at the top right, showing that Thrustmaster is under license with the HOTAS Warthog flight stick.
The main selling points of this stick are also right up front, and easy to see:
- Metal Casing (Handle, Base, and Triggers)
- Realistic button feelings
- Magnetic sensors
- Exclusive feeling with unique five coil springs system
- And this flight stick is made for the PC using Windows, XP, Vista and 7,8, 32bit, or 64bit
Some of those specs are bit outdated, and we wonder how many gamers are still using Win XP 32bit, but it's nice to know that you can use just about any Windows OS with this stick.
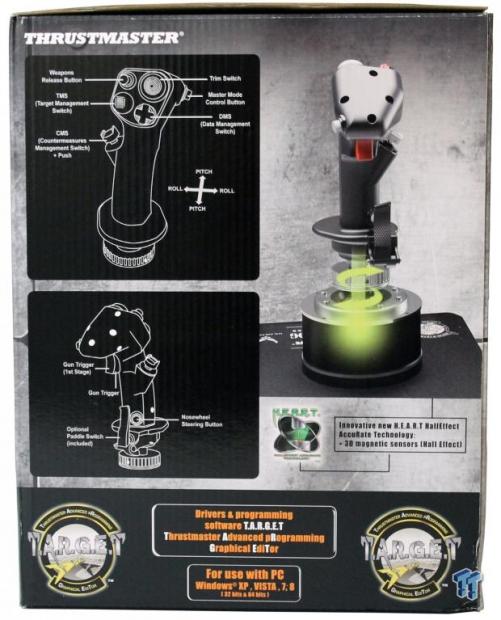
The left and right sides of the box have the same image. Here we can see pictures of what all the buttons and triggers do on this stick. A nice graphic shows how the H.E.A.R.T. (Hall Effect AccuRate Technology) works. The bottom section has logos for the T.A.R.G.E.T. software used with the Warthog, and again offers system specs.
This is the top of the retail box. There is a nice picture of the joystick, and fancy afterburner flames coming out of the back of a jet.
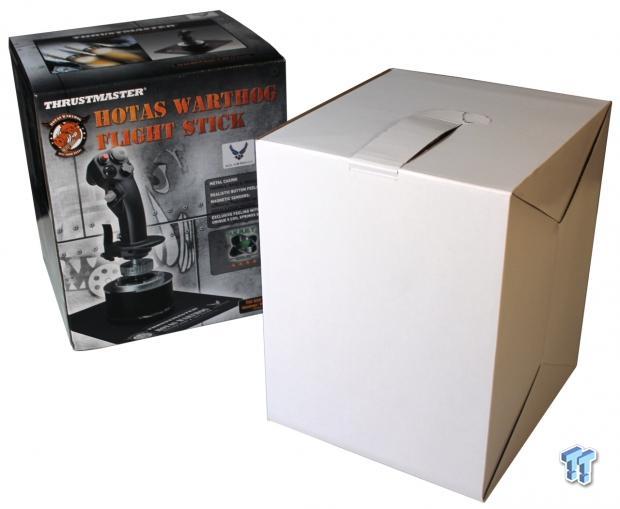
After opening up the retail box, you are greeted with another box. There is a kind of lifting tab at the top of the white box, but it was not strong enough to be able to lift the white box out, so it's best to turn it all upside down, and slide the outside box off.
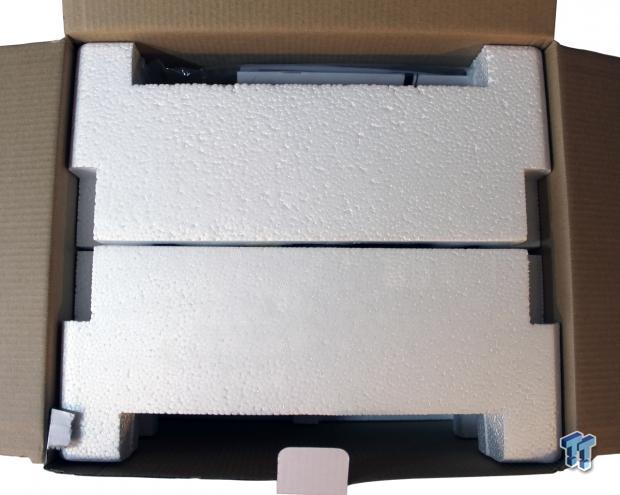
Opening up the white box, we find everything is nicely packed with Styrofoam. Again, it's best to turn this upside down, and lift the white box off.
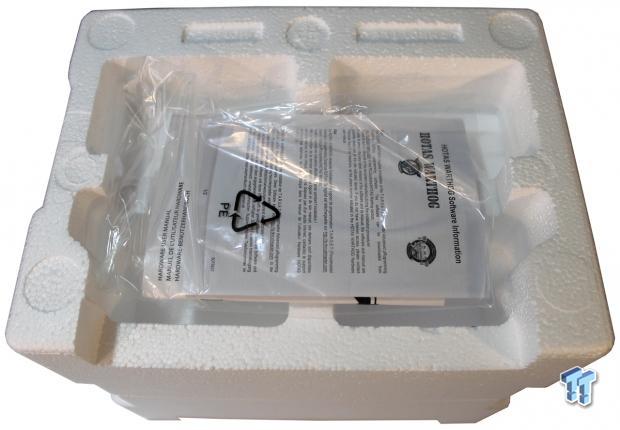
After lifting the white box off, we find a plastic bag with instructions and user manual along the side of the Styrofoam packing.
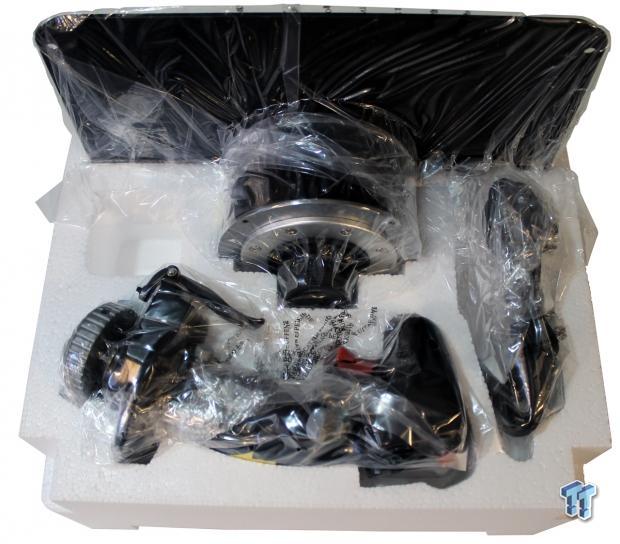
Now when we finally get to the flight stick inside, everything is enclosed in plastic bags, and stored nicely and neatly in the Styrofoam packing. It looks like more, but there are really only two pieces here, the base and the flight stick.
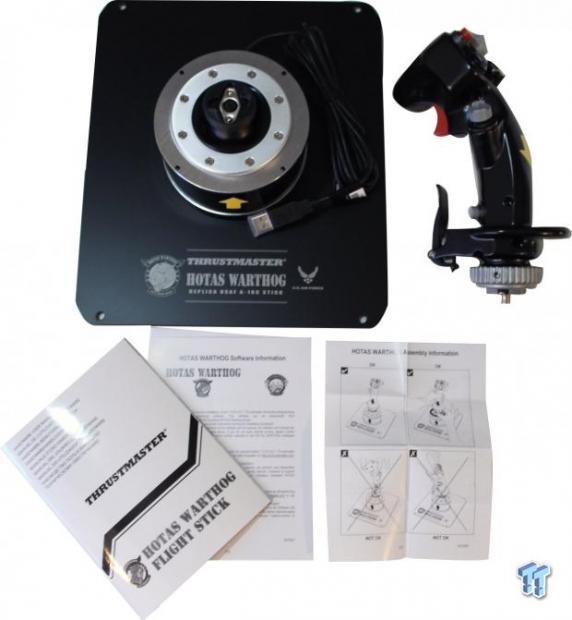
Here we have the entire contents of the retail box. There really are not a lot of parts to this; there are only two pieces, and the user manual.
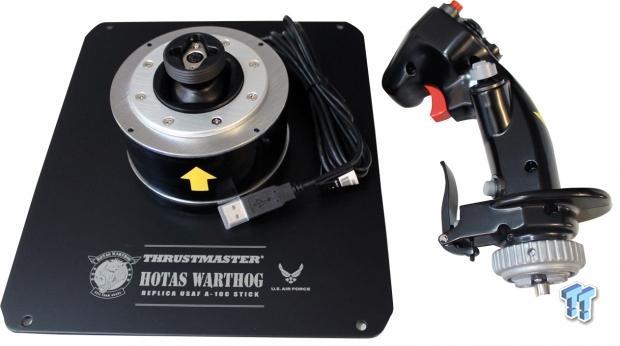
Here is another look at the flight stick and base.
Our first impressions are that this stick weighs a lot, and there is a very nice finish to the flight stick itself. The HOTAS Warthog is very solid, and has no real lip or grove where the two halves of the flight stick are assembled.
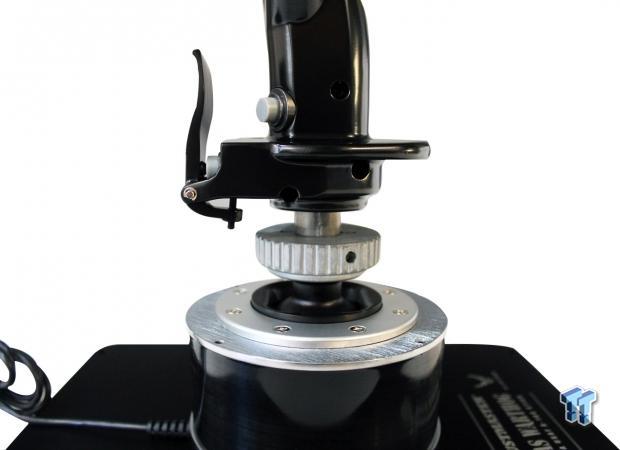
Attaching the flight stick to the base is rather simple; just insert the flight stick into the socket, and screw down the metal retaining nut. It's not rocket science here, and it only fits one way.
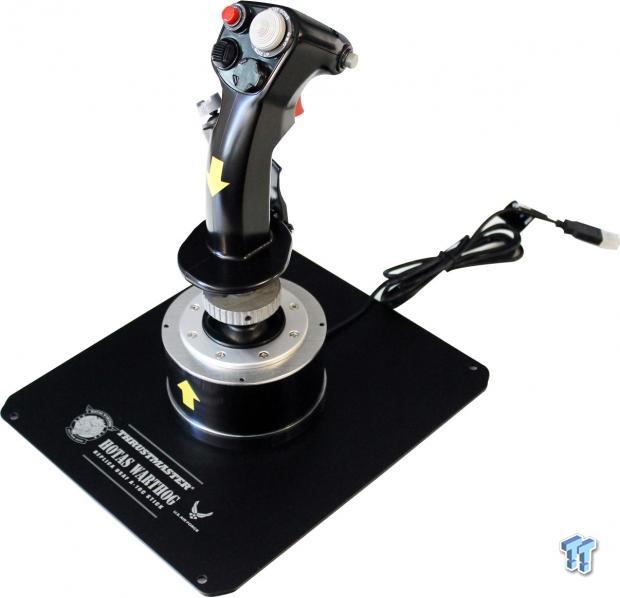
HOTAS Warthog Flight Stick

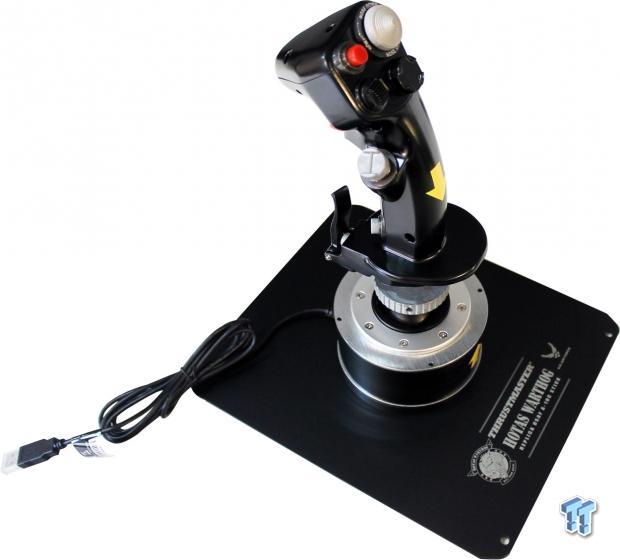
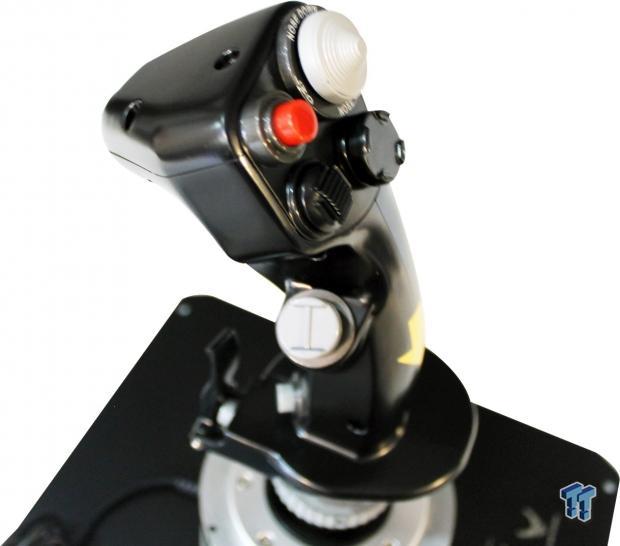
Here we get our first look at the fully assembled HOTAS Warthog flight stick; it's impressive to say the least. Weighing in at 6.6 pounds, it's not light, and it can take a fair amount of force without even budging on your table.
The base plate is rather large, and can take up a fair amount of room on your desk. It's also rather tall, and comes to about 11 inches high.
I am about 6' 2" tall, and sitting in my chair with my arm stretched out level to grab onto the stick is no issue really. Up close to where I would use the stick is fairly comfortable for me. The flight stick itself is rather large, but fits my hand just fine. Reaching up to the red button and gray HOTAS is a bit of a stretch, but it's not too bad though. Holding the stick does feel natural and comfortable to me.
The movement of the stick itself is very smooth; it takes just enough force to move the stick around to allow for precise aiming and movement. On some other sticks, we tried going from a left 90 degree to straight up, and would sometimes have a notching feel at the 45 degree zone as though they were hitting guide grooves inside the stick; so going in a full circle, you can feel the 45 degree zones. The HOTAS Warthog is smooth all the way around, doing full circles no matter how hard of a turn you are trying to make.
It does self-center rather well, and maybe a bit too aggressively if you let go of the stick. There is enough tension on the stick to self-center even when holding it.
Here we have another angled look at the flight stick. The finish of the stick itself looks shiny; it's smooth, and does not show finger prints all over after using it.
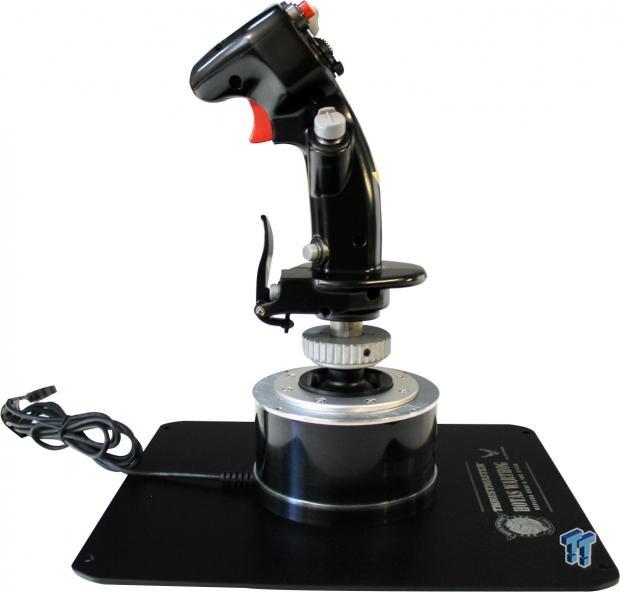
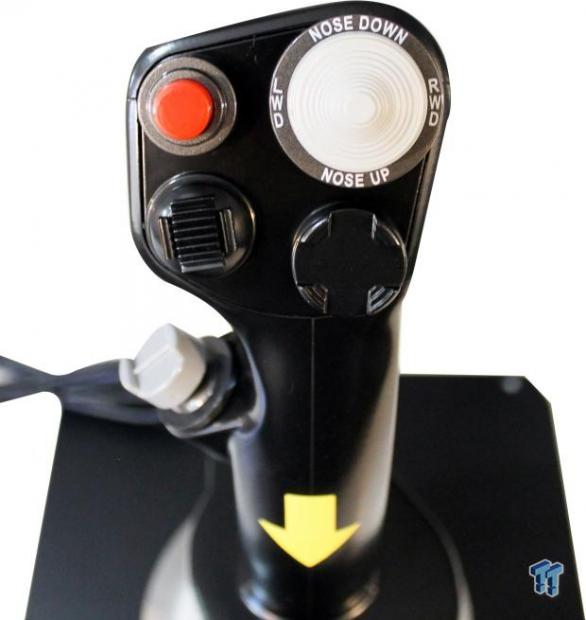
We are looking at the side of the flight stick now.
The base of the stick is almost 2.5 inches, with the trigger being about 5.5 inches up from where your index finger would be. It does sit high up, which takes a little bit of getting used to.
We are looking at the left side of the HOTAS now. This picture shows the matte finish of the metal rather well. You can see the assembly seam where the top metal piece is attached to the rest of the stick, but you can't really feel this seam; it's very smooth.
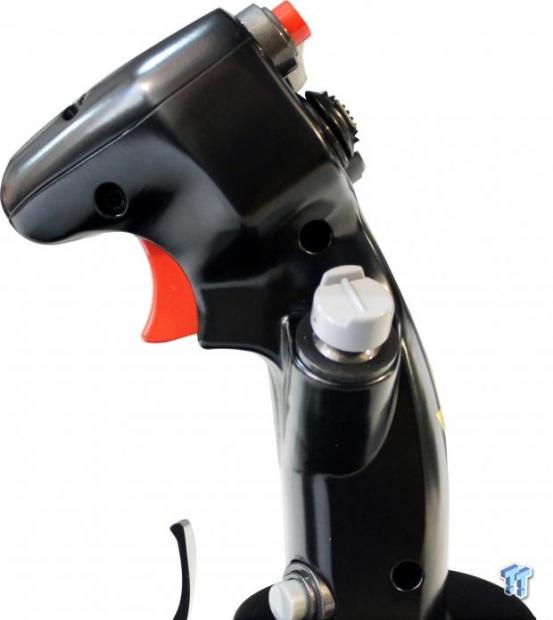
The red gun trigger is two stage. Hold it in a little, and you can feel it latch; hold back all the way to hit the second stage trigger.
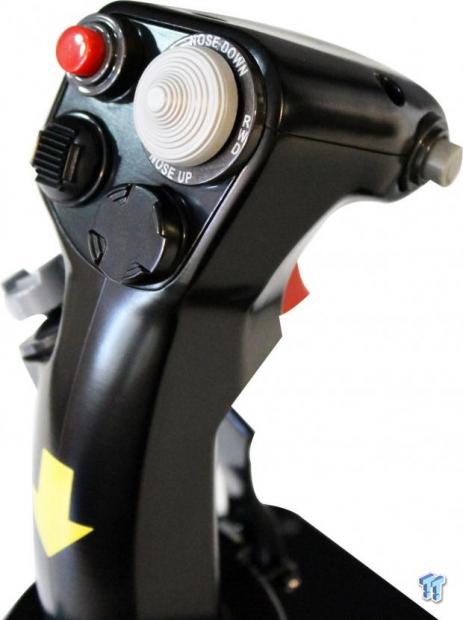
Another angled shot of the HOTAS.
Here is a close up of the business end of the HOTAS. Thrustmaster has placed the two black TMS (Target Management Switch) & DMS (Data Management Switch) at slight angles, which line up with your thumb position very well; you will be using these a lot. Moving back and forth from TMS to DMS is effortless, and natural.
Here is yet another angled look at the HOTAS.
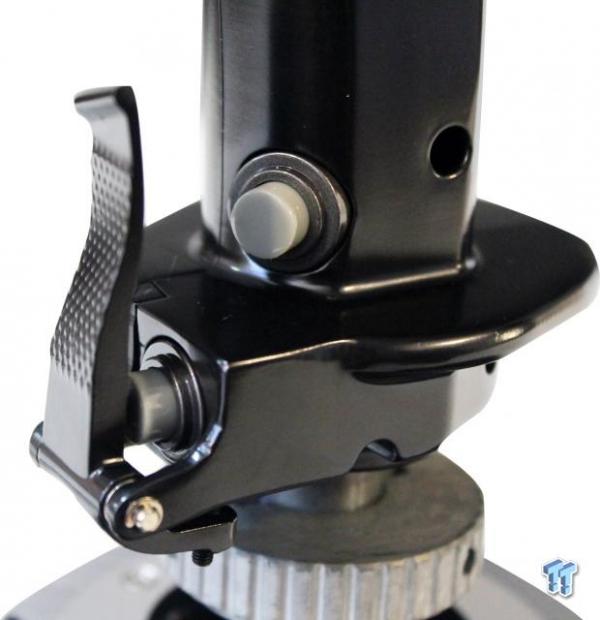
It says on the box that the pedal switch is optional, but we think this may have changed and the pedal switch is now included on all sticks. You would use your pinky finger to activate this, and right behind that is the nose-wheel steering button.
You can mount the base of the stick to your desk by using the four holes, and screwing it down. We don't feel a real need to do this, as the stick is plenty heavy enough, and does not move around on your desk.
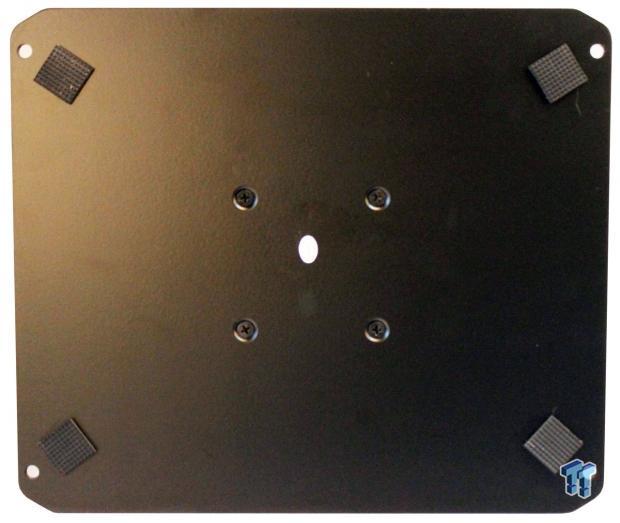
If you will be using the HOTAS Warthog flight stick in a cockpit or flight chair setup, the base of the stick can be unscrewed. You can then use those four screw holes to screw just the base down to your chair or cockpit, and not use the big flat base that comes with it.
This allows you to arrange all kinds of custom setups for your flight simulator. Here you can also see that the base has four rubber pads to keep the stick from slipping around on your desk.
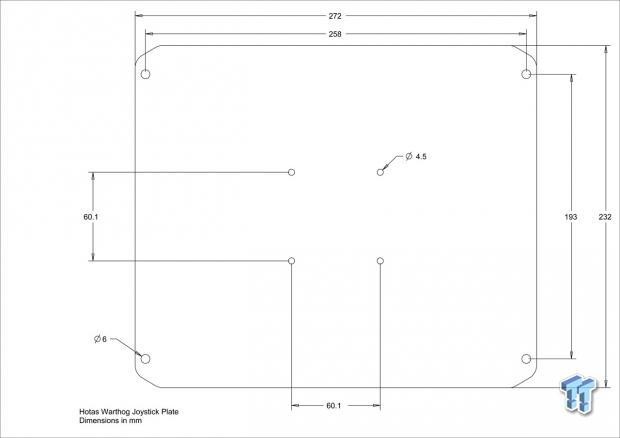
The mounting hole patterns can be found in a pdf on the Thrustmaster download section for the HOTAS Warthog.
Installing the Software
We have taken a detailed look at the flight stick itself, and now let's look at the software that you need to actually use the Warthog.
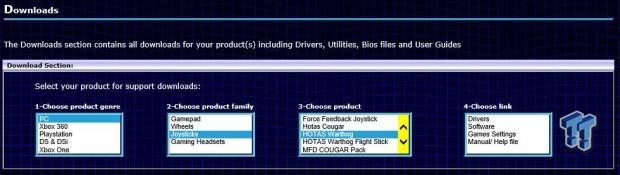
This is the order of selections that you need to reach the proper downloads. Go ahead and download the Drivers and Software to get started. At this point in time, do not have the Warthog plugged into your computer, you will be prompted to do that during the software installation.
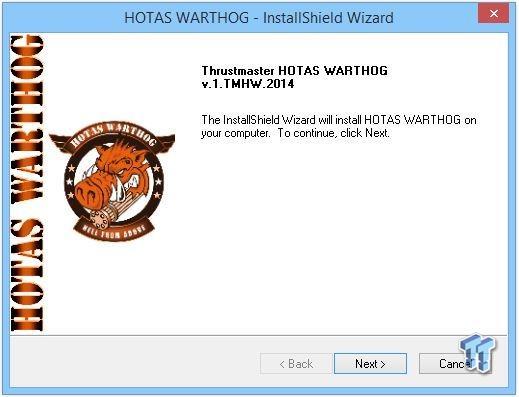
After everything is downloaded, and you're ready to start installing the software, start off with the driver package called 2014_TMHW_1; double-click that to get started. This is the first screen you will see; go ahead and click next.
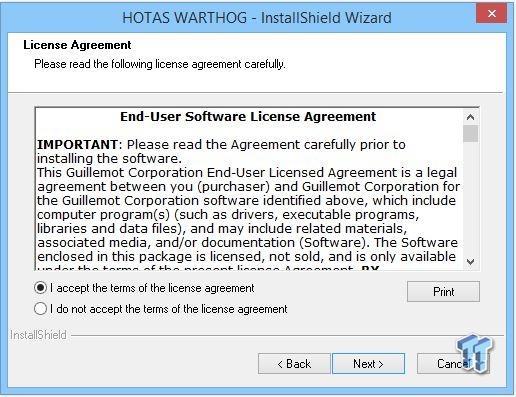
Of course, you must agree to the End User Agreement to continue, and then click next after that.
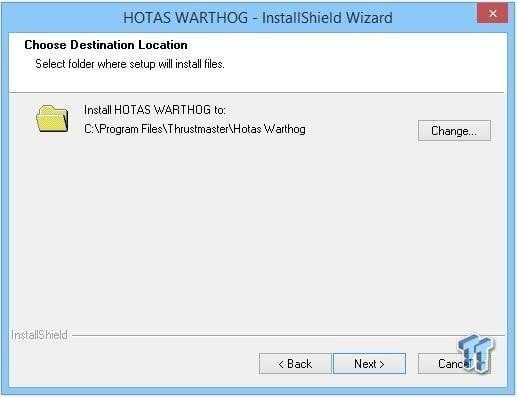
This shows the default folder location that everything will get installed into. We left this at default, and clicked next.
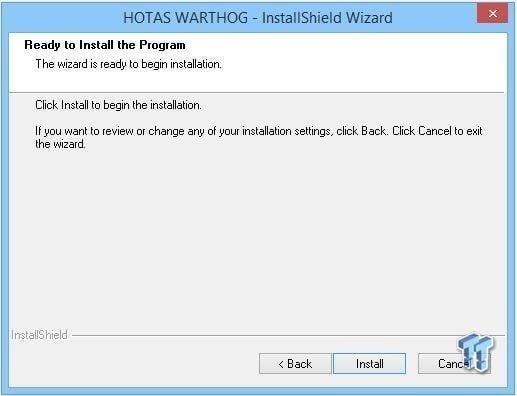
Finally, it's ready to start installing, so go ahead and click the install button.
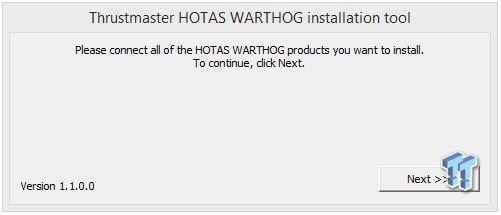
During the driver installation, it will come to a point where it asks you to connect the Warthog USB cable to your computer; after you have completed that, click next.
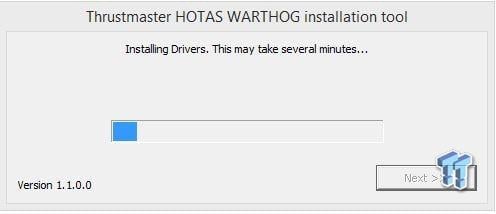
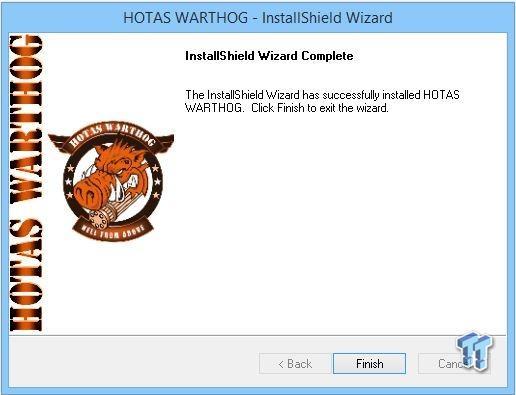
The driver install goes through what it needs to do with a progress bar showing status. When it's finished, click next to complete the driver installation.
Now that the Warthog drivers are installed, we can move onto installing the T.A.R.G.E.T. software. Locate the file TARGET_v1.0 that you downloaded, and double-click it to get started.
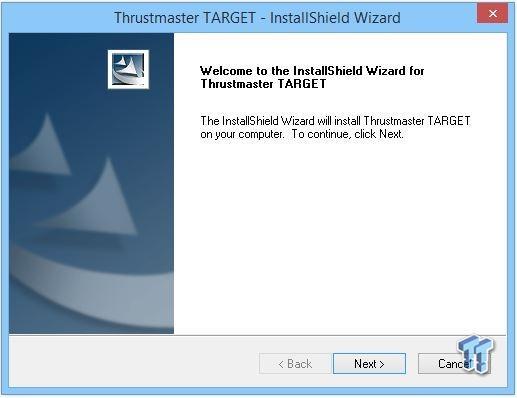
Go ahead and click next to complete the T.A.R.G.E.T. software installation.
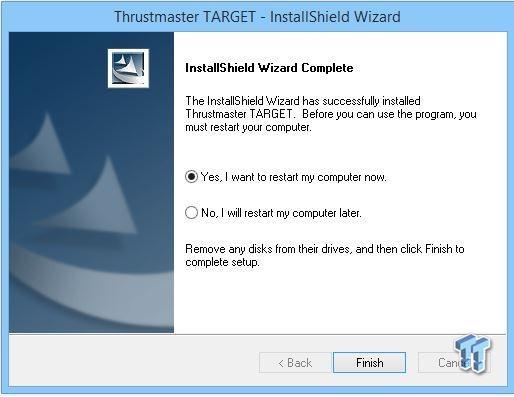
When that is all finished, you will see the final screen asking to you to reboot to finish the T.A.R.G.E.T. software installation.
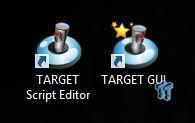
After rebooting, you will see these two Icons on your desktop.
TARGET GUI and TARGET Script Editor
TARGET GUI
The T.A.R.G.E.T. GUI software allows you to program all of the buttons on the Warthog, and run your applications right from this GUI.
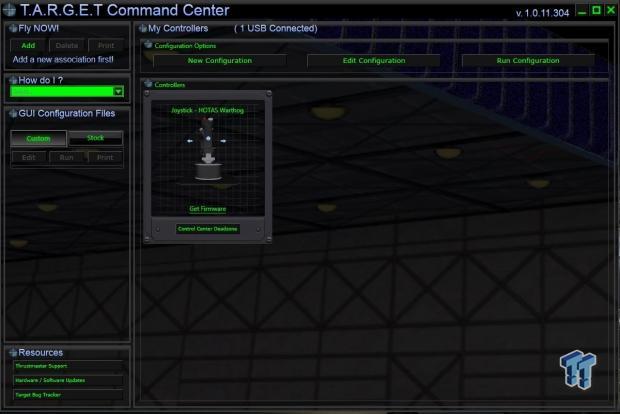
This is the home screen for T.A.R.G.E.T. GUI.
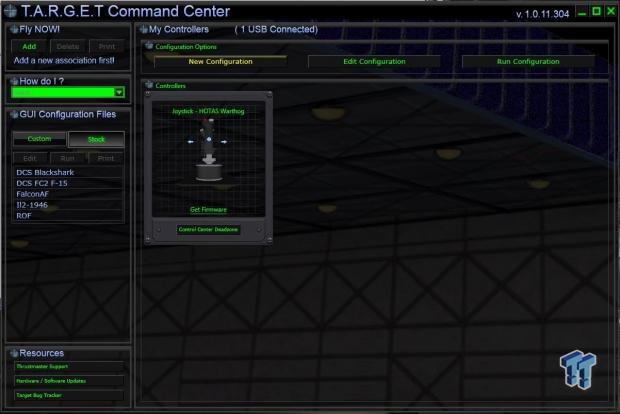
On the Home screen, if you click the "Stock" button, you will see a list of preconfigured setups for the games listed.
We will click the first stock configuration for DCS Blackhawk.fcf to see how to change button settings. At the top of the screen, click the Edit Configuration button.
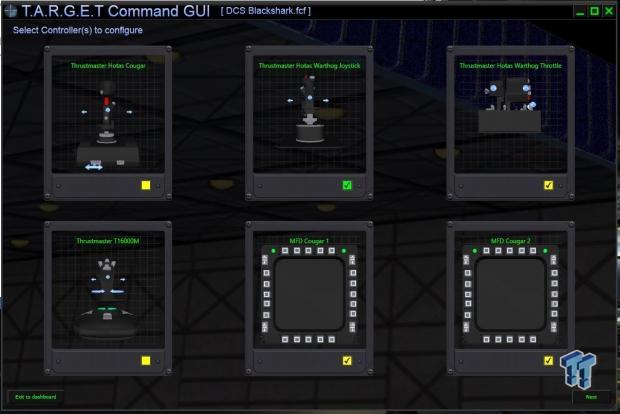
This shows possible devices that could be connected to your system; you may not have all of these connected. As you can see, we have the Thrustmaster HOTAS Warthog Joystick, which starts with a green box and a check mark inside it. Go down to the far bottom right, and click next.
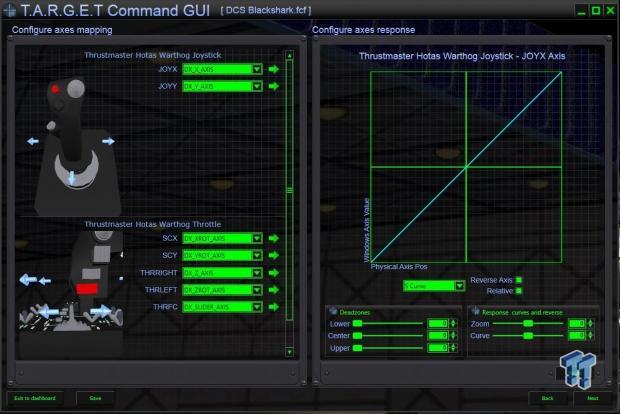
What we see next is adjustment options for the Joystick X & Y axis. Here you can adjust dead zones and response curves to configure the stick to your personal preferences.
We did not change anything here, and moved on to the next screen by pressing next at the lower right side of the screen.
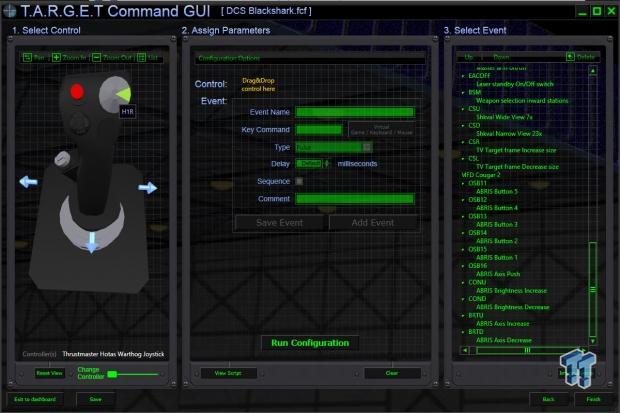
This is the meat and potatoes of the T.A.R.G.E.T. GUI software. Here you can assign buttons to whatever you wish. You can rotate the picture of the stick around to select any button that you wish to edit. Each button can be programmed with an event name, so you can easily find what that button's function is. Give it a key command, which can be a keyboard button, and then assign other features to that event.
Not every game or flight simulator has preconfigured setups for the Warthog, so generally speaking, you will need to edit configurations to match the game, or your personal preferences. This can get rather cumbersome, because many flight simulators have a large number of keyboard short cuts that can be assigned to buttons.
It's best to have the keyboard layouts printed out and sitting next to you while assigning these, then be sure to test them out before using them.
TARGET Script Editor
The T.A.R.G.E.T. Script Editor allows you to look at HTML code that assigns buttons to key presses. Depending on what system you use, this can come in very handy in modifying your configuration files.
We did not get too deep into this yet, as it can get fairly complex.
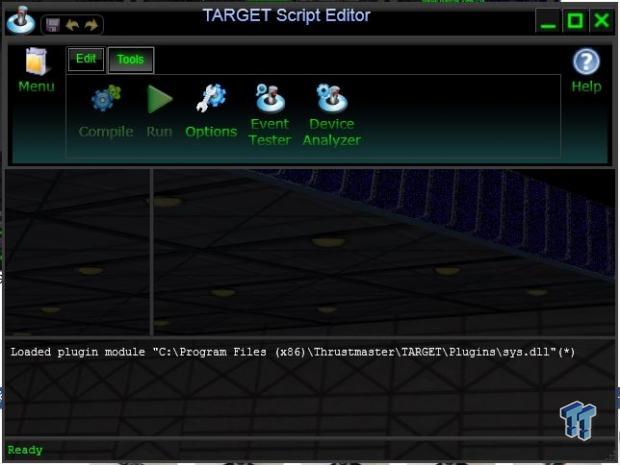
Here we see the home screen for the T.A.R.G.E.T. Script Editor.
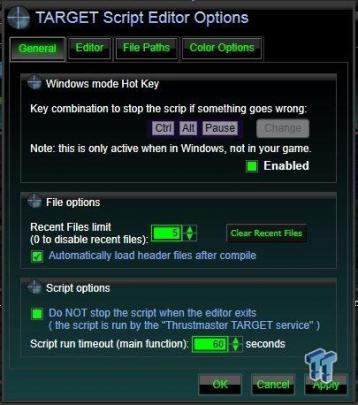
Clicking the Options button brings up the list of options that can be changed.
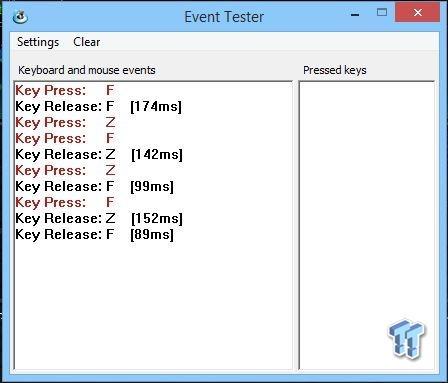
Clicking the Event Tester button allows you to test your keyboard, and see delays for each key you press.
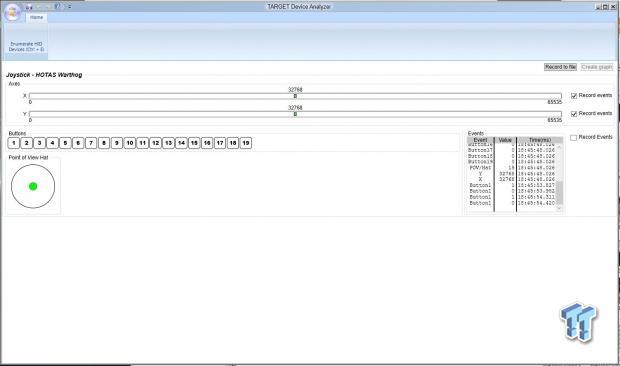
Clicking the Device Analyzer button brings up the Warthog layout. Here you can test all of the buttons on the joystick itself.
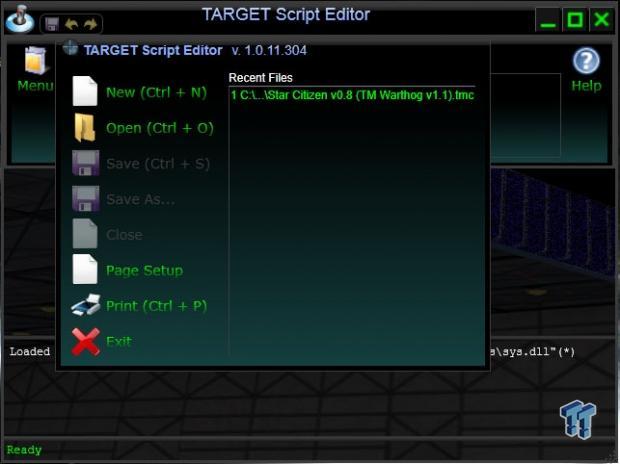
Clicking on the Menu button brings up this screen; here you can open, save, and print your configuration files.
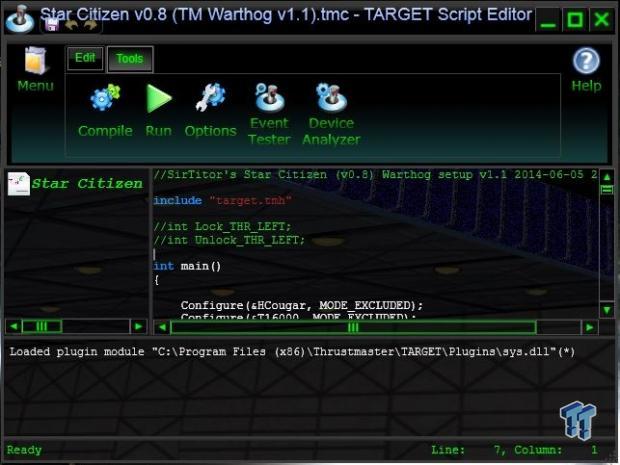
Here you can see we loaded up our Star Citizen Configuration file, and it was then displayed in HTML. We can edit it here as we wish.
Gaming
Here in the Enterprise lab, we often run benchmarks that can take a long time to complete. During these times, we like to fire up some of our favorite games. Here are a few of those games we are using, and details on how we got the Warthog working with them.
Star Citizen Arena Commander
Star Citizen is one game we have a strong interest in, and we have pledged far more than we wish to admit. This game is looking to be one fantastic game, and we do love space simulators.
Currently, Star Citizen has released an alpha version of Arena Commander, which allows you to fly two different ships in free flight, or combat in the Vanduul Swarm. There is also a multiplayer feature just starting to come out. To learn more about Star Citizen, click here: Star Citizen
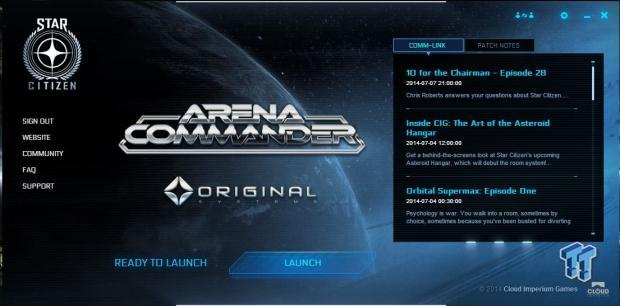
If you have pledged certain packages in Star Citizen, you can now jump into the Arena Commander, or AC. After you download and install AC, you will see a screen to login, and then this screen will show up.
Let us look at how to set up our Warthog flight stick. Please note that AC is still in alpha phase, and many features will be added soon. Right now, it has a somewhat limited ability to configure joysticks in-game. There are pros and cons to using a keyboard mouse setup, or a joystick. It's still debatable on which works the best, and we think it's really a matter of personal preference.
When you hit launch, you will find yourself in the hanger; at this point, hit the ESC key and head to your options. You can find the Thrustmaster HOTAS Warthog flight stick, but you need to do more than just select this. Hopefully this option will be set up later in the alpha phase.
We looked at many different ways to get the Warthog working, and we did have some good success with those, but in the end we were not happy with how everything was working.
After a fair amount of searching on the forums, we ran across a very helpful video made by Clifford Z. He does a great job at going into detail on how to get everything working and configured so you can use the Warthog in Arena Commander.
If you go to Clifford Z's YouTube, and click on the Show More button, you find he has included links to the files you will need to get started. We have watched his video and downloaded the files he provided, so let's start getting this all set up.
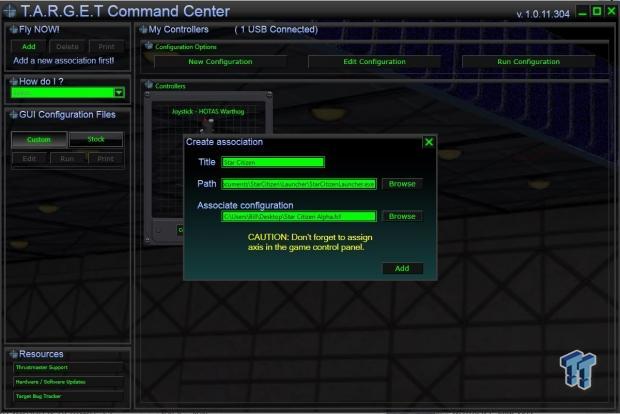
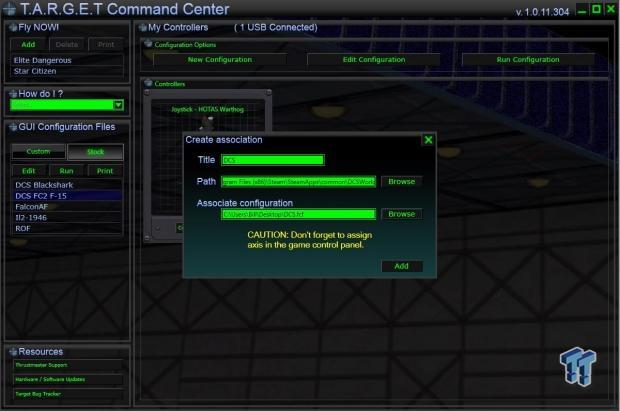
The first thing you want to do is fire up the T.A.R.G.E.T. GUI program.
Right under Fly Now, click the Add button, and the next screen will pop up. For Title, we named this Star Citizen. Path is the location of the Star Citizen Launcher; in our case, it is C:UsersXXXDocumentsStarCitizenLauncherStarCitizenLauncher.exe, where XXX is your user name.
Associate Configuration is the location of the Star Citizen Alpha.fcf file that we downloaded from Clifford Z's video. We had that on the desktop, so our location is C:UsersXXXDesktop Star Citizen Alpha.fcf, where XXX is your user name. You can use the Browse button to locate these files. When that is all completed, click the Add button.
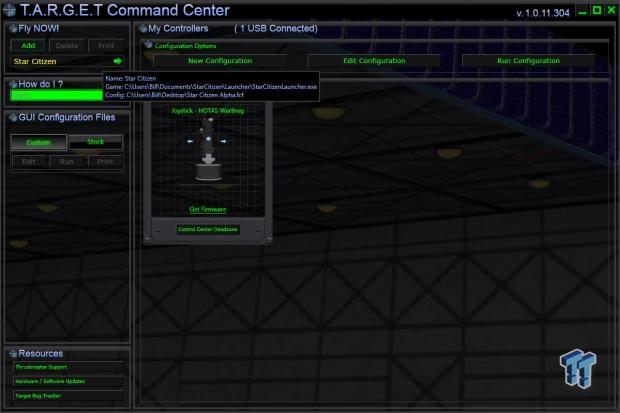
Okay, great! We are all finished setting up the Warthog flight stick. To use this, double-click on Star Citizen, which we just created under the Fly Now section. This will bring up the Star Citizen Login screen; log-in now, and that will take you to the hanger.
We have now logged in and launched Star Citizen, and found ourselves sitting in the hanger.
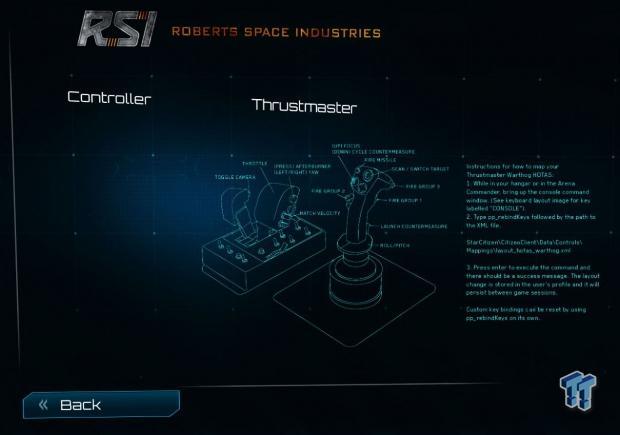
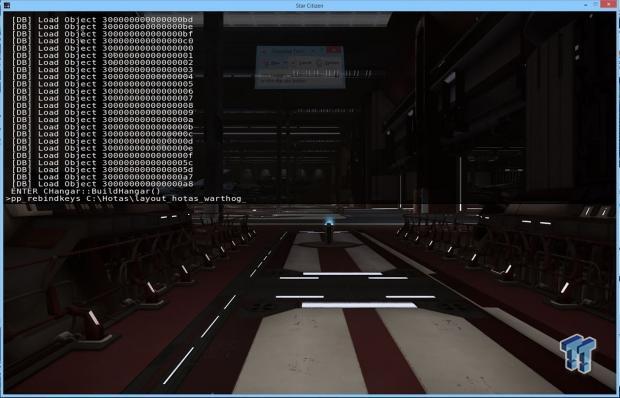
When we looked at the options screen, and found the Warthog screen, it basically tells you to hit the command key, (which is "~") and we see this screen now. If you followed Clifford Z's instructions, you will have created a folder on your C: drive, and named it HOTAS. You put the Layout_hotas_warthog.xml file inside of that folder. We also created a notepad file that is on our desktop that has this command line saved into it. We open that file, and copy this command line:
pp_rebindkeys C:Hotaslayout_hotas_warthog
Now that we have returned to the screen showing us in the hanger (and hit the command key "~"), paste that command line, and hit return. When finished, close the command window by hitting "~" again. Alright, now walk over to your helmet, put it on, and head to the ship you will be flying; in our case we got into our Hornet.

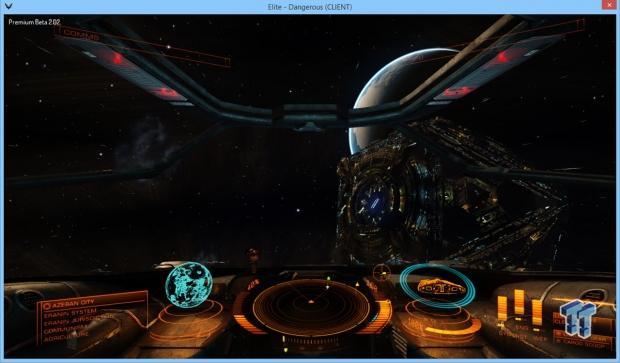
Helmet is on, and we are sitting in our Hornets cockpit. We select the Vanduul Swarm, and get ready to hunt us some Vanduul.
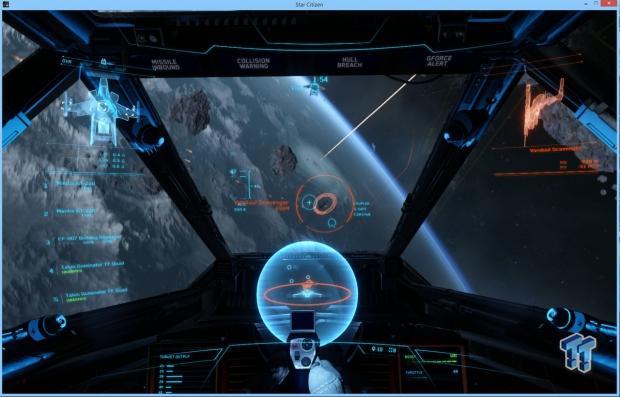
Before you know it, you are in space blowing up Vanduul right and left. Get ready, because they come at you wave after wave. We found that by following Clifford Z's instructions, we were able to get the Warthog working just fine.
Our impressions of the HOTAS Warthog flight stick were very positive. It has a very fine adjustment rate, allowing us to stay on target, hold our own against the Vanduul, and rack up a fair amount of kills. The Warthog is very smooth in flying, and doesn't swing all over the place. Tracking with our gun sights to get the green diamond that shows when it's time to fire was still tricky, but with time and practice you can become very good at it.
Elite: Dangerous
Let's move on to the next game we have on our radar, which is Elite: Dangerous. This one is still in Beta phase, so there are plenty of things to add and look forward to.
To learn more about Elite: Dangerous, click here: Elite: Dangerous. You will need to Pre-Order Elite: Dangerous in order to play this game right now.
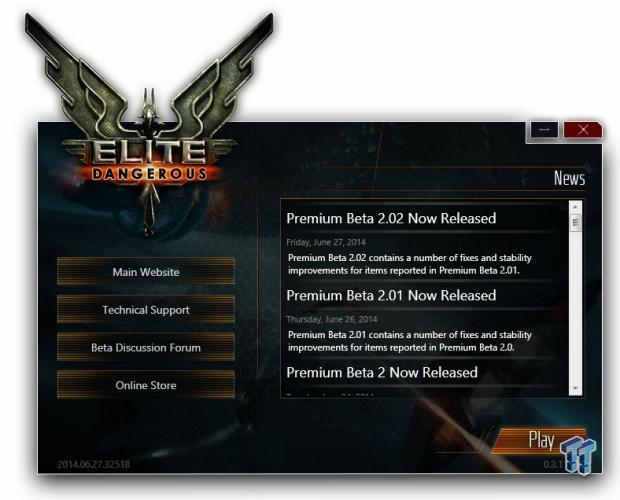
If you are in the Beta for Elite: Dangerous, and fire up the launcher, you will then log-in, and hit play to get started.
Elite: Dangerous has only a generic joystick setup in the options menu, so we will need to create our own. Everything you will need to map has a keyboard shortcut, and you can see what the generic joystick has predefined by scrolling through those.
We did search for preconfigured files to use with Elite: Dangerous, and we found this link that MikeyTT created over on the ED forums here: Elite: Dangerous Forums
Following this link, you will find MikeyTT has created a configuration file that we can use. Let's download that to our desktop.
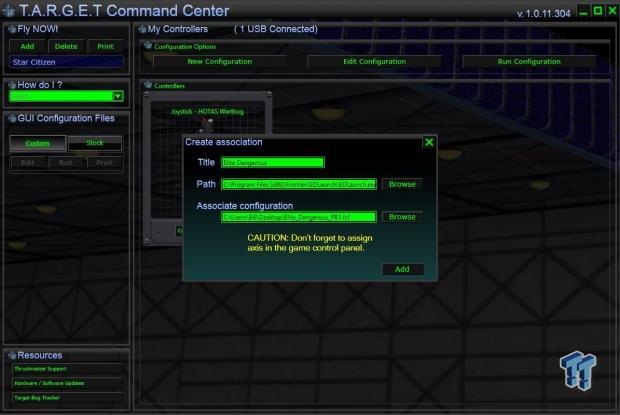
Just like in Star Citizen, we need to set up the T.A.R.G.E.T. GUI to use this configuration file. When we have finished doing that, we just double-click Elite: Dangerous under Fly Now, and log into the game.
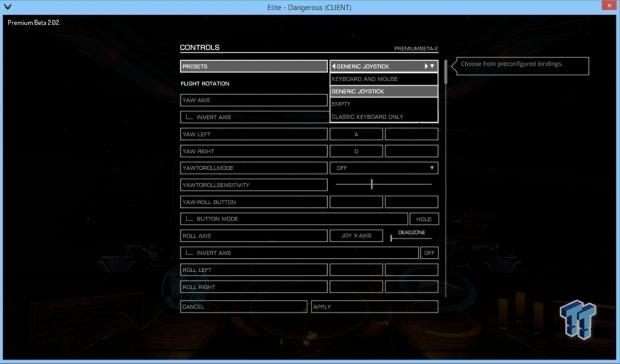
Here we are looking at the generic joystick settings in Elite: Dangerous. Most likely, we are going to have to go through all of these keyboard shorts, and double check these in MickyTT's configuration file.
We did get into the game using these settings, and found we could fly around just fine, but we did not go too far into testing to check how everything worked. Like we said before, we might have to go through and double check everything to make sure it all works okay.
Digital Combat Simulator
Thrustmaster's HOTAS Warthog flight stick was designed after the A10 control stick, so let us try this out in a simulator that can fly the A10.
We picked up DCS Flaming Cliffs on Steam, and set about getting everything working with that. This one is complex, and has a huge learning curve.
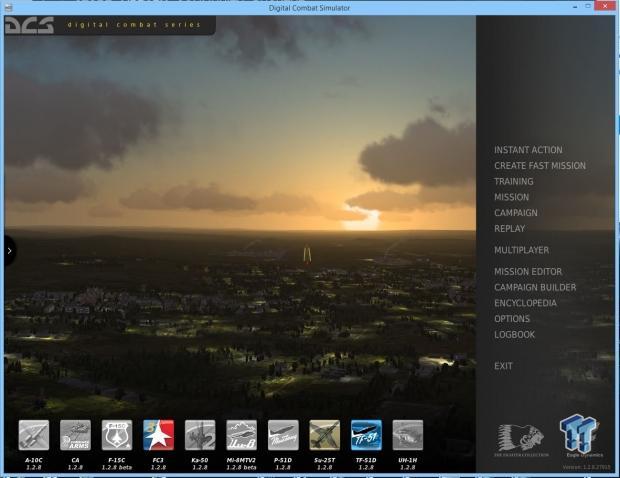
We found several good links to help us get started with DCS, which you can find here: Digital Combat Simulator, Eagle RU Forums. Some info in these links seemed to be outdated, but if you read through them, you can find files to get you started.
Again, just like in the other games, we loaded the configuration file into the T.A.R.G.E.T. GUI, and launched DCS.
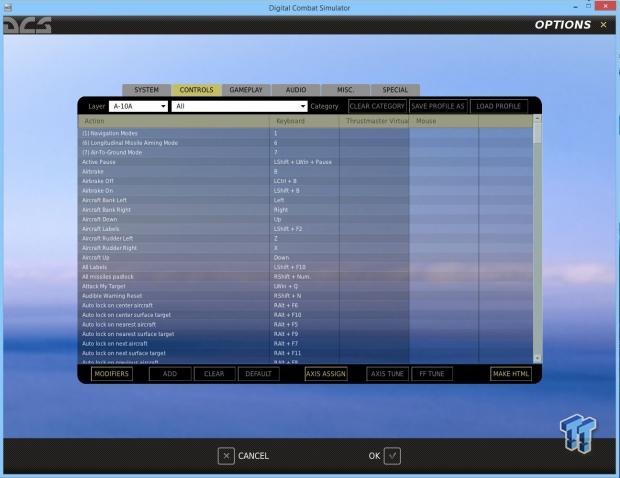
Inside DCS now, we bring up the options for the A10 controls to see all of the command assignments. Yeah, there is a lot of them. Each plane has different assignments also, so you might need to make a configuration file for each plane.
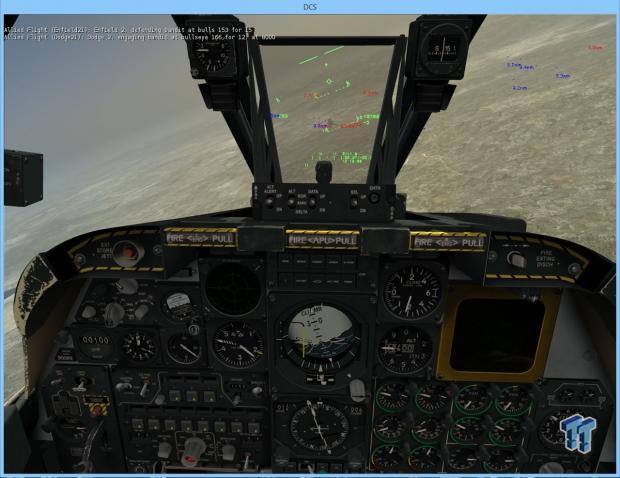
Before too long, we are flying the A10. Everything seemed to work for basic flight, but we did not try all of the settings, as there is a huge number of those. It did seem to work okay, but we feel it needs some more work.
Using the Warthog flight stick in DCS was very smooth, and we felt like we were flying the real thing.
Final Thoughts
Our final thoughts of the Thrustmaster HOTAS Warthog flight stick are that it's a very impressive stick, made with very high quality materials; and workmanship is second to none. We must note that there is no twist to the stick, so if you want rudder controls, you will need to get yourself a set of pedals to add that feature.
Flying around in a simulator using the Warthog felt natural, and it provided fine levels of adjustment while in flight. It could also handle heavy combat maneuvers, without making you feel like you're going to break the stick when banking very hard. You really don't need to pull very hard to the left or right to make hard turns, but it takes a little bit of behind the control time to get used to it.
All of the buttons were located in easy to reach positions, and we really didn't have any issues in flight with that. It just takes practice getting used to all of the controls, and where to find everything. But, before long, you will master it.
We really didn't have a lot of issues configuring the Warthog for use in Star Citizen; given time, that will become easier as the game progresses. However, with our time in the Arena Commander, we felt very comfortable using the Warthog in Vanduul Swarm. Again, practice makes perfect.
Now for the bad part: Even though using T.A.R.G.E.T. GUI is pretty straight forward, and it does allow you to configure the stick without to many issues, overall, each simulator is different, and requires a lengthy setup time to get the stick to function properly.
This is a high-end flight stick, and we feel some of these issues should be worked out, and configuration files be made available for download. Yes, the first two games we tested are in alpha or beta stages, so these have not been created yet, if they ever will be. Thankfully, in each game there are players working to address some of the issues by making files and guides available for all of us to download and watch.
In some of these games we have had very little time behind the stick, like Elite: Dangerous, and DCS. Both of these will require some effort on our part to get configuration files set up so we don't have too many issues.
On the plus side, Thrustmaster has created configuration files for some games that you can download, and you can check out the ones in T.A.R.G.E.T. GUI. For other games, I am afraid you will need to make up your own. Overall, the Warthog is an excellent joystick made of very high-quality materials that will serve you well in any flight simulator.
Another product that is designed to complement the Warthog is the Warthog Throttle. Both of these can be purchased together in a single package, or just the joystick can be purchased by itself as it is shown here. The Warthog is backed by a two-year warranty, which is very good considering the hefty price of this stick, but it's worth the cost because of the quality of the stick.
PRICING: You can find the Thrustmaster HOTAS Warthog Flight Stick for sale below. The prices listed are valid at the time of writing but can change at any time. Click the link to see the very latest pricing for the best deal.
United States: The Thrustmaster HOTAS Warthog Flight Stick retails for $287.81 at Amazon and the Thrustmaster HOTAS Warthog Flight Stick with Throttle retails for $497.65 at Amazon.
Canada: The Thrustmaster HOTAS Warthog Flight Stick retails for CDN$298.06 at Amazon Canada and the Thrustmaster HOTAS Warthog Flight Stick with Throttle retails for CDN$499.99 at Amazon Canada.
 Corsair MAKR PRO 75 Hall Effect DIY Keyboard Review - Pre-Built and Ready for Action
 Razer Viper V4 Pro Wireless Gaming Mouse Review - Built for Competition
 NuPhy Node 100 High Profile Wireless Keyboard Review - A Productivity Winner, for Windows and Mac
 Corsair SABRE v2 PRO CARBON FIBER Wireless Gaming Mouse Review - The Premium Option
 Corsair SABRE v2 PRO Wireless MG Gaming Mouse Review - A Strong Contender
 Discord is finally adding comprehensive Linux support thanks to the Steam Deck
 ASUS's ROG XREAL R1 micro-OLED gaming AR glasses now available for pre-order
 Microsoft's Advanced Shader Delivery cuts load times on Forza Horizon 6 for Radeon gamers by 95%
 MSI unveils the world's first 27-inch 5-layer QD-OLED Penta Tandem gaming monitor
 Resident Evil hits 200 million sales as franchise celebrates 30 years of horror
 Redditor buys a Ryzen 9 9950X3D2 Dual Edition, gets a normal 9950X3D instead
 Rockstar Games will not send GTA 6 review copies to journalists and media, claims insider
 Final Fantasy XI celebrates 24th anniversary with unlimited free trial, new content, major discount sale
 Old shipping manifest suggests that the new Googlebook may feature a high-end Panther Lake model
 Intel Wildcat Lake laptops launch May 18 in China with Honor's MagicBook X14 listed at $650
 PCCooler CPS RZ620M X CPU Cooler Review
 Memblaze PBlaze 7 7A40 Ocean 61.44TB Enterprise SSD Review - Oceans of QLC at 3.3 million IOPS
 MOZA SGP Sequential Sim Racing Shifter Review
 COLORFUL iGame GeForce RTX 5070 Ultra OC Review - When Style and Performance Meet
 GIGABYTE Z890 AORUS Elite WiFi7 Plus Motherboard Review - Right in the sweet spot
 PNY GeForce RTX 5080 Slim OC Review - A Compact 4K Powerhouse
 HP OmniBook 7 (Panther Lake) 16" Laptop Review
 ASUS ROG Strix X870E-E Gaming WiFi7 NEO - A Crosshair by any other name
 Cooler Master Cosmos Alpha Full-Tower Chassis Review
 Thrustmaster T598 Direct Axial Drive Force Feedback Racing Wheel Bundle Review
 The Snipping Tool quietly became the only screenshot app I keep installed on Windows 11
 How to Set Up a Windows Computer for a Senior User
 Bluetooth Toggle Missing in Windows? Try These Fixes
 GPU Overclocking Basics in Windows 11: Safe Performance Gains Without the Guesswork
 GIGABYTE's new Ultimate OLED Gaming Monitor Bundle includes Xbox Game Pass
 I automated 5 annoying Windows maintenance tasks, and my PC basically runs itself
 How to Fix Windows 11 Black Screen on Boot or After Login
 The first 8 settings I disable on every fresh Windows 11 install in 2026
 Is Your Ethernet Performance Slower Than Wi-Fi? Here's How to Fix It
 MSI's Project Zero Delivers a Stunning Cable-Free Look to More Gamers