


Our Verdict
Introduction & Specification Details and Close-up
Elgato has been the staple brand of capture cards for quite a while, and now I've finally got their former flagship capture card in my hands - the Elgato 4K60 Pro.
I say former because, during CES 2020 (Consumer Electronics Show), Elgato announced the 4K60 S+, the new flagship capture card from Elgato. I currently have one on the way to me at the time of writing this, but before I review that I thought it would be good to have a look at the 4K60 Pro. So, today we will be running the 4K60 Pro through its paces to see if its worth that hefty price tag.
The 4K60 Pro is aimed directly at streamers and content creators, and it seems to come with all the bells and whistles that would attract both categories of people. The price tag, on the other hand, could shy a few people away, coming in at the cost of $249.99, Elgato seems to be asking quite a lot for a capture card. In this review, we are going to examine if the price gives buyers the equivalent in useable features. So, let's jump straight into it, starting with the design of the capture card.
Close-up
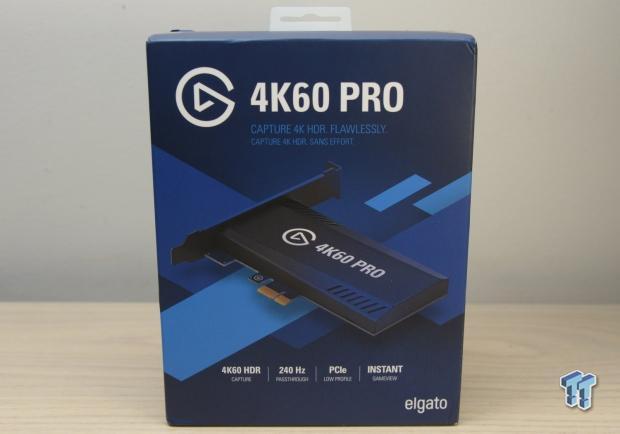
To start things off, we have an image of the front of the box, which shows some of the features of the capture card. Here are the features listed on the front of the box - 4K60 HDR, 240hz passthrough support, PCIe and Instant Gameview.

Best Deals: Elgato 4K60 Pro MK.2 4K HDR 240Hz PCIe Capture Card
Price Trend:
Prices last scanned 14 hours and 38 minutes ago
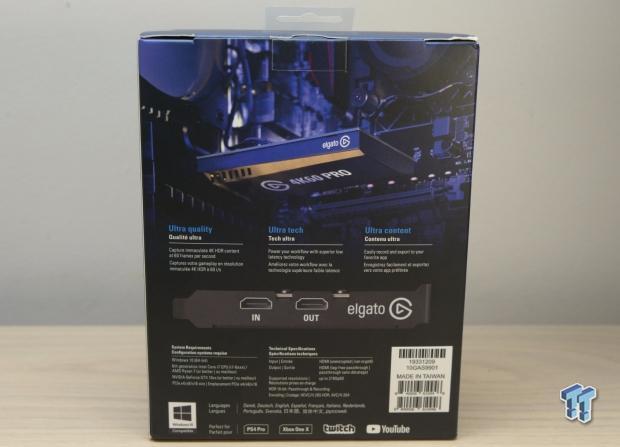
Moving onto the back of the box, we see an image of the capture card installed into a PC, and also an image of the HDMI In/Out slot. The back of the box also features different languages.
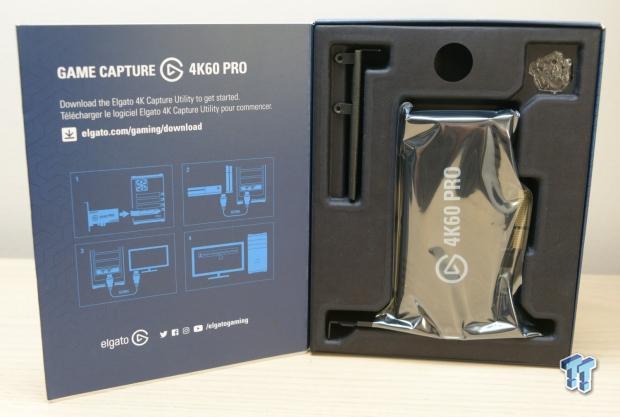
Here we have an image of the inside of the box, showcasing the packaging of the 4K60 Pro. The 4K60 Pro arrives in an anti-static bag, and the box provides users with a four-step process for installing the capture card into a PC.
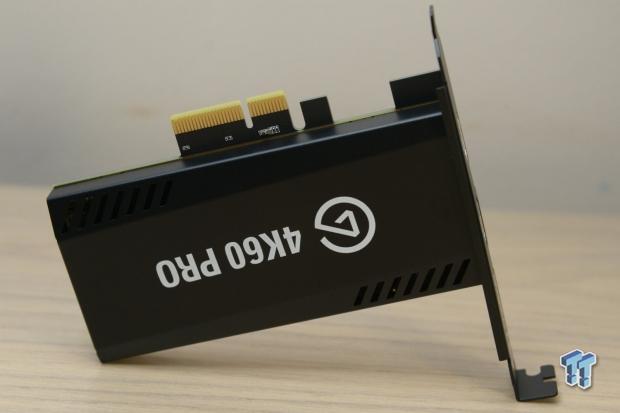
Above is a front-on image of the 4K60 Pro. From here, we can see the PCIe x4, which will plug straight into a PCIe slot in your PC. I will get more into this later on in the review.
Our Latest Streaming Review Coverage
- AVerMedia CamStream 4K Review - Turn That Pro Camera Into a Plug-and-Play Broadcast Studio
- Elgato Stream Deck + Review - Content Creators, Don't Walk, Run to Get One Now
- Elgato Prompter XL Review: Bigger, Better, Exactly What I Wanted
- Elgato Facecam 4K Webcam Review - Studio-level Camera Quality for $249
- OBSBOT Tail 2 Review - The New YouTuber, Streamer, Podcasting AI Camera
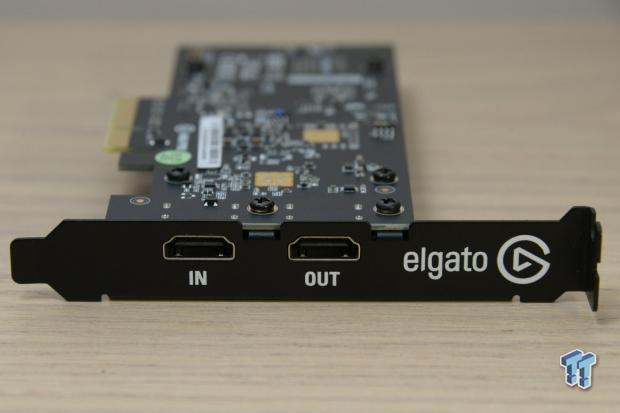
In this image, we can see the PCB, as well as the HDMI In/Out slot.

Here we have a straight-on image of the back of the capture card.

Above is an image of the capture card lying down, showcasing the back of the capture card and the six screws that hold it all together.
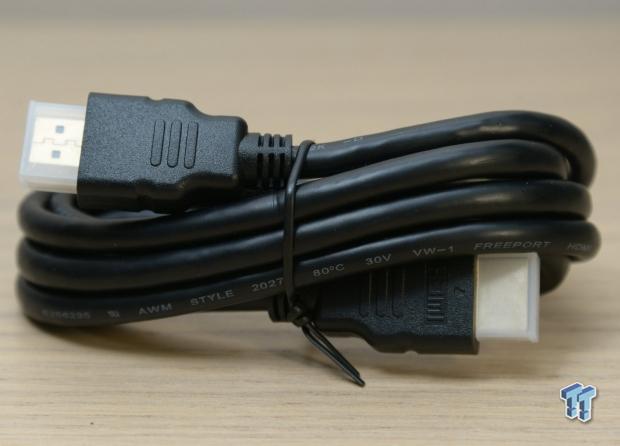
Above is an image of the HDMI cord that comes with the capture card. This HDMI was used throughout my testing.
Jak's Test System Specifications
- Motherboard: ASUS ROG Crosshair VIII Hero X570 (Wi-Fi) (buy from Amazon)
- CPU: AMD Ryzen 5 3600X @ 4.4GHz (buy from Amazon)
- GPU: EVGA GeForce RTX 2070 SUPER XC GAMING (buy from Amazon)
- Cooler: be quiet! Silent Wings 3
- RAM: 16GB (2x8GB) Corsair Vengeance LPX 16GB 3200MHz (buy from Amazon)
- SSD: GALAX HOF Pro SSD PCI-E M.2 2TB
- Power Supply: Corsair CX Series 750 Watt (buy from Amazon)
- Case: be quiet! Silent Base 600 (buy from Amazon)
- OS: Microsoft Windows 10 Pro 64-bit (buy from Amazon)
Software & Setup
First off, I'm going to walk you through setting up the 4K60 Pro. This will be a tutorial for how to install the 4K60 Pro into your PC, as well as setting it up to work in both OBS and Elgato's 4K Capture Utility.
PC Setup
According to the box, for you to successfully install your 4K60 Pro into your PC, you will need at least a 6th generation Intel Core i7 or an AMD Ryzen 7 CPU or better. You will also need a spare x4/x8/x16 PCIe slot and an NVIDIA GeForce GTX 10 series graphics card or better. Once you have all of those requirements, you can move onto the installation process.
Installation
First, you want to power down your PC and locate the motherboard for that spare PCIe slot.
Remove packaging from your 4K60 Pro and slot your 4K60 Pro into that spare PCIe slot. (make sure the side that says '4K60 Pro' is facing the same way as your graphics card fans). It should slot in very easily. To secure the capture card in place, you can screw it into the bracket with a thumbscrew.
Now that you have successfully installed your capture card, we can move onto setting it up for capturing your slick gameplay.
Gameplay Capture Setup
Inside the 4K60 Pro box, you will find the provided HDMI cable, and if you are planning on capturing gameplay from your PS4, Xbox One, or Nintendo Switch, you will want to take that HDMI cable and plug one end into the console of your choice. With the other end of that HDMI cable, you want to plug it into the 'IN' port located on your 4K60 Pro. What you are doing here is routing your gameplay signal from your console through your PC, hence the 'in' port, which is short for input, or in this case input signal.
Next, you want to take the HDMI cable that you were using to connect your console to your TV/monitor and plug that into the 'out' port located on your 4K60 Pro. Then take the other end of that HDMI cable and plug it into your display. What you are doing here is giving your inputted signal from your console that is running through your capture card, a source to be outputted on.
Here's a quick setup guide (after the capture card is installed your PC):
Step 1: take provided HDMI cord and plug it into your console of choice.
Step 2: take the other end of the HDMI cord and plug it into the 'in' slot of your capture card.
Step 3: take another HDMI cord and plug it into your 'out' port on the capture card.
Step 4: take the other end of your HDMI and plugin into your TV/monitor.
After those steps are complete, head on over to the Elgato website and download the 4K Capture Utility, a link can be found here.
4K Capture Utility

After you have downloaded and installed the 4K Capture Utility from Elgato, you should be presented with the above screen. In this instance, I have the capture card plugged into my Nintendo Switch, and I'm running Super Smash Bros. Ultimate. I noticed that I could not get my Nintendo Switch to display my game unless I had the 4K Capture Utility open on my PC. I'm not quite sure if this is a problem on other consoles, but do take note if this problem occurs when you attempt to power on your console while it's plugged into the capture card.

As you can see, the Elgato software showcases a massive preview screen, but there is also a bunch of features hidden around the sides. First off, you can pull up the gameplay naming tab by clicking on the circled 'I' at the bottom left-hand corner of the window. That will open the little window seen above. Here you can change the name of your recording, set the name of the game you are capturing, and also add some tags that will allow your Elgato library to better filter through your captures.

Next, we have the setting menu, which is with no doubt the most important part of the software. The settings menu can be found at the top right-hand corner of the 4K Capture Utility software, under the cog symbol. Clicking on that cog will open the above window. Here you will be presented with five different tabs; General, Device, Picture, Recording, and Mic. First off is General. In this tab, you will be able to enable an awesome feature that Elgato has; it's called Stream Link.
Stream Link allows users to capture gameplay in the 4K Capture Utility while a user is streaming through another program such as OBS (I will get into this more later on). The General tab also has automatic update checkboxes and the option to reset all settings back to default.

Moving onto the Device tab. In this tab, we have the option to choose what capture device you are capturing gameplay from. This tab also shows the firmware version and the video that is being inputted into the device. In this case, a 1080p 60FPS signal is being inputted into the capture card from my Nintendo Switch. If you have a console that supports a higher resolution, and you are running that console at a higher resolution, it would most likely say 2160p30 or 2160p60. This tab also has the HDMI color range option; I'd recommend leaving this option on Bypass. For the next two options, I'd recommend changing Input EDID Mode to Display and EDID (Internal) to Default.

Next, we have the Picture tab. In this tab, users can tweak their brightness, contrast, saturation, and hue settings. I would recommend users leave these settings as they are.

Next is the Recording tab, which is probably the most important tab out of the entire settings menu. Firstly, users can select where their gameplay saves on their PC through 'Library Location', as well as where screenshots are saved through 'Screenshot Location'. Next is the Video Encoder. I would recommend that users select whatever their graphics card is for their video encoder as it will do a much better job than the inbuilt software.
In this case, I'm using my NVIDIA GeForce RTX 2070 SUPER. Next is the option to enable HDR recording, and then the Format option, which is where you will choose what resolution you want your video to be recorded in.
Since the Nintendo Switch is limited to only 1080p at 60FPS, I have selected my format to be at 1080p 60FPS. If you are running a console that supports a higher resolution, you can select a higher recording format. I would suggest recording in 2160p at 60FPS if you want to capture gameplay footage in 4K. It should be noted that this capture card does support capturing gameplay footage at higher refresh rates too, but you will only have to worry about this if you have a dual PC setup. I have listed the resolutions and the refresh rates it supports below:
- 1080p & lower: up to 240FPS
- 2560x1440: up to 144FPS
- 3840x2160: up to 60FPS
- 2560x1080: up to 144FPS
- 3440x1440: up to 100FPS

Moving on, we have the microphone tab. In this tab, users can select what microphone input they want their recordings to use to pick up audio. In the above image, I have selected my headset microphone, the Logitech G935 microphone.
OBS Setup
Let's talk about OBS, and how to set up your brand new capture card for recording gameplay through OBS. Before I get into how to do this, I will say that OBS is an extremely complex piece of software, and there are many more in-depth guides out there that explain all of the settings much more thoroughly.
Instead of going in-depth with OBS, I will instead be giving you a short tutorial into how to get your capture card to show up in OBS, and how to make sure it's recording your gameplay. With that little disclaimer now out of the way, let's move onto how to get it to show up in OBS.
Obviously for this tutorial you must have already downloaded OBS, and if you haven't and would like to a link to the download can be found here.

Firstly, open OBS, and you should be presented with the above image. In the sources menu, you want to locate the + icon, click that and add a new Video Capture Device.
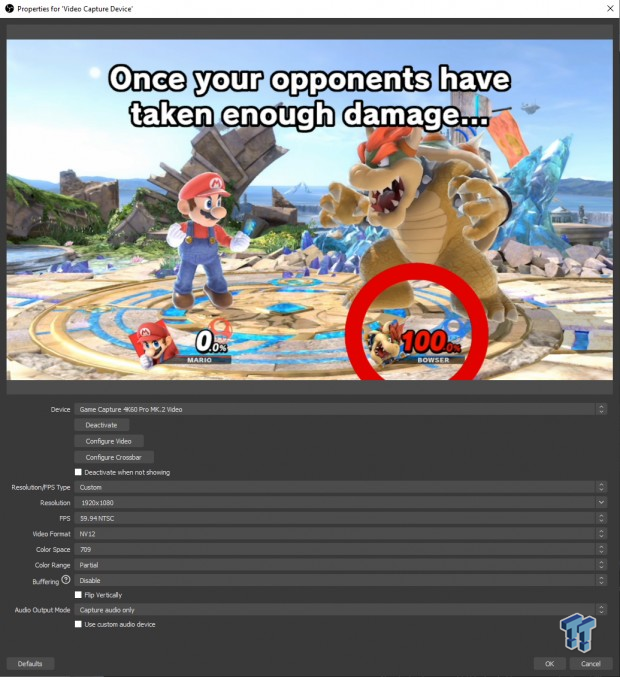
Once you have clicked that, you will be presented with the above image. This is the properties of your Video Capture Device and is where you can tweak all the different settings. To get your gameplay to show up in OBS, make sure you have selected 4K60 Pro MK.2 Video in the 'Device' menu. Next, you want to go down to 'Resolution/FPS Type' and set that to 'Custom'.
Resolution should be set to whatever you want to record your game in. In the above screenshot, I have set mine to 1920x1080, as that is the maximum resolution that the Nintendo Switch can handle. If you are running a game in 4K and would like to record your game in 4K, then set it to 3840x2160.
Moving onto FPS, set yours to 59.94 NTSC, and if you happen to be recording anything that has a higher refresh rate, then set it to whatever that refresh rate is. Video format should be on NV12, and color space should be on 709, the color range should be set to partial, and audio buffering should be disabled. Once you have the setting set up this way, you should be able to see your gameplay, and you are now ready to record.

To start recording, you can just click on the 'Start Recording' option on the right-hand side of OBS.

Before you do that, though, you will want to change your Output setting in OBS. To do this, click on the 'Settings' tab near the recording option. In the above screenshot, you will see several things highlighted. First, you want to navigate to the 'Output' submenu, then click on 'Recording'. You want to make sure your 'Recording Path' is set to a place in your PC you know how to get to. In this instance, I have all my recordings going to my SSD that is purely for recordings and gameplay capture. Set yours to a place you know how to navigate to so you don't lose any recordings.
Next, if you have NVIDIA GPU, that is a 20 series you want to change your 'Encoder' to NVENC H.264 (new) as this will take the load off your CPU and put it on your GPU.
As for the rest of the settings, feel free to copy mine as they seem to work perfectly for me. If you want to a more in-depth guide on OBS settings, there are some great tutorials on the EposVox YouTube Channel. A link to the OBS master class can be found here.
Once all that is done, you are ready to record gameplay through OBS. Congratulations!
Final Thoughts
What's Hot
The Elgato 4K60P Pro makes gameplay capture easy, while also providing the people that want to push gameplay capture to the limits with an option to do so.
The 4K60 Pro can push its video output to two sources, which is an incredible feature, and will certainly be a selling point for content creators that are looking to stream gameplay online while also capturing it.
What's Not
The 4K60 Pro comes with a hefty price tag, other than that there isn't really that much downside. The Elgato 4K Capture Software could use some work, but it's hardly a downside.
Elgato has done it again, and has brought another fantastic product to market that will no doubt come as a great addition to a bunch of content creators.
Content creators, and streamers, in particular, should heavily consider purchasing this capture card if they are looking to capture 4K video from an external device. This capture card should also be considered even if you are currently capturing 1080p video, but are looking to upgrade the resolution in the future. Essentially, you would be future-proofing yourself with this purchase.
While all of the features on the 4K60 Pro are incredible, they do come with a price tag to match. The 4K60 Pro comes in at a price of $399, and is it worth it? Well, that depends on what you want out of it. If you are only planning on capturing gameplay at 1080p, and aren't bothered about future-proofing yourself and don't care about streaming, then don't buy the 4K60 Pro.
There are cheaper and more affordable options out there such as the Elgato HD60 S. But if you are looking for the best of the best capture card and know you want to capture gameplay in glorious 4K, look no further than the Elgato's 4K60 Pro mk.2.
 IQUNIX Magi96 Pro Aluminum Low Profile Mechanical Keyboard Review - Premium Build, Satisfying Sound
 Razer Pro Type Ergo Wireless Split Ergonomic Keyboard Review - Built for Comfort and Support
 ASUS ROG Strix Morph 96 Wireless Gaming Keyboard Review - Great Performance, More Affordable
 Corsair MAKR PRO 75 Hall Effect DIY Keyboard Review - Pre-Built and Ready for Action
 Razer Viper V4 Pro Wireless Gaming Mouse Review - Built for Competition
 Apple's first touchscreen MacBook Pro is '100% confirmed', leaker says
 AMD reversed a warranty rejection for a swollen Ryzen 9 7950X3D after Hardware Unboxed called it out publicly
 ASUS' $50 ROG Equalizer cable meant to stop GPU connector burns reportedly burns itself
 Intel's 18-core Core Ultra 7 251HX is matching its 20-core siblings in early PassMark results
 Elon Musk is the world's first trillionaire - enough to spend $1 million a day for nearly 3,000 years
 Anthropic's latest AI model 'Fable' was so powerful the US government banned the world from it
 Xbox prioritizes Elder Scrolls VI, Fallout, and Halo in new strategy shift
 Xbox exec wants to use ads to open up new access points, not just to collect money
 Redditor buys RTX 2080 Ti Super engineering sample on eBay, has the same number of cores as an RTX Titan but half the VRAM
 Report: Xbox may be spun off into subsidiary or joint venture with another company
 MOAIPLAY ORA PRO G1 850W ATX 3.1 PSU Review: high efficiency and 10-year warranty for $119.99
 Navman MiVue Smart True 4K Surround Dashcam Review - Seeing In All Directions At Once
 Asetek Forte S-Series Racing Simulator Bundle Review
 SAPPHIRE Radeon RX 9070 GRE PULSE OC Review - A New 1440p Challenger Has Arrived
 NZXT H6 RGB+ Compact Dual-Chamber Chassis Review
 ASRock Radeon RX 9070 GRE Steel Legend Review - The RDNA 4 Mid-Range Reshuffle
 ASRock Z890 Taichi Aqua Motherboard Review - Flagship features without the flagship price
 This Windows security feature protects Documents from ransomware, but it is off by default
 Windows 11 already has a voice typing tool, and it is the one most people are not using
 Quick Assist is the only remote-support tool I open when a relative calls about their PC
 The PowerToys utilities I keep enabled on every Windows 11 PC, and the ones I turned off within a week
 TweakTown's Best of Computex 2026 Awards - The Best Hardware, Gaming Gear, and AI
 Phison E37T SSD Controller Exclusive Preview - The Fastest DRAMless SSD Platform Yet
 USB Ports Not Working in Windows 11? Try These Fixes
 ASUS WiFi Routers and Networking Solutions Deliver Long-term Security and Reliability with No Additional Cost
 Second Monitor Not Detected in Windows 11? Try These Fixes
 Turn Your Old Smartphone Into a Dedicated Webcam for Your Windows PC