


Our Verdict
Introduction, Specifications, and Pricing
NZXT is no stranger to making chassis, with their H series being the one that defined a recognizable styling for the NZXT offering. Today we have the newest in the NZXT H1, which is an ITX based chassis designed for an ultra-small footprint while carrying a rather slick and elegant styling.
The new H1 is designed from the ground up to be a builder's chassis with an integrated and pre-routed PSU and cabling solution. That is cool, but NZXT also integrated an M Series AIO unit to cool the CPU, and we now start to see the H1 shape into what we can expect for the rest of this review. It is clear from the onset that the H1 was designed to not only allow builders to make a small form factor rig that builds quickly. This also will likely apply to the NZXT BLD series of prebuilt system options, as this configuration will probably cut down on production time, hence quicker turn around.
Key features of the H1 are as follows:
- Included components (140mm AIO, PCIe riser card, & PSU) represent $250+ value
- The 13.6-liter size that supports almost all GPUs on the market.
- Footprint uses just 350 cm (squared) of desk space.
- Integrated PSU, PCIe riser card, AIO liquid-cooler.
- Features tool-less SSD tray, easy-to-install riser card, and pre-routed cables.
- Tinted tempered glass front panel.
- Dual-chamber layout airflow for GPU, CPU, and PSU.
- Rear I/O cable routes.
This is quite interesting as NZXT's stated value of their integrated components comes very close to our calculation. We came to about $80 for the AIO, $140 for the Seasonic Gold SFX Modular PSU, and $40.00 for the premium quality riser cable. The total we estimate is approximately $260 as of the time of writing.
Best Deals: NZXT H1 Mini-ITX Chassis
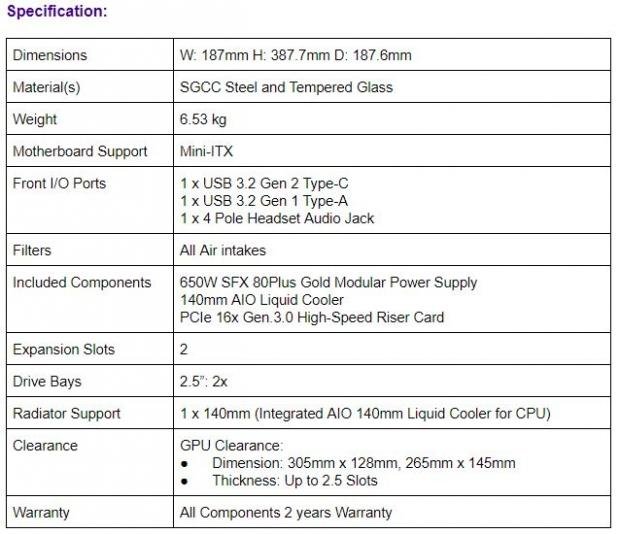
The H1 chassis comes to the market with the part number of CA-H16WR-B1-US, which is for the black version we have today. The H1 also comes with a white option, which would be a white exterior shell with a black interior, as we have seen on other H series chassis. The H1 measures in at 387mm tall, 187mm deep, and 187.6mm wide. The warranty for the H1 has been updated via NZXT, while the spec sheet seen above may say that all components come with a two-year warranty. NZXT has since updated the warranty as follows:
- Case & AIO: 3 Years
- PSU: 10 Years
This is a fairly reasonable warranty for the components. The PSU now has warranty support similar to the best in the PSU field, which adds some serious value and ease of mind if you choose the H1 for your next mITX build.
Motherboard fitment for the H1 is ITX only. Storage fitment is 2x 2.5" drives with no space allocated for larger 3.5" storage. PSU fitment is SFX and comes with a 650W Gold unit preinstalled.
Our Latest Small Form Factor Cases Review Coverage
The only cooling fan on the H1 is a 140mm AER unit, which comes preinstalled on the M series 140mm AIO. There is no need for a spec of CPU air cooler fitment since this unit comes with the cooler installed. Should the cooler eventually fail, however, the fitment would not be very bog, and you would probably want to locate a similar replacement should it occur. GPU fitment is up to 305mm long, with up to 2.5 slot thickness accounted for.
The NZXT H1 comes to market at $349.99, which for a moment may shake you until you account for the items included. The estimated value hovers to around $250 - $260 for the installed AIO, PSU, and GPU riser integrated into the H1. This means the H1 chassis itself will run about $89.99 to 99.99, depending on how you value the preinstalled components. At this price level, we do not have a ton of competition that is relevant to ITX builders. However, what we do have is NZXT's H210, the NZXT NODE 304, and the TU150 from Lian Li.
Let's see how the new NZXT H1 stacks up to the real competition on the market.
Shannon's Chassis Test System Specifications
- Motherboard: ASUS ROG Strix Z390-i (buy from Amazon)
- CPU: Intel Core i7 8700K (buy from Amazon)
- Memory: Corsair Vengeance Pro RGB CMW32GX4M4C3000C15 (buy from Amazon)
- Video Card: MSI GeForce RTX 2060 Gaming Z (buy from Amazon)
- Storage: Sandisk M.2 256GB
- OS: Microsoft Windows 10 Home 64-bit (buy from Amazon)
Packaging
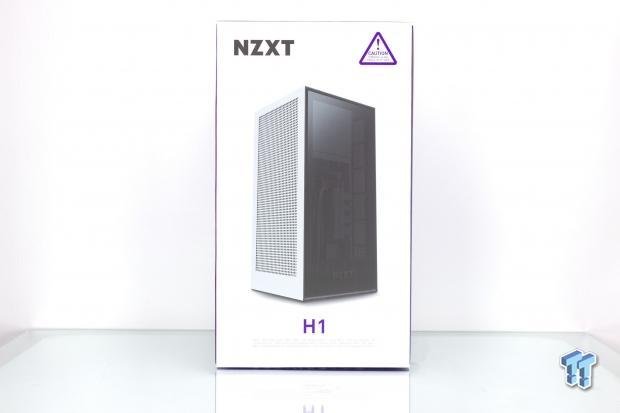
The primary front side of the box is like what we have seen on other H series chassis from NZXT. Their packaging style is quite chic with a clean aesthetic, the brand name, the product, and the product name. Any marketing data must deal with being a small entry at the very bottom to afford the clean overall look. This is quite the relief compared to getting your eyes blasted with various feature icons and marketing blurbs that may or may not even be applicable to your needs or use case.
Rotating the package ninety degrees, we see the five selected key features or talking points of the H1 along with two languages translated of these points. Then we have a fully clad, along with an image of a mockup assembled H1 below. The bottom rounds out with the inventory control label.
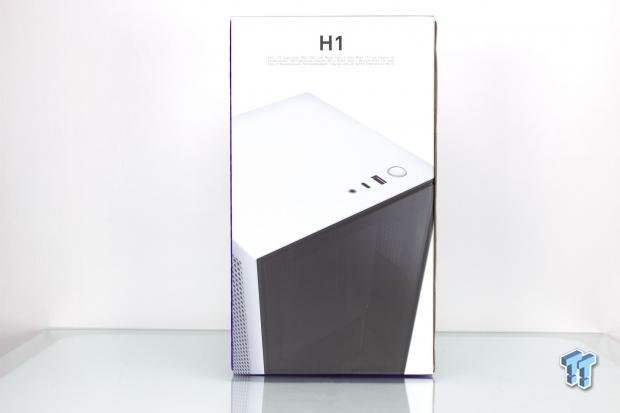
Rotating another ninety degrees, and we see the H1 naming moved up top along with the lightly colored marketing text below it. Now the case profile has been changed for a top-down quarter angle shot, which shows the I/O and tempered glass along with the vented sides. This is probably one of the strongest images showing a lot of what the H1 is about in a single shot.
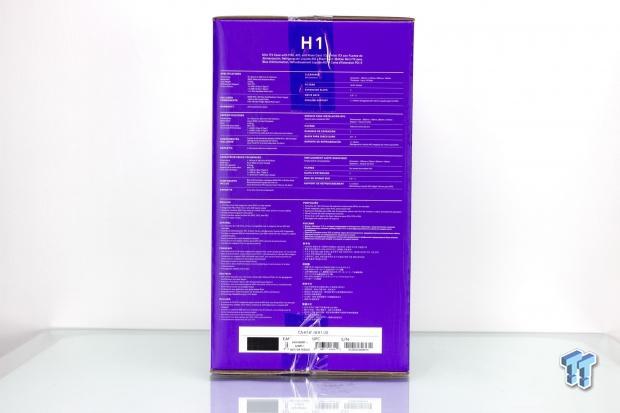
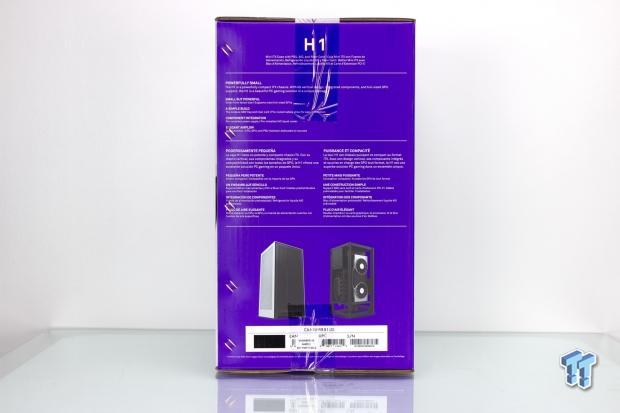
The final ninety-degree rotation shows the side of the packaging, which has the specs table. Here we also see the marketing language flanking the name above in full brilliance. Below the spec table, we find the feature bullet list in eleven languages, including English. The bottom once again is rounded out by the inventory control label.
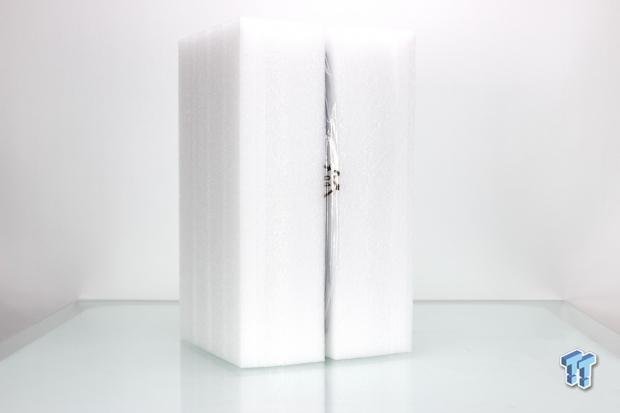
Pulling the box from the H1 shows it comes wholly encased in a polystyrene style soft foam shell. Inside that shell, the chassis is in a plastic bag to further help protect the case surfaces. The main glass panel also has a plastic cling film in place, which helps protect the glass panel from any sort of abrasion or damage during shipping.
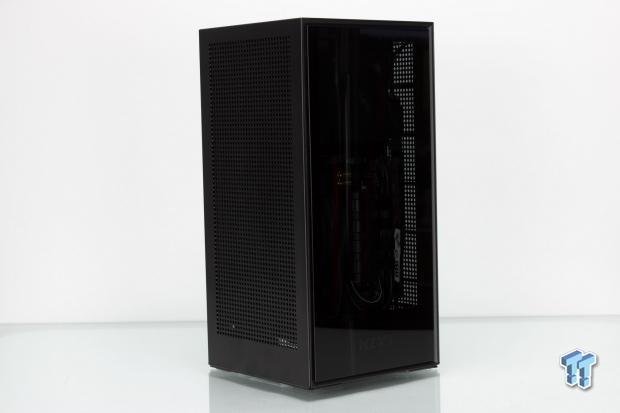
NZXT H1 Mini-ITX Chassis
The front panel is opaque enough that you don't see very clearly inside without some sort of internal lighting. The lights in my photo studio blast the glass to give a solid view inside, but with this chassis on your desk, you will not see the internal structure nearly as easily. Also, the NZXT logo is well integrated and almost fades into the glass in most scenarios.
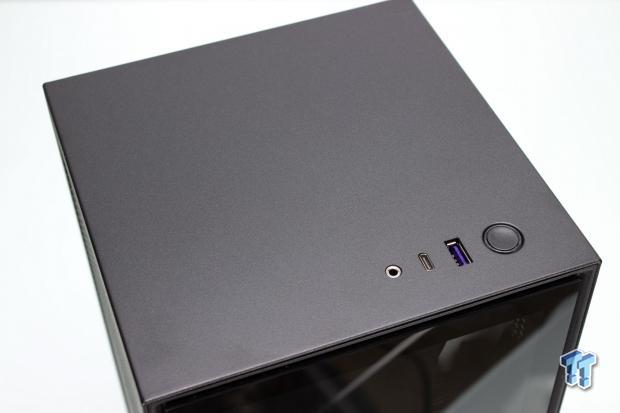
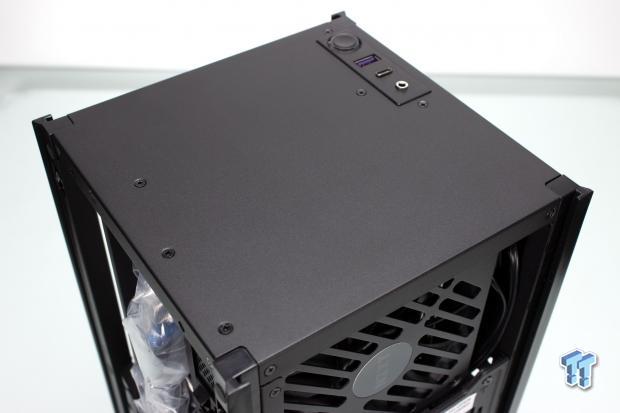
The top of the H1 since it is a monolith style chassis is simple and solid metal except for the Front I/O. since there is not much else here, we will cover that as well.
The I/O consists of the following:
- Combo headphone and microphone 3.5mm jack
- USB 3.2 Gen 2 Type-C port
- USB 3.2 Gen 1 Type-A port
- Power Button with illuminated power&HDD LED ring
The I/O is complete, and I am pleased to see the Type-C, in this instance, being full speed. I do know that NZXT's goal is to be clean and minimalist with this chassis, but I do once again wish they included dual USB 3.2 Gen 1 Type-A ports as once again, we see a wasteful use of a full 20-pin header for a single Type-A port.
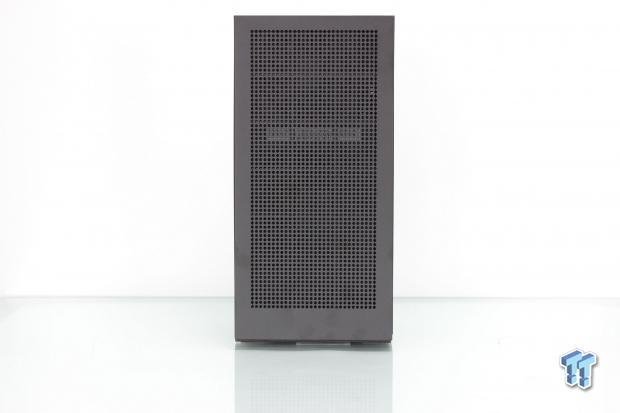
Rotating to the side with the AIO installed, and you can see the entire top to bottom length is an open mesh with an internal dust filter to allow the H1 to breathe.
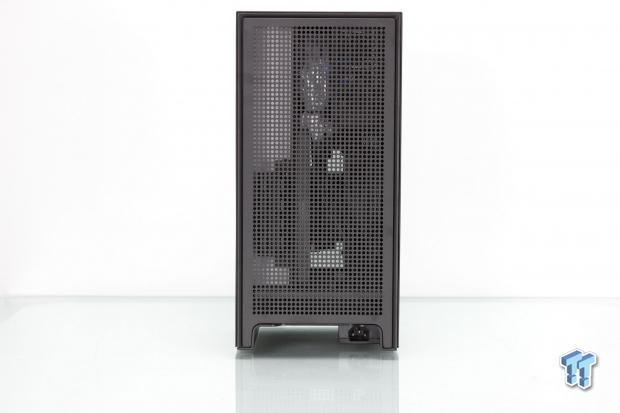
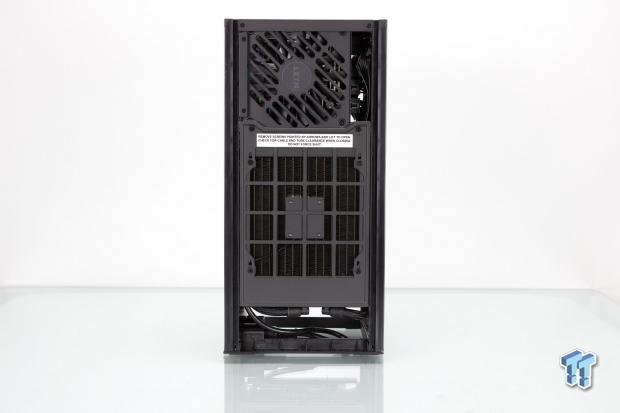
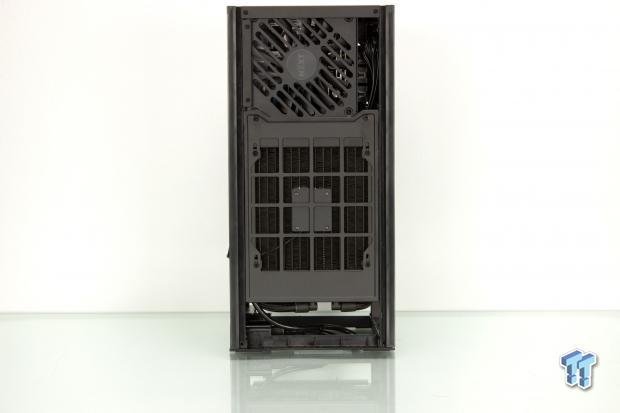
Rotating the H1, we find the end opposite the glass panel. This side also has an open hump at the bottom, which houses the AC input receptacle for the PSU along with areas to pass through your I/O cables such as peripheral and display connectivity. Here once again, we have a fully vented panel in place which allows air to escape freely and with any luck keep components cooler. So note that since this back vented panel is not considered an inlet, it is not filtered to help avoid obstruction of exhausting heated air.
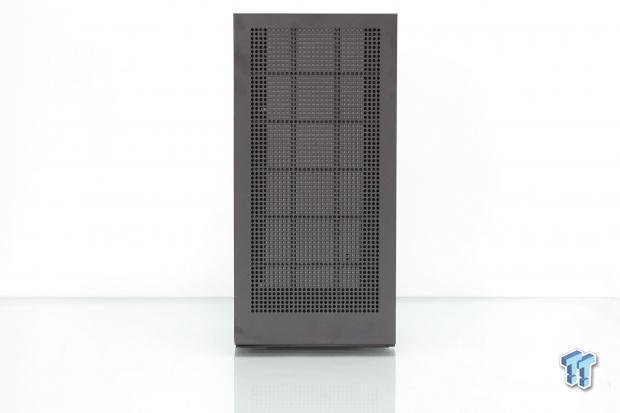
Rotating the H1 again ninety degrees, and we now have the GPU side panel. This side is well vented and filtered the same as the opposing one and will help make sure no matter the design of your GPU, it should have no issue with a lack of available air to pull in.
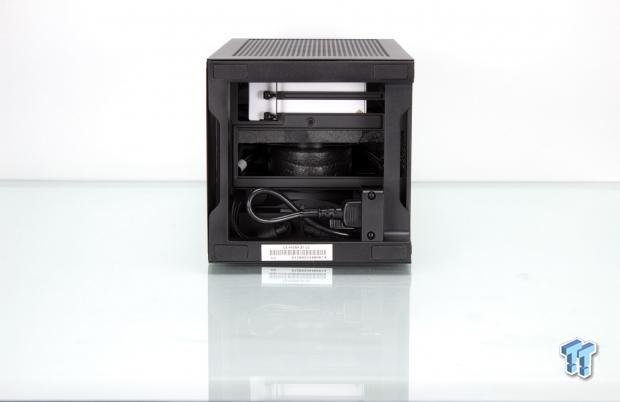
The bottom of the H1 is where a bulk of the action happens or at least concerning connectivity. Here we have the motherboard I/O shield cutout along with the adjacent GPU I/O. Here we also see the AC input cable, which is routed up to the integrated SFX PSU inside the top of the H1.
Inside the NZXT H1
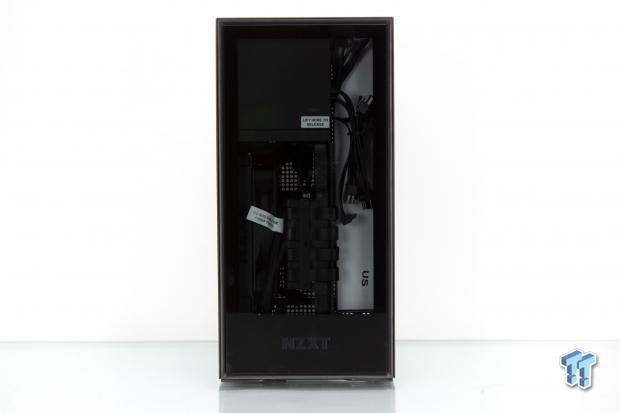
The first panel we remove from the H1 is the front glass panel. This panel covers the PCIe slot side of the motherboard and the top of the GPU once installed. This will ensure any lighted bits on the top of the GPU will show through the window, which shows there was some thought into component positioning. The panel has ball and socket retention and pulls off from the bottom and away with relative ease. The top two holes you see are where the two opposing removable panels help to retain the rest of the chassis outer panels, which slide up and off.
Here we have rotated the H1 a full one-eighty. Here we now look at the top of the motherboard, along with the bottom or slot side of the GPU. This panel uses the same ball and socket mounting and has the top pins retaining the rest of the outer shell.
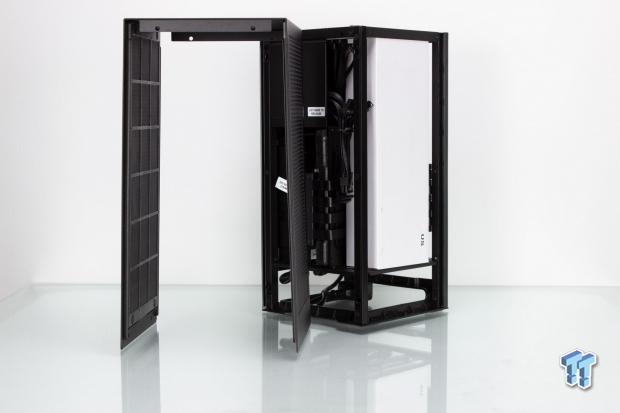
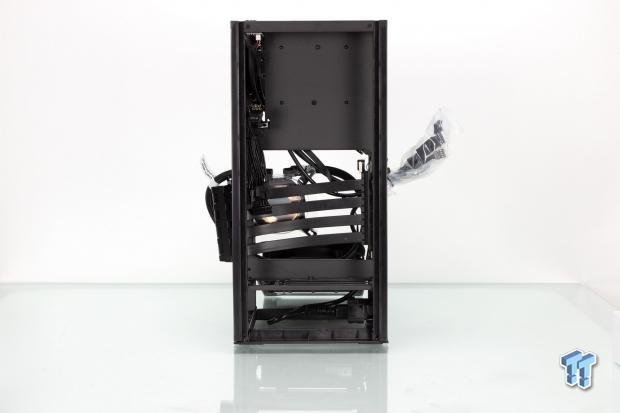
After removing the two ball and socket panels, we find the rest can lift up and off of the H1. Lifting the shell off allows us to see the fan filters inside the H1 shell, which covers both sides, which also happen to be the two inlet sides for the AIO and GPU, respectively. This also breaks the H1 down to a bare frame, which will lead to a much smoother build process.
Here we peek into the side with the preinstalled AIO. The center square is the pump, which in the M series from NZXT integrates the pump into the radiator body. This is over the fan hub area, so I am not too concerned with it blocking cooling airflow. Above this area, we find the PSU air inlet as well for the 650W gold-rated SFX supply.
With all of the external panels off, you can see that the top is still solid, as it is part of the integral chassis and its inherent stiffness. The only break in the lines up top is the I/O section.
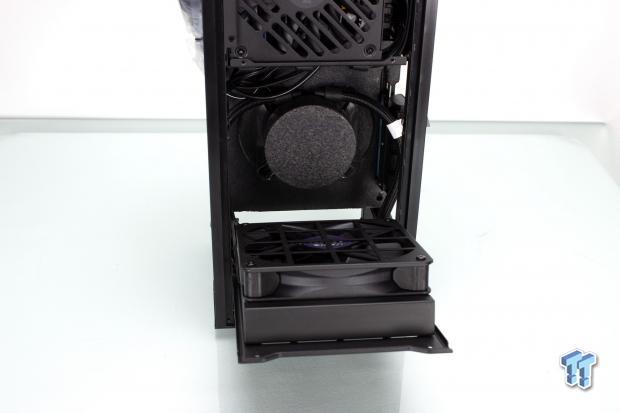
Pulling the two screws at the top of the AIO bracket, we find that the M series 140mm radiator and fan rotate away from the motherboard area. This allows for the cooler to pivot away and hardware installation to occur while the AIO is still attached to the chassis.

Pulling the protective foam cap, we now see that the AIO, even though it will be unlikely to be seen it does have an NZXT logo branding on the CPU block portion. NZXT also created a mock foam motherboard for the AIO to recess into along with the PCIe ribbon cable to rest within.

Here we take a different angle on the flipped down AIO unit, so we can now see that NZXT instructs to keep the hoses pointed outward. This ensures the tubing for the liquid to not become pinched off, which can damage the tube or impede flow, causing to pump failure or overheating. Here you can also see the foam mockup motherboard NZXT uses for the PCIe ribbon in place along with the AIO CPU block.
Inside the NZXT H1 Continued
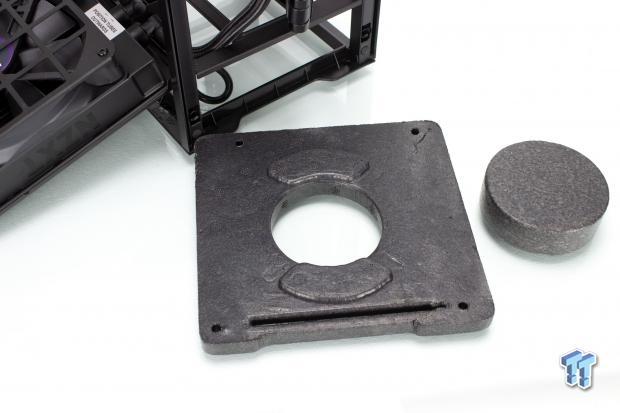
Here we have the mockup foam motherboard and cap for the AIO. I got to give NZXT credit; this is quite a smart way to handle integrated components like this for a DIY chassis as it ensures a lack of movement of the parts and less likelihood of damage.
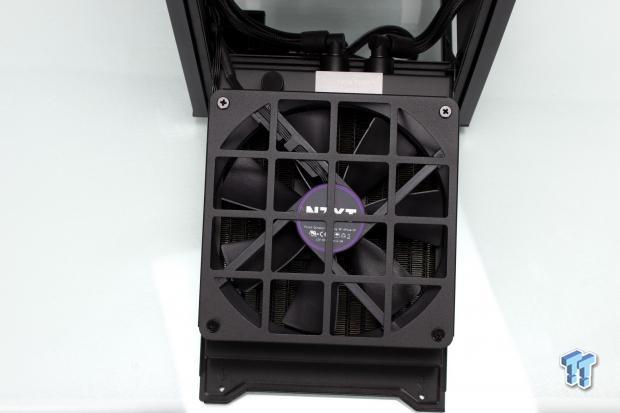
Here you get a straight-on shot of the 140mm H series AIO from the fan side. As you can tell, this is a standard AER P 140mm model. The Aer P model fans are static pressure focused and ideal for a radiator fan application, especially when you consider that tighter FPI will require a bit more push to get through the cooling surface area.
Here we have the white accessory box removed form the GPU section of the H1, and we see space is mostly an open chamber made to house the GPU at up to 2.5 slot thickness. The GPU's I/O is located at the bottom, as we showed before. The Ribbon cable comes from the PCIe slot and around behind where the GPU will sit to the slot where the GPU will be inserted.
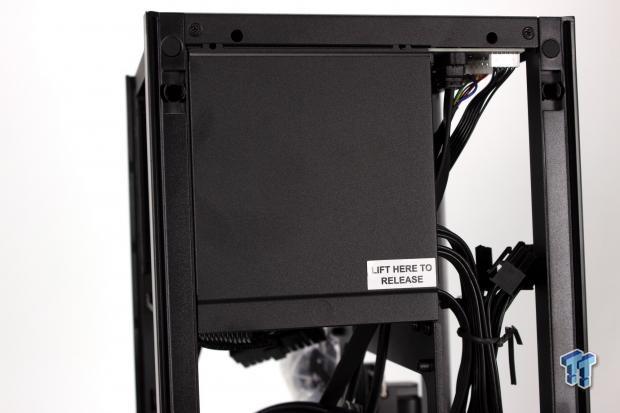
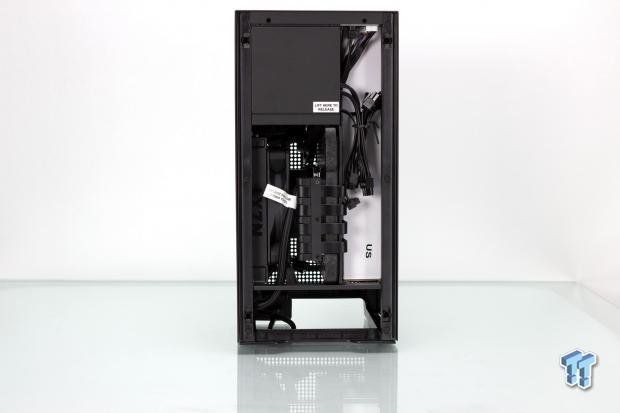
Toward the front glass panel, you may have noticed this panel, which says to lift to release. This panel covers the PSU and dual SSD cage behind and makes them disappear behind the glass. You will want to remove these white decals before putting the system into service as they show through the glass panel and simply won't look that good.
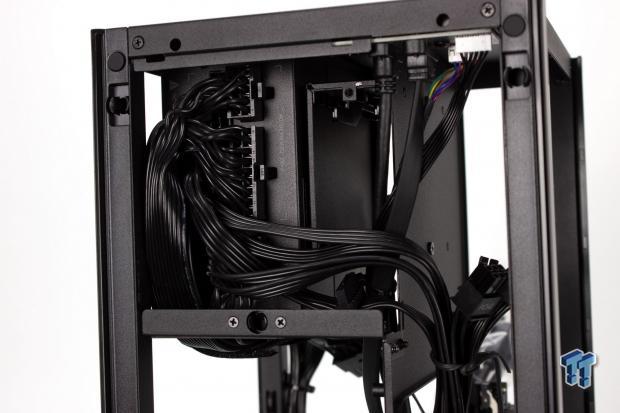
Removing the panel had a single ball and socket mount, as you can see here and two tabs at the roof of the chassis helping top retain the panel. Once removed, you can see the fully cabled SFX PSU, and to the right of that also covered is the previously mentioned 2.5" drive cage. I like this design as it hides most of the cabling up here when not used as there is a gap that can be used to tuck cables. The top of the chassis 2.5" cage has a threaded hole that has an accessory piece included in the accessory pack, which will lock drives in the cage for travel or shipping with a single screw and a small metal plate.
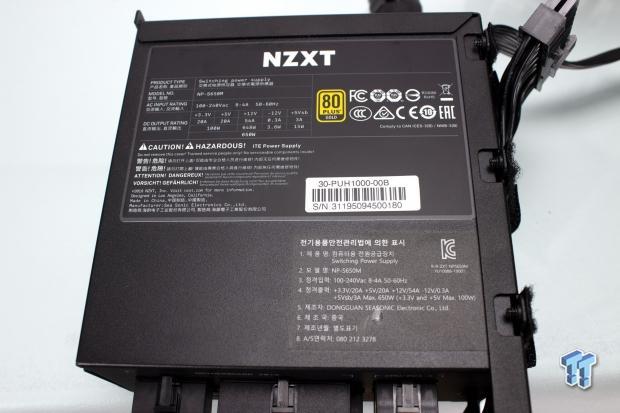
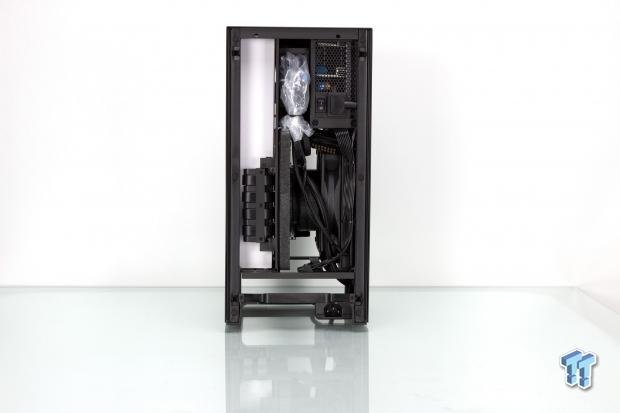
To ensure what we were dealing with, we also went through the steps necessary to remove the integrated PSU. I am happy to report that it is a Seasonic unit that is gold rated and 650W. This should handle virtually any system you could want to put into the H1. This is a unit in which NZXT worked with Seasonic to OEM for them. If I were to draw a comparison, I would look at this similar to the Seasonic Focus 650W gold. The PSU's bracket even has Velcro straps integrated to help manage cables. I do not necessarily recommend removing the PSU as its not the easiest to withdraw due to the specialized nature of the H1.
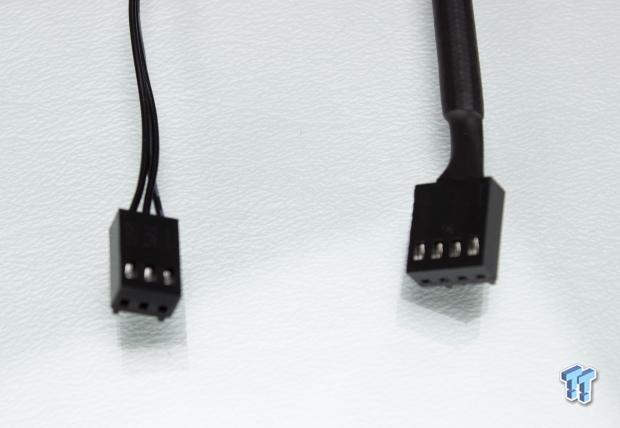
Here we have the connectors for the M series AIO. The pump is a standard DC 3-pin connection, while the fan has full PWM capability and is 4-pin.
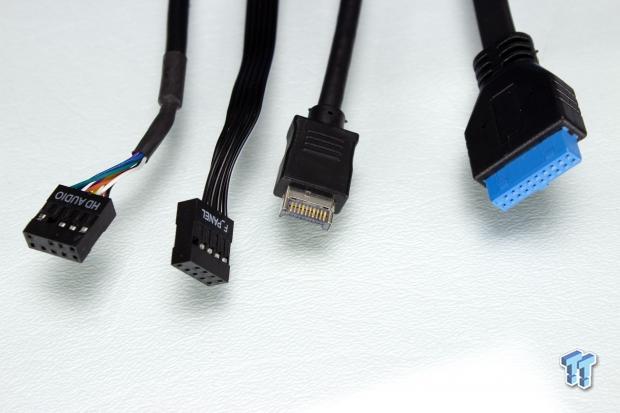
The Front I/O cabling is simple and to the point. It is laid out as follows:
- HD audio connector
- Front panel pin header
- USB 3.2 Gen 2 header (feeds I/O Type-C port)
- USB 3.2 Gen 1 header (feeds I/O Type-A port)
Once again, the I/O is solid, but I will once again mention that using the full 20-pin Gen 1 header to feed a single Type-A port is wasteful, and with ITX, you are already limited on connectivity in many cases. That is something I would like to see NZXT buck this tradition.
Hardware & Documentation
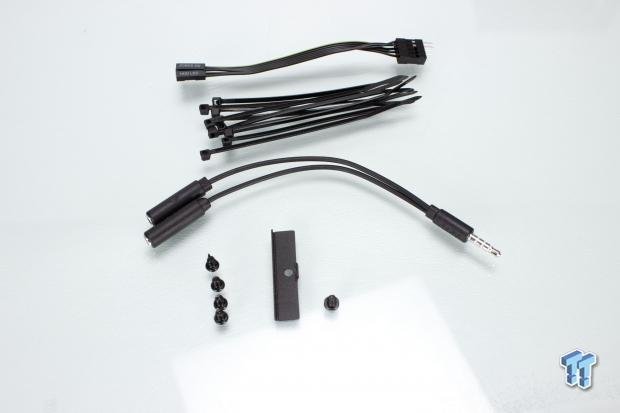
Peeking in the accessory box, we find the following:
- Front panel connector adapter
- 10x zip ties
- Combo 3.5mm jack to split headphone and microphone 3.5mm jacks
- 4x motherboard mounting screws
- 1x screw and plate for locking the SSD's in their cage
This has everything you would expect, including the handy 3.5mm adapter, which is not always included, as we have seen in chassis in the past.

Next up, we have the AIO hardware. The mounting is unique as it uses tabs in the backplate to lock the screws into place, but overall it worked very well and included mounting hardware for both AMD and Intel mainstream sockets.
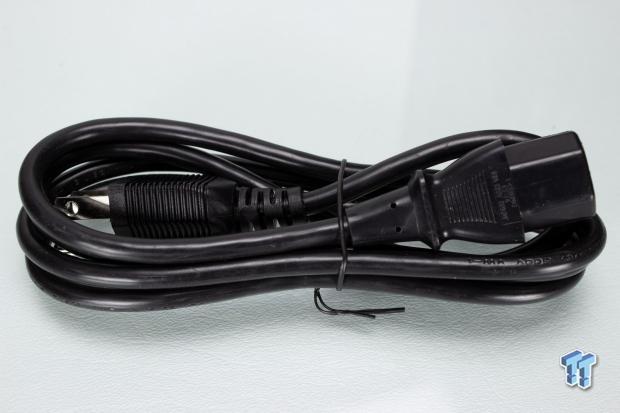
The H1 comes with an AC input cable, of course, and is found in the accessory box.
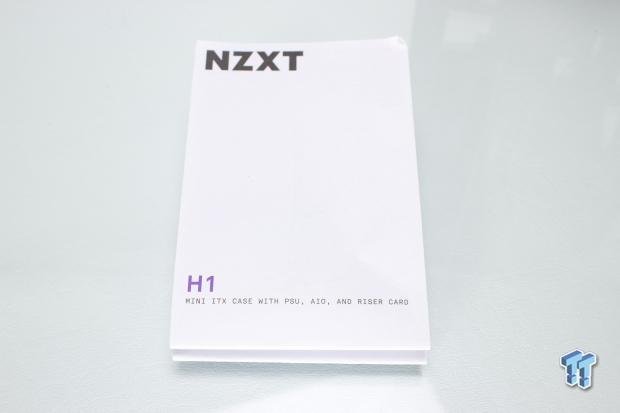
The manual for the H1 is a multi-fold sheet that is quite big. The manual does a reasonably good job of explaining everything about the H1 and how to install it. One thing to note is that the little plate for locking the SSD's in place is not listed, which is why I took special care to mention it as it was not detailed in the manual. Overall the H1 gets a passing grade for its detail as far as the build components and instructions on how to assemble in the chassis.
Case Build & Finished Product
Here we have the build in the H1 complete. As you can see, the RAM is our gold Trident Z Royal DIMMs; this is due to a height limitation we ran into where the AIO when folding shut did not have the clearance necessary to allow our taller Vengeance Pro RGB modules. We swapped down to Geil Super Luce, which also was a few millimeters too tall, so we swapped to the Royals, which fit with about 2mm clearance.
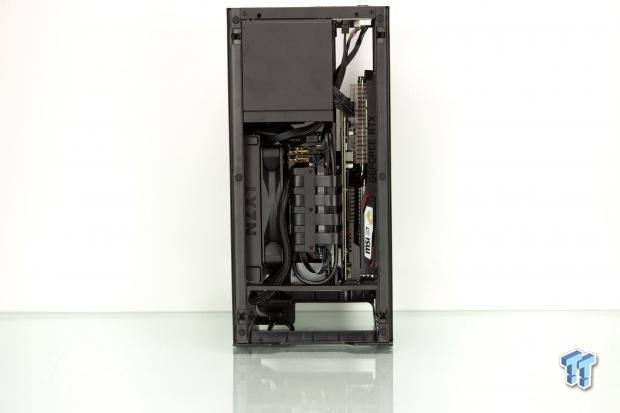
Here from the AIO side, you can see that nothing changed as this side is covered by the PSU and the AIO, which obscures the view of the finished build.
Flipping around to the rear side and we can see that the cable tie points on the frame bars of the H1 come to good use keeping cables out of the way. An add-on effect with the AIO being so close to the motherboard means the airflow from it should carry across the VRM and board components helping to cool them as well.

The GPU side, to what will surprise nobody, is the GPU. You do not see much here as the GPU side is a mostly separate chamber explicitly made to house a GPU, and that's what you get. You can see that the RTX 2060 Gaming Z from MSI fills in well here, but there is some room still for larger, more beefy GPUs as your build demands.
Here we take a close-up of the RAM clearance, and you can see why there could be fitment issues depending on your memory choice. You will want more standard DIMMS, avoiding larger RGB modules with huge diffusers or large appendages as they likely will not allow the AIO to swing into place.
Before tossing the panels on, I want to give some perspective as to how petite this build is in the H1. Everything is held in a 7" by 7" square, which towers upwards, and had I had a banana for scale; it would be even easier to understand.
Dropping the two-sided shell in place then affixing the main panels, everything quickly disappears. With the light pumping lumens into the H1, we can somewhat make out the internals, but overall the H1 looks like a dark black monolith until you light things up.
For the powered-on shot, I flipped the chassis to have the glass panel sowing left so we can showcase how the GPU ARGB is visible through the vented sides along with the glass. Overall the H1 is not a chassis build for a lit-up showpiece showing off all your parts. The opaque glass ensures you do not see the undesirable chassis bits, but overall when well managed, it's a neat looking build.
Final Thoughts
When I first heard from NZXT that a new ITX chassis was coming, I was interested, quite interested. NZXT had said that it was a pretty significant departure from what they had done before, and they were excited to get it out there. When a company is excited about their product, I mean legit excited, not marketing "excited," that says a lot. After using the H1, I can see why they were excited. Overall the H1 is a solid case idea, and its execution is mostly on point with very little I can complain about.
During testing, we observed an ambient of 21.6C with an RH of 44%. The CPU on our H1 test build showed an average delta over ambient of 44.2C, while the GPU showed a delta of 44.3C. This is very good for the CPU as it falls into almost 5-6C better thermal than most of our previous tests; however, they are not directly comparable due to cooler differences. But it is a good indicator that the H1 does not seem to impede the CPU cooling capabilities. The GPU, however, is about 1.4-2C higher than we usually see, and this is likely due to a lack of passive airflow from chassis fans. The GPU turns its fan on at 60C, so the GPU had to wait for that point to even see airflow. The H1 would not be ideal for a passively cooled GPU, but any fan-cooled GPU in this chamber should work just fine.
What we like
First up, let's discuss the happy thought we have about the new H1. The fact that everything is integrated means you buy your main components, and you will be ready to run. Not needing to sort which cooler may fit or needed PSU, NZXT built the H1 in such a way that it should handle most any build that will fit in this chassis. The included AIO and its fan are not audible during normal usage; however, when pushing heavy render loads, like most coolers, it will ramp up as needed. The fan, when around 1100-1200 RPM under full load, was audible but was controlled enough. It was not an annoying sound but more of a wind rush.
What do we think could be better?
Now we must address what we think NZXT could have done better with the H1. Hindsight is always 20/20, and while I have harped on NZXT before for employing a 20-pin header only to feed a single port, I do hope in the future, especially on ITX, that they correct this. The RAM clearance is a bummer, but due to the form factor, I'm willing to give that a partial pass here. Overall the quality of parts holds up well, and I don't have much more I can complain about, so with that, let's wrap this up.
Looking at the base price of $349.99, it is easy to write up the H1 as an expensive ITX chassis, but you need to understand the added value parts in this scenario. You will need a PSU, cooler, and riser cable for any build where you have the GPU laid back to back with the motherboard. With all of these considered, the H1 starts to make a lot of sense simply based on the quality and value of components. Then we look at the ease of build offered by all the components preinstalled and even partially pre-wired.
The NZXT H1 offers ease of building and performance at a level that is rarely seen, and this sort of solution for SFF is welcome. The NZXT H1 is not only an excellent value for what you get, but it's also a great experience to build in.
Shannon's Chassis Test System Specifications
- Motherboard: ASUS ROG Strix Z390-i (buy from Amazon)
- CPU: Intel Core i7 8700K (buy from Amazon)
- Memory: Corsair Vengeance Pro RGB CMW32GX4M4C3000C15 (buy from Amazon)
- Video Card: MSI GeForce RTX 2060 Gaming Z (buy from Amazon)
- Storage: Sandisk M.2 256GB
- OS: Microsoft Windows 10 Home 64-bit (buy from Amazon)
 MOAIPLAY ORA PRO G1 850W ATX 3.1 PSU Review: high efficiency and 10-year warranty for $119.99
 NZXT H6 RGB+ Compact Dual-Chamber Chassis Review
 Lian Li HYDROSHIFT II 360P OLED Curved Liquid CPU Cooler Review
 ID-Cooling FROZN A620 SLK CPU Cooler Review
 GAMDIAS Atlas P6 CG Dual Chamber Mid-Tower Chassis Review
 Corsair GPU Power Bridge, designed to handle 100+ degrees, melts GeForce RTX 4090
 Gears of War: E-Day PC requirements detailed with GeForce RTX 2060 minimum and RTX 5060 recommended
 Insider pours cold water on rumors of Rockstar delaying GTA 6 release into 2027
 CD Projekt Red is reportedly working on an unannounced free-to-play Witcher co-op RPG for PC and mobile
 Google is in talks with Samsung to build next-gen 'Icefish' TPU on 1.4nm and 2nm process split
 AMD's Ryzen AI Halo AI mini PC launches in the US with 128GB memory and a $3,999 price tag
 Microsoft expands Advanced Shader Delivery support to all AMD Radeon GPUs since RX 5000 series
 Microsoft CEO strongly hints at free cloud gaming with YouTube monetization comments
 Apple's first touchscreen MacBook Pro is '100% confirmed', leaker says
 AMD reversed a warranty rejection for a swollen Ryzen 9 7950X3D after Hardware Unboxed called it out publicly
 Speed Racer (2008) 4K Ultra HD Blu-ray Review: a stunning remaster of the cult classic
 Navman MiVue Smart True 4K Surround Dashcam Review - Seeing In All Directions At Once
 IQUNIX Magi96 Pro Aluminum Low Profile Mechanical Keyboard Review - Premium Build, Satisfying Sound
 Asetek Forte S-Series Racing Simulator Bundle Review
 Razer Pro Type Ergo Wireless Split Ergonomic Keyboard Review - Built for Comfort and Support
 ASUS ROG Strix Morph 96 Wireless Gaming Keyboard Review - Great Performance, More Affordable
 SAPPHIRE Radeon RX 9070 GRE PULSE OC Review - A New 1440p Challenger Has Arrived
 ASRock Radeon RX 9070 GRE Steel Legend Review - The RDNA 4 Mid-Range Reshuffle
 This Windows security feature protects Documents from ransomware, but it is off by default
 Windows 11 already has a voice typing tool, and it is the one most people are not using
 Quick Assist is the only remote-support tool I open when a relative calls about their PC
 The PowerToys utilities I keep enabled on every Windows 11 PC, and the ones I turned off within a week
 TweakTown's Best of Computex 2026 Awards - The Best Hardware, Gaming Gear, and AI
 Phison E37T SSD Controller Exclusive Preview - The Fastest DRAMless SSD Platform Yet
 USB Ports Not Working in Windows 11? Try These Fixes
 ASUS WiFi Routers and Networking Solutions Deliver Long-term Security and Reliability with No Additional Cost
 Second Monitor Not Detected in Windows 11? Try These Fixes
 Turn Your Old Smartphone Into a Dedicated Webcam for Your Windows PC