
The Bottom Line
Introduction, Specifications, and Pricing
Lian Li is not a name unfamiliar to anyone who has been around the PC scene for a relatively decent amount of time. That being said, they sort of fell from grace several years ago when trying to attract the lower-cost PC market from the chassis side. Lian Li has been known for at least for the most part in making stylish aluminum chassis with most being very minimalist.
Today we get yet another glimpse at the new Lian Li where they are back and with fervor from the industry that harkens back to the old days. Now mind you, many of Lian Lis cases are no longer subdued and minimalist. For the most part, that is not what a large part of the consumer market is asking for or purchasing.
To meet that demand, Lian Li adopted not only new trends such as RGB and tempered glass as we saw on the Lancool One Digital. Also massive high airflow showpiece cases such as the PC011 Dynamic. On that note, it is worth mentioning what case we are looking at today which took the existing PC011 Dynamic and made it even better. Or at least that is what Lian Li is hoping. The PC011 Dynamic XL is the chassis we have today, and it's a behemoth both in size but in overall fitment and feature set.
The PC011 Dynamic XL increased the airflow capabilities, along with having an insane amount of liquid cooling capabilities to ensure even the most extreme builds can be serviced in this chassis. The ROG Certified portion of this is likely to do with the fact that the PC011D XL is one of only a very select number of chassis that can actually house the ROG Dominus Extreme motherboard.
Yes, I am referencing the massive EEB motherboard with LGA 3647 socket similar to the Xeon scalable server boards/socket but made for the extreme enthusiasts Xeon W-3175X. I know that was a mouthful, but with a chassis like this, there is a lot to consider and even more to take note as this thing is a downright beast.
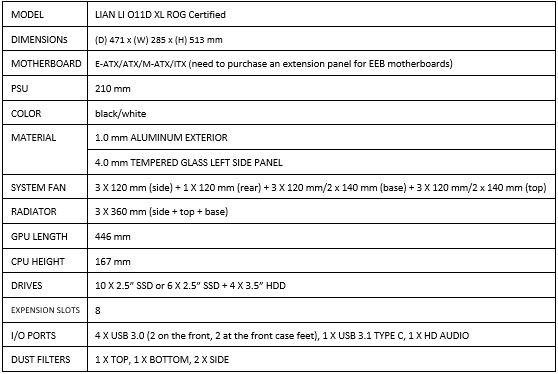
The chassis as we said before is the PC011 Dynamic XL or as I will reference in this review the PC011D XL as typing it out every time would be exhausting. It comes in at a relatively compact 513mm high and 471mm deep while having a quite expansive 285mm width. The reason I said relatively compact is that in terms of fitment and capability, this chassis could easily be much larger. But Lian Li pulled off such a feat by making the chassis wider and relocating the PSU to a back chamber behind the motherboard tray area.
The motherboard fitment goes from ITX up to ATX and even EEB if you purchase the optional bracket to extend the fitment. HDD and SSD fitment are massive as you can imagine with up to four 3.5" HDD's while 2.5" Drives/SSD's you can fit up to six if using the aforementioned quad 3.5" HDD. If not using any 3.5" those 3.5" hot-swap mounts can be used to house 2.5" SSD's raising the count to ten. As mentioned previously the PSU is relocated to the rear of the main chamber. No shroud necessary as everything will be hidden except your main components and of course, cooling.
Cooling fitment is where the PC011D XL comes to life as you can fit up to ten 120mm fans and triple 360mm radiators in those same places with the rear port supporting 120mm fitment. The vertical tray parallel to the motherboard as configured out of the box has SSD mounts in place. But when removed this is where one of the radiators can be mounted along with top and bottom mounting perpendicular to the motherboard to reach your total of triple 360mm radiators.
Ensuring you have more than enough liquid cooling to support an insane showcase rig or even a heavy lifting platform such as the Dominus Extreme. If you chose to go air cooling the maximum height is 167mm, so you should be fine there and 446mm GPU length, so, yea, I would say you can virtually fit anything in here. The PC011D XL does not come with any fans installed, and therefore you need to source your cooling options based on your brand and style preference.
The PC011D XL carries an MSRP at the time of writing, pre-launch of $199.99 and will be initially available from Newegg, but other outlets such as Amazon will quickly follow. The competition to the PC011D XL would be the likes of the View 71 from Thermaltake, the Dark Base Pro 900 from Be Quiet, and the Phanteks Enthoo Luxe. These all are quite capable chassis with plenty of high airflow capabilities and some substantial liquid cooling support.
With that being said, I would say it's about time we take a dive into the PC011D XL and what it has to offer that makes it worth your hard-earned dollar.
Shannon's Chassis Test System Specifications
- Motherboard: ASUS ROG Maximus XI Hero (Wi-Fi) Z390 (buy from Amazon)
- CPU: Intel Core i7 8700K (buy from Amazon)
- Cooler: Corsair H100i Pro RGB (buy from Amazon)
- Memory: Corsair Vengeance Pro RGB CMW32GX4M4C3000C15 (buy from Amazon)
- Video Card: MSI GeForce RTX 2060 Gaming Z (buy from Amazon)
- Storage: SanDisk M.2 256GB
- Power Supply: SilverStone Strider Platinum 1000W (buy from Amazon)
- OS: Microsoft Windows 10 Home 64-bit (buy from Amazon)

Packaging
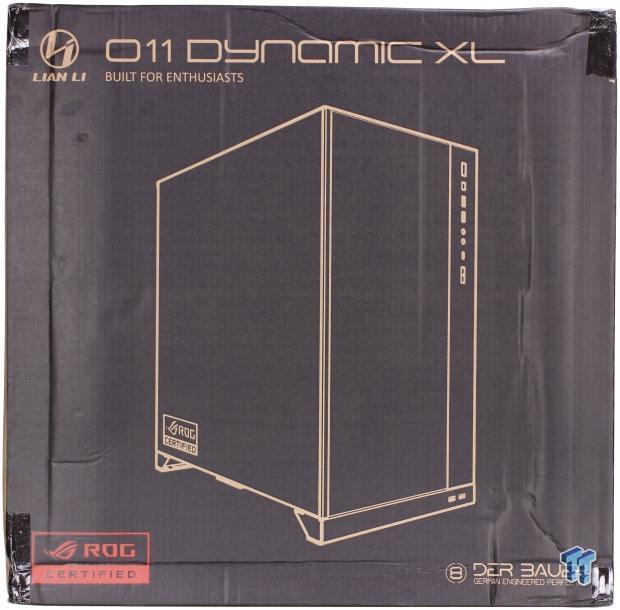
The main side of the packaging has an opaque view of the chassis with a negative effect so that the details are bare box color. The chassis looks almost like a solid black tower with a ROG logo on the side. You can make out the mass connectivity on the front, but everything else except the Lian Li logo and product naming is there. Lian Li is proud of their ROG certification as it is not only on the box but on the chassis. Same with their co-working with famous enthusiast and professional overclocker Roman (Der Bauer) Hartung. The latter being a good point for Lian Li to highlight as Roman worked with them on the original predecessor to this chassis the PC011 Dynamic.
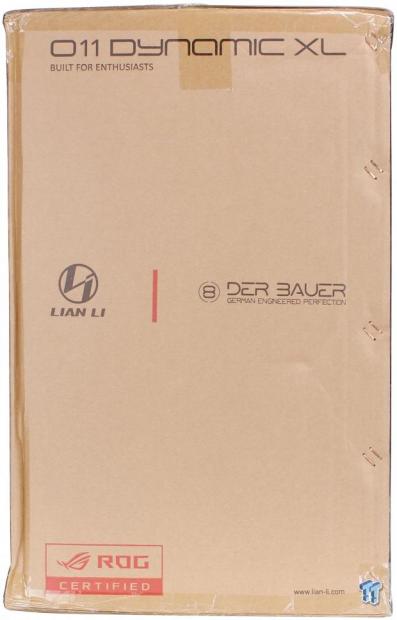
This side shows the same logo and name, along with the Der Bauer logo and the ROG certified logo.
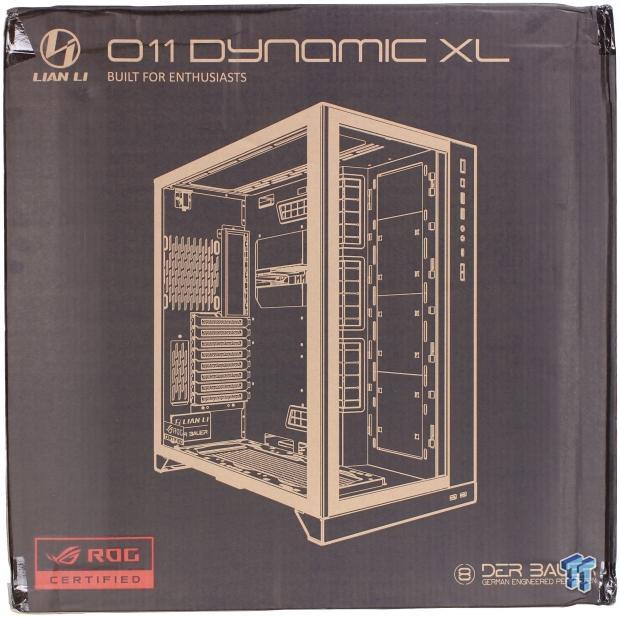
Now we have the rear side which opens up the view to show the internal structure of the PC011D XL. As you can now see, there is a lot of room in the PC011D XL, and that lends credence to the "built for enthusiasts" claim on the box.
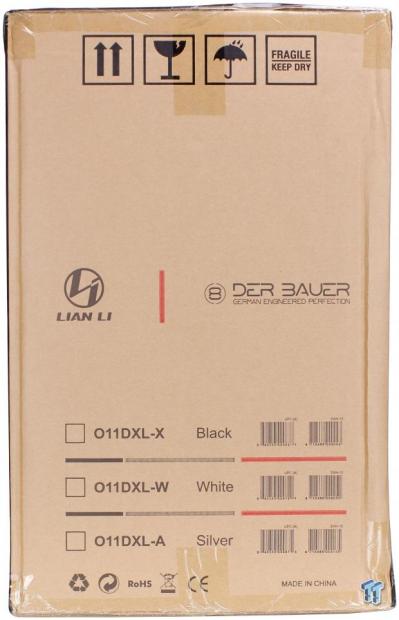
Lastly, we have the final smaller side, which has the same iconology. Below all of this, it also shows the three models available for the PC011D XL. The chassis comes with three color options; black marked by an X suffix, while white will be a W suffix and lastly silver with an A suffix. Why Lian Li chose to not put B for black or S for silver is anyone's guess at this point, but it is similar to the naming rules we observed on the TU150 from Lian Li.
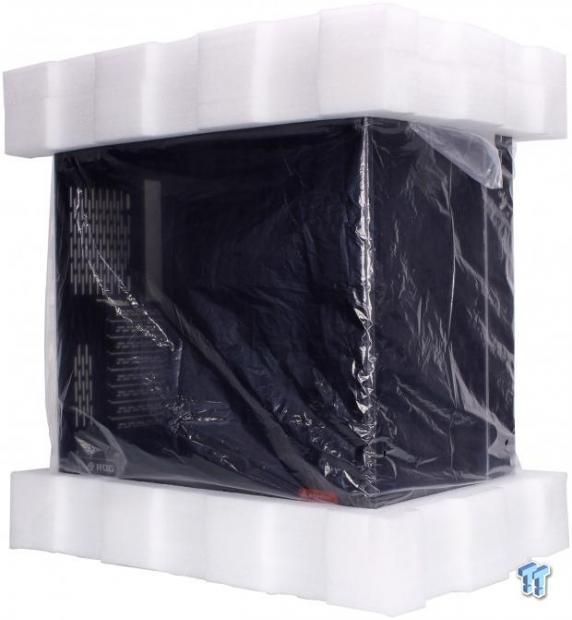
The PC011D XL comes out of the box with soft polystyrene style end caps, and the chassis is wrapped in a plastic bag. The tempered glass panels are also covered with plastic cling on both sides to ensure minimal chances of damage during transit.
Lian Li PC011 Dynamic XL Full-Tower Chassis
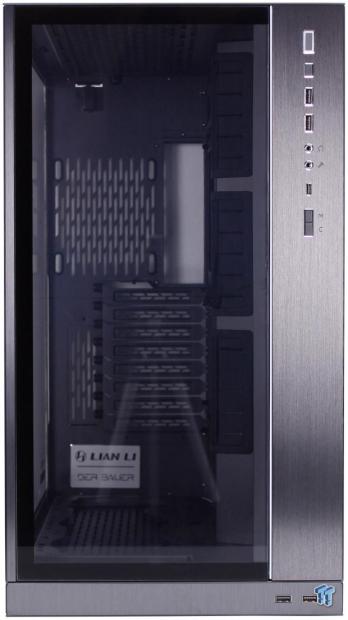
The front of the PC011D XL has an aluminum semi-frame design with brushed surfaces below and to the right of the front glass. The glass panels lift up and off of their retention slots, which makes this a much different panel retention mechanism than we have seen previously. There is no ventilation visible on the front edge, so let's take a look up top.
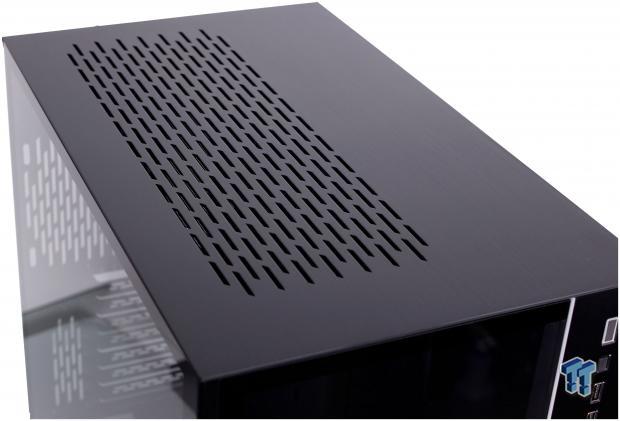
The top panel is a black brushed aluminum design, and it has elongated ventilation rectangles or almost parallelogram shapes. This is where your installed 360mm radiators or triple fans would breathe through.
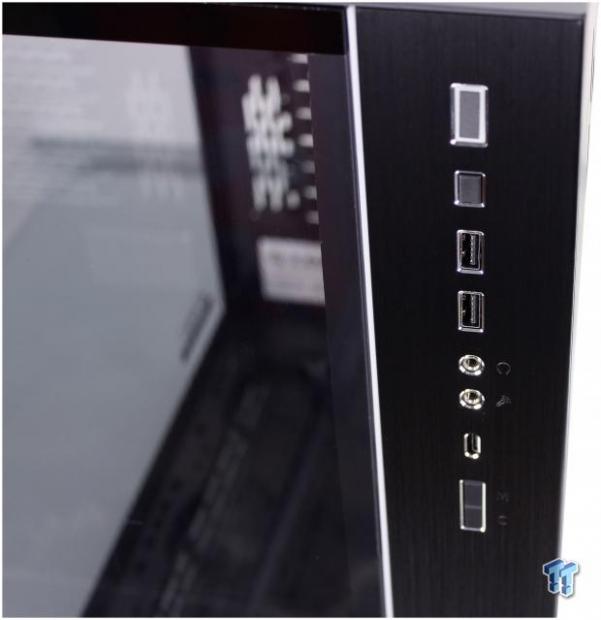
The front I/O is broken into two parts, firstly we will look at the main part and move down to the supplemental USB 3.2 Gen 1 ports. The main I/O is to the right side of the front glass instead of being on the top like we see on so many chassis.
The I/O is outfitted as listed below (top to bottom):
- Power button with integrated power and HDD LED surround
- Reset Button
- Dual USB 3.2 Gen 1 (USB 3.0) Type-A ports
- Headphone and microphone 3.5mm jacks
- USB 3.2 Gen 2 Type-C port
- M/C front LED strip control switch (M controls mode, C controls static color)
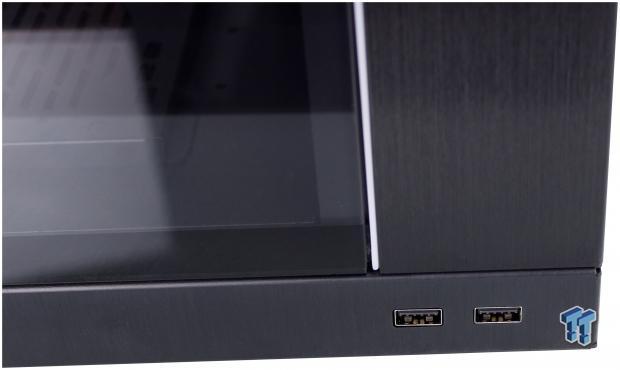
The lower foot area of the PC011D XL houses two extra USB 3.2 Gen 1 (USB 3.0) Type-A ports. This has its own 20 pin connector, so if your board does not happen to have a second connector. You can either deploy an add-in card or even buy an adapter to connect these ports to USB 2.0 so that they are usable.
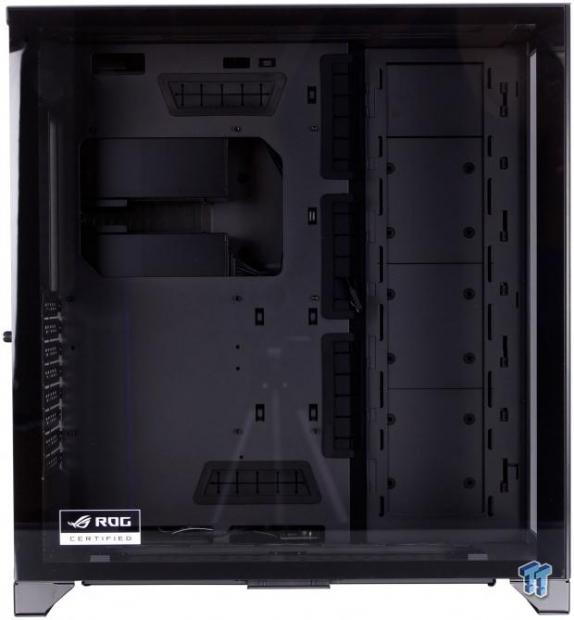
The main side panel is tempered glass as you would expect and it has a slight tint but overall not crazy dark. Overall the panel is just tinted enough it adds a subtle smoky effect. The beautiful thing about slightly darkened glass panels on a chassis. The tinted glass can help hide small wires showing so that your build looks even more impressive. This panel should be complementary in that sense but not so dark you need lighting internally to see your parts.
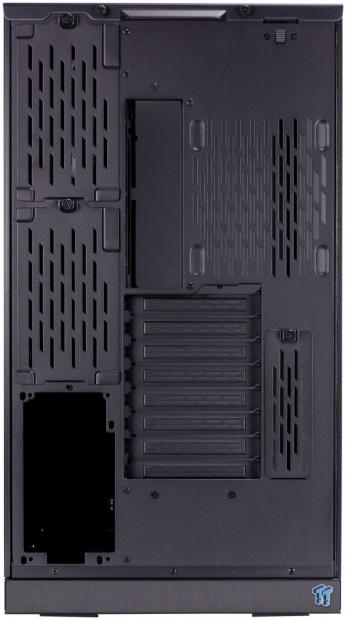
The rear is where things start to turn a bit more interesting. Firstly let's look at the right where everything is relatively standard. Average I guess may not be the right word since the rightmost side looks like a standard chassis rear section floating with bare metal above and below it. This is kind of accurate as Lian Li has left large spaces above and below the motherboard where thick radiators can be placed to ensure maximum cooling capabilities for enthusiast users.
Moving to the left is where things are quite interesting. By default, there is a standard ATX PSU opening at the bottom, while there are two covers above this which have dual HDD hot-swap caddies below the cover. These can fit up to four 3.5" or 2.5" drives or a combination of this. However, if you need a genuinely extreme system like the aforementioned Dominus Extreme pushed to the limit. You can have up to three' PSU's in place as the HDD hot-swap bays use standard PSU style mounting so that they can be removed and replaced with power supplies should the need for far more power be needed.
Lastly, towards the top, we see the dual thumb screws which retain the top panel, along with a grab handle. Even with the thumb screws removed the top panel will stay put as there is a switch which pulls down to allow the top panel to be slid off toward the rear. The reason this is worth noting is that the top panel is the only thing retaining the two main side panels and front glass panel. All of the main panels can be removed by lifting upward and away from the chassis after the top panel is removed. We will show this later as we dig into the PC011D XL.
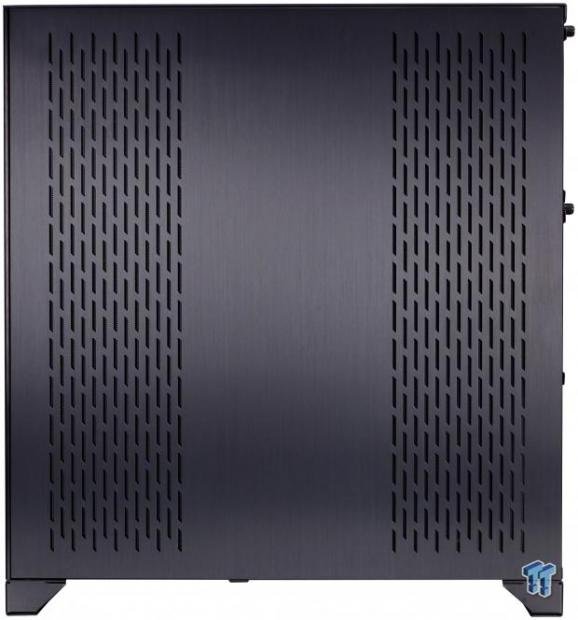
The rear or cable management side is one of the only sides which has a metal panel instead of glass. This is welcomed as many do not prefer to show off their cabling and management or lack thereof. The panel has two large openings, one being right behind the SSD tray area we saw before which can be removed to mount a radiator. The other opening towards the rear is in line with PSU mounting. Which means regardless of where you install your PSU or multiple PSUs, you will have a direct side area where filtered air can be ingested.
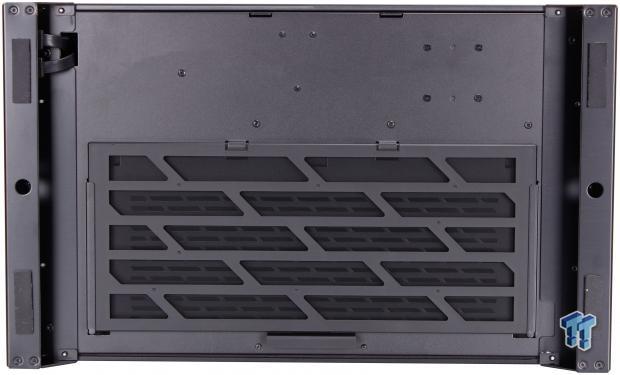
The bottom of the PC011D XL is where we finally get a real sense of exactly how wide the chassis is. The filter you see here is removable from the side and covers 120mm openings, so as you can see here, the PC011D XL is quite a wide chassis overall. The metallic feet are finished with four total rubber anti-skid feet which keep the chassis from sliding around when in place. You can also see at the top left of the image the cabling for the two USB 3.2 Gen 1 ports on the front foot.
Now let's dig further into the PC011D XL and see what kind of cool stuff we can find.
Inside the PC011 Dynamic XL
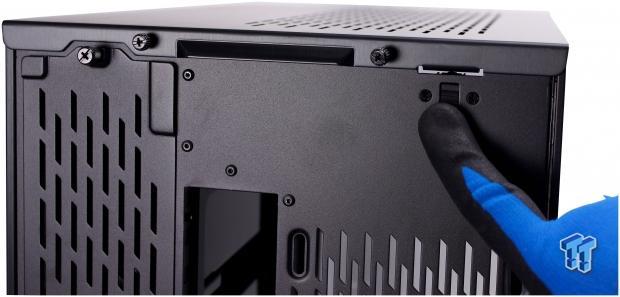
To pull the panels, here we see the switch which is released by pulling it downwards. This is, of course, after you thread the two thumbscrews out of the top rear section. If you remove these captured screws, you can use only the latch to hold the top, but then the top can move backwards a few mm so I would prefer to keep them in when the panel is installed.
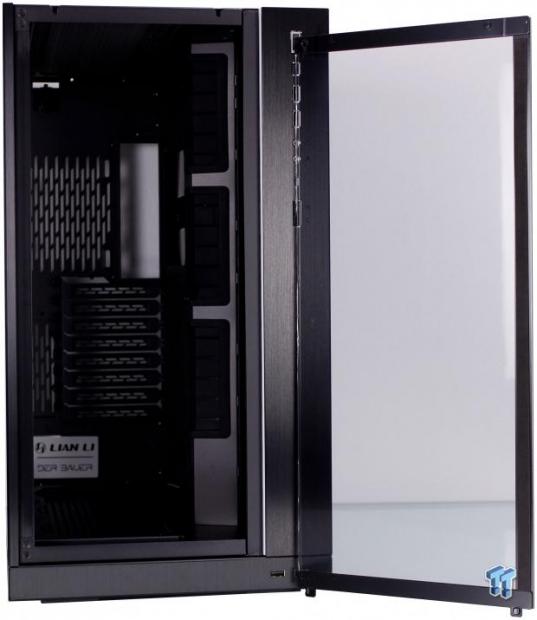
Once the top was removed, the front glass panel was removed by simply lifting it, and it releases from the slotted cutouts and the bottom tabs. As you can see here, there is no mounting for any cooling here as there is no ventilation possible from the front of the chassis. The PC011D XL is a chimney style cooling setup moving air from bottom to top.
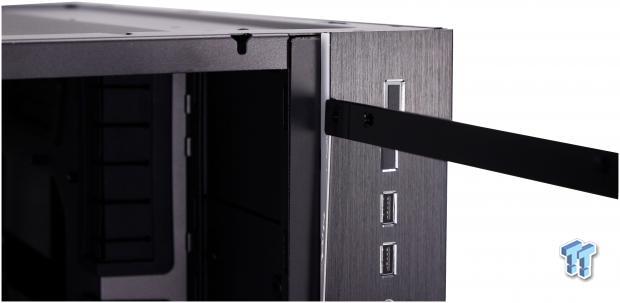
Here we see the top of the front panel and the slots that the top slots into. The top panel goes over this area and therefore retains the panel as it blocks upward movement.
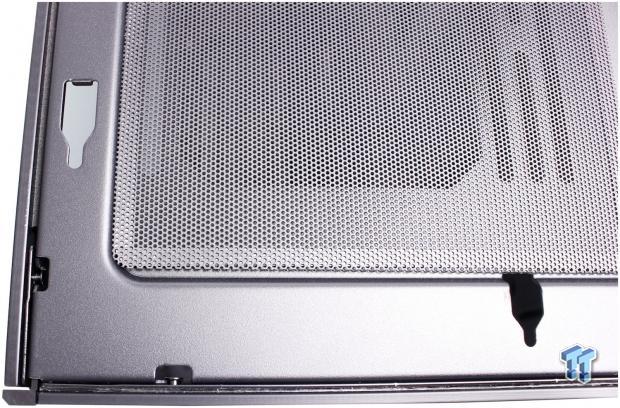
Here we get a top-down shot of the front and side panel slotted into their retention slots to better show precisely how panel retention works for the PC011D XL.
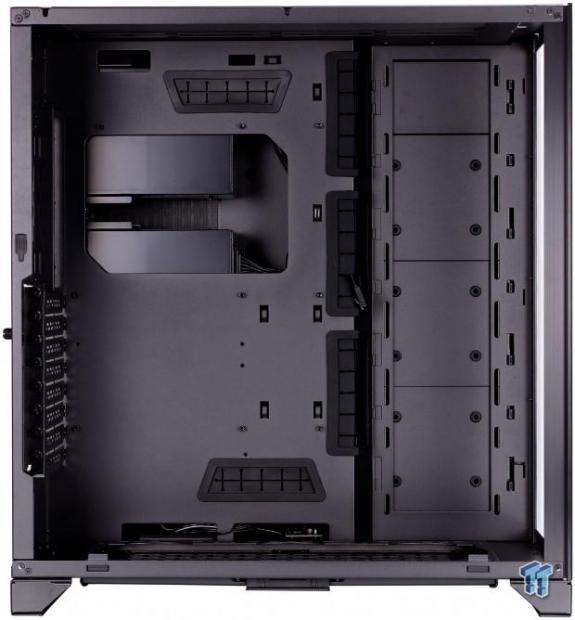
Now with the panel removed we get a bit clearer view of the interior. It is a vast expanse of mounting and possible use cases where you can genuinely make the PC011D XL your own. While this chassis is heavily targeted at liquid cooling enthusiasts, it can hold its own with an AIO or even an air cooler depending on what your build requires. All of the areas previously mentioned which support up to a 360mm radiator can also fit fans in the place to create a veritable whirlwind in the vast open expanse. I don't see anything that would be a detriment to fitment here.
One thing worth noting is that Lian Li advises for larger boards such as EATX with under board backplates or RGB. You can cut off the topmost portion of the grommets over the cable management pass-through to ensure they do not catch on components. Here we also see the three SSD mounting plates which can be removed or even relocated to the bottom. Should you choose and want to mount a radiator or fans in this position.
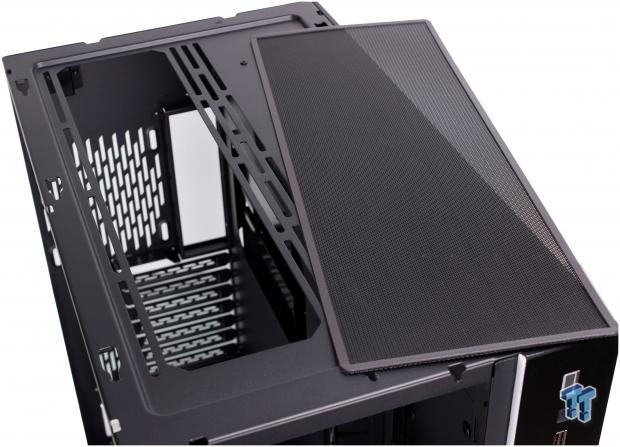
The top section has a magnetic filter in place. The top fan and radiator mounting is slotted to allow finite adjustment as needed to match the fitment of tubing or cabling. The adjacent blank panel is covering the rear chamber where the hot-swap bays and PSU reside.
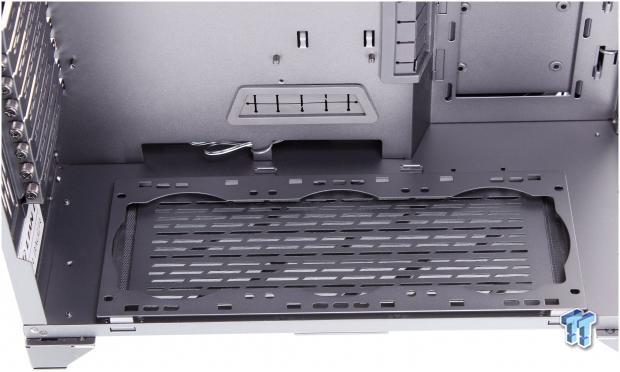
The bottom as we see here usually is where the PSU would reside, but with it being flipped 90 degrees in the back, it opens up yet more space for cooling or drives fitment. Here you can mount large thick radiators, fans or even swap the drive mounting plates to this location if you need them and want to use the vertical mounting for a radiator.
Inside the PC011 Dynamic XL Continued
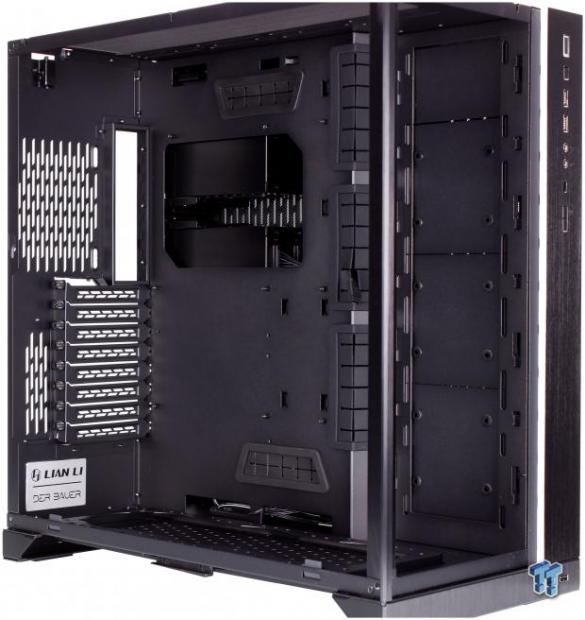
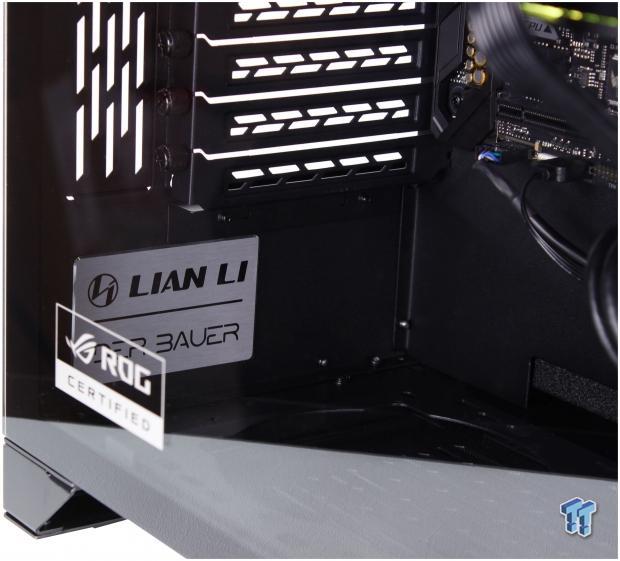
Here we have the rear section where you get your first real look at the large placard signifying the partnership between Lian Li and Der Bauer on the PC011 Dynamic chassis. We also see the full eight slots of expansion for HBA's, SSD's or GPU's depending on your configuration needs. It is good to note here that there are no separators between slots. This means that there is less likelihood of the issue where a slightly offset board mounting can have a DisplayPort or HDMI GPU port being blocked. The fan port supports 120mm, and the CPU cutout adjacent to it is massive.
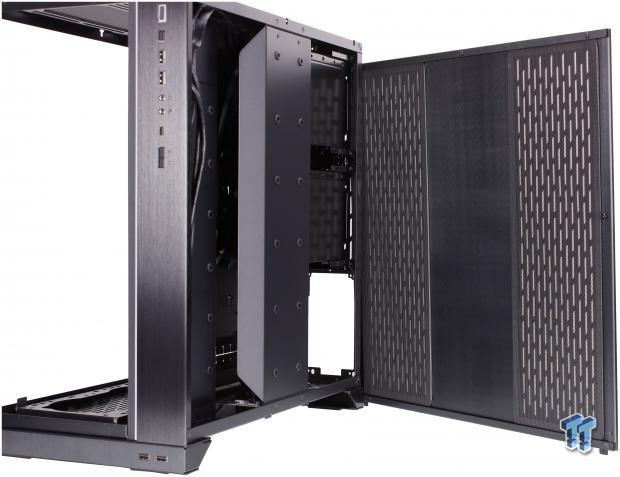
Lifting the panel off, once again we see the top and side retention studs which slot into the top and side rails of the chassis. We also see across the bottom of the panel it has tabs just like the other panels to help slot the panel into place. The previously mentioned airflow mesh can be seen here as well along with the magnetic filtration which is stuck to the inside of the panel.
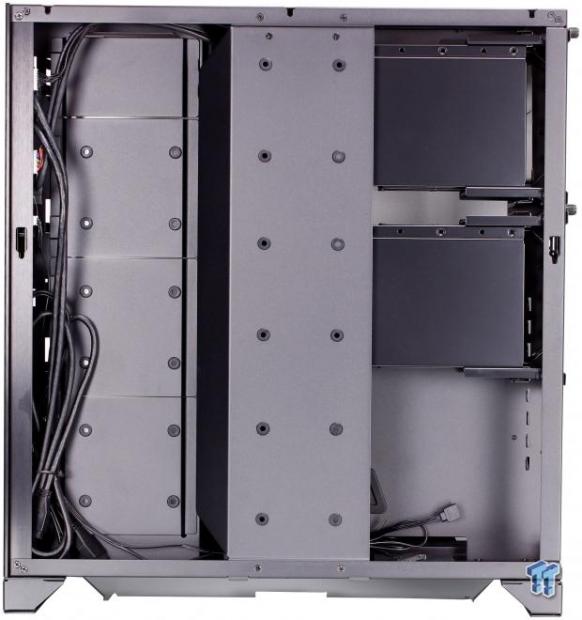
Here we see the vertical bar which can be used for mounting an additional three 2.5" drives. That panel also works as a vertical separator capable of hiding the cabling to make for a visually cleaner build. You will notice the central part of the I/O cabling can be seen tied off to the left.
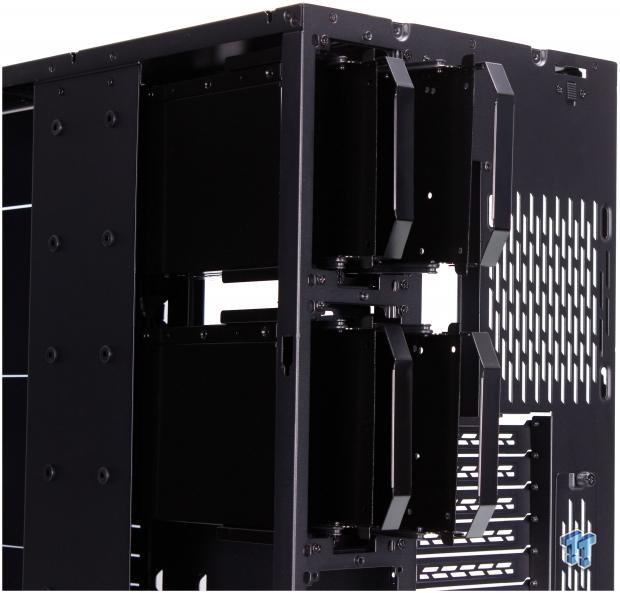
Here we now remove the covers we mentioned previously. Under these covers are pre-wired hot-swap cages, two per opening for a total of four hot-swap cages capable of supporting 3.5" or 2.5" drives. The trays are metal and do not simply slide out as they need to have a recessed thumbscrew loosened first. This is to ensure none of the installed trays come loose during normal usage. Which would be problematic to have a drive you may be using to become disconnected randomly. As mentioned before you can remove these trays entirely in favor of more PSU's if you need. But I imagine most users will likely leave the hot-swap bays in place.
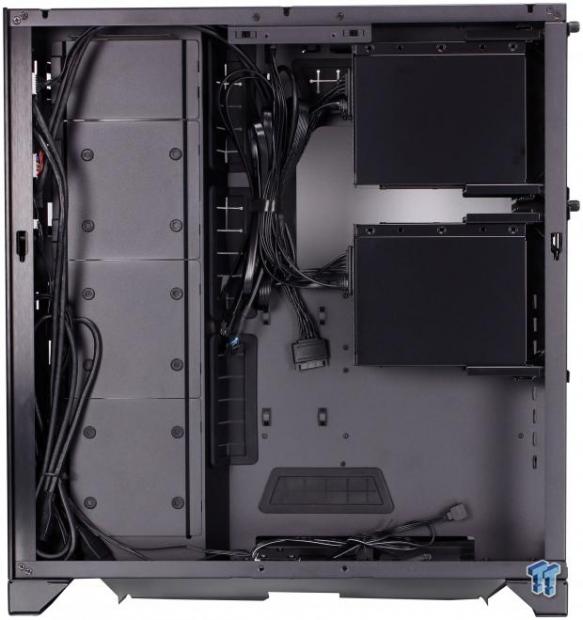
Removing the vertical bar, we now get a look at the two hot-swap bays and their internal wiring. Also, some of the I/O wiring is here as well, and it also reveals cable tie-down locations. These can be used to bundle cabling under the vertical bar to make for a cleaner build even if the cables are just bunched up behind the bar; nobody would ever know.
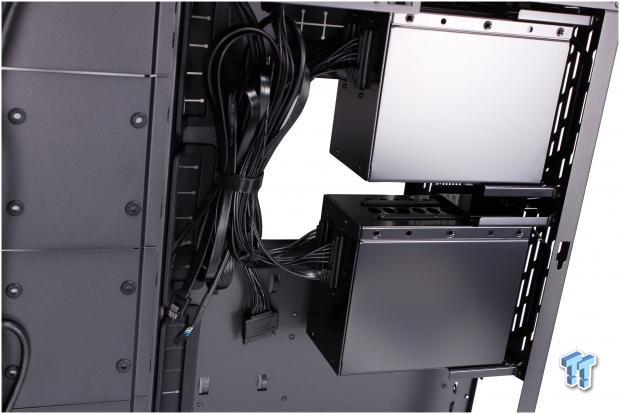
Here we take a closer look at the preinstalled hot-swap cages and their connected wiring. Each has two SATA data connections and a single SATA power connection which splits to both bays in the cage. This is good as it means the four hot-swap drives can utilize only two SATA power leads. This will simplify cabling since most SATA power cables on PSUs have four connectors.
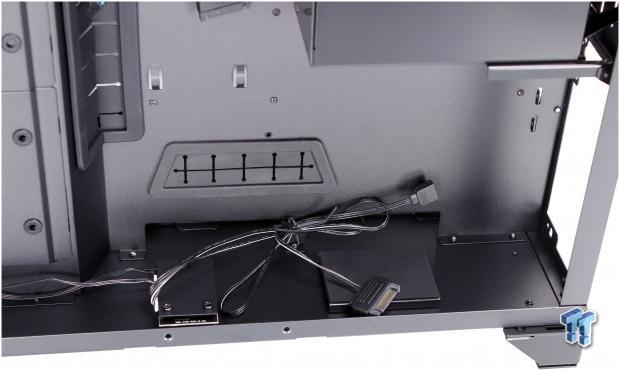
The bottom-most area is where the stock PSU location is placed. There is a rubberized foam pad in place here to ensure your PSU rests somewhere less abrasive than a direct metal surface. There is also another small square to the left, which is the LED controller for the front panel vertical RGB strip. The controller has a SATA power coming from it along with a three-pin ARGB header to allow it to sync with your motherboard.
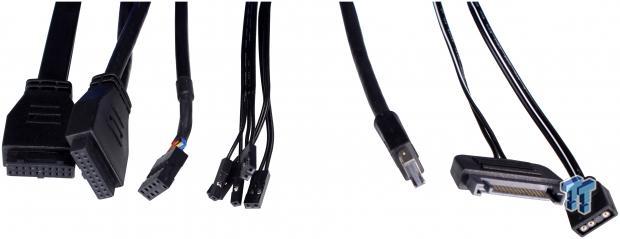
The front panel cables are plentiful for the bevy of connectivity both at the front and bottom I/O locations.
The cables are as follows (left to right):
- USB 3.2 Gen 1 (USB 3.0) 20-pin header feeds the foot-mounted Type-A ports
- USB 3.2 Gen 1 (USB 3.0) 20-pin header feeds the I/O top-mounted Type-A ports
- HD Audio connector
- Front panel power/reset switch and HDD/power leads.
- USB 3.2 Gen 2 Type-C internal header
- SATA power connector for internal RGB controller
- 3-pin ARGB header for RGB controller powering front panel strip
Now, let's take a look at what comes in the accessory pack.
Hardware & Documentation
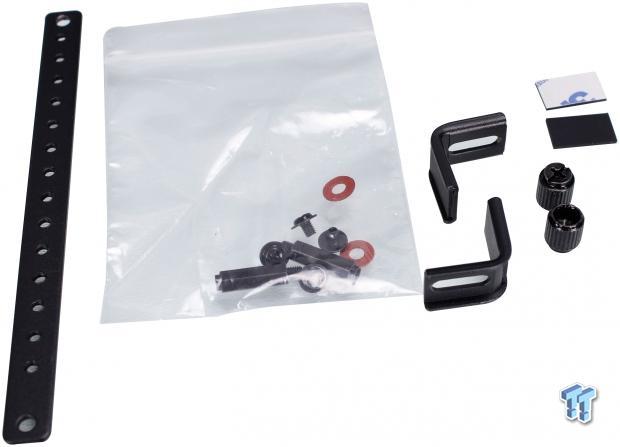
We have to break up the accessories as there are quite a few here. First up is this piece which goes together to support GPUs from sagging while being hidden. It attaches into motherboard standoff mounting, so it supports the GPUs from the lower section to better allow GPU support without a big intrusive bracket.
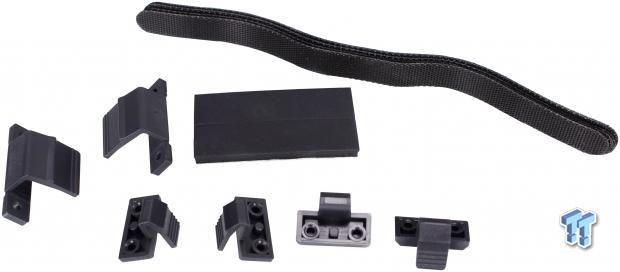
Here we have what we will call extra parts. There are spare clips for mounting both the bottom radiator plate and also the SSD trays in the vertical mount position. There are also foam rubber strips here which are meant to be used between PSU's if you choose to install dual or triple PSU setups in the PC011D XL. There are also four Velcro strips to assist with your cable management journey.
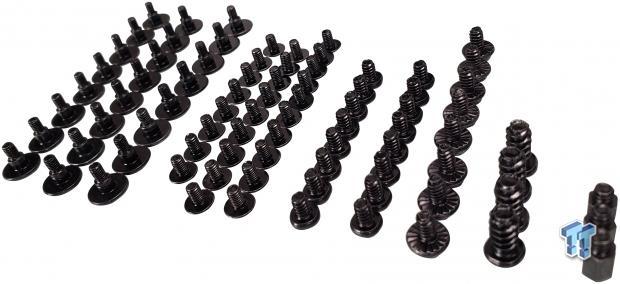
Lastly, we have the screw sets. They are listed below from left to right:
- 24x screws for 2.5" drive mounting (rubber grommet mounting)
- 28x screws for the motherboard and 2.5" drive mounting (non-rubber grommet)
- 16x screws for 3.5" drive mounting
- 8x screws for PSU mounting
- 4x screws for fan mounting
- 3x standoff spare for motherboard mounting
Now let's get to building!
Case Build & Finished Product
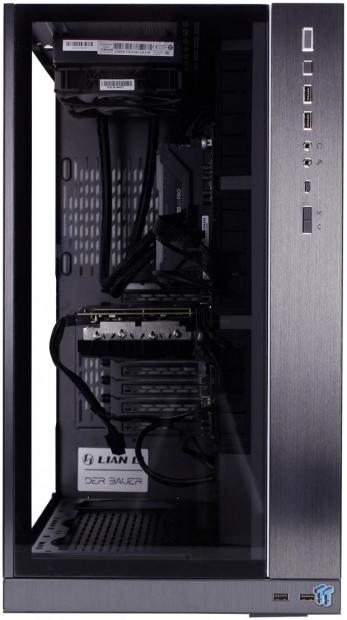
Here we see the front of the PC011D XL which looks virtually the same as when we first unboxed it, with the significant exception that it is no longer a massive open space, well in truth, it is. But now it is populated with our standard test bench, and admittedly, this build does not even come close to doing justice to the PC011D XL capabilities. I would say that the PC011D XL is an attractive chassis. But it definitely would not be the first choice for blending in with a subdued home theatre or office setup; this is definitely an enthusiast-level chassis to the Nth level.
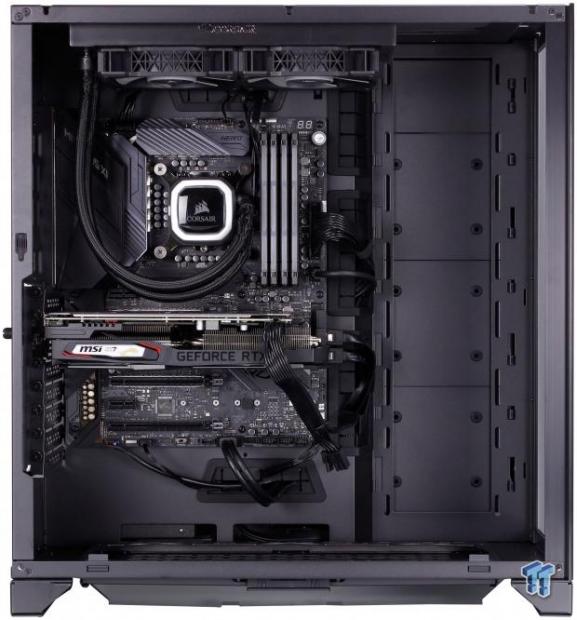
Here we take a peek inside and well, our test bench being full ATX almost looks like we could fit a second board next to it almost. The top mount AIO fits with ease and shows just how much more space is available for much thicker radiators in this thing, and the bottom and RH side looks empty. Overall the PC011D XL is easy to work in as it's a vast open space.
Which means there's no cramped feeling. The only issue is when building such a minor system. I cannot help but feel like something is missing since there's so much open space waiting to be used. Everything went in without any issue to speak of, and well, there's plenty of room for expansion even if you start simple like we have here and plan to go bigger over time.
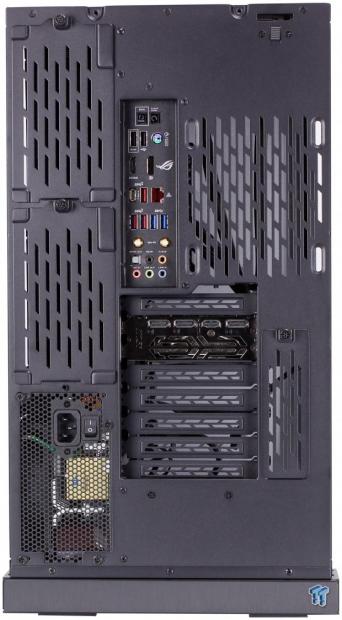
The rear of the PC011D XL even when populated with our test bench is mainly unchanged as there's so much back here. It's merely scratching the surface of the amount of gear we could stuff into this chassis if we were so compelled.
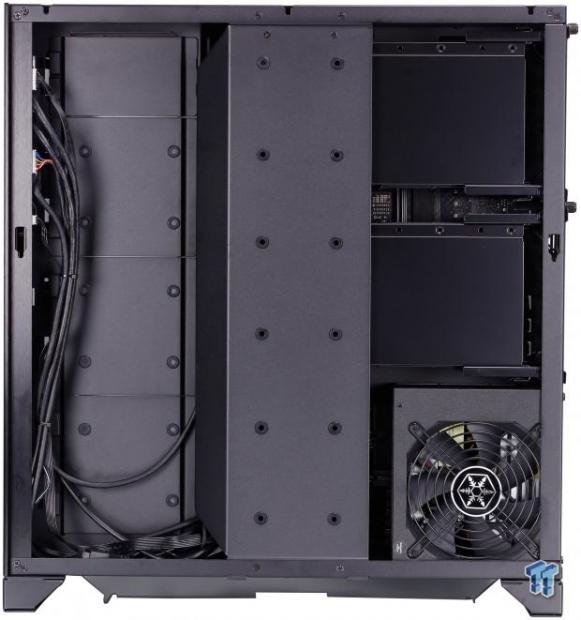
The cable management capabilities of the PC011D XL is strong. I intentionally took all of the cables and bunched them in the center as quickly and messy as possible zip-tying them into one of the cable management loops. I then slapped on the cover bar as you can see here, and this shows how much can be hidden as I gave virtually zero effort to help make pretty cabling to demonstrate a worst-case scenario.
As we see here, the vertical bar hides almost everything without even a hint of the rat's nest I left behind it. If you hate cable management, well the PC011D XL may be your new best friend. Of course, I feel I must say that I intentionally did a poor job at cable management as a capabilities demonstration for the chassis, but it is worth noting that it can be done in the way shown here with no real ill effects, until of course, you may need to trace a cable in the future.
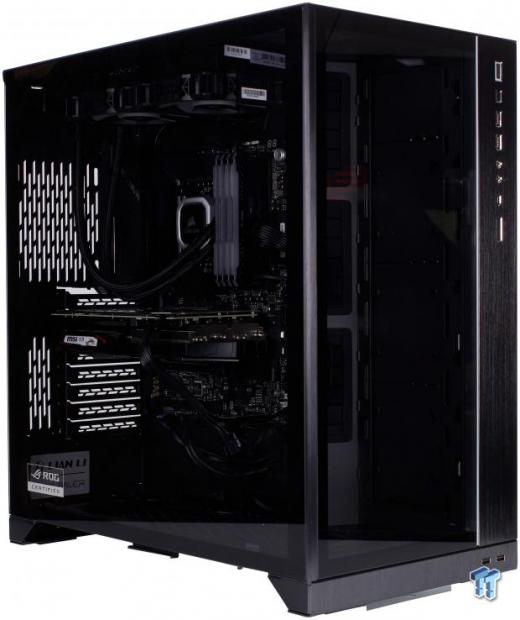
Now that all of the panels are reattached and we buttoned up the system for completion. The first thing to note is that even though it's just clear or slightly tinted glass, even the rather modest test system looks awesome being shrouded by glass on the front and side. When time allows the PC011D XL is on my shortlist to try out some liquid cooling equipment to see exactly how awesome it can look when beefed up.
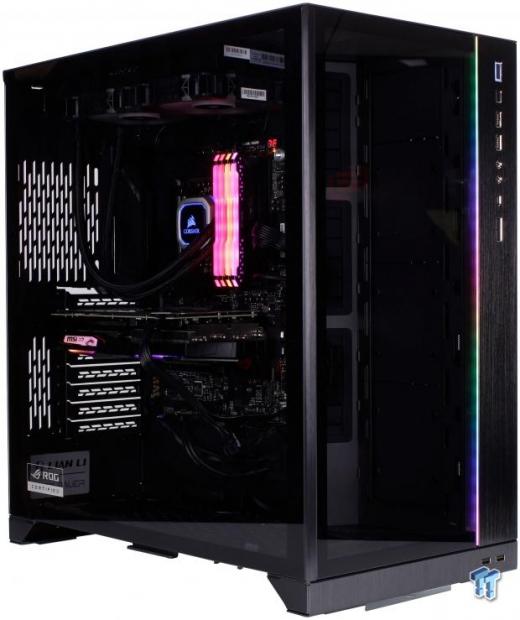
Here we have the system powered on and it goes form a subdued to lively with eth integrated ARGB front strip and internal components. Now, this is only a small taste as to what you can expect from the PC011D Xl, and while our component list is quite basic to ensure fitment on many cases, it shows what a change even small amounts of RGB makes. The same goes for any installed components as you could choose something like white LED strips and all blacked out components to have a lit-up showcase system that has an unlit stealth appearance. As I started with, in this review, the PC011D XL really does enable you to make the system you want out of it.
Final Thoughts
I will admit, I was excited to see what Lian Li would do with the PC011 Dynamic. With the XL they made some positive quality of life improvements which attributed to it being so versatile to match pretty much any build you may want to do with it.
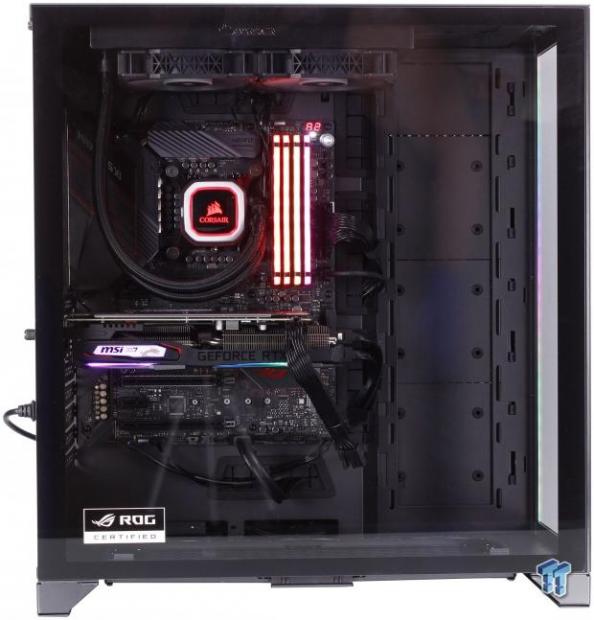
In testing, we installed only the AIO as we do with any chassis that does not include fans. Therefore airflow is solely dependent on the H100i's capability to cool the CPU and draw air in as it pushed exhaust out the top. Most users would install many more fans or radiators, but I wanted to keep to our control set of parts as there are so many fan variations that it would be unrealistic to represent precisely how you may build.
Much to my surprise, the PC011D XL did an excellent job even when fighting an uphill battle form a GPU that exhausts into the case and only a dual-fan radiator exhausting as its sole source of air movement. The ambient during testing was recorded at 22.4C and an RH of 46%. The CPU comes in at a T over ambient average of 48.7C while the GPU comes in at 39.3C average. This is effortlessly passing, and with a proper airflow setup, this should drop substantially.
Now let's look at some of the most welcome things in the PC011D XL. First I would say the enhanced cooling capability with the inclusion of the rear 120mm mount. This opens things up for air cooling users. For those looking for something a bit more aggressive, the liquid cooling capabilities are substantial. The PC011D XL can be stuffed with thick 360mm rads which would be a massive amount of thermal density. With that, it can cool even the most beastly builds like massive multi-card HEDT workstations while looking awesome in the process.
The flexibility and adaptability of the chassis are outstanding as many things can be swapped to meet your needs or the needs of your build. I know there are plenty of people that don't like RGB, and the front lighting can even be turned off if needed. But the front strip is tastefully done and also has solid color modes, so I really cannot see anyone taking issue with it. The attachment mechanism for the panels is excellent and very different from most cases, I feel very secure in the panel retention, and I feel like it's not really going anywhere. The PC011D XL swings way above its price class in both looks and capabilities.
Lian Li made a rare thing in a case I simply cannot pick apart. The only real concern I could note would be the fact that it comes with no fans, so if a novice builder gets this case, it may be a bit of a shock. Other than that the ability of the brushed metal finish to absorb fingerprints means you will want to keep a soft cloth and possibly some cleaner close by to remove oils otherwise I could see this getting messy with fingerprints rather quickly.
The PC011 Dynamic XL is a behemoth of a case with tons of possibilities. The $199.99 price point, I feel comfortable saying it's justified, be aware you could spend easily 20X â€" 30x that to fill it with gear and build something truly masterful.
Lain Li simply killed it; the PC011D XL is a masterpiece both to look at, and to build in.
GG Lian Li, GG.
Shannon's Chassis Test System Specifications
- Motherboard: ASUS ROG Maximus XI Hero (Wi-Fi) Z390 (buy from Amazon)
- CPU: Intel Core i7 8700K (buy from Amazon)
- Cooler: Corsair H100i Pro RGB (buy from Amazon)
- Memory: Corsair Vengeance Pro RGB CMW32GX4M4C3000C15(buy from Amazon)
- Video Card: MSI GeForce RTX 2060 Gaming Z (buy from Amazon)
- Storage: SanDisk M.2 256GB
- Power Supply: SilverStone Strider Platinum 1000W (buy from Amazon)
- OS: Microsoft Windows 10 Home 64-bit (buy from Amazon)

Performance |
97% |
Quality |
95% |
Features |
99% |
Value |
95% |
Overall |
97% |
The PC011 Dynamic XL does so many things right, its virtually ideal for any sort of build. The design may favor insane liquid cooled builds, but any build no matter how wild or mild would benefit form this chassis.

Similar Content
Related Tags

