Introduction
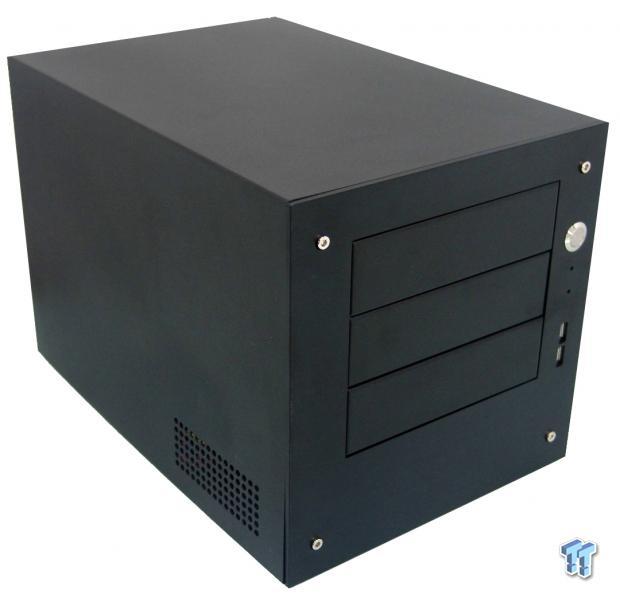
Just to set things straight right out of the gate: I am not any form of a NAS expert, nor do I pretend to be. If you want technical aspects for these sorts of devices, please refer your questions to Tyler and Chris, as they have a much better grasp of the technical aspects, and software limits. However, the basis as to why we are here is something I can handle. I can also understand why there is something like this coming up for review. That is simply this: with all of the various models, feature sets, and manufacturers to check (like Thecus, QNAP, Netgear, and Synology), looking into a personal NAS can not only get a touch overwhelming, but for those with little background on it, it can be downright mind-blowing.
For those that need very little from a NAS, piecing together components to run it does not take much at all. While there are some powerhouses out there on the market with the latest and greatest innards, I have been told for years that basically, an old Pentium 3 system is sufficient to run some sort of Linux distribution, FreeNAS, or Windows Server operating system. Then, you find the appropriate RAID setup for the amount of drives, and needs, you require of your backed up storage. While redundancy is typically key, with what we were delivered today, you could run RAID 0, RAID 1, RAID 5, or JBOD setups, and it will answer to the needs of most NAS users.
Today we are taking a look at two products, in one swipe, from iStarUSA. We were given both the S-35 Mini-ITX NAS tower chassis, along with the BPU-230, three bay, military grade, reliable, hot-swappable hard drive enclosure. These two components should get us on the way to building a nice little NAS, with whatever components we can get to fit inside of this S-35 chassis.
This will hopefully show both sides at once. It should also show whether or not iStarUSA built something worthy of housing higher dollar hardware, and what kind of hardware we can pack in this tower to get the best out of a NAS, which is likely the whole reason one would take on the idea of building their own in the first place.
Specifications, Availability and Pricing
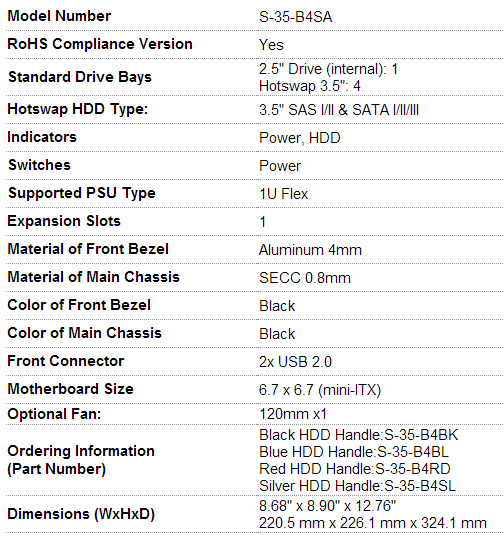
For starters, this chart is close to what we had been given by iStarUSA. It combines the features of both components we were given. The all steel S-35 is left natural on the inside, while the exterior is painted black. In addition, there is a thick, aluminum face plate that is bolted onto the chassis. The front of the S-35 offers three 5.25" bays with metal covers. It will also allow for any of iStarUSA's three bay storage drive systems, and there are quite a few to choose from. This chassis also comes with a 1U Flex PSU, delivering 200W of power. The chassis will only house a Mini-ITX motherboard, offers one expansion slot, and offers a place for an optional 120mm fan to draw air out of the chassis through the back.
The other component, the BPU-230, is a three bay, hot-swappable, drive enclosure. As I said before, I am not a NAS expert, but this does feature some handy options. There are locks on the front for each of the bays so they are not accidentally ejected. There are also power buttons for each bay, to allow you to switch drives on and off in a JBOD setup, but it also allows users to check functionality with a large green or orange indicator light. The three bays will allow for both 3.5" and 2.5" drives, as we would expect, and comes with everything you need to get things mounted, connected, and underway.
From what I can find searching around, there is very little information off site about the S-35 as a standalone purchase, but I have seen references to a $99.99 sales price. However, there are no links to confirm actual location or price. What I can easily find are many variations of the S-35 with bay devices already installed, but none of them seem to be the exact model we are testing.
But, as I said before, that specs chart shows many of the configurations, and the various models that iStarUSA is offering. For one similar to what we are about to see, I am able to get actual pricing that ranges from near $110 to $120. For what we were given to review today, on paper, this combo from iStarUSA seems like a pretty good deal.
Packaging and Hardware
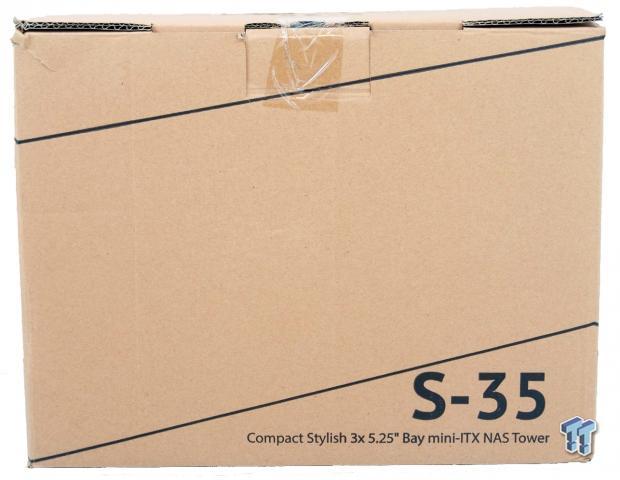
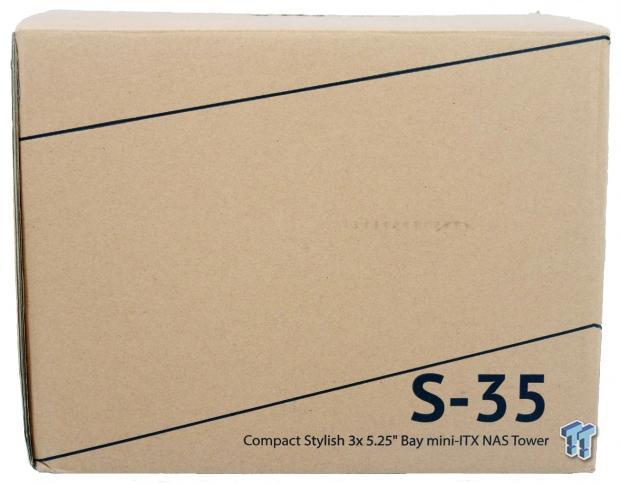
The iStarUSA S-35 arrived in some very thick and stout packaging. While they used a plain cardboard packaging with black printing on it to lessen the cost, they simply offer a pair of stripes, the S35 name, and the statement that this is a "compact stylish 3 X 5.25" bay Mini-ITX NAS tower.
This panel simply changes the angle of the stripes, and shows that this chassis is made in China at the bottom left corner.
On the back, we find a match to the front panel.
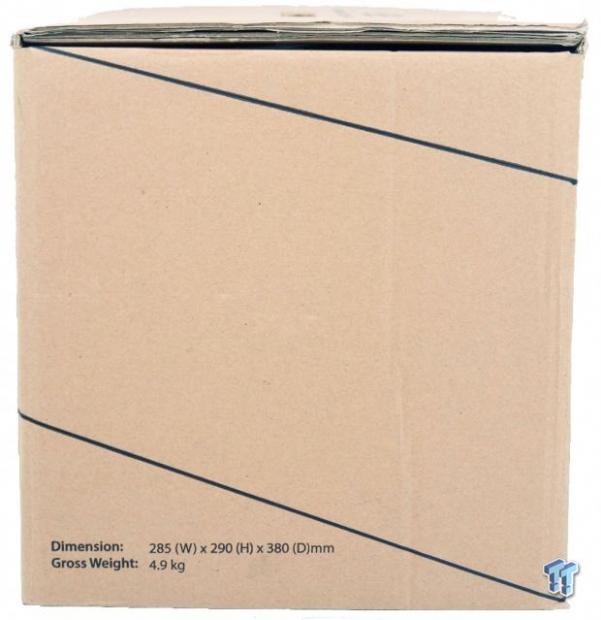
The last panel is pretty plain as well, but at the bottom there are chassis dimensions, and the gross weight of the S-35 with the packaging included.
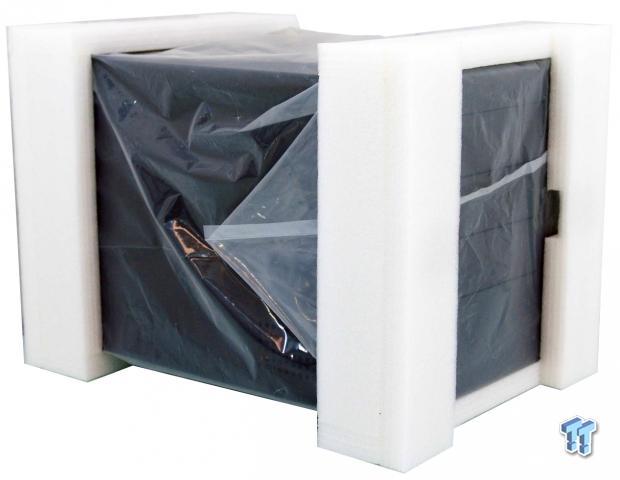
As we typically would, we opened the top and flipped the box to let the chassis slide out. With the S-35, there was hardware loose in the box, but due to the thick plastic liner, no damage was done to the chassis. Also, on top of using double thick cardboard, high density foam is used to make sure any bumps along the way won't damage the chassis inside.
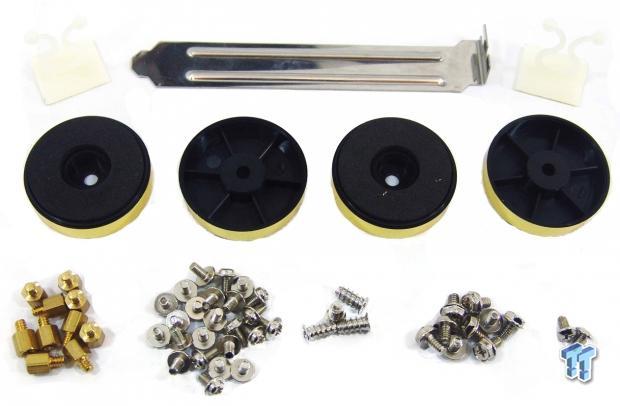
All of this kit comes in one of the two included bags. There are two wire tie points with adhesive on them, and the expansion slot cover at the top. In the middle are the four plastic feet with gold trim, and foam pads at the bottom. The last row offers standoffs, ODD screws, fan screws, motherboard / expansion slot screws, and a pair of extra screws we found no use for, much like the standoffs.
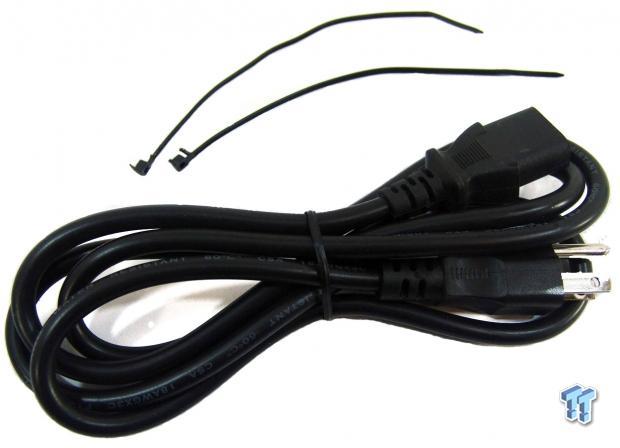
The other bag that is inside of the box, offers a pair of wire tie strips, and a power cord for the included 200W power supply. They do not ship any instructions, but the chassis is built and used pretty intuitively.
iStarUSA S-35 Mini-ITX NAS Tower Chassis
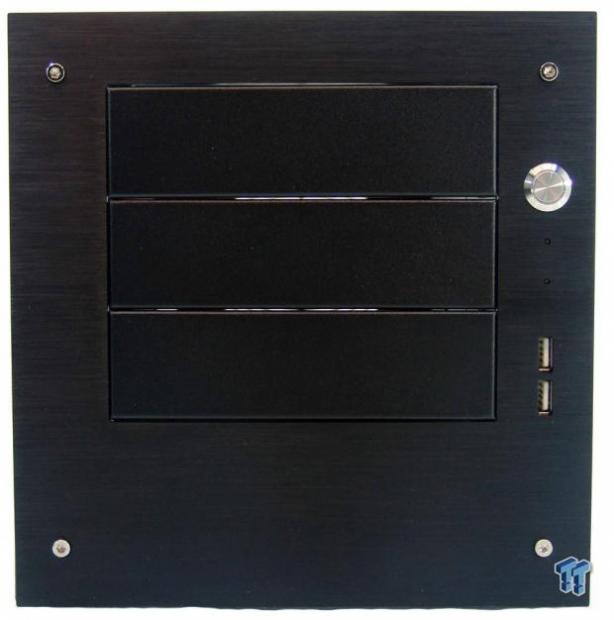
The front of the S-35 offers an aluminum plate that is 4mm thick to cover the front of the steel chassis. It is screwed on in the four corners, offers three 5.25" bays down the center, and has the I/O to the right. In this I/O panel is a large power button, a power LED, HDD LED, and two USB 2.0 ports.
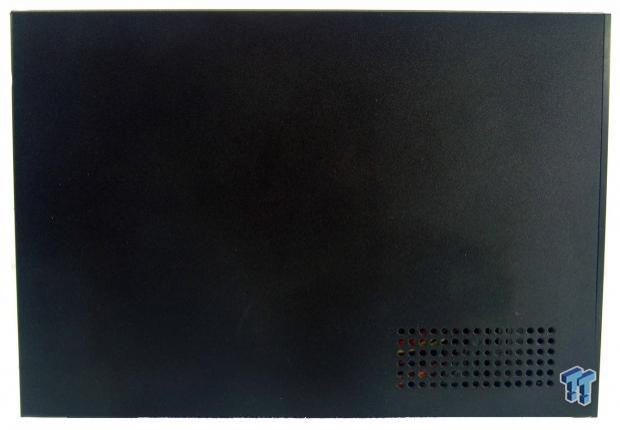
As we move to the left side of the S-35, we see a lot of black textured paint. At the front, near the bottom, there are six rows of holes to allow air to be drawn into the chassis. Outside of that, it is just flat steel here.
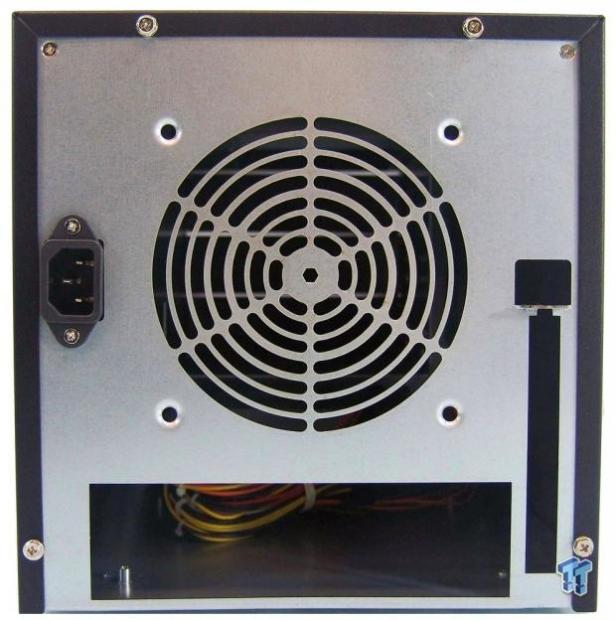
Since the back of the chassis is made from the steel of the frame, it is also left in its natural state. Four screws at the top, and sides, allow the top to be removed. There is room for an optional 120mm fan. There is also a power cord socket, one expansion slot, and room for the rear I/O of the board to poke out of the back.
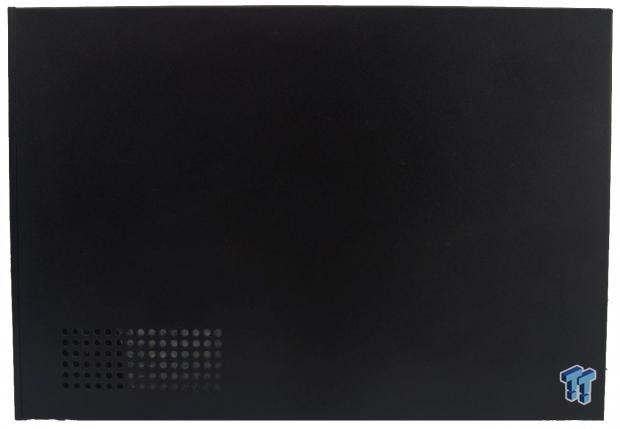
The right side of the S-35 is the opposite of what we saw to the left. Here, there is more of the textured black paint, and there is also venting near the front on this side as well.
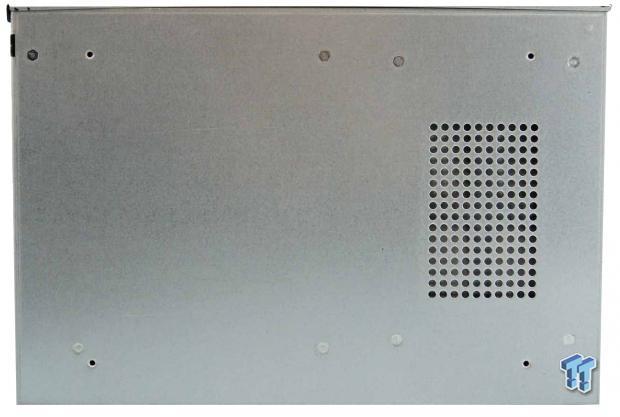
The bottom of the chassis offers a bit of ventilation near the front of the S-35. There are eight locations where standoffs have been added to mount the motherboard, and the PSU, but there are also four empty holes to allow the feet to be attached.
Inside the S-35
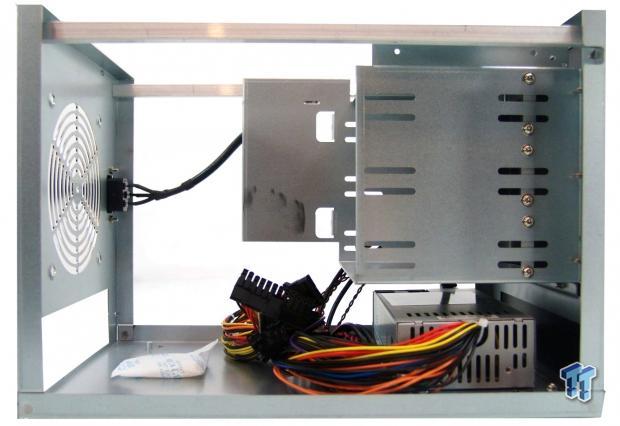
After removing the four screws and pulling the top of the chassis to the back, we are allowed to remove the three sided lid. Inside of the S-35, this is what you are given.
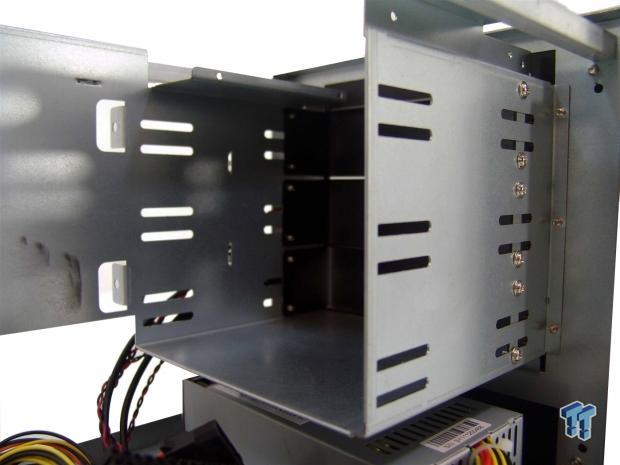
There are three 5.25" bays with metal bay covers currently installed into them. This entire section is removable after locating some eleven screws.
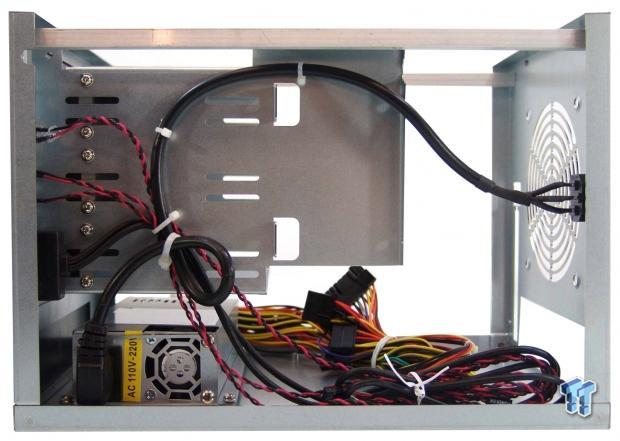
Before we start removing anything for a better view, as we turn the S-35 around, we can see the wiring has been tied to the side of the bays via tabs intended for wire management. This is mainly to keep the power extension cable in check, as well as provide a place to store the excess front I/O wiring.
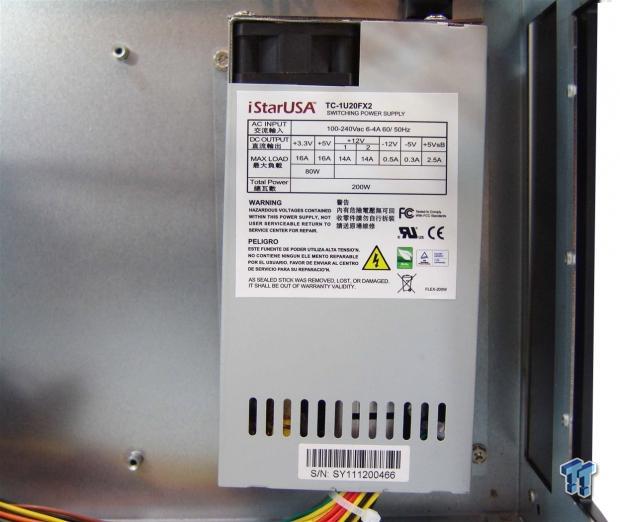
With the 5.25" bays now out of the chassis, we can view the included TC-1U20FX2, 200W power supply. Notice that if you choose not to use an optional fan, the PSU would use the venting in the steel cover to stay cool.
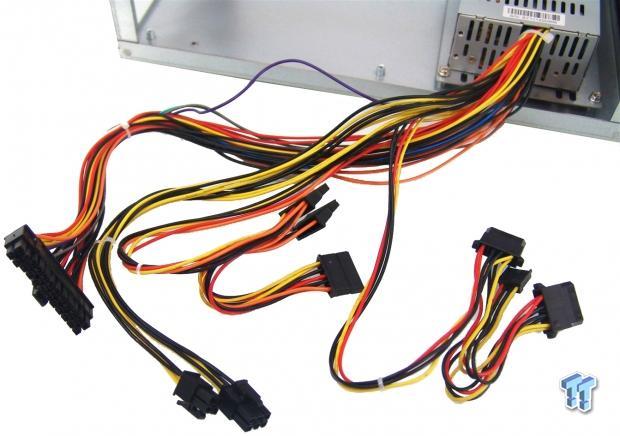
They include a 24-pin, 4-pin EPS, 6-pin PCI, along with leads for SATA and Molex. The leads are more than long enough for this chassis. At the end of the Molex run is an FDD power plug.
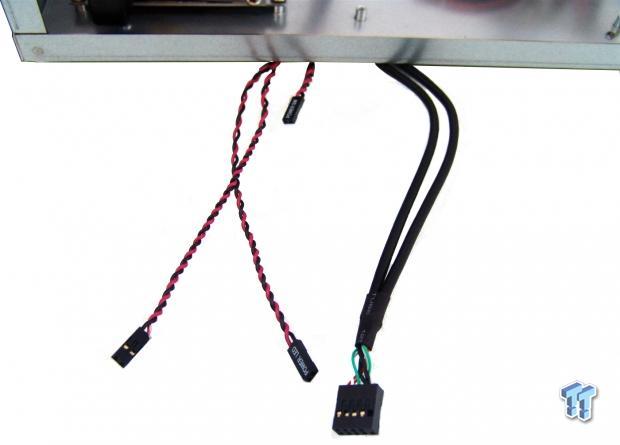
The front I/O wiring was taken around the floor of the chassis, and was still long enough to go all the way under, and poke out of this side. There are three red and black cables that are for the power HDD LED, and power LED. The black cabling is for the pair of USB 2.0 ports on the front to connect to a motherboard header.
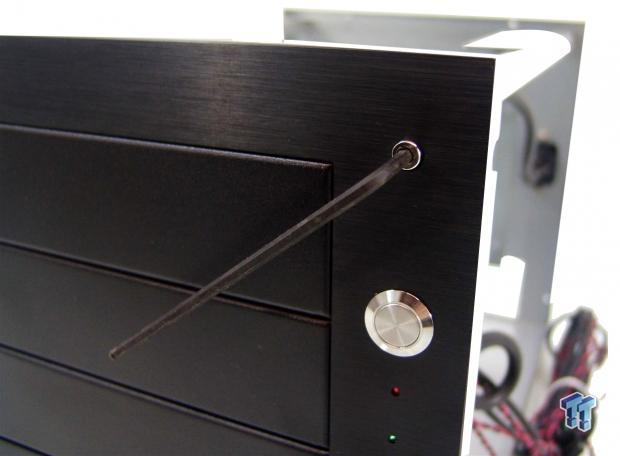
The screws seen on the aluminum face plate are not just there for show. You will need to grab the appropriate Allen wrench and remove them to gain access to the 5.25" bay screws.
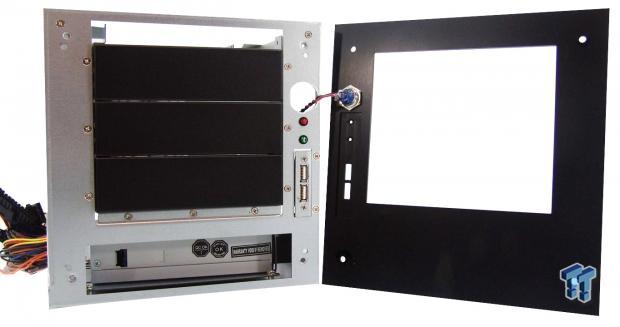
After all four screws are removed, the face plate will swing away to allow access to another nine screws that need to be removed. You can leave the bays in the chassis, but the installation is much easier with them out of the way.
iStarUSA BPU-230
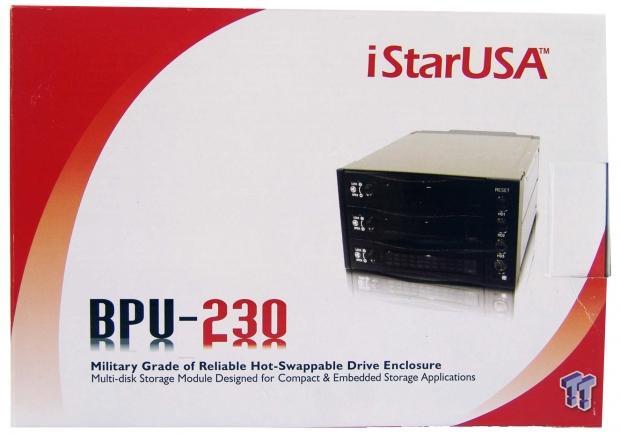
As the second part to the combo, we were also sent this BPU-230. Along with the image of the device off to the right, at the bottom, it tells us that this is a hot-swap drive enclosure, designed for compact and embedded storage applications.
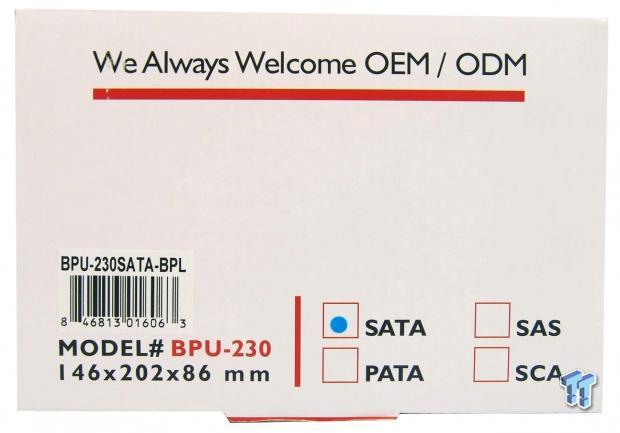
Spinning the packaging around, we find that this BPU-230 is 146mm wide, 202mm deep, and stands 86mm tall. We can also see that this device is designed for SATA drives.
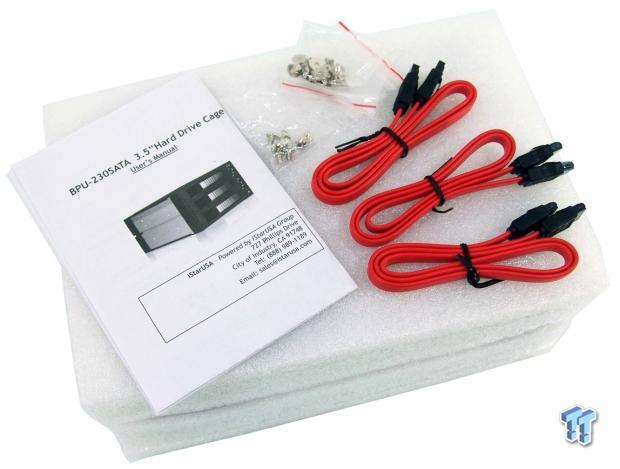
Inside of the packaging, the BPU-230 is surrounded in high density foam. Along with the bays comes paperwork, screws to mount drives in one bag, screws to mount this into a chassis in another bag, and three SATA cables with clips on the connections.
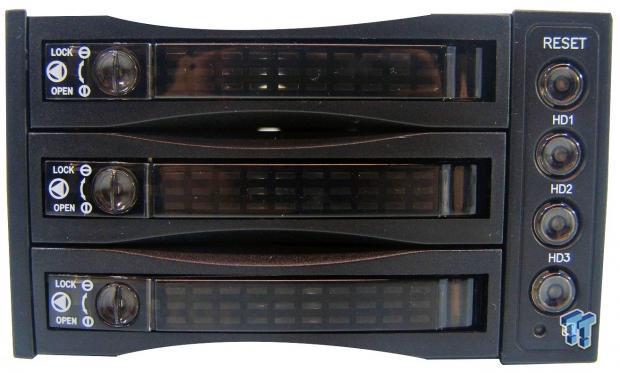
The front of it is made of solid bits of black plastic, like the thin left side, and the right side with the reset and individual drive power buttons. In the middle, there are three trays with tinted plastic covers. To the left are the buttons to open each tray. There are also locks offered for each tray.
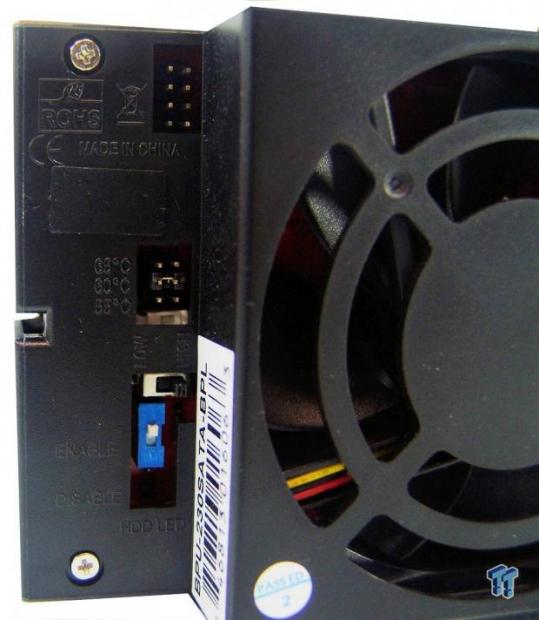
After checking with the NAS guys (even though I don't have the foggiest idea of what the jumpers and switches are for), I was told this is typical of what NAS bays like this offer. In the middle of the back of this bay, there is an 80mm fan to keep the drive inside of it cool.
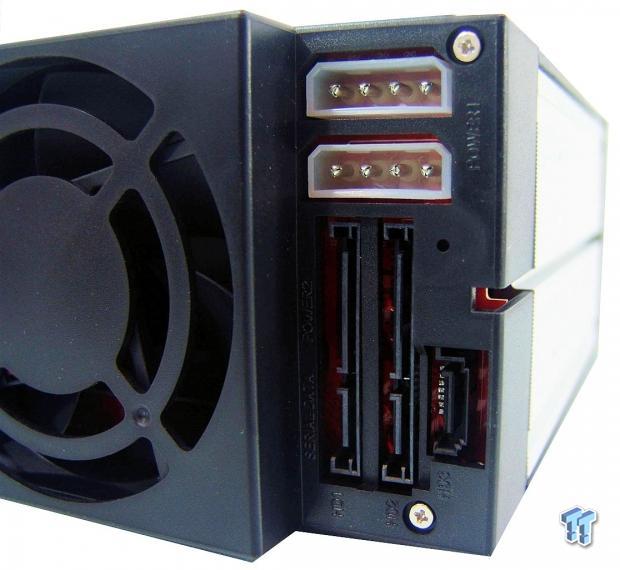
The right side is where the connections are made for the BPU-230. Two bays have SATA power next to the SATA connections, while the third offers only the transfer cable pot. You will also need to add two Molex connectors at the top to gain full functionality of this device.
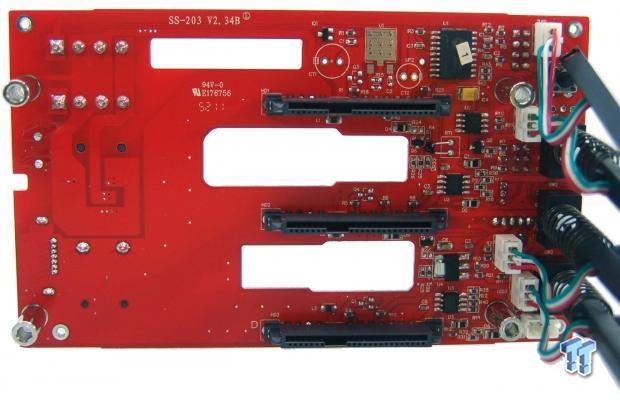
I do not suggest the removal of the back plane, but this was the only way to get a clear look at it. Things seem pretty straight forward here, with the controller IC at the top, and switches and LED power leads running from the right side of the PCB.
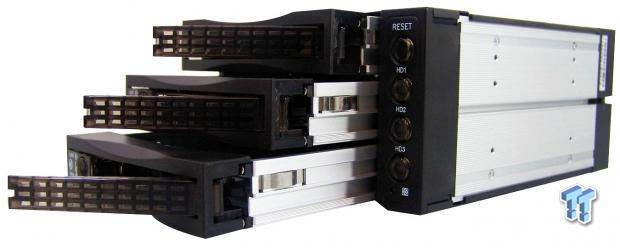
This is just one last shot of the BPU-230 before we load it up with drives, and attempt to add this into the S-35 for our final build.
The Build and Finished Product
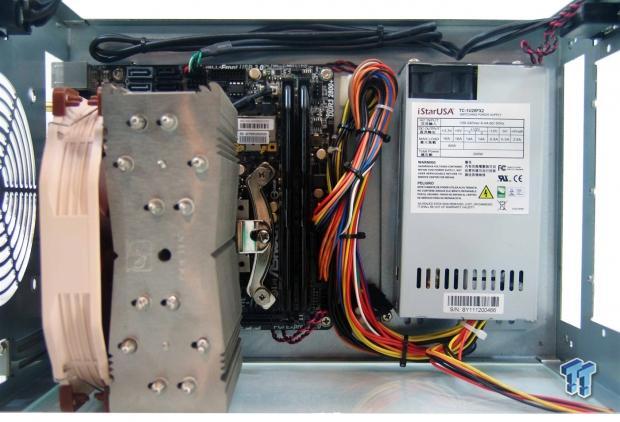
With the motherboard now in place, and the PSU and wiring all tended to and run so that it will stay out of the way, we took this image to show this stage, as soon the view to this will be very limited. Oh, and yes, that is a Noctua NH-U14S in there with the fan pulling air through the cooler.
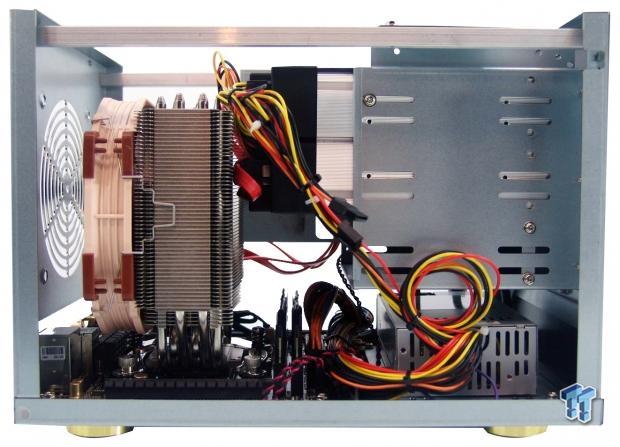
At this point, we have the BPU-230 in the 5.25" bays. The connections for it are thru to the back, and to the PSU, and motherboard. It is easy to see, even with so much in the S-35, there is plenty of room for everything, allowing sufficient airflow throughout the case.
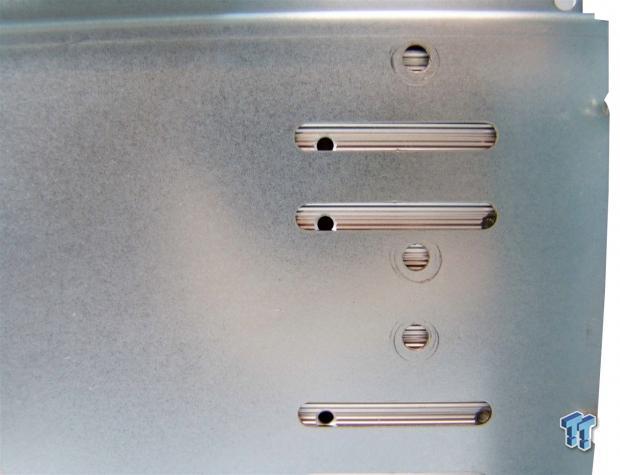
Along with some basic chassis alignment issues, some shoddy workmanship here and there, and every edge in the chassis just waiting to draw DNA from you: things like their own bay device not aligning with the 5.25" bays, are just too much.
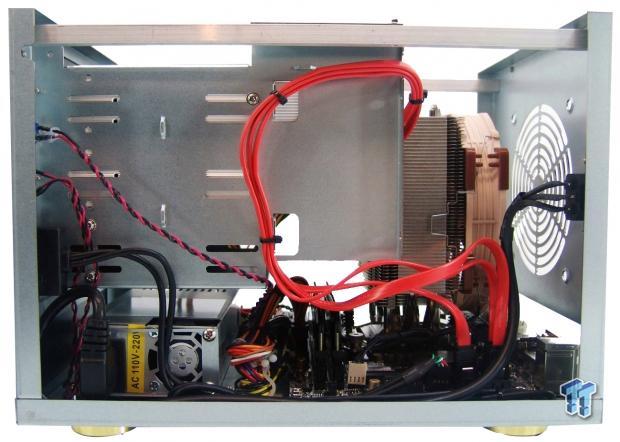
With some creative wiring, we were able to get a very clean looking build inside of this relatively compact chassis. We rerouted the power cable to allow the trio of SATA cables to have a place to tie to.
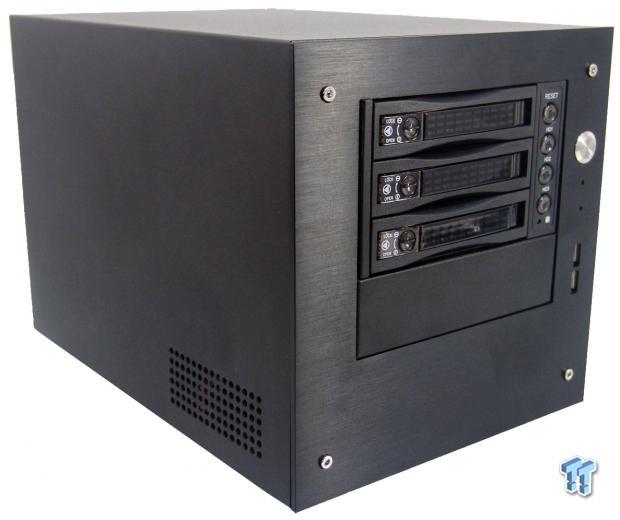
With everything now back in place, I do have to cover yet another issue. With the hot-swap bays in, and the cover for the extra 5.25" bay, we had to slam on the front panel to get it to fit around them. It did not matter if we reversed it either; it is almost like these parts are from two different manufacturers.
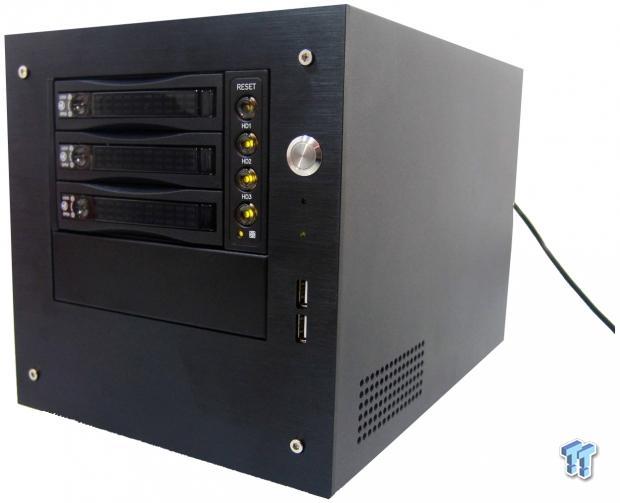
Once we get the S-35 and the BPU-230 powered up and all running just as a JBOD setup, all of the bays are functional, and currently display a green LED showing we are good to go. The green LED on the chassis is showing the power is on, and there is also another LED to show the fan is running.
Final Thoughts
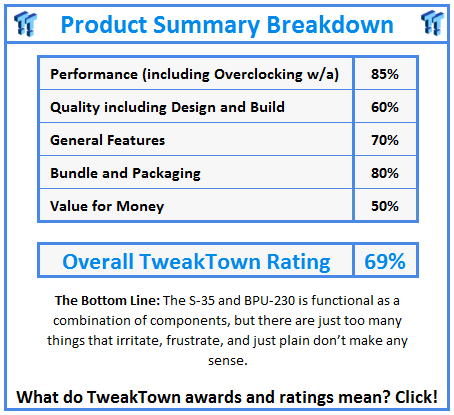
The S-35 is structurally sound. It does look pretty nice, and with the BPU-230 installed, I was well on my way to enjoying the new NAS I had built. The S-35 offers more than enough hardware; even things you cannot use. It would have been nice to have some form of paperwork, but if you are planning on building your own NAS, you have a pretty good idea of what to do when you are handed components and a chassis. Functionally, there were no issues to speak of, and once the S-35 is all back together and running, what I thought were going to be really loud fans in the PSU, and the BPU-230, turned out to only put out 45dB of noise while running. On top of all of that, it is also able to stay cool inside. With the 80mm fan blowing through the CPU, and the 140mm Noctua fan, our CPU was at near chilly temperatures inside of the S-35.
That isn't to say that there weren't things that we ran into that we had to doctor, or just found odd. First off, was the cut of all the panels. Now, I have had my fair share of rough cases, but this S-35 makes you cringe every time something slips, as you are almost positive it bit you and drew blood. Installing the motherboard and wiring up the chassis were not that bad at all, but when it came to the fit of the BPU-230 into the 5.25" bays, it was like the left hand had no idea what the right hand was doing, and designed both parts to different specifications.
The best we could do was to get four screws to hold it in at the top, and that was out of twenty-four possible holes. Then, to top it off, when trying to install the front panel over the device and the bay cover, it literally took a heavy palm to the plate to force it around the hot-swap bays and the bay cover. Again? WOW. Did anyone even try to put these into the S-35? I mean, they sell them assembled. Why does this not line up at all?
At the beginning, I was sort of excited to build and test this NAS, but with all of the headaches and oddities that we had to deal with in the build process, it just seems like a half-hearted attempt. After we forced things into places close to where they are supposed to go, and pondered taking a rubber mallet to the face of it just to get it back into place, I'm going to have to pass on this design. Maybe they should leave it to the big NAS makers to do what they do best.
From what I have seen with the S-35, what it lacks to use the BPU-230 properly, the fact it will cut anyone who isn't anally careful during the build, and the fact that it costs near $120 for this sort of setup: it should have better quality, and should not frustrate the customers.


 United
States: Find other tech and computer products like this
over at
  United
Kingdom: Find other tech and computer products like this
over at
  Australia:
Find other tech and computer products like this over at
  Canada:
Find other tech and computer products like this over at
  Deutschland:
Finde andere Technik- und Computerprodukte wie dieses auf