












Our Verdict
Pros
- Build quality
- Included fans
- Thermal performance
- Pricing
- Unique Trapezoid Shape / dual opening glass
Cons
- No BTF compatibility
- No included riser cable
- Bottom dust filter access
- User manual needs an update
Should you buy it?
Introduction, Specifications, and Pricing
In for review today, we have a case from Gaming Art in Motion God, or as they are rather known, GAMDIAS. For those wondering what the earth I am on about, the GAM in GAMDIAS provides their company slogan, while DIAS is Latin for God. So, now you know.
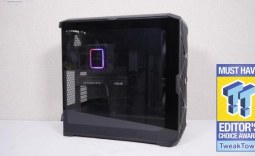
The GAMDIAS case in question today, then, is their dual chamber Neso P1 Pro, coming in with an MSRP of $189.90. The GAMDIAS Neso P1 Pro is available in either white or black, features a unique trapezoid design, has panoramic tempered glass panels, and supports a range of motherboards and radiators.
The GAMDIAS Neso P1 Pro also ships with three AEOLUS P2 ARGB reverse intake fans to the side, features a rotatable PCIe bracket for a vertical GPU mounting option, and includes an eight-port ARGB/PWM hub. In terms of features, on paper at least, it seems that the GAMDIAS Neso P1 Pro ticks quite a few boxes for those looking for a new full-tower, dual-chamber style case.
Now it's time to get started with the unboxing and review, to see what the GAMDIAS Neso P1 Pro has to offer, and more importantly, how it performs.
| Item | Details |
|---|---|
| Model | GAMDIAS Neso P1 Pro |
| Form Factor | Full Tower ATX Dual Chamber |
| Dimensions | (D) 490mm x (W) 310mm x (H) 495mm |
| Weight | 12.35kg / 27.23lbs |
| Materials | Steel, Glass, Plastic |
| Color | Black or White |
| Motherboard support | Mini-ITX, Micro-ATX, ATX, E-ATX (Up to 310mm) |
| BTF Motherboard Support | No |
| Cooling Compatibility | Top: 3x120mm / 2x140mm or 280mm / 360mm Radiator | Rear: 1x 120mm / 1x 140mm or 120mm Radiator | Side 3x 120mm (Included) / 3x 140mm or 120mm / 140mm / 240mm / 280mm / 360mm / 420mm Radiator | Bottom: 3x120mm / 2x 140mm |
| ARGB / FAN Hub | 8 Port Fan/ARGB Controller |
| Drive Support | Behind Motherboard: 2 x 2.5" SSD or 2x 3.5" HDD or 1x 2.5" SSD and 1x 3.5" HDD |
| Front I/O | Power, USB 3.0 x2, Type-C x 1, HD Audio x1, LED control x1 |
| CPU cooler height (max.) | 193mm |
| PSU Length (max.) | 180mm |
| GPU Card Length (max.) | 426mm |
| Warranty | 1 Year |
Packaging

The GAMDIAS Neso P1 Pro shipped in a pretty large box, given that the case measures 490 x 310 x 495 mm; the packaging needs to protect a case that weighs almost 12kg, or 26lbs.
Best Deals: GAMDIAS Neso P1 Pro


Our sample arrived safe and sound with only some minor rips and damage to the box. The front indicates the model with an exploded image of the GAMDIAS Neso P1 Pro.

The rear of the box has a more zoomed-in view, focusing on the top case panel, and also displays the included side-mounted fans.
Our Latest Full-Tower Cases Review Coverage

Both sides of the packaging provide additional information on the case, including detailed specifications.

Upon removing the GAMDIAS Neso P1 Pro from the box, it is found to be packed in open-cell foam on both the top and bottom, with a clear bag within to protect the case from damage. The foam extends at the front, given the angled design of this part of the case.
Outside the GAMDIAS Neso P1 Pro

Sitting barebones, the GAMDIAS Neso P1 Pro is an attractive case. You start to pick up on the slanted lines and curves that we will cover as we go around the exterior of the case. It is a style we are seeing become relatively common, fish tank / Lian Li 011D inspired, with each manufacturer massaging the general design concept, then going away and building it into their versions. There is even a tiny fabric pull tab located at the top of the side glass, and I am sure that this is included to prevent fingerprints from appearing on the glass.

The top panel of the GAMDIAS Neso P1 Pro is made of plastic, featuring angled vents that run towards the front side and then continue back to the front further down the panel. Just below the top panel is a square button that, when depressed, pops open the tempered glass side panel. The top can be popped off to provide internal access for fan and radiator mounting.


Turning our attention to the front of the case, the angled design is pronounced with the glass panel able to swing open, providing additional access to the internals.
Below the glass is the case IO, neatly arranged, featuring power, two USB 3.0 ports, one Type-C port, a combo audio 3.5mm port, and an LED control button.

Circling around the back side panel, we are greeted with a huge full coverage vent design. I am hopeful that the thermals within this case are good, given the amount of ventilation this case has. To each corner, there are recessed areas for mounting magnetic feet that are included within the accessory box, to lay the case down, similar to what the be quiet! Light Base series of cases offer.

To the rear, the GAMDIAS Neso P1 Pro has a fair bit going on. Being a dual-chamber case, the power supply sits at the bottom left. Above this, there are two removable drive sleds with a pass-through grommet above. In the middle sits the motherboard rear IO slot with a 120mm or 140mm fan mount to the right, and while the slots are elongated, there is no vertical adjustment possible.
Sitting below the motherboard IO and fan mount is the eight-slot PCIe bracket that can rotate 90 degrees to accommodate a vertical GPU mount. We're noticing that many manufacturers are omitting riser cables, which is a common oversight. They offer the ability to rotate, but they lack an included option to complete the process. For me, it's half a job, but having said that, you can mount radiators, but none are included, so I have just cancelled out my argument! You get the point, but for me, including the riser, may just tip the balance in favour of one case over another, providing it performs well, of course.

Before moving to the case interior, finally, the bottom of the chassis features similar ventilation to the top panel design. The case feet here lift the case around 20mm from the floor. According to the instruction manual, GAMDIAS indicates that these feet are magnetic and can be hot-swapped to the back panel. Instead, though, the feet are screwed into position with magnetic feet included in the accessories for the rear side panel. The rubber pads provide good grip and are removed to access the screws.
Inside the GAMDIAS Neso P1 Pro

Opening up the case, starting with the top, the top vented cover simply pops off and reveals a recessed fan/ radiator mounting tray. This tray is removable to assist with mounting of cooling components to the top and includes cable pass-through points with rounded edges to prevent any wiring from being cut. There is some degree of front-to-back movement for fans, depending on what you install, but overall, the tray has a rigid installation point via the 6 Phillips screws. While recessed, if fitting a radiator, this will likely sit above the bracket with the case fans mounted from the other side; it's not deep enough to accommodate both.

On the rear side panel, you can see the full coverage dust filter on the inside of the panel. The side panel can be removed by taking out the included single screw to the rear, but it's not captive, so don't lose it! The fine mesh inside is magnetic and can easily be pulled out for cleaning.


After removing the rear side panel, we can see the back of the motherboard tray. The left side is equipped with a triple fan mount, and there are numerous cable grommets around the tray. Additionally, it features several cable tie-down points. The two side cable grommets are angled to include the side of the tray, allowing for a nice, clean run around to the motherboard.
To the top right are the drive sleds for 3.5" or 2.5" drives, with the included fan/ARGB controller installed below on a separate bracket. It's not the sturdiest mount and can be bent up and down quite easily, but it is sufficient given what is attached to it.
The power supply sits below the hub area, with good space available for routing cables and storing away any additional length that needs to be hidden. The included Velcro ties are long enough to secure a good variety of wires.

Moving on to a significant feature of the GAMDIAS Neso P1 Pro, we have dual-hinged tempered glass side panels on both sides and the front. These both open up fully, providing extensive access to the internals. GAMDIAS claims they can open over 170 degrees; although I'm not measuring it, I believe them. The panels can also be removed to store them out of the way while building your system and ensuring they don't get damaged during the build process. Note the curved edge to the front glass; this wraps nicely around the front corner, blending the front and side almost seamlessly.
With the case opened up, while not a radical change to layout, the case looks great, with a good finish to the paint work. It seems slightly aggressive, like it just wants to gobble up your hardware and run it flat out!
The side intake AEOLUS P2 ARGB fans are recessed, and a 420mm radiator can also be installed here. This is a common feature we are seeing in these types of cases, but if it isn't broken, don't fix it, right?

Exploring the internals a little more, to the top is the removable fan/radiator mount we covered earlier, and cable grommets below. Nothing strikes me as out of the ordinary, again keeping to the norm, with grommets where they need to be.

The floor pan is more interesting, however. On the inside, there are mounting locations for use when installing a vertically mounted graphics card. There are also threads toward the front; some of these appear to line up for a 120mm fan to be installed on top of the panel, but these are not mentioned in the user manual.

Delving deeper, to install two 140mm, or up to three 120mm fans to the floor area, you have to flip the case over to gain access from underneath, similar to how the Hyte Y60 does this.

For me, this is one drawback of this case. While the top and rear side panels can easily be removed for cleaning, the floor makes this a little more difficult. The bottom panel pops off, just like the top, so there is no slide-out filter here, but the panel has cutouts, and these surround the case feet. It's by no means a deal breaker; the initial installation only requires access here once. However, it does make regular maintenance cleaning a little more of a hassle.


Before we move to testing, let's have a look at the included accessory kit in a little more detail. The included paper user manual lists several included items, but there is no mention of a GPU support bracket or how it is mounted. Yet, we do indeed have a bracket. How it mounts, I will figure out.

After speaking with GAMDIAS to query this, regarding the clarity of the user manual, GAMDIAS is going to take this on board, saying, "At the moment, we don't have plans to update the user manual right away as it's quite a busy period for our team. That said, we'll definitely be making updates in the near future to include clearer guidance on the GPU support bracket. Appreciate you pointing this out."
So GAMDIAS is prepared to listen and make changes so that the end user experience is better, which tells me they are serious about their products.
Moreover, the accessory kit we received included a few more items than those listed in the user guide, which is nothing to be frowned upon. There are additional blanking caps available if you wish to change the orientation of the case sits, from bottom to side. The kit also includes the usual mounting hardware for putting your system together, so while the GPU support bracket isn't listed at this time, it is nice to have it included.
Installation, Testing, Finished Product, and Final Thoughts
Kris' Test System Specifications
| Item | Details |
|---|---|
| CPU | AMD Ryzen 5 9600X (Buy at Amazon) |
| Motherboard | MSI MAG B850 Tomahawk MAX WiFi (Buy at Amazon) |
| GPU | ASUS Prime GeForce RTX 4070 Super OC (Buy at Amazon) |
| RAM | Corsair VENGEANCE DDR5 16GB (2x8GB) (Buy at Amazon) |
| SSD | Corsair MP700 Elite 1TB (Buy at Amazon) |
| Cooler | be quiet! Dark Rock Elite (Buy at Amazon) |
| Power Supply | be quiet! Dark Power 13 1000W (Buy at Amazon) |
| Monitor | Acer VG272U V3 (Buy at Amazon) |
| OS | Microsoft Windows 11 Pro (Buy at Amazon) |
The build experience with the GAMDIAS Neso P1 Pro was, I would say, pretty much flawless. While we have marketing again stating a tool-free installation, I have said before that this marketing mumbo jumbo needs to be taken with a pinch of salt across every case. Unless we start having motherboard trays that clip your board into place without using a screwdriver, or magnetic fan mounts, etc., then, well, no, no case is a tool-less experience, is it?


Installation of the test system was straightforward; nothing raised a query with me, and the included Velcro ties around the back are spacious. Using the included screws for motherboard installation, hooking up cables was just plain sailing, you know, the way it should be.

I also chose to build in the standard form, but to test the process out, swapping the case feet over literally took a minute, so if you wish to lay this case on its back, it's a flawless process.
The system I have built for testing includes an AMD Ryzen 5 9600X CPU housed in an MSI B850 Tomahawk Max Wi-Fi Motherboard paired with two sticks of 16GB Corsair Vengeance DDR5-6000. Our CPU is kept cool using the be quiet! Dark Rock Elite. For storage, I am using a Corsair MP700 Elite 1TB NVMe M.2 drive. Finally, for graphics, I have an ASUS Prime RTX 4070 12 GB Super. Testing is completed with PBO enabled, AXMP1, and MSI Smart fan configuration.

All testing was completed using Aida64 Engineer's System Stability Test v7.65.7400 for 2 hours. Other software used was HWiNFO 64 v8.28-5770, TechPowerUp GPU-Z v2.66.0, and CPU-Z v2.15.0 x64.
Performance throughout testing was excellent, temps have dropped here a little to around 24C on a usual day. With the CPU max coming in under 80 degrees, and an average of 74.5 °C, I do not doubt that the GAMDIAS Neso P1 Pro performs well. Add more fans, and these numbers get even better. For the graphics temperatures, a 75 °C max was recorded and an average of just over 74 °C. Temperatures seemed to reach their desired level and then just flat-lined at that point, pretty much. I am curious what would have happened if they had included a 140mm exhaust at the rear of the case as well. As it stands, the GAMDIAS Neso P1 Pro sits very well in the range of cases I have tested for TweakTown.


Before I get to my final thoughts, I just want to go back right to the start for a minute here, though, to the unboxing. Let's pretend I had this case sent in a blank box, with no logos or manufacturer names attached. As soon as I pulled this case out of the box, it said one thing to me. Hyte.
Now I have already mentioned Hyte earlier, remember, and I could have mentioned them six times over, even down to how the bottom fans are installed. From the moment I laid my eyes on the top panel, from the vent design, to the plastic material used, to the way it mounts to the chassis. I would have put my mortgage on this being a Hyte product. But, it's not.
I went as far as to ask my contact at GAMDIAS about this, and I even queried if any of the design staff had joined them from Hyte. The response I got was: "None of our design team members have previously worked at HYTE. It's true that at first glance the NESO P1 PRO may resemble the Y60, but we've made several distinct changes to set it apart - such as the trapezoid shape for dual orientation (vertical and horizontal setups), the side swing glass door for easier access, and most importantly, enhanced airflow performance."
GAMDIAS appears to have used the Hyte Y60 as inspiration for this case, albeit with some distinct changes, as stated. While I don't want to go anywhere near a discussion about just how much crossover there is, it is clear that there are some marked similarities between them.
Regardless of what comes with that, just taking the GAMDIAS Neso P1 Pro on its own, pretending Hyte doesn't exist, then well, wow. It's a great case. The build quality and functionality are there; the performance under testing was good, and overall, it ticks so many boxes.


I have also recently reviewed the be quiet! Light Base 900 FX, and indeed, that was a great case too. We seem to be in a realm at the moment where there are several cases with similar layouts, and it will simply come down to preference or maybe price for the end user.
It is clear that GAMDIAS was concentrating on the airflow. With the dual-hinged glass and three included fans, it does put it up there with some big case market names. Yes, there are a couple of minor issues, such as the bottom dust filter access and the lack of instructions on mounting the GPU support bracket. Still, at least you get a bracket, and I would have no hesitation using it, along with the rest of the GAMDIAS Neso P1 Pro for my own personal build.