


Our Verdict
Introduction, Specifications, and Pricing
We have done many reviews of cases from the Antec Performance Series over the years, but, from what we can recall, none of the Performance Series cases came with anything after the P other than numbers on any of the chassis naming. Today, we will be changing that, with a word that we had to look up the definition to, as to ensure we still knew the meaning of, which just so happens to be luxury. Go ahead, think about that word a moment, we will wait. Antec is combining two words with the new moniker, many times with a hyphen, but not in the packaging or anything beyond the description.
What we have been slow-rolling into is that while Antec is sticking with the Performance series in this cases name, it is also followed with the letters F, L, U, and X. We read it as FLUX, as the box and what we glanced at online seems to show it in a manner which leaves little choice. However, on the product page, they do explain the term. Not only is it called F-LUX there, but we are also told this stands for "Flow Luxury." At that point, we get a bit confused. Is the chassis luxurious, or is the airflow through it luxurious? Airflow cannot be in a state of great comfort of extravagant living, but we could see terms like great, maybe even extravagant as it lacks restraint, but we feel that this has to be a translation thing and that the chassis we have in hand is both luxurious, and offers airflow.
With much of the pretense out of the way at this point, we can now get right into the reason we are here. While we have had a few moments of hard-adulting lately, which has delayed our look at this chassis, nevertheless, we are here with the Antec P10 FLUX. In the most general sense, what you should expect to see in the flowing pages is a mid-tower chassis with a reversible front door, many of the common features found in cases, and an obvious nod to airflow. Antec made sure to sound dampen the interior. The list continues with other tricks of the trade and even a few things many manufacturers are not using at this time to give you a chassis that is affordable and worthy of your time to give it a once-over before buying your next chassis.
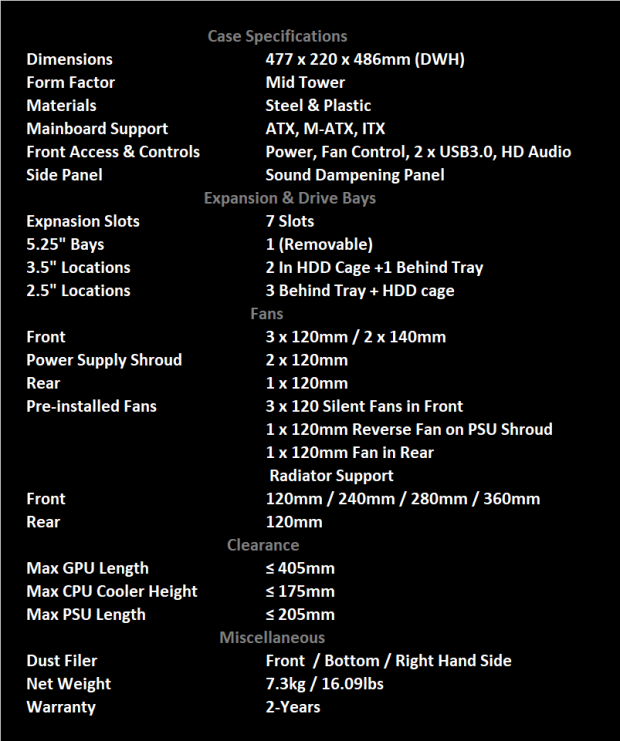
Due to the size of the chart that Antec provides, we had to size it down; as not to make the font so small it is unreadable in a standard-sized version, so we copied every detail into the version you see above. The first portion of this chart gets right to it with the 18.8" depth, the 8.6" width, and the 19.1" height of the mid-tower P10 FLUX. The chassis is made from steel and plastic bits, some steel painted black, while others are more of a blue tone. Inside of this chassis, one can install an ATX, Micro-ATX, or ITX motherboard, and both side panels and the front and top of the chassis all have sound dampening material attached to them. The last bits point to the front I/O panel and its power button, fan control button, and the USB 3.0 and HD Audio connectivity.

Best Deals: Antec P10 FLUX
The next section tells us that there are seven expansion slots at the back of the chassis and then moves into the drive bay configuration. Something we have not seen in a while is a 5.25" bay, and for those without the need for it, it can be removed. When it comes to stuffing 3.5" drives into the P10 FLUX, you have the option to fill the pair of bays in the drive cage, and there is a third location on the motherboard tray. For those looking to use 2.5" drives, you get more options. One drive can be attached to the motherboard tray, much like the 3.5" option, but there are also a pair of trays attached to the motherboard tray, which slide on and off, where the former location is permanent. You can also use the HDD cage and the pair of trays there, if not used up by 3.5" drives.
With a chassis sporting names like Performance, Flow, and Luxury, it only fits that the chart's cooling section is the biggest. The front of the chassis can contain a trio of 120mm fans or a pair of 140mm fans. The PSU shroud offers a pair of locations for 120mm fans, and at the back of the case is room for one more 120mm fan. Installed by Antec, inside of the P10 FLUX, you are given three 120mm silent fans to drive air into the chassis. There is a 120mm reverse-flow fan intended to be mounted to the PSU shroud, and the last of five preinstalled fans is the 120mm fan at the back as the exhaust. For those looking to liquid cool the CPU, GPU, or both, you can fit a 120mm, 240mm, 280mm, or 360mm radiator in the front of the P10 FLUX, with the only other location being the rear of the chassis.
Skipping ahead a touch, as it has to do with the cooling, is the mention of dust filters. The front of the chassis has one built into the front bezel, which is easily removable. The PSU intake is covered with a filter that is removable from behind the chassis, and even the right side of the case is vented and is backed with another filter, this time magnetically attached. We also found another filter, the same as the one for the right side panel, inside the chassis, but it is not used anywhere.
Our Latest Mid-Tower Cases Review Coverage
Clearances are quite good for other major components in the build. The GPU or GPUs can be up to 405mm in length, which is plenty to house most video cards out there. CPU coolers can be as tall as 175mm and still be able to close the doors, and that is without having to crush the noise-dampening material inside of the panel either. The last clearance shown is for the PSU and is 205mm of room, but this is not a hard number if you have no plans to use the HDD cage.
Along with the fact that the Antec P10 FLUX weighs in at a touch over sixteen pounds empty and that the chassis is backed with a two-year warranty, we also need to know what it costs. As with just about anything at the moment, pricing is pretty much all over the place, depending on where you look. At Amazon, we see the P10 FLUX, with an almost laughable listing, with IPC-STORE as the seller, with a price set at $121.17, and at that price, they will cover shipping. Newegg, Walmart, and even eBay show better prices, and of them, Newegg was the lowest with a price of $79.99.
The only downside to the Newegg deal is that you will need to add a few bucks for shipping, $6.99 to be exact, in our location. We are still below the $100 mark, and it is something we like to see with mid-tower cases. We hope that Antec added enough in all the right places to make the P10 FLUX a chassis too good to pass it by!
Packaging
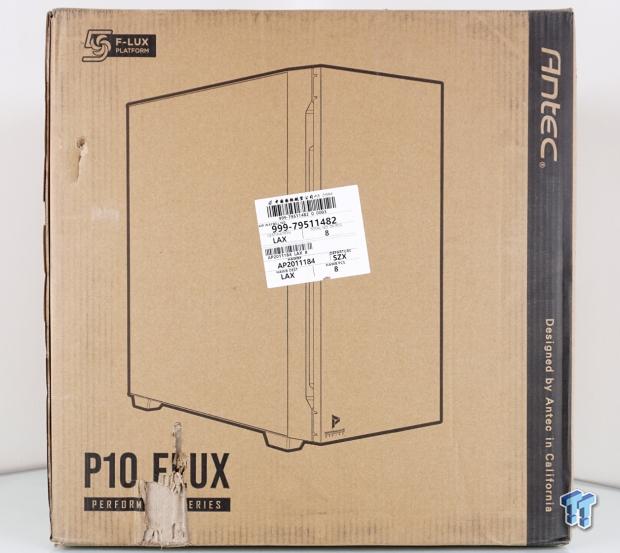
The outer packaging is kept minimal with the use of black printing on plain cardboard. On the front of it, we find a mention of the five-fan F-LUX platform, with the outline of what the chassis looks like taking up most of the room. Under the chassis, we see the P10 FLUX Performance Series name, while to the right, in the black bar, we see the Antec name near the top and that this chassis was designed in California near the bottom.
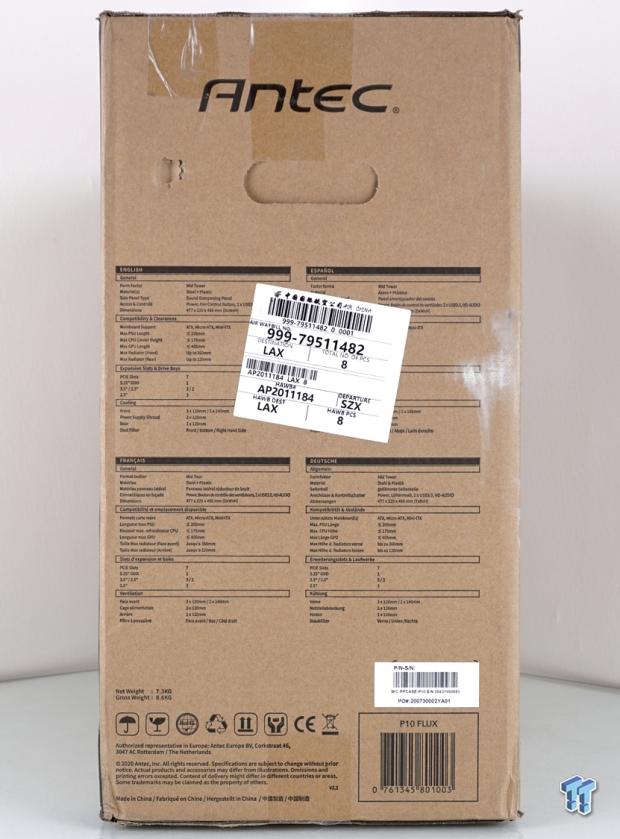
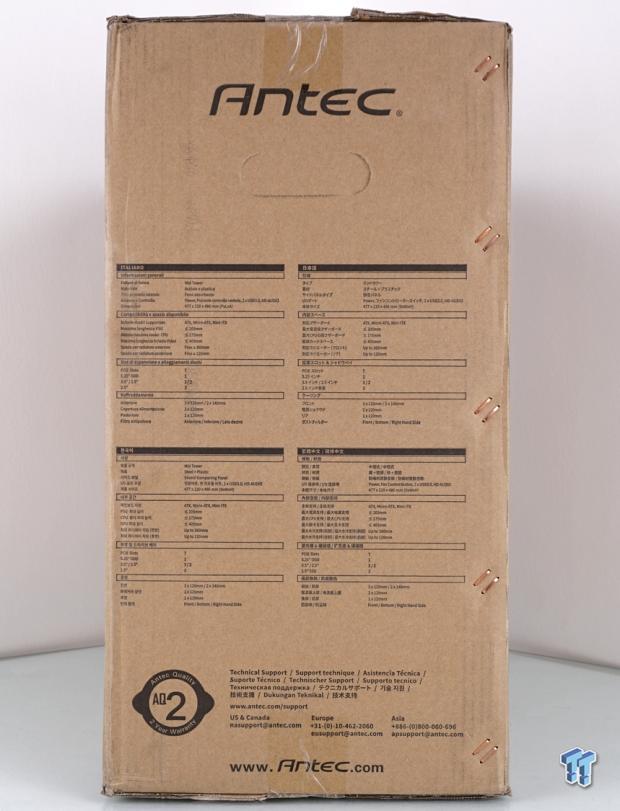
The Antec name tops the right side of the package, just above the pop-in cutout handle. The bulk of this panel is covered with four specifications charts in various languages. The bottom then offers up the weights, compliance and safety iconography, legal information, and even a sticker with the model and serial numbers on them.
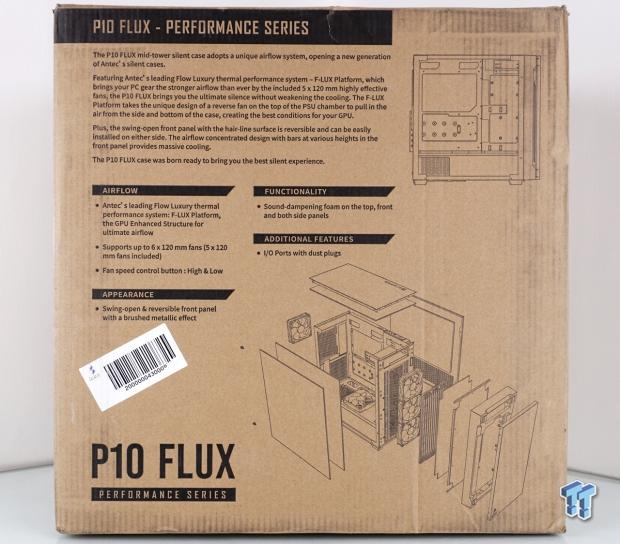
Spin the box once again, and we make it to the back, where the top is used for the name of the chassis in the black bar, followed by an explanation of why Antec feels you should consider this option over all others, even offering a look at the interior to the right of the text. Next are mentions of airflow, appearance, functionality, and additional features that Antec may have missed thus far. Things end on this panel with the chassis's name to the left of an exploded diagram of the P10 FLUX.
One last spin of the box lands us on the left side panel. Antec tops the panel again, and we also see four more charts, this time in other languages, to support their markets. At the bottom, we see a mention of the AQ2, two-year warranty. To the right of that, we see things like the support web address, US, Europe, and Asia phone numbers, and even the main site address is listed for easy reference, should an issue arise.
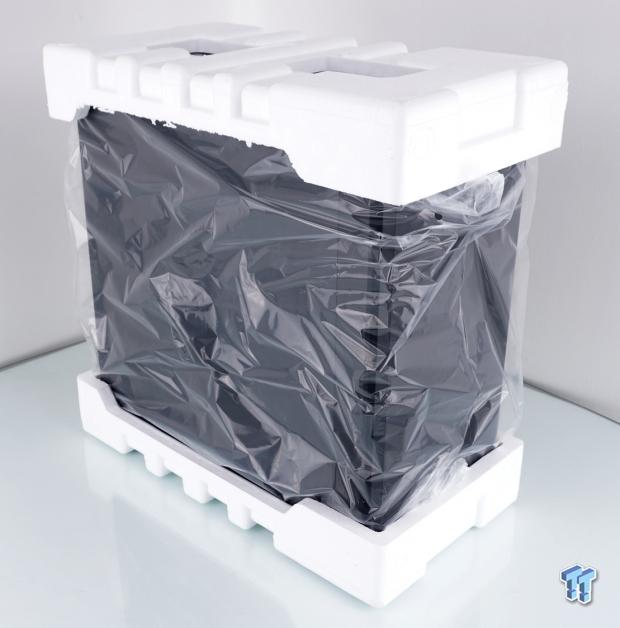
Our chassis came from the other side of this big blue ball, and the cardboard does show signs of mishandling, bangs, and bumps, and is out of square like to may have been bounced somewhere. However, using a plastic liner to cover the chassis ensures that the Styrofoam caps' motion took on the hits and kept the chassis away from the cardboard paid off big for Antec. Our P10 FLUX is in perfect condition despite the mileage and obvious signs of a rough trip to our door.
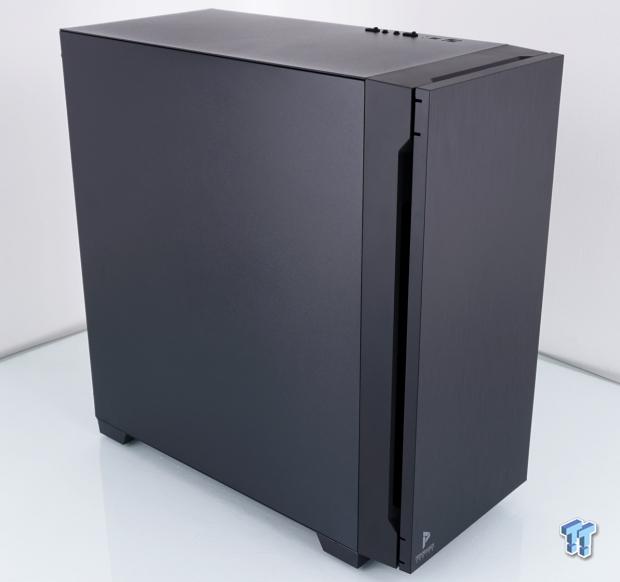
Antec P10 FLUX Mid-Tower Chassis
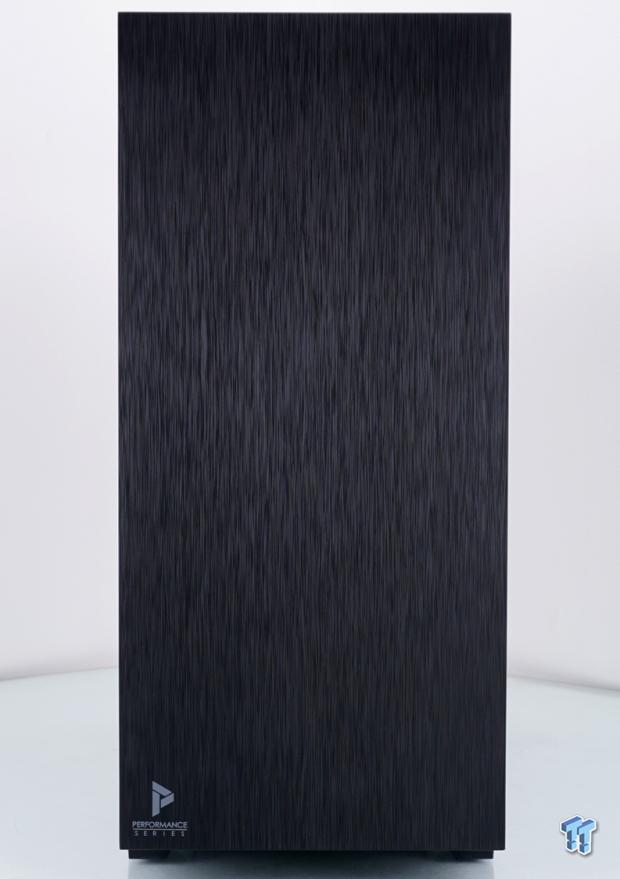
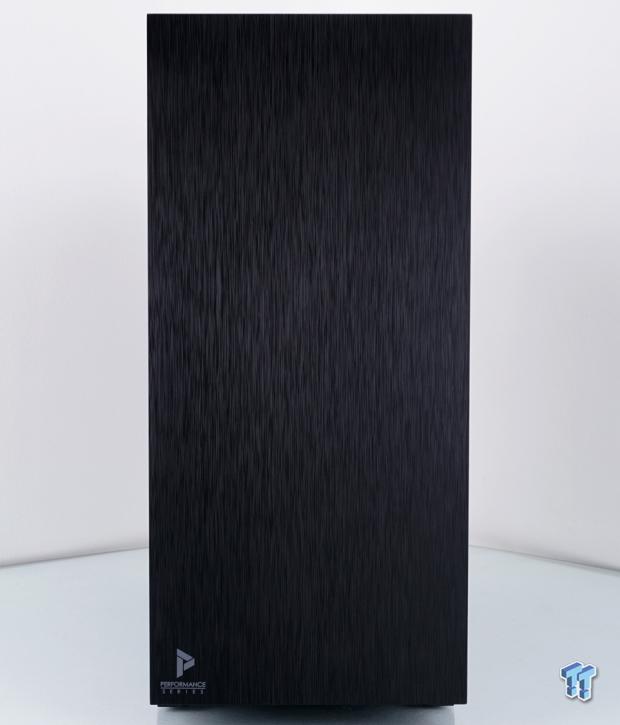
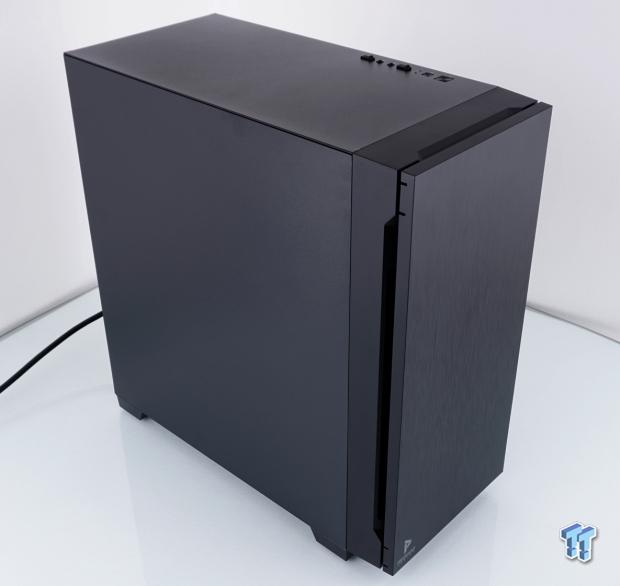
Fresh out of the box, the front of the P10 FLUX sports a solid panel appearance with a hairline finish to the black plastic. Outside of saying it is rectangular, the only other thing we see is the P and Performance Series painted onto the panel in the bottom-left corner.
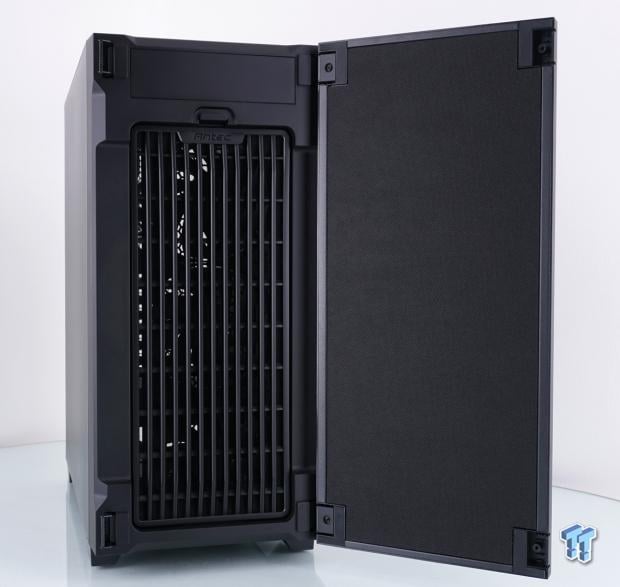
As shipped, we can open the door, which is a right-hand-swing setup. Inside the front door, we can see the sound-deadening material used, but we can also see how the door swing could be changed by swapping hinges from one side of the door and the bezel to the other. On the front bezel, we see the removable 5.25" bays cover above a tall, slotted, dust filter which is removable via the tab just above the Antec name.
The dust filter comes out of the bezel for cleaning with very little effort. In most instances, removing the filter would also allow access to the fans. However, the preinstalled fans from Antec are mounted from the inside of the chassis. There are no screw heads visible from this side.
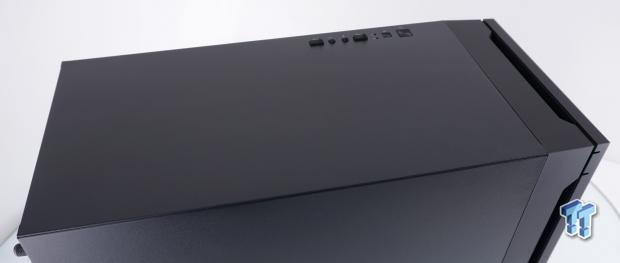
With a view from the top, we can get a feel for how thick the front bezel if the P10 FLUX is, and we immediately notice that the top of the chassis is solid, with no ventilation at all. At this time, we noticed that the front I/O panel is a permanent addition to the top of the chassis and is found along the right side of the chassis, rather than across the front or down the left.
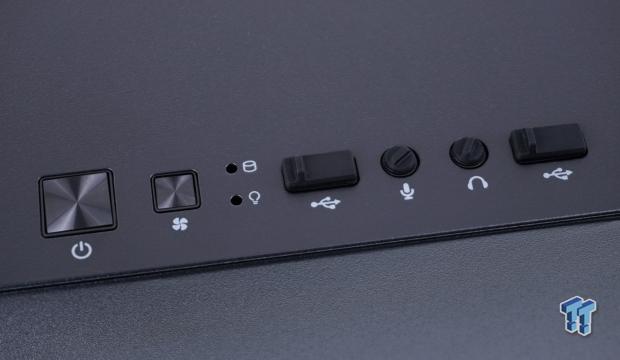
To see the front I/O panel, we spun the case around and got up close and personal. The power buttons start things off, followed by the fan control button, a pair of activity LEDs, and USB ports with HD Audio jacks between them. Not only are the buttons highly stylized, but all of the openings in the I/O panel are plugged with rubber covers. Functionality is marked with the white-painted iconography and matches the high-end aesthetic the front door delivered.

Our view of the left side of the P10 FLUX is not all that exciting, but solid side panels do tend to mean less sound coming from the chassis. Beyond being able to say that the side panel is steel, it is textured in its finish and is black. All we can say is that the body lines are tight and square, and the chunky plastic feet fit the theme.
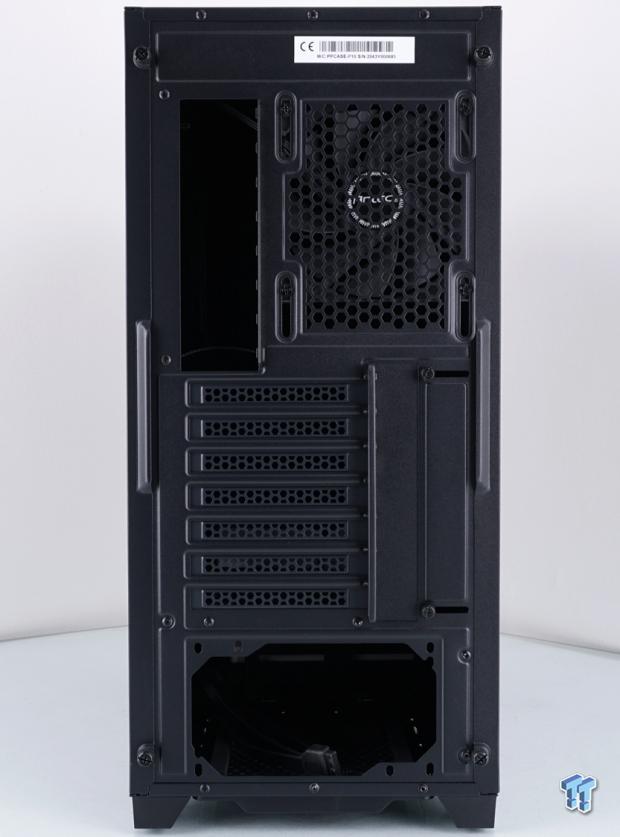
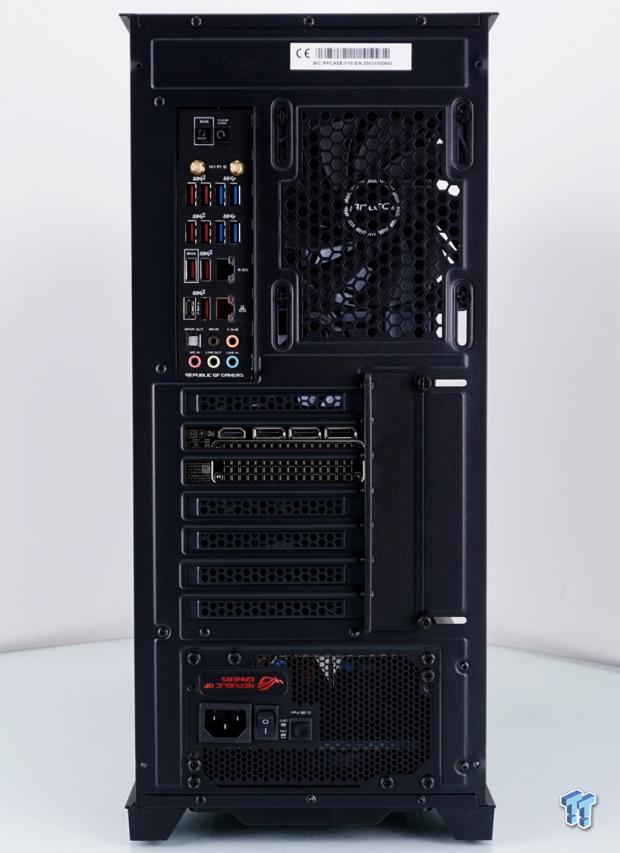
Behind the P10 FLUX, we find the rear I/O opening and the adjustable-height exhaust fan location at the top. They are followed by seven expansion slot covers, accessed by removing a sliding cover plate, leaving the PSU mounted at the bottom. The doors are held in place with a pair of thumbscrews, which are also captured in the panel, so they are not lost or misplaced.
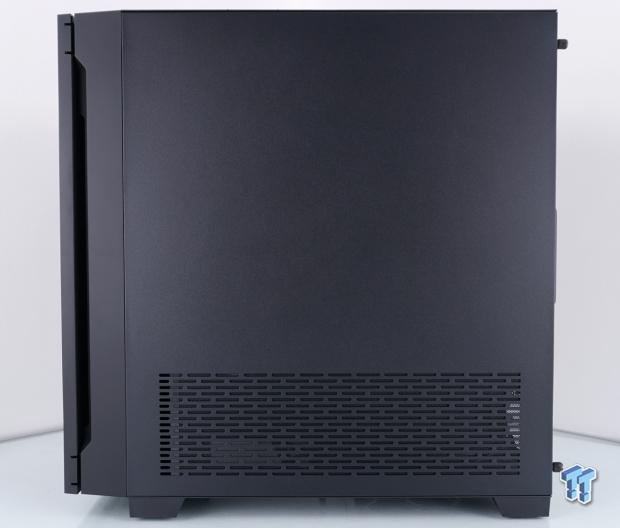
While one could easily assume that with the plain-looking left side of the P10 FLUX, we should expect the same on the right side of the chassis, but that is not what has happened. To allow airflow into the chassis, Antec chose to open the right side panel with slotted ventilation under the PSU shroud, backed with a magnetic dust filter. Again, the body lines are tight and square, showing no signs of the damage the packaging took.
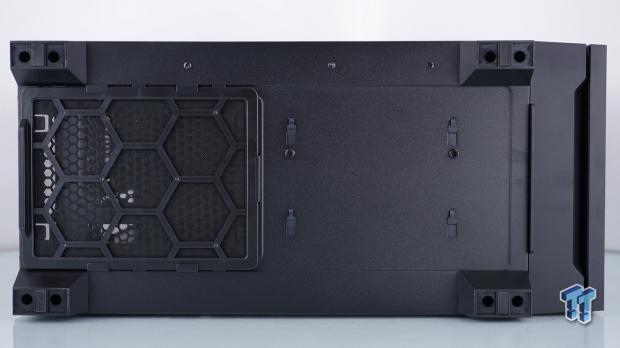
Under the chassis, we find a few things to discuss. At the far left is the plastic dust filter for the PSU intake, which can be slid towards the back of the chassis to be cleaned. The filter sits between what looks like large feet, which use tiny rubber feet to support this chassis, and is also the same at the front. Between the front feet, you will see a pair of screws and tabs in slots. These are for the HDD cage, and if you want to remove it, it needs to happen from here.
Inside the P10 FLUX
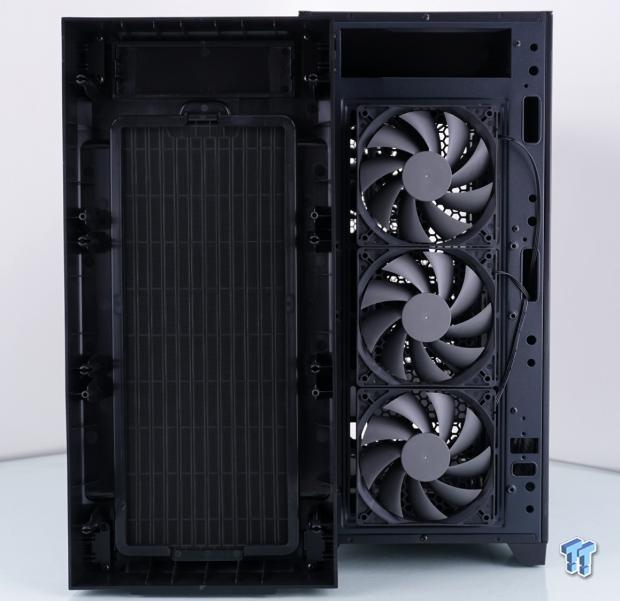
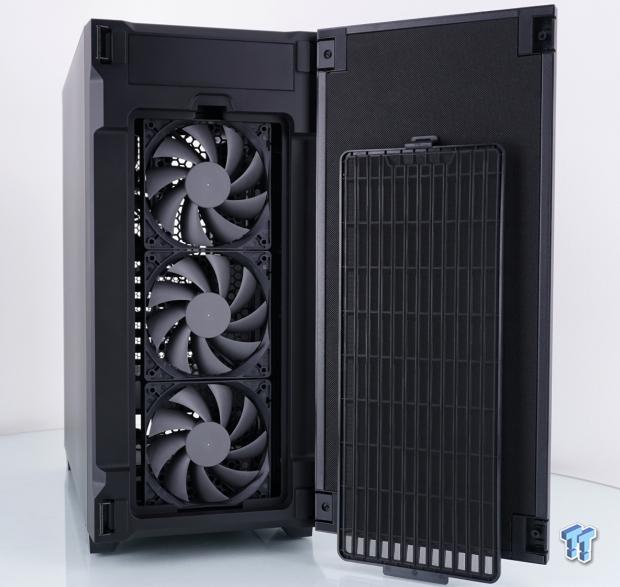
Back at the front of the P10 FLUX, we have pulled the front bezel off of the chassis, which exposed the four round clips on either side of the bezel that clip into the steel holes. Inside of the bezel, we find the tabs to unlock that 5.25" bay cover, while on the face of the P10, all we see are the preinstalled fans with all three wires run through one of the four options, which are not offered behind where the bezel is resting.
Opting to use a thicker front bezel allows Antec to put their fans outside of the chassis, leaving more room for GPUs, and for those wanting to use an AIO, you only need the radiator thickness, not the extra fan thickness to account for. If you look closely, you can spot the fan screws used to mount the preinstalled fans. Speaking of screws, four of them are holding in the removable 5.25" drive bay, two accessible from the front, the other two running through the motherboard tray.
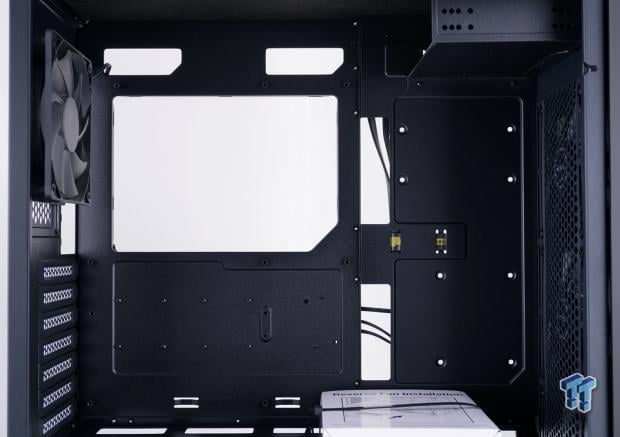
We would have appreciated seeing grommets in the seven wire pass-through holes around where the motherboard mounts to the tray, but with a solid side panel, we can understand why they are not present. Mounting for ITX through ATX motherboards can be done in the P10, with wide-open access to the back of the motherboard for CPU cooler installation. To the right of where the motherboard mounts, just past a pair of holes in the tray, we can see mounting holes for a 2.5" and a 3.5" drive, which go behind the solid steel section.
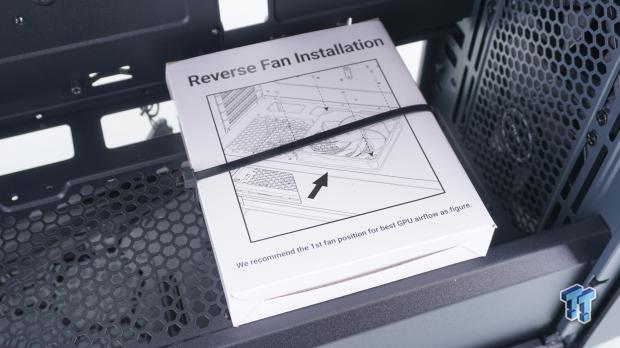
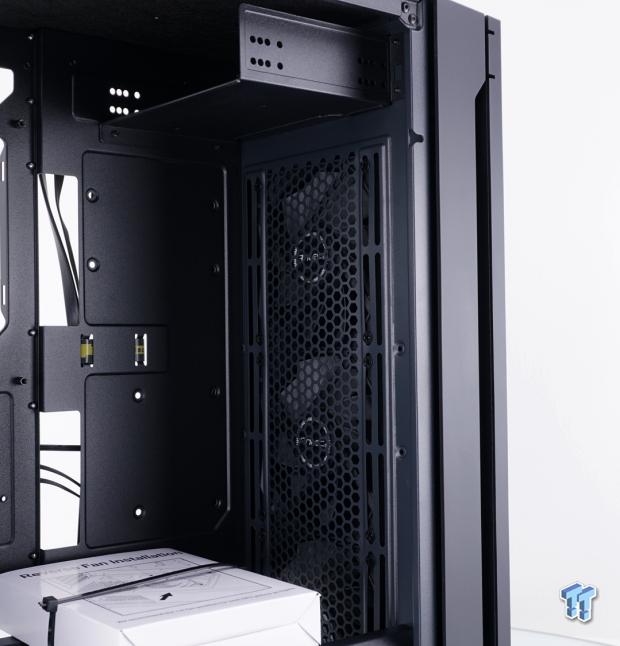
Strapped to the top of the PSU cover is a white box stating it contains a reverse-flow fan inside it and offers mounting and placement instructions. There is room for two of these fans to go on the top of the PSU cover, but only one comes with the kit.
As Antec refers to it, the PSU shroud has a large hole at the front for thick radiator and fan support, along with them opening the top with mesh and three places to route wires. The mesh area is where fans can be installed, before the shroud angles from the top to the side, where it is open at the back to allow the PSU sticker to be viewed through it.
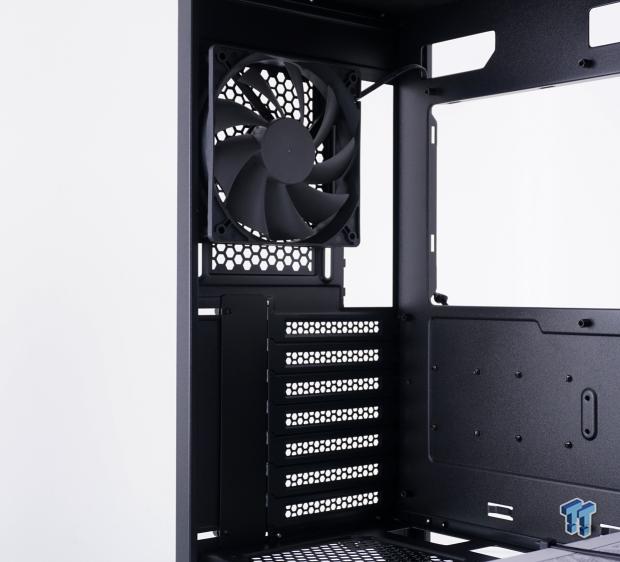
The back of the chassis is where you will find the fifth of the five-fan F-LUX platform, with its wire already ran behind the motherboard tray. Note that it is adjustable in height to align with CPU air coolers. The rear I/O is cut steel to allow for an I/O plate to be snapped in or pressed against in the case of our ASUS motherboard. The seven ventilated expansion slot covers will need to be accessed from the outside, but removing the cover at the left allows the covers to come out and cards to be locked into the chassis.
Behind the motherboard tray, we find that the P10 offers 34.5mm of room at the left and 26.5mm of room directly behind the motherboard. Doing so means that if drives are installed at the left, they fit easily, while behind the motherboard is plenty of room for smaller drives and wiring of the system.
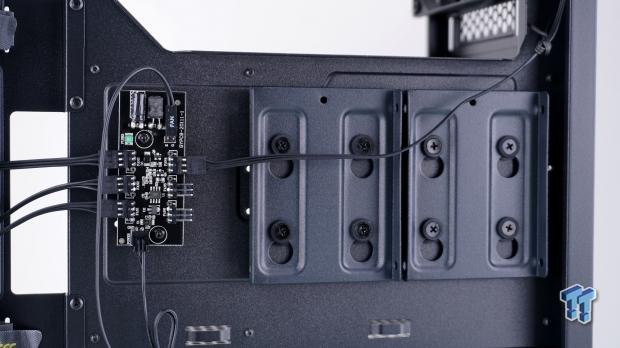
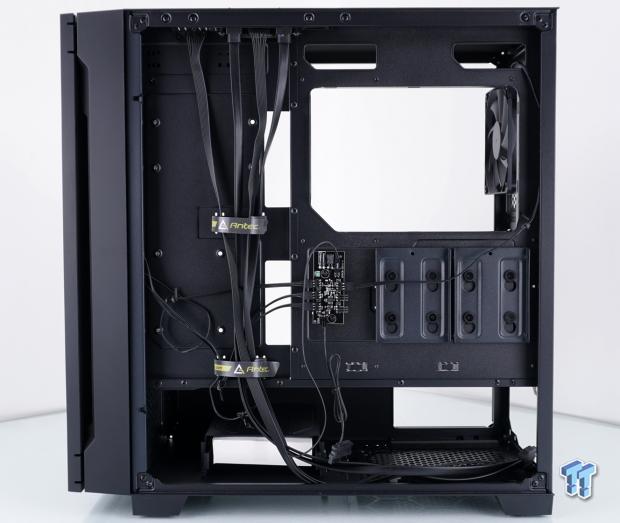
Moving in much closer, just under the cooler access hole, we find the 6-fan hub, which is not PWM controlled but can run in HI or LOW mode with the press of a switch. The four fans are already connected, as is the top cable to the fan switch. The power has yet to be supplied. To the right of the hub, and where the blue-colored steel is more obvious, is in the 2.5" drive trays which are held in place with rubber grommets on screws.
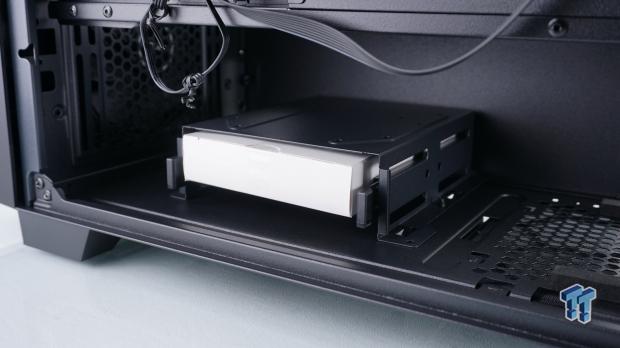
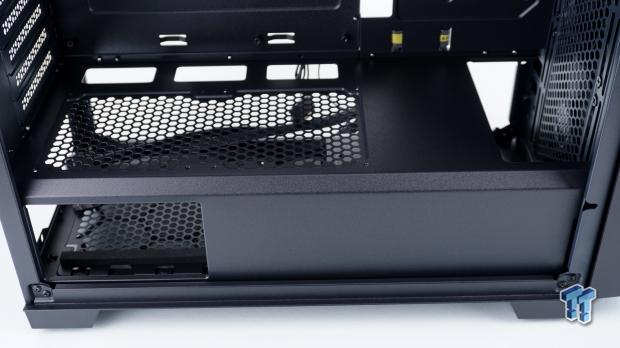
Near the front of the chassis, under the PSU shroud, we have the HDD cage. While it appears that it offers only one location, in the tray it contains, the top of the steel cage is also drilled to allow a 2.5" or 3.5" drive to be screwed onto it. To do so, we suggest removing the cage first, then reinstalling the cage with the drive attached. Otherwise, this can also be removed entirely.
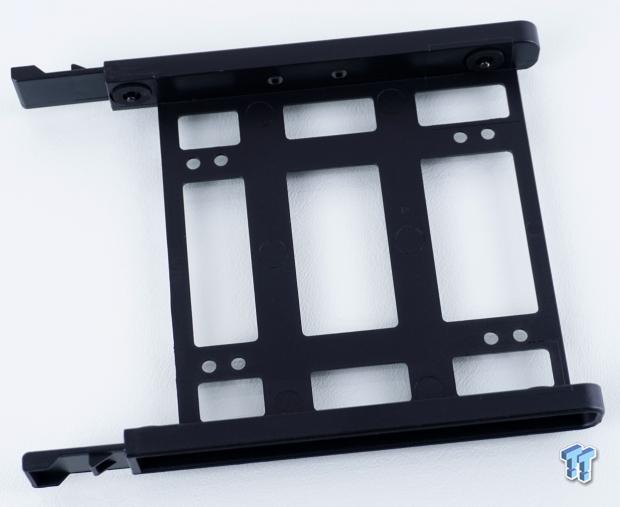
The drive tray holding the white cardboard box of hardware has been slid out of the chassis and the box removed. It exposed the plastic tray that will clip into the sides of 3.5" drives but is also designed to have holes in the frame, which allow 2.5" drives to be used here.
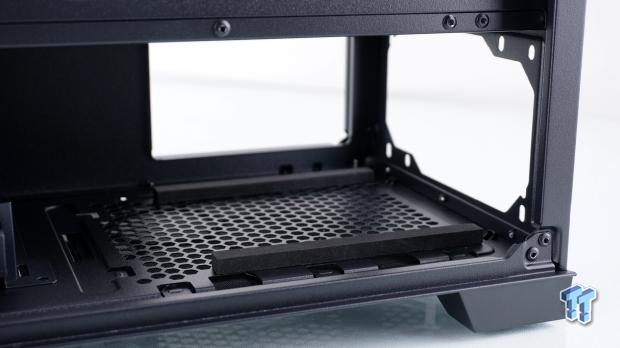
With the HDD cage just visible at the left edge of this image, you can get a good sense of how much room is left for the PSU and wires. Using supplied screws, the PSU is mounted to the back of the chassis as it rests on the thick foam pads on either side of the ventilation on the floor. The PSU is intended to be slid in this opening, but we would suggest connecting the wires to the PSU if modular, before installation, if planning to use the HDD cage.
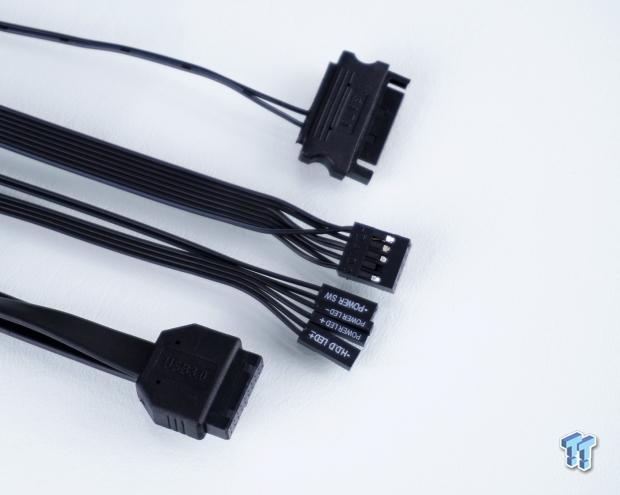
All of the wires found in the P10 FLUX are black, which helps them blend in with the build, but again, unless the sides panels are off, they could be bright orange, and it wouldn't matter. We get a native USB 3.0 connector to power a pair of ports on the chassis, seen at the bottom. Above are the front panel connections that need to be made so that the switches and LEDs function properly. We also have the HD Audio cable to connect, and the SATA power connector is what powers the fan hub.
Accessories and Documentation
Installation and Finished Product
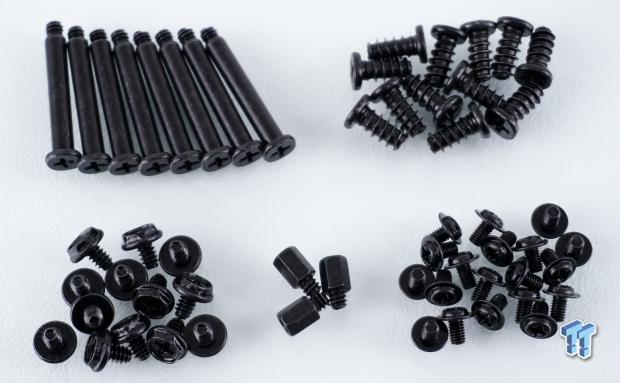
The box we found in the HDD tray was opened up, and inside of it, we found the screws and bits you see now. For use with the GPU cooling, reverse flow fans, Antec offers eight long fan installation screws, but should you need to install fans otherwise, we are offered a dozen standard-sized fan screws, both versions seen at the top. For the PSU and some drive bays, we are given thirteen hex-head screws. There are three extra standoffs, and the last of the checklist are the twenty M3 screws for 2.5" drives and motherboard mounting.

Oddly, we have forgiven Antec for things like no grommets inside of the chase, then continuing to say the wires could look like hunters in a field as far as it matters once the shop was closed up. However, Antec does care what the inside looks like, even if you only see it while maintaining it. A few zip-ties is not all that special; they are handy to have, but it is the addition of hook and loop straps for bundling wires. There are two of these already ran through part of the motherboard tray, and with these, we now have four straps to keep any rats nest from forming.
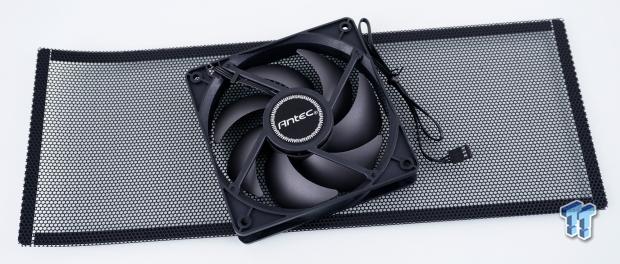
The fan we see here is the reverse flow fan from on top of the PSU shroud, which we flipped over to see if we could find a model number for, but find the hub has a fancy Antec sticker instead. Like the other four fans in the chassis, it is also 3-pin powered. As to the filter it is lying on, it was the extra we found inside the chassis, which is a match, to the one found inside the right side panel of the P10 FLUX.
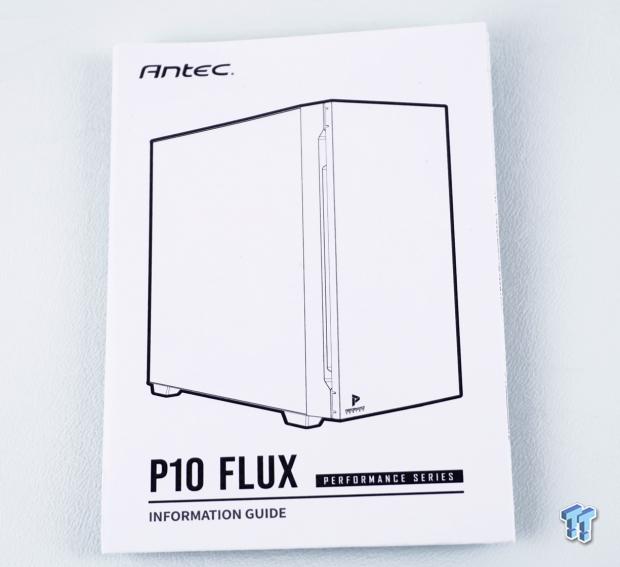
The manual for the P10 FLUX is made of a single sheet of paper, folded many times. You will find a parts list to ensure you have everything you need to get started inside of it. Beyond that is a mix of renderings showing components being installed, a short but sweet wiring guide for the fan hub, and an exploded diagram of the chassis to help refresh your mind as to how it all works.
Test System, Installation, and Finished Product
- Motherboard: ASUS ROG DARK HERO (AMD X570) - Buy from Amazon
- CPU: AMD Ryzen 5 3700X - Buy from Amazon
- Memory: Team T-Force XTREEM ARGB 3600MHz 2X8GB
- Graphics Card: NVIDIA GeForce RTX 3070 FE - Buy from Amazon
- Storage: Sandisk Extreme II 120GB SSD
- Case: Hydra Bench Standard
- Power Supply: ASUS ROG Thor 850W - Buy from Amazon
- OS: Microsoft Windows 10 Home 64-bit - Buy from Amazon
- Software: AMD Ryzen Master, AIDA64 Engineer 6.32.5600, and CPU-z 1.94.0 x64

Typically, at this point, we would be showing the closed-up look at the front of the chassis, but we wanted to point out a couple of things here. First of all, we left the preinstalled fans where they were, even though we put our 240mm based AIO behind it. The second thing is to help clean up the fan wiring, both that of the chassis and the AIO. We routed them all to the right of the fans and tied it up, which fits without incident when replacing the bezel.
This is the image we expect to see starting off this portion of the review, the front of the P10 FLUX, closed up, ready for power and use. We appreciated the hairline surface treatment, the color, and the simplistic branding at the bottom is just as attractive now. There is almost an air of Fractal Design or maybe Phanteks, where looks may be subdued, but you get a structurally sound and feature-rich chassis, with sound dampening and cost-effectiveness all taken into account.
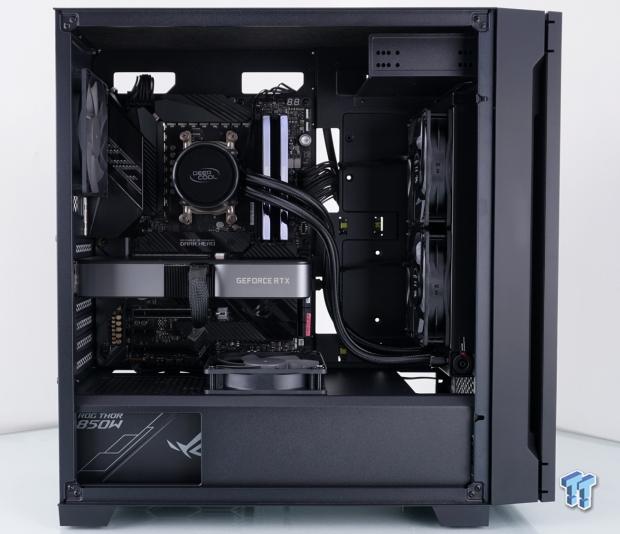
The motherboard aligned with the rear I/O cutout and was a cinch to screw into place. We did have to take some time with the wiring, and placing the AIO in the front took some different screws and ways of mounting things. We still have plenty of room for the GPU and the extra fan to cool it. We also like the window on the side of the PSU cover, which allows the ASUS Thor 850W to be seen as soon as the panel is gone. All things considered here, we cannot think of a single thing to complain about.
Out back, the rear I/O plate on the motherboard presses right against the opening and using an AIO, and we found no reason to adjust the exhaust fan's height. The GPU is nearly level, only slightly leaning to the right. We could have played around with that one screw for a while, but we feel this is close enough not to be an issue with connectivity to the monitor. As for the PSU, we found eight screw holes in the back of the chassis, which allows the PSU to be installed fan-up or fan-down, although our ASUS has all of those holes, so we used all eight screws.
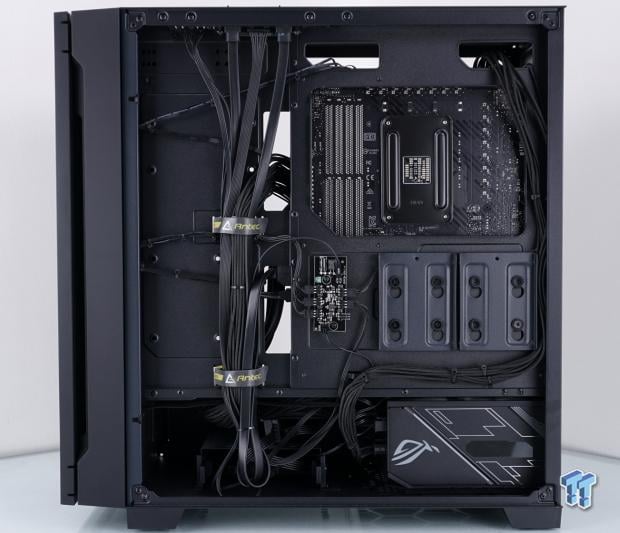
Behind the motherboard tray is where a lot of the magic happens, and sadly will likely not be seen unless there is an issue with your system or it comes time for routine maintenance. Whether it be the wires from the PSU running to the top of the motherboard, routing fan wires, or connecting the front I/O panel to the system, we have tons of room and plenty of options. Our build is light on the components, so the extra straps went unused but could be handy near the PSU or bundling the 2.5" drive cables next to the PSU. It is a shame that this chassis comes with solid steel panels.
The black monolith is nothing new to the chassis game, and at roughly three to four feet away, with the choice of components we made, we could not hear or see anything to indicate we assembled things properly. We had to lean in to hear anything or see the only external lighting this chassis offers.
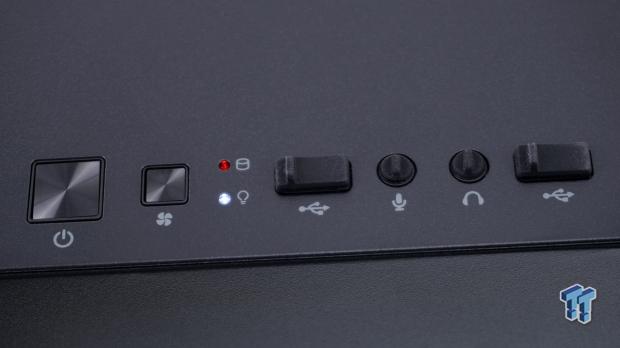
Spinning the chassis around does show us the pair of LEDs illuminated. The top one shows when the storage drive is active, and the white LED means the system is on. When we were here, we pressed the fan control button, and now at just a foot away, we could tell there was a slight increase in noise shifting from LOW to HI.
Final Thoughts
As we should, let's talk testing. In that respect, we left the door closed for both a LOW fan test and a HI fan test, although Antec does say that to get the best from the chassis, you can open the front. Our stance on this is that if you offer a case with a door, we are testing it as it comes out of the box. Onward we went with the LOW fan speed set to the hub; we set off to stressing the components. What we find is that the P10 FLUX left our CPU Package temps with a +2.3°C Δ, the VRM with a +3.1°C Δ, and our GPU with a +4.5°C Δ over our open-air testing. At the LOW setting, fans spin at 1100 RPM delivering 41 dB into the chassis, without any accounting for sound dampening. Outside of the chassis a foot away, the noise is much closer to 30 dB.
While you may be sitting there thinking, well, those results are not all that bad, and while you are right, we still can spin all five fans faster using HI speed mode on the fan hub. Doing so increased fan speed to 1400 RPM, with noise rising to 52 dB at this time. 45 dB of which makes it outside of the case. Temperatures inside decreased as well where the difference now is +0.3°C Δ to the CPU Package average, +0.8°C Δ on the VRM, and only +2.3° Δ on the GPU. Impressive, to say the least!
On the high note that the thermal and audio results leave us on, we return to the more obvious things. The appearance comes to mind first, and while the all-black chassis has been done to death, we feel that Antec did enough to keep buyers interested. Making the front thick enough to offer more interior space is an advantage many may not consider, and while the front could have gone in many directions aesthetically, we appreciate the hairline finish and the light hand used with the branding. All of the panels align well with each other; the chassis is strong without the panels, almost to the level of what the likes of Fractal and Phanteks regularly deliver, not only in strength but also in feature set as well.
We want a tad bit more rubber under the much larger plastic feet, and even at the cost of noise coming from the chassis, Antec delivered all means for a build worthy of view, and we are saddened not to have one. However, this chassis is designed with a different mantra, and we can say that you get flow, and you get luxury in the P10 FLUX, as described.
As far as usability and the installation is concerned, there is not a single corner Antec did not peer around to see if they forgot something. The motherboard nearly falls into place and the screws and standoffs supplied are of a quality where we had no issues with threads or stripped standoffs. Our AIO took some work to get it into place, but the option is there, even though the top of the chassis was closed off to us as the standard option. The PSU rests on pillows of thick foam in the bottom of the chassis; the card aligned well enough not to sag, but it doesn't matter if it did as you cannot see it most times.
When you have a chassis that comes at us like the P10 FLUX did, making us a believer of all of the marketing hype, and the worst things we can come up with are a lack of grommets you can't see, and the fact that there isn't a view inside shows how well Antec did with this design.
For roughly $80, the P10 FLUX can be yours. None of the RGB many do not seem to like-much less sound than the average mid-tower equipped with five high-airflow fans included in the deal. There is plenty of room for multiple storage types, there is an ODD bay, and every intake is filtered. We feel that when it comes to mid-tower cases, at $100, you are pushing the boundaries, but Antec finds a way to not only deliver a smaller closed-off chassis capable of cooling performance near open-air levels, all while not making your ears bleed is huge to us! While you may have a hard time finding bits to put into this chassis, if in the market for the new "sleeper" in cases, look no further; Antec has you covered.
 MOAIPLAY ORA PRO G1 850W ATX 3.1 PSU Review: high efficiency and 10-year warranty for $119.99
 NZXT H6 RGB+ Compact Dual-Chamber Chassis Review
 Lian Li HYDROSHIFT II 360P OLED Curved Liquid CPU Cooler Review
 ID-Cooling FROZN A620 SLK CPU Cooler Review
 GAMDIAS Atlas P6 CG Dual Chamber Mid-Tower Chassis Review
 NVIDIA's AI agents taught robots to install GPUs into motherboards without any human help
 Another AMD AM5 CPU has reportedly swelled and died, this time a Ryzen 9 9900X less than a year old
 Valve just told Half-Life 3 dataminers it knows exactly what they are doing with new Dota 2 variable name
 Destiny 2 situation not result of Sony revenge plot, decisions are entirely financial
 AMD Zen 6 will target a 7 GHz boost clock for Ryzen CPUs, according to insider
 New Halo CE remake won't get new DLC, story missions, maps, or any extra content
 $90 GTA 6 price not real, says renowned games leaker billbil-kun
 AMD's RDNA 5 Radeon GPUs will launch in mid-2027, per new leak
 GTA 6 price seems to have leaked, base version to cost €89.99
 Assassin's Creed Hexe is reportedly going to launch earlier than expected
 Speed Racer (2008) 4K Ultra HD Blu-ray Review: a stunning remaster of the cult classic
 Navman MiVue Smart True 4K Surround Dashcam Review - Seeing In All Directions At Once
 IQUNIX Magi96 Pro Aluminum Low Profile Mechanical Keyboard Review - Premium Build, Satisfying Sound
 Asetek Forte S-Series Racing Simulator Bundle Review
 Razer Pro Type Ergo Wireless Split Ergonomic Keyboard Review - Built for Comfort and Support
 ASUS ROG Strix Morph 96 Wireless Gaming Keyboard Review - Great Performance, More Affordable
 SAPPHIRE Radeon RX 9070 GRE PULSE OC Review - A New 1440p Challenger Has Arrived
 I stopped Windows 11 notifications from interrupting me with Do Not Disturb, Focus, and a priority list
 I read the Windows Backup app screen carefully, and it does not back up what most people think
 Low Sound Volume on Windows 11? How to fix audio issues and restore normal volume
 8 Critical Warning Signs You Should Never Ignore in Windows 11
 This Windows security feature protects Documents from ransomware, but it is off by default
 Windows 11 already has a voice typing tool, and it is the one most people are not using
 Quick Assist is the only remote-support tool I open when a relative calls about their PC
 The PowerToys utilities I keep enabled on every Windows 11 PC, and the ones I turned off within a week
 TweakTown's Best of Computex 2026 Awards - The Best Hardware, Gaming Gear, and AI