


Introduction

Somehow when the original GS-6070 came out I missed the boat and didn't have a chance to look at it. That being said, I went back to find there were two flavors of this original design. There was one with a cowling like scoop of the door and another that had a bit of a window incorporated into a larger mesh insert. For a Sentey chassis, the GS-6070 has a very pleasing exterior design, that while still using shiny materials and chrome trim, is a chassis that from the outside won a lot of people over, I am sure of that.
Any design, even if it incorporates all of the latest and greatest will succumb to time just like anything else. With the success the Abaddom brought to Sentey, they figured it was getting about the time to where, if they plan to stay competitive with what other cases offer, they need some touching up.
Looking back on the original after seeing what I am about to review shows that there isn't much that is really new and improved, but since I didn't see the original design, it's all new to me. As such, I will be going over all of the fine points and while I may not catch every single change from the original, I have a good idea of what has been delivered in the newest release of this idea in the Extreme Division series of cases from Sentey.
Sentey has sent along the GS-6070 II Abaddom chassis. This steel mid-tower is more on the smaller side and may not be the first choice of an enthusiast, but I can see how the styling and what the feature set offers, lending to this case being a good solution for a second or third PC or maybe even a box to throw old parts in to give to the neighbor kid. That's not to say that this chassis doesn't deliver everything a gamer would want with the basic setup of a board, card and a couple of drives on air cooling. It is more to the fact that the overall size and room is cut back for those with water cooling or even an AIO, you may have issues with getting radiators to fit inside at all.
Enough of my ramblings; let's have a look at the technical end of things so we can get to the images and what I think about the latest from Sentey in the GS-6070 II Abaddom mid-tower chassis.
Specifications, Availability and Pricing
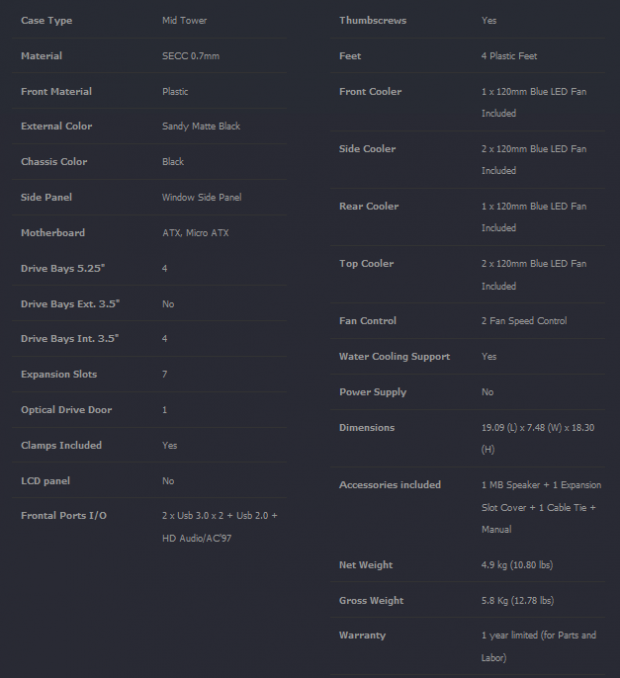
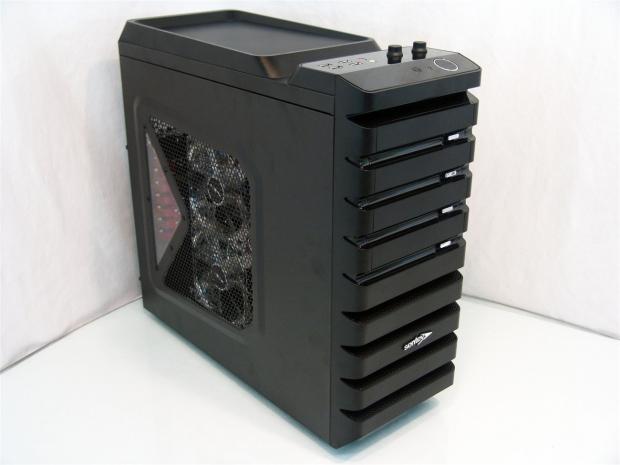
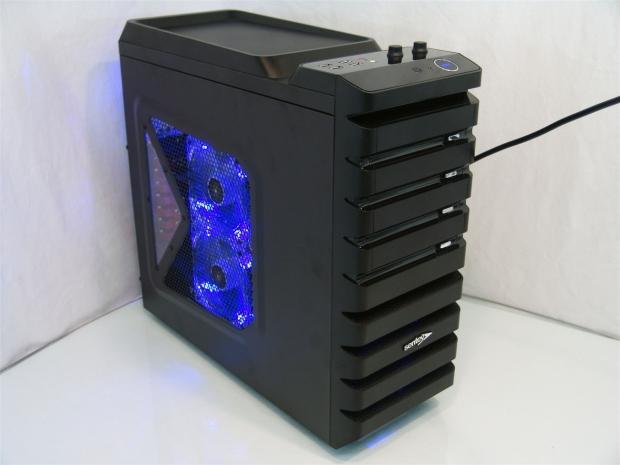
The GS-6070 II stands at 19.09" tall, is 18.3" deep and is only 7.48" wide and this is quite small for a mid-tower chassis. The majority of the construction is done with 0.7mm SECC steel that has been painted black throughout. For things like the feet, front bezel and the top, there is a mix of mesh and ABS plastic comprising those pieces. Getting past the technical into physical looks, the chassis exterior is pleasing to the eye, even if a little aggressive. The front has gouge like pieces removed in a horizontal striping down the front and Sentey has hidden the 5.25" bays with stealth covers and chrome buttons. On the left there is a large mesh panel with two 120mm fans applied to it with a triangular section of clear plastic inserted for a window view of the components as well. The right side of the case is plain and just offers a finger grip at the back to remove the panel with. As for the back I will cover that in the interior discussion.
Inside the case I want to start off with the cooling. There is the pair of 120mm fans I mentioned in the door, a pair in the roof, one in the front, one in the rear of the chassis and even an 80mm fan on one of the hard drive trays. As for optional locations, well there is one spot on the floor for a 120mm fan, if the PSU you choose will allow for that. I almost forgot to mention, every fan in the chassis is powered by a Molex connection and when powered, all equipped fans spin with the glow of blue LEDs. Moving away from the cooling and back to the chassis components, in the front of the chassis you find a rack system with four 5.25" bays that use tool-less latches. Below those there are four trays that slide out and stretch over the hard drives and slide back in with the wiring exposed to the left side of the GS-6070 II. The motherboard tray does offer some basic wire management and will accept both ATX and Micro-ATX motherboards. In the back you have the rear I/O, the exhaust fan, a pair of pass-through holes and seven break-out expansion slot covers. This area also uses plastic tool-less latches, that lock the cards into the chassis.
Our Latest Mid-Tower Cases Review Coverage
Looking around for the Sentey GS-6070 II Abaddom chassis via Google shopping it turns up only one location currently stocking this chassis. I guess if you are going to pick only one to go with, Newegg is the one I would list my products on as they have to have the biggest audience inside of the USA. Oh right, the price. While I was there I saw the GS-6070 II is selling for $74.99 and is even currently selling with free shipping.
In my opinion, that seems right on point considering the feature set and the amount of cooling provided in the box, but I will let you make your own conclusions as we tear through the rest of this review as I show off what the GS-6070 II Abaddom has to offer.
Packaging
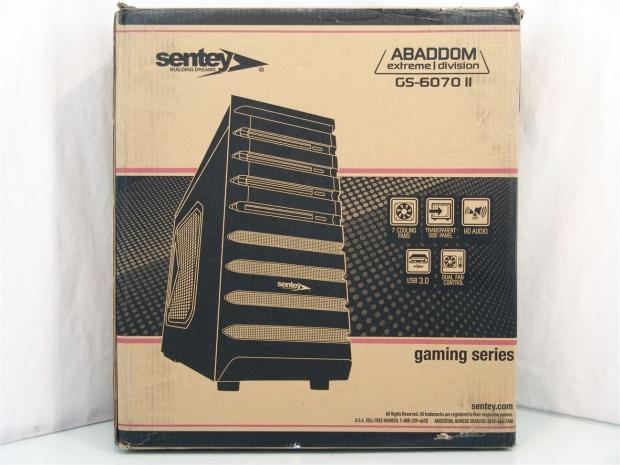
Even though choosing to go with the plain brown cardboard box, Sentey did spring for the two tone screening on the box to add a little flair to the mesh background behind the image of the chassis. The company and chassis name are at the top, with the right side offering five features highlighted.
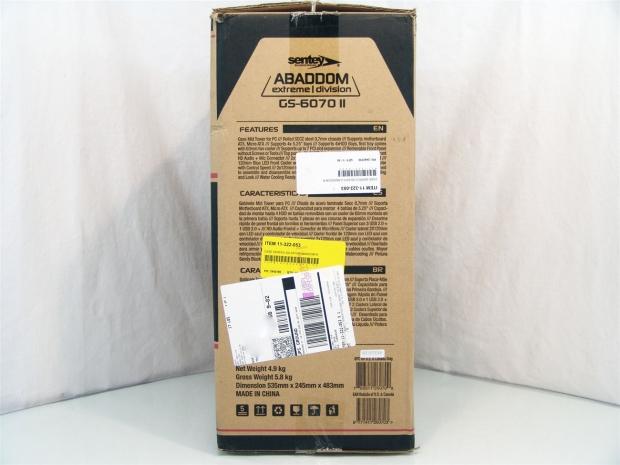
If FedEx hadn't covered this all up with stickers, you would be able to read a bit about the features of the GS-6070 II in English as well as a couple of other languages.
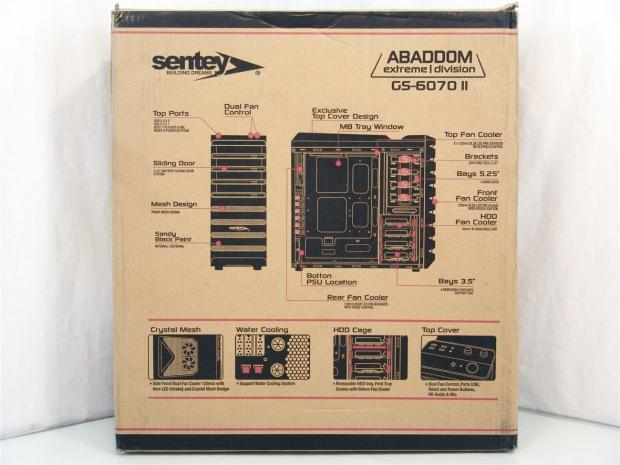
The back shows off two sides of the Abaddom, both the front and the left side without the panel in place. Around both they point out 15 features found in and around this case. Then at the bottom there are four features covering the mesh, water cooling potential, HDD cage and the fan controller.
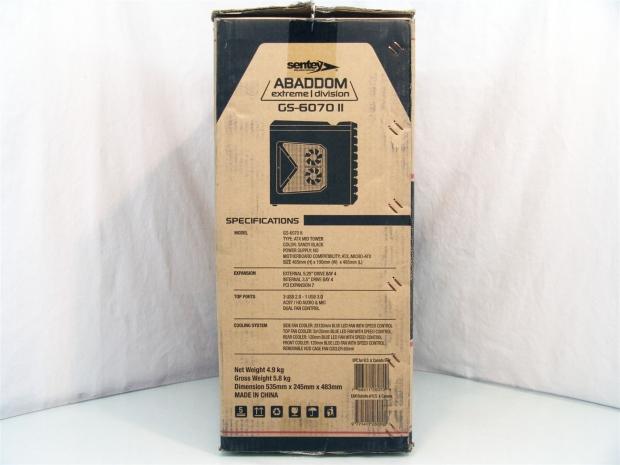
On the last side of the box you find a much more simplified version of the specs chart than the one we just covered.
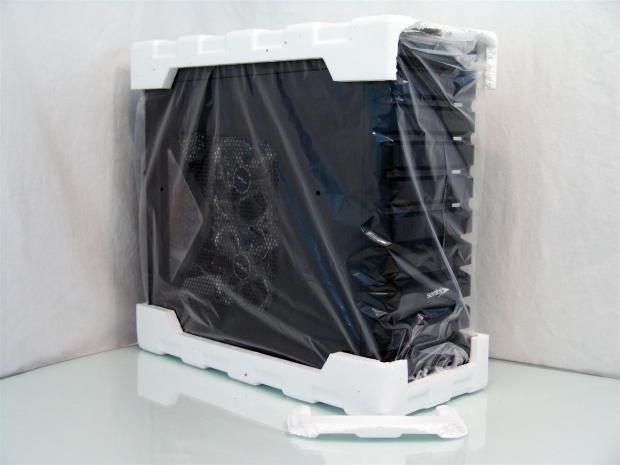
The inner packaging did its job. It looks as if the GS-6070 II that I received took a good hit in transit. While the Styrofoam cap at the top did break, the plastic liner kept the scratches off and the foam breaking is better than damage to the chassis, of which I have none. Even though the inner packaging is a little battle worn, the GS-6070 II Abaddom arrived in perfect shape.
Sentey GS-6070 II Abaddom Mid-Tower Chassis
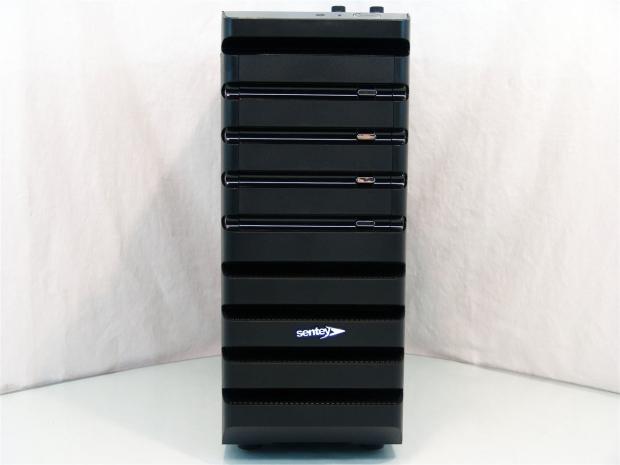
The front bezel offers a textured plastic down the front with
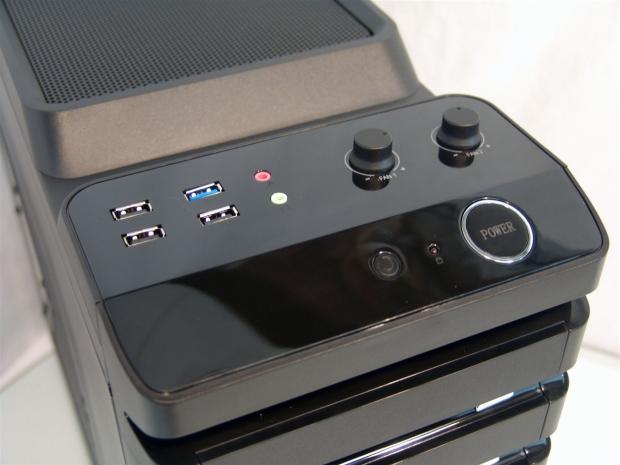
The front I/O panel sticks out by itself at the top of the chassis and uses this shiny plastic to back the area. There are three USB2 .0 connections and one USB 3.0 and the 3.5mm jacks on the left. On the right are two fan control knobs and the reset, HDD activity light and the ringed power button.
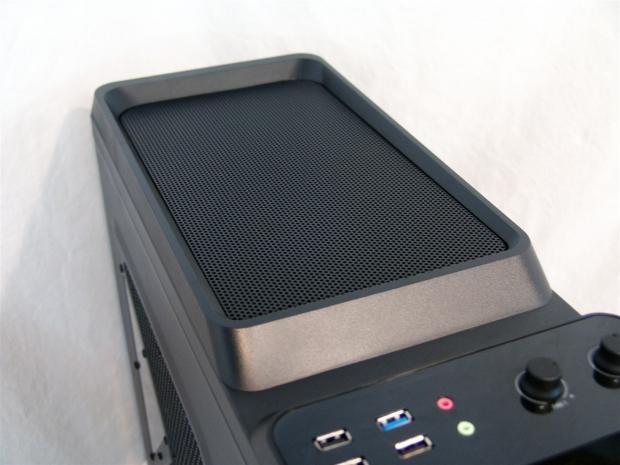
Just behind the I/O panel there is another raised section, this time mesh covered, to allow for the pair of 120mm blue LED fans to breathe through when the chassis is powered up.
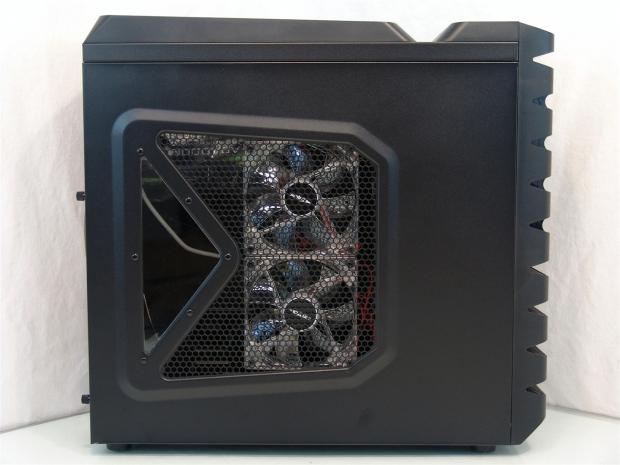
From the left side you can see there is an aggressive slant to the top that sort of matches the angles applied to the door panel where the mesh and window are located. To help cool the CPU and video cards, there is a pair of blue LED 120mm fans here too.
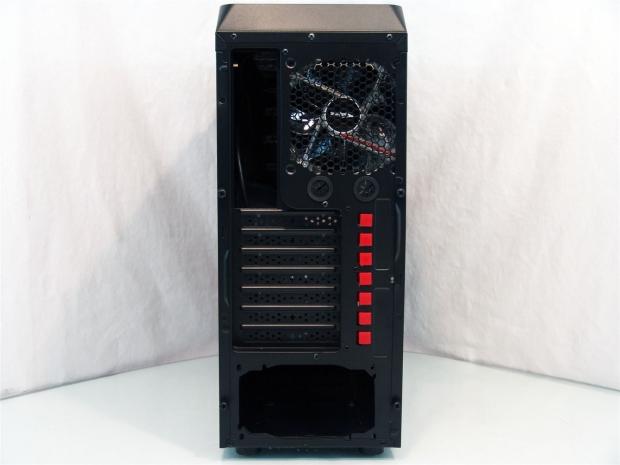
Behind the GS-6070 II there is the rear I/O area next to the 120mm blue LED fan. There are small pass-through holes, but due to the USB 3.0 cable one has to be used for that. Then you have the seven expansion cards and plastic locks above the PSU mounting area that has a gasket on the other side.
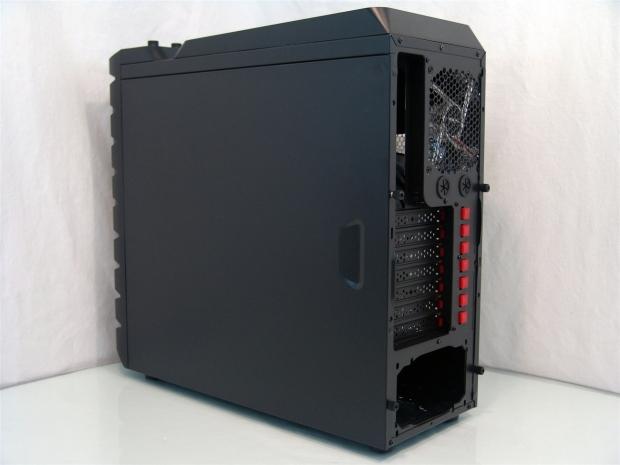
On the right, there is just a vast expanse of textured black paint over the flat panel. Near the back there is an indentation to allow for grip to remove the panel from the chassis.
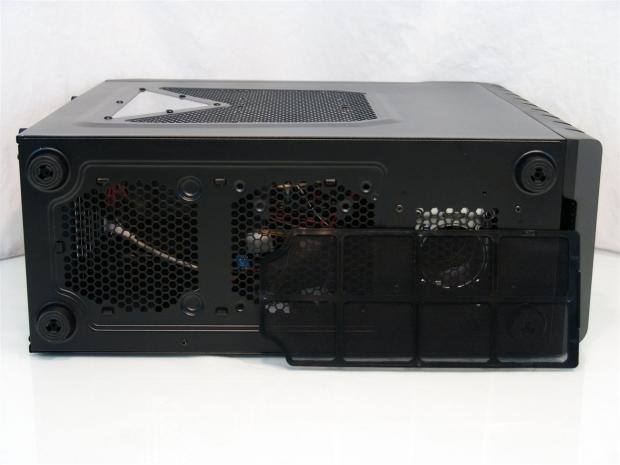
Under the chassis there are four large hard rubber feet right at the corners of the steel to maximize the stability. Between the feet there is an area for the PSU to gather air at the left, with a 120mm fan mounting hole just in front of it. The dust filter seen here covers those two holes, but must be removed to the front of the chassis. The last hole is to allow the HDD fan a place to gather air from.
Inside the Sentey GS-6070 II Abaddom
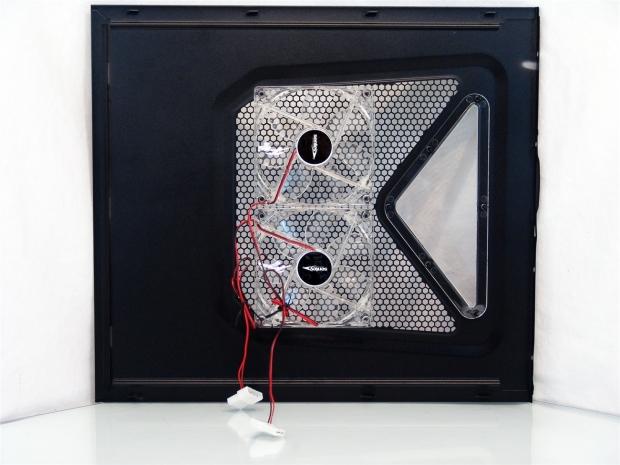
I stopped to get an image of these clear fans hanging on the door mostly to show that they are to be powered via the pair of 4-pin Molex connections at the end of the long leads coming from the fans.
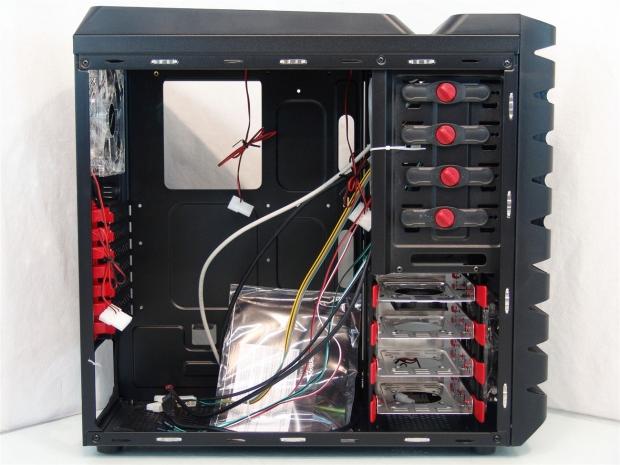
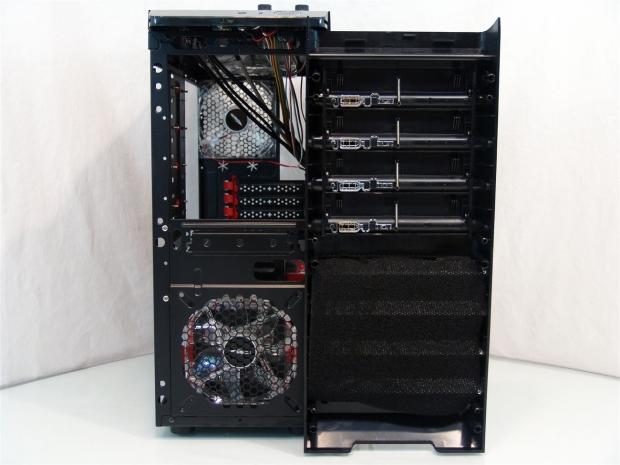
The first look inside the chassis seems to be pretty chaotic. The wires are just strewn about with no attempt to tie up the front I/O wiring, just the fan power leads. As for the hardware and paperwork, the hardware is tied up in the ODD bays and the paperwork is lying on the floor of the case.
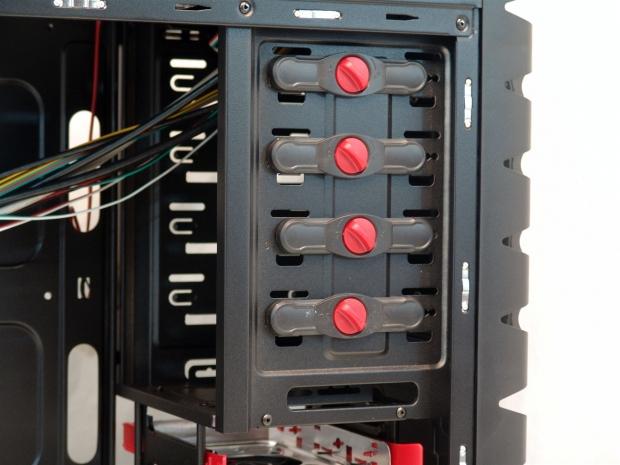
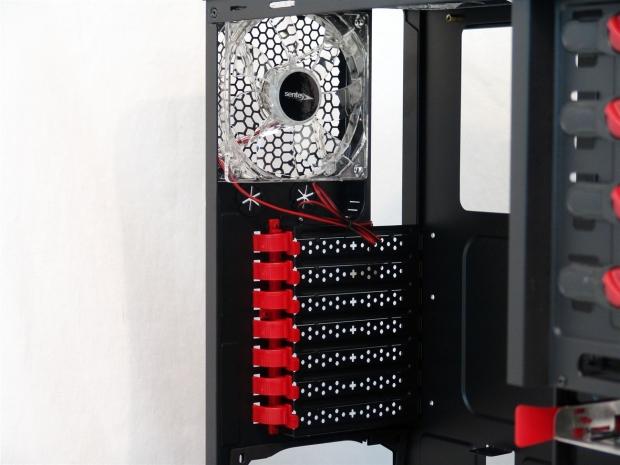
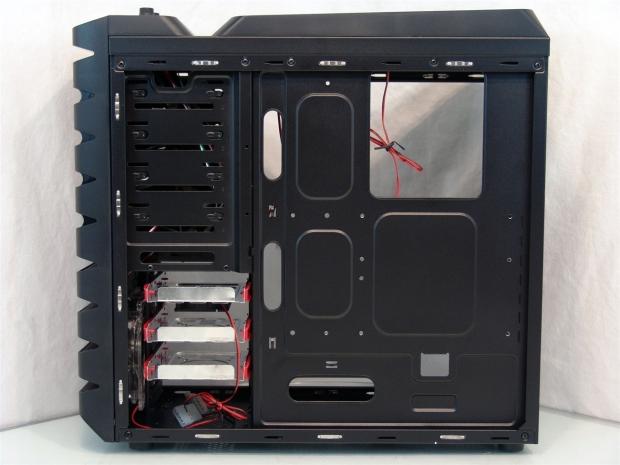
The front I/O takes up what would be the top bay inside of the chassis, so below that are four 5.25" bays with these tool-less clips. This style of twist and lock clip is actually pretty secure to keep drives in place even if moving it around a bit. The bottom bay does offer a 3.5" drive conversion tray.
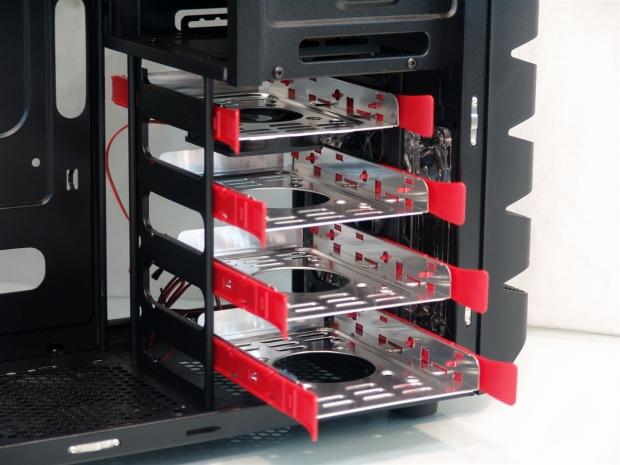
As for hard drives, you can install up to four of them on these slide in trays. There are screw holes for 2.5" drive mounting, but the depth is wrong and may cause issues for connectivity.
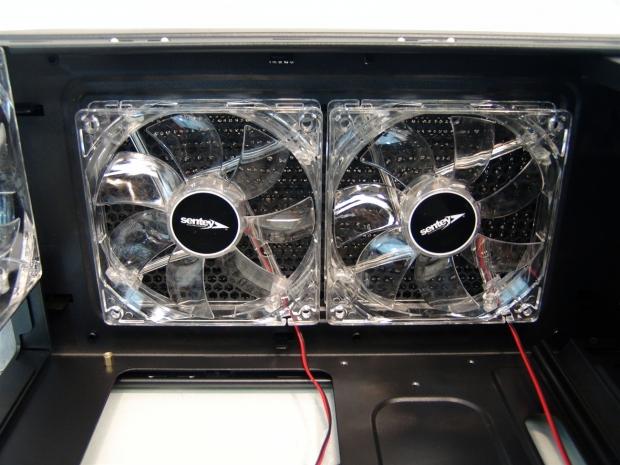
Inside of the top of the chassis, under all of that mesh we saw behind the front I/O, is this pair of 120mm fans that will glow with blue LEDs that will flood the chassis more than it is visible through the mesh once powered. These also use Molex power connections.
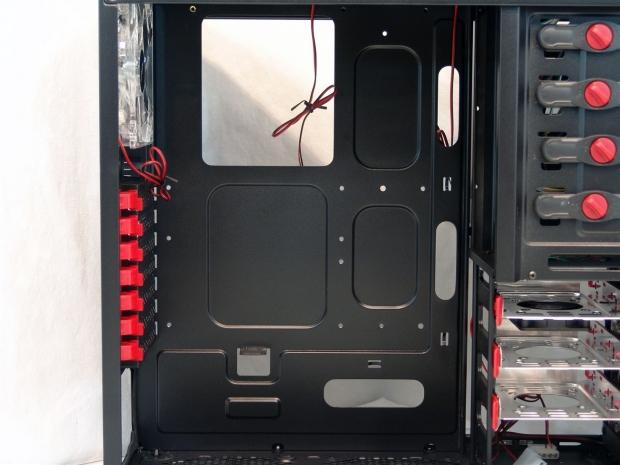
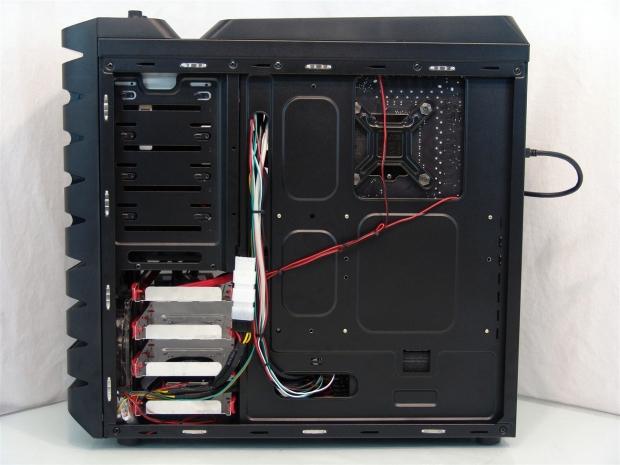
The tray offers room for Micro-ATX and ATX motherboards, has an access hole and three management holes for wiring. There are also only three places to tie wiring, but with the limited offset, there isn't much room behind this anyway.
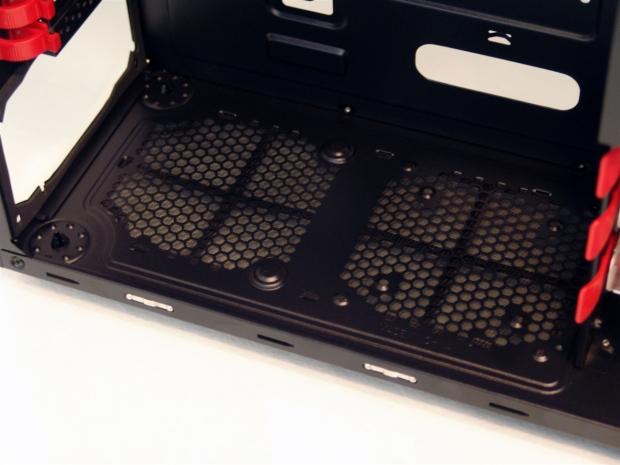
On the floor of the chassis there is a pair of rubber pads to support the front of the PSU. Mine is too long, but if you use a short PSU, you can use the 120mm fan hole, but the wiring may still cause issues.
In the back you will find another blue LED clear 120mm fan, also powered with a Molex connection. As for the latches that hold the expansion cards, they are capable to do what I needed and didn't leave me looking for a screw for better mounting.
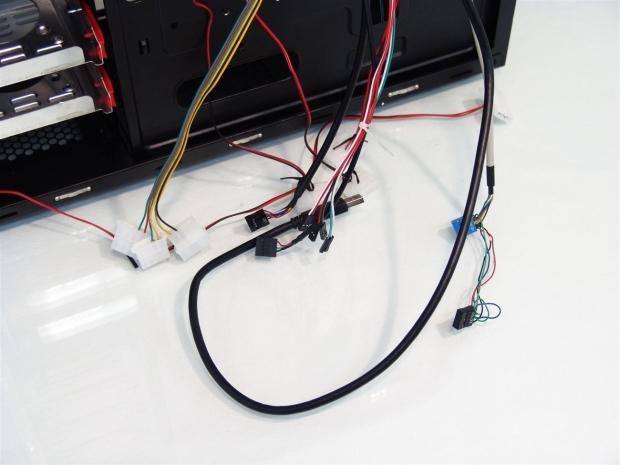
Again we get a rainbow of wiring to deal with, but at least most of the wires were long enough to hide. The HD Audio cable is too short though and requires you to droop it over the board to get to the header. Also the USB 3.0 cable needs to go to the back of the motherboard, so you definitely loose on of the holes in the back of the chassis for this.
You have to choose your battles carefully here. With only a 15mm offset, you need to be careful about bunching wires and how all of the Molex clips are lying, as it will easily cause issues replacing the panel.
Accessories and Documentation
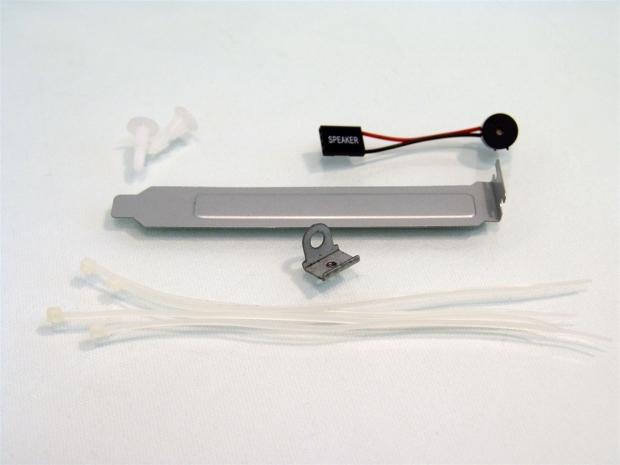
Digging into the hardware bag that was tied to the ODD bays you find, in this half, a pair of plastic motherboard risers for the bottom right corner of ATX boards, a speaker, a solid expansion slot cover, a lock loop and a set of five milky white zip ties.
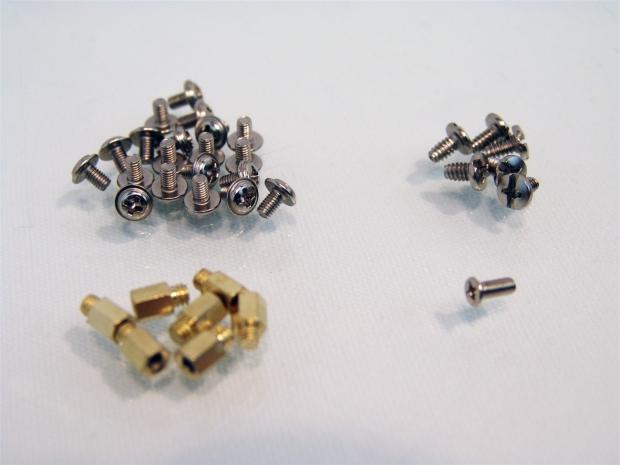
Also in the bag is the assortment seen here. There are 20 pan head screws for the motherboard and drive installations, six large head screws for the PSU and ODD bays, a set of seven risers, plus the one in the case and the plastic ones we just saw and a screw for the lock loop.
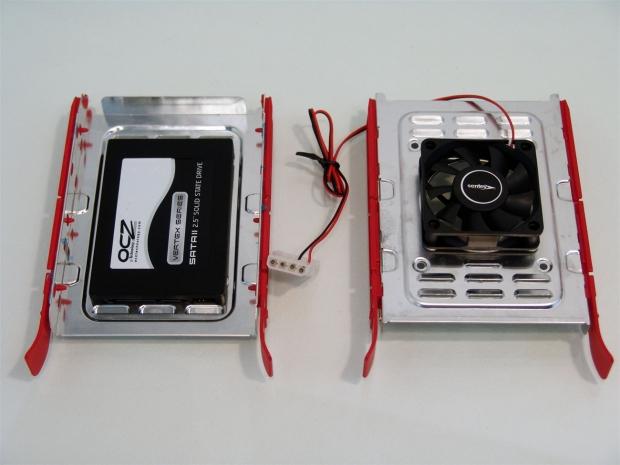
The hard drive tray will use the red plastic pins to line up with the side of a 3.5" drive and the connections will need to face this side. They do offer holes for a 2.5" drive, but you can see how far on the plate it is, causing connectivity issues. There is one tray with an 80mm fan attached to the underside to keep a mechanical drive as cool as possible. Because of the fan you can't use this in the bottom slot, but the holes in the case floor and all of these trays should allow some air to the fan anyway.
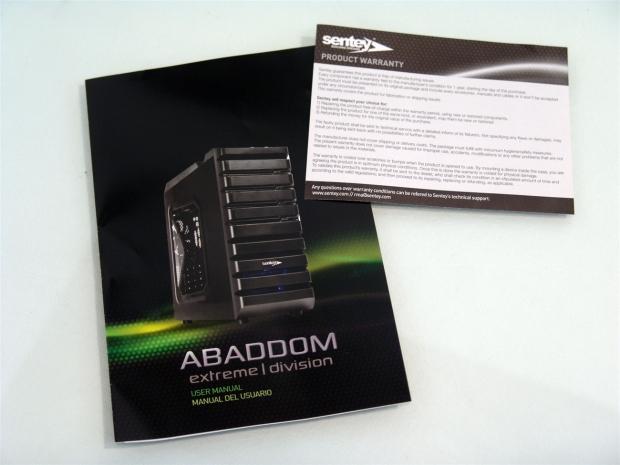
The user manual comes in a bag with the product warranty information card. This covers the terms and conditions of the one year parts and labor warranty with the GS-6070 II.
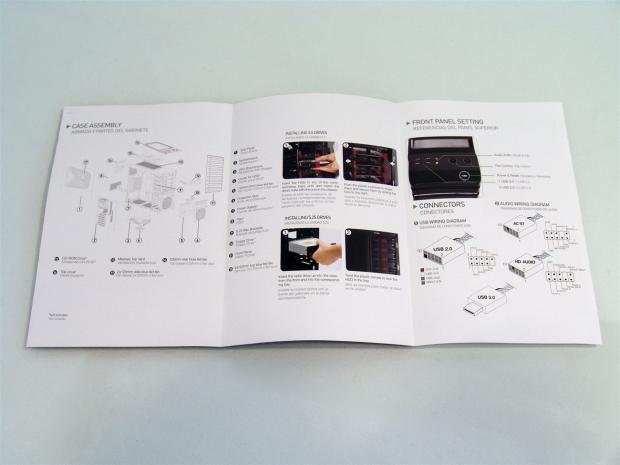
Inside of the tri-fold manual you get an exploded view of the chassis labeled for you to be able to see how it all goes together. Page two covers the 3.5" and 5.25" drive installations and page three covers the front I/O and offers a wiring diagram at the bottom.
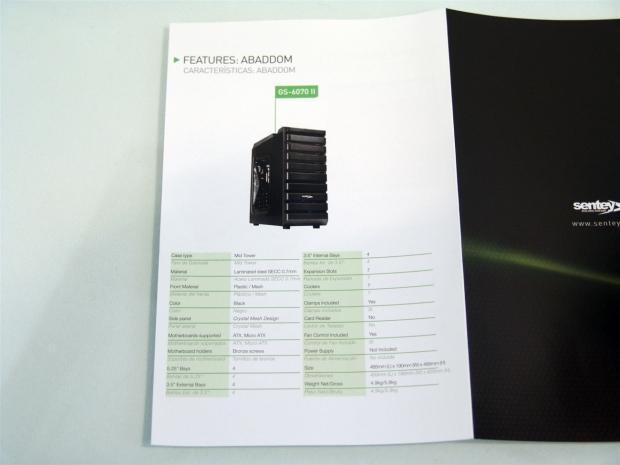
On the back on page four of the manual you get another look at the FS-6070 II Abaddom with yet another look at the chassis specifications.
The Build and Finished Product
Removing the front bezel is pretty easy and there are no wires attached to tie it down to the chassis. On the left you can now see the last of the blue LED 120mm fans in the intake of the chassis. On the right you can see the four ODD bay covers that are spring loaded, as well as the foam insert acting as a dust filter.
I removed the spring once I installed the DVD player so that the door would stay open to show the drive behind the bay cover. With the spring back in place the GS-6070 II looks exactly as it did when we first looked at it.
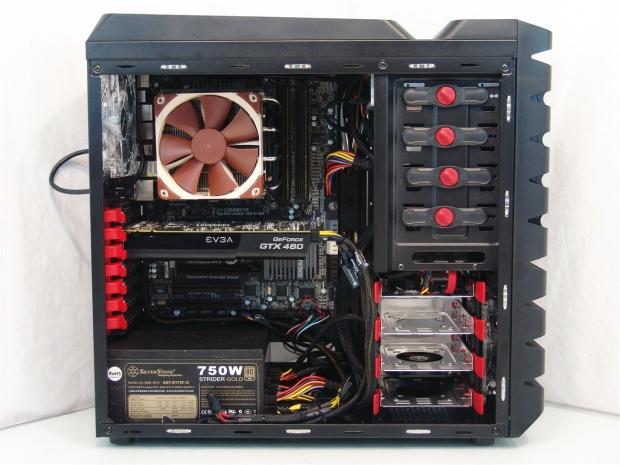
Everything eventually fit inside the chassis, but that isn't to say there wasn't a struggle. At the top, the fans sit right on top of the motherboard making the screw installation a pain. I could only use one screw in the SSD because it needed to flex up to be able to be powered and I couldn't fit my Radeon HD 7950.
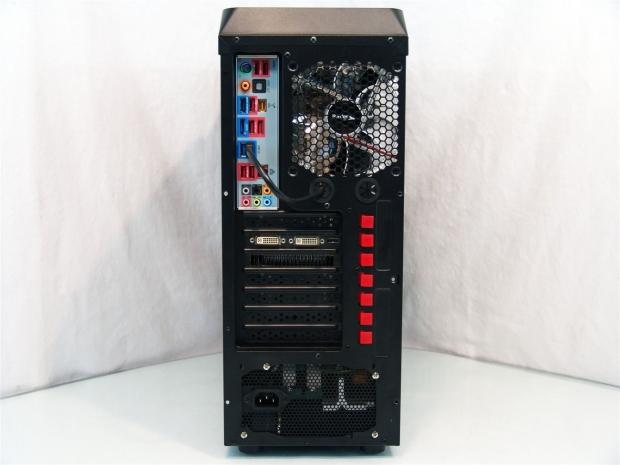
In the back there is nothing out of the ordinary to discuss except for the USB 3.0 cable. I get that the wholes are for water cooling and since they went so small with the diameter, why not make three so I can have water and USB 3.0?
I routed the fan wiring back here along with those from the front I/O panel. Even with the small bundle I have and the Molex connections near it, I had to be sure it was as flat as possible and the Molex plugs still rubbed on the inside of the door panel.
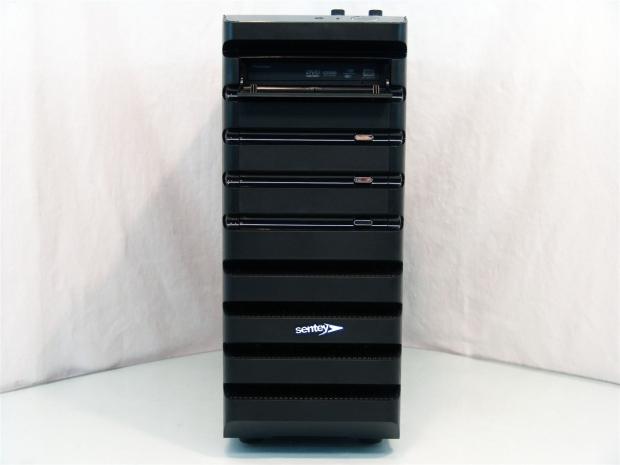
Now that the panels are back on, you really can't see any difference between the first image out of the box and this one which is fully built and ready for the power.
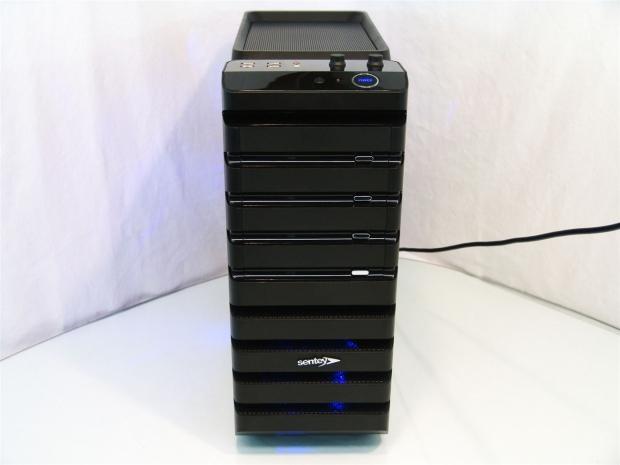
On the front of the GS-6070 II, once powered, there is a healthy glow of blue LED through the lower section of the front as well as the power button now illumination indicating the system does have power.
From this angle you can see the effect of all of the blue LED fans as they flood the interior and anything close to it with the glow of LEDs. The top is illuminated as well, but as much as I tried, the doubled mesh of the steel top of the case and the mesh on the plastic top blocks most of the light that would have otherwise passed through.
Final Thoughts
Even with somewhat limited space and the money saving tactics, they are small issues with this chassis. The GS-6070 II Abaddom isn't that far off the mark. While it does have plastic latches on the expansion slots, they do work. I don't like that the expansion slots are break-away and not replaceable, but again, just make sure you pull the right covers if you are really worried. I also would rather have gotten a Native USB 3.0 connection and a longer HD Audio cable, but they do work and are able to connect.
What I really like that made me overlook a few of these things is two things. Aesthetics, as this is one of the better looking chassis that Sentey has sent me and the second is the pricing and value in that price. Compared to the Game Tiger we just looked at, at least the Sentey covers all of the fan holes in the case but one and also delivers quite the LED light show once it is powered, unlike the lame effects that didn't work on the Xniper. Attention to detail is what I always end up saying will make or break a chassis and while a few things aren't the greatest, at least they offer a solution and cover all the basics.
Speaking of the fans and furthermore, the fan controllers. I was really pleased with this part of the chassis. With seven fans running full blast in the chassis along with the fan on the video card, the chassis is really silent. The fan controller only covers two fans in the chassis, but you get to choose which, as long as they are Molex powered like the ones around the chassis. I chose to connect the HDD fan and the front fan for testing purposes and the reaction from the fans to the dial is fast and accurate. In the build you've just seen, I would not have been able to install a 120mm or an 80mm fan on the floor due to the length of the PSU. Furthermore, even with a shorter PSU installed, the wiring would still interfere with the fan as this is really the only place to route extra wiring and make the connection to the PSU from all of the various components.
For me, the chassis is a little too small for my needs, I look to fit full length video cards in a case and I prefer cases that have better wire management options. For those new to the game of case building or if you are building a machine with special limitations, but still want a classy looking case to fill that void, Sentey offers you quite a bit for the price. Considering the current $74.99, delivered to your door pricing, the GS-6070-II is worth the investment. As I said adding to the value for me is the bright glow of LEDs that everyone wants at some point and the sheer number of fans that provide more than sufficient amounts of airflow to help compensate for the lack of space.
If you meet any of those requirements or you just fell in love with the looks as you read this, by all means pull out your wallet and shell out for this case. After reading this you have the full scoop and there should be no surprises when yours arrives at your door.
 NZXT H6 RGB+ Compact Dual-Chamber Chassis Review
 Lian Li HYDROSHIFT II 360P OLED Curved Liquid CPU Cooler Review
 ID-Cooling FROZN A620 SLK CPU Cooler Review
 GAMDIAS Atlas P6 CG Dual Chamber Mid-Tower Chassis Review
 SAMA S50 Mid-Tower Chassis Review
 Intel's Nova Lake-S LGA1954 socket will reportedly support CPUs beyond 'Razor Lake', per new leak
 GIGABYTE unveils a pair of B850 motherboards with backside connectors, bringing cable-stealth to a lower price point
 Remedy's Control Resonant launches into a packed September lineup, PS5 gets exclusive 2-day early access
 Intel introduces Xeon 7 'Diamond Rapids' CPU lineup, built on the 18A-P process node
 New Onimusha Way of the Sword gets late-September release date, playable demo now live on PS5
 ASUS demos RTX 5090 with 16-pin connector running on a 48V system at Computex, GPU can push 1000W through a single cable
 Ocypus unveils new AIO cooling solutions at Computex 2026 that can physically move
 ASRock showcases next-gen GPU design at Computex 2026, and it could be for RDNA 5
 Levelplay's Newtro liquid cooler adds a turnable fan speed knob to your PC
 be quiet! teases next-gen Pure Base 803 and Pure Base 803 LX cases
 Razer Pro Type Ergo Wireless Split Ergonomic Keyboard Review - Built for Comfort and Support
 ASUS ROG Strix Morph 96 Wireless Gaming Keyboard Review - Great Performance, More Affordable
 SAPPHIRE Radeon RX 9070 GRE PULSE OC Review - A New 1440p Challenger Has Arrived
 ASRock Radeon RX 9070 GRE Steel Legend Review - The RDNA 4 Mid-Range Reshuffle
 ASRock Z890 Taichi Aqua Motherboard Review - Flagship features without the flagship price
 GIGABYTE Z890I AORUS Ultra Motherboard Review - Mini-ITX with surprisingly good thermals
 Seagate FireCuda X1070 4TB SSD Review - A New Mainstream Contender
 Phison E37T SSD Controller Exclusive Preview - The Fastest DRAMless SSD Platform Yet
 USB Ports Not Working in Windows 11? Try These Fixes
 ASUS WiFi Routers and Networking Solutions Deliver Long-term Security and Reliability with No Additional Cost
 Second Monitor Not Detected in Windows 11? Try These Fixes
 Turn Your Old Smartphone Into a Dedicated Webcam for Your Windows PC
 The Send To menu is the right-click feature on Windows 11 that nobody bothers to customize
 Windows 11 will not let you pin a folder to the taskbar, but a 30-second workaround does
 ASUS ProArt Displays Unlock Creativity with Professional Monitors for Everyone
 What Happens If You Don't Activate Windows 11? 5 Downsides Explained
 Fast Internet on Your Phone but Slow on Your PC? Try These Fixes