Introduction
Digging into the history of where this new chassis received its name, I found that there were actually two of these buildings. Here comes a bit of history! The original building was erected under a commission from Marcus Agrippa as a temple to Mars and Venus in 27 BC, but was burned down in 80 AD, and again in 110AD by lightning. Some years later, Emperor Hadrian commissioned the building which we see today. The new temple construction was to now worship all the gods of ancient Rome. The building is of course the Pantheon which has stood the test of time for near two whole centuries.
The history of the continual burning and damage to the building play into this review in an odd way, so I will continue on the path that the Pantheon name might still be guarded by these Roman gods. The package I received from Xigmatek looks like it had the wrath of something inflicted on it during shipping; I can only hope at this point that the chassis inside is in fair enough condition to show you what the chassis offers.
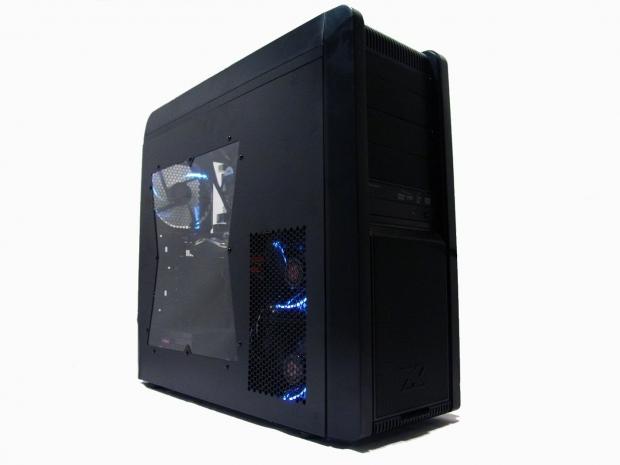
Speaking of what the chassis has to offer, The Pantheon mid tower chassis shows intriguing designs and what appears to be a very good feature set. With the mane of this chassis being Pantheon, I find it slightly odd that such a vast building spawned inspiration for a mid tower build. I assume that with this name there is a vast amount of room in the interior, and with the completed product, it should appear clean and simplistic. Xigmatek has quite a history of great bang for the buck products up to this point, but they don't have the two centuries of the name sake, but I will see if this is not only the case to fit my criteria, but will this chassis stand the test of time?
Specifications, Availability and Pricing
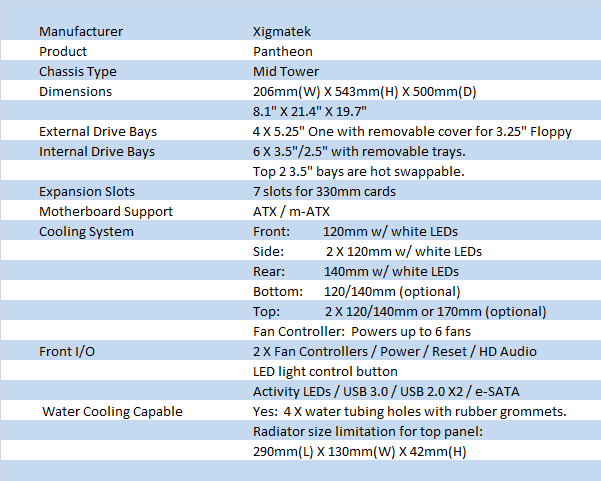
As I addressed, the Pantheon is a mid tower chassis and is built from steel with ABS plastic trim. Externally there is a lot of steel mesh with a foam liner acting as a dust cover on the front. The bottom of this removes to allow access to the hard drives from outside the chassis to utilize the pair of hot swappable drive bays. On the top there is more mesh, but this time it covers a well for either fans or it even has room for a double 120mm or 140mm radiator. There is an option with this chassis; you can opt for an all steel door panel with mesh over the CPU and GPU area which can have optional fans installed. The version we are looking at has the "X" shaped window installed. Both chassis designs allow for the hard drive fans to draw through this panel and exit a similar vented area on the other side of both chassis.
Internally there are options galore. Down the front you get four 5.25" drive bays with tool-free locks on both sides. These "screw type" locks are some of the strongest I have seen built of plastic, and do leave the drive in a very secured mounted position. Below you will find the six 3.5" or 2.5" hard drive trays. Once the panel is removed from the front bezel, these trays slide out the front of the chassis. The top two drives are set up inside to allow for hot swappable drive bays with the addition of hardware that can stay connected on the rear of the drive rack. The motherboard tray will accept both ATX and m-ATX motherboards and has a very large CPU cooler access hole. Around the edges you will find both a few wire tie points punched into the tray, and wire management holes with rubber grommets.
From Xigmatek there are only three fans installed in the chassis, but they do leave a ton of options above those three. The front uses a pair of 120mm fans stacked on top of each other to introduce air to the hard drive trays. That air is free to flow out the opposing door panel, while a fraction actually enters the motherboard area. The rear of the chassis is what draws in most of the air to the chassis as this 140mm fan exhausts air out the back of the chassis. Optionally you can add a 120mm or 140mm fan to the floor in front of the power supply. They also made a cavity in the roof of the chassis. You can either set the fans in this well, or even a radiator if you should choose to. In this well you can put two 120mm fans, two 140mm fans, or a 170mm fan. As for the radiator, you can fit in a double 120mm or a double 140mm radiator as long as its outer dimensions are within the specs on the chart. Xigmatek incorporated four holes in the rear of the chassis to pass the tubing through, as well as a pair of holes in the plastic top to get the tubes to the radiator cleanly.
For all of my readers in the US, you are going to have to wait just a bit until this chassis makes it to the States. I was able to track down one e-tailer listing the chassis, a place called Cenfonix, which I have never used or even heard of until now. They are listing the chassis at 121.49 with the window, and $107.84 without the window. For those who are one the opposing sides of either ocean, you selection of retailers is greater, and I see 3 pages of hits from Google. UK with prices as low as £51 for the non-windowed version and as high as £105.57, so as always look for the best deal you can find in your region. For relevance to this article I will base the bang for the buck, and its feature set off of the US pricing.
Packaging
The Packaging
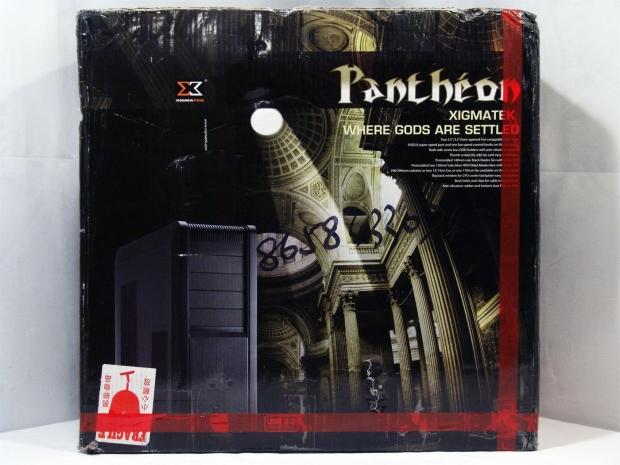
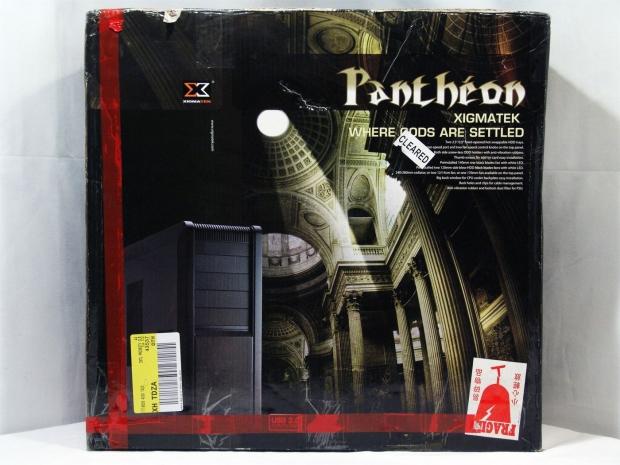
The Pantheon ships in a packaging that shows both the Pantheon the chassis overlayed over the Pantheon the building. This is also a view of the non-windowed version.
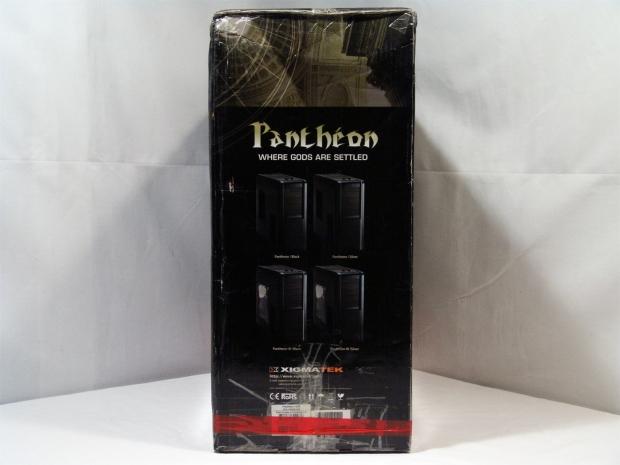
This side shows that there are actually a total of four versions of this chassis. There is a black or a silver option to both the windowed and non-windowed versions for this chassis.
The large rear panel mirrors that which we saw on the front.
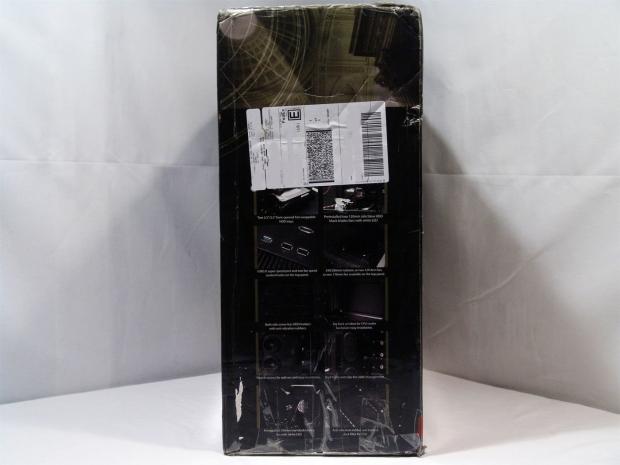
Besides the large Fed Ex sticker, this side displays ten key features of the Pantheon chassis.
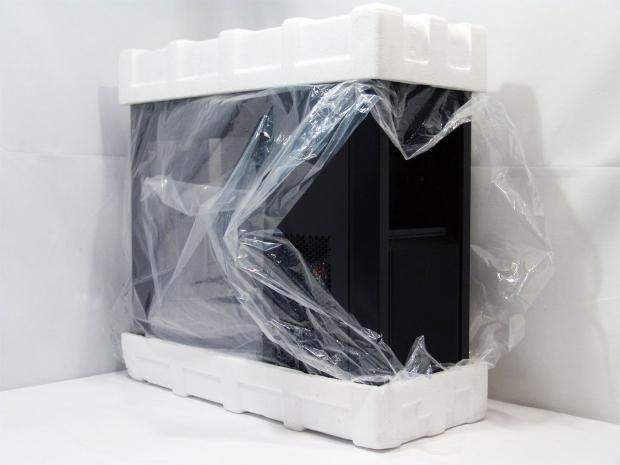
Removing the box, I found a strangely packed chassis inside. Not only were the Styrofoam caps broken, the front bay covers are knocked out as well. The odd thing is that this is the first case I have seen with the bag oriented this way.
The Xigmatek Pantheon Mid Tower Case
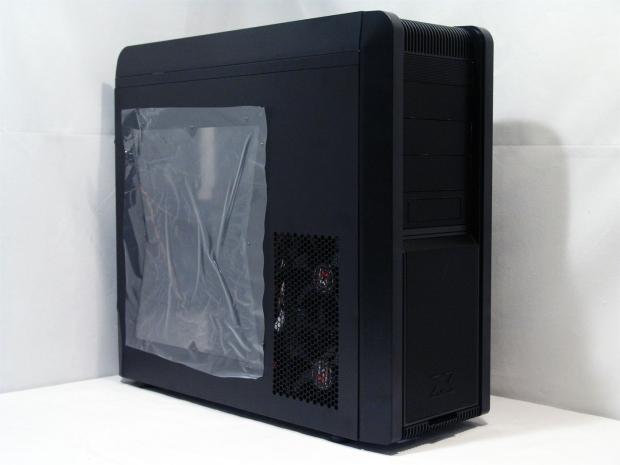
With all the packing now gone, I am glad to see that the window also comes protected with a static cling plastic sheet on this side, and more of a film that needs peeled on the inside.
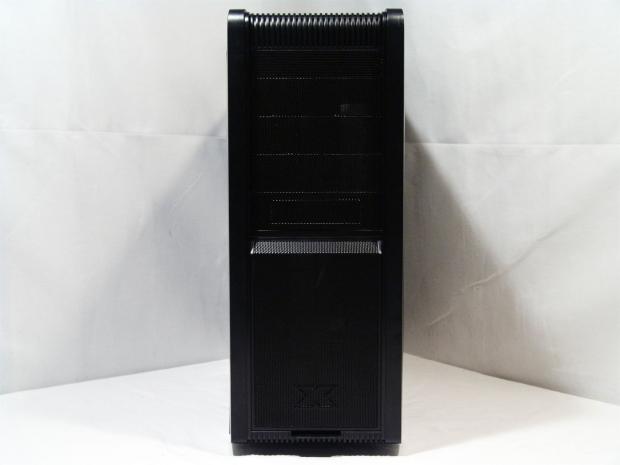
The front of the Pantheon has a smooth and rounded "feel" to it. The top holds four mesh bay covers, the bottom of which will adapt to house a floppy drive. Below is a large ventilated mesh panel. The large tab at the bottom gets tugged and the panel can be removed for hard drive access.
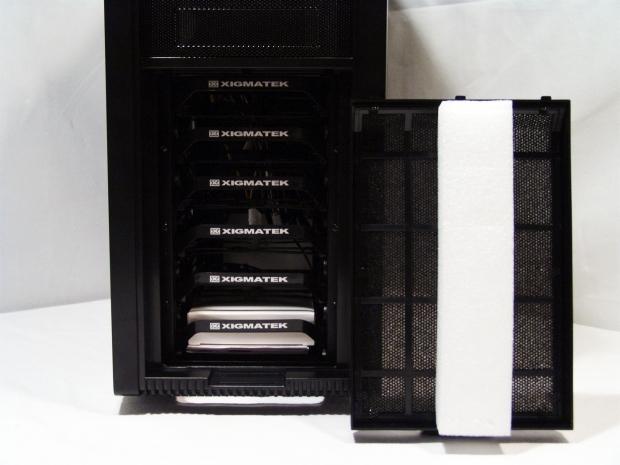
There is a large foam block behind the panel to keep the tray in place during transit; you should remove this. In the bays you can see the six trays for the hard drives. The bottom tray has the hardware box set in with the same pins through the box that will hold the 3.5" drives in place.
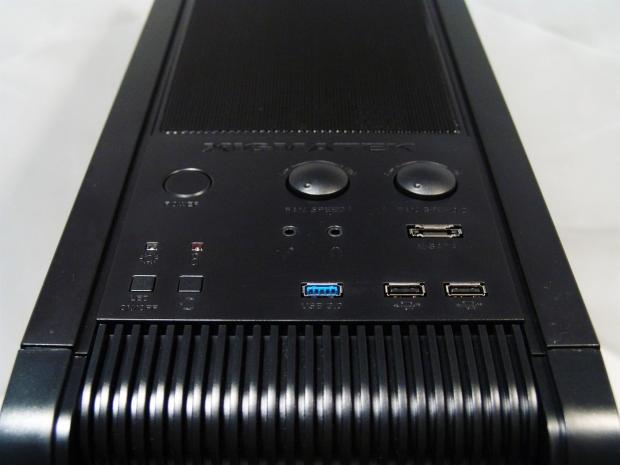
The front I/O has everything you need - USB 3.0, audio jacks, LED lighting control, and even two fan controllers capable of powering up to six fans; three each.
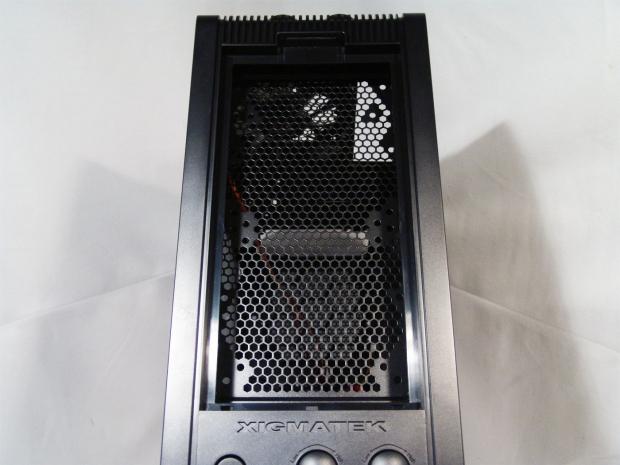
Just under the mesh you saw behind the I/O panel you saw in the last image is this well for fan-s or a radiator. The panel covering this simply lifts up and removes easily. In here you can house a pair of either 120mm or 140mm fans or a dual radiator for either 120 or 140mm.
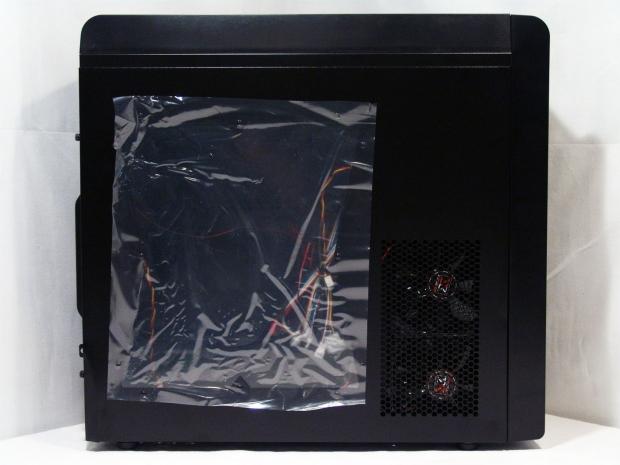
The left panel has of course the large window which I haven't peeled the plastic from yet, but also has a large ventilated area near the front. This opening is backed with a pair of 120mm fans that are used for both the intake for the chassis and the direct cooling of the hard drive bays.
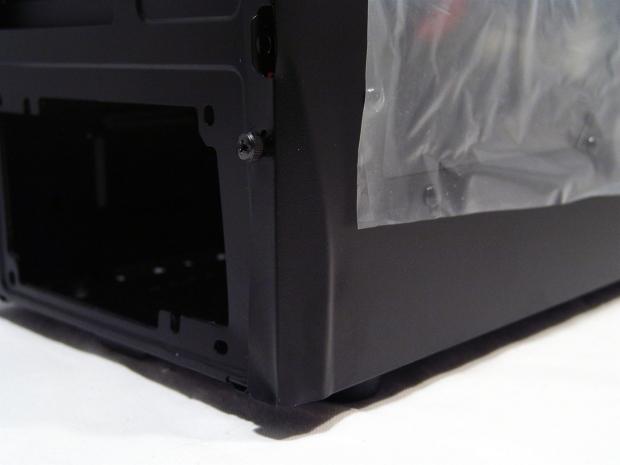
Here is where the gods have smote my chassis. Not only did the box get trashed and the foam broken, but it seems my chassis may have fallen from the roof of the Pantheon. This folding of the door panel continued into the frame of the chassis and distorted it pretty good.
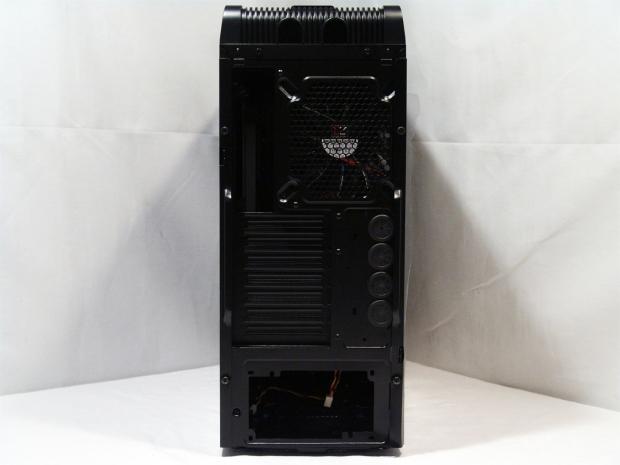
The rear of the chassis shows the two holes in the plastic top and the quartet of holes down the right side for water cooling. There is a 140mm fan for exhausting the chassis and seven expansion slots all above the bottom mounted power supply.
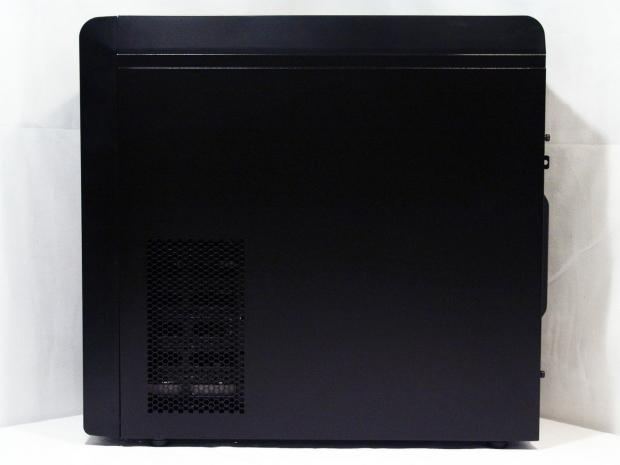
The right side panel is pretty plain except for the matching vented area we saw on the other side. This will allow the pair of fans on the reverse to flow across the drives and right out of this side of the chassis.
Inside The Xigmatek Pantheon Mid Tower Case
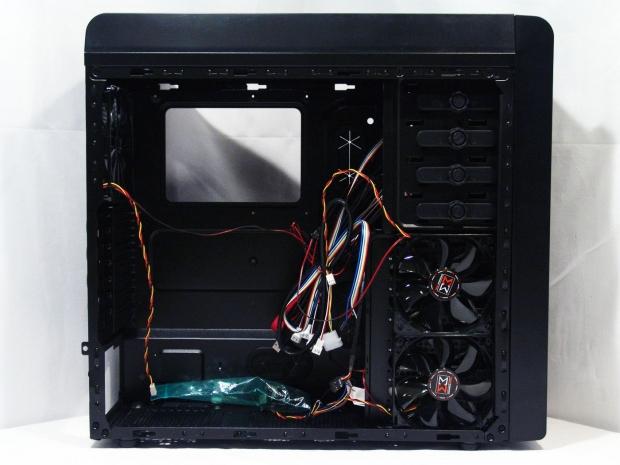
The wiring inside the chassis pretty much stayed in place, but the bag of hardware exited the box during the jolt the chassis took. In this instance it's a good thing the inside of the window was protected.
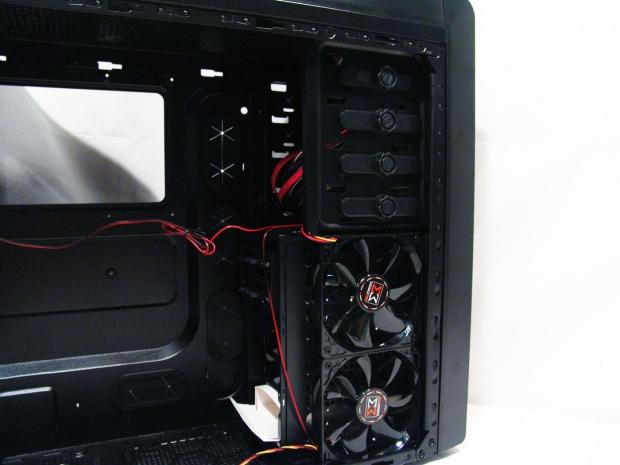
The front of the chassis has the screw type tool-free mechanisms for the optical bays. These work as a screw would, lefty loosey, righty tighty. Under the optical bays you run into the pair of translucent black fans that have white LEDs in them.
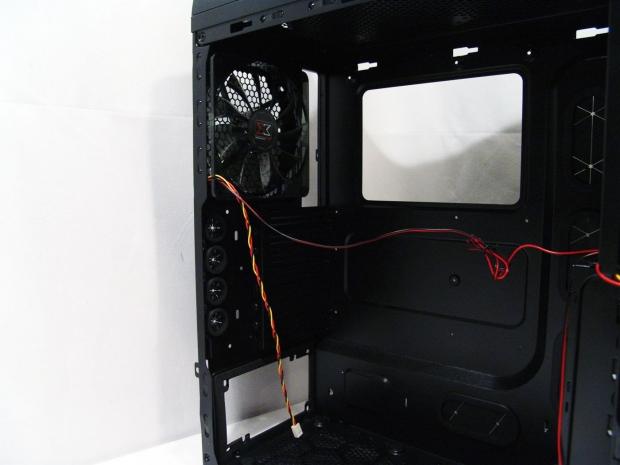
The motherboard tray is pretty straight forward and even labeled for both ATX and m-ATX riser placement. There are four wire management holes around the board, and the large hole in the top for access to CPU back plates. In the rear of the chassis you can see the 140mm exhaust fan that matches the other two in looks and white LEDs.
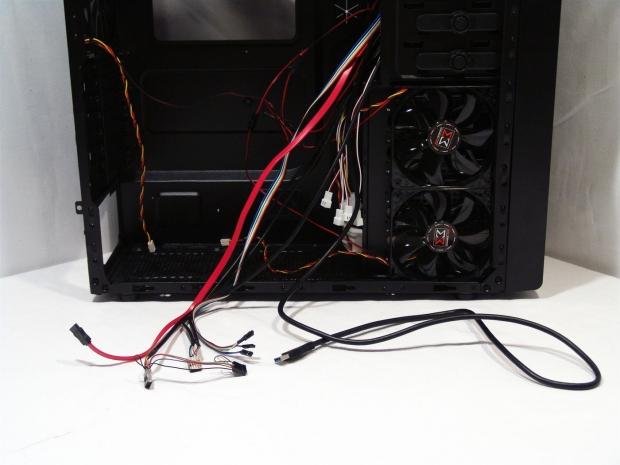
The fan controller wiring in the background is a fair bit shorter than the rest of the wiring, but is plenty to get power to any fan in the chassis. The bulk of the wiring containing things like the power and USB connections are a good length as well. The USB 3.0 cable is super long and will allow it to go anywhere you want to run it.
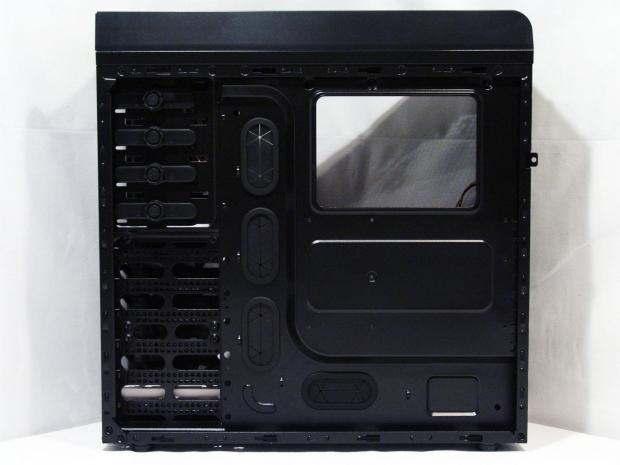
There is a fair bit of room behind the tray to run even the fattest 24-pin cable. For the bulk of extra wires for those who don't have a modular PSU will have to be confined to the larger area beside the hard drive bays.
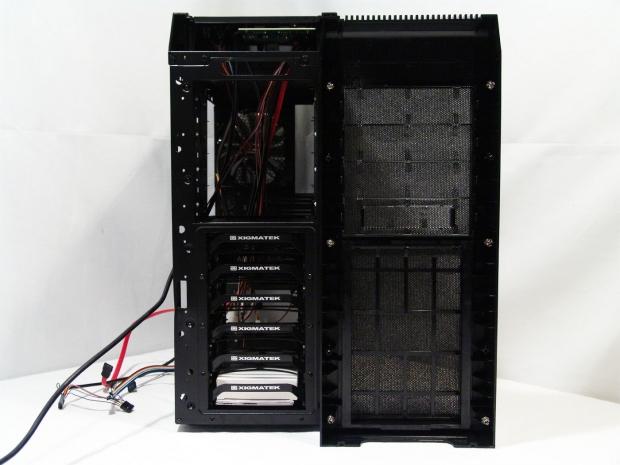
The entire front bezel does come off with just a gentle pull and allows you to have full access to both the drive bays and it allows you to pull the appropriate bay covers at this time.
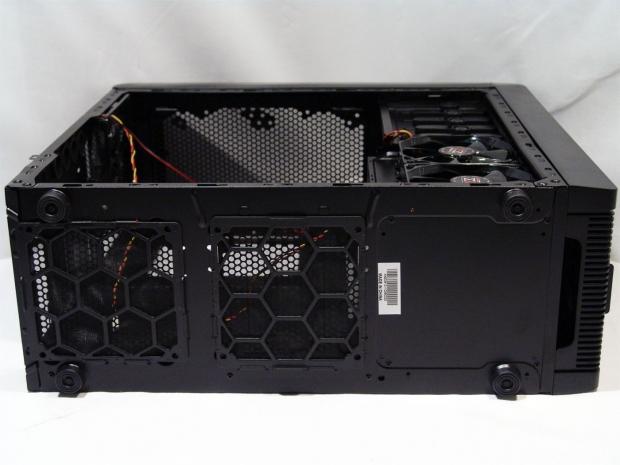
Under the chassis there are two removable dust filters that cover both the power supply access to cool air, but it also covers the optional fan hole in front of it. While they are a bit tricky to remove without laying the chassis over, I feel it's better to have them there, then not at all.
Accessories and Documentation
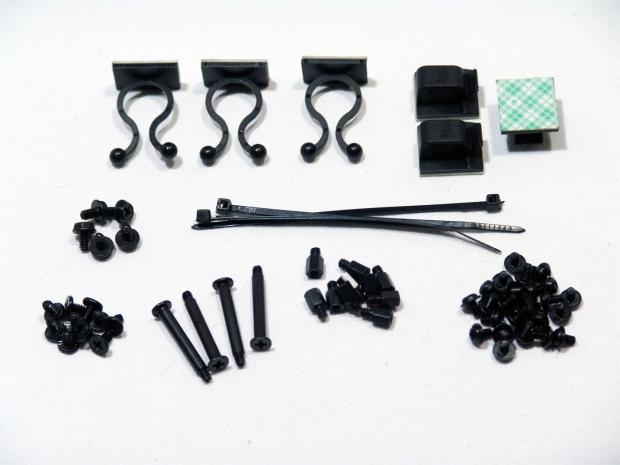
In the green bag that ships in the hardware box you will find this great assortment of hardware. Six wire management clips, a trio of zip ties and an assortment of screws for the motherboard, drives, and even four longer ones for adding an optional fan.
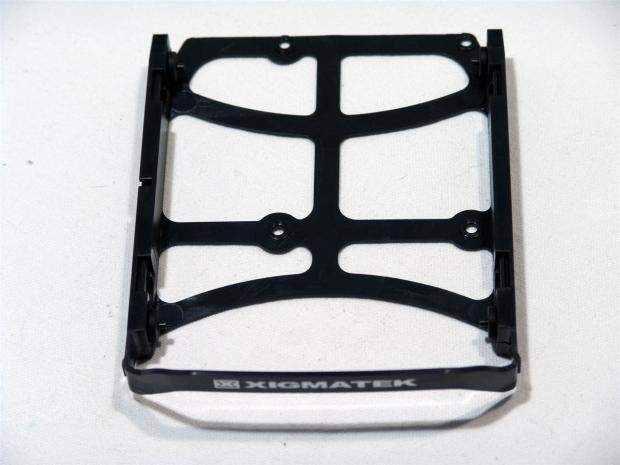
The 3.5" hard drive trays will also work with any 2.5" drive via the four holes in the floor of each tray. For 3.5" drives, the tabs on the sides lock them in place.
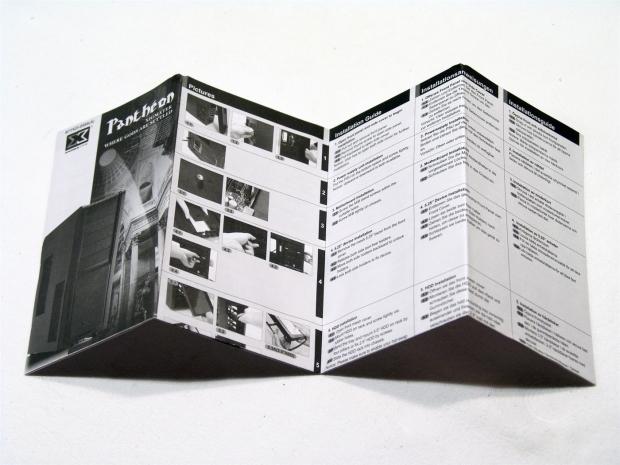
The instruction manual is shipped under the hardware box in the bottom tray. While it holds a lot of information, there were some important aspects I found myself having to work out on my own.
The Build and Finished Product
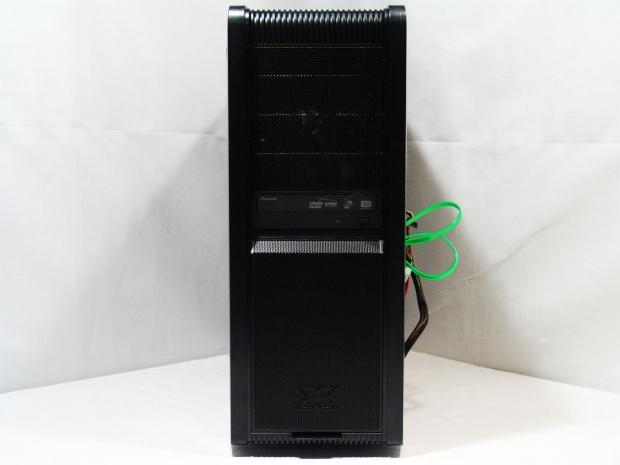
To keep things clean inside I installed the optical drive lower in the chassis, but even with it in there, the solid black of the front is only slightly interrupted and keeps its sleek look.
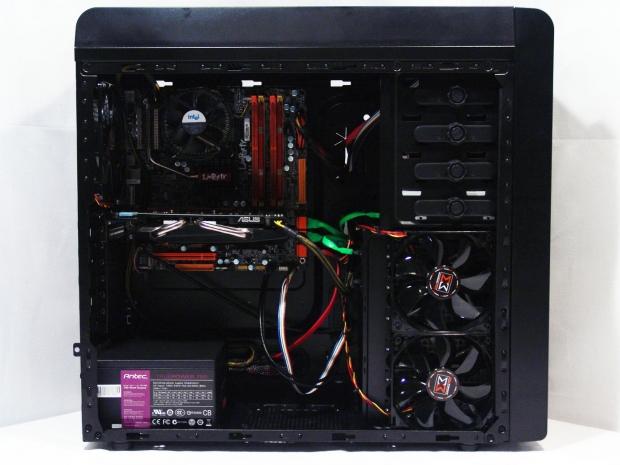
I used an m-ATX board for this build, but there would be no issues getting a full ATX board in here. One thing you will have to watch out for is the longer GPU's. While they may actually fit, the wiring to the drives and the power placement on some cards will cause issues on the right side.
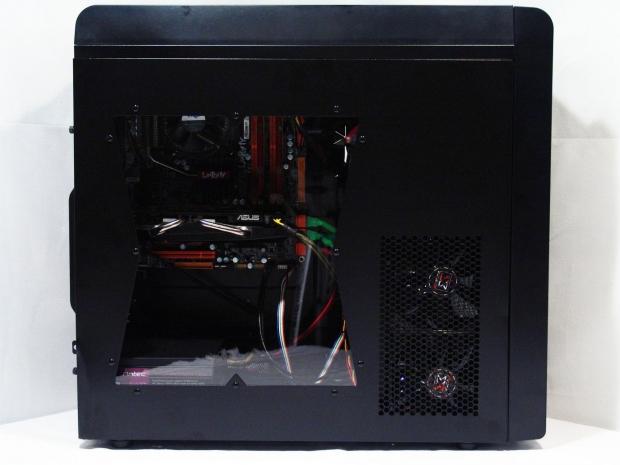
With the hardware in and the door back in place, you can see that the "X" shaped window gives you a good view of the hardware. I like seeing that case manufacturers actually care what the window shows, and we don't have to look at our hard drives and all the wiring.
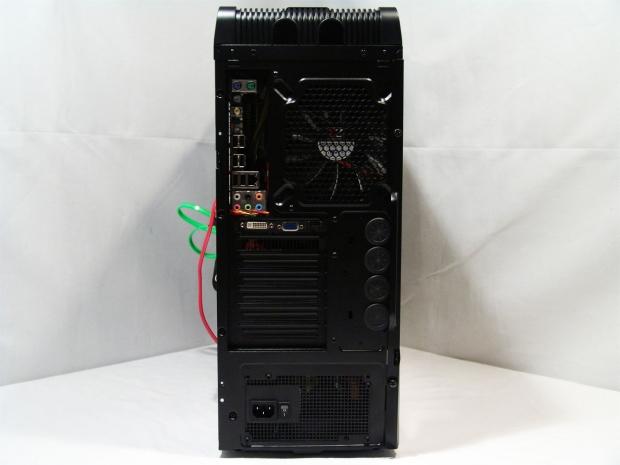
The rear of the chassis filled out nicely. One thing to point out is that the hit the case took actually made installing the PSU quite a challenge. I am pleased to say that once I screwed in the PSU, the case corner did straighten up and "squared" the case a fair bit from the off kilter corner I saw when I opened the box.
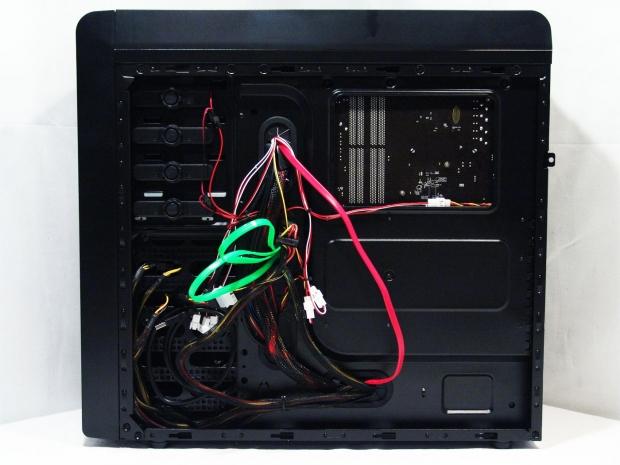
I piled the wiring on thick, and to be honest with the limited holes in the tray I was only left with this option. I am pleased to say that even with this mess, the door panel slid on as if the chassis had nothing behind the tray anyways. The amount of room here is very deceptive.
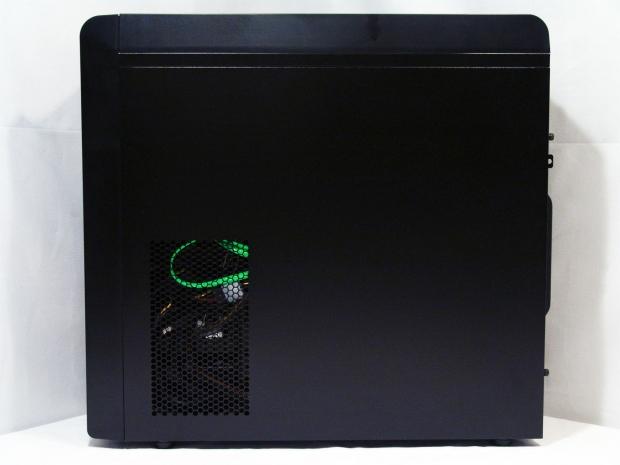
With the panel back in place you can see that you don't want to intrude on the area next to the hard drives all that much. The more you block off this area, the warmer the hard drives are going to run. A bonus to blocking this hole is that it may force more air from that pair of fans to actually deliver it into the main body of the chassis.
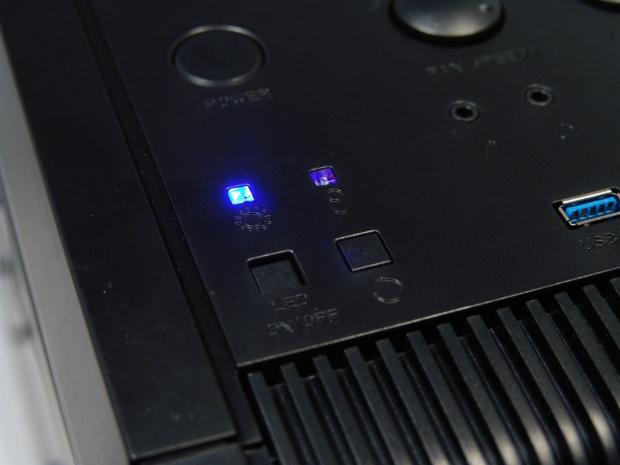
Besides the lights on the trio of fans, the only LED lighting left is the power indicator in blue, and the indicator to the right for hard drive activity, which lights up in red.
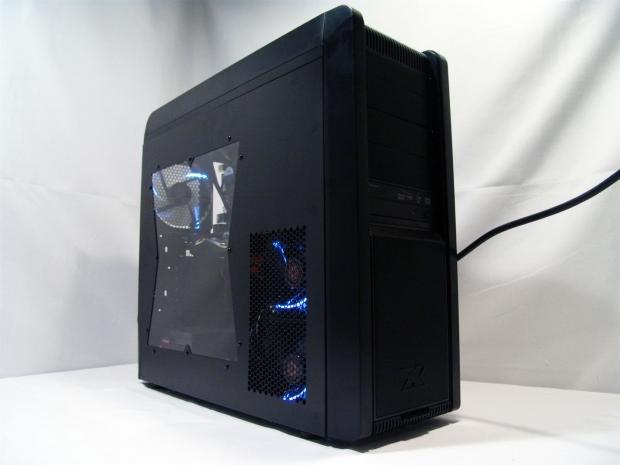
Stepping back to take it all in the glow of white LEDs; it does make for a very attractive finished product. Even so, if you are trying to sleep or watch a movie, you simply click the switch and turn off the LED's all together.
Final Thoughts
So after all the smiting my chassis took, the Pantheon still delivered a full feature set along with simple and sleek styling and the addition of some really cool ideas. Hot swappable bays have been done, and access through the front of the chassis for them has also been done, it's just that Xigmatek took a slightly different approach to it. The intake to the chassis is definitely something that I don't normally see, and the well at the top for fans and a radiator is a very cool trick I see made its way over from the Utgard. All of these combined with USB 3.0 connectivity and plenty of options for wiring and water cooling routing, and I find the Pantheon is well appointed for the near $120 US dollar pricing.
Now I did run into the obvious damage outside the chassis, but to speak a bit for the quality of the chassis, even though it looked like it took a solid blow from an eight pound sledge hammer, it still functioned and allowed me to do a completed review. My only issue is that the name Pantheon to me describes a very spacious place made from aged stones that all have taken on a similar color over the centuries of existence. I sort of expected all of the same in the chassis. I wish that companies would go the extra step and not allow a rainbow assortment of wire colors, and this chassis, in my mind, should have been a full tower or bigger. The naming just doesn't strike me as very fitting for this understated and smaller chassis.
Even with my personal issues with the chassis and the huge hit the case took during shipping, I still like what the Pantheon brought to the table. Not only the list of things I have already mentioned, there is also the option of a window or not, and silver coloration or black, the Pantheon seems like it just keeps on giving. The dual fan controller is very handy for zoned cooling and getting the performance to noise ratio just right. What I did find is that with the placement of the fans as shipped, the airflow inside was a bit lacking, but nothing a couple of extra fans wouldn't have fixed. So for the $120 USD pricing, or the much better pricing over the pond of around £70-75 for the same windowed Pantheon I am showing you, I really think the chassis is well worth its asking price, provided you get one in good shape. I won't be detracting much for the damage as I know this sort of thing can happen from time to time.



 United
States: Find other tech and computer products like this
over at
  United
Kingdom: Find other tech and computer products like this
over at
  Australia:
Find other tech and computer products like this over at
  Canada:
Find other tech and computer products like this over at
  Deutschland:
Finde andere Technik- und Computerprodukte wie dieses auf