












Our Verdict
Pros
- Value
- Performance
- Modularity
- Build quality
Cons
- Long GPUs prevent front fan installation
Should you buy it?
Introduction, Specifications, and Pricing
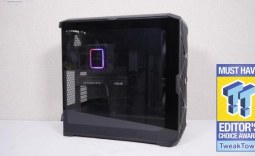
The new Cooler Master Q300L V3 brings the next evolution of mATX cases from Cooler Master, offering improved airflow and hardware support for smaller form factor PC builders when compared to the V1 and V2 versions of this case. The Q300 V3 is essentially the Cooler Master QUBE 340, but it removes the carry handles while retaining all the functionality of the FreeForm 2.0 platform. This approach lets users customize their case under Cooler Master's open design philosophy, with the Q300L V3 using the same mounting hole pattern as the QUBE 540 and the QUBE 500 Flatpack, so compatible QUBE accessories fit these newer cases.
Priced at just $45, the Q300L V3 offers a compact case for entry-to-mid-range configurations, includes a 140mm rear exhaust fan, and lets you access and 3D-print a growing range of accessories from Printables.com. The Q300L V3 provides a blank canvas to upgrade over time, with modular panels and accessories to customize the experience, plus flexible I/O placement with mounting on either the front or top of the case. Cooler Master doesn't stop there, though, as the Q300L V3 can also be laid flat for an HTPC style, or when vertical height is at a premium. Both black and white versions are available, with or without ARGB (region-dependent), so if you want a compact, airflow-oriented, modular case, the Q300L V3 might be what you're after. To tell you whether it's worth buying, we need to take a look, so let's get started.
| Item | Details |
|---|---|
| Model | Cooler Master Q300L V3 |
| Form Factor | Compact micro-ATX |
| Dimensions | 386.1mm x 230mm x 388.5mm |
| Weight | N/A |
| Materials | SGCC / TG / Mesh |
| Color | Black or White |
| Motherboard support | Mini-ITX / Micro-ATX |
| BTF Motherboard Support | No |
| Cooling Compatibility | Top: 2x120mm or 2x140mm or 120mm/240mm Radiator I Front: Top: 2x120mm or 2x140mm or 120mm/240mm Radiator I Rear: 1x 120mm or 1x 140mm (Included) I Bottom: x 120mm or 1x 140mm |
| ARGB / FAN Hub | No |
| Drive Support | 1x 3.5" Up to 4x ".5" |
| Front I/O | Power, 2x USB Type-A, 1x USB Type-C, 1x 3.5mm Combo Audio |
| CPU cooler height (max.) | 178mm |
| PSU Length (max.) | 200mm |
| GPU Card Length (max.) | 366mm |
| Warranty | 2 years |
Packaging

The Q300L V3 ships in a brown cardboard box with purple printed detail. The front shows the Cooler Master logo and model at the top, while the bottom left shows which version of the case I have for testing. Finally, a large image of the case takes up most of the front.


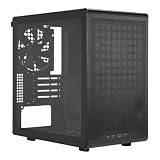
Best Deals: Cooler Master Q300L V3 Micro-ATX PC Case
Prices last scanned 18 hours and 4 minutes ago


The back shows another large image of the case, while both sides provide more details on the case specifications and QR code links to the Cooler Master website and product registration.

After removing the case from the packaging, Cooler Master used bubble wrap instead of a standard plastic bag to keep the case safe and dust-free, with a cardboard egg crate protecting the top, bottom, and corners. I like the egg crate approach, with cardboard offering much better eco-friendly packaging than foam.
Outside the Cooler Master Q300L V3

With all the packaging removed, I have the standard black, non-ARGB version of the case for testing. I'll note that the region dependency for ARGB options applies to North America, with only base-model black or white variants offered; this helps keep the price low and competitive, and as close to the Q330L V1 retail price as possible for consumers. The Q300L V3 measures 386.1mm x 230mm x 388.5mm (LxWxH), and provides 32.17l of capacity. As with the QUBE 340, Cooler Master offers a two-year warranty on this case.

The top of the case features a full-coverage, fine-mesh magnetic dust filter sheet that is easy to remove. Pulling the sheet off reveals the hole pattern and ventilation for the top of the case, where you can install either two 120mm or two 140mm fans, along with radiator/AIO support. You'll notice the long cutouts at the front and back of the panel; this is where the front-mounted I/O can be moved, so depending on your setup, it can provide easier access to the ports and power button.
Our Latest Small Form Factor Cases Review Coverage


The front is similar to the top, but it shows the included I/O at the bottom. Depending on where you want to position the I/O, the top and front magnetic filters are interchangeable, as the front includes a cutout for the I/O to pass through. Removing and repositioning the ports is as easy as removing two screws, rerouting the internal cables, and installing the panel in its new position. Cooler Master provides a centrally placed power button, two USB 3.2 Gen1 Type-A ports, a single USB 3.2 Gen 2x2 Type-C, and a combo 3.5mm audio jack. As with the top, you can install two 120mm or 140mm fans at the front, and it also supports a 120mm or 240mm radiator/AIO.

Frequently Asked Questions
Open a question for an answer from TweakTown's coverage of this review, or ask your own below.
How much GPU clearance is left if you install a front fan or a front radiator in the Q300L V3?
Can the Q300L V3 fit a 240mm AIO on the top and front at the same time?
How does moving the front I/O to the top affect cable routing and dust filter placement?
What 3D-printable accessories are available for the Q300L V3 on Printables.com?
Have a question about this content not listed here? Ask below and TweakBot will answer it.



The SGCC rear panel is very plain, apart from rubber cups with a screw in each. These act as securing screws for the panel, but also as case feet if you go for the HTPC-style setup. Here, you can also see the clearance to the floor provided by the case feet, around 20mm.

The rear layout is clean and simple; to the left of the motherboard I/O cutout, there is 30 mm of internal space for cable management. On the right, the preinstalled 140mm fan is visible, with the option to swap it for a 120mm fan if you wish. Below are four PCIe slots with a cover over the mounting screws, and the power supply opening is at the bottom. The PSU is installed from within the case, but it includes a bracket with four screws that attach it to the main frame.


Underneath, we again have a full-coverage dust filter, meaning all intakes are protected around this case to keep the system clean. Here, though, you will have to tip the case over for access and cleaning, as the filter is cut around the feet and held with two rubber grommets, rather than being magnetic. If you are going for the HTPC vibe, the feet are easy to remove; however, there are no covers to replace the filter cutouts. Further fan mounts are included; however, the PSU covers one, and the front supports a single 120mm or 140mm fan.
Inside the Cooler Master Q300L V3

With the tool-less tempered glass side panel removed, the Q300L V3 interior looks fairly simple. The Q300L V3 supports Mini-ITX or Micro-ATX motherboards, with a large cutout to the back of the motherboard tray for cooler maintenance. Cooler Master states that CPU cooler clearance is 178mm, while graphics cards up to 366mm can be installed, provided you don't install a front fan; reduce this figure accordingly if you fit a 25mm thick fan, for example. For power supplies, you can install a 140mm ATX unit if you want to use a bottom-mounted fan, or 200mm without. No GPU support bracket is provided, and I can't fault this exclusion, given the price of the case.

From the bottom, you can see the PSU mounting bracket on the left, and two rubber isolators to sit the power supply on. Well-sized cutouts along the bottom edge of the motherboard tray are included for routing front panel connections, USB, and other cables as needed.

The top also includes well-positioned cutouts, with fan mounting locations visible. Three of the front I/O mounting locations are also visible, should you decide to move this from the bottom of the front panel.

The preinstalled rear 140mm fan is a good inclusion at this price point; while some manufacturers opt for a 120mm fan, the larger 140mm will remove hot air from the case more effectively.


Removing the rear panel lets you see the front cable cutouts more clearly. Around the back, it supports 1x 3.5" drive, or a total of 4 2.5" drives. Two of the 2.5" drives can be installed on the motherboard tray towards the front of the case, while a removable drive sled sits below the motherboard cutout. The 30mm of cable management space will help should you decide to reposition the front I/O, and a good amount of tie-down points are also provided

Cooler Master includes a basic but suitable accessory package with screws and mounting grommets, along with the quick start guide.
Test System, Installation, and Finished Product


Before installing the test system, I wanted to see how easy it was to move the front-mounted I/O. Two screws hold the module in place; removing them and repositioning it to the front of the top panel was really simple, and rerouting the internal wiring took about two minutes. I swapped over the dust filters, and it's all good to go.


Installation, since I am using an ITX board for testing, required me to attach the CPU power cables before installing the motherboard because of the limited space at the top of the case. A little planning helps a lot, and it's a common theme on smaller cases, where space can be tight. Apart from that, everything was simple enough to accomplish, and the rear cable-management space is ideally sized for the cables you need. Depending on what you're installing, the tie-down points will come in handy, with sensible cutouts along the side of the motherboard for routing 24-pin and GPU power. Overall, it's a good experience, with nothing complicated to install, and the PSU installation bracket works well.
The system I built for testing includes an AMD Ryzen 5 9600X CPU, housed in an MSI B850i Edge TI Wi-Fi motherboard, paired with two 16GB Corsair Vengeance DDR5-6000 memory sticks. The CPU stays cool with the be quiet! Dark Rock Elite. For storage, I am using a Corsair MP700 Elite 1TB NVMe M.2 drive. Finally, for graphics, I have an ASUS Prime RTX 4070 12 GB Super. Testing was completed with PBO enabled, AXMP1, and MSI Smart Fan configuration.
All testing was completed using AIDA64 Engineer's System Stability Test v7.65.7400 for 2 hours. Other software used was HWiNFO 64 v8.32-5840, TechPowerUp GPU-Z v2.70.0, and CPU-Z v2.17.0 x64.
Kris' Test System Specifications
| Item | Details |
|---|---|
| CPU | AMD Ryzen 5 9600X (Buy at Amazon) |
| Motherboard | MSI MAG B850 Tomahawk MAX Wi-Fi (Buy at Amazon) |
| GPU | ASUS Prime GeForce RTX 4070 Super OC (Buy at Amazon) |
| RAM | Corsair VENGEANCE DDR5 16GB (2x8GB) (Buy at Amazon) |
| SSD | Corsair MP700 Elite 1TB (Buy at Amazon) |
| Cooler | TBC (Buy at Amazon) |
| Power Supply | TBC (Buy at Amazon) |
| Monitor | Acer Nitro XV322QK (Buy at Amazon) |
| OS | Microsoft Windows 11 Pro (Buy at Amazon) |
Because the Q300L V3 only has a rear exhaust fan, we rely on the be quiet! air cooler to do the majority of the work here. As always, I test in the default configuration to give you an idea of the worst-case scenario, but I am sure that those looking to purchase this case will add in their own fans, and perhaps an AIO to assist with getting fresh air into the case.

With temperatures starting to cool off, we are testing at 24C today, and the results are about what I would expect, given the single exhaust fan. The AMD 9600X peaked at 74.9C and, over two hours, settled to an average of 72.1C. With temperatures normalized, the Q300LV3 performs well, placing it mid-table between the GAMDIAS M4M and the Cooler Master MasterFrame 600. If you add more fans, this will no doubt improve even more.
Graphics card temperatures show the same trend, reaching a maximum of 70.7C on the day and averaging 69.7C. Once we level the playing field at 20C ambient, the Q300L V3 sits just 0.6C behind the Lian Li Lancool 217 INF (with two additional fans installed), so it's a great result for the little Cooler Master case.
If I'm thinking of using the Q300L V3 long term, I think a 240mm AIO mounted to the top, with two front intake fans, would really help improve this already well-performing case. A further bottom-mounted fan would help pull in more fresh air toward the GPU for a compact little machine capable of high performance while staying cool.
Final Thoughts


Cooler Master set out to produce a case capable of a straightforward build experience that offers value, flexibility, modularity, and performance. I think it's safe to say they have achieved all these things with the Q300L V3.
The performance in testing was pleasing, to say the least, with plenty of scope to achieve even better temperatures should you add in some more fans and an AIO, and despite only having one fan installed, it's a quiet little thing when it's being put through its paces. Build quality throughout my time with the case is also good, with every part fitting well and no concerns over flex when installing the test system.
If you are into tinkering with your PC case, the Q300L V3 gives you a canvas to "Make It Yours," as Cooler Master would say. Cooler Master wants you to embrace the maker spirit with the Q300L V3, explore the possibilities, and push the boundaries with the FreeForm concept. Given the price, it's an attractive, accessible way to get into a modular platform that doesn't sacrifice performance.
Personally, I would opt for the white version to brighten things up internally and show off the installed components, but it's up to each person to choose the color. Regardless of the color, being able to lay this down in an HTPC format is another real plus that seems to be dying out for some reason over the past few years, so it's nice to have the option here.
I would like to see some covers for the holes left by the bottom dust filter, in case you lay this flat and remove the feet, and a GPU bracket would also be nice. The thing is, though, you can add these things if you want: design them, 3D print them, and upload the files to the Cooler Master Printables.com page. Here, you could even search first to see if anyone else has provided a solution. I like the community side a case like this can provide, with its own little ecosystem and the chance to add that missing element.
Overall, the Q300L V3 is a fantastic little case, open to opportunity and competent in everything it sets out to achieve. While larger GPUs may require some compromise with front fan installation, it's a great start for an all-round setup.