Our Mission and Part Selection
You can win this gaming PC, join the giveaway! (until November 9, 2018)
About six months ago we wrote a build guide for Supermicro that detailed our building of a $700 Intel based gaming rig, and then they requested we hold a giveaway of that system. Luckily for you, Supermicro came back again and asked us to take their mini-ITX Z370 motherboard we had in our possession and build a high-end gaming rig that would cost you over $2,000, and then give it away for free. Of course, in this case we had to bring other vendors on board to help sponsor the giveaway, and the total cost of the system we will build is over our target, at a whopping $2,300. One lucky winner will receive the beastly gaming system, so if you haven't already, head over to our Facebook page and follow the instructions to get in the random drawing!
It took us a few months to put together the give away, and at the time Intel sent us a boxed 8th Gen Core Processor i7-8086K, which is still their fastest 6-core 12-thread CPU, even with the 9th generation of CPUs, since Intel has not announced any 6-core 12-thread 9th generation CPUs. The CPU has a 5GHz boost, and for now maintains slightly better minimum FPS in certain games than even the 9900K. Once we knew the CPU and motherboard combination, we reached out to Kingston for RAM. One thing Kingston always does it ask exactly what model motherboard and CPU we are using, they are sticklers for compatibility, which is awesome for sourcing RAM that will work. When I found out they were sending two 16GB sticks, I was a bit worried about compatibility, but once I put the system together I was not only relieved to find it they work perfectly, but the RAM even defaults to 2666MHz, which is its rated speed.
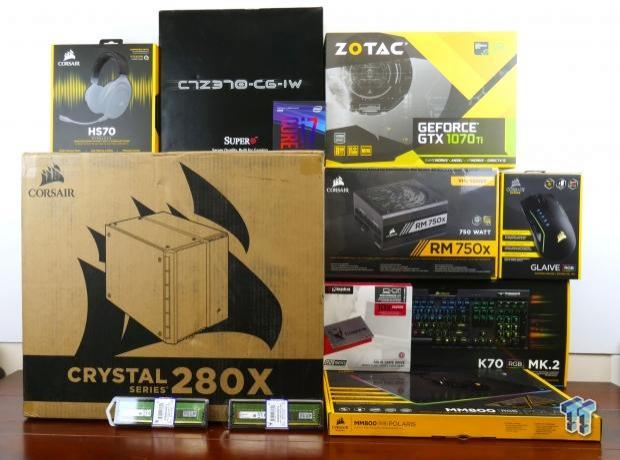
Always use your motherboard's qualified vendors list for DRAM, or the list of motherboards on the RAM vendor's site (if they have one). The winner of this machine gets 32GB of DDR4 worth over $300. Kingston also sent over a 1TB (960GB) SATA based SSD, which leaves both x4 PCI-E 3.0 NVMe M.2 slots on the motherboard open for future upgrades. Down the road, if you wanted to, you could add in a faster NVMe based SSD, and use the 1TB SSD for game storage. Next up we went to Zotac and they sent over a mini GTX 1070 Ti, which would match our small build. Once we knew the power requirements we asked Corsair for a case and a PSU. They sent over a 750W fully modular PSU and a case designed for a 280mm AIO which supports up to micro-ATX motherboards, so we have the cooling capacity to overclock the system. Corsair then upped the ante and decided to send in a lot of RGB accessories such as a wireless headset, keyboard, mouse, and even an RGB mouse pad to make things full circle.
CPU: Intel 8th Gen Core Processor i7-8086K (BX80864I78086K) $439.99
Motherboard: Supermicro C7Z370-CG-IW $214.44
RAM: 2x Kinston ValueRAM 16GB 2666MHz (kvr26n19d8/16) $148.33 x2 $296.66
GPU: Zotac GTX 1070 Ti (zt-p10710g-10p) $419.99
SSD: Kingston UV500 960GB SATA SSD (suv500b/960g) $200
PSU: Corsair RM750x (CP-9020179-NA) $99.99
Case: Corsair Crystal 280X (CC-9011135-WW) $169.99
Cooler: Corsair H100i V2 Extreme (CW-9060025-WW) $95
Mouse: Corsair Glaive RGB Gaming Mouse (ch-9302011-na) $69.99
Mouse Pad: MM800 RGB Polaris (CH-9440020-na) $59.99
Keyboard: Corsair Gaming K70 LUX RGB (CH-9101010-NA) $138.10
Headset: Corsair HS70 Wireless Gaming Headset (CA-9011179-NA) $99.99
Total: Around $2,300
Looking at the Motherboard as a Backbone
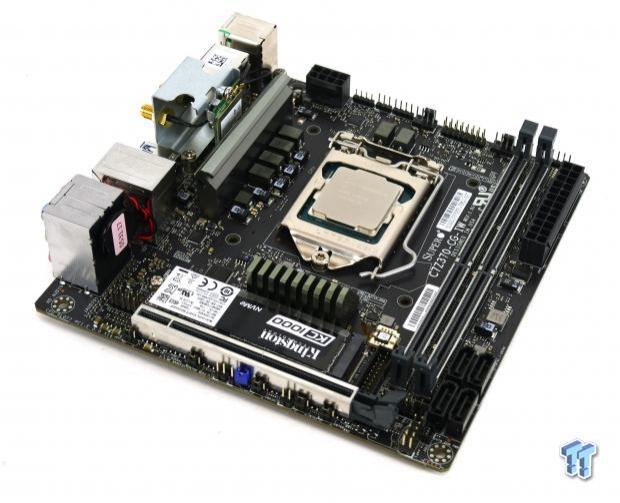
The motherboard is the backbone of the system, in our case it's a C7Z370-CG-IW, which is Supermicro's high-end mini-ITX motherboard. Many people like mini-ITX because of the form factor, and vendors have found many ways of adding in the latest features in the small form factor.
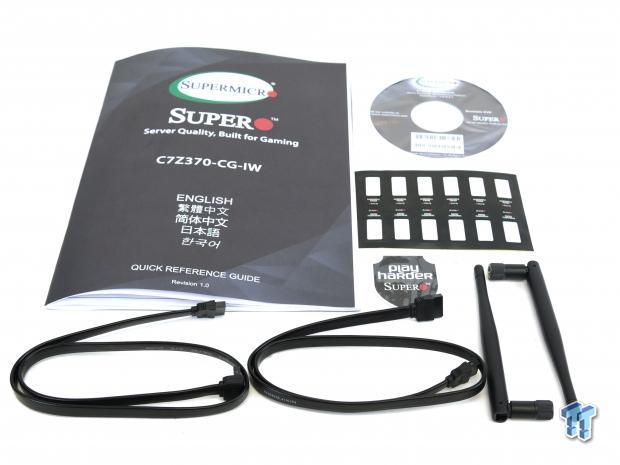
Recently I found a post on Reddit where the guy was adding two SATA cables into his shopping cart. I immediately informed him that motherboards almost always comes with at least two SATA6Gb/s cables, and that he had no reason to buy one. In our case we also get a case badge, IO shield (not pictured), WIFI antenna, and some other odds and ends. The good news is that our Kingston SSD came with a red SATA cable (most SSDs don't come with cables), which would have clashed with our color scheme, so we were happy Supermicro included black ones.
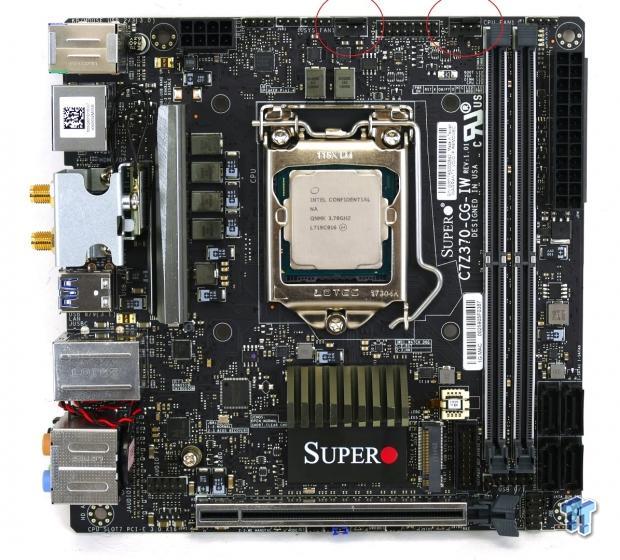
The CPU you see in this picture is not the CPU you will receive, you will receive a retail Intel box CPU (yes, we will include the letter from the former CEO and the certificate of authenticity). We wanted to mention the importance of paying attention to fan headers. Supermicro motherboards have high current headers, typically rated up to 2A. In this case, the motherboard has two headers that support up to 2.5A each, which means you can use splitters on them. Most motherboards only support up to 1A. We used a case with two fans built in, and we used a cooler that controls its own fans and doesn't require motherboard power or control, so we avoid having to use splitters.

The rear IO panel is also a good thing to look at depending on the number of USB devices you will be using. In our case we would have enough to power our keyboard (two), mouse (one), mouse pad (one) and still have a few reaming. However, our keyboard has a pass through, so our mouse pad can plug into it, and then our mouse pad has a pass through that allows our mouse to plug into it. In the end we were able to open up two more rear USB ports, and we still have our front USB ports open for our headset charging cable and transmitter.
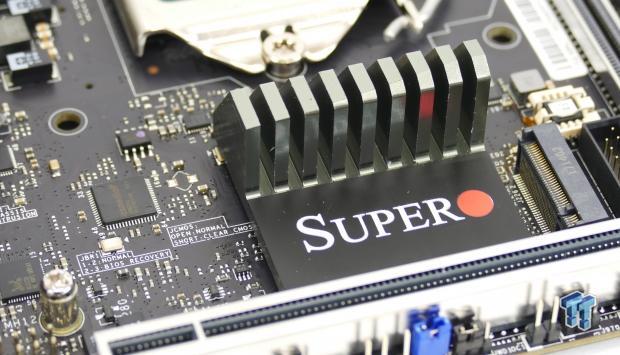
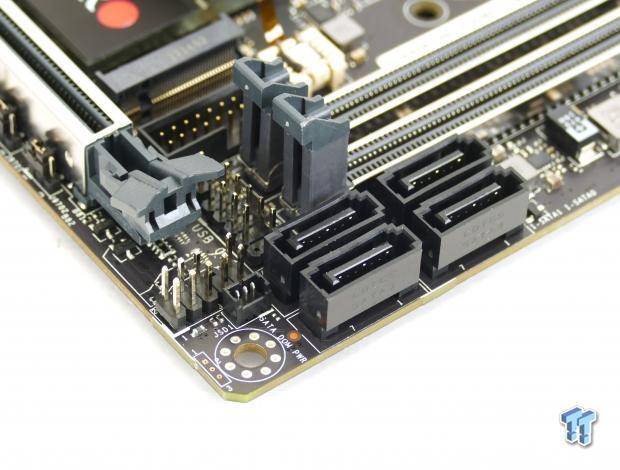
There are two main storage connectors on modern motherboards. You have the M.2 slots (left) and then you have SATA ports (right). Now, M.2 slots can operate in SATA mode or PCI-E/NVMe. While SATA6Gb/s runs at a maximum of 6Gbps or roughly 550MBPS, M.2 slots can operate at many different speeds including x2 PCI-E 2.0 (10Gbps), x2 PCI-E 3.0 (16Gbps), x4 PCI-E 2.0 (20Gbps), or x4 PCI-E 3.0 (32Gbps). M.2 slots also need to specifically support SATA or PCI-E, so make sure your motherboard's slot can support the speed and type of drive you buy before you buy the motherboard and drive. Good news, in this case our motherboard supports up to x4 PCI-E 3.0 and SATA M.2 drives. We can also see that this motherboard features an internal USB 2.0 header that will provide two USB 2.0 ports if hooked up for a USB 2.0 panel.
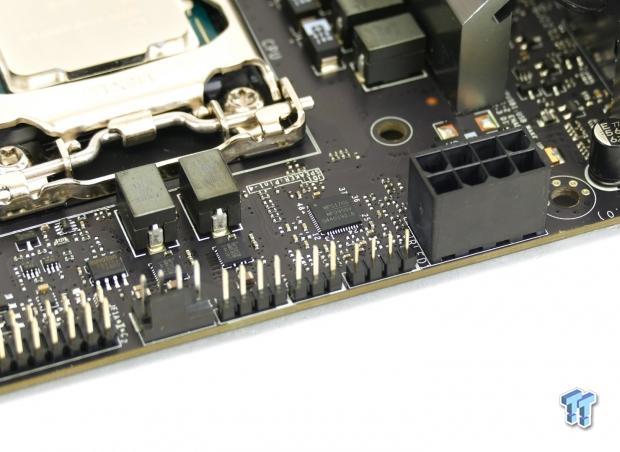
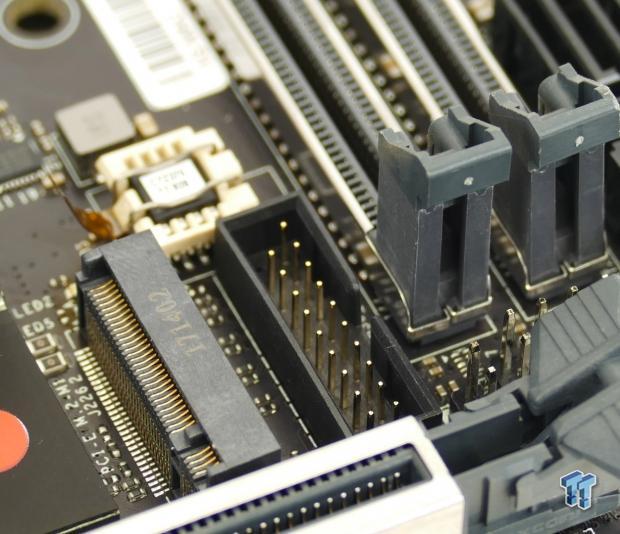
The motherboard also features an RGB LED header, and keep in mind its front panel headers are located at the top of the motherboard. The motherboard also features a USB 3.0 internal header and a BIOS in a socket so you can easily repair your motherboard if the BIOS gets corrupted. Thankfully Supermicro also has a BIOS recovery system, and you can find instructions for how to use it in Appendix 5 of the manual.
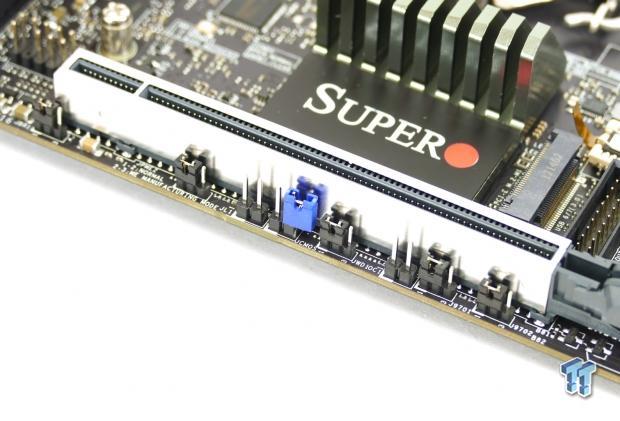
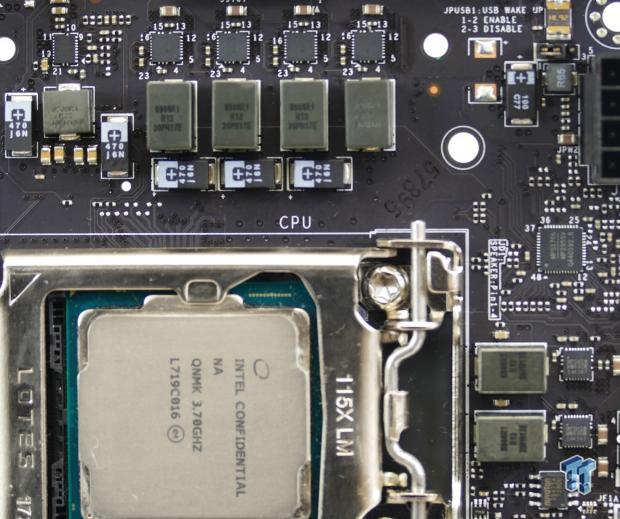
If you are more of a tactical user and prefer messing with physical hardware, then you will like the fact that Supermicro is one of the only remaining motherboard vendors that gives you both software and hardware means (jumpers) of accomplishing certain tasks such as disabling features, switching modes, and activating BIOS recovery. The motherboard's voltage regulator is also an extremely important part of a motherboard. In this case, they used a very high quality VRM. The MPS MP2955V is a digital multiphase VR13 controller (4+2 phases in this case), and it's the same controller (different last letter) we saw on SuperMicro's full-ATX motherboard.
The new PWM controller works with the integrated power stages. SuperO uses the MP86908 50A power Intelli-Phase integrated power stages. The VRM filter stage uses 51A CooperBussman high-current power inductors. That means at maximum it should be able to output 200A, which at 1.3v (typical 8086K max voltage under AIO water cooler) is roughly 260W of power, which is more than enough for a decent overclock on an 8086K (pulls 109W stock at 4.3GHz all core with AVX under synthetic Intel Burn Test load). Our thermal testing results for this motherboard reveals that it can handle a 8700K at 4.9GHz (CPU limit on most Z370 motherboards) with ease, so we hope to hit 5GHz all core with ease and still maintain lower temperatures on the rear of the motherboard, which is a sign of a sustainable VRM load.
Putting It Together Using Best Practices
We figured that some of you might want to see us build it rather than look at pictures, so we put together this comprehensive video of us building the system we are giving away. We have some tips we mentioned in the video that we are going to mention again here:
Tip #1: If you build on carpet, wear shoes if you have socks on. Once the PSU is plugged into the wall it will become a ground, even if it is off, and if you screw it into your case your case will act as a ground. So you can touch ground often this way, and that way discharge any static electricity, and for bonus points don't move your feet after grounding. Also, don't wear things such as cashmere sweaters or other clothing that creates a lot of static. If you are really scared of ESD, you can just buy a real anti-static wrist band and tether yourself to a ground, they also sell anti-static gloves.
Tip #2: Install your CPU, cooler bracket hardware, RAM, and any M.2 drive when the motherboard is outside of the case. Working inside a case can be difficult.
Tip #3:If possible, test the CPU, motherboard, RAM, and GPU outside of the case using the box of your motherboard as a stand. Do not put the motherboard on anti-static material when it is on, as anti-static material is conductive (it's designed to create a faraday cage around the components inside). You will obviously need your PSU and your cooler to run the device outside of the system. The reason we recommend testing outside the case is because sometimes people short out on the case, and they can't figure out why their system isn't working; it happened the first time I built a computer.
Tip #4: AIO water coolers either come with thermal paste pre-applied or no thermal paste. If they don't have thermal paste pre-applied they typically come with some in a tube, but be sure to remove whatever is protecting the bare copper on the block, sometimes it's a thin layer of clear plastic that is hard to spot.
Tip #5:It's best never to over apply thermal paste, the traditional wisdom is to use a small pea-sized blob in the center of the CPU. On some CPU's it's better to use a small line over where the die is located underneath the CPU, and in other cases like huge CPUs, it's better to use multiple lines or blobs. We like the single pea-sized blob on this CPU. Beware; some pastes like IC7 Diamond will corrode the internal heatspreader surface of your CPU since they have diamond particles inside, which might make RMA of the CPU difficult.
Tip #6:If you have a modular PSU count out the number of connections you need as use as few wires as possible to optimize chances of good cable management. Heat is the ultimate pre-mature killer of computer hardware, and wires can block airflow and can effect temperatures.
Tip #7:Install your motherboard's IO shield before the motherboard, many people forget this step. I recommend installing it as soon as you open the case or motherboard box, just so you don't forget.
Tip #8:If you don't have a monitor or you aren't getting video, look to see if you can toggle the Number-Lock light on your keyboard. If you can toggle it, then you should have video output as the motherboard has finished the POST process (power on self-test) and your CPU, motherboard, and RAM are all working properly. You might be plugged into the wrong video output, so if you have a dedicated graphics card you need to be plugged into it and not into the motherboard. If you have a dedicated graphics card and you are plugged into it but have no video, make sure you plugged in power for the GPU and double check the monitor input selection, then turn on and off the monitor (some monitors won't pick up BIOS splash screen as a wake up signal). If none of that works, take out the GPU and plug into the motherboard's graphics output, and test your GPU in another system.
Setting Up BIOS and OS
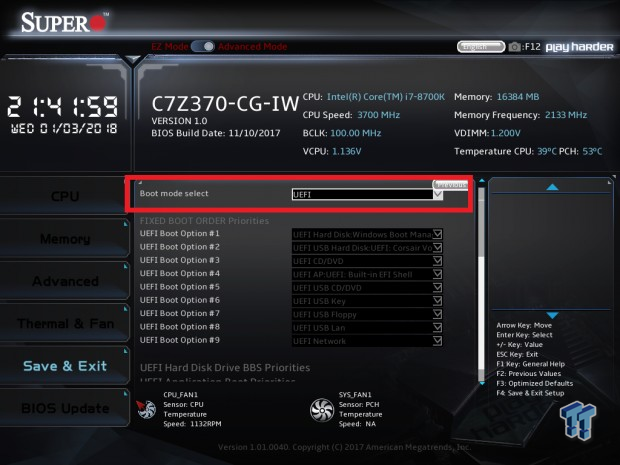
Entering the BIOS isn't something I recommend for everyone, but if you want to make sure your system is setup in UEFI mode it's important to go in and disable Compatibility Support Module (CSM) and set boot mode to UEFI. You can find boot mode under the "Save & Exit" menu.
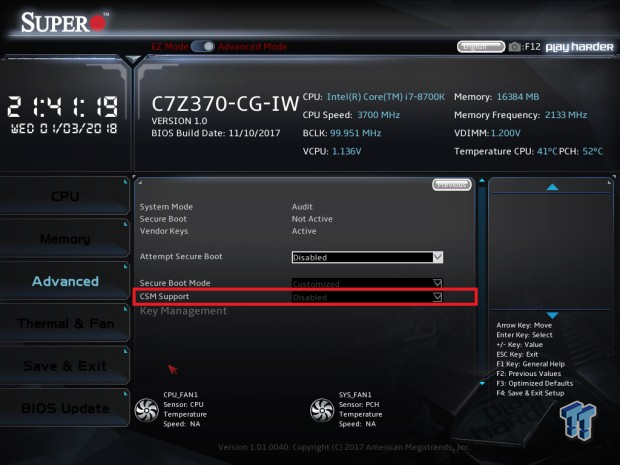
CSM can be found in the Security sub menu. You also need to disable CSM if you want to RAID the two M.2 slots on this motherboard, we have a separate guide for that specifically using this motherboard.
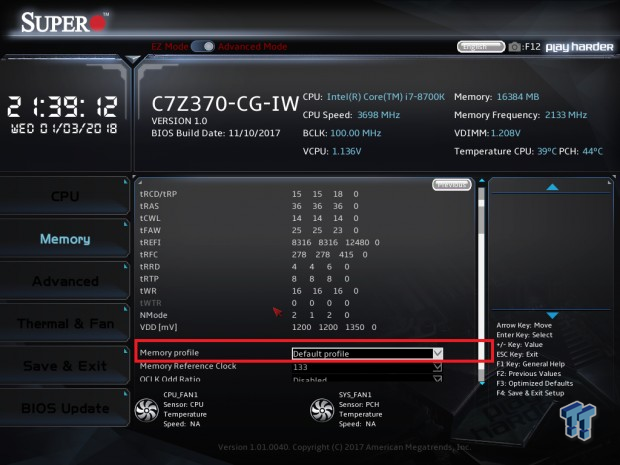
You might as well also set the memory speed to XMP on this motherboard if you use a kit rated above 2133MHz, in our case our kit had a 2666MHz JEDEC mode and it automatically went up to 2666MHz.
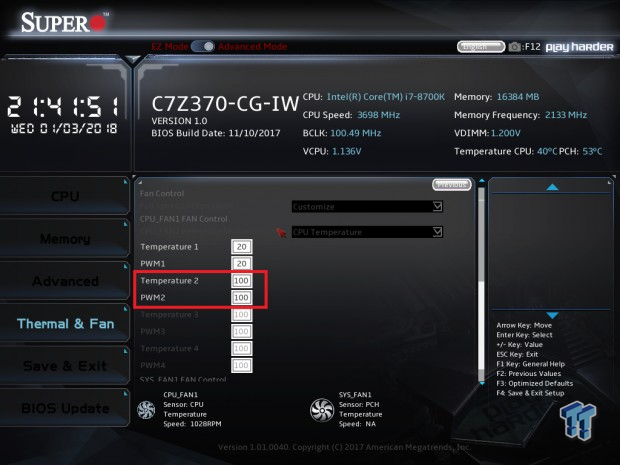
Fan control is also a good idea if you have fans plugged in, and if you are wondering why Temperature 3 and Temperature 4 are grayed out, it's because you need to set Temperature 2 and PWM 2 to values under 100. Once you do that you can then set the fan up.
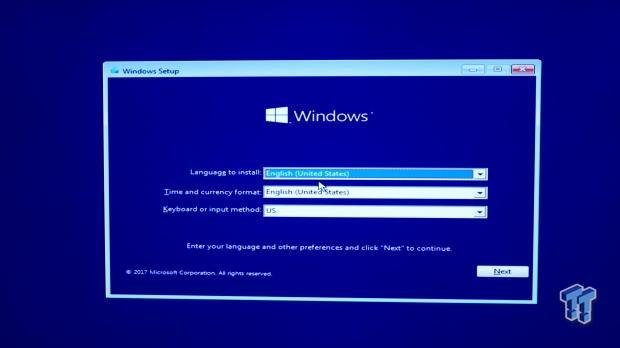
Once you are ready to install Windows 10, just download the Windows 10 Media Creation Tool from the Microsoft website and make a USB key following instructions through the program. Once you have that USB stick, you can stick it in, and if you have UEFI boot enabled it will work very quickly and easily.
The Final Result
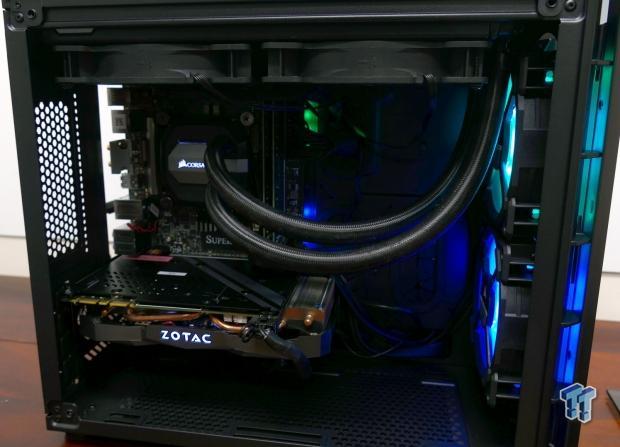
Our final result is a somewhat clean build; I can admit we could have done slightly better with cable management. The H100i V2 fits perfectly in this case, and the GPU doesn't take up too much room. We decided to use positive airflow in this case, as it has many open vents we need air blowing out of so dust doesn't accumulate.
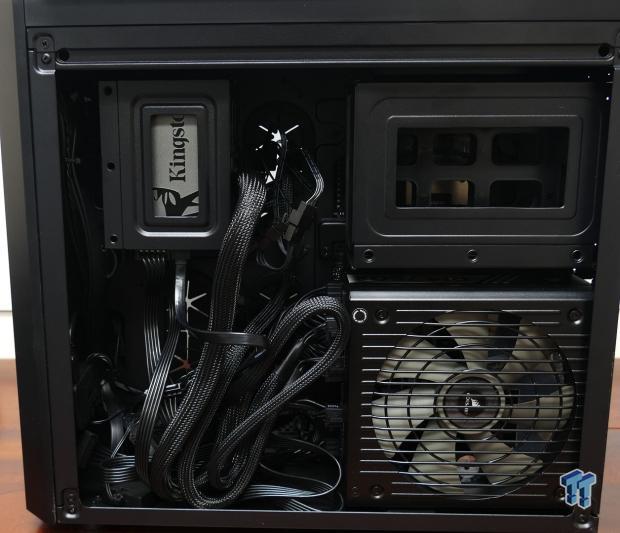
The power supply is situated so it grabs fresh air from the vent in the side panel and then blows it out the back of the case, and our 2.5inch SATA SSD was easy to work with. We crammed all the cables into the backside of the case, it makes cable management on the window side better.
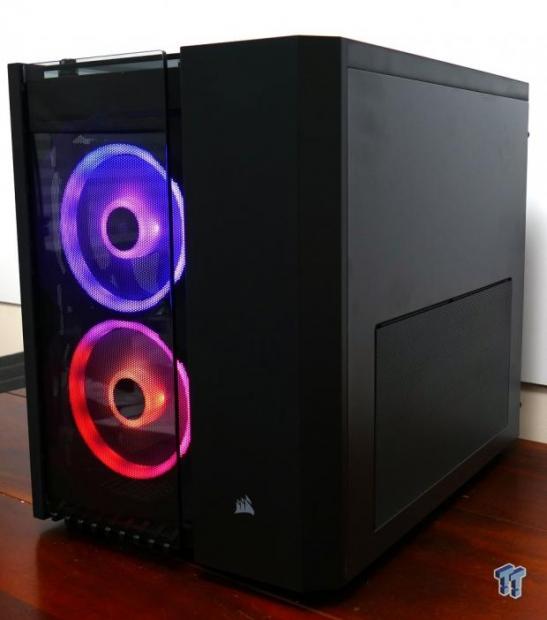
We love the RGB LED fans that came with the Corsair case.
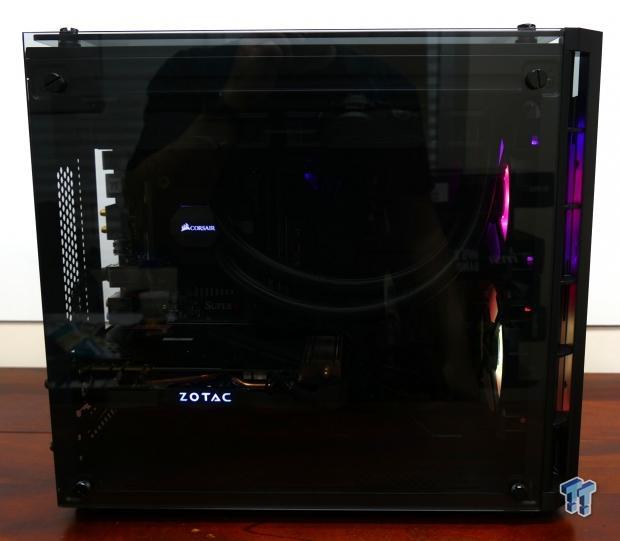
The tempered glass windows is gorgeous and you can spot the motherboard's RGB LEDs as well.
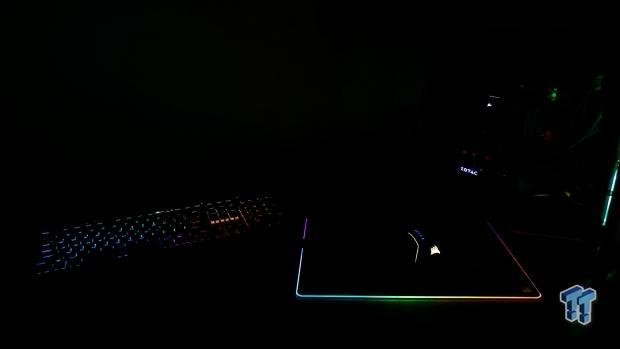
Here are all the RGBs from the mouse, mouse pad, keyboard, and case is action and getting the job done. If you want to win this machine for free, please visit our Facebook page and follow the rules to win!
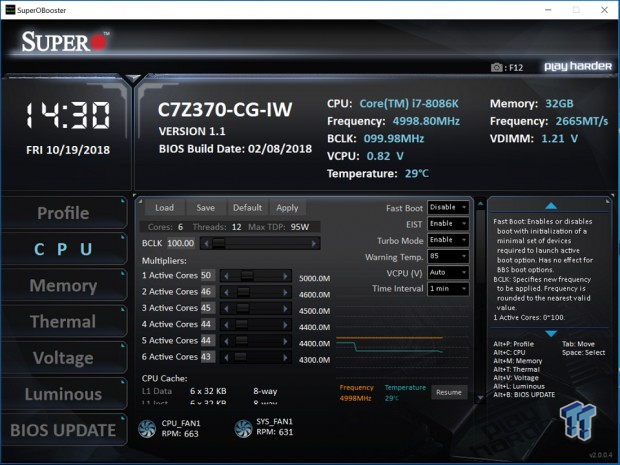
Now, Supermicro has a really neat and easy to use utility called SuperOBooster, and it's a very nice piece of motherboard software for one very glaring reason; it has no frills and doesn't eat up resources. It has basic OC functionality; you can change multipliers and voltages, and monitor them.
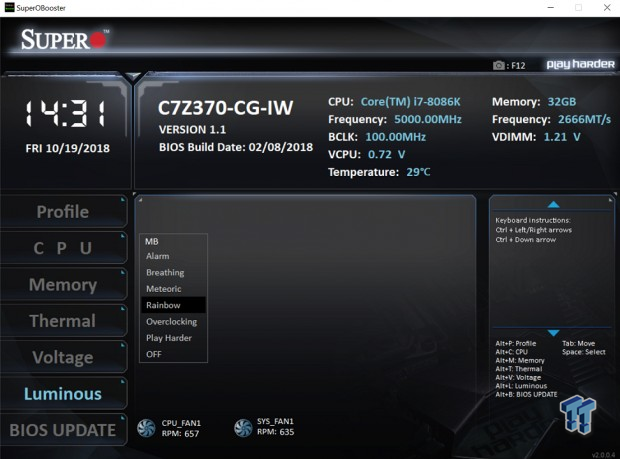
The software is also the only way you will be able to control the built-in RGB LEDs and RGB LED header, it has a few built-in profiles. It also provides fan control and OS-based UEFI update capabilities.
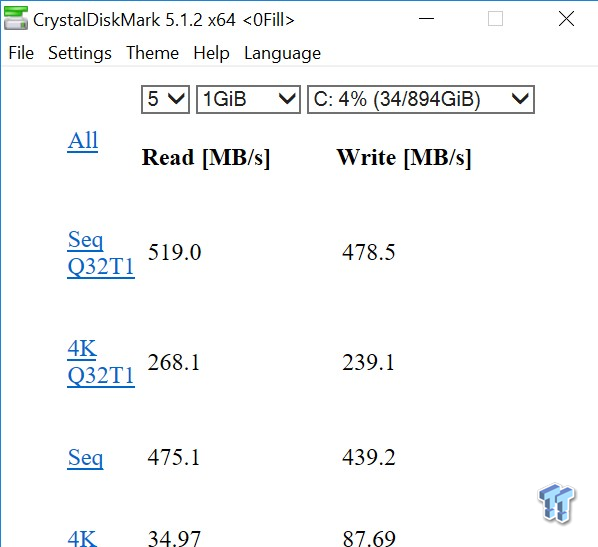
Now, while you are in Windows it's always good to check to make sure your SSD is working well, and ours is, as our speeds are in line with Kingston's specifications.
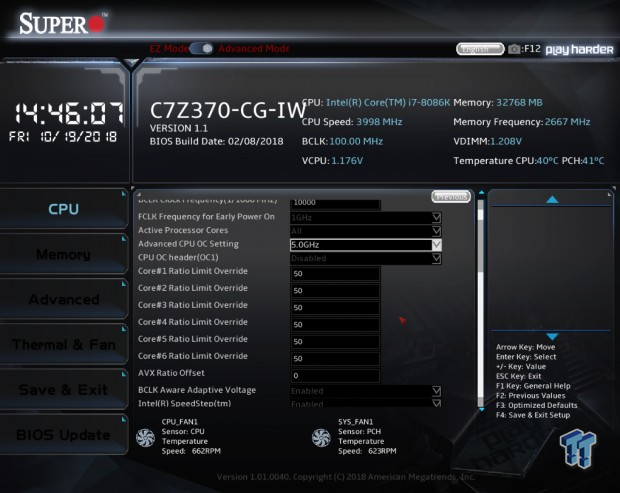
Want to overclock? Well, this motherboard can be overclocked through Windows or through its BIOS. Above we have the BIOS configuration menu for CPU overclocking. Setting "Advanced CPU OC Setting" to 5.0GHz will up a lot of power limits by setting all your cores to 5.0GHz. You can choose other frequencies as well.
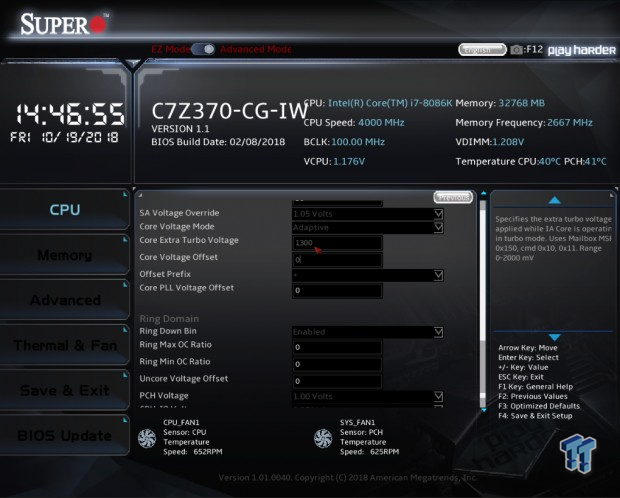
Voltage settings are located further down the page, and by default it is in Adaptive mode. We set "1300", which is 1.3v.
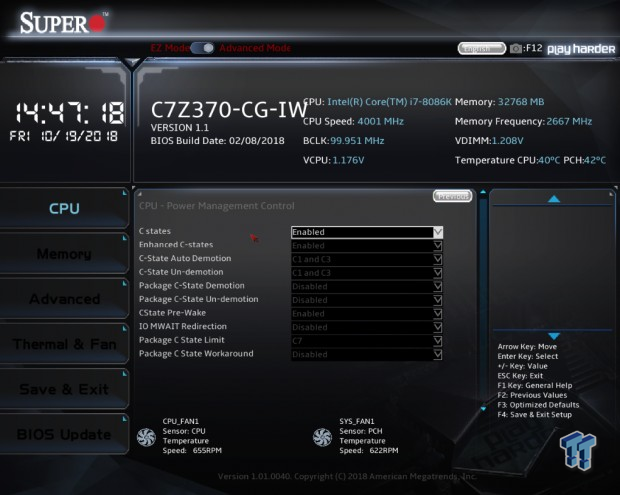
The next thing you will want to do is control C-States. If you are using adaptive voltage then you might want to leave these alone, but if you are going to use override voltage mode, then you might want to disable C-states.
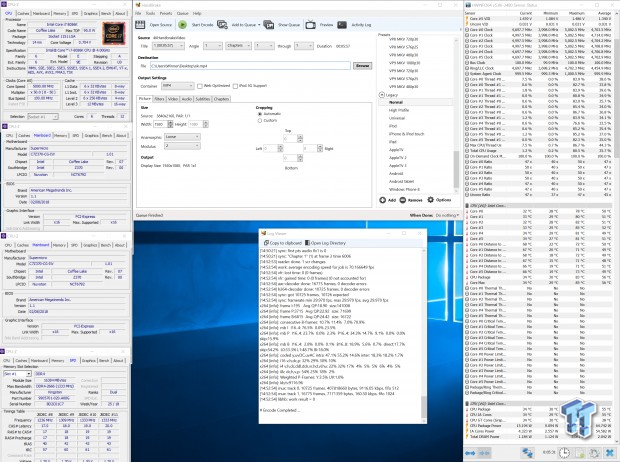
Here is our final OC, all cores at 5GHz, and memory running at 2666MHz. The motherboard is very versatile, and the winner of the giveaway can ask us to overclock the machine for you or deliver it in its default state since the 8086K is quite fast. Be sure to enter on our Facebook page to win! If you end up not winning, you can buy our combo from Newegg and save some money here.
Intel, the Intel Logo, Intel Inside, Intel Core, and Core Inside are trademarks of Intel Corporation or its subsidiaries in the U.S. and/or other countries.
You can win this gaming PC, join the giveaway! (until November 9, 2018)

 United
States: Find other tech and computer products like this
over at
  United
Kingdom: Find other tech and computer products like this
over at
  Australia:
Find other tech and computer products like this over at
  Canada:
Find other tech and computer products like this over at
  Deutschland:
Finde andere Technik- und Computerprodukte wie dieses auf