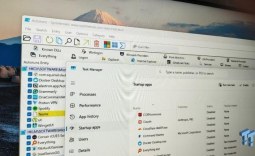








A second monitor gives you more screen space to work with, but Windows' default multi-monitor settings aren't always ideal. With a few simple tweaks, you can make your displays work together much more seamlessly. Whether you already have a multi-monitor setup or are planning to get one, these are the settings you should change first.
Extend or Duplicate Your Displays: Which Should You Use?
When you connect a second monitor, Windows gives you several display modes to choose from. You can use PC Screen Only or Second Screen Only if you only need one display at a time. There's also Duplicate mode, which mirrors the same content on both screens. This is useful for presentations, classroom teaching, demonstrations, and similar situations.
Popular Now: G.Skill replaces a $150 RAM kit now selling for $1,199, earning a customer for life in the processFor most people, however, "Extend" is the best option. It treats both monitors as one large workspace, allowing you to open different apps on each screen and drag windows freely between them. It's the ideal setup for multitasking and getting more work done. To switch between these modes, press

Set Your Main Display and Arrange Your Monitors
When you use multiple monitors, Windows designates one as the main display. This is where new apps open by default, games usually launch, and key taskbar elements - such as the Start menu and clock - appear. If Windows has selected the wrong monitor as the primary one, you can easily change it.
Open Settings > System > Display, select the monitor you want to use as your main screen, and check "Make this my main display."

Best Deals: Dell UltraSharp U2723QE Monitor
Price Trend:
Prices last scanned 3 hours and 2 minutes ago


It's also important to arrange your monitors so they match their physical positions on your desk. If they aren't aligned correctly, your mouse pointer may jump to the wrong screen, and dragging windows between displays can feel awkward. To fix this, go to Settings > System > Display, where you'll see numbered boxes representing each monitor.

Click "Identify" to see which number corresponds to each display, then drag the monitor icons left, right, up, or down until they match your actual setup.
Our Latest TweakTown Guides
- These powercfg commands explain why your PC wakes at night or won't sleep
- Snipping Tool handles most of my screenshots, but this open-source app still does the jobs it can't
- I almost uninstalled 7-Zip after File Explorer learned RAR, and then I hit the gaps
- Your Windows PC is enforcing policies you never set, and one command lists them
- Here's the four Windows 11 components I only add when a job calls for them
Fine-Tune Resolution, Refresh Rate, and Scaling for Each Display
Your monitors might have different resolutions, refresh rates, or screen sizes, and Windows lets you configure these settings for each display individually. To do this, open Settings > System > Display, select the monitor you want to adjust, and scroll down to its display settings. First, set the monitor to its native resolution, as this provides the sharpest image.

Guide Q&A
Powered by TweakBot
From TweakTown's coverage of this guide.
How do I switch between Extend and Duplicate display modes in Windows?
How can I change which monitor is set as the main display?
Where do I arrange monitor positions so the mouse and windows move correctly between screens?
How do I set the native resolution, scaling, and refresh rate for each monitor individually?
Want something else? Ask TweakBot.


Next, adjust the scaling so text and apps are comfortable to read. 100% usually works well for lower-resolution displays, while 125% or 150% is often a better choice for higher-resolution monitors with smaller text. Finally, open "Advanced Display" and choose your preferred refresh rate.

Configuring these settings for each display individually ensures that both monitors provide the best possible image quality and a more comfortable viewing experience.
Rotate a Display for Better Reading or Coding
There are times - such as when coding, reading long documents, or working with spreadsheets - when having more vertical screen space is far more useful than extra width. In these situations, you can rotate your monitor and switch it from Landscape to Portrait mode. To do this, open Settings > System > Display, and select the monitor you want to rotate.

Then scroll down to "Display Orientation," select "Portrait" or "Portrait (flipped)" if your monitor is physically rotated in the opposite direction. Once the display rotates, simply turn your monitor physically to match the new orientation. A vertical display lets you see more lines of text at once, reducing the need to scroll.
Even better, Windows supports mixed orientations, so you can keep one monitor in landscape mode while using another in portrait mode.
Keep Apps and Windows on the Right Monitor
One of the most common annoyances with a multi-monitor setup is having apps reopen on the wrong display after restarting your PC or reconnecting a monitor. That means you have to drag them back to the correct screen before you can get back to work. Fortunately, Windows can remember where you had your windows open and restore them to the correct monitors.
To enable this, go to Settings > System > Display > Multiple Displays and turn on "Remember window locations based on monitor connection." While you're there, it's also worth enabling "Minimize windows when a monitor is disconnected." This prevents apps from getting stranded on a disconnected display by automatically moving them to one of your remaining monitors.

Keep Your External Display On When You Close Your Laptop Lid
If you use your laptop with an external monitor, Windows may be set to put the laptop to sleep when you close the lid, turning off both displays. However, if you want to use the external monitor as your only display, you can change this behavior. That way, you can close the laptop lid, tuck it away, and free up desk space while continuing to work on the external monitor.
To do this, open the Control Panel and go to Hardware and Sound > Power Options. Click "Choose what closing the lid does" in the left pane. Next to "When I close the lid," select "Do Nothing" under Plugged in. If you also want the laptop to stay awake while running on battery, change the "On Battery" option.

A multi-monitor setup can boost your productivity, but the right settings make it even more enjoyable to use. A few minutes spent adjusting these settings can remove common annoyances and make working across multiple monitors seamless. Not every setting will suit the way you work, so experiment with them and keep the ones that best fit your workflow.