
The Bottom Line
Introduction, Specifications, and Pricing
The vast majority of the keyboard market is taken up with full layout models. By this, we mean to say that 104-key keyboards are the majority winner when it comes to customers choosing a product. However, it is no secret that we prefer to use smaller keyboards! There are two immediate reasons why we prefer them. First, we do not do much data entry in spreadsheets, not enough to warrant having a number pad at least!

Secondly, the mouse can be kept much closer to the other hand while gaming, and reduces stress in the shoulders! 87-key keyboards have been around, and we have seen quite of few of what is out there, but this time, we have a smaller keyboard, which delivers a World's First quality that many find appealing!
Gamdias, while not that well known, has delivered us some award-winning products in the past, whether it was the features that set it above or the fact that they frequently go on sale which gives you plenty of bang-for-the-buck! However, up until now, their products tended to follow the market, rather than coming forth with new ideas. That has changed as of late, as Gamdias is entering the 87-key keyboard game with low-profile switches on it, and they are the first to come to market with such a keyboard! Good for them, we say, as rather than being an affordable option to everything else out there, Gamdias can also now be known as an innovator, possibly garnering more attention from the masses as time goes on!
Since this keyboard has been out in the wild for a bit of time now, it is likely that you may have seen news or social media posts of others already owning the Hermes M3 RGB we have for you now! With an office full of similar keyboards on just about every PC, we are eager to see how low-profile switches play out and see which we prefer at the end of it all. For many, an 87-key layout may have you walking away immediately, but for those like us who gravitate to smaller keyboards already the Hermes M3 RGB may be the next evolution in how you game and address the PC! We have high hopes for this keyboard, as it is the next level in what TKL keyboard can be!

If you venture to the Hermes M3 RGB product page, the specifications we have here are what is found there. At the top of the list, Gamdias starts with the switches used in this keyboard! Described as Gamdias low-profile mechanical switches, but the logo on them says Kailh makes them. As for switch types, the Hermes M3 RGB has options of blue, brown, red, and black, can vary by region, and in the US, all we found were brown and blue options. Each switch is rated to take sixty-million presses before wear or any potential issues, which is in range of many standard mechanical switch ratings!
In the specifications section we see that this 25mm thick keyboard is only 354mm wide, and 128mm deep. Weight is kept down as well, and all told, the Hermes M3 RGB is only 540 grams! To accommodate Macro and Profile storage onboard, there is 72KB or memory. The switches come with default settings for 1000Hz polling and NKRO support. And on top of that, you can record Macros on-the-fly, you can disable the3 Windows key, and you can also lock the entire keyboard from use! The cable is detachable, it has gold plated connections, and its 1.5-meter length is rubberized. You will have to locate and download the HERA software for usage, the WASD and arrow keys are swappable, and there is no consecutive attack mode.
Lastly, there is a customization section at the bottom. Here is where Gamdias mentions the pair of G-keys, which are programmable on all profiles. There are also six multimedia keys placed on the F-keys. Beyond that, there are 16.8 million colors to the backlight, and it can be shown in one of four levels of brightness. With the use of HERA software, you will have many options for customization of the lighting, but without it, there are a few modes to use as well.
As we type this review, the cost for the Hermes M3 RGB is ridiculously low! While looking at the product page, we were initially shocked that the MSRP had been set to $149.99! We feel that is too much for a TKL with RGB lighting and a few software features! However, when it came time to look to buy one, we were shocked again at the sale prices we are finding! As we looked to Newegg to grab one, we saw that their $94.99 listing of the blue switch version is much closer to reality and affordable; however, we did not see the brown switch version, and it can be had cheaper still! While Amazon does list the brown switch option that we have at just $67.69, which is a much better deal! Even better though is the price for the Hermes M3 RGB with blue switches, as it can be had for the paltry sum of $54.99 at the time of this review. With four price points, it does complicate things when we end this review, but for the customers, if the Hermes M3 RGB low-profile mechanical gaming keyboard strikes your fancy, now is the time to act!
Chad's Peripherals Test System Specifications
- Motherboard: ASUS Prime X299 Deluxe - Buy from Amazon
- CPU: Intel Core i9 7920X - Buy from Amazon
- Cooler: Corsair H150i Pro - Buy from Amazon
- Memory: G.Skill TridentZ RGB 3600MHz 32GB - Buy from Amazon
- Video Card: EVGA GeForce GTX 1080 Ti Hybrid SLI - Buy from Amazon
- Storage: Samsung 960 EVO 250GB - Buy from Amazon
- Case: Cooler Master Cosmos C700P - Buy from Amazon
- Power Supply: Thermaltake Toughpower DPS G 1050W - Buy from Amazon
- OS: Microsoft Windows 10 Professional 64-bit - Buy from Amazon
Packaging, Accessories, and Documentation

The packaging offers a view of the keyboard to the left, with features pointed out, the ZEUS and RGB logos, and even a bit about what makes a low-profile switch what it is. On the right, we get the name of the keyboard with mentions of the switches, the RGB backlighting, the G-keys, and HERA software.

The longer side we see here shows us two of the backlit profiles for MOBA games. However, mind the notation to the left, where it mentions HERA software is needed to use these RGB LED modes.

The smaller end of the box is kept simple. All we are presented are the ZEUS logo, the Gamdias name, and the "Gaming Art In Motion" tagline.

The second of the longer sides have more of the RGB LED preset options shown. For FPS players out there, here is a pair of options available once HERA software is installed.
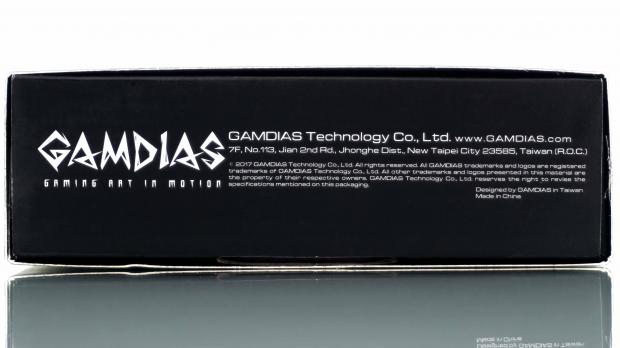
The other smaller panel offers the company name and tagline, but this time it is followed with the location, legal jargon, and that it is made in China!
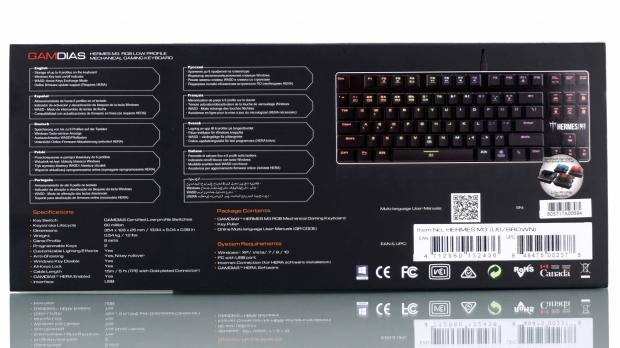
The back of the box is used to display features in ten languages, above the specifications, contents, and requirements. The right is used for an image of the Hermes M3 RGB, while it shows the switch options and offers a QR code to obtain the manual easily.
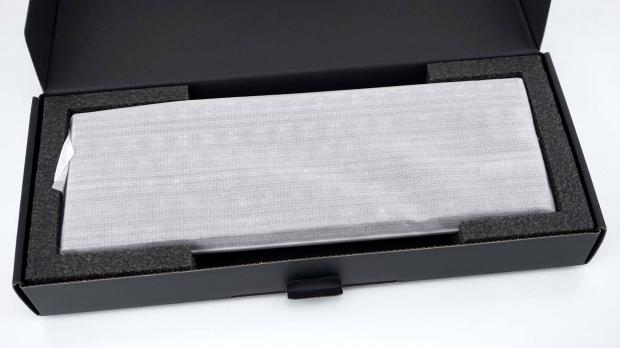
Most of what we just looked at was printed on a cardboard sleeve, and once removed we could open the box inside of it. Inside of the box, we find the keyboard wrapped in a thin foam bag, and on either side dense foam is used to support it. Once the keyboard is removed, look inside of the dense foam bits, as the rest of the gear is found there!

The 1.5-meter rubberized cable with gold plated connections even comes with a strap to make traveling with the Hermes M3 RGB easier. Gamdias also supplies a key puller, and the bright orange plastic should make it hard to lose this, or easier to find when the time comes to use it.
Gamdias Hermes M3 RGB Mechanical Gaming Keyboard

Looking at the Hermes M3 RGB from the left side, we quickly realize how much thinner the profile is than that of a standard mechanical keyboard! Only 25mm tall at the back, comprised of low-profile keycaps, low-profile switches, an aluminum top plate, and a short plastic frame supported on rubber feet!
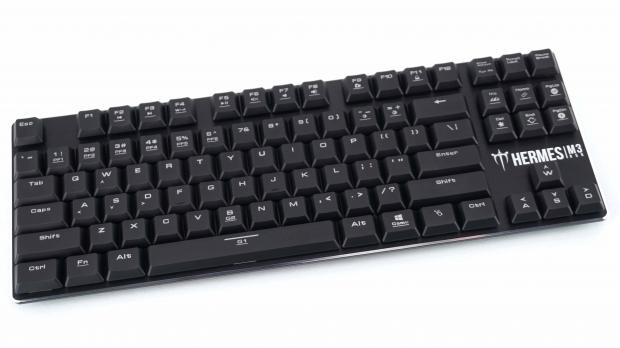
The top view of the keyboard delivers a look of 87 keys on this TKL solution. Many keys have a dual purpose, and we will cover those, but we also noticed no dedicated lock LEDs, just the brightly painted Hermes M3 RGB found above the arrow keys.

Starting off with some of the dual function buttons, we are in the F-keys, and it begins. F2 is used for media play to select the previous track. F3 does the opposite, where it requests the next track. F4 can be used to switch out the WASD and arrow keys. OF course, for these to work, you also need to be pressing the Function button.
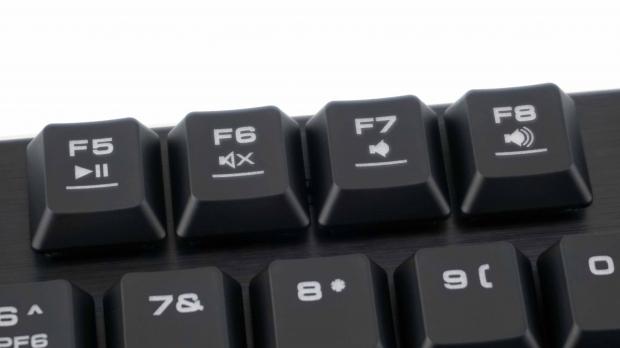
F5 is the play and pause button, F6 mutes the PC, F7 lowers the volume, and F8 increases the volume.

The last pair of functions offered in the F-keys is the on-the-fly Macro record button found on F9, and the full keyboard lock on the F11.

After programming the six profiles through the HEAR software, the numbers, one through six can be used to quickly swap between them without the need to visit the software suite.
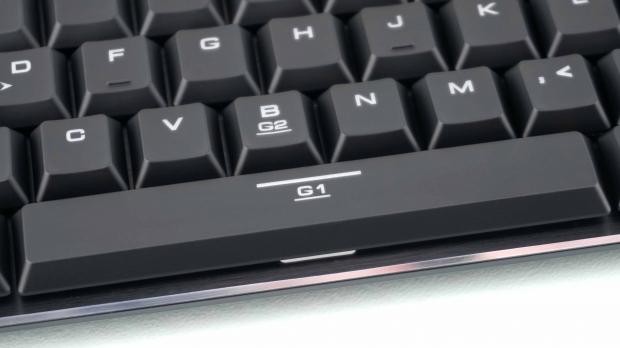
Even though the entire keyboard can be remapped in software, Gamdias offers a pair of G-keys which remind us of "Thumbster" buttons. These are dedicated for Macros on all profiles.
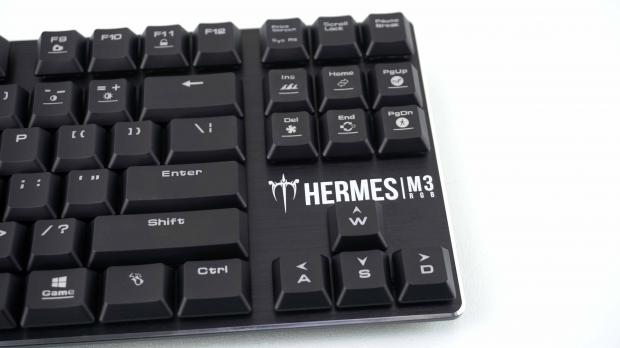
On the right edge, we find the command keys present at the top, and some of them offer options for the lighting modes, direction, speed, and intensity. On the arrow keys, we also see the WASD notations for left-hand users or those who like the mouse as close to the keyboard as possible.

Making our way to the right side of the Hermes M3 RGB, extending the feet in the back, made a massive difference in height and angle of attack!

Dead center of the back edge, there is a port for connecting the cable. Just grab your cable, and insert the Micro USB connector into the keyboard. There is also a tab on the connection, which goes on the top side, to make connectivity easier after looking at things the first time.

The bottom of the keyboard is flat, but the plastic is textured, except the smooth area at the center where the product sticker is placed. The front uses a pair of rubber feet and a plastic bump in the middle for support. The back edge uses the rubber of the flip out feet for grip.

The same rubber used when collapsed is what gives grip when the feet are extended. They are easy to get to this position, but the lock could be stronger, as minor adjustments can collapse these feet!
Inside the Hermes M3 RGB

Since this is a keyboard with low-profile switches, the keycaps are also low-profile, about half the height of the standard switch keycaps. Each cap uses two legs which insert into the top of the switch, while the more extended caps have additional clips outside of them for support as well as connectivity to the torsion bars.

All of the switches found on this Hermes M3 RGB are low-profile brown switches. While there is a cursive "D" logo on each, if we are not mistaken, the second logo is for Kailh switches. The top of the switch bodies are clear to allow the RGB lighting to go inside of the switch, and we see that the torsion bars are exposed.

Ten screws hold the top plate to the plastic frame below it, and once removed, we can see the support system used to stabilize the Hermes M3 RGB. However, with weight reduction does come a compromise, where a bit of flexibility is found, more so than in other keyboards we try to bend!

Finding a random location to get an image of the PCB, we find that the soldering is done cleanly, and while most residue has been removed, we do see a bit left behind here and there.

Someone did a bang up job of painting the MCU. So much so that we cannot identify it in this image or under higher magnification! We do know that it is a Holtek chip, and we do see ARM printed on it, but all we can go by is the specification that it is a 32-bit processor.

At the time of taking these images, we were in the photo booth without access to the HERA software. At this time, the red on the left and the green on the right for the RGB backlighting was the best-looking thing offered. Keep in mind though, with HERA installed; the RGB LED possibilities are near endless!
HERA Software

Key assignments are where you go to swap some functionality like the Function key for the Windows key, enable consecutive mode, and assign any key a function from a drop-down menu of nine choices. Things like launching programs, bringing up HERA software, disabling and remapping.

Macro Management is where you go to program the Macros, and after completion, can be used through other menus. There are six Macros in the list when opened, but to add one click on create macro near the bottom. After naming it, the commands at the top of the right box will illuminate to press the record button. Do your thing, stop recording, and try it. If it fails, there are a full set of editing tools, with time delays, to perfect it.

Luminance is where you go to tinker with the RGB LEDs. The keyboard view will show a live preview of what you are trying to accomplish. The three small keyboards are the base layers to start with, and there are many ways to change static colors or use some of the modes offered. It even appears that images can be uploaded, as long as the size and format are correct.

For the forgetful ones out there, there is also a section for timers! In this menu, you may select a key to start the timer, choose a sound, and even how the time is to alert you once turned on!

If you plan to use sounds for the timers that are custom, you will need to visit the Sound File Edit menu first. This is where you can record and upload sound files, edit them for longevity, even name and store them!

The timer setting section is also a bit behind in order, as those wanting custom timers will need to go here before using it in the Assign menu. Timers can run for days, or as little as a few seconds, can have reminders applied, will display on the screen with a custom prompt, and even the font size can change to ensure you notice the message!
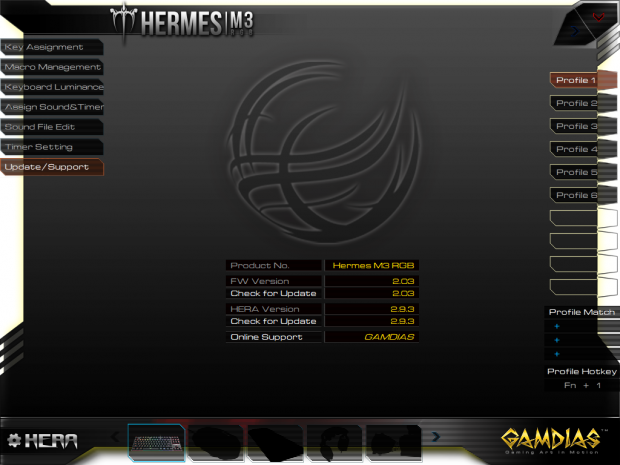
Gamdias also includes an update section to ensure you are using the latest firmware and software. One click on the check for updates highlighted text, and it will show you where you stand.
Gaming and General Impressions
DOOM & PUBG
In games, we noticed nothing out of order or any point that we missed an input! The NKRO support is fully functional and picked up every move we made! Anti-ghosting also plays to an advantage, as there are times we are trying to hold our breath or creep around while moving, And the Hermes M3 never failed to read whatever combination of keys we attempted to use simultaneously!
Macros do not play well to FPS games, but we did give things a try with older Macros we have for DOTA, and we were pleased to see they imported and functioned flawlessly! Also consider recording Macros on-the-fly with flawless execution, Windows and keyboard locks, swappable arrows and WASD keys, and the G-keys all offered to help make your gaming experience as pleasing as possible.
There is a bad side to this keyboard for us though! We realize we may have big heavy hands, but we feel many gamers tend to relax their hand on the keyboard! With that in mind, and even though the brown switches had a fair bit of resistance, we did find it easy to collapse nearby switches. Not everyone is the same, but for our style of use, we would have likely opted for the blue switch version, accepting the noise that is missing from the brown switches we have currently!
Windows and Productivity
While writing reviews, we do tend to hit multiple keys at once more than we usually do on any other keyboard. This is partly to do with the brown switches, but we feel that the low-profile nature changes the natural positioning of our fingers enough to be a more significant factor. With time, we will get better at it, keep in mind; there is a bit of a learning curve getting used to the thinner layout!
Aside from that, all other features used at the desktop level, without considering games, worked as intended. The multimedia controls work fine, the command keys are easy to find and use, and the lack of size and weight compared to most others makes it easy to get it right where it needs to be for the best comfort! In all, with a bit more usage, getting used to the changes, we feel that as a go-to for composing emails, social media posts and replies, trolling the internet, or writing a term paper, the Hermes M3 is very functional, giving you a near scissor switch laptop feel!
Final Thoughts
The Hermes M3 RGB took some time to get used to the low-profile nature of its design, but with the right amount of time under our hands, we have come to like it! We thought it might feel mushy or too much like a cheap laptop, but in this aspect, it has delivered a fairly decent feel and usability like any other keyboard on the market. While it is a TKL, 87-key offering, do not let that scare you away. Take the time to consider how much you use a number pad, and make the call. We have gone without for years, as the position with a TKL and a mouse is closer, and feels better after many hours of play.

Keep in mind as well; you can swap the WASD keys and the arrow keys, getting the mouse as close as possible or giving you much more room to move the mouse since a right-hand gamer would shift the keyboard way to the left! The lighting is bright enough to keep anyone happy, it is adjustable in intensity, and with HERA software in play, the lighting can do almost anything you can come up with as an idea!
Beyond the standards of size, weight, or feel of a product, all of the features work as intended. Whether it be the multimedia keys, the locks, profile buttons, G-keys, or LED control buttons; it all just works right out of the box! Of course, HERA software raises the feature set to another level! With all of the abilities, the software delivers, and with what we covered in the software section, nothing is missing that gamers would need, no matter the game style! While the big deal with the Hermes M3 RGB is that it is the World's first low-profile 87-key mechanical gaming keyboard, it doesn't hurt that the keyboard is a great option to have under your hands either! Considering current prices, it only makes the Hermes M3 RGB stand out even more, and kicks the pants out of the budget-friendly MK6 we tested not all that long ago!
The starting point for the Hermes M3 RGB may be near $150, but that is just ludicrous to pay for a keyboard such as this, even as good as it is! At $100 we are on the same level and is what Newegg is asking for the blue switch variant of our keyboard. We are pleased to see pricing dip even further at Amazon, where the brown switch M3 RGB is roughly $68, and if you prefer blue switches, you are asked about $55 for that one! The problem with sales is that they will end. With the standard prices shown in the $100 range, we fell you are getting what you paid for! That being said, if you can get Hermes M3 RGB mechanical gaming keyboard for near $50, we strongly urge you to make the purchase!
Chad's Peripherals Test System Specifications
- Motherboard: ASUS Prime X299 Deluxe - Buy from Amazon
- CPU: Intel Core i9 7920X - Buy from Amazon
- Cooler: Corsair H150i Pro - Buy from Amazon
- Memory: G.Skill TridentZ RGB 3600MHz 32GB - Buy from Amazon
- Video Card: EVGA GeForce GTX 1080 Ti Hybrid SLI - Buy from Amazon
- Storage: Samsung 960 EVO 250GB - Buy from Amazon
- Case: Cooler Master Cosmos C700P - Buy from Amazon
- Power Supply: Thermaltake Toughpower DPS G 1050W - Buy from Amazon
- OS: Microsoft Windows 10 Professional 64-bit - Buy from Amazon

| Performance | 99% |
| Quality | 85% |
| Features | 100% |
| Value | 100% |
| Overall | 96% |
The Bottom Line: At current prices, you will be remiss if you do not buy the Hermes M3 RGB! This 87-key, lightweight, compact keyboardi s a bargain, and well worth a try!
PRICING: You can find products similar to this one for sale below.
 United
States: Find other tech and computer products like this
over at Amazon.com
 United
Kingdom: Find other tech and computer products like this
over at Amazon.co.uk
 Australia:
Find other tech and computer products like this over at Amazon.com.au
 Canada:
Find other tech and computer products like this over at Amazon.ca
 Deutschland:
Finde andere Technik- und Computerprodukte wie dieses auf Amazon.de
What's in Chad's PC?
- CPU: Intel Core i7 13700K
- MOTHERBOARD: ASUS ROG Maximus Z690 Hero Eva
- RAM: TEAM DDR5-7200 32GB
- GPU: ASUS GeForce RTX 3090 Eva
- SSD: addlink m.2 2TB
- OS: Windows 11 Pro
- COOLER: Fractal Lumen S36
- PSU: be quiet! Dark Power Pro 1500W
- KEYBOARD: ASUS ROG Strix Scope TKL Electro Punk
- MOUSE: ASUS ROG Strix Impact Electro Punk
- MONITOR: ASUS ROG Swift OLED PG42UQ
Similar Content
Related Tags

