The Bottom Line
Introduction, Specifications, and Pricing
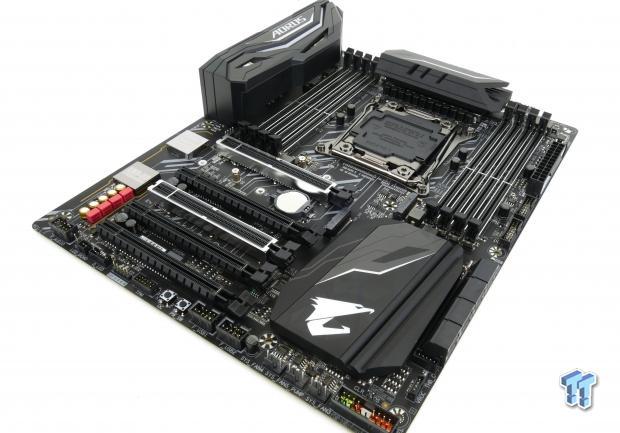
GIGABYTE's X299 AORUS Gaming 3 is GIGABYTE's current entry gaming model for the X299 platform. Compared to other sockets and platforms, Intel's X299 isn't just loaded from a chipset/CPU perspective, but also from the perspective of what vendors put into the motherboard on top of Intel's default feature set.
The X299 AORUS Gaming 3 is at the bottom of GIGABYTE's current X299 lineup, but it's loaded with a huge amount of features and has some really interesting design choices and surprises under the hood.
So, without further delay, let's take a look!
Specifications

The X299-AORUS Gaming 3 features two M.2 slots, USB 3.1 type-C and type-A, SATA 6Gb/s, Intel Gbit LAN, and 120 dB SNR audio.
Pricing
The X299-AORUS Gaming 3 costs $249.99.
Packaging and X299-AORUS Gaming 3 Overview
Packaging and Overview
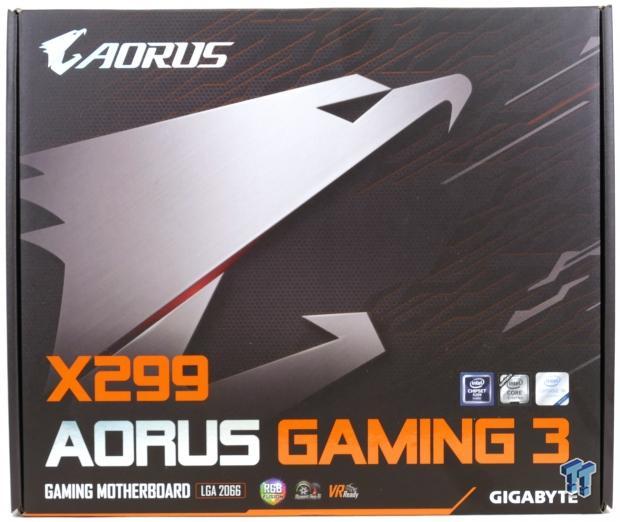

The motherboard's box and packaging are very high-end, but not as high-end as some of GIGABYTE's other X299 motherboards. The motherboard and included accessories are well protected within the confines of the box.
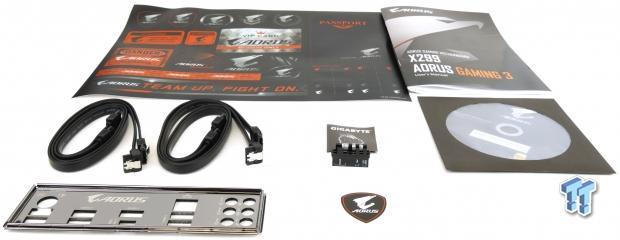
The accessory package includes four SATA6Gb/s cables, G-Connector, case badge, AORUS stickers, IO shield, manual, and driver DVD.
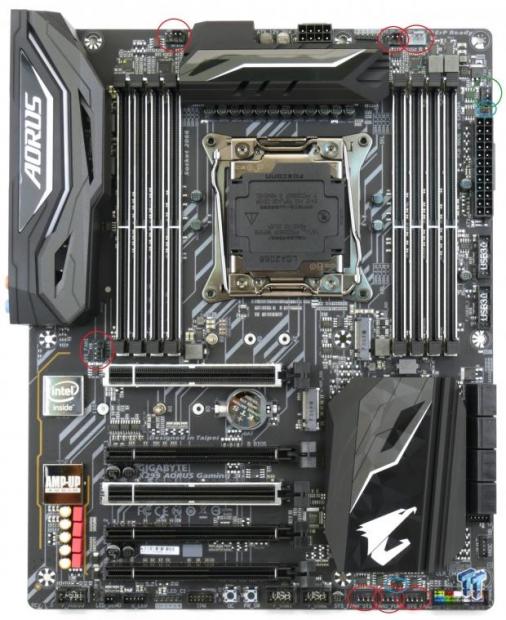
There are eight fan headers, all of them are flexible PWM/Voltage mode headers. The red headers are all identical, but the header circled in green is a 3A high output header for water pumps or multiple fans. Two headers labeled "EC" allow you to attach the two included EC temperature sensors so you can use those for fan header reference, they are circled in blue.
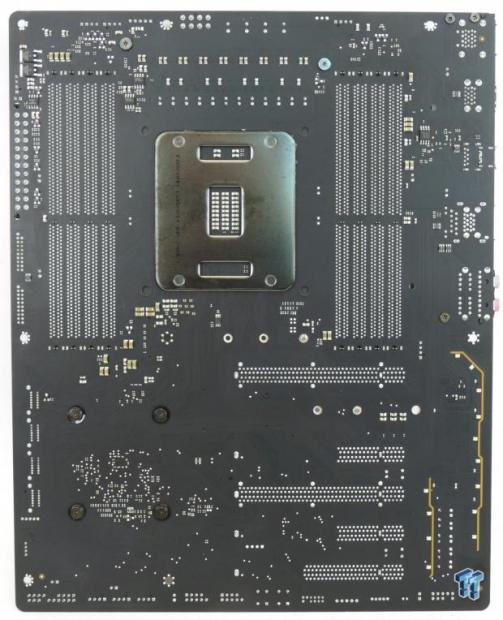
The Gaming 3 doesn't have as many RGB LEDs built into it like the Gaming 7 and Gaming 9 motherboards, and that might be something a lot of people might like since the Gaming 3 is significantly cheaper. Only the PCH heat sink and two PCI-E slots as well as the audio section light up. The motherboard's black and gray color theme is easy to match, and the back of the motherboard doesn't have many components.

The IO panel features six USB 3.0 ports, USB 3.1 type-A, USB 3.1 type-C, PS/2 Keyboard/Mouse, Gbit LAN, and 7.1 audio outputs.
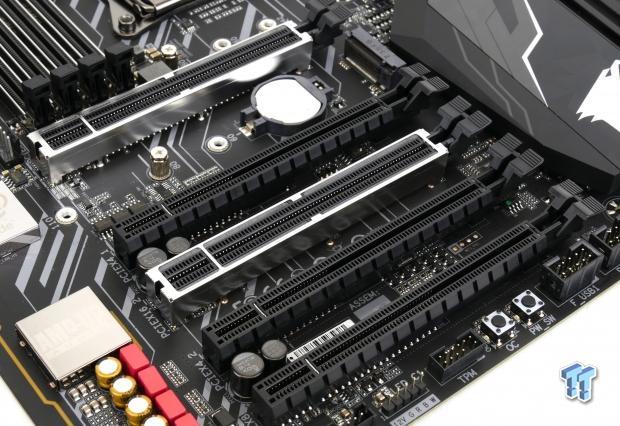
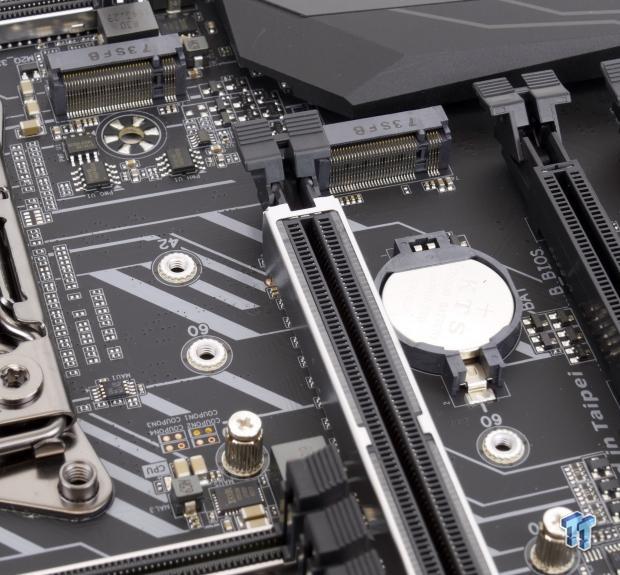
Okay, let's talk about one of the most interesting PCI-E layouts on the X299 market. The Gaming 3 has no quick switches for moving PCI-E lanes from the CPU. Instead, things are fixed. The first slot with reinforcement is your first x16 slot, the second x16 slot right below it is x4 wired to the CPU, and it's disabled when using an x16 lane CPU. Skipping that slot, the slot right below the second reinforced slot is x4 wired to the PCH.
Numbering the slots as slot1/slot2/slot3 and overlooking the two x4 slots, a 44 lane CPU operates at x16/x16/x8, a 28 lane CPU operates at x16/x8/x0, and a 16 lane CPU operates at x8/x4/x0. Unlike other X299 motherboards, an x16 lane CPU can only run x8/x4/x0; even a single card will only get x8. There are two M.2 slots that operate at 32Gb/s; M2Q_32G shares all of its lanes with SATA ports 4, 5, 6, and 7.
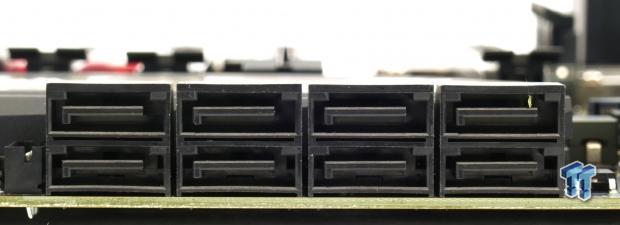
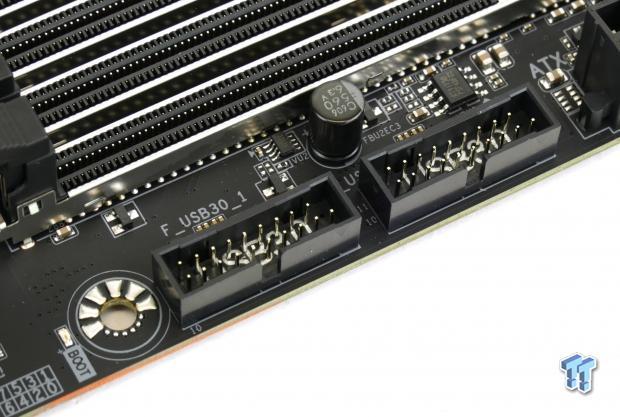
Four of the eight SATA6Gb/s ports are shared with the M2Q_32G slot. Two USB 3.0 internal headers are located below the 24-pin power connector. We can also get a glimpse of one of the Boot LEDs that illuminate if there is an issue.
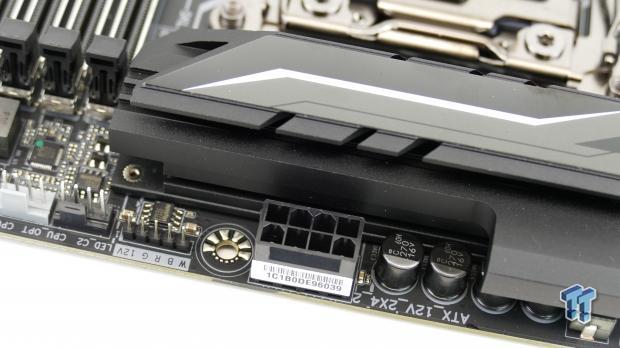
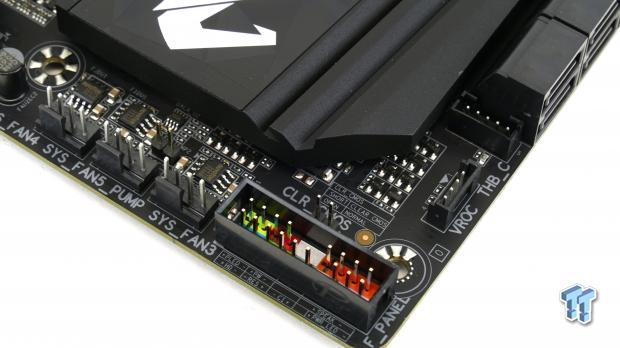
The motherboard uses a single 8-pin CPU power connector to feed the CPU VRM, and there is an RGBW header located right near it. ThunderBolt 3 GPIO and VROC headers are located below the SATA ports. A clear CMOS header is located above the front panel connectors while your second EC temperature header is located above the middle fan header.
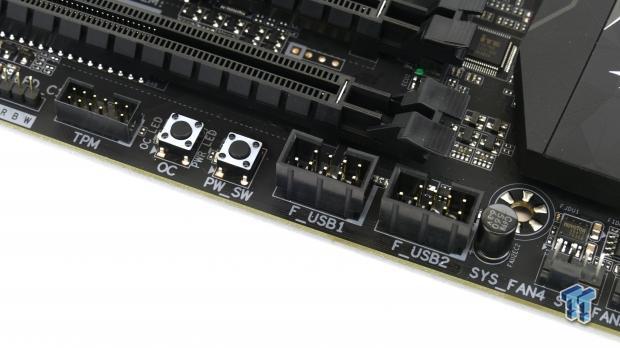
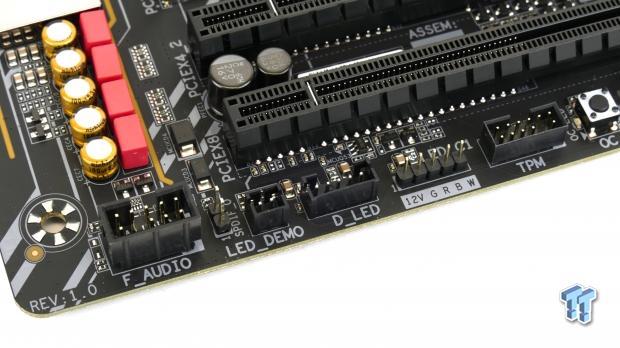
Interestingly enough, to the left of two USB 2.0 headers, we find a power switch and an OC button. There is a second RGBW header located next to a digital LED header, which outputs 12v and 5v, and looks identical to the ThunderBolt 3 GPIO header.
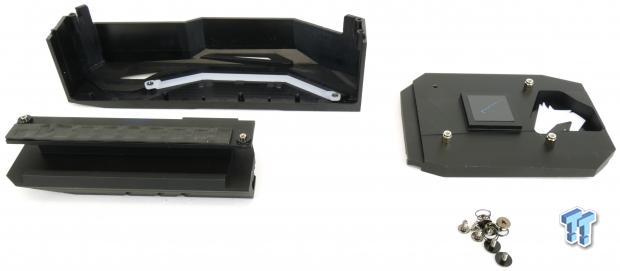
Heatsinks are decent, but I was surprised not to find a beefier VRM heat sink.
GIGABYTE X299-AORUS Gaming 3 Circuit Analysis
Circuit Analysis
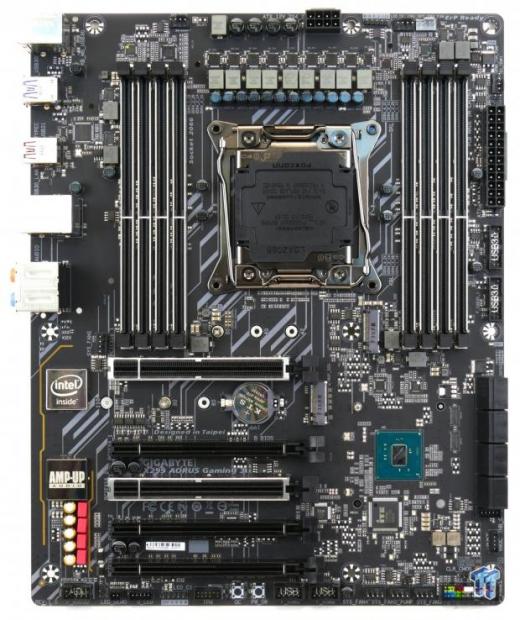
The X299 AORUS Gaming 3 looks awesome without the heat sinks.
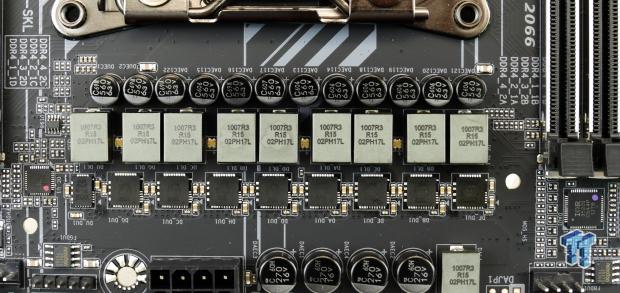
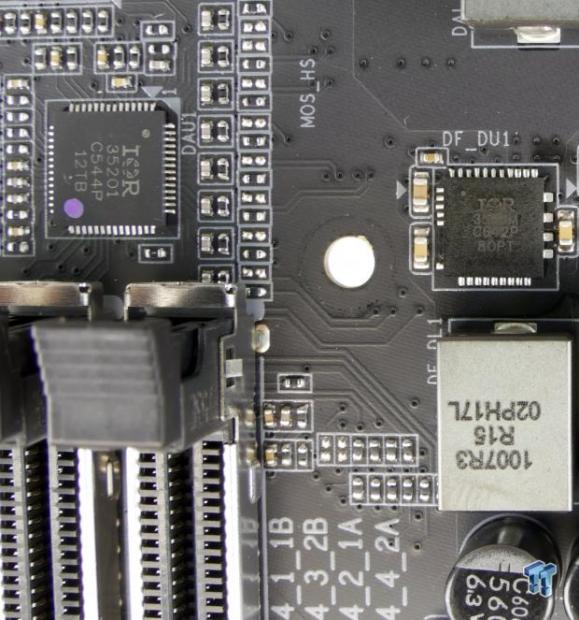
The motherboard has eight true phases for the main CPU voltage rail. The IR digital PWM, the IR35201 is used in 8+0 phase mode and controls eight phases made up of IR3556 fully integrated power stages rated at 50A. Eight 70-76A high current Cooper Bussmann power inductors and 10K FP caps are used for the LC filter on the motherboard.
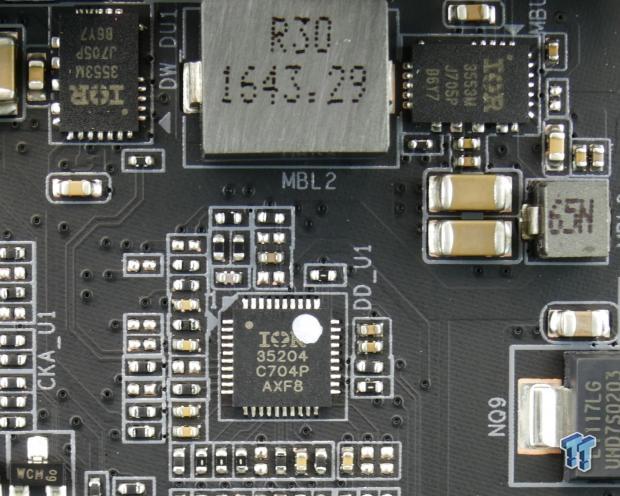
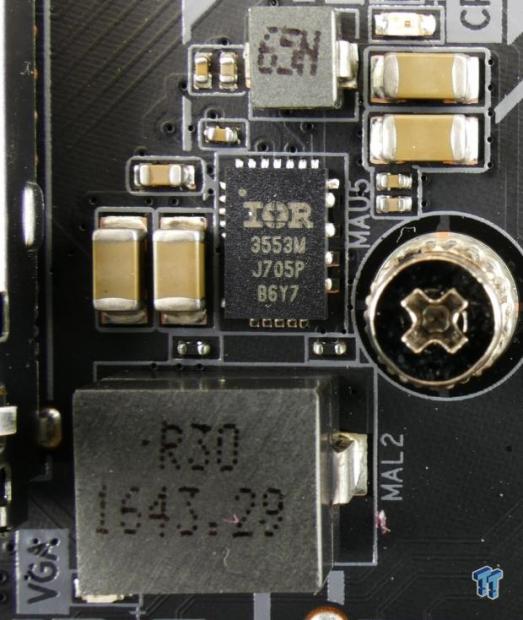
A few Infineon IR35204 3+1 phase digital PWM controllers are used to control the secondary rail VRMs (like VCCSA and IO), main DDR VRM, and DDR VPP VRM. The VCCSA uses an IR3553, as does the VCCIO, and memory rails. The VCCIO rail is located at the bottom of the socket.
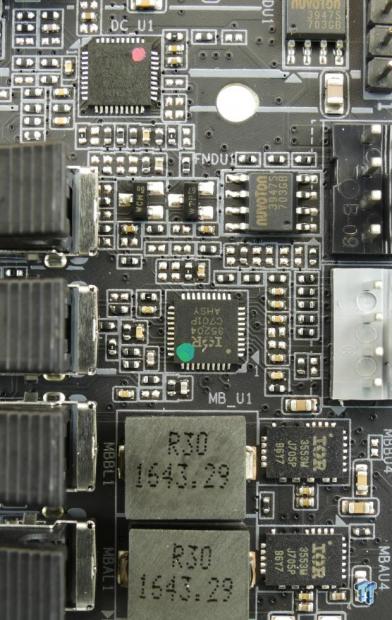
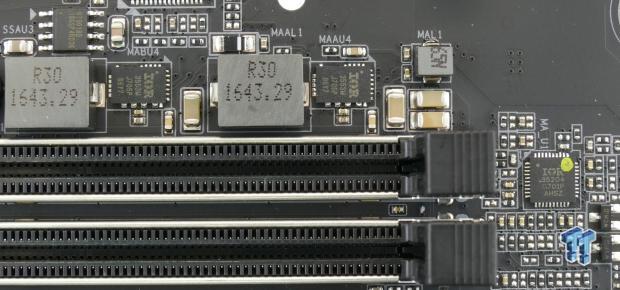
Each memory VRM uses another IR35204 and two IR3553 for the memory VRM and a single IR3553 for the DDR4 VPP.
GIGABYTE X299-AORUS Gaming 3 Circuit Analysis Continued
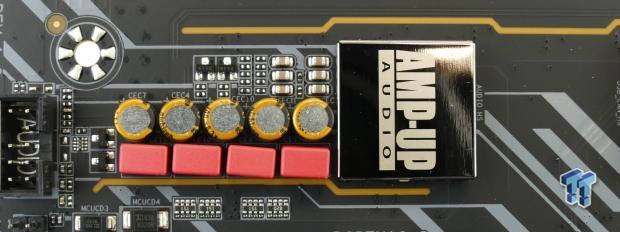
Audio on the Gaming 3 consists of an ALC1220, WIMA audio capacitors, Nichicon Gold plated capacitors and a physical divide in the PCB that separates analog and digital signals.
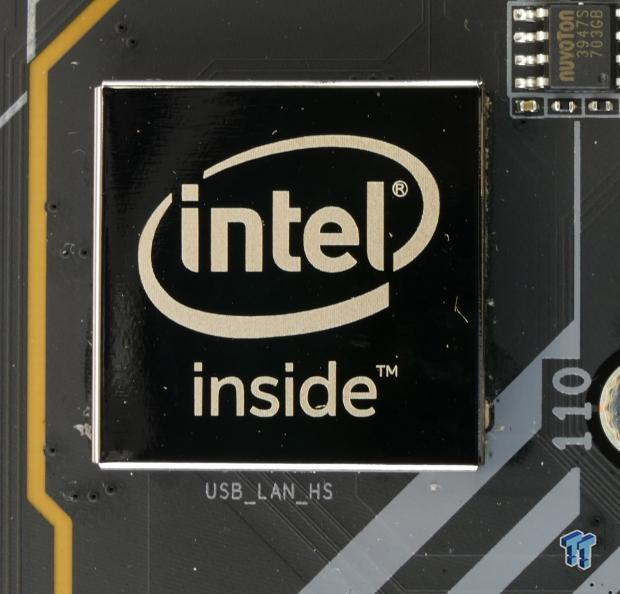
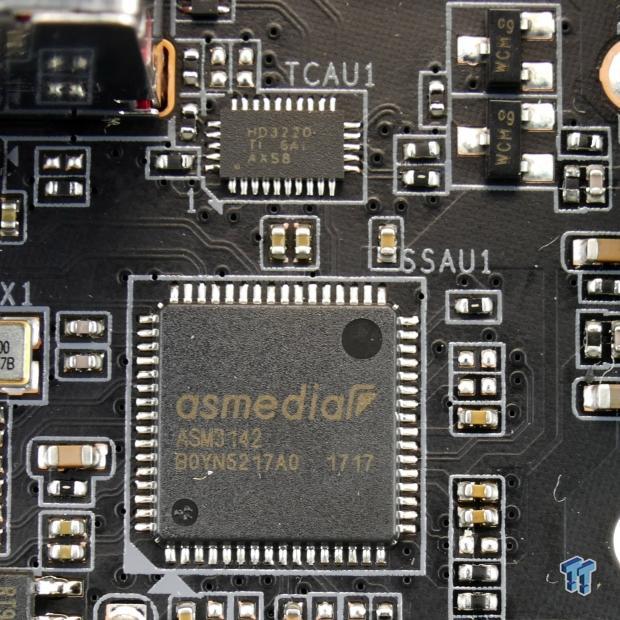
An Intel i219v is hidden below a metal shield and provides Intel Gbit LAN. An ASMedia ASM3142 is used to provide USB 3.1, and an HD3220 is a multiplexer used for the type-C port.
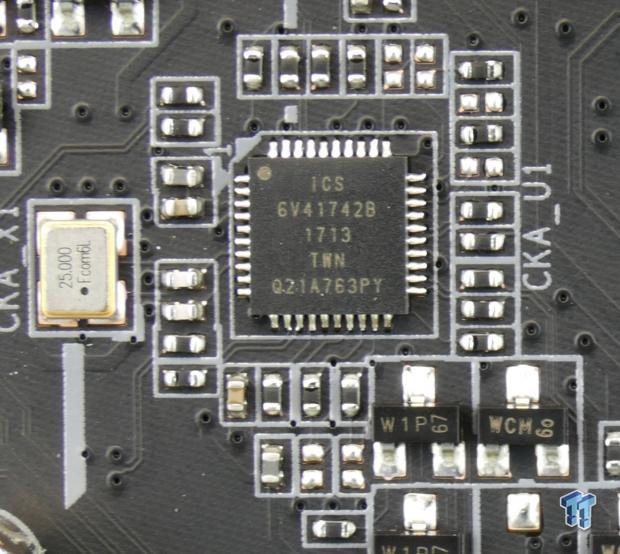
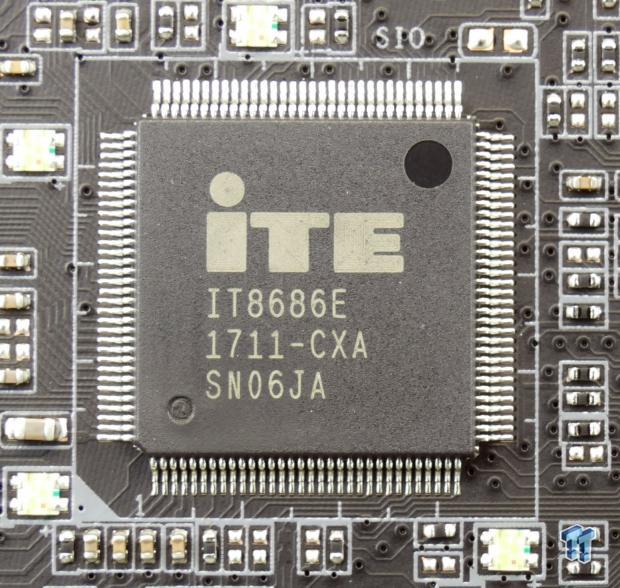
An ICS clock generators, a 6V41742B is used to enhance BCLK overclocking. An ITE IT8686E is used as the main SuperIO on the motherboard.
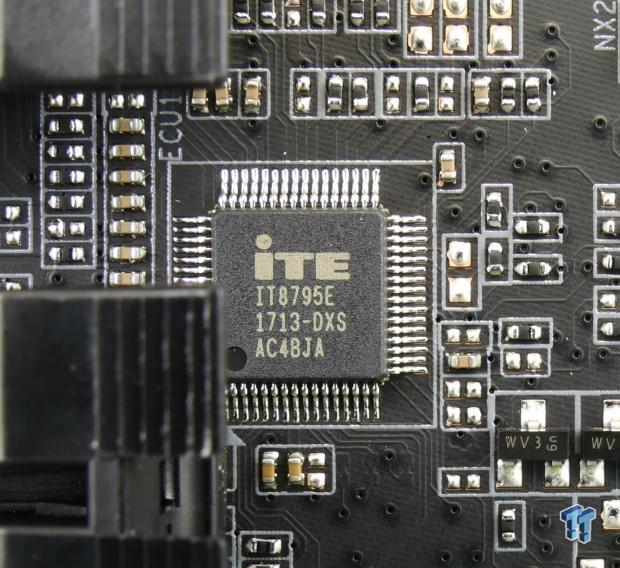
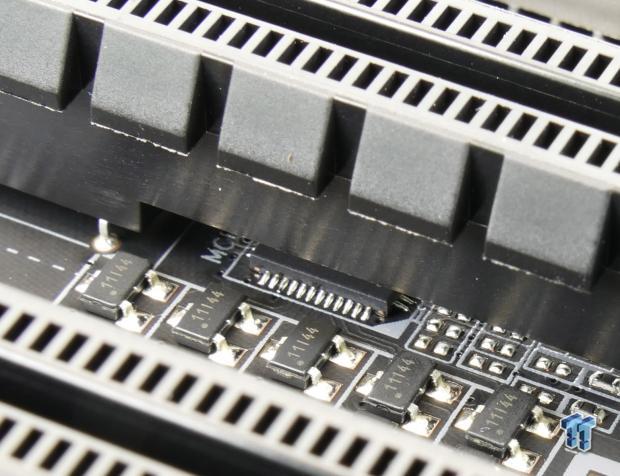
An ITE IT8795E is used to expand fan control and other secondary features, such as the EC temperature sensors. Under one of the PCI-E slot is a chip from ITE labeled MCU, and this is used to control the RGB LEDs on the board and the digital and normal RGBW strip headers.
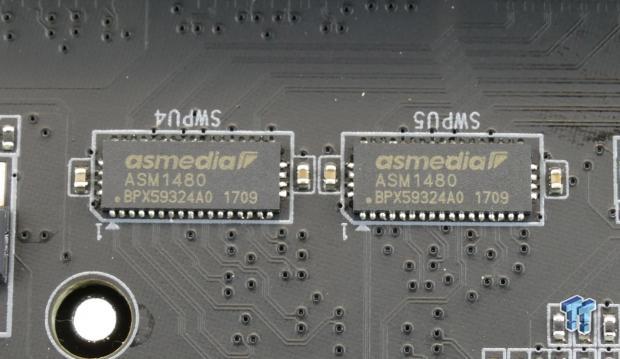
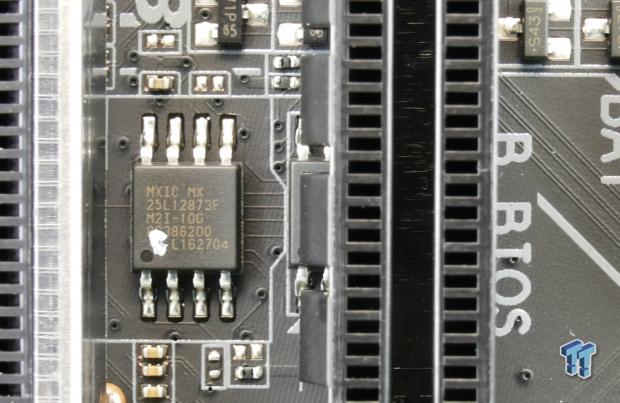
There are only two ASMedia ASM1480 on the motherboard, and they are used to move x4 SATA/PCI-E between one M.2 slot and four SATA ports. The motherboard features two BIOS ROMs, and they are each 128Mbit.
BIOS and Software
BIOS
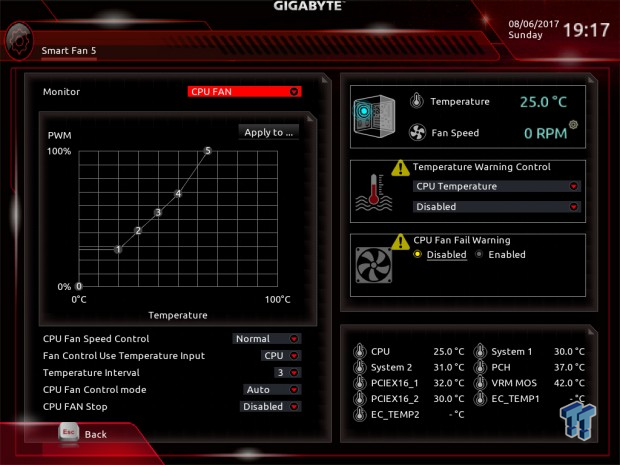
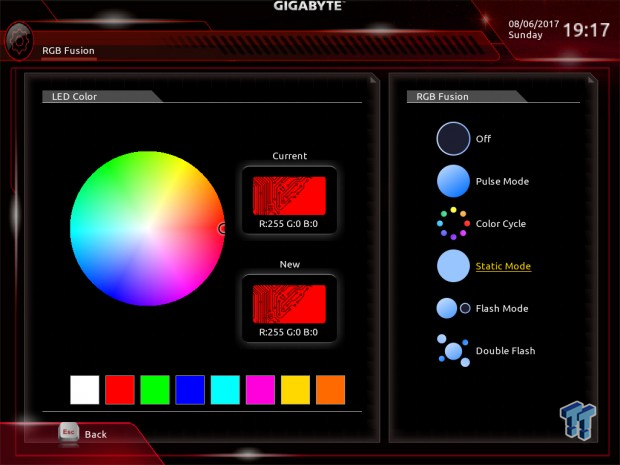
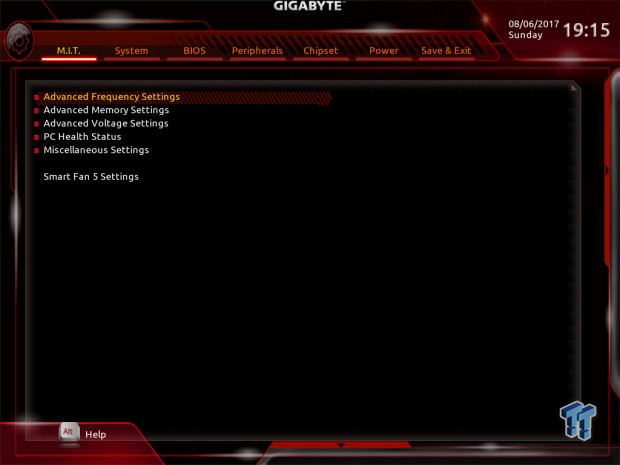
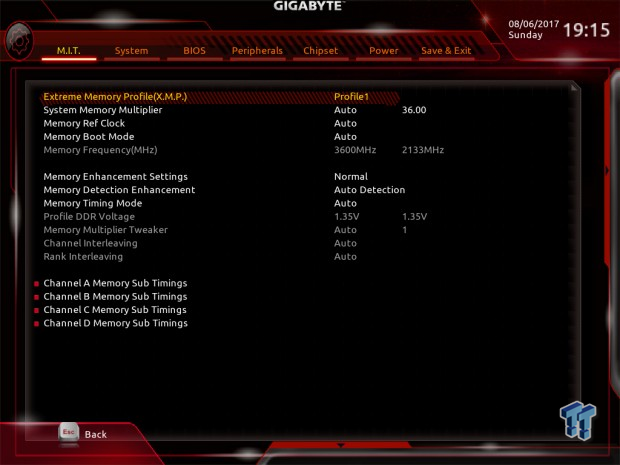
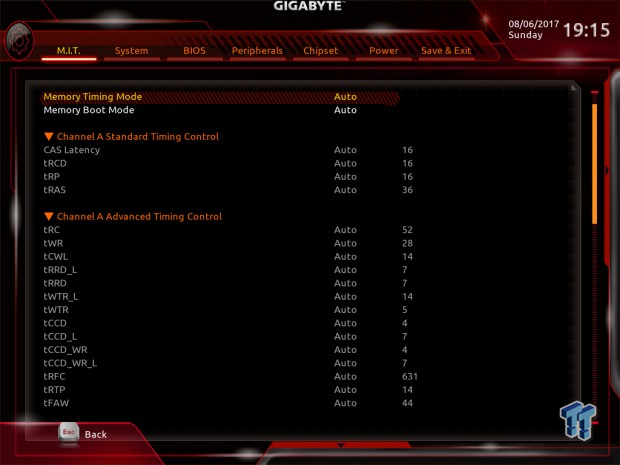
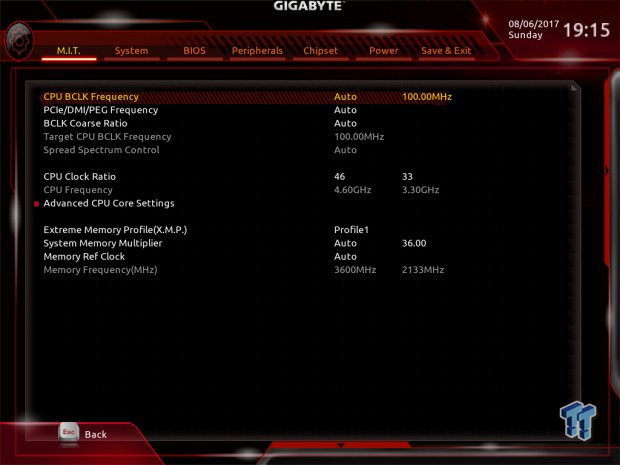
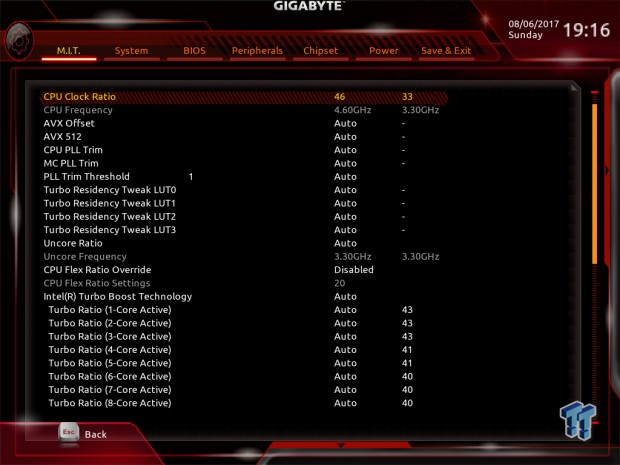
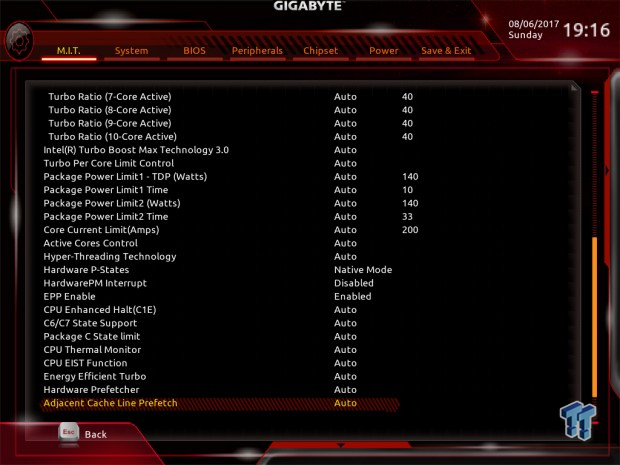
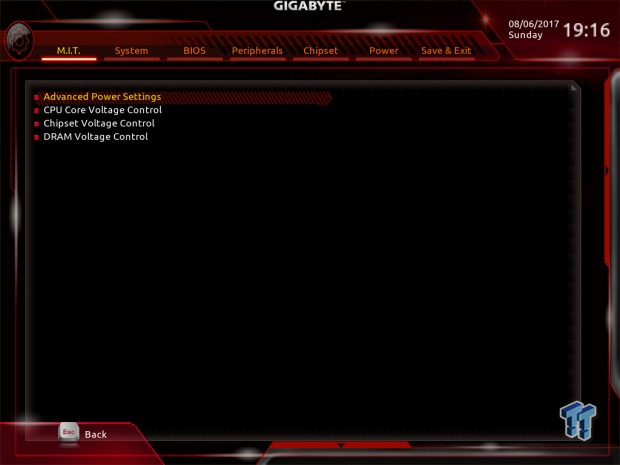
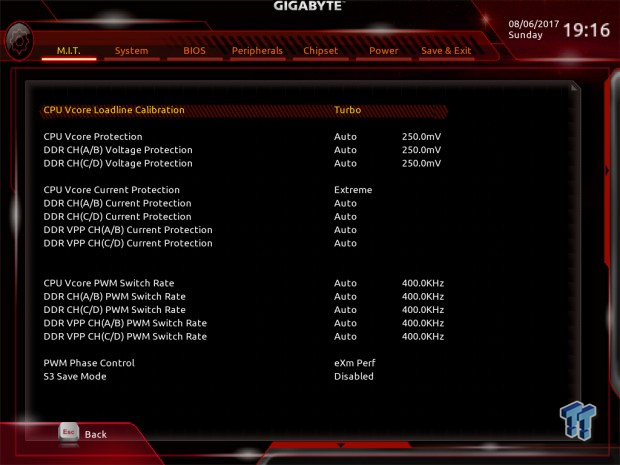
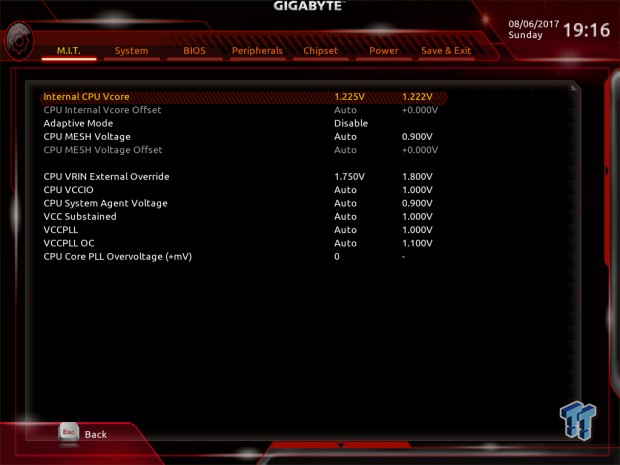
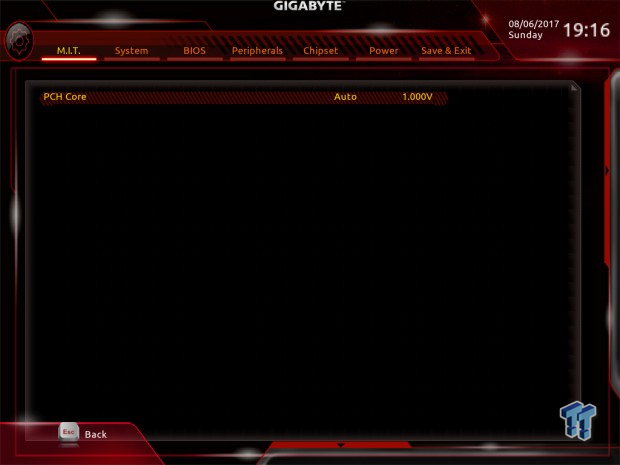
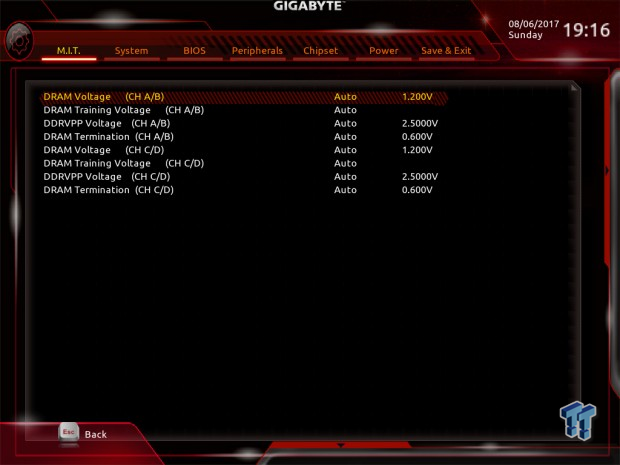
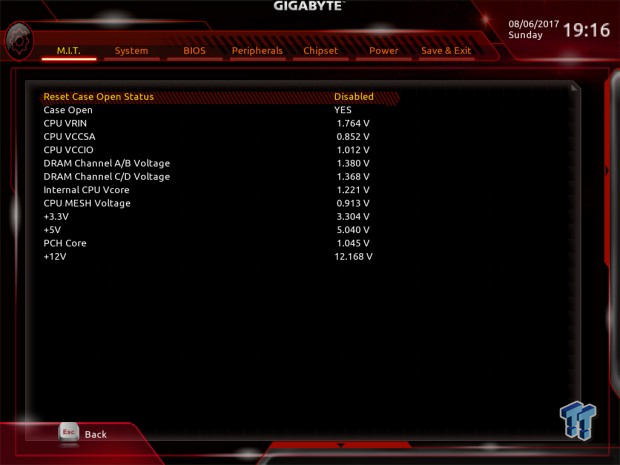
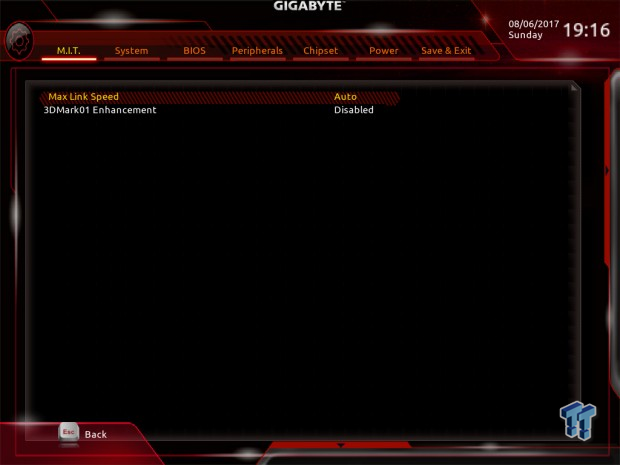
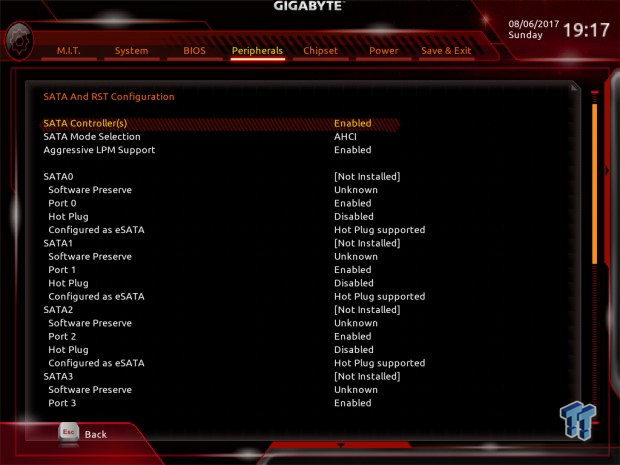
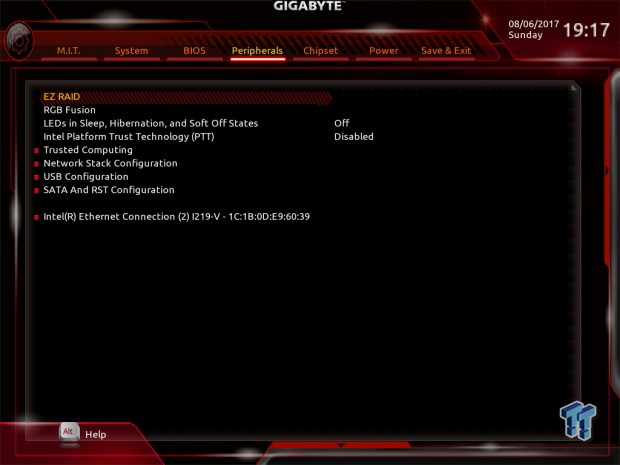
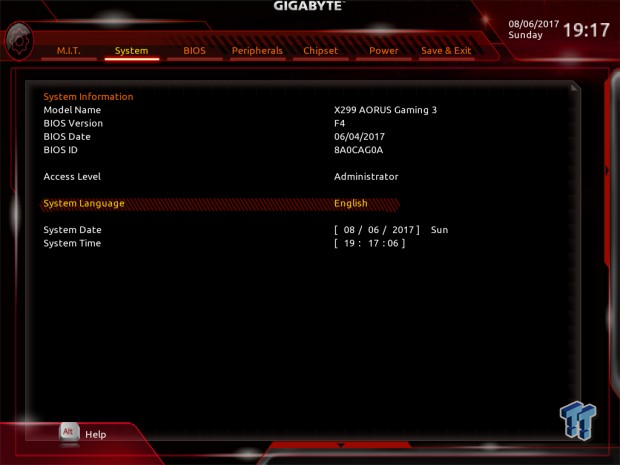
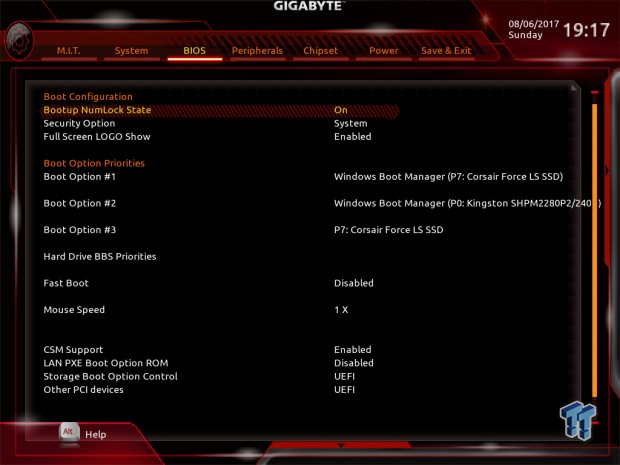
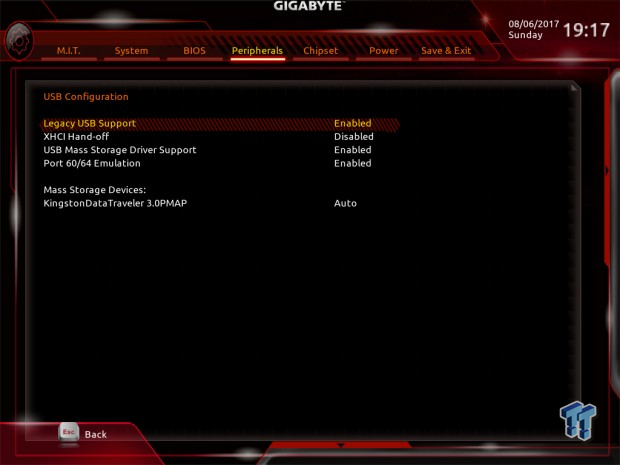
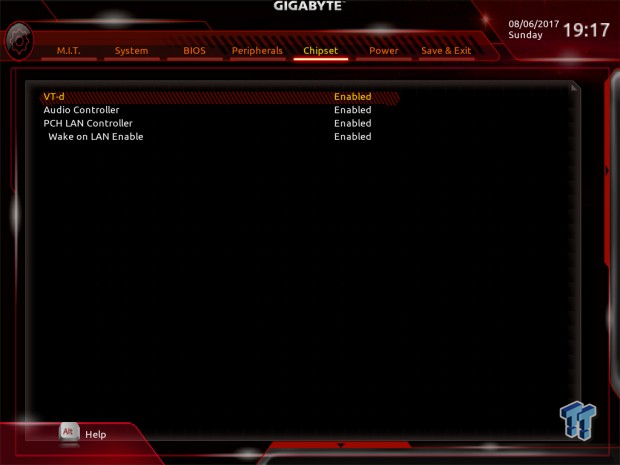
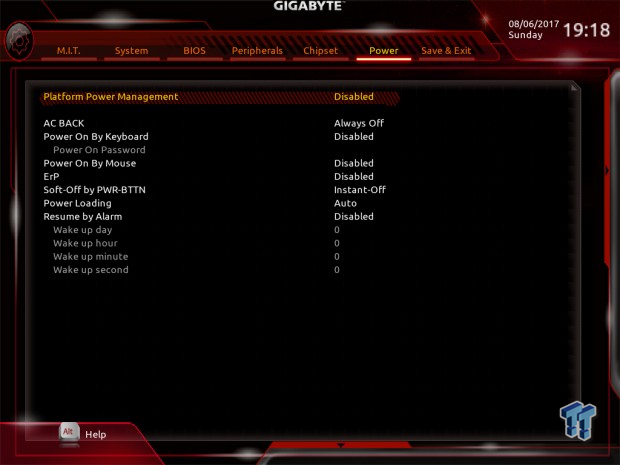
GIGABYTE's X299 UEFI is loaded with features from fan control to RGB LED control. It also has all the basic features you might expect such as platform configuration settings to boot override. You have the ability to control fans through a GUI, but there currently isn't any manual text box input menu for fan control, but the GUI is good enough.
Overclocking settings are present, and there are many of them, so you shouldn't have a hard time locating things such as load line calibration or minor CPU voltages. The RGB LED control is quite basic compared to GIGABYTE's extensive RGB software, but it's better than nothing. There is also an Easy Mode for more novice users.

Software
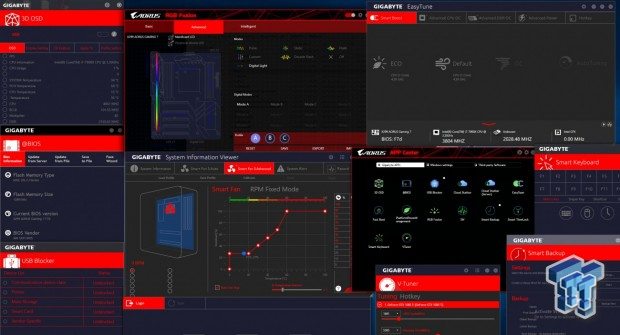
Software applications bundled with the motherboard include 3D OSD, @BIOS, BIOS Setup, USB Blocker, Cloud Station, EasyTune, Fast Boot, RGB Fusion, SIV, Smart Backup, Smart TimeLock, Smart keyboard, and VTuner.
Test System Setup
Steven's Motherboard Test System Specifications
- Motherboard: GIGABYTE X299-AORUS Gaming 3
- CPU: Intel Core i9-7900X
- Cooler: Corsair H110i - Buy from Amazon
- Memory: G.Skill TridentZ RGB (4x8GB) 3600MHz
- Memory: Geil EVO Spear (4x8GB) 3200MHz
- Video Card: NVIDIA GeForce GTX 1080 - Buy from Amazon / Read our review
- Storage - Boot Drive: Corsair LS 240GB
- Storage – M.2 Drive: Samsung 950 Pro 256GB
- Storage - USB Drive: Corsair Voyager GS 64GB - Buy from Amazon / Read our review
- Case: Corsair Obsidian 900D - Buy from Amazon / Read our review
- Power Supply: Corsair RM1000 - Buy from Amazon / Read our review
- OS: Microsoft Windows 10 - Buy from Amazon
- Monitor: ASUS PA328 ProArt 32" 4K - Buy from Amazon
- Keyboard: Corsair K70 LUX - Buy from Amazon
- Mouse: Corsair M65 PRO RGB - Buy from Amazon / Read our review
- Headset: Corsair VOID RGB Wireless - Buy from Amazon / Read our review
- BIOS: F4
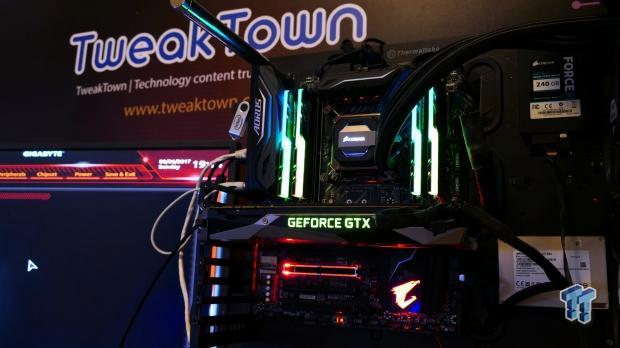
The X299-AORUS Gaming 3 lights up, but not as intensely as the Gaming 7 or Gaming 9. There are some built-in RGB LEDs that are obviously missing, and most of them are on the top of the motherboard.
The eagle on the PCH still lights up as do two of the PCI-E slots. The Gaming 3 is much less flashy, and that can be a great thing.
Overclocking
Overclocking Results
CPU Overclocking
Right now, I am going to see how far the motherboard can push my 7900X. The best overclock (or typical one) able to pass my Handbrake 4K encoding benchmark for stability is 4.6GHz with 1.2v VCore.
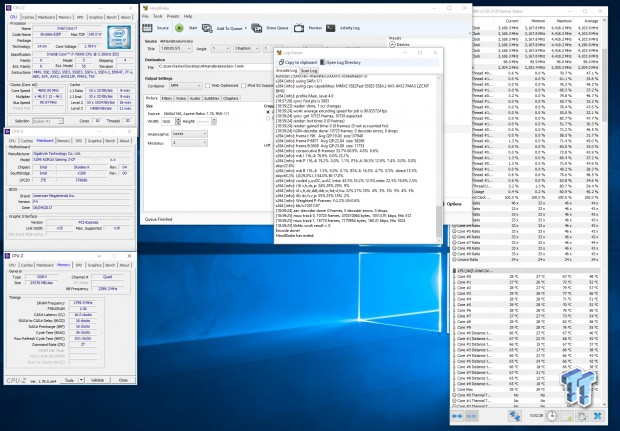
I set 1.75 input voltage with LLC on Turbo, then I set the VCore to 1.22v, phases to extreme performance, and enabled XMP. With a CPU multiplier of 46x, I was easily able to achieve my target 3600Mhz memory and 4.6GHz CPU frequency with ease. Temperatures on the CPU went towards 85C, but only one core surpassed 80C.
Memory Overclocking
Vendors are encouraged to send over their prime X299 memory kits to find out XMP compatibility for each of the motherboards I test.
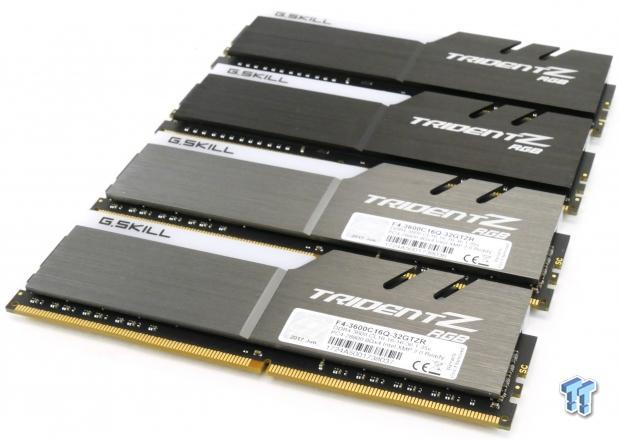
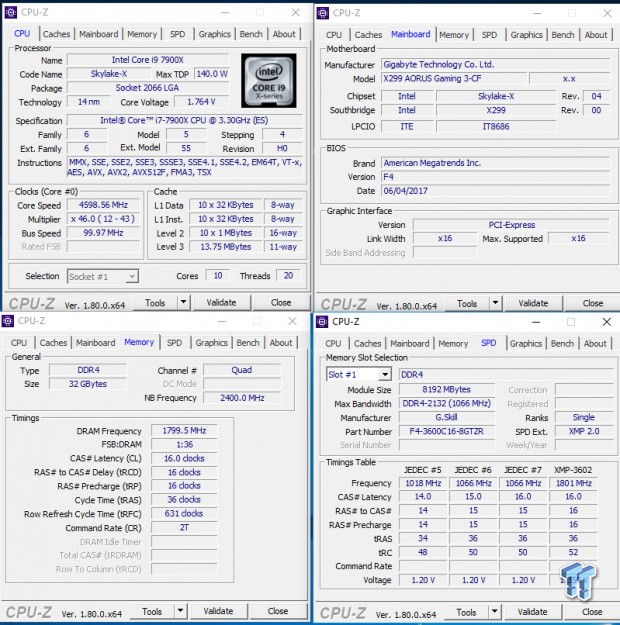
The G.Skill 3600MHz CAS 16 kit easily hits its target, all I did was enable XMP.
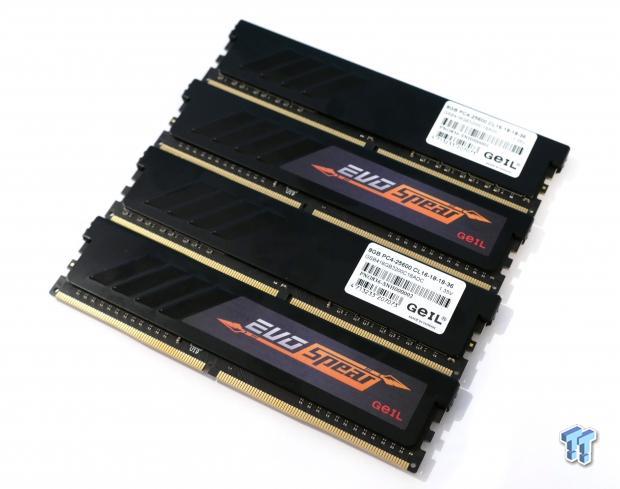
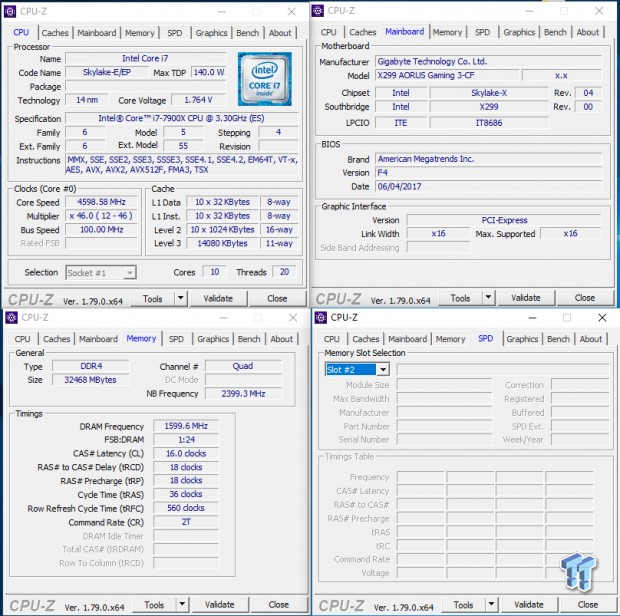
GEIL's 32GB of EVO Spear hit 3200Mhz with ease as well.
CPU, Memory, and System Benchmarks
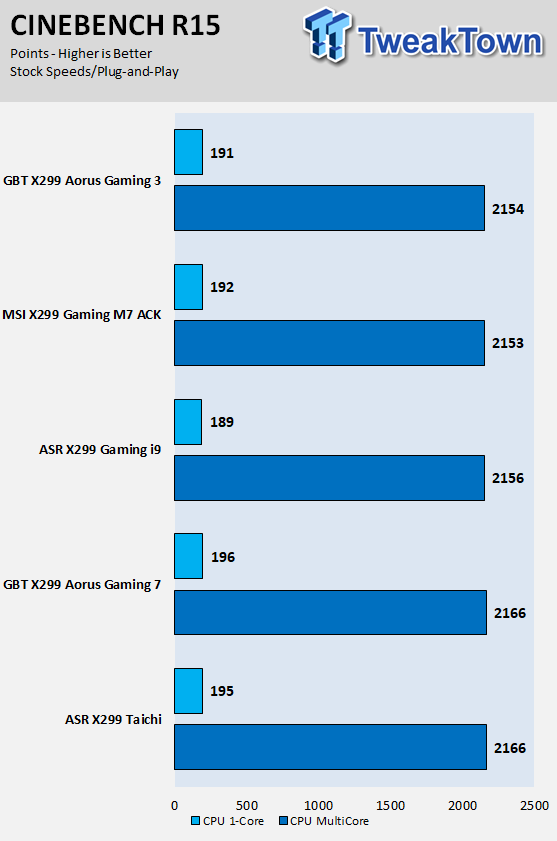
CINEBENCH R15
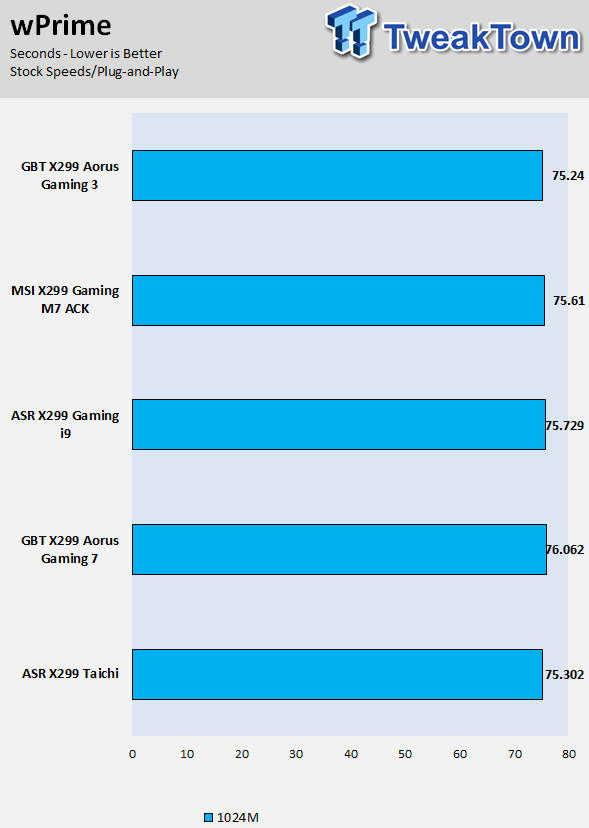
wPrime
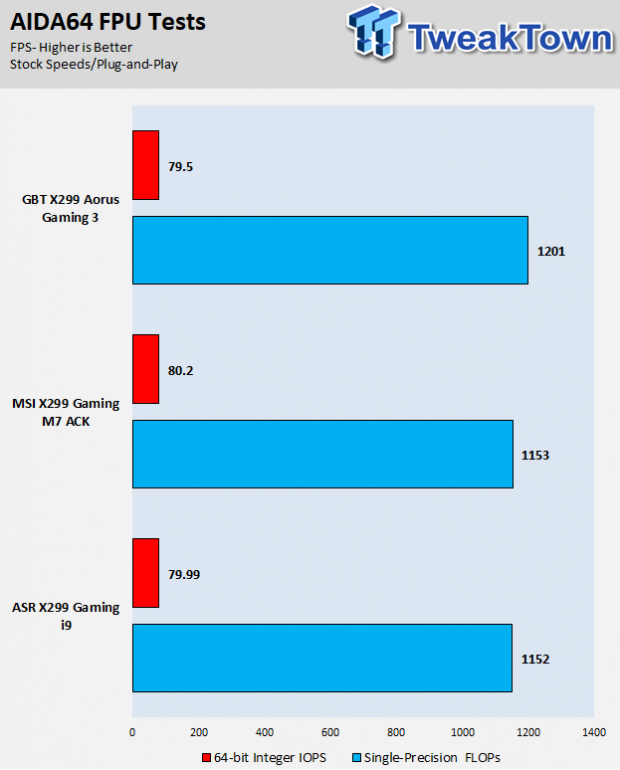
AIDA64 FPU
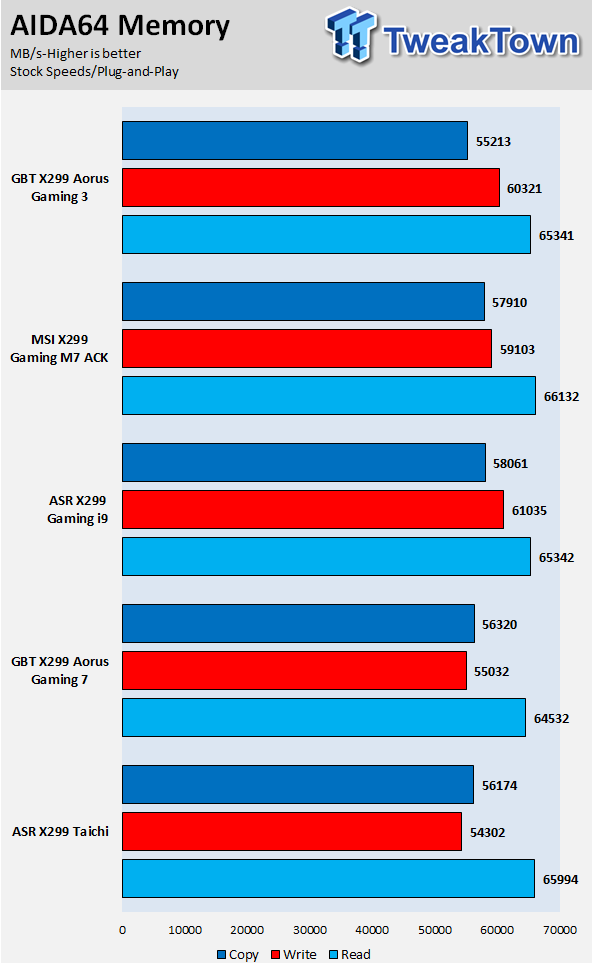
AIDA64 Memory
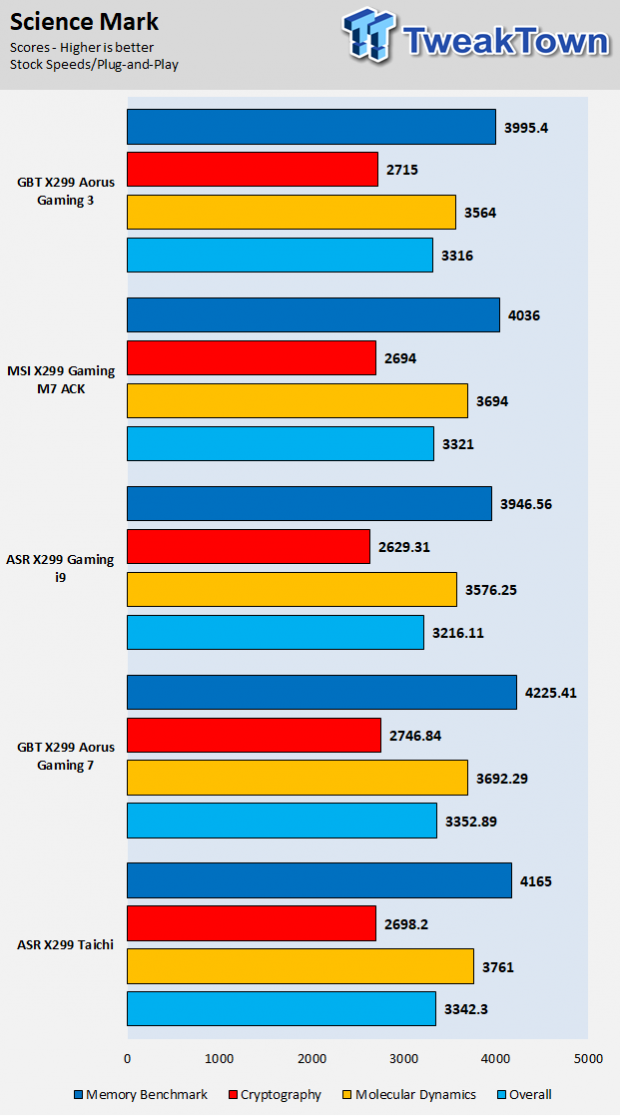
ScienceMark
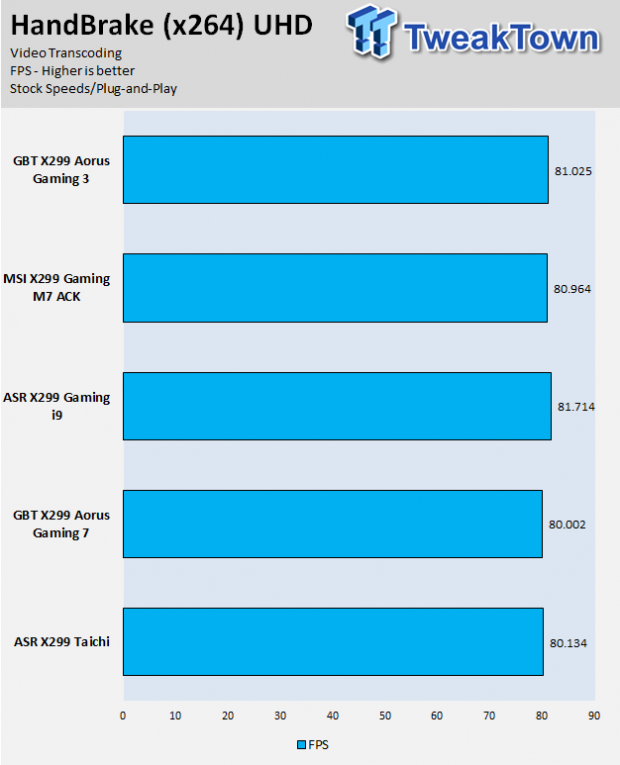
HandBrake
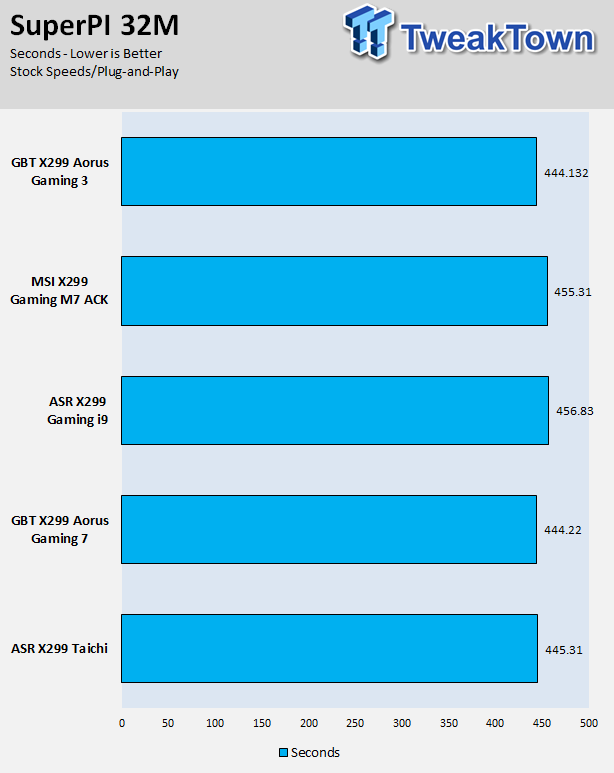
SuperPi 32M
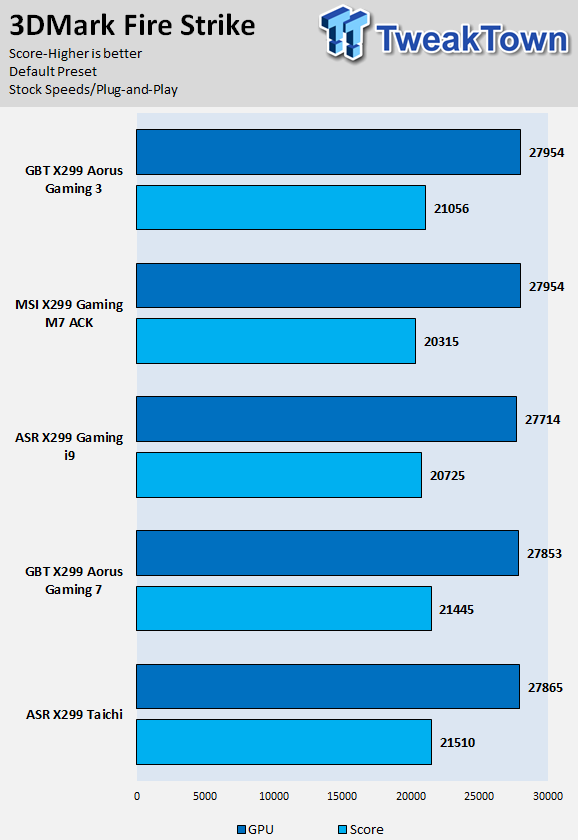
3DMark: Fire Strike
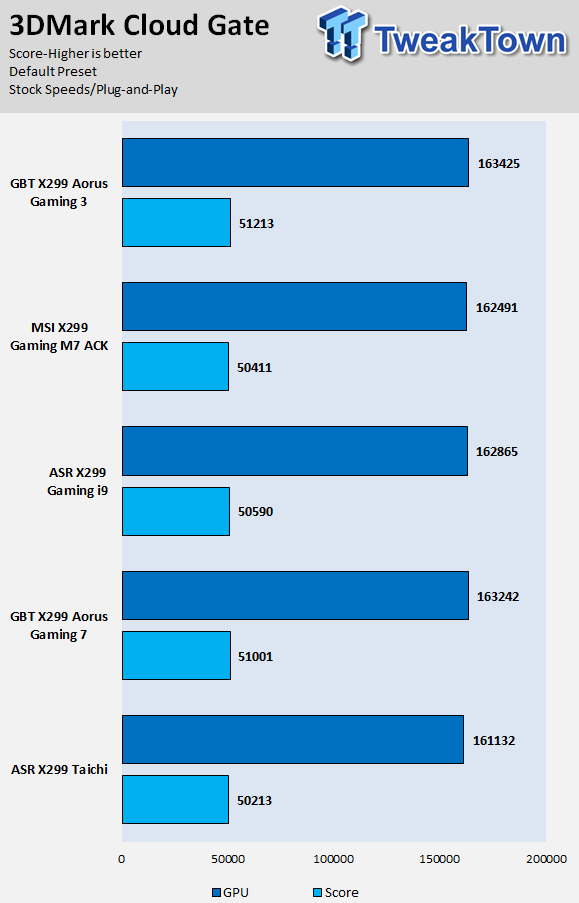
3DMark: Cloud Gate
ResidentEvil 6
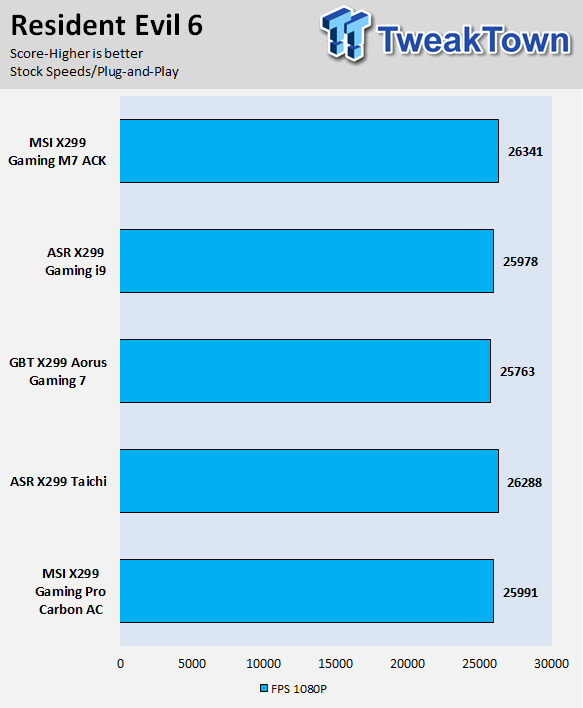
The GIGABYTE X299 AORUS Gaming 3, X299 Taichi, and MSI's Gaming M7 are using a new microcode, and it did have a slight impact on performance. The other motherboards in the charts will also show the same performance if their UEFIs are updated. Overall, the Gaming 3 has solid all-around performance without any issues or remarkable performance feats.
I don't put too much credence into benchmarking the CPU or GPU to see how well the motherboard does, as the difference is almost always within the margin of error. These tests are to make sure performance isn't below that margin, or to see what's going on if it's above.
System IO Benchmarks
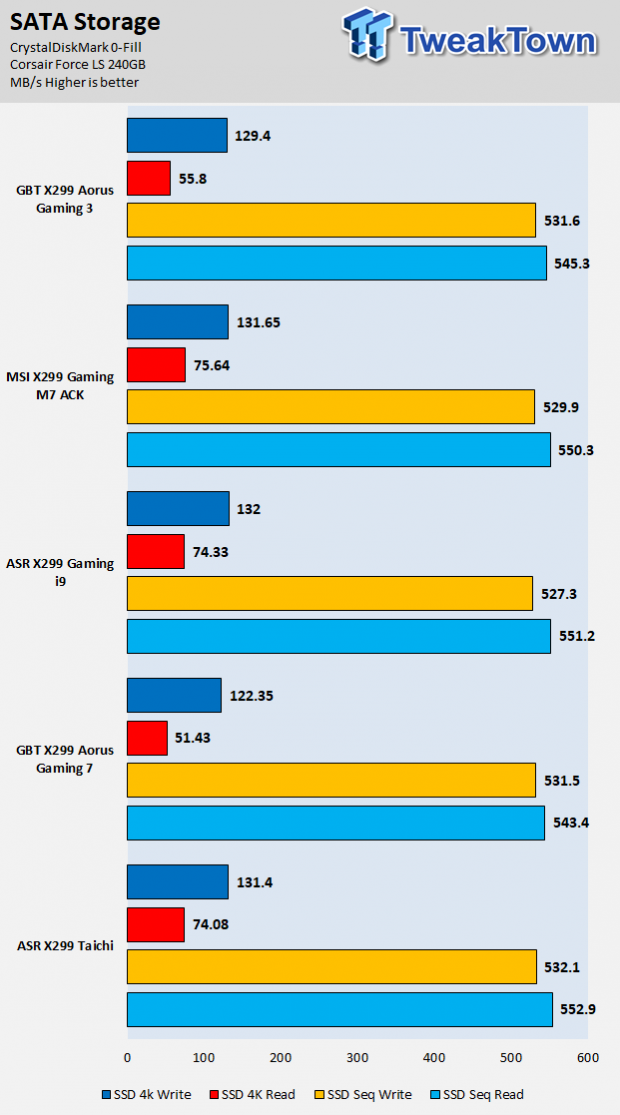
CrystalDiskMark SATA6G:
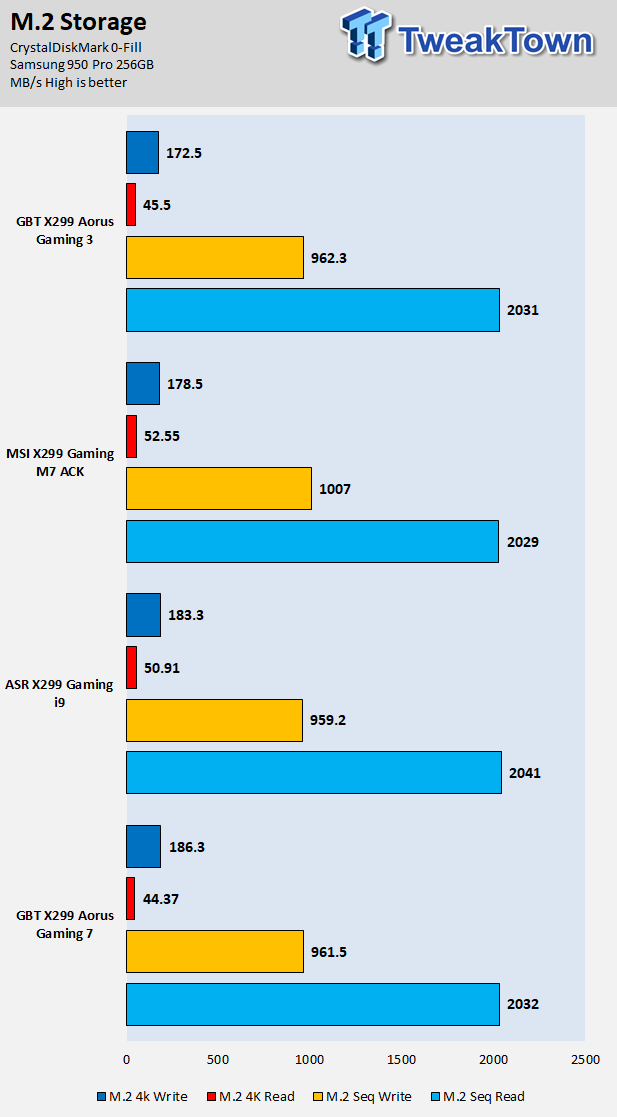
CrystalDiskMark M.2:
ixChariot Network Throughput:
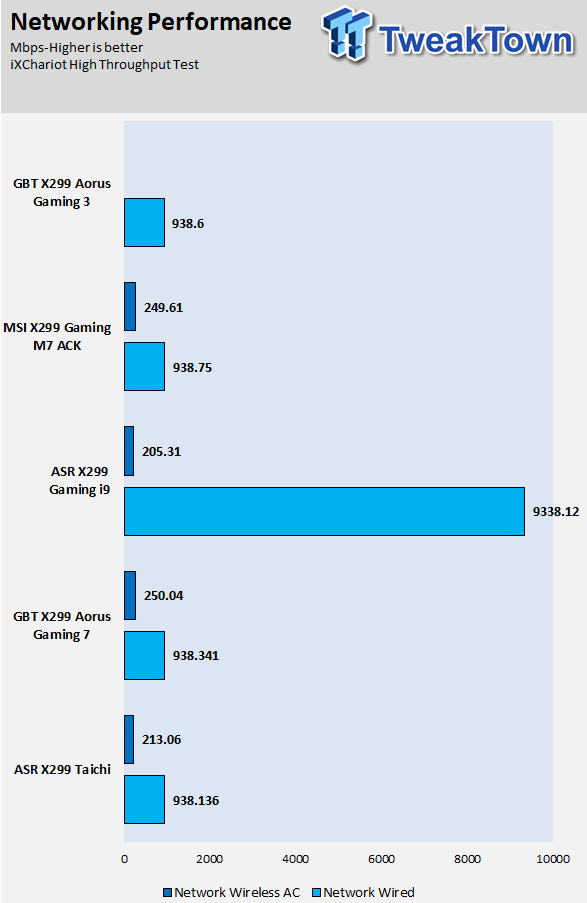
The X299-AORUS Gaming 3's storage performance is decent for SATA, but better on M.2. Network performance is what I expected as well; there is no wireless score because the motherboard has no wireless adapter.
Audio RMAA 5.5:
I disable all audio features, set the correct bitrates, and then test the audio with a loopback test.
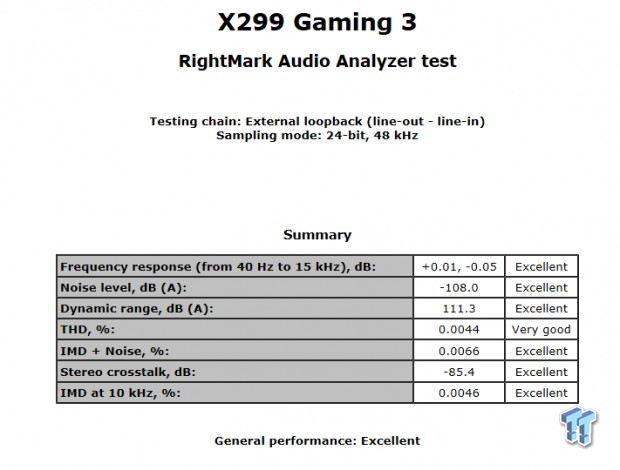
Sound Judgment by Ear: Excellent, but most motherboards score like this and sound like this because of the Realtek ALC1220, it really does change the game quite well, as now most integrated audio solutions offer great performance. There are five ratings for audio: 1. Problems, 2. Okay, 3. Acceptable, 4. Very good, 5. Excellent
VRM and System Thermal Imaging and Power Consumption
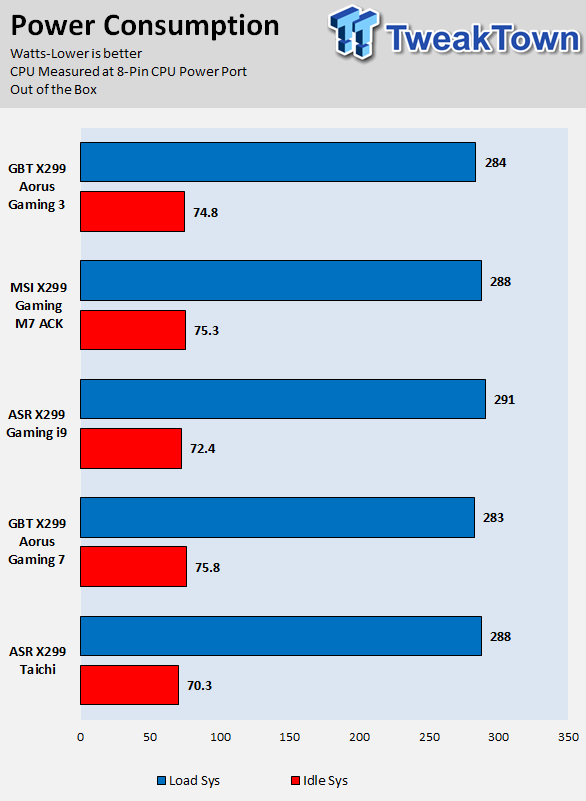
System power is measured at the wall with an AC power meter.
Note on Thermal Images: In the temperature section, we use our Seek thermal imaging camera to capture the surface temperatures of major components on the board. I look at the VRM and then all other things that light up the screen. If there is something to worry about, then I will state it. Otherwise, I will just show the hotter running parts of the board for fun. Unless some component is over 80-90C, then there isn't anything to worry about.
All systems will act differently, so I will look for commonalities, such as how far from the VRM the heat spreads through the PCB and the difference in temperature between the front side and backside of the PCB. Keep in mind, the majority of the heat from the VRM goes into the PCB as it is a giant soldered on copper heat sink. A larger difference in temperature between the back and front of the PCB points towards a more effective heat sink.
Thermal Testing at Stock Speeds:
The image on the left is always at idle, and the image on the right is at load. During ALL TESTS, fans above the VRM that cool the CPU cooler's (Corsair H110i) radiator are turned on to high (12v).
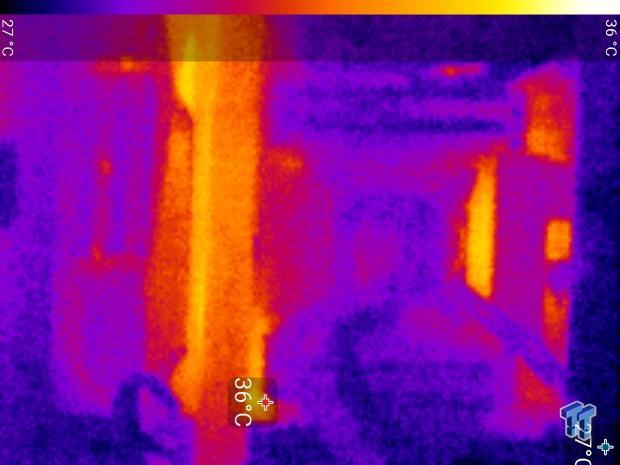
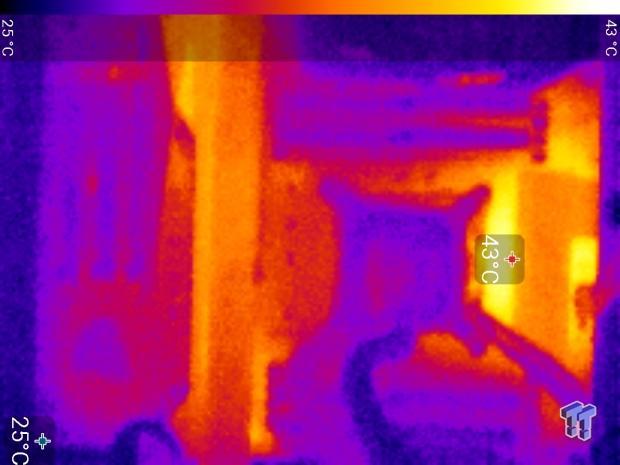
Full frontal.
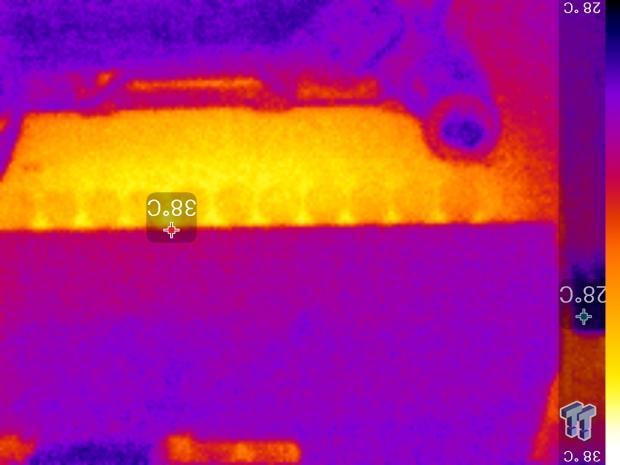
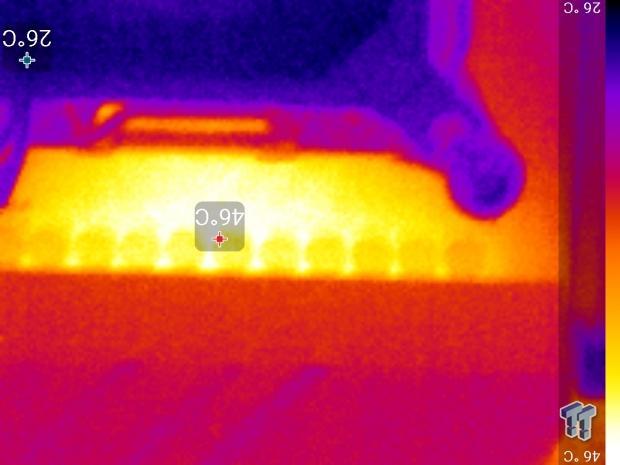
Up-close of the front of the VRM.
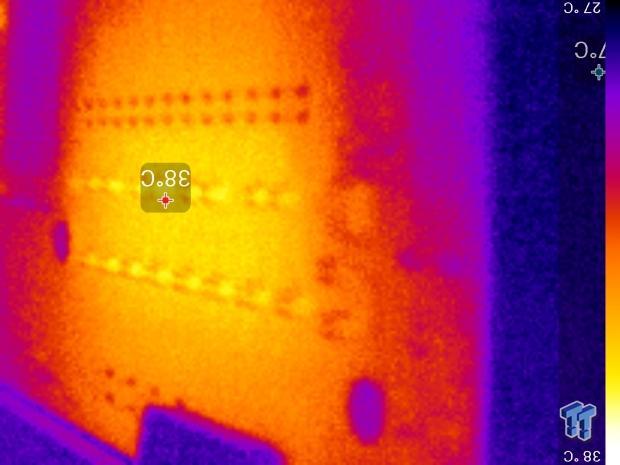
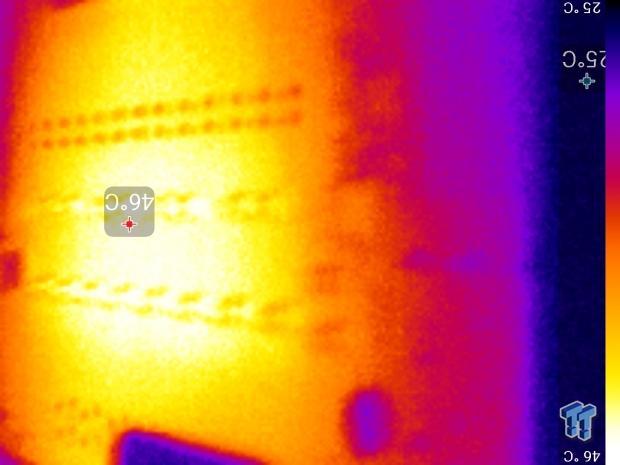
Up-close of the back of the VRM.
The VRM here is very solid regarding quality, but the cooling isn't anything magnificent. That being said, temperatures on the back and front are almost identical at stock, and they are actually low, which is great news for those who don't plan on pushing their HCC (high core count) CPUs to the maximum.
Low to moderate airflow 4.6GHz 1.75V VCCIN OCed VRM Thermal Imaging:
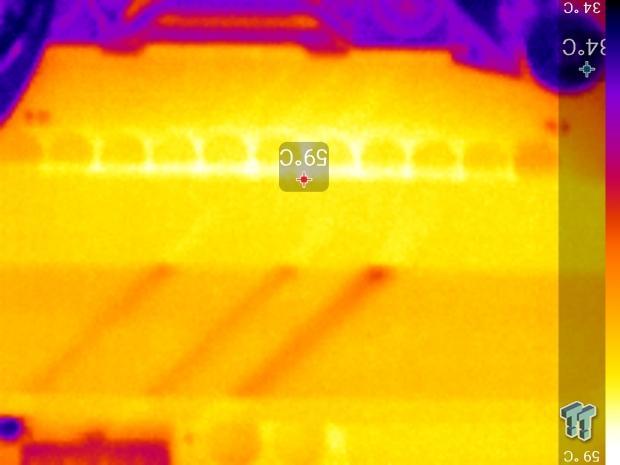
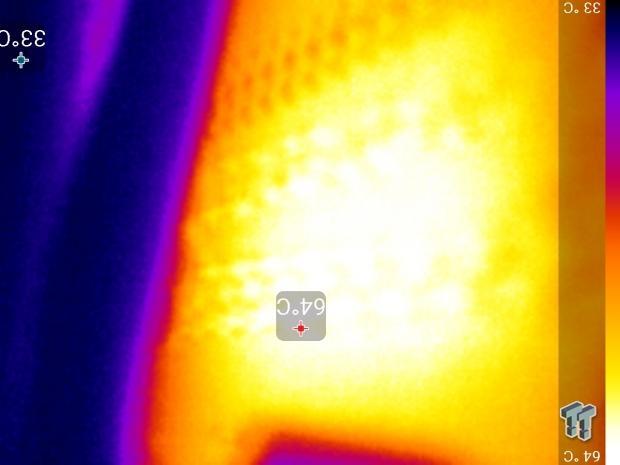
Temperature readings are taken after 40 loops of Intel Burn Test have been run (with AVX). Pictures of the setup are on the Test Setup Page. The two radiator fans (120mm Corsair) of the H110i blow in the general direction of the motherboard and VRM from the side (that is why the right side is slightly cooler in the first pic), so there is airflow (less than a case but more than a test bench with no airflow). The VRM here is cooled by a single heat sink, and there is no heat pipe.
There is also no backside cooling plate and not much surface area. The results here are not the worst and not the best. You should be fine with 4.5-4.6GHz with little airflow (like on an open test bench), anything higher and you will want to put the system in a case with decent airflow.
What's Hot, What's Not & Final Thoughts
Here are key points about the GIGABYTE X299 AORUS Gaming 3.
What's Hot
Solid Quality: When I speak of quality on this motherboard I am pretty much referring to the VRM quality of the CPU. It's top notch, and actually quite similar to that of the Gaming 7 and Gaming 9, which cost hundreds more. The only thing you will need to do is get some decent airflow in your case or on a test bench to help keep the heat sink cool.
Unexpected Fan Frenzy: I expected many fewer fan headers than on GIGABYTE's high-end boards, but the Gaming 3 has a whopping eight fan headers, all of which are PWM/DC mode hybrid, and one that even offers up to 3A. You also get the two temperature input headers in case you have external temperature probes.
RGB Support: The X299 AORUS Gaming 3 doesn't have that many built-in RGB LEDs, but it still offers two RGBW headers that can work as normal RGB headers. It also has that 12v or 5v digital RGB LED header, which is one of the cooler RGB features. GIGABYTE did maintain RGB LEDs in the PCH, and for the two PCI-E slots, so they kept it lit up on the bottom.
Fixed Lane Allotment for 44 and 28 lane CPUs: Quick switches can add latency, especially when going down multiple layers, and the good news is that the Gaming 3 is the first motherboard I have seen without any quick switches for these lanes. This is decent news for 44 and 28 lane CPUs, but not so much for 16 lane CPUs.
What's Not
Ouch for a 16 lane CPU: CPUs with only x16 PCI-E 3.0 are hardwired to the PCI-E slots at x8/x4. That means even with a single GPU, you can only run it at x8 instead of x16, and that is because of the lack of PCI-E switches and the way PCI-E lanes are routed on this platform. It also means you can't run SLI on an x16 lane CPU.
Digital RGB and ThunderBolt 3 headers look identical: Read the manual, so you don't plug into the wrong header.
Final Thoughts
The motherboard is built for Skylake-X, and that can be seen through the PCI-E allotment. While it can run a Kabylake-X CPU, I wouldn't recommend it, as GIGABYTE has other options in this price range that could support better PCI-E allotment for those x16 lane CPUs.
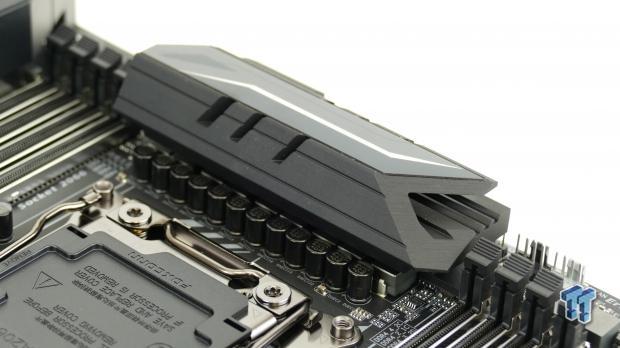
The motherboard, while just under the $300 mark, is actually on the mid to low-end when it comes to X299 motherboard prices. However, it retains many of the high-end features of not only the platform but also GIGABYTE's more expensive X299 offerings.
The GIGABYTE X299-AORUS Gaming 3 is an excellent value proposition for someone with a Skylake-X CPU who doesn't want to spend over $300 on a motherboard, but also wants to maintain relatively high-performance features, looks, and performance.

