


Our Verdict
Introduction, Specifications, and Pricing
After releasing the Pandora, which was a sleek and elegant design for Micro-ATX or smaller systems, BitFenix received a ton of user feedback for what was to be the second coming of this chassis. Users, of course, wanted the chassis to be able to house an ATX motherboard, which takes the original mid-tower chassis and blows things up to the full-tower category. They also wanted things like front facing SSD mounts, and a bay-less design that offers room for all things water cooling related.
BitFenix did not stop with just the more obvious elements of this design, though. They closed off the bottom of the chassis with a full-length PSU cover plate for starters. Enlarging the tower also allowed BitFenix to add additional water cooling support, without encroaching on other components. BitFenix even took the exterior into considerations, and rather than having just the rounded front, this time they added steel elements to the rear of the chassis to help continue that rounded look, this time, both in the front and at the back. Also gone is that oddly shaped side panel window, as this time there is no drop down section of it, yet you can still get a great view of everything inside of the chassis.
With all of that in mind, it seems that BitFenix took a good concept, and while introduced in a basic form with the original Pandora, this time around things are much more refined. BitFenix asked the masses for ideas and did they ever deliver by taking all of the ideas and criticisms to heart. What you are about to see, in our mind is an evolution, leaps and bounds step forward in the Pandora chassis. While our first look at a Pandora chassis left us wanting and did not overly impress us, this time around, you are going to find that BitFenix keeps their unique styling, yet at the same time, have delivered us a larger, much more impressive chassis to share with you today.
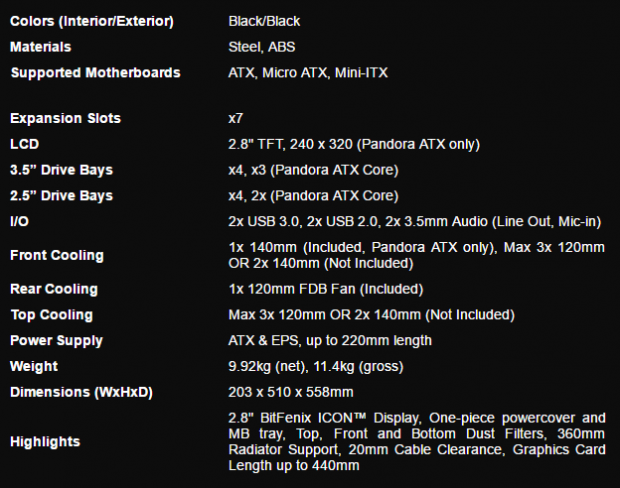
Unlike our Pandora, the Pandora ATX only comes in black at this point, and the Pandora ATX is made mostly of painted steel components, with bits of ABS plastic here and there to complete the aesthetic appeal. In this full-tower version, you can house Mini-ITX and Micro-ATX like the original, but this time, ATX motherboards can also find a home inside. The front I/O panel offers users USB 3.0, USB 2.0, and HD Audio ports, and at the back of the chassis, we are offered seven expansion slots to fill. The exterior also offers a 2.8" TFT LCD screen on the front, which sports a resolution of 240x320 pixels. By default, this is setup to display the BitFenix logo, but with software, it can produce any image that you drag and drop via their software. This feature is not available in the Pandora ATX Core.
Inside of the chassis, we are offered a total of four locations to house 3.5" drives, and the same is found for 2.5" drives because they use the same mounting plates. This means that there is room for a total of four storage drives altogether. We also notice that the Pandora ATX offers not one bay for optical drives, helping to clean up the looks of the interior. As for the cooling, the chassis is shipped with a single 140mm fan screwed into the front bezel. In this area, you do have the option for up to three 120mm fans, or you can also opt for a pair of 140mm fans here. The rear of the chassis also comes with a fan in place, this time, it is a 120mm fan, with no options for a 140mm fan installation here. The top of the chassis houses the same fan configuration as what the front offered, but unlike the Pandora, the Pandora ATX offers a deeper well here for fans and thin radiators. The last things we see on the cart includes the 9.92kg weight and the 203mm width, 510mm depth, and 558mm of height that the Pandora ATX is.
Shopping for this chassis may be slightly confusing, but don't let any of that fool you. Currently, there is only one version of the Pandora ATX, no matter if the naming includes the ICON or not. Anything you see listed with the Pandora ATX naming will be black, and it does include the ICON LCD screen. The only other version we can find a mention of is the lesser equipped Core, and that does not even show up on the BitFenix website at this time. Amazon lists the Pandora ATX for $134 with free shipping at the time of writing.
Chad's Chassis Test System Specifications
- Motherboard: GIGABYTE GA-Z68X-UD4-B3
- CPU: Intel Core i7 2600K (buy from Amazon)
- Cooler: Corsair H80i GT (buy from Amazon)
- Memory: G.Skill Ripjaws F3-12800CL6D-4GBXH
- Video Card: ZOTAC GeForce GTX 970 AMP. Extreme Edition (buy from Amazon)
- Storage: SuperSpeed 128GB SSD
- Power Supply: SilverStone SST-ST85F-G (buy from Amazon)
- OS: Microsoft Windows 7 Ultimate 64-bit (buy from Amazon)
Packaging
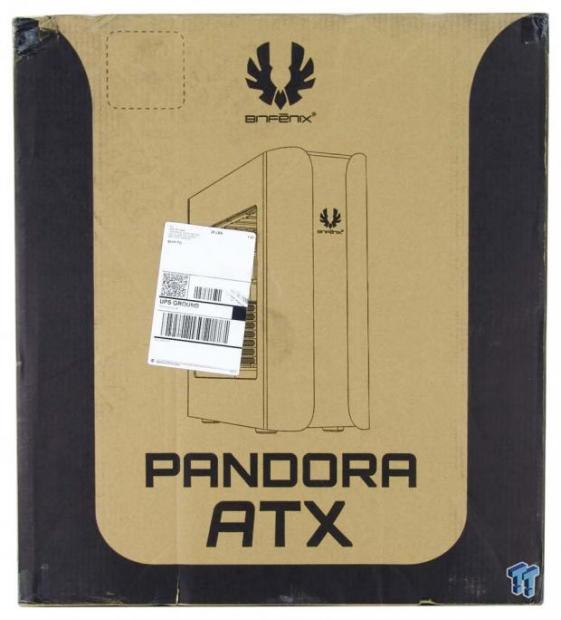
The front of the packaging offers the BitFenix logo and name at the top of the panel, with a rendering of the chassis just below that. At the bottom, we see the PANDORA ATX in bold letters, and a thick black bar on the sides and bottom, that follow the design of the front of this chassis.
Our Latest Full-Tower Cases Review Coverage

On this side panel, the chassis name tops things off, and we find another rendering below the handle. At the bottom of it all, we find two specifications charts, the left one for the Pandora ATX, and the right one covering the Pandora ATX Core.
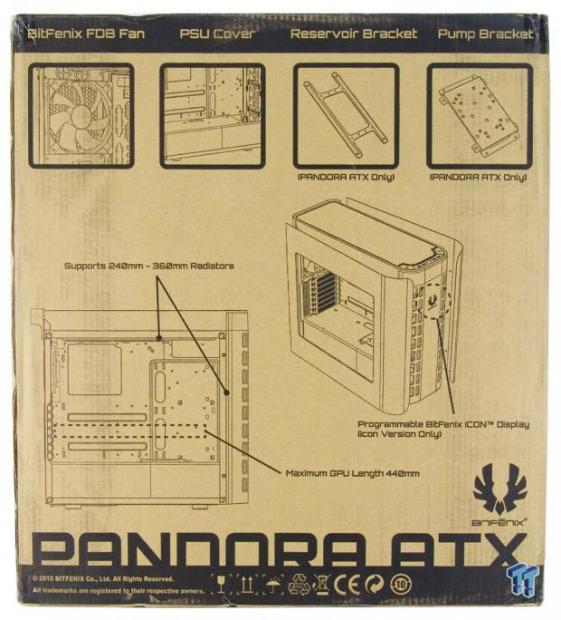
Moving to the back of the box, we now find icons across the top covering the FDB fan in the back, the PSU cover, the reservoir bracket and pump bracket, which are specific to the chassis we are about to see. Lower on the panel we see water cooling compatibility, video card clearance, and a notation to the ICON display, around the pair of renderings.

The last panel offers the naming for both versions under the handle, where we can see a sticker next to the Pandora ATX name. The midsection here is used for stickers with part numbers, serial number, and a couple of barcodes.
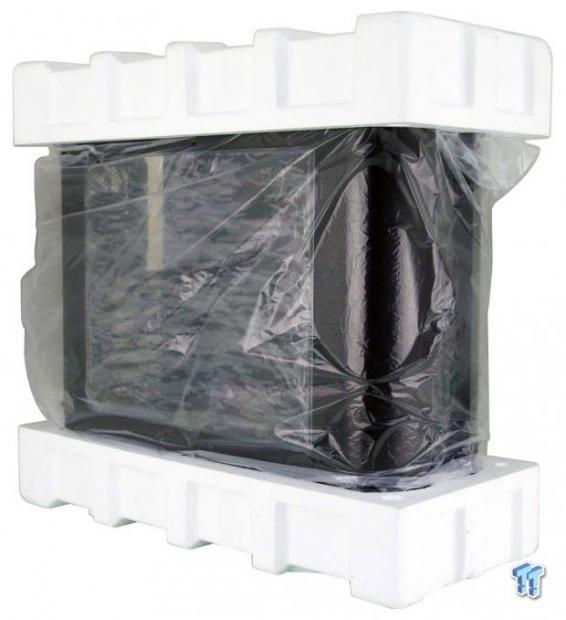
The window has plastic clinging to both sides of it, inside of the plastic liner that surrounds the entire chassis. That along with the thick Styrofoam caps at the top and bottom of the Pandora ATX chassis allowed this sample to arrive in perfect condition, without obvious damage, or any marring to the surface treatments.
BitFenix Pandora ATX Full-Tower Chassis
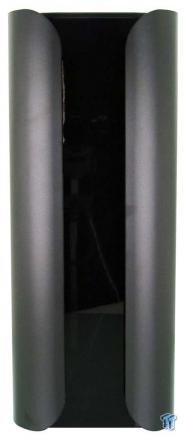
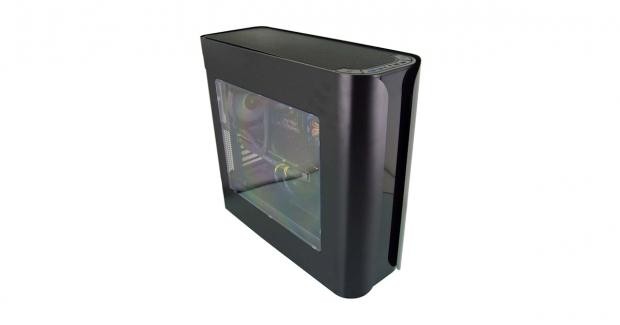
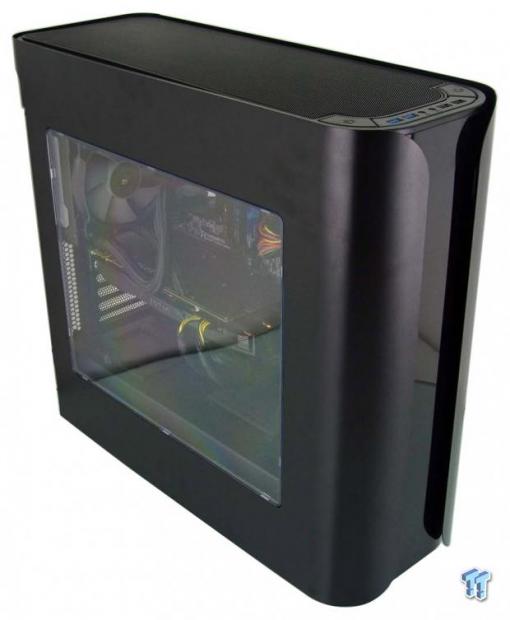
Fresh out of the packaging, our Pandora ATX looks exactly like the original, from the front view. The side panels wrap around the shiny black bezel and are rounded at the corners. The top and bottom are still flat, but it is hard to deny that the look is very appealing.
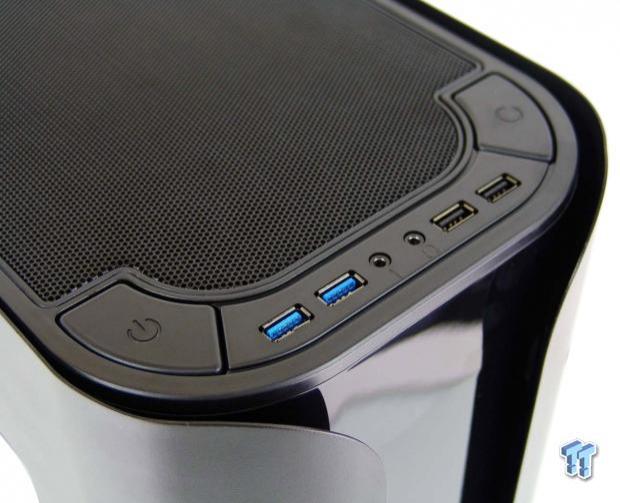
The front I/O panel is found at the top of the front bezel, as it also curves to wrap around the front of the chassis. From left to right, we are given a large power button, a pair of USB 3.0 ports, HD Audio jacks, a pair of USB 2.0 ports, and a large reset button on the far side.
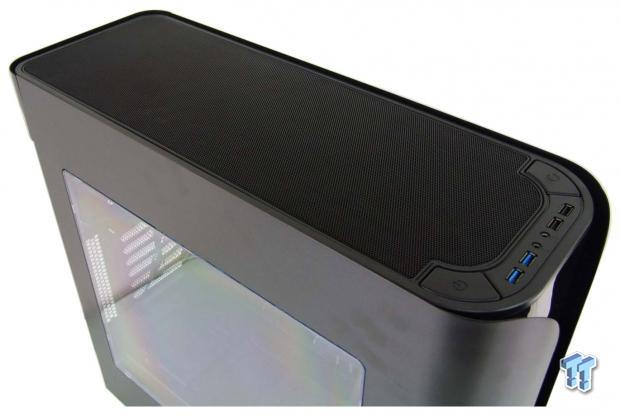
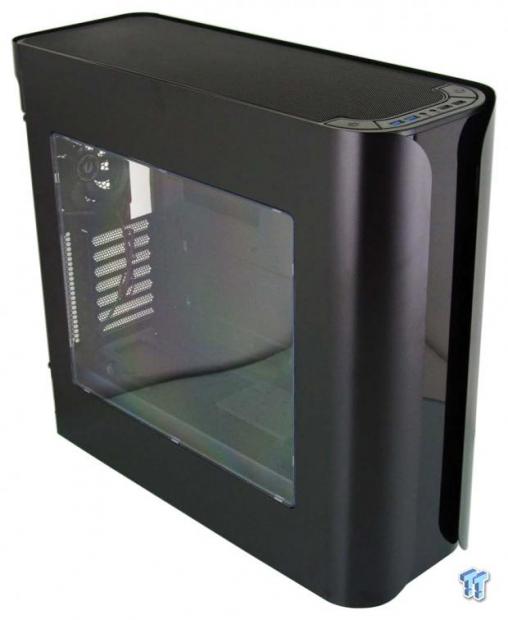
The rest of the top panel is opened right up and has a large steel mesh panel inserted. This allows for the fans or water cooling to breathe easily through it, with as minimal of an obstruction as possible, yet looks good at the same time.
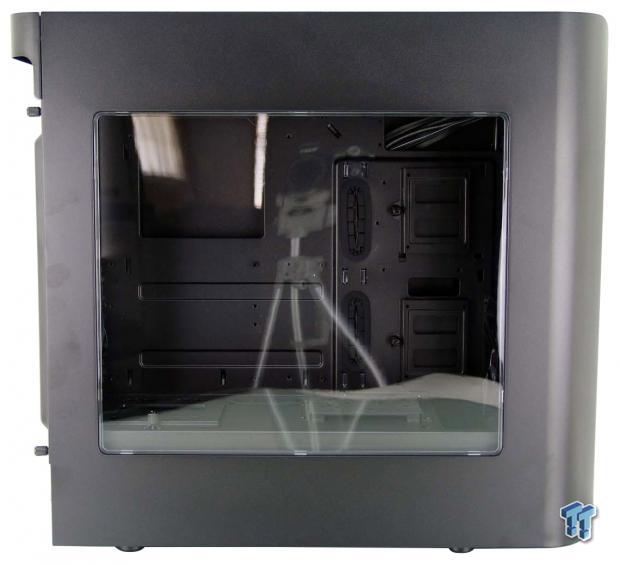
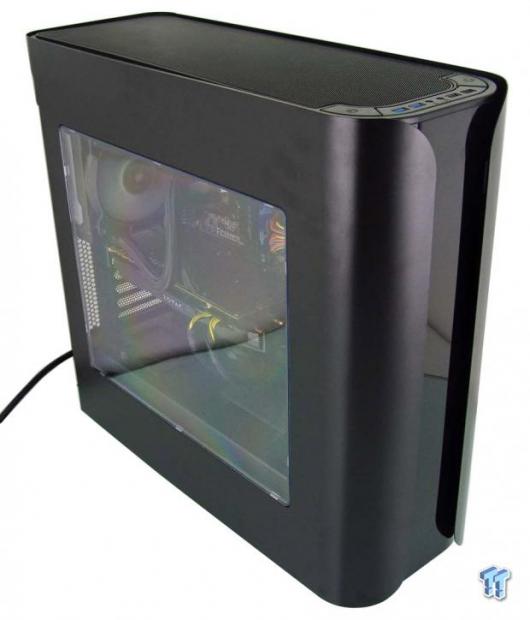
Looking at the Pandora's left side, we see a rounded bit bolted to the back at the top, and it goes along with the curve that the right side of this panel offers as it wraps around the front of the chassis. We also find a large opening that starts near the top of the PSU cover and offers a full view side to side, and to the top of the motherboard, through its clear window.
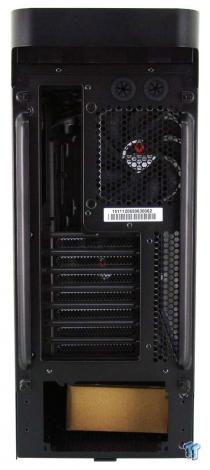
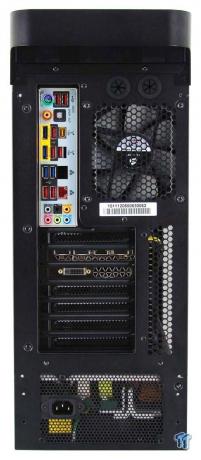
The back of the chassis has the steep bar at the top, but just below that are two grommets for water cooling or wiring, with the rear I/O and rear exhaust just below. Then we find seven expansion slots with passive venting next to it, and a large hole at the bottom to hold the power supply in place.
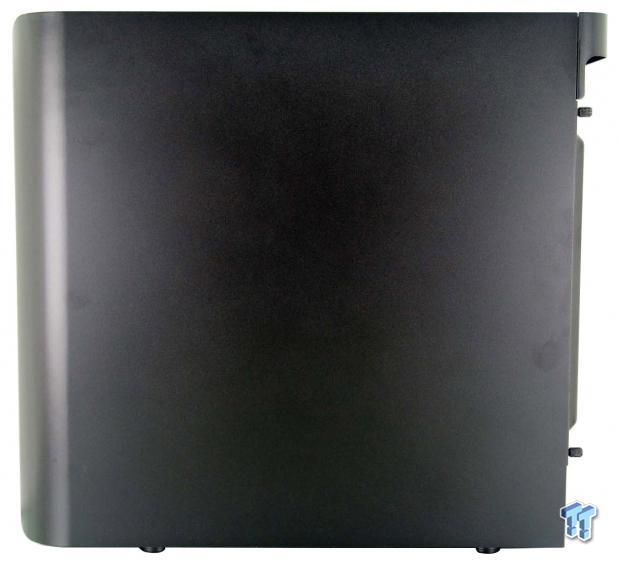
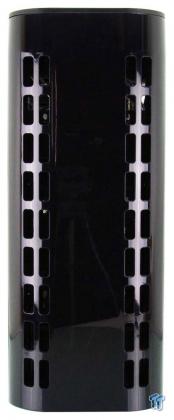
The right side of the Pandora ATX mimics the opposing side, but this time, there is no window. Thumbscrews hold the panels in place, but studs are released at the front edge, near the curve, for removal of the panels.
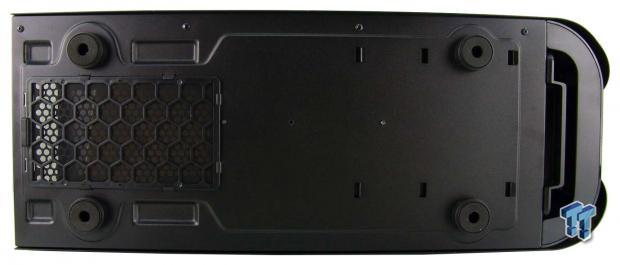
Lying the chassis on its side, we can see what is under the chassis. Here are round plastic legs with rubber feet on them to support the chassis. The front is solid for the most part, and at the back are large holes and a dust filter to allow the PSU a source of fresh air.
Inside the Pandora ATX
We removed the front bezel to find the ICON display mounted to the back of it, near the top, but centered. The front of the chassis offers a long clip in dust filter for the intake, and while there is a single 140mm fan here now, there is plenty of room for 360mm or 280mm worth of radiator to go there instead.
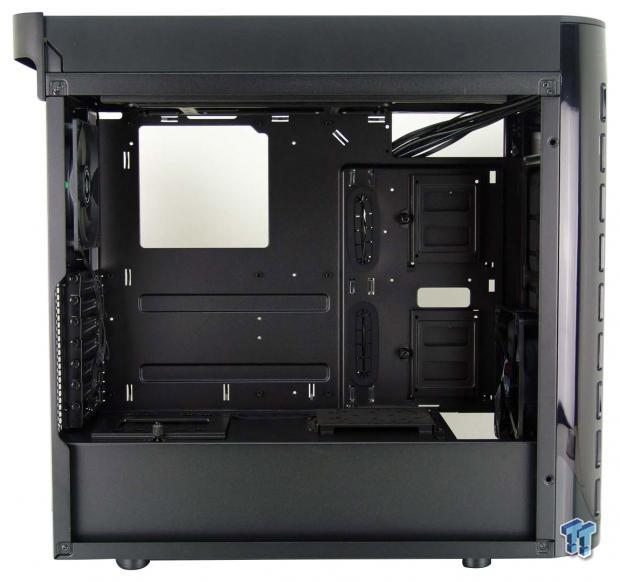
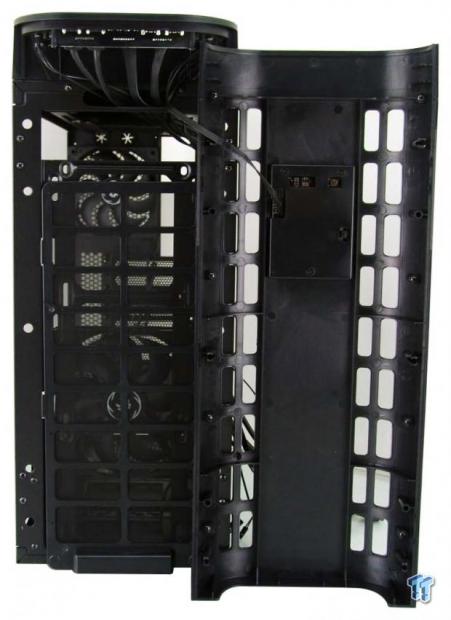
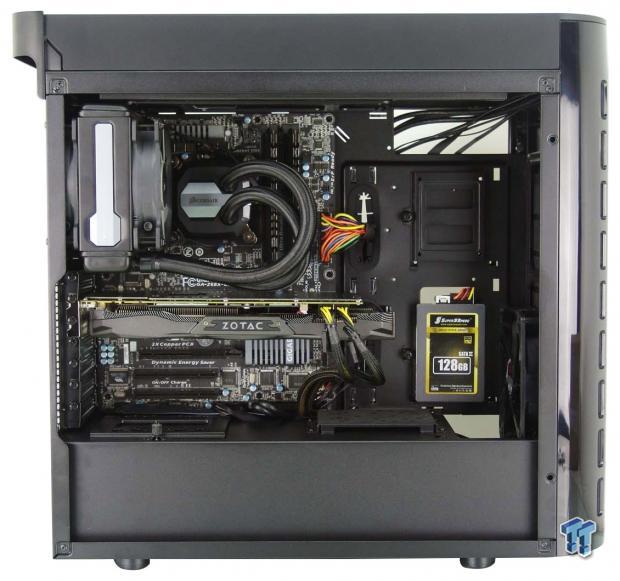
The first look inside the Pandora ATX shows us a large main compartment at the top, and a lower section, divided off by the PSU cover. For transit, the wiring is run behind the motherboard tray, and this ensures that they can never touch the window and cause any damage to it.
In the front, we find no optical drive bays, but we can see two trays for 2.5" drive mounting stuck to the motherboard tray. Inside the bezel, we see the black 140mm fan, and this also leads your eyes to the deep cutout here to allow fans and a radiator without issue with the PSU cover.

Removing the top panel is the easiest way to gain access to fan and radiator mounting, but keep in mind, the wiring is attached to it. In this design, you could have the fans in the main compartment and a radiator in this well, or vice versa, but either way, you can again opt for a 360mm or 280mm cooling solution.
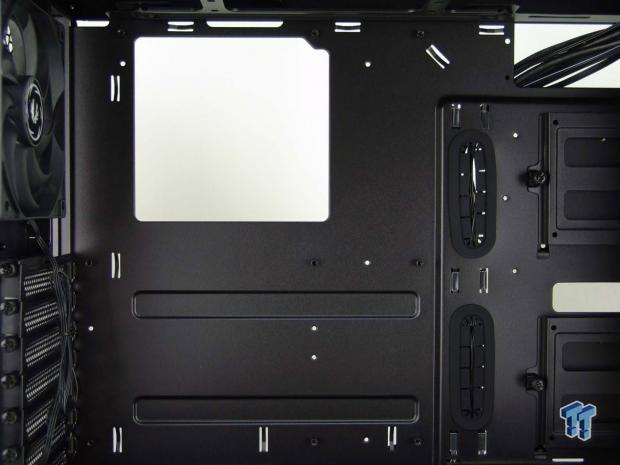
The motherboard tray offers two wiring holes across the top, and a pair with grommets down the right side, along with fifteen wire tie points. The CPU cooler access hole is sufficient in size, and the standoffs come installed in the tray for ATX motherboards.
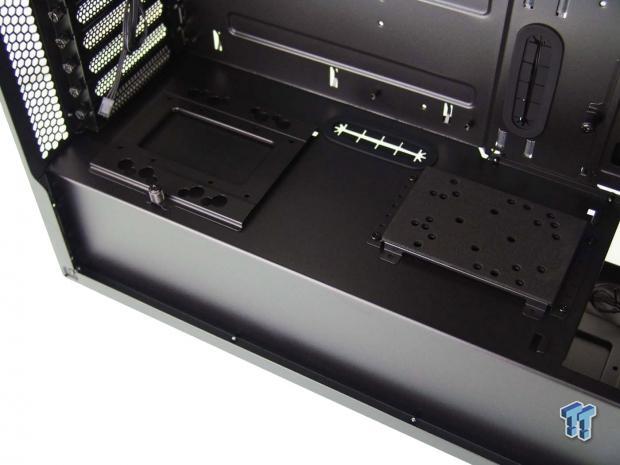
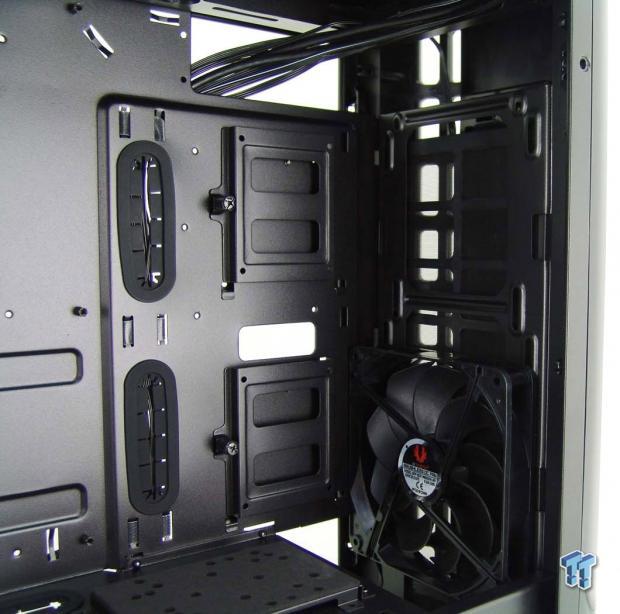
On the top of the PSU cover, just below the motherboard try, we find a hole with a grommet along the back edge, but we find two new plates. The one to the left is for 3.5" or 2.5" drive mounting, and the plate to the right, covered with foam, is a pump mounting plate.
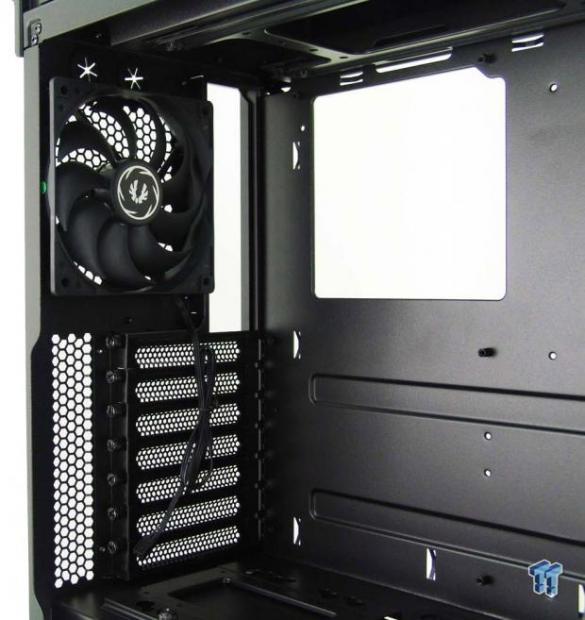
Inside of the back of the Pandora ATX chassis, we find the second fan, a 120mm fan this time to exhaust the chassis. Below it, we see that the ventilated expansion slot covers are held in place with thumbscrews.
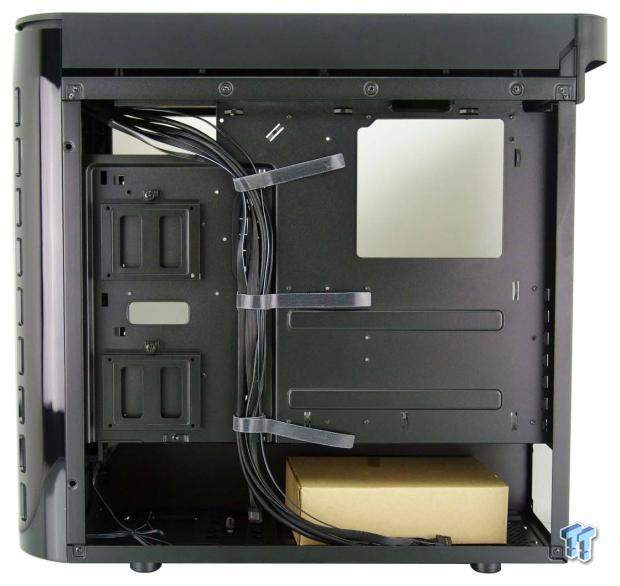
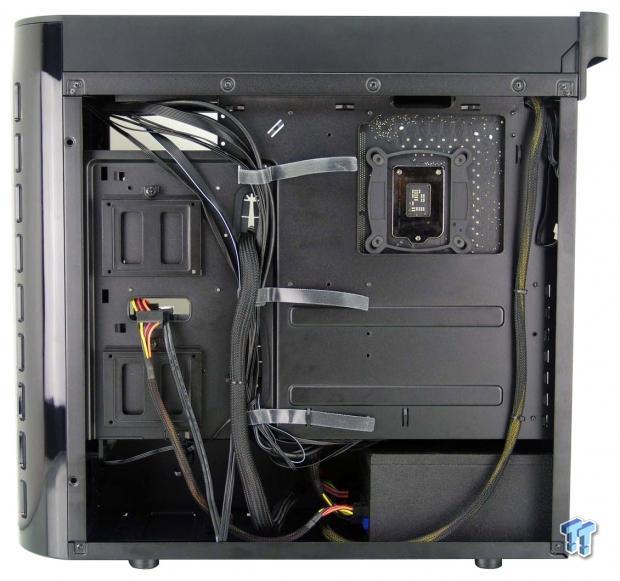
Behind the right side panel, we find another pair of trays to house 2.5" drives on the left side. The wiring has been tended to with the use of Velcro straps, ran through loops in the motherboard tray. In the open lower section, we finally find the box of hardware sent along with this case.
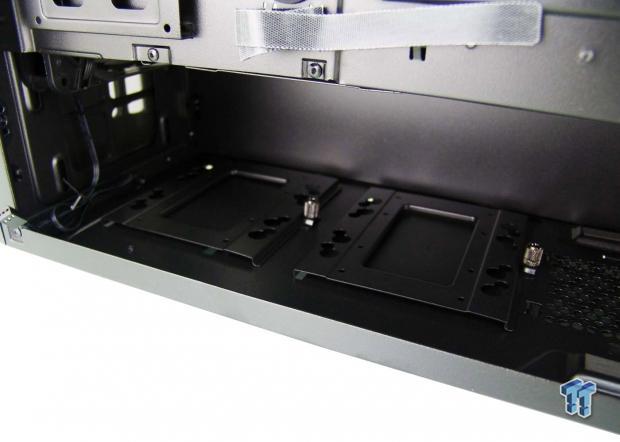
At the front of this large opening, there is another pair of 3.5" drive trays, and like the rest, are split into tracks and are held in place with a thumbscrew. Usage of the one to the right depends on the PSU chosen as well.
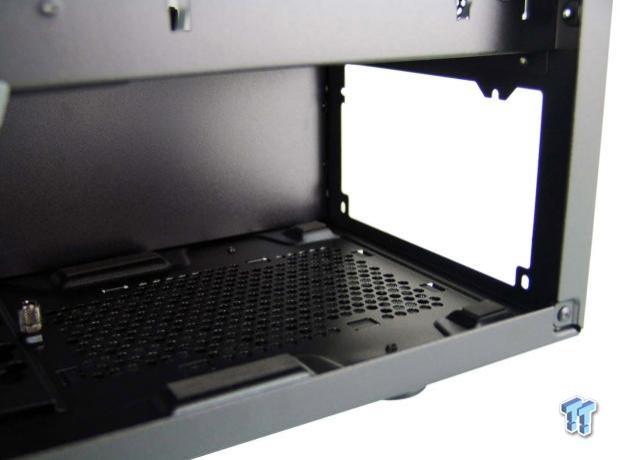
At the back of the chassis, we found four rubber pads on the floor to support the PSU. With the open floor, this allows the PSU to be installed with the fan down, giving it access to air flow that the PSU would cut off if you tried installing the PSU with the fan on top.
Hardware & Documentation
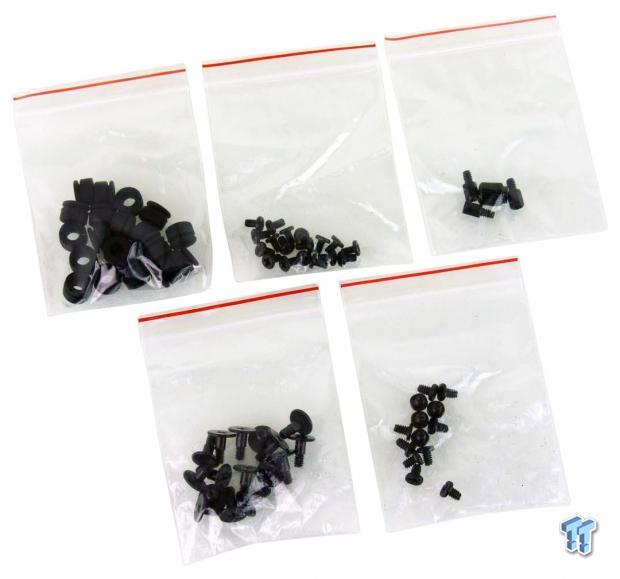
In the box containing all the hardware, we found five bags of screws and grommets. At the top left, we have 3.5" drive mounting grommets, with 2.5" drive mounting screws, and standoffs and a socket in the bag at the right. Along the bottom, we have screws to use with the grommets on the left, and a bag with motherboard screws in it to the right.

We are also given six zip-ties, a set of 6-32 thumbscrews, and a set of 6-32 hex head screws. On top of that, you are given a metal-like BitFenix logo to apply to the chassis where you want to.
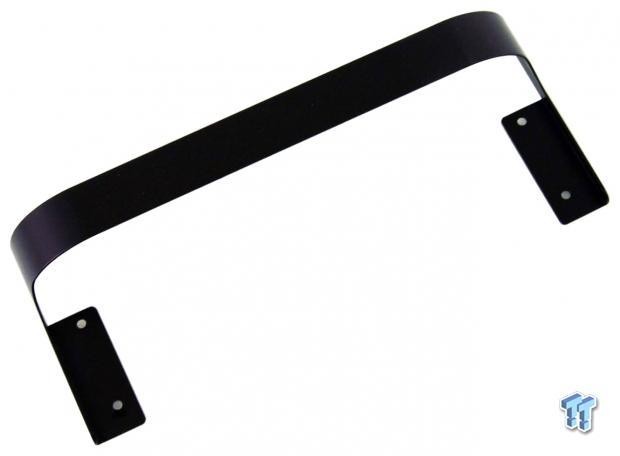
What we have here is the lower steel bracket that gives the rear of the chassis that rounded look. This screws into the back of the chassis and is optional. If you never see the back of the chassis, you may not want to bother installing this.

There is a quick installation guide offered as well. This starts out covering the features and where to locate them, moves into the build process for the major components, and all told, should get a novice builder through a normal build. More advanced users may never open this as everything is laid out in an obvious, easy to figure out fashion.
Case Build & Finished Product
As we finished the build, we left the side panels off the Pandora ATX. This allows a good view to see how the intake works with the panels covering most of the bezel. The large holes on the side easily intake cooler air for the fans that can be placed behind this panel.
Inside of the Pandora ATX, we had no issues with fitment or alignment. While we did not opt for a custom loop, it is easy to see the room in the front offered, and just how the motherboard fits for top mounting water cooling. Even so, we have a very clean build with little wiring showing, and everything inside is on full display to see through the window.
The back of the chassis offered up no surprises either. The dust shield snapped right in, the card aligned as it should, and the PSU was easy to line up and screw into place.
We didn't have to get into anything crazy behind the motherboard tray, but at the same time, all the leads are gentle runs of wiring, and plenty of ways to maintain them to be had. Even with the 24-pin and the front I/O wiring together, the panel still snaps right back on the chassis without conflict.
While the normal view was quite pleasing, we did find the wiring plan to sort of fall apart. There is plenty of room to close the panel on this mess without rubbing anything, but we just found it tough to do anything cleanly using the chassis with our gear and the layout provided.
Full disclosure being what we do, we do have to mention that our AIO is a bit wider than the case can handle., If you look along the top of the panel, it is bent to fit, but was still able to be locked down in the back with the thumbscrews. Now all we need is a bit of power. From this angle, the ICON display is lost in the glare of the lights and does not stay on long when initially booting up. The view from the window is very nice, and the LEDs on the card and head unit shine brightly without it being tinted.
Final Thoughts
We like the simple layout without a mass of drive bays to take up the front of the chassis and destroy air flow like so many other designs do. We still like the shape, and elegance this chassis delivers. The ICON display offers a ton of potential to customize it to near anything you can think of, and the window on the left offers a superb view of everything you install, except for a few storage drives and the PSU. We also like the PSU cover, as most do, but adding room for water cooling at the front, allowing wiring to pass through it, and throwing in a pump bracket just sweetens the pot a bit. Also, with only two fans blowing through this chassis, the most we could hear from it was 26dB of noise with both fans running at full speed.
There are some cons to the build though that we need to address, but nothing overwhelming, or that detract from the chassis much. First of all, we found that on the first boot, the BitFenix logo came on through the ICON display, but once we got to the OS, it disappeared. It wasn't until we installed the software that it came back, but after that, we found it to be fully functional.
There seemed to be an error in the specifications as we only found three 3.5" drive locations, not four, and while we did find the reservoir bracket installed at the top of the chassis, it seems like an odd location. The only other thing we need to address here is the lack of sufficient air flow provided out of the box. Here again, the chassis is designed to allow more fans and get more air flow, for the cost, we wanted more.
Considering all things, we still like what the Pandora ATX chassis has to offer. We are glad that they did not just super-size the original Pandora, as that would have resulted in a lackluster presentation. Instead, we get to see a sleek look, smooth and curvy exterior, which offers a completely open concept inside. The PSU cover is almost a must to get buyers interested these days, but everything about that specific component was on point. Wiring through it is simple, adding a pump or hard drive to it is easy too, and it also stops short enough to allow water cooling in the front in the form of 360 or 280mm radiators.
The end product was clean, and with this large of a window, it adds points for BitFenix. The only thing that we see which could slow down potential buyers is the current price, but innovation and retooling have its costs, and they can't just give away these cases and still stay in business. So, even though it may be on the pricey side, the Pandora ATX delivers in ways the original could not, and proves that BitFenix took every bit of advice when designing this chassis, and arrived with a serious contender for your money.
Chad's Chassis Test System Specifications
- Motherboard: GIGABYTE GA-Z68X-UD4-B3
- CPU: Intel Core i7 2600K (buy from Amazon)
- Cooler: Corsair H80i GT (buy from Amazon)
- Memory: G.Skill Ripjaws F3-12800CL6D-4GBXH
- Video Card: ZOTAC GeForce GTX 970 AMP. Extreme Edition (buy from Amazon)
- Storage: SuperSpeed 128GB SSD
- Power Supply: SilverStone SST-ST85F-G (buy from Amazon)
- OS: Microsoft Windows 7 Ultimate 64-bit (buy from Amazon)
 Lian Li B4-mATX Review: a compact mATX SFF case with excellent airflow and premium features
 Ocypus Sigma F36 BK ARGB Cooling Fan Review: high airflow and unified design in one frame
 PCCooler CPS RZ820 Display Review: a flagship-level CPU air cooler with an LCD screen
 MOAIPLAY ORA PRO G1 850W ATX 3.1 PSU Review: high efficiency and 10-year warranty for $119.99
 NZXT H6 RGB+ Compact Dual-Chamber Chassis Review
 KeyBoy Advance is a compact keyboard designed to look and be held like a Game Boy Advance, and it's expensive
 Lexar's new DDR5-7600 desktop memory will use Chinese-sourced CXMT chips
 GeForce Game Ready driver for DOOM: The Dark Ages big expansion and Assassin's Creed's return is here
 Elder Scrolls Online team affected by layoffs, devs uncertain about MMORPG's future with such a small team
 PlayStation didn't warn anyone before announcing the end of physical discs, not even its own offices
 Report: Game Pass day one releases were controversial behind the scenes at Xbox
 RTX 5080 Super appears in Seasonic PSU calculator with 24GB GDDR7 and 415W TDP
 IO Interactive acquires Project Fantasy IP, but closes Istanbul studio
 Valve's Steam Machine can now run Windows officially but requires wiping SteamOS first
 Report: Xbox lays off nearly half of id Software, Doom and Quake still priorities
 Simagic Zeus Formula Steering Wheel Review: premium build and advanced inputs for F1 racing
 GIGABYTE X870E Aero X3D Dark Wood Review - A woody goody
 The Super Mario Galaxy Movie (2026) 4K Ultra HD Blu-ray Review
 KTC H49S66 5K2K (5120x1440) 49-inch 180Hz Gaming Monitor Review
 HighPoint Rocket 1604L Gen5 x16 NVMe Software RAID AIC Review: half the price with full 59 GB/s speed
 Next Level Racing ERS3 Haptic Seat Review: immersive sim racing comfort with integrated haptics
 ASUS TUF Gaming X870-Pro WiFi7 W NEO Review - Tuffed up
 GIGABYTE GO27Q24G Gaming Monitor Review: Glossy OLED Gaming at 240Hz
 MSI MPG 322UR QD-OLED X24 Review: A Brighter, Tougher 4K 240Hz QD-OLED for $1099
 6 PC cleaning mistakes to avoid for safer hardware maintenance
 Phison and Intel Take Aim at Local AI's Memory Wall with aiDAPTIV
 How to Remap Keyboard Keys in Windows using Microsoft PowerToys
 7 tips to organize your Windows files for faster, easier access
 Intel Arc G3 Extreme first impressions with MSI's Claw 8 EX AI+ - Incredible power for an extreme price
 How to fix Wi-Fi Adapter Not Working on Windows laptops: troubleshooting tips
 Hisense U7SG 4K TV: Modern Entertainment for the New Age
 6 underrated Microsoft Word features worth using to boost your productivity
 Level Up Your PC Gaming with these Fantastic ASUS Prime Day Deals on GPUs, Motherboards, and More
 GIGABYTE Wants to Kickstart Your New Gaming PC or Upgrade with These Limited-Time Deals