
The Bottom Line
Introduction, Specifications, and Pricing
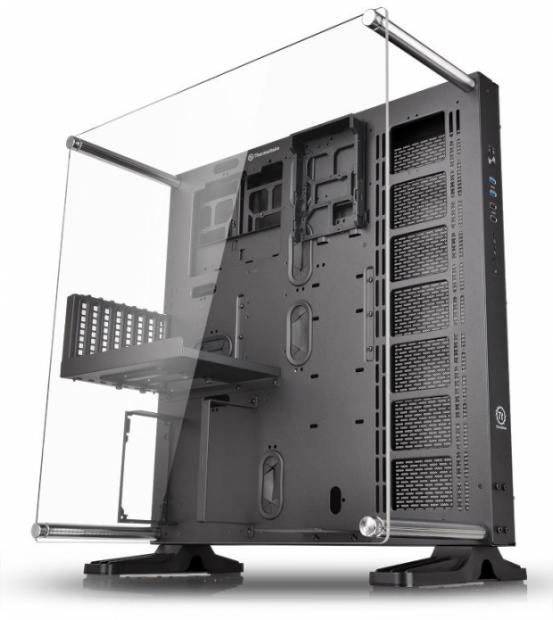
Once again Thermaltake is at it with development on a new idea in case design. While there may be others on the market that may offer some of the features you are about to see, this is the first of our knowledge to take the idea of an open air chassis to all new levels. Of course, an open air chassis is not everyone's cup of tea so to speak, but this chassis crosses boundaries. It is one of those designs that if you bought into it, you could find a use for this chassis for many years to come in one of its three modes of operation.
Being loosely based on the original Level 10 chassis, we are given a solid plane to mount everything to, with all the accouterments like grommets, wire management, and CPU cooler that we are all used to, just not inside panels closing off access to all the components this time. Rather than a closed frame, this design uses steel bars to support a Lexan panel that will help keep fingers out of fans if that sort of thing is a concern. What sets this apart though, outside of it being open air, is that this chassis can stand on a pair of feet, much like how the Level 10 was presented. The thing is we still have two other options yet. One of them is to use solid rubber feet that can be mounted on the back panel so that it lays on its back as a test bench. Lastly, users also have the option to wall mount it via any VESA mount, but this needs to be purchased separately.
For those of you who want something out of the ordinary, and like it when cases offer more modularity than just in what parts can go inside of the chassis, Thermaltake has what you are looking for in the new Core P5 "chassis". While we did cover some aspects of this design, we are only getting started. There is so much going on with this design, and even when you think you have it all figured out, there is even more to look at and address. So, strap in and enjoy the ride as we have a ton to show you as we cover this unique design and deliver our opinion on just how cool and universal this streamlined chassis design is.
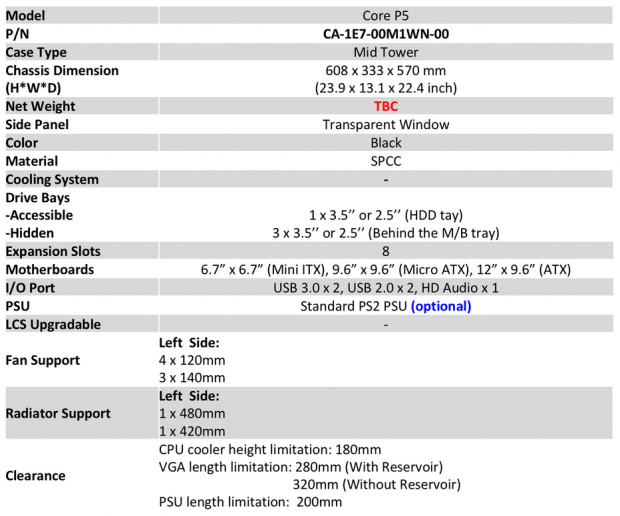
Thermaltake is classifying the Core P5 open air chassis as a mid-tower design, and that is likely due to the measurements. The chassis is 22.4 inches from front to back, it is 13.1 inches in width, and all assembled, it stands only 23.9 inches in height. The left side of the chassis does indeed offer a transparent "window" as they call it, but the reality is the entire panel is made of a solid transparent panel. The right side of the chassis and the many add-on brackets that come in the assortment of accessories are made of steel and painted with a textured black finish. There is also a set of four support bars for this chassis that are also steel but are left natural in their finish.
We cannot say that all of this can be found "inside" this design, as most of what happens here happens on the outside of the "case". There is room for three 3.5 or 2.5" drives inside of the steel frame behind the motherboard tray, and an optional location just to the right of the top of the motherboard on the front of the tray. There are eight expansion slots, but with this design, they can be oriented horizontally and vertically regardless of the chassis orientation. We also see that this chassis has standoff holes in the motherboard tray for Mini-ITX, Micro-ATX, and ATX motherboards. It can accommodate larger boards as well, but it does cut into wire management options. Lastly, the front I/O connectivity includes a pair each of USB 2.0 and USB 3.0 ports as well as HD audio jacks. And that this design takes a standard PS2 PSU, and the length is not much of a concern here either.
Even though this is an open air design, there is a section of the motherboard tray that is specifically designed for cooling needs. While they do show that you can install fans in this location, unless you are planning to add airflow to cool the hard drives, fans alone in this location will do little to cool anything in the system. This location is intended for water cooling where everything is laid flat and easy to see. There is room for a quad 120mm radiator or a triple 140mm radiator at its maximum capacity, but if you have (for example) an AIO and a new AMD video card with an AIO also, you can install both into this design, or go full custom with the loop and makes this a real show stopper to sit on your desk. At the bottom, we do see some limitations listed, but we feel that 180mm for the CPU cooler, 280mm for the video card with the pump bracket in play and 320mm without, and 200mm for the PSU are hardly what we would say are "restrictions".
There is a bit of construction that needs to be done to take full advantage of this chassis out of the box. It comes shipped in a compressed fashion, not only to save on packaging and shipping, but to better protect the components and offer the end-user a much nicer chassis in the end, rather than cracking panels and bending bits in the rigors of transit. Since this review is hitting you as the NDA is lifted, we cannot provide you with any comparative pricing that we found, but we were given the MSRP of this chassis. Amazingly, the Core P5 is set at only $149.99.
Chad's Chassis Test System Specifications
- Motherboard: GIGABYTE GA-Z68X-UD4-B3 (buy from Amazon)
- CPU: Intel Core i7 2600K (buy from Amazon)
- Cooler: Corsair H80i GT (buy from Amazon)
- Memory: G.Skill Ripjaws F3-12800CL6D-4GBXH (buy from Amazon)
- Video Card: HIS HD7950 IceQ (buy from Amazon)
- Storage: SuperSpeed 128GB (buy from Amazon)
- Power Supply: SilverStone SST-ST85F-G (buy from Amazon)
- OS: Microsoft Windows 7 Ultimate 64-bit (buy from Amazon)
Packaging
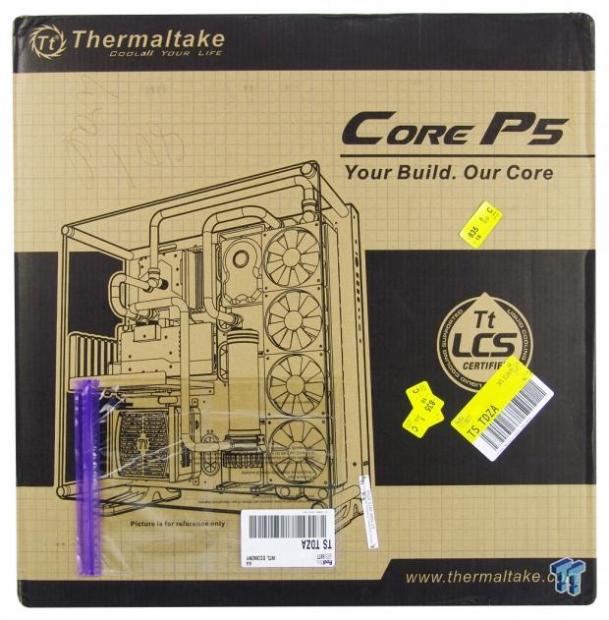
The packaging is typical of the Core Series of cases where the plain cardboard has the grid pattern and wide black bars applied to it. Thermaltake and Core P5 flank the top of a rendering of the chassis inside of this box. We see this design is Tt LCS certified, and if you want to see more, visit the address listed at the bottom.

As we see this side of the box, we noticed there is much less box than the chassis illustrated on the front would need to fit in if fully assembled. On this panel, we are given features like the location of the I/O panel, that there are four drive bays, and that the chassis offers a modular rack design as well.
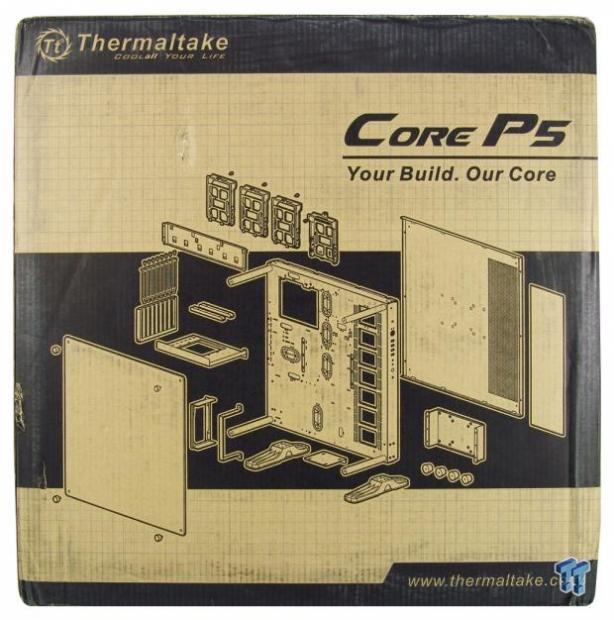
Spinning the box around to the back, now we see an exploded view of the Core P5 to sort of help wrap your mind about what we have been explaining this whole time.

The last panel to show is this skinny one. Here Thermaltake offers a specifications chart listing all of its capabilities, so even at a big box store you are well informed of what you are buying.
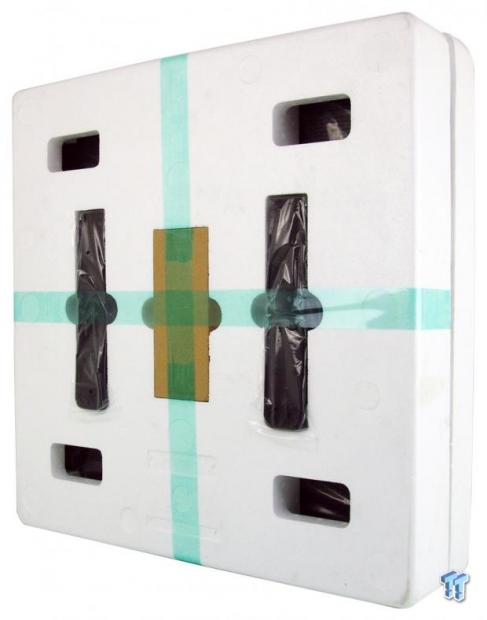
Inside of the box, we find thick Styrofoam used to surround the motherboard tray and back panel components of the chassis. In cutouts on this side, we find the feet and the support bars for the clear panel that is taped into the foam on the opposite side. As we mentioned earlier, this is done to secure the product as best as they could, and allowed our Core P5 components to make the long trip across the pond to us and still arrive in great shape.
Thermaltake Core P5 Open Air Chassis

Above is what you find in the middle of the foam packing, the base of the Core P5 chassis. This bit is tall and thin, flat across the front, offering only the I/O panel and the Tt logo and naming near the bottom. There is also three of the six thumbscrews visible at the right to allow the removal of the back panel.
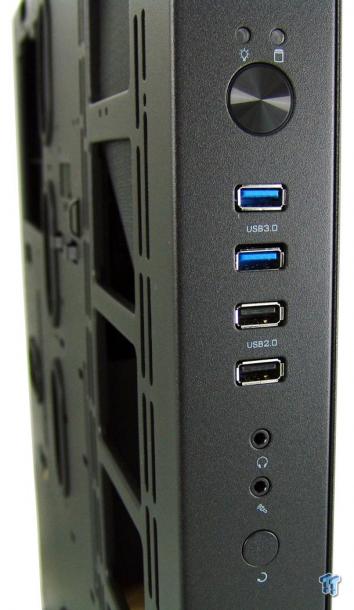
In that I/O panel, we are given a PC power LED and the HDD activity LEDs above the power button. We then run into a pair of USB 3.0 ports, then a pair of USB 2.0 ports, and we see the HD Audio jacks before we get to the reset button.
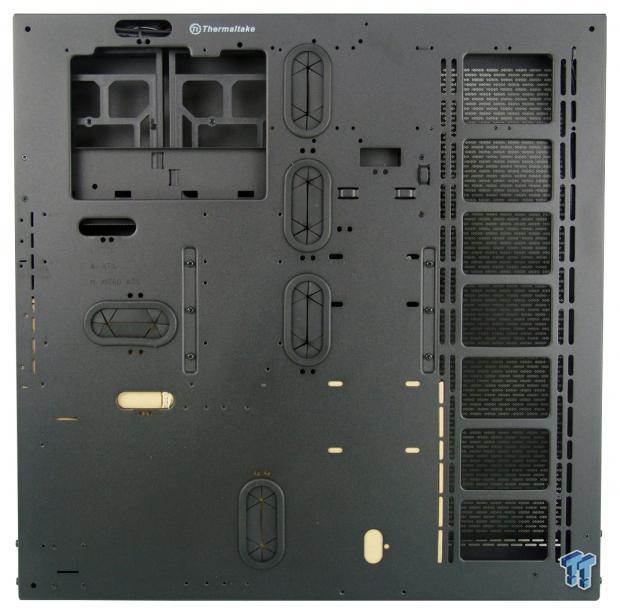
Above is the motherboard tray, which is the left side of the main section. Here we find all the usual suspects like grommets and access holes, but there are also plenty of tie points and a lot of holes to be filled with various brackets and doodads as we assemble the P5 a bit later. The right side is entirely designed to support radiators, reservoirs and pumps, and it allows air to flow through the cabinet.
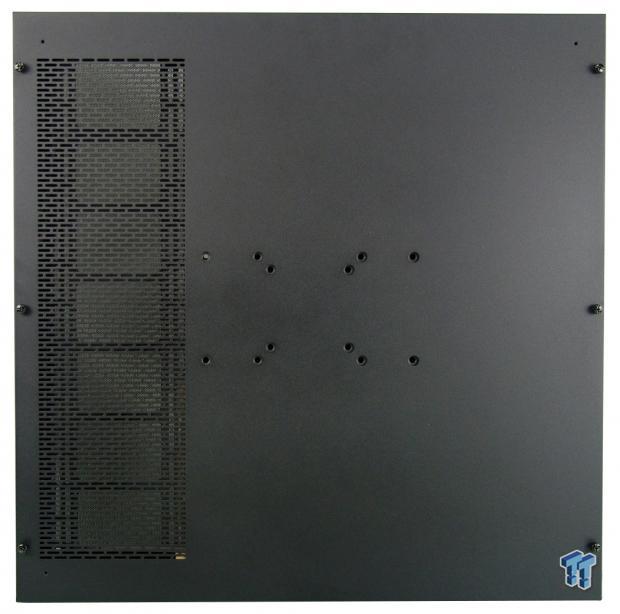
The back is a flat expanse of steel, so we moved right along to the right side of the main section. We see venting at the left for the optional cooling area, and in the middle we see holes for VESA mounting. If desired, the Core P5 can hang from the wall rather than taking up valuable desk space.
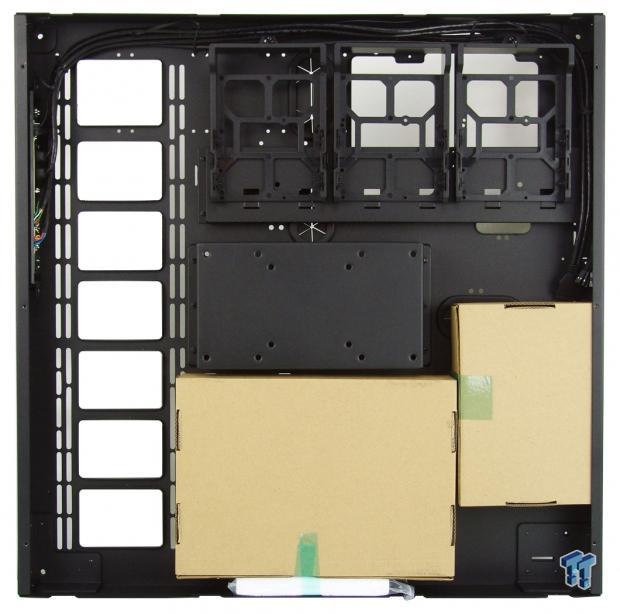
We removed the thumbscrews and found the panel has to slide to the back before it can be removed. And once gone, we can see two boxes of goodies at the bottom, just below and to the right of the VESA mounting plate.
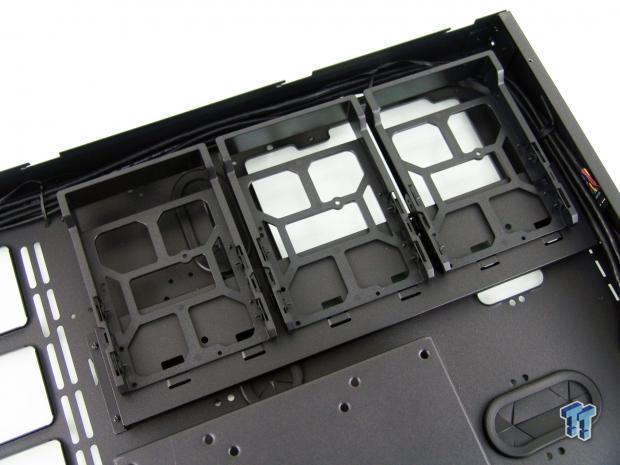
At the top right corner of the main section, we find three drive trays for both 3.5" and 2.5" drives. Each tray is removable from the steel plate with just a single thumbscrew at the top holding them in place. Also, if you do not wish to use this in any fashion, the plate is removable and does ease wire management.
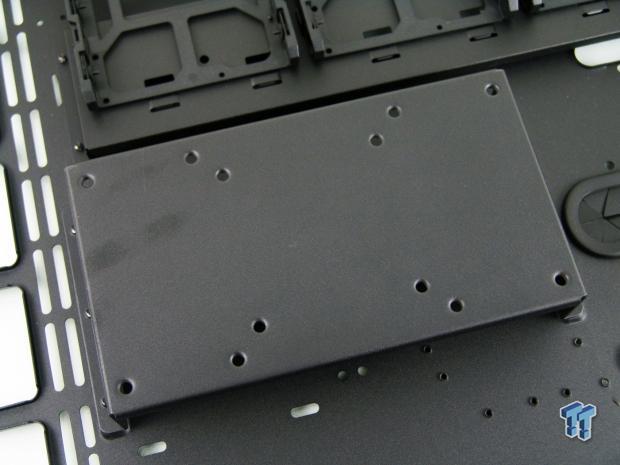
The VESA mounting plate is very solid and gets large diameter screws to attach it to the motherboard tray so it should never become lose and will keep the chassis hung on the wall. Keep in mind, to use this option, you will have to locate and purchase the mount, it does not come with the Core P5.
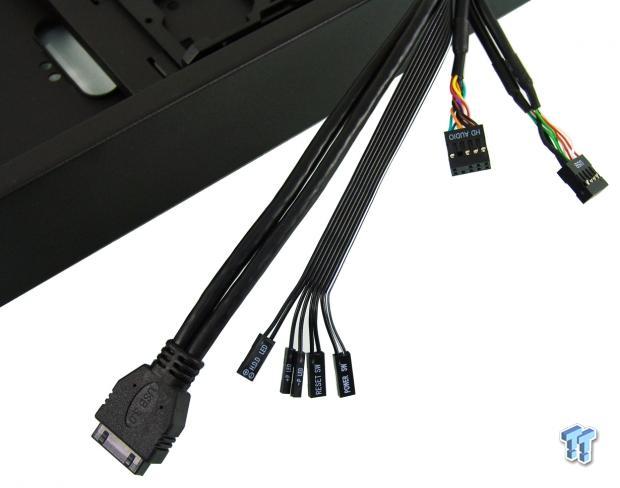
The last thing we will touch on at this point is the chassis wiring. It is routed across the top for shipping, but there are plenty of these black leads to get to the bottom of the chassis as well, and being black they will blend into the build.
Accessories & Documentation
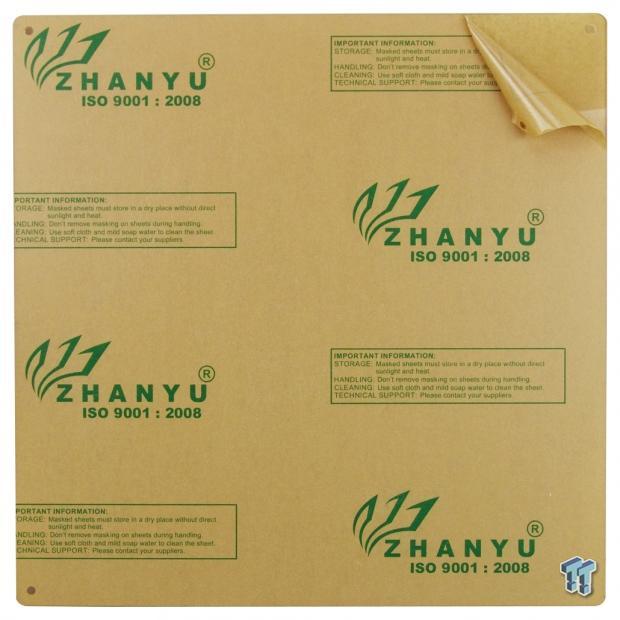
First out of the packaging was this transparent panel for the left side of the Core P5. It is shipped with the paper still on both sides to protect it from damages.
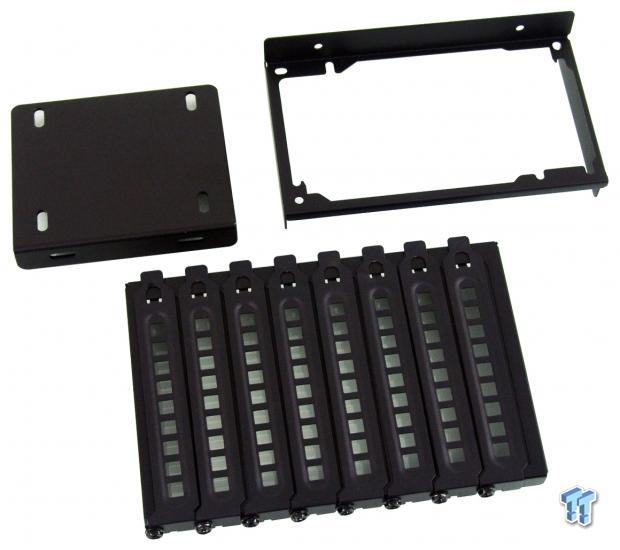
As we start to open the boxes, we first ran into this. There is a pump/reservoir bracket at the top left, next to the PSU mounting bracket. At the bottom, we also found the eight expansion slots, covers, and mounting screws.
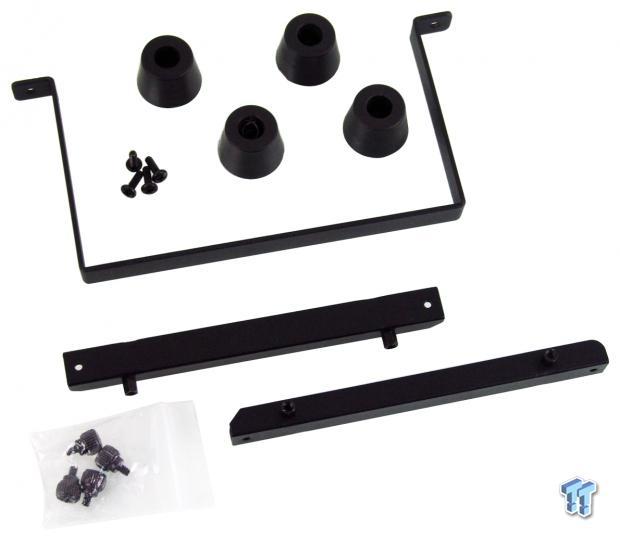
This next group of bit covers the rubber feet for the right side panel to lay the P5 on its back, along with the four included screws. Surrounding them is a PSU support bracket to help manage the weight of the PSU. At the bottom, we find two PCI-e extension cable brackets and thumb screws to lock them into the plate they are used with.
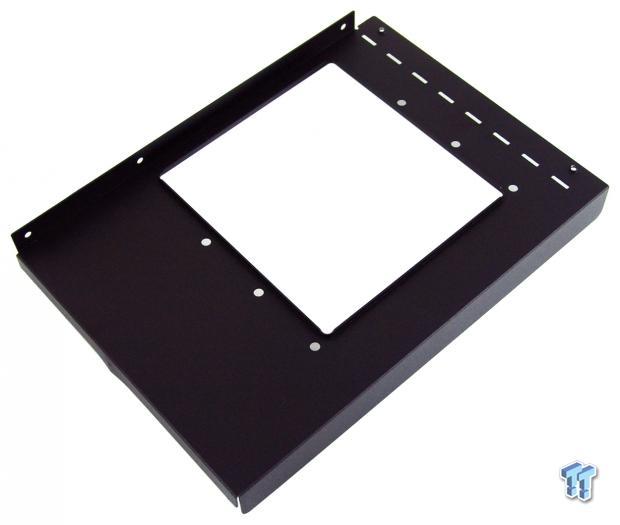
This plate allows the option of vertically mounting the video cards. It attaches to the motherboard tray, and the expansion slots mount to the back. The large hole in the middle allows the extension cable a way into it, and the holes on either side are where the brackets in the last image install.
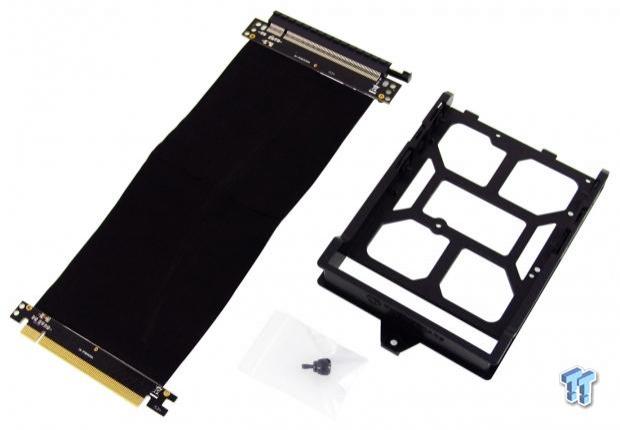
Digging deeper, we found that we are given the extension cable to move the video card off the motherboard for vertical mounting. We also found a fourth drive tray to use in the front if all three in the back are planned to be used.
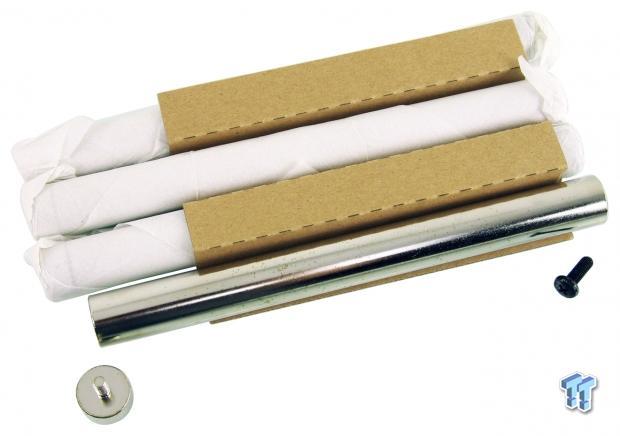
Inside of another box, we slid these out for the photo. These are the steel supports for the transparent side panel of the chassis. One end mounts with a standard screw to the chassis, and the other end is a cap of steel to go through the panel and secure it. As to the staining seen here, we are told retail versions will not be stained and will be all pretty, as they should be.
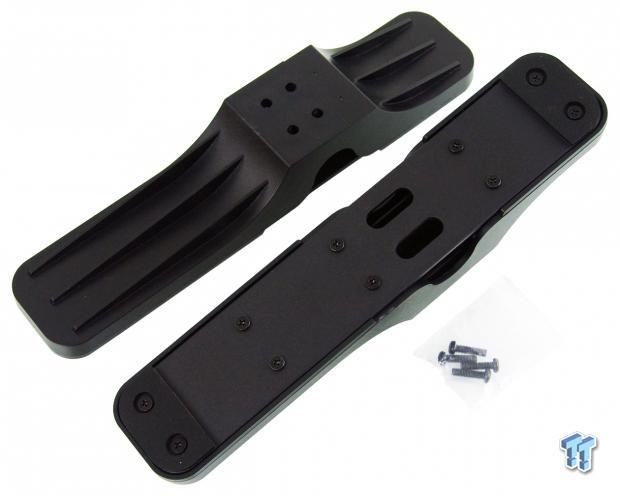
We also have to show the huge feet. The top of them are ribbed for design and strength, and with a plastic cover over the steel inner frames, the provided screws secure them to the chassis solidly with no fear of toppling this chassis.
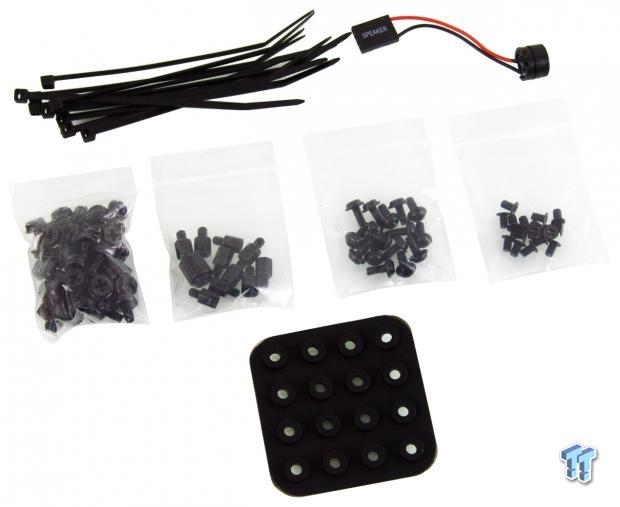
We also found the basics. We are given ten zip ties and a motherboard speaker seen at the top. In the bags, we have hex head 6/32 screws for just about everything mountable, one with standoffs and a socket, one full of round head M3 screws, and a bag of countersunk screws for SSD mounting. At the bottom is a sheet of rubber washers used to isolate drives when installing them.
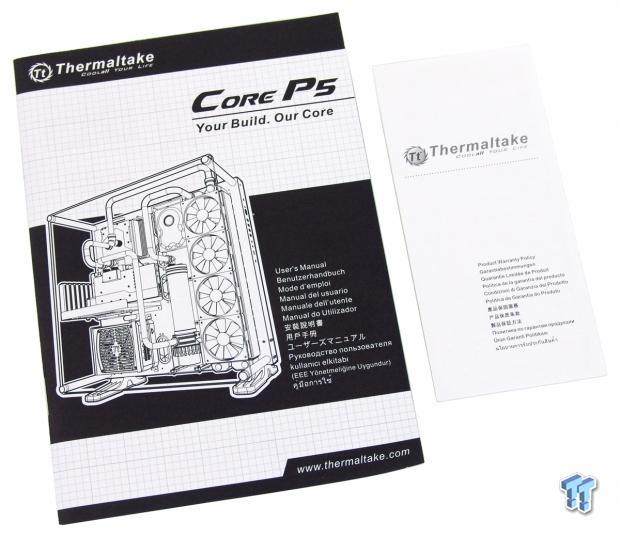
The manual is as good as it gets. It starts with a checklist to be sure you have everything needed, then takes off into the assembly of the chassis and is how we are presenting the build section. It covers everything with great images and descriptions to get even the most novice user through this build process. We are also given the warranty information as to what is covered during the one-year warranty period.
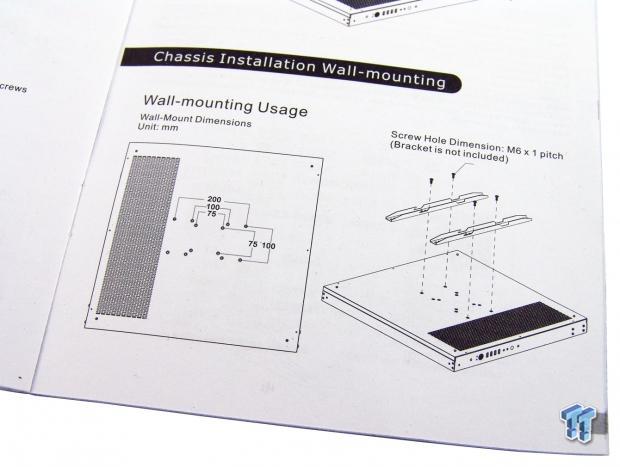
Just in case we were not clear about how it works, we did snap an image of the manual and VESA wall mounting this chassis. With all the standard offsets and the notification that the bracket is not included, it is clear what you need to do if wall mounting the P5 is on your list of things to do.
Case Build & Finished Product
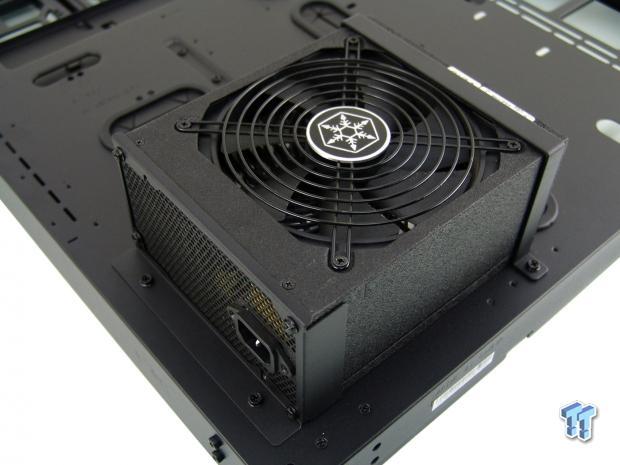
Following the manual as our build guide, we are first told to set the pair of screws for the PSU mounting plate into the motherboard tray, then to go ahead and mount the PSU to that. Before that, though, you need also to install the support bracket, and there are four sets of holes to adjust for various length PSUs.
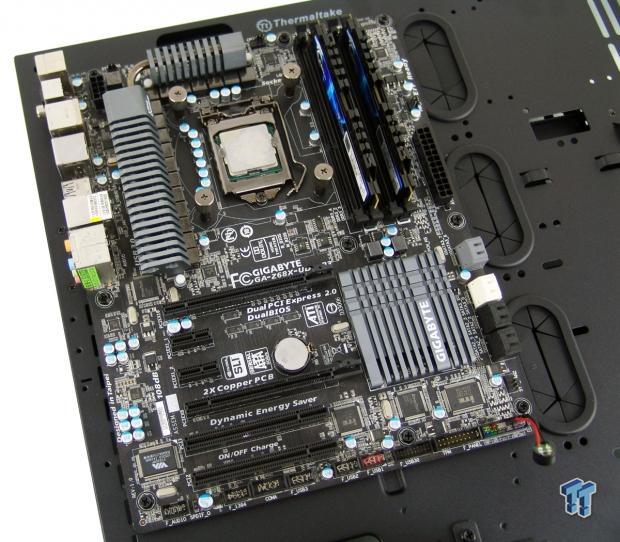
It then shows us to install the standoffs in the appropriate locations and with the round head M3 screws, mount the motherboard into place. It is nice to see the grommets on the right and the open hole at the top are placed well for wiring this chassis.
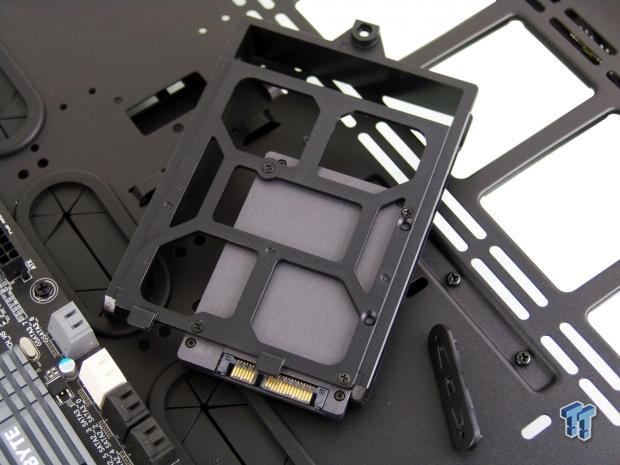
We opted to use an SSD for our build. In doing so, you will need to remove the clip with the 3.5" drive pins in it to allow the SSD to slide over enough to be screwed into place.
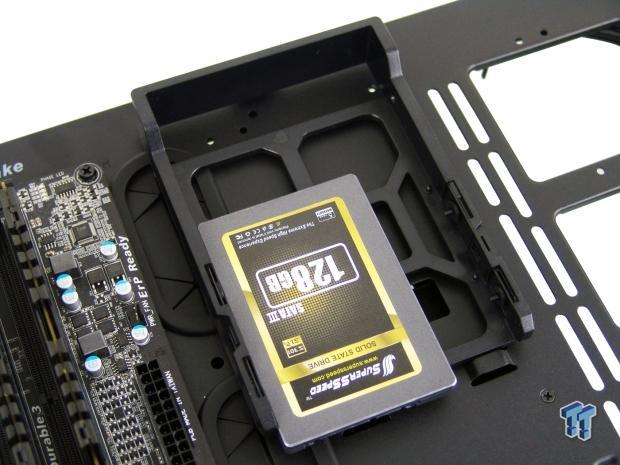
Because we can, we decided not to hide our storage choice in this build and opted to mount our SSD just to the right of the motherboard in one of the optional locations these trays slide into.
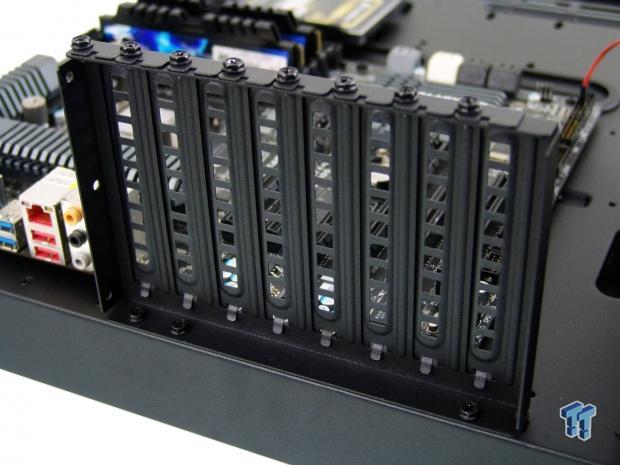
We are then directed to install the expansion slots. Here is where things can take a turn. Using three screws, you can install the bracket directly to the motherboard tray as seen here for the standard setup.
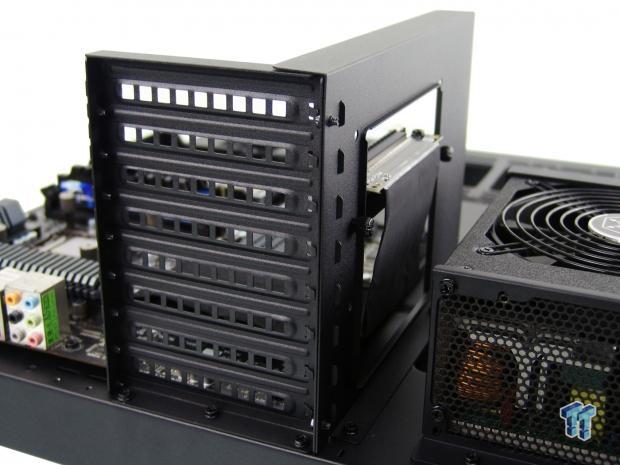
However, you also have this option. Using the adapter bracket, we now install the expansion slots the other direction. Along with the use of the PCI-e extension cable and its bracket, cards can be installed to look at the coolers, or more relevantly, the water blocks on the video cards.
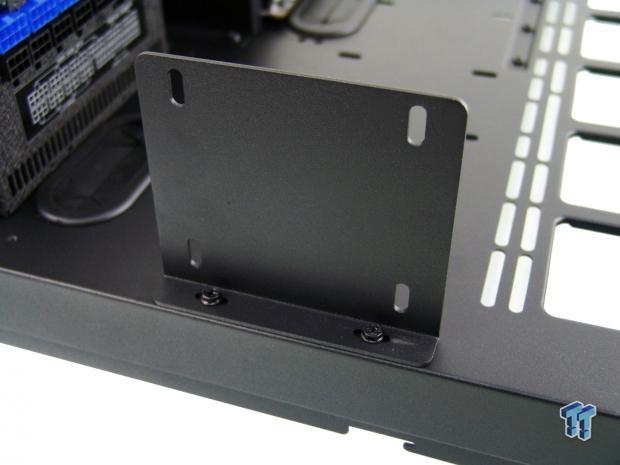
In front of the PSU, there is a location to mount this pump/reservoir bracket for taller tube style reservoirs with the pumps built in under them. This can limit the PSU, and depending on the tube length, could affect video card length as well.
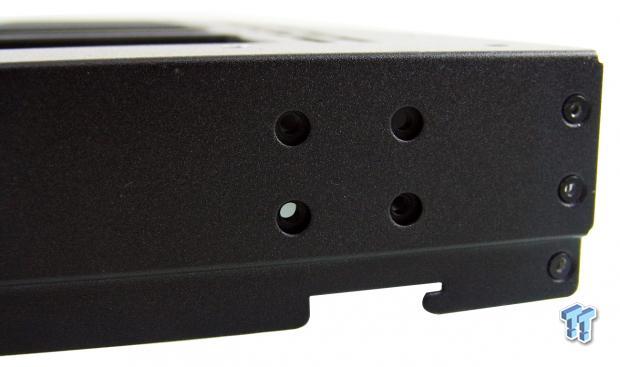
Now we are directed to a set of four holes at either end of the bottom of the Core P5. This is where we had to dig the screws out of the plastic caps to mount them to these locations.
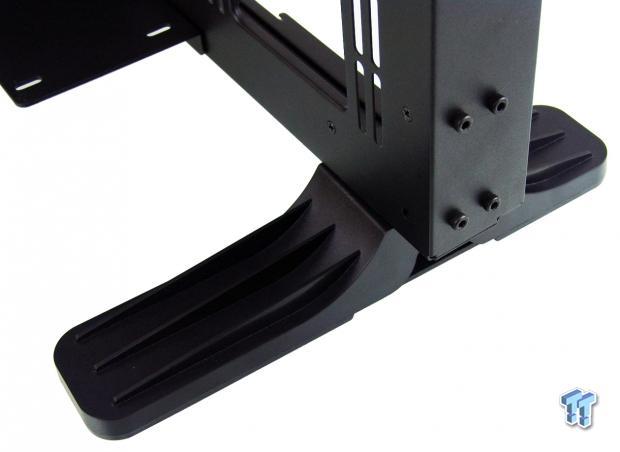
Once installed, the feet are nearly as wide as the chassis, but do extend past all of the weight in both directions to give the Core P5 a very solid foundation with no fear of your expensive hardware falling over.
Case Build & Finished Product Continued
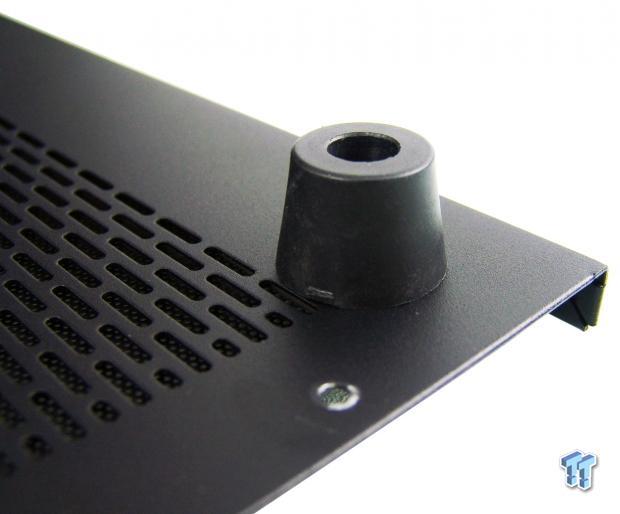
You are now looking at the corner, outside of the right side panel. The manual also shows that instead of opting for the large set, you can install these solid rubber feet like this, and lie the Core P5 on its back like a test bench setup.
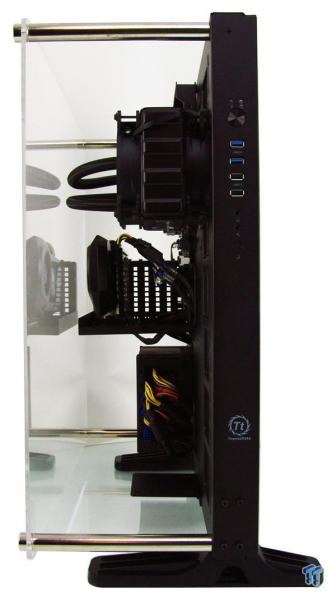
For our purposes, this is the final version of what we went with. We see the resemblance to the Level 10 even more now, but we can now get a good feeling of just how wide this is.
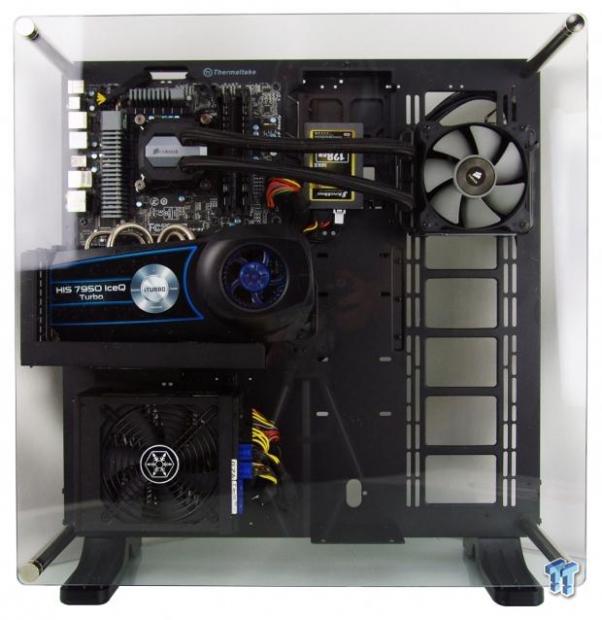
Without a custom loop to install at this time, we did make it easier going with the AIO, but it gave us a chance to play with the mounting and such. What we do like about this though is that not one bit of the build is hidden from view. Oh, and that video card on its side, that's damn cool too.
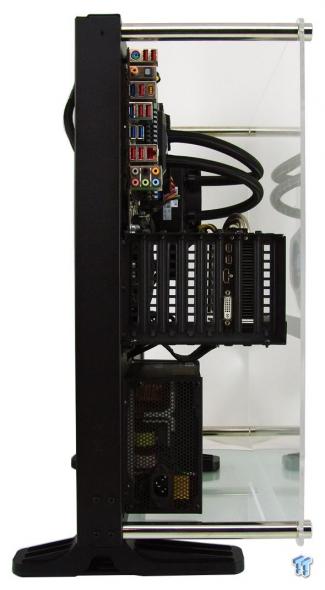
There is no support for the rear I/O dust shield, but there doesn't need to be; this is an open air chassis after all. We still want to brag about the video card options, and we also see the PSU will have no issues sourcing air for the intake fan.
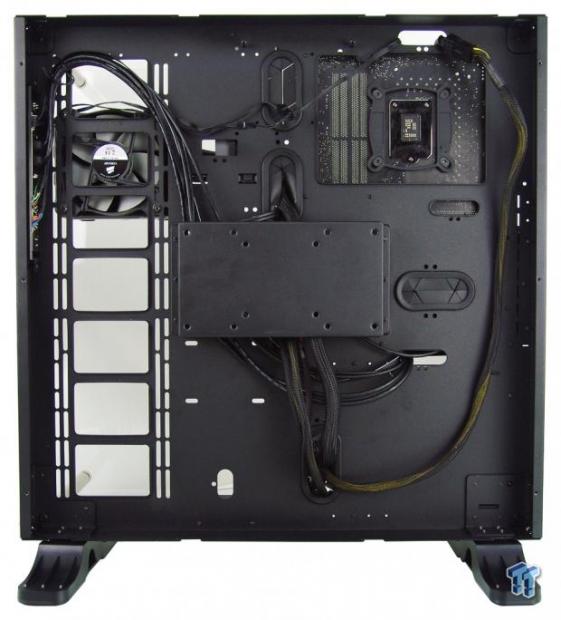
Before we close this side of the chassis, we did want to show some of the potential. It is plenty deep enough to take our wiring without issue, and could have tubing routed there as well. We also removed the HDD rack as it did free us up to run the 24-pin lead.
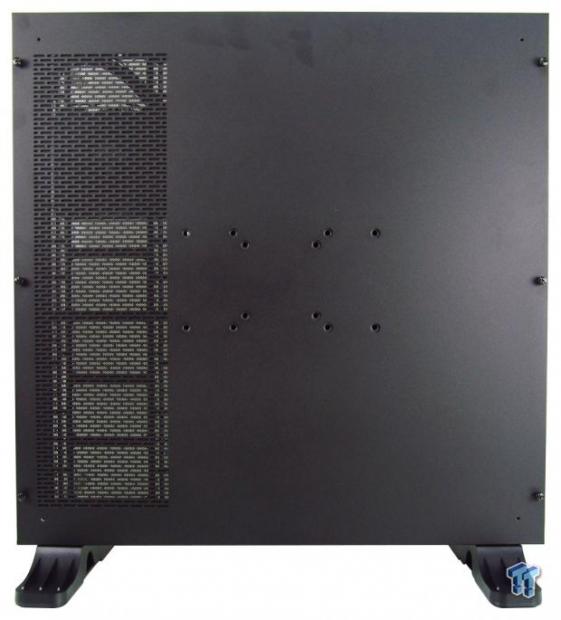
Then of course we are back to what we started with once the panel is back on. One other thing that we should mention is that the ventilated area to the left does offer a magnetic dust filter inside of it.
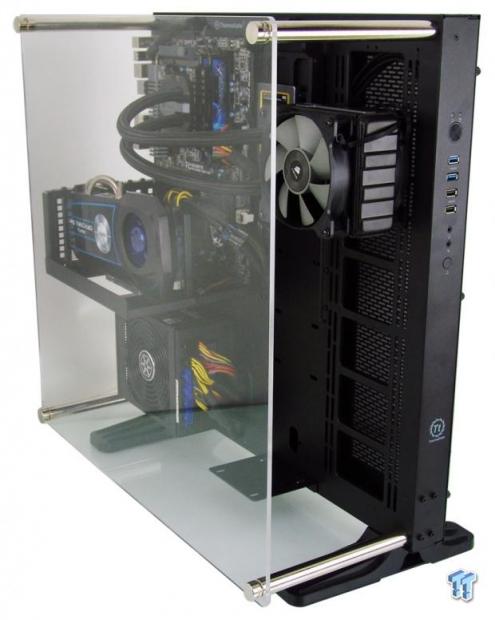
From any angle, the Core P5 is a pleasure to view. Air cooling is more than possible for the average users, and water cooling with this chassis is also designed right into it. And for those using pots, it will lay flat and be ready to take that on as well. Truly an open air chassis for anyone.
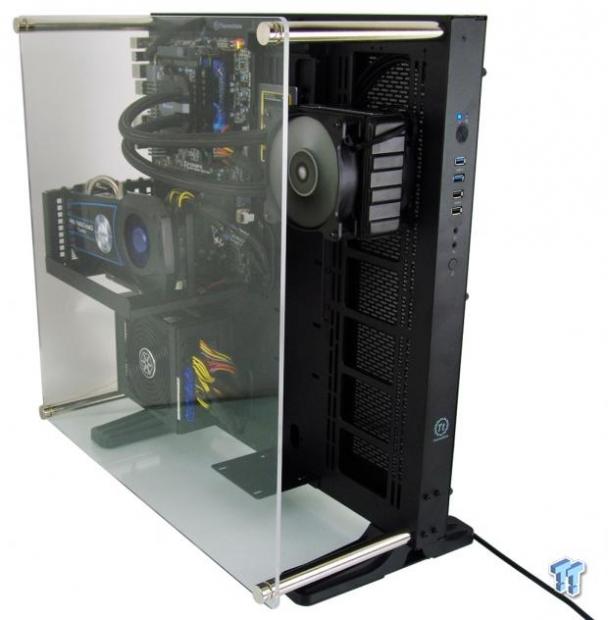
Once we powered things up, any noise we did hear was not a product of the Core P5 chassis, as it has no moving parts. The natural flow of ambient air is better thermally for the components, but dust can be a concern long term. The only thing that changes is the blue LED indication that the power is on, and we missed the blue LED flash when the SSD loaded the OS.
Final Thoughts
Not everyone out there thinks that they have the skills to build a chassis from scratch like along the lines of a MountainMods or Danger Den chassis, but this is not a design that needs that level of skill and patience. If you can turn a Phillips screwdriver, and can read enough to follow the instructions, you too can get through this. Once all the parts are laid out and accessible, it was maybe thirty minutes tops until we had the chassis from laid out on the table to assembled with everything, but the wiring finished. So, do not let the fact that this chassis needs some love out of the box shy away from what Thermaltake is offering.
We did find a couple of minor issues with our sample during the build process, but this is normal for pre-production samples. When discussing things with our Thermaltake rep, we were told they are fully aware of things like the staining on the steel bars, and assured us this will not be found in the retail versions that hit the shelves. Outside of superficial things, we have no complaints in the design, layout, feature set, its ruggedness, or its modularity to work in many situations, not just as a monolith that takes up space on the desk or floor. Being open air, and only needing to remove four caps to remove the transparent panel, everything is easily accessed, can be easily cleaned and maintained. And for those that like to bench a lot of different gear, this is a chassis that is right up your alley.
Another nice thing about this design is that you are not wasting money on bits you won't normally need. Most of us change out stock fans, and enclosed cases have their set of issues that users constantly have to deal with. Also, there is the aspect that thermally and acoustically the limits are set by the user with no influence from Thermaltake. So, why buy it if you don't need it? Here you are given a structurally solid base that supports anything you can fit into this chassis. It offers the ability to not only be a case or a test bench, but it also can hang on the wall with any VESA mount rated for the finished weight of this design, and be sure to account for this. With a loop and all the gear installed, this chassis can vary greatly in what the weight is you will be hanging.
What we still cannot get over though is that everything we just described is, in our opinion, way undervalued. Don't get us wrong here. We appreciate the sweet deal being offered as-is at $149.99 for the Core P5 open air chassis, we just feel they could have sold this at nearly double the cost. That being said, Thermaltake has no plans to make a price hike based on our opinions. We are pleased to say that when these do hit the shelves, the Core P5 is a serious bit of kit for an "entry level" investment. If kids or pets will not kill your dreams of a showcase system, the Core P5 is a perfect solution for anyone who appreciates what this design is all about in any fashion. No other case that we have reviewed offers what it does, and not at this price point.
Chad's Chassis Test System Specifications
- Motherboard: GIGABYTE GA-Z68X-UD4-B3 (buy from Amazon)
- CPU: Intel Core i7 2600K (buy from Amazon)
- Cooler: Corsair H80i GT (buy from Amazon)
- Memory: G.Skill Ripjaws F3-12800CL6D-4GBXH (buy from Amazon)
- Video Card: HIS HD7950 IceQ (buy from Amazon)
- Storage: SuperSpeed 128GB (buy from Amazon)
- Power Supply: SilverStone SST-ST85F-G (buy from Amazon)
- OS: Microsoft Windows 7 Ultimate 64-bit (buy from Amazon)

| Performance | 100% |
| Quality including Design and Build | 97% |
| General Features | 99% |
| Bundle and Packaging | 99% |
| Value for Money | 99% |
| Overall | 99% |
The Bottom Line: It is very hard to deny the awesomeness of the Core P5 from Thermaltake! With a bit of assembly and hardware installation, this wall hangable open air chassis is a real stunner that anyone can appreciate.
PRICING: You can find products similar to this one for sale below.
 United
States: Find other tech and computer products like this
over at Amazon.com
 United
Kingdom: Find other tech and computer products like this
over at Amazon.co.uk
 Australia:
Find other tech and computer products like this over at Amazon.com.au
 Canada:
Find other tech and computer products like this over at Amazon.ca
 Deutschland:
Finde andere Technik- und Computerprodukte wie dieses auf Amazon.de
What's in Chad's PC?
- CPU: Intel Core i7 13700K
- MOTHERBOARD: ASUS ROG Maximus Z690 Hero Eva
- RAM: TEAM DDR5-7200 32GB
- GPU: ASUS GeForce RTX 3090 Eva
- SSD: addlink m.2 2TB
- OS: Windows 11 Pro
- COOLER: Fractal Lumen S36
- PSU: be quiet! Dark Power Pro 1500W
- KEYBOARD: ASUS ROG Strix Scope TKL Electro Punk
- MOUSE: ASUS ROG Strix Impact Electro Punk
- MONITOR: ASUS ROG Swift OLED PG42UQ
Related Tags

