
The Bottom Line
Introduction, Specifications, and Pricing
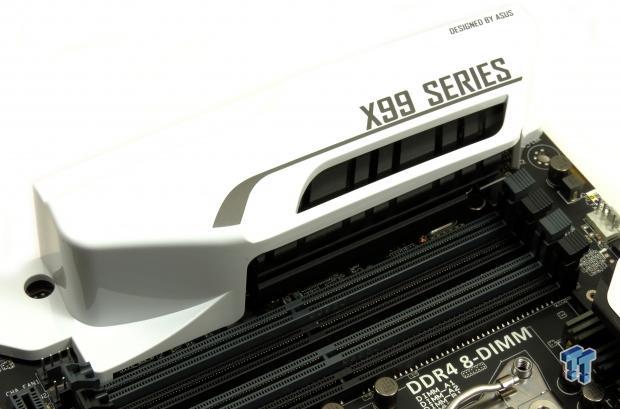
ASUS is one of the leading motherboard manufacturers in the world; focused on high-end performance motherboards, ASUS does great with Intel's high performance desktop platform. The X99 chipset is Intel's leading high performance consumer platform, and ASUS is bringing their A-game to the market with a wide selection of X99 chipset motherboards. Today, I take a look at one of their mid-range X99 motherboards, the X99-PRO. While it's a mid-range board in ASUS's lineup, compared to most other X99 motherboards, it's a high-end offering.
ASUS decided to break out of the gate quickly with X99, providing some unique features such as the ASUS OC Socket, which offers the ability to greatly improve cache overclocking, and even helps when it comes to memory overclocking. ASUS's X99 motherboards have a sleek white theme which is much different than previous color themes, yet at the same time is very chic.
Specifications

The X99-PRO has a lot of features one would expect from an X99 motherboard, including M.2 (with 4x PCI-E 3.0), SATA Express, a bunch of USB 3.0 ports, AC WIFI/BT 4.0, and an interesting PCI-E layout. The board supports 3-Way SLI/CrossFireX with both 40 and 28 lane CPUs when you don't use the M.2 slot.
Pricing
The ASUS X99-PRO is currently $315 on Newegg, which puts it in the mid to high range when it comes to Intel X99-based motherboard prices.
Packaging and the X99-PRO
Packaging and the Board
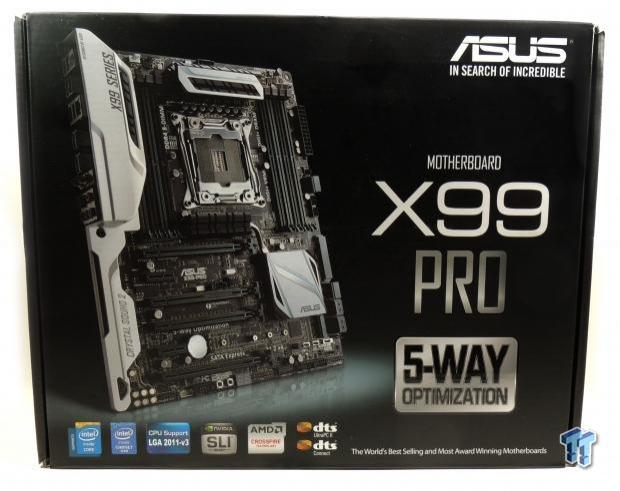
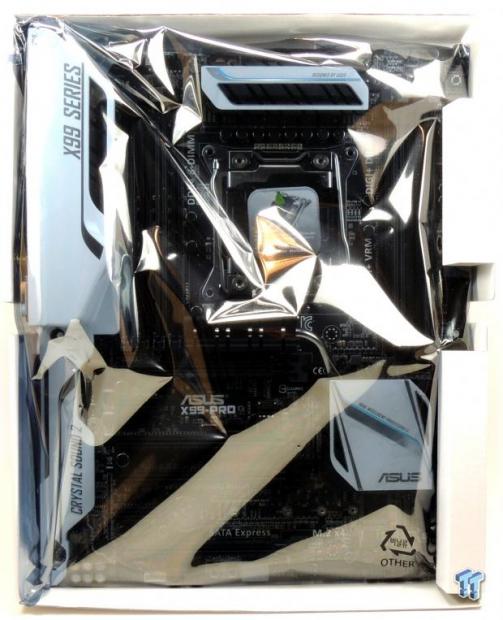
The box shows off a nice image of the board and some of its better features. ASUS's 5-Way Optimization is also advertised on the front. The board is inside an anti-static bag and there is some foam protecting it as well, which should do a great job of protecting the motherboard.
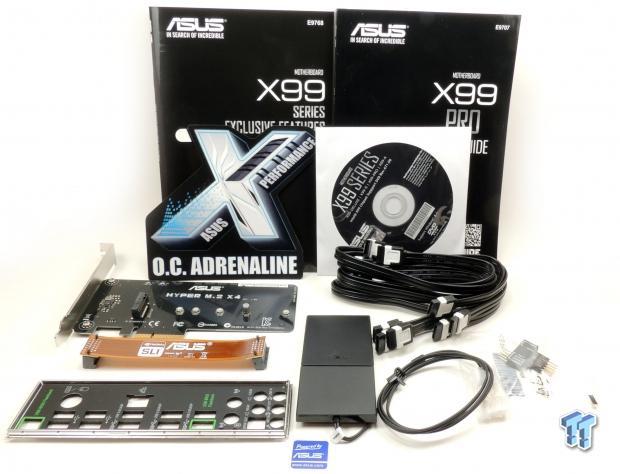
Accessories are plenty; 6x SATA6G cables, 2-Way SLI bridge, IO Shield, ASUS 2T2R dual band antenna for WIFI/BT, Q-Connectors, Hyper M.2 4x card for extra M.2 support, manuals, case badge, and driver DVD.
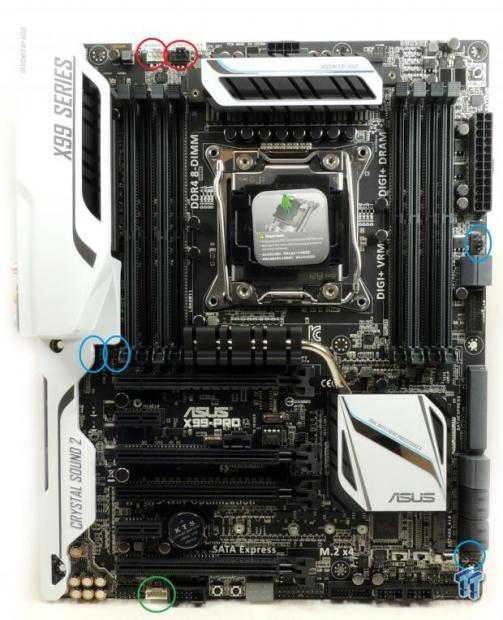
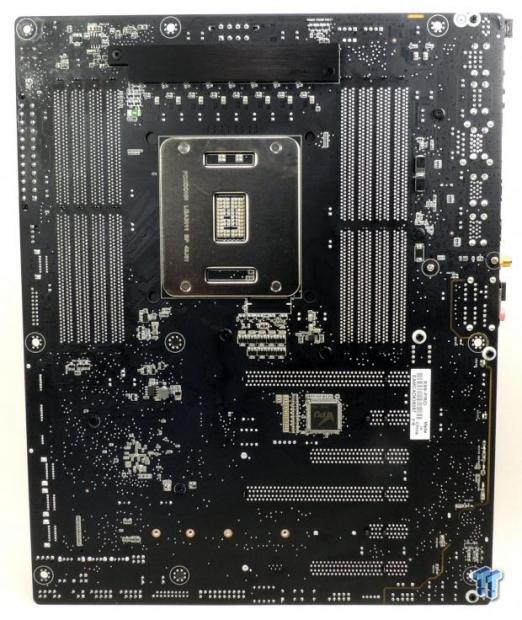
I have circled the fan headers on the board. The headers circled in red are 4-pin PWM headers and the four headers circled in blue are 4-pin voltage mode headers (which are compatible with both 4 and 3 pin fans). There is also a header I circled in green, this is for a fan expansion card that ASUS sells, and it allows users to add additional fans. Extensive fan control is available through the UEFI and Windows. The black and white heat sinks paired with the shield over the IO panel and audio sections provide really great aesthetics.
The board looks as good, if not better, than in the pictures, and if you want a white themed build, then the ASUS X99 lineup is perfect for you. White is also good because it will go with any color themed build and not clash with other colors. The back of the PCB has a few ICs and a heat sink over the back of the CPU VRM cools down the drivers for the CPU VRM. The audio isolation path is also visible from the backside.
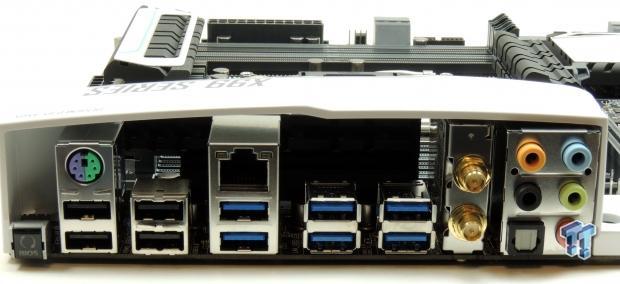
The back panel IO features a 1GBit NIC (Intel), 6x USB 3.0 ports, 4x USB 2.0 ports, PS/2 keyboard and mouse, a 7.1 TOSLINK for audio with S/PDIF out, WIFI/Bluetooth Antenna connectors, and a ClearCMOS button. The shield helps with aesthetics, covering up the silver reflection of the aluminum from the IO connectors.
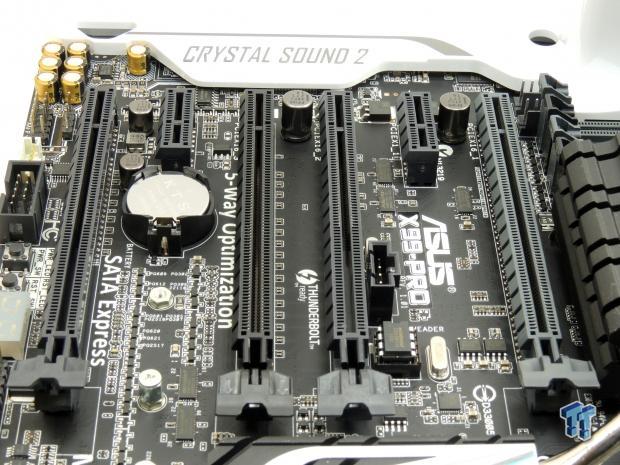
The PCI-E layout on this motherboard can support 3-Way SLI/CrossFireX with both types of CPUs (40-lane or 28-lane). The first and third PCI-E 16x slots are to be used if you do 2-Way and the last 16x slot can be used for 3-Way. However, the last PCI-E 16x slot is the one that gives 4x PCI-E 3.0 to the M.2 slot for 32Gb/s of bandwidth. The second PCI-E 16x slot is routed to the PCH and supports 4x PCI-E 2.0, not PCI-E 3.0 like the other full sized slots.
There is also some sharing going on with the PCI-E 2.0 slots. The first 1x PCI-E slot and the second PCI-E 16x slot (the only PCI-E 2.0 16x slot) share bandwidth with the controller that provides the two USB 3.0 ports below the RJ-45 LAN port. The second PCI-E 1x slot shares its bandwidth with the WIFI/BT card. However, this bandwidth sharing doesn't impact performance, and I don't think it will cause any issues.
By default, the system is set to optimize bandwidth for the WIFI/BT and USB ports, which is a good choice since more people will be using those two devices than the PCI-E 1x slots. If you want, you could put a M.2 drive into the Hyper card that is provided, and plug it into the 16x PCI-E 2.0 for a second 4x M.2 slot so you can run 3-Way SLI.
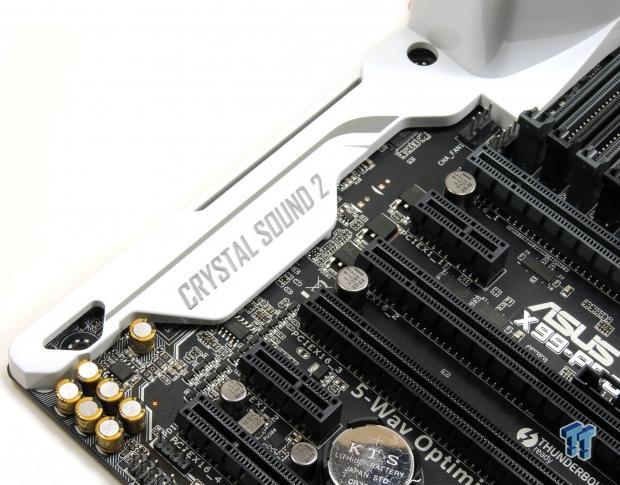
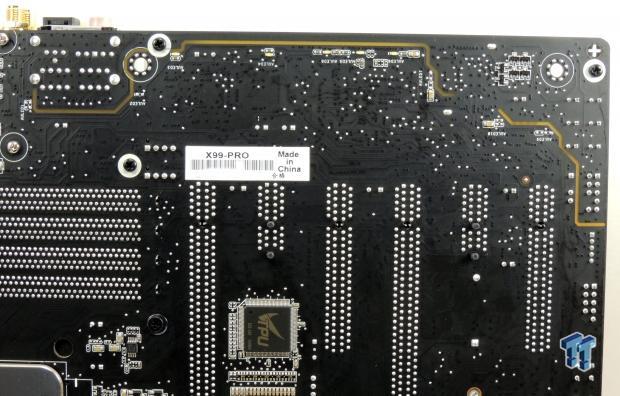
Crystal Sound 2 is ASUS's upgraded ALC1150 implementation with high quality Nichicon electrolytic audio capacitors, amplifier, and PCB isolation. There are 5 white LEDs on the backside of the board to illuminate the PCB divide of the analog and digital domains.
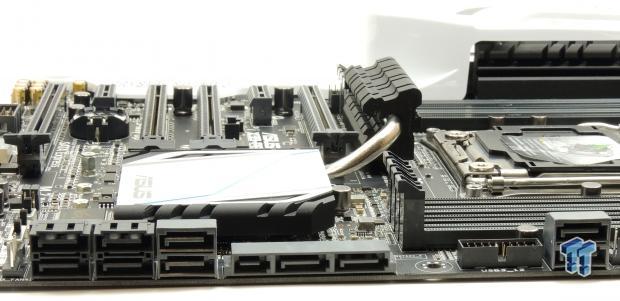
There are 10 SATA6G ports from the PCH, however, if you use SATA Express, then you obviously lose two of the 10 ports. The grey ports support RAID, but because of chipset limitations on all X99 motherboards, the black ports do not support RAID. A single USB 3.0 front panel header is located further up near two of the SATA ports. I really like the location of the two northernmost SATA ports because it is much easier to unplug SATA cables with GPUs installed.
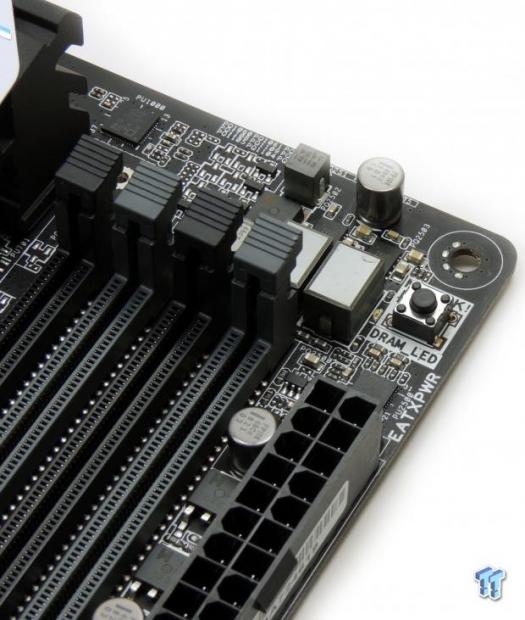
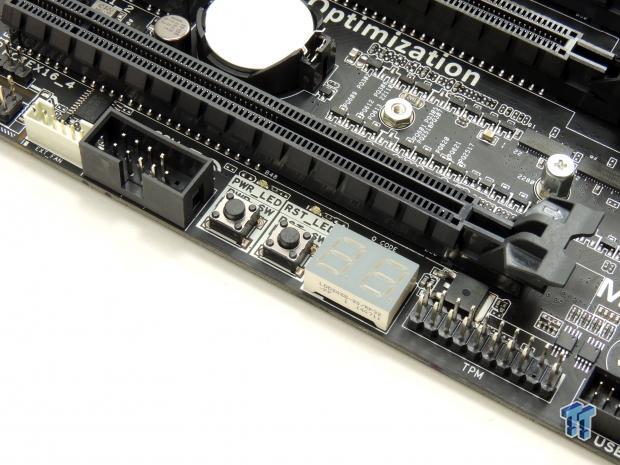
ASUS provides some basic OC features along with some more useful features for novice users. A POST code display, power, and reset buttons are located at the bottom of the board. At the top of the board is a "MemOK!" button which helps with memory troubleshooting.
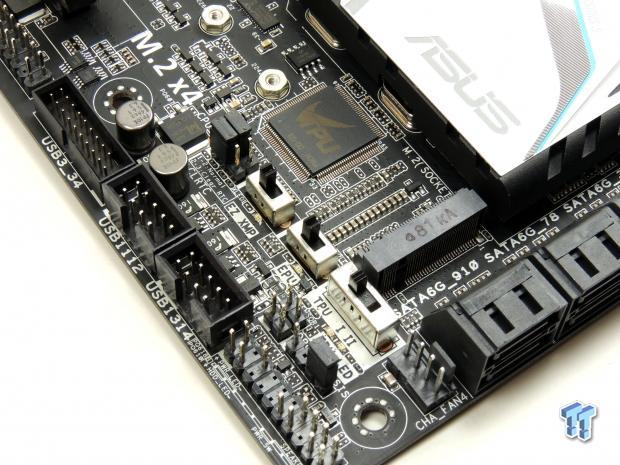
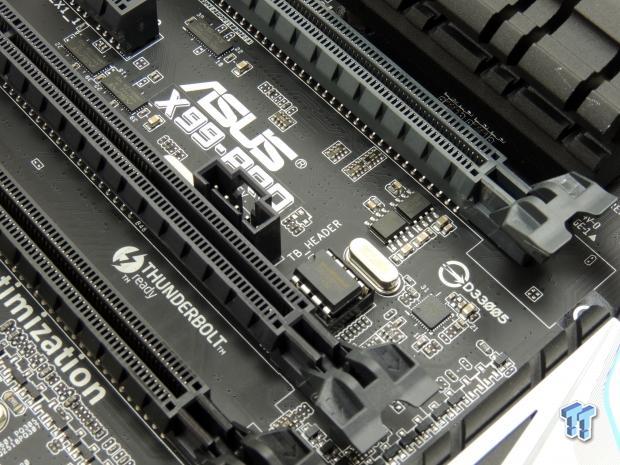
Located right below the PCH is the 4x PCI-E 3.0 M.2 slot as well as some switches. The EZ_XMP switch will allow users to easily enable XMP without entering the BIOS. The EPU switch allows for power savings to be engaged and the TPU switch allows for some auto overclocking. These features make it easy for novice users to easily change some system settings without going into the UEFI. There is also a header for a ThunderBolt card located above the second PCI-E 16x slot, perfect placement near the slot you would install the card into.
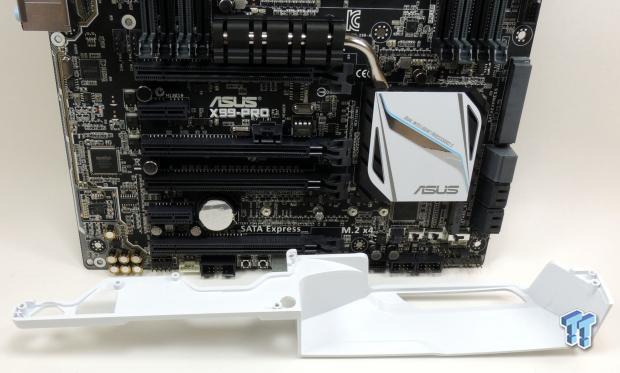
The white plastic shield is held down by four screws.
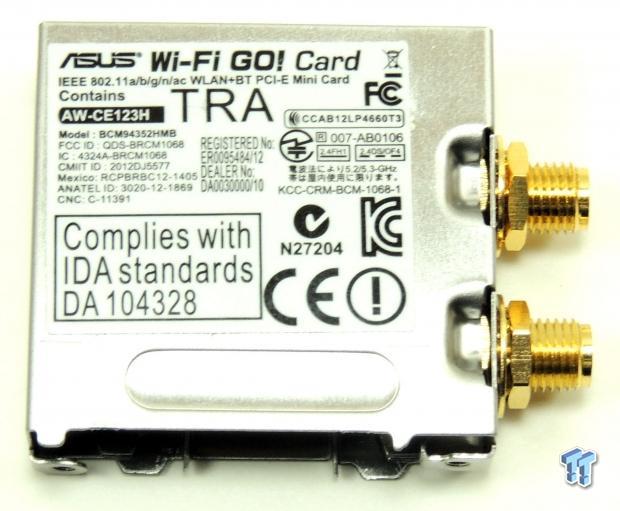
I removed the ASUS Wi-Fi GO! card for inspection on the next page.
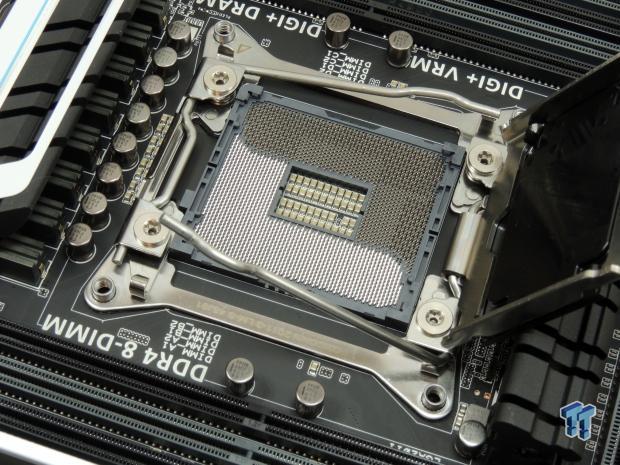
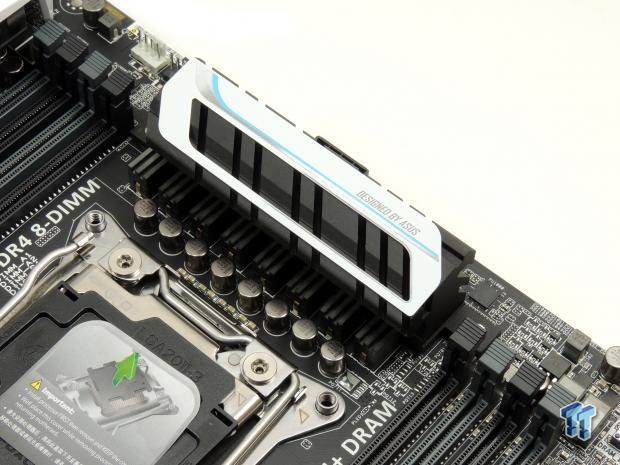
At launch, all ASUS boards had ASUS's OC Socket which features extra pins to allow for better cache overclocking and a reduction in IMC volts for memory overclocking. ASUS was the first to sell motherboards with this socket. The VRM on this board is an 8-phase VRM.
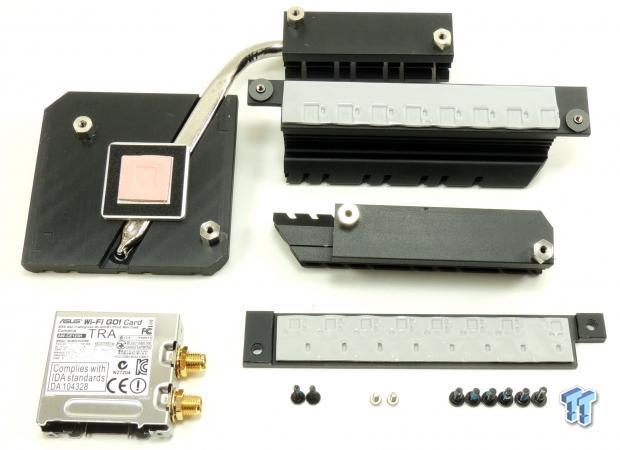
All the heat sinks on the board seem to have a purpose except the one underneath the shield, which seems to perhaps stabilize the PCB or something, as it's not connected to the CPU heat sink and doesn't seem to cool anything directly.
X99-PRO Circuit Analysis
Circuit Analysis

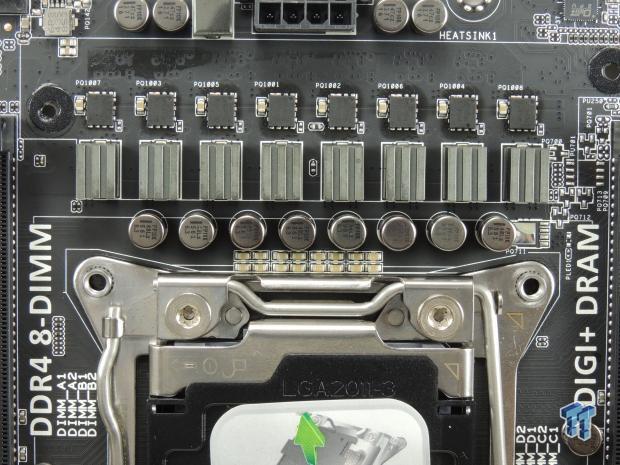
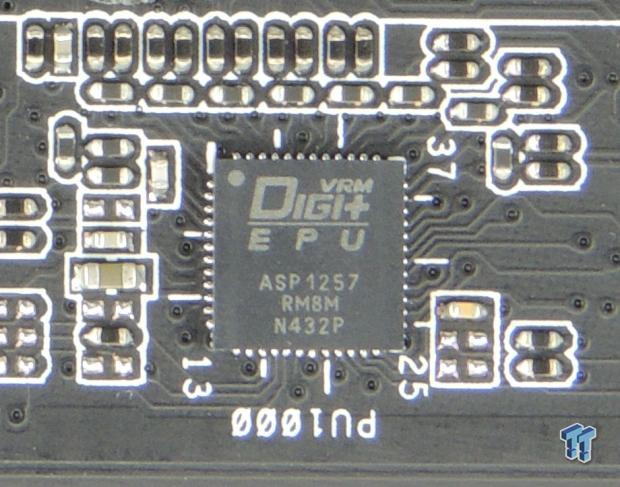
The CPU VRM on this board consists of 8 true phases. I am not sure about the specifications on the inductors, I would guess they are rated around 40-60A, and they have ridges to expand surface area to lower temperatures as inductors get hot. ASUS is using 10K Nichicon FPCAP solid capacitors on the entire board. The CPU VRM has 8x 560uF of the 10K capacitors for a total of 4480uF. The PWM is an 8 phase PWM, most likely an International Rectifier IR3580.
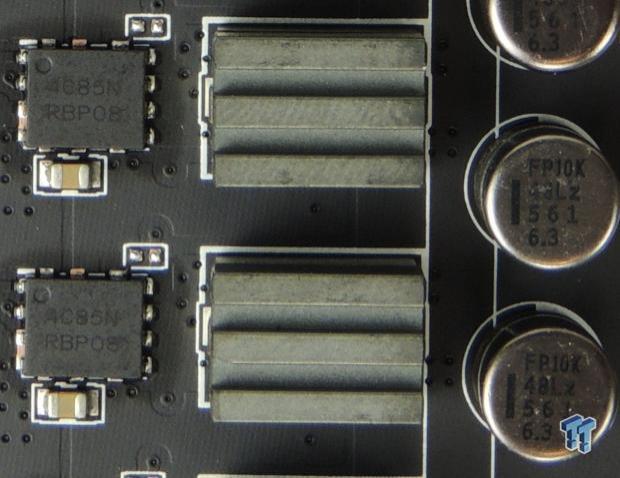
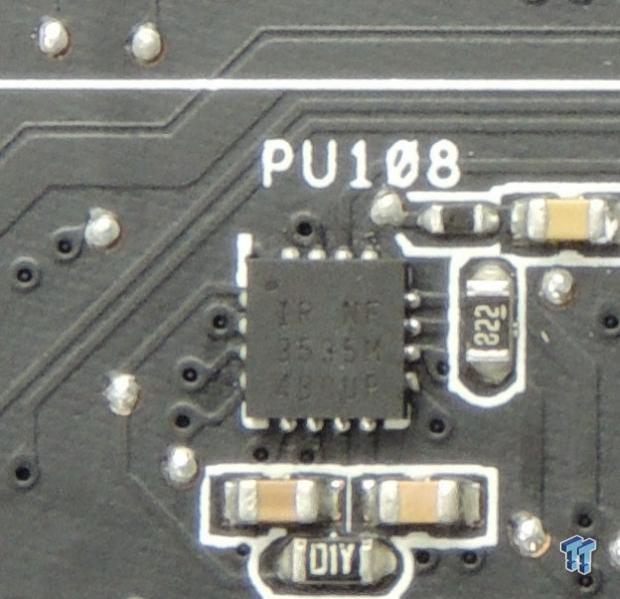
Each phase consists of a single dual N-Channel MOSFET from ON Semiconductor, the NTMFD4C85N. Each of these dual MOSFETs has a high-side MOSFET capable of 25A and a low-side MOSFET capable of 49A, and those current rating are at 3.1W, which can be found in their datasheet. These are very high quality power MOSFETs. Since this MOSFET package doesn't have integrated drivers, ASUS adds eight IR3535, popular single phase drivers, on the back of the board.
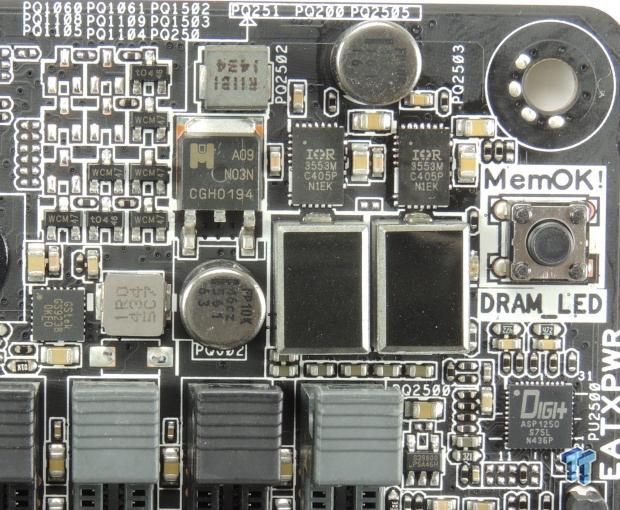
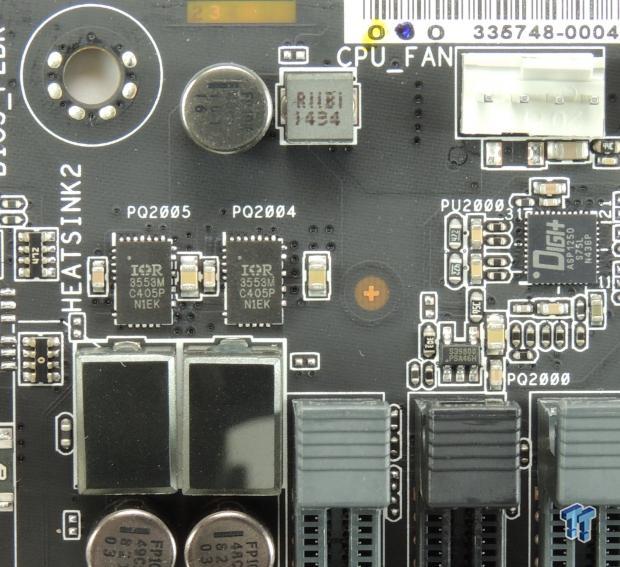
Each memory VRM is powered by a rebranded ASUS PWM, which supports at least two phases for the two IR3553 40A integrated PowIRstages from International Rectifier. The VPP supply for each set of DIMMs (the second one is not shown in the picture on the right) comes from a GSTek 8A integrated buck, the GS9238.
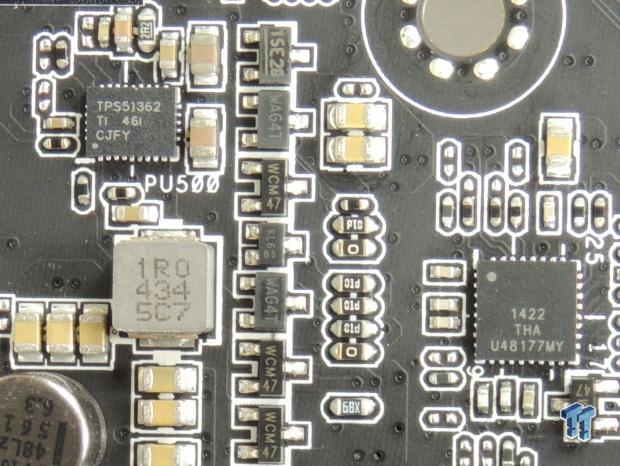
A single TPS51362, which is a 10A buck converter, is possibly being used to power the PCH. The other IC is possibly a secondary clock generator or some special IC for the extra pins in the socket, as I couldn't identify it (but its placement hints towards something to do with the CPU and possibly DMI bus).
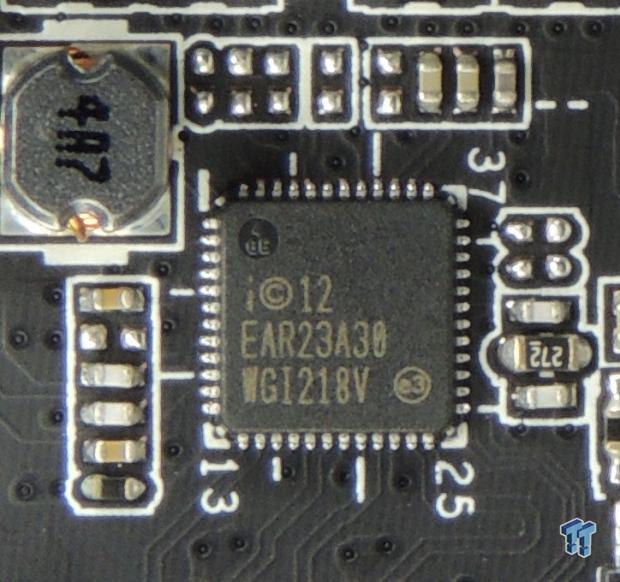
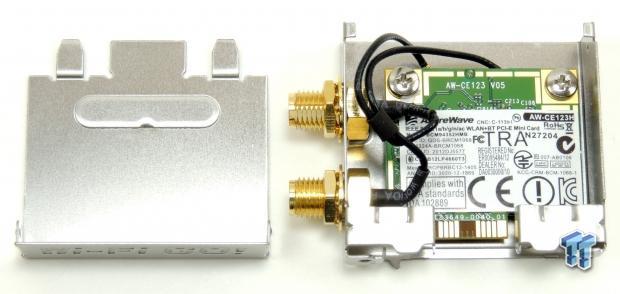
ASUS is using the i218v, Intel's latest PHY for the 1GBit LAN. For the WIFI/Bluetooth ASUS is using an AzureWave Broadcom BCM94352HMB 802.11/ac/867Mbps WLAN + BT4.0 Half Mini PCI-E card.
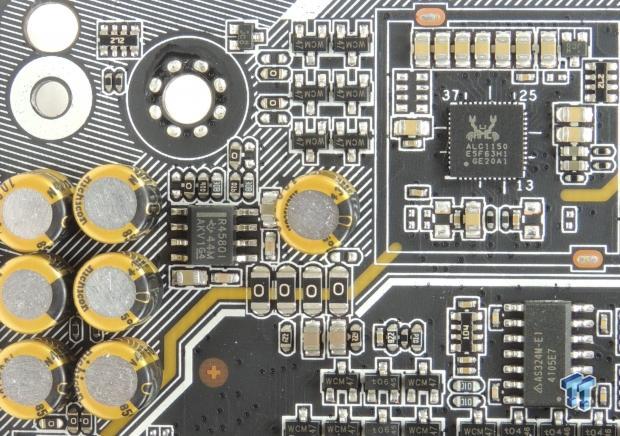
ASUS's Crystal Sound 2 consists of a Realtek ALC1150 which works with the integrated Intel Azalia HD audio processor in the PCH. ASUS optimized the trace paths for the left and right audio outputs to reduce crosstalk, implemented a de-pop circuit, and isolated the analog audio domain from the digital domain of the rest of the motherboard. ASUS added in seven Nichicon audio capacitors and added a Texas Instruments RC 4580 audio amplifier for the front panel audio output.
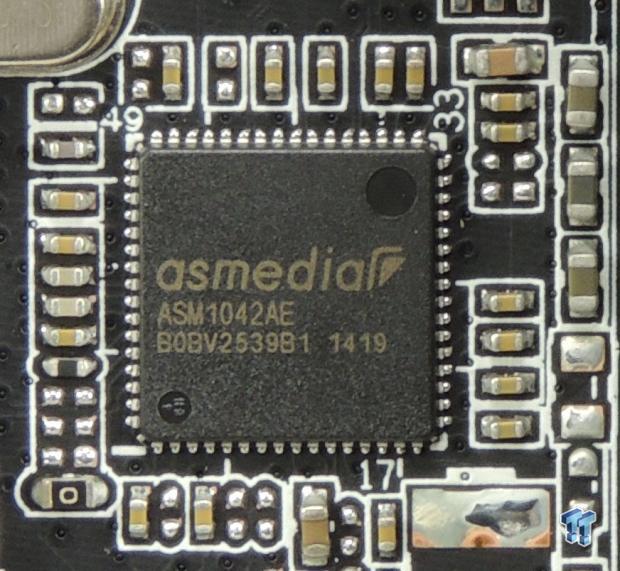
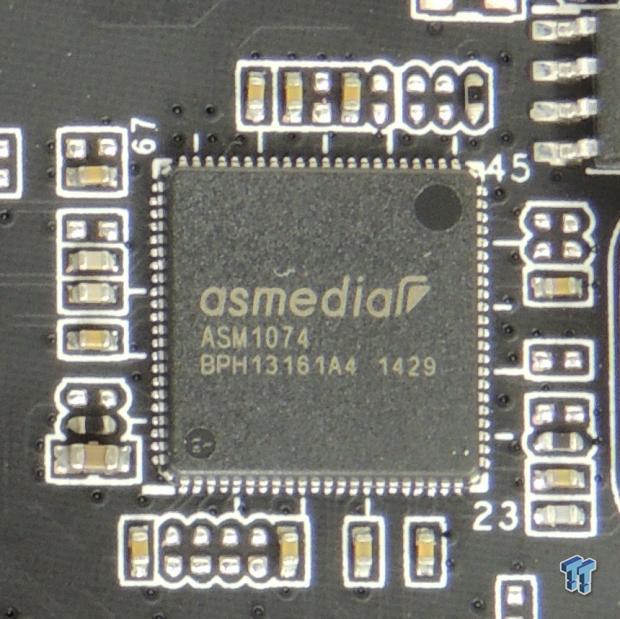
ASUS is using an ASMedia ASM1042AE to provide two extra USB 3.0 ports for the backpanel (located under the RJ-45 LAN port) and an ASMedia ASM1074 1-to-4 USB 3.0 hub for the other four backpanel USB 3.0 ports.
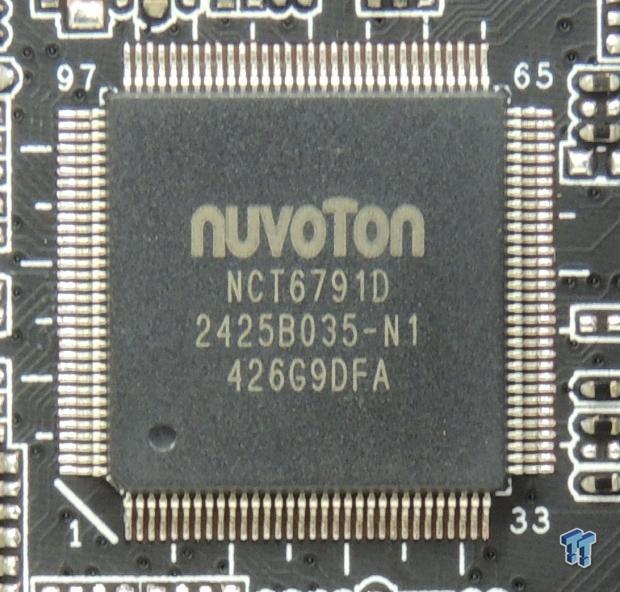
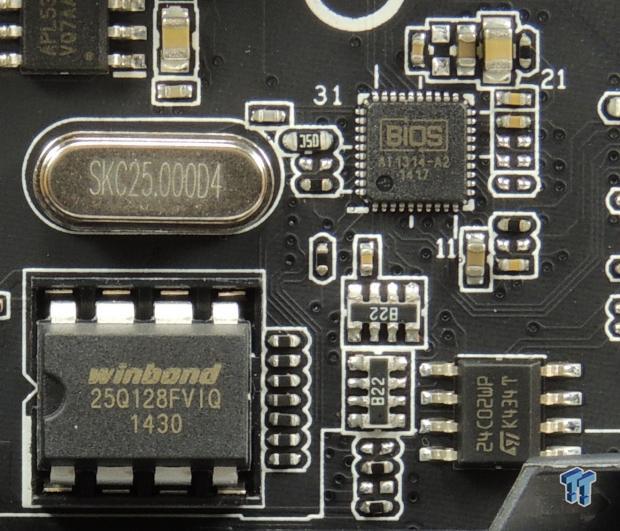
ASUS is using the popular nuvoTon NCT6791D for the SuperIO chip which also supports the PS/2 on the backpanel. The X99-PRO has a single 128Mbit(16MB) BIOS ROM located in a DIP socket in case you need to replace it. ASUS's BIOS flashback is also included, and I think the BIOS chip located in the image on the right is responsible for that functionality.
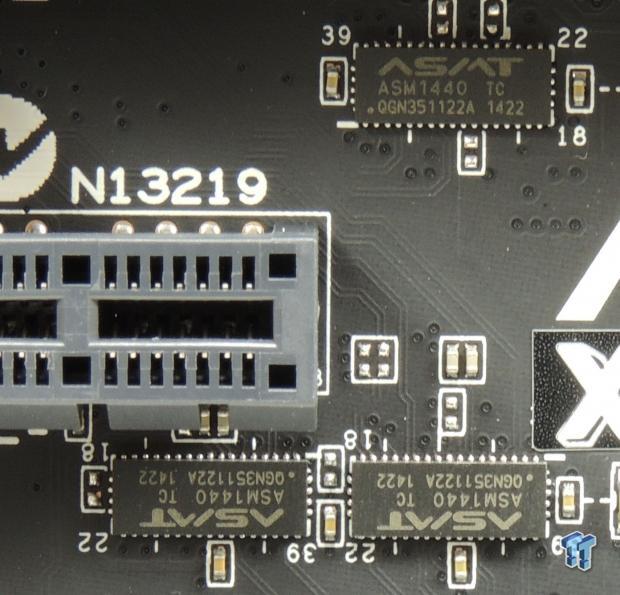
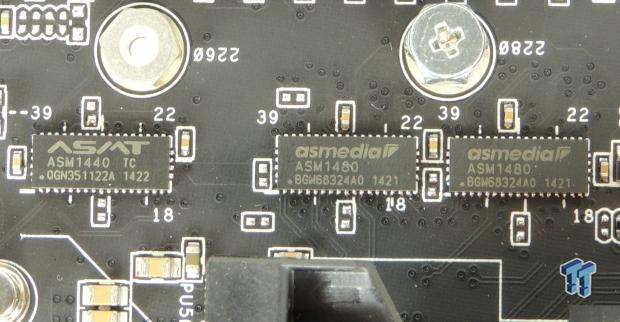
The image on the left shows three ASM1440 PCI-E 2.0 quick switches and the image on the right shows a single ASM1440 and two ASM1480 which are PCI-E 3.0 quick switches. All of these switches are used to switch around PCI-E lanes (mostly PCH lanes) to allow for more expansion possibilities mentioned earlier.
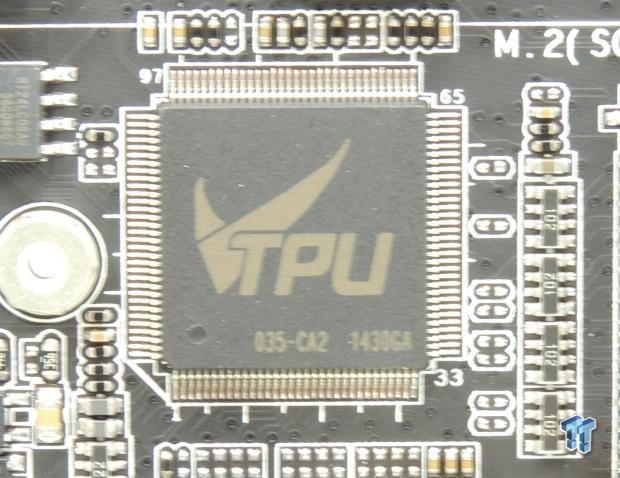
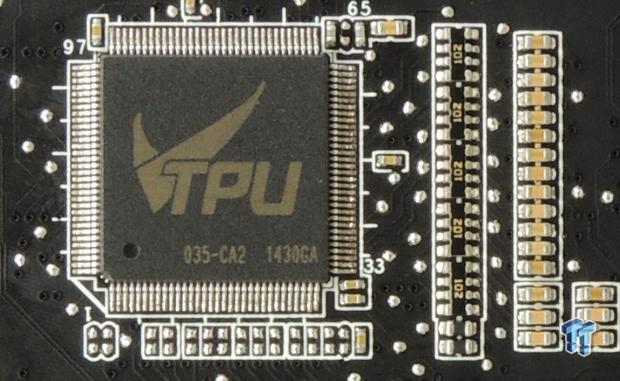
Two TPU ICs, one located on the back and the other on the front side are embedded controllers which control overclocking features.
BIOS and Software
BIOS
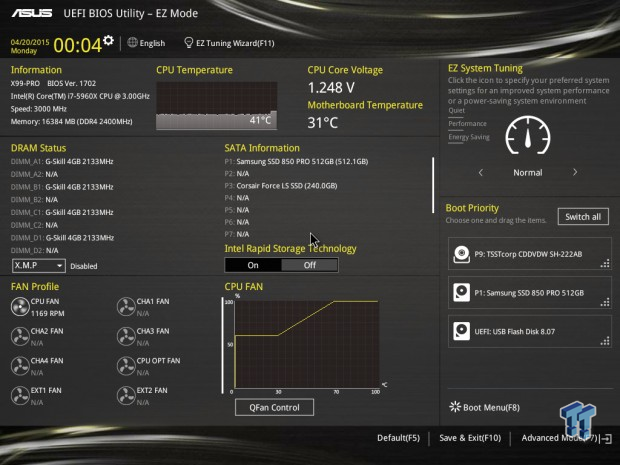
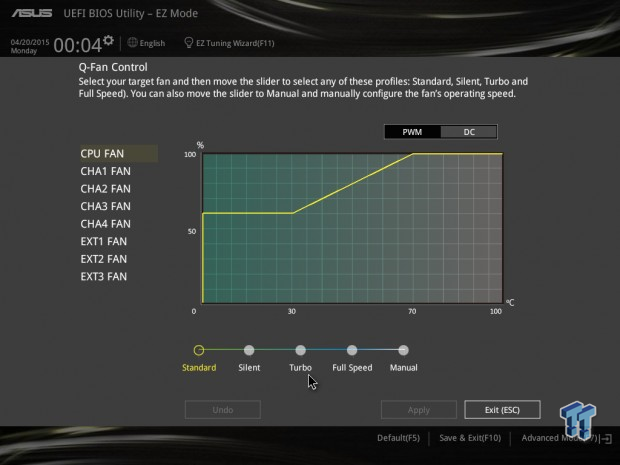
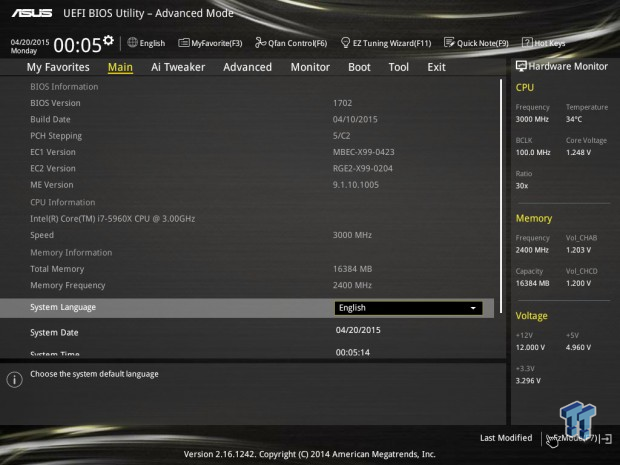
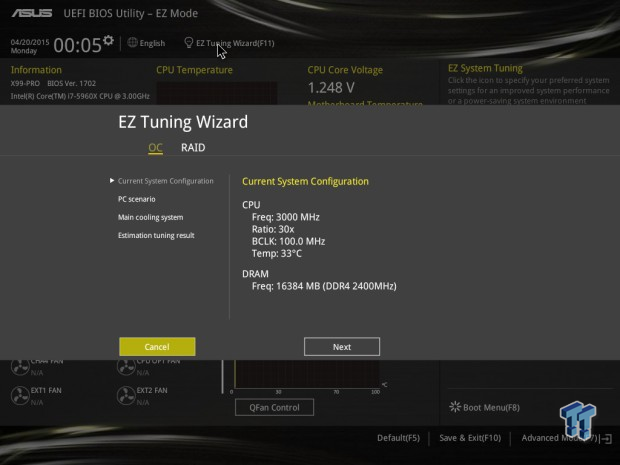
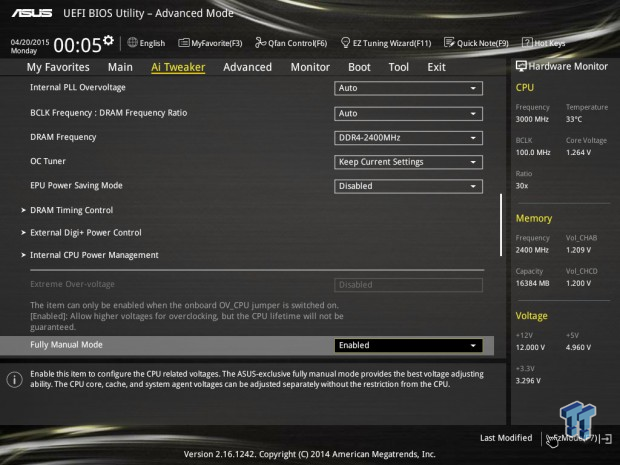
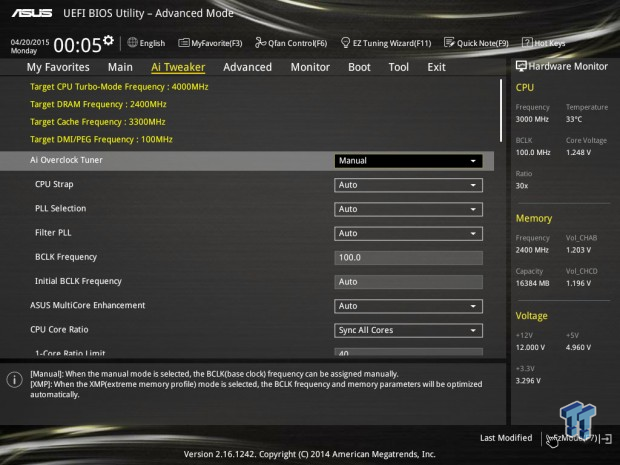
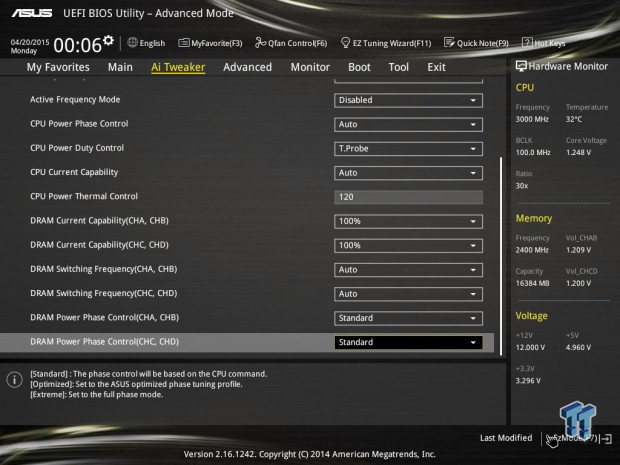
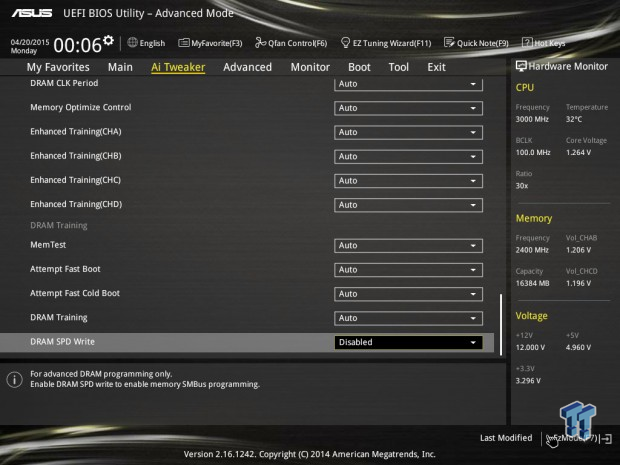
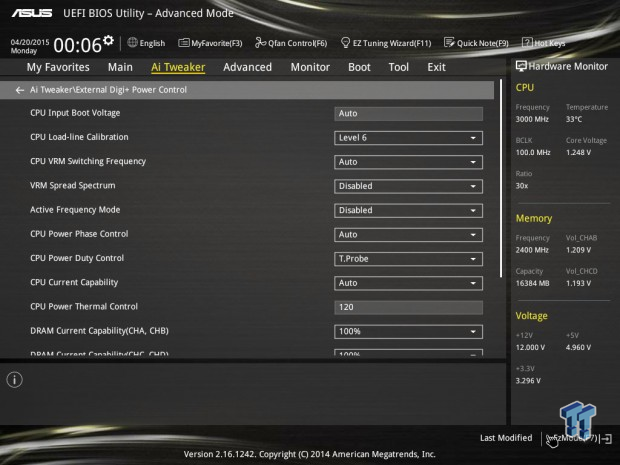
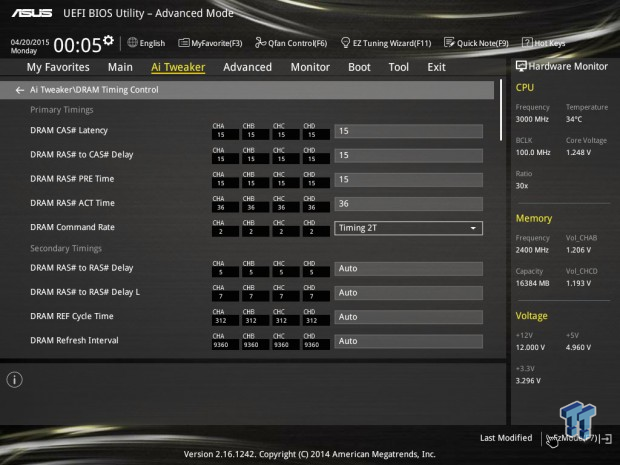
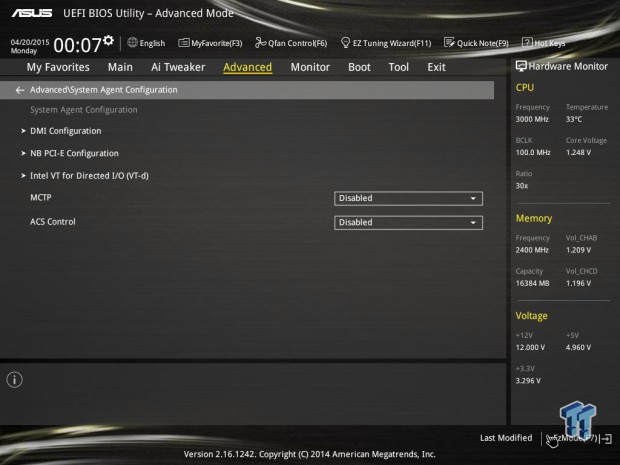
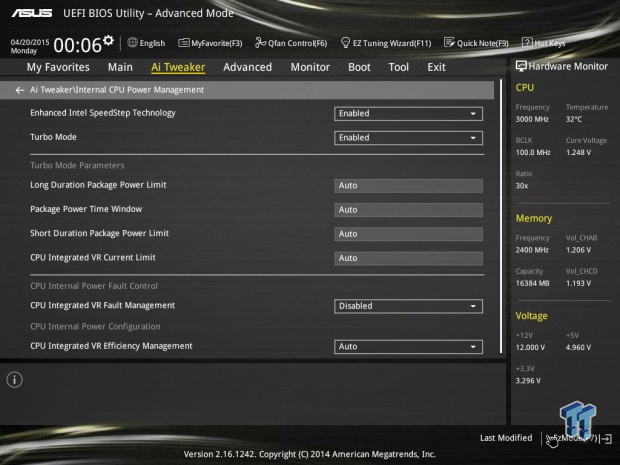
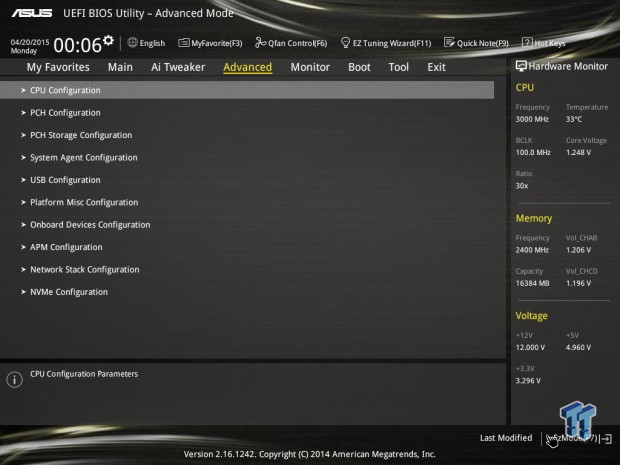
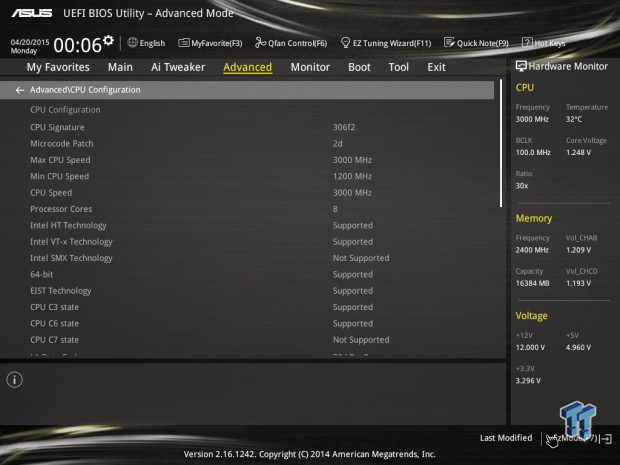
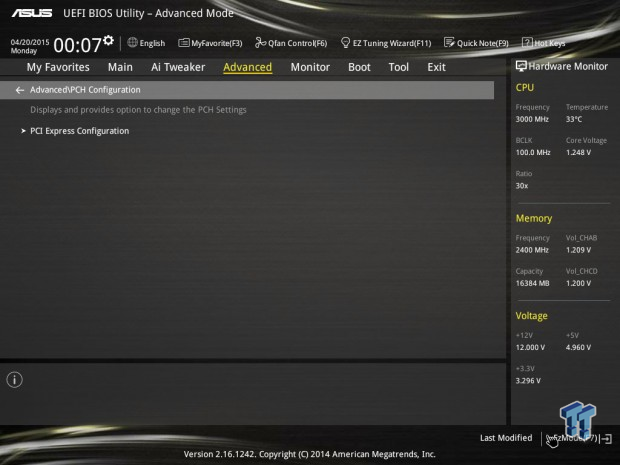
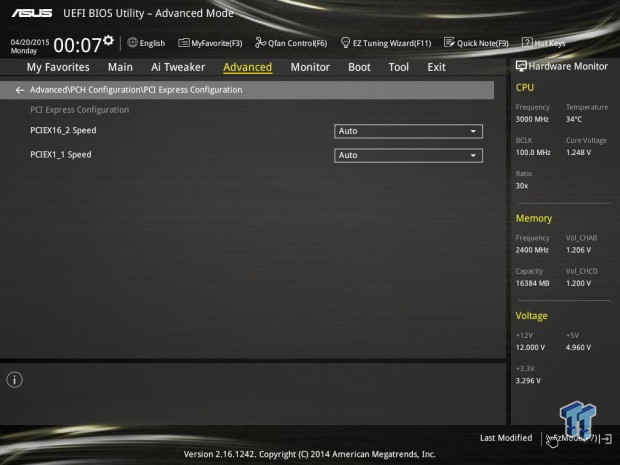
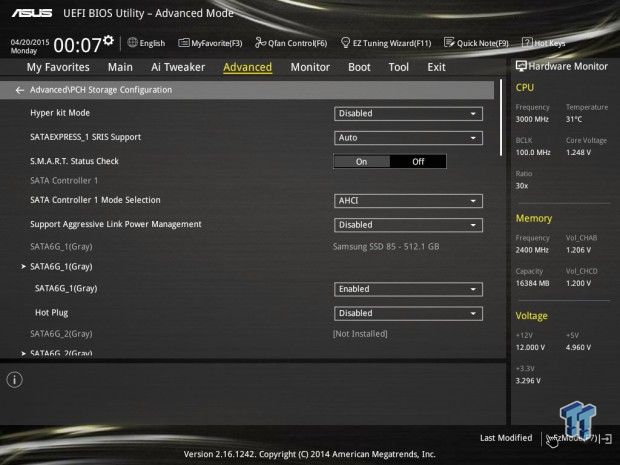
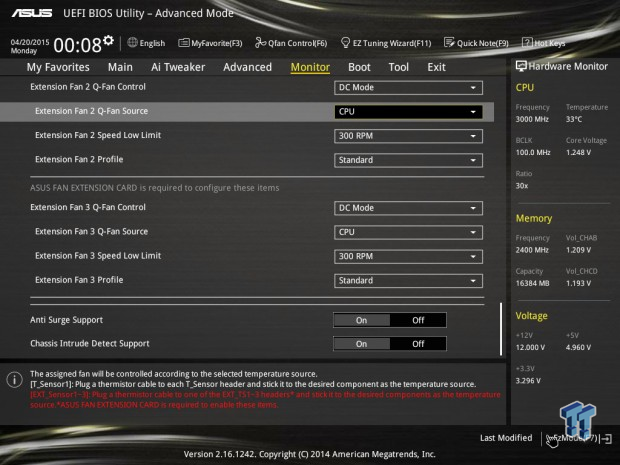
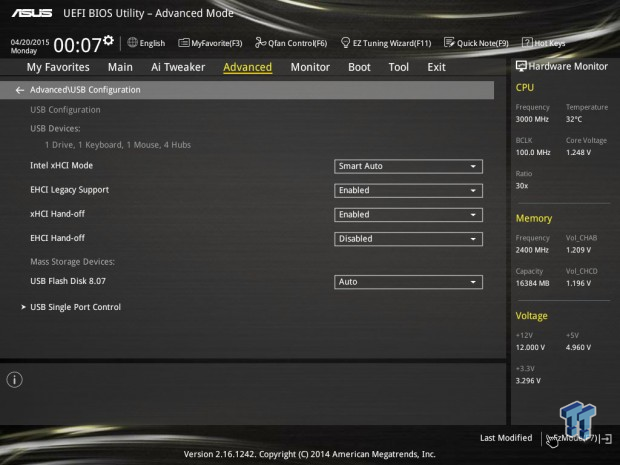
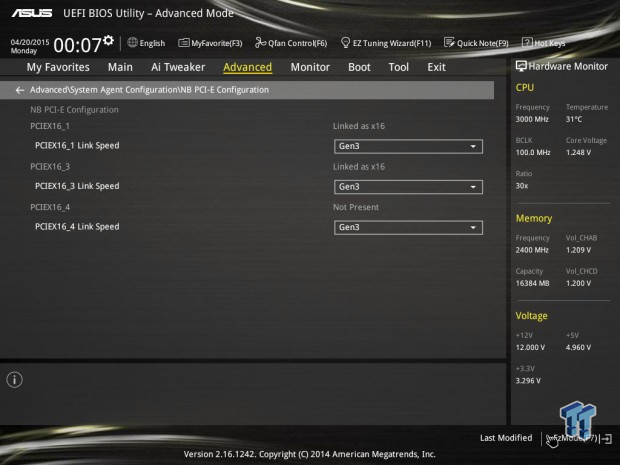
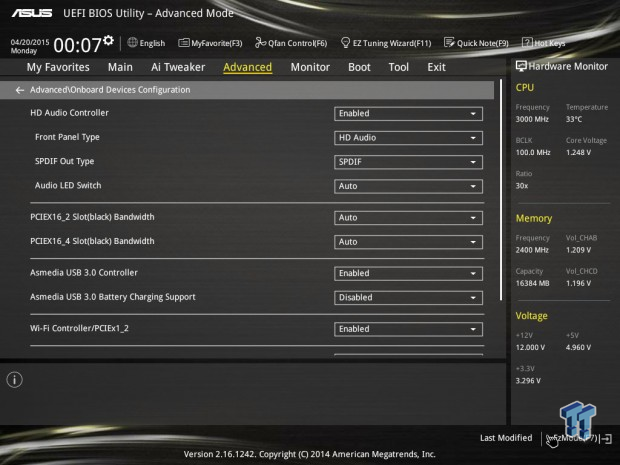
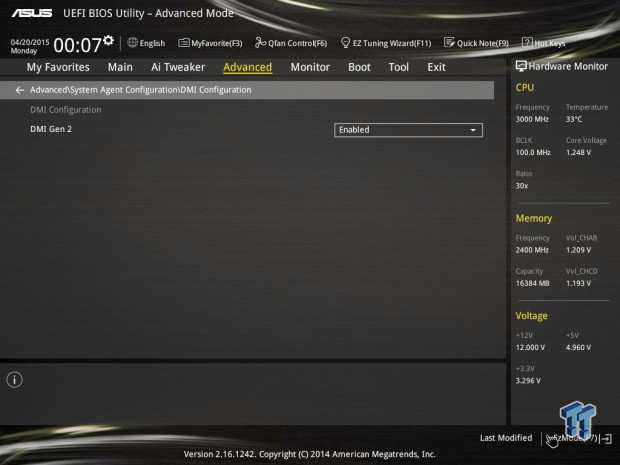
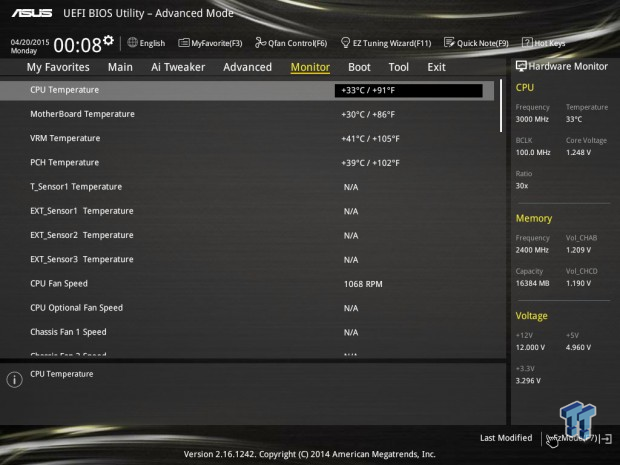
ASUS's UEFI has two modes, an EZ Mode and an Advanced Mode. Q-Fan control is provided through a fancy GUI, one of the nicer ones I have seen. The Advanced Mode is what many have come to expect from ASUS's UEFI, and I used it for all the overclocking I did for this review. There are many settings for tweakers to mess around with, and if you need extra voltage ranges ASUS provides an OV jumper to unlock higher voltage ranges. Overall, ASUS's UEFi was simple enough to use, and didn't seem to have any major bugs worth reporting.
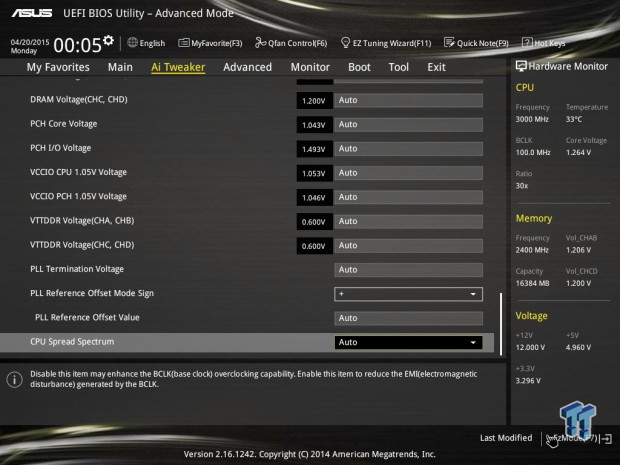
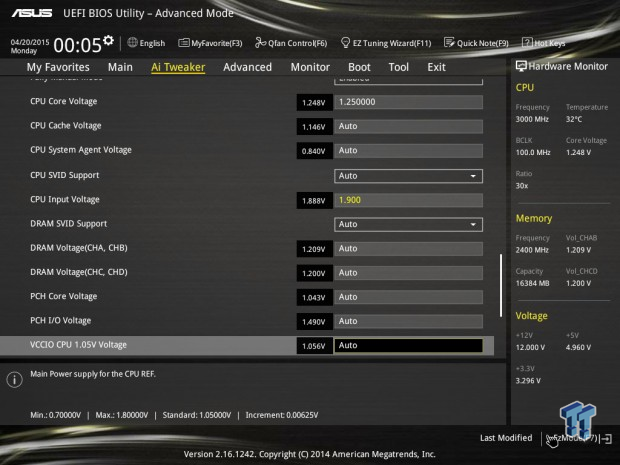
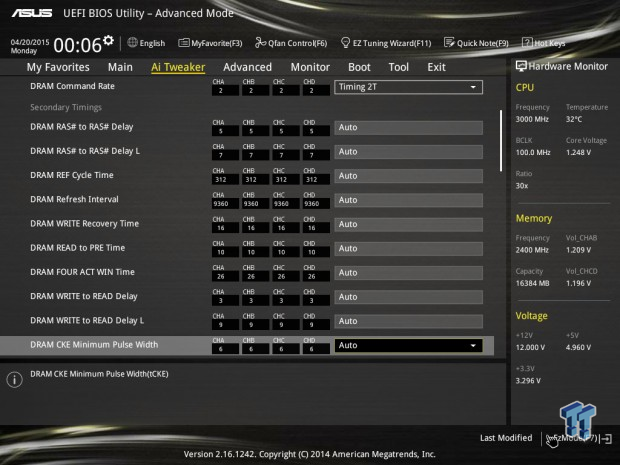
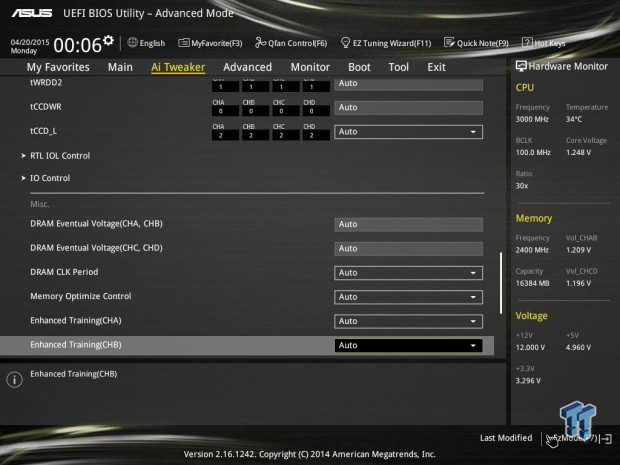
Software
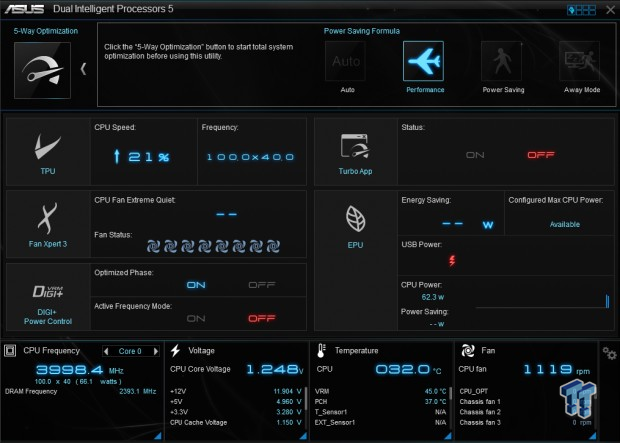
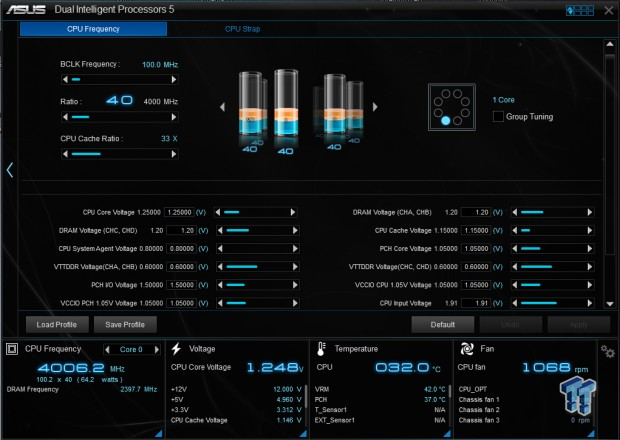
ASUS has a software suite which installs all the software into one easy to use program called Dual Intelligent Processors 5. The TPU part of the program offers great in-Windows overclocking options.
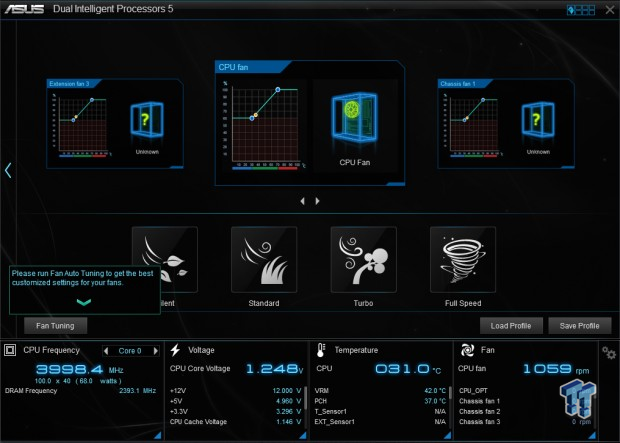
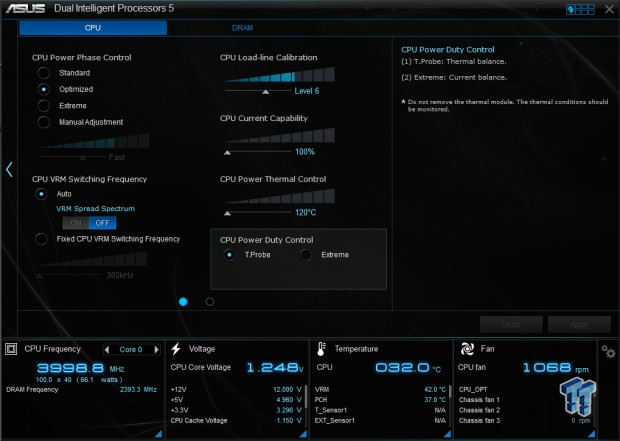
Fan control is also done through Fan Expert 3, which has a very nice GUI. There is also power control for the digital PWM.
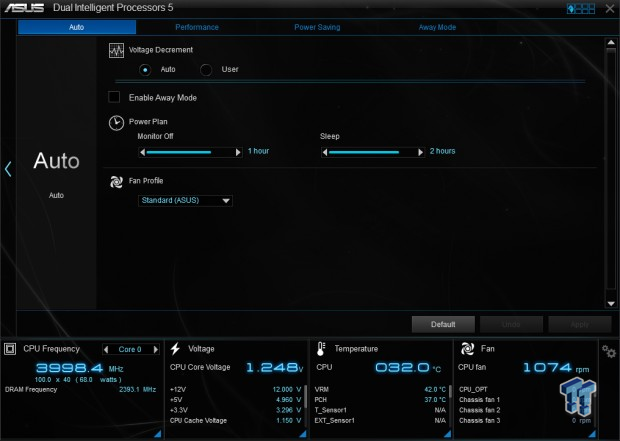
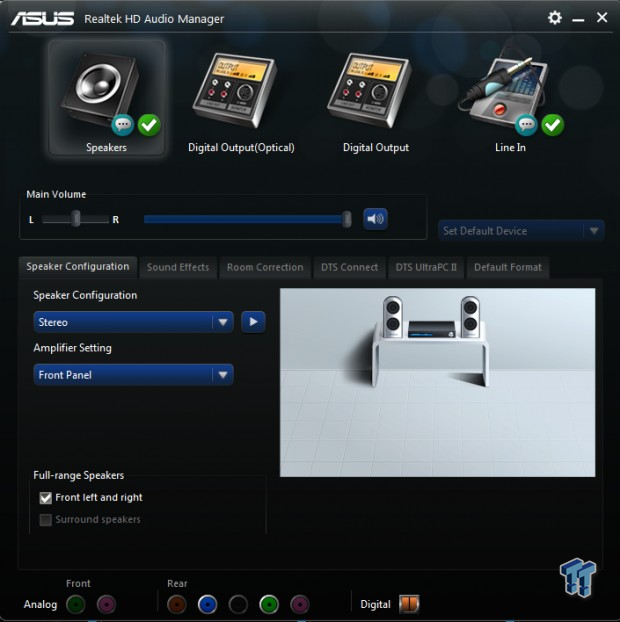
System power control can also be handled through the suite. On the right is an image of ASUS's customized Realtek software suite for the audio.
Test Setup and Overclocking
Test Setup
A big thanks to Corsair for sponsoring the case, fans, SSD, USB drive, and PSU!
A big thanks to Seek for sponsoring the Thermal Camera. You can find my review of the camera here.
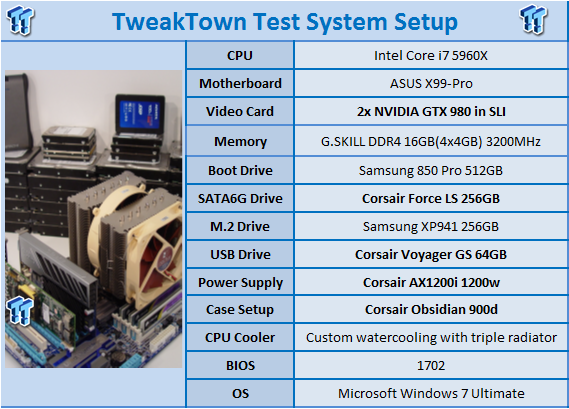
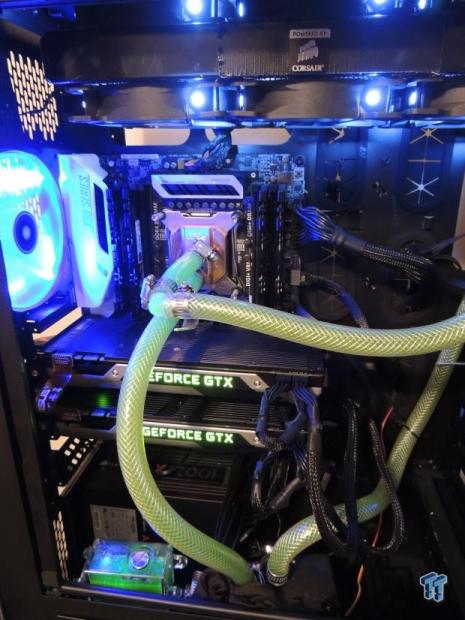
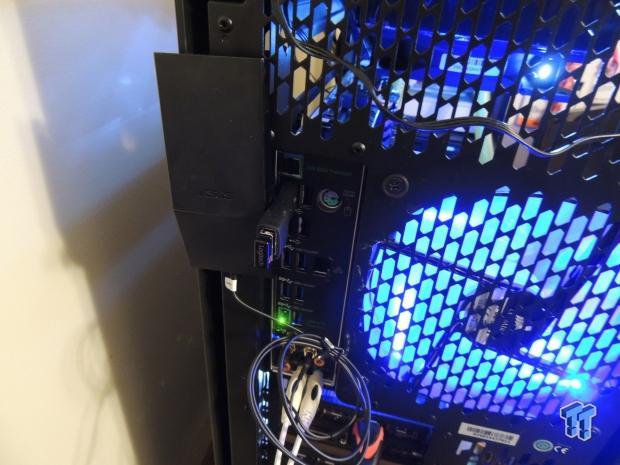
This is the new test bench, and it is designed to test every aspect of the motherboard and IO. I have designed it so that the motherboard sits in a case and is cooled by fans always on at a constant rate to keep the conditions similar for all tests. I have cut out part of the case behind the motherboard so I can get thermal images of the back of the PCB where the VRM heat spreads. System and CPU power measurements are now digitally logged.
I am also using a Netgear Nighthawk X4 AC2350 for our network (including wireless AC) tests. The latest M.2, SSD, and USB technologies are also being utilized to test the maximum potential of the motherboards that are being tested.
Overclocking Results
In this section, I will go through overclocking this board.
CPU Overclocking
Max CPU Overclock is found by setting the VCore to 1.5v, Input voltage to 2.1v, cache voltage to 1.15v, booting with a CPU multiplier of 45x and disabling any features that would result in CPU frequency fluctuation. I then proceed into Windows and use software to increase the multiplier; in this case I opted to use TPU and ITXU.
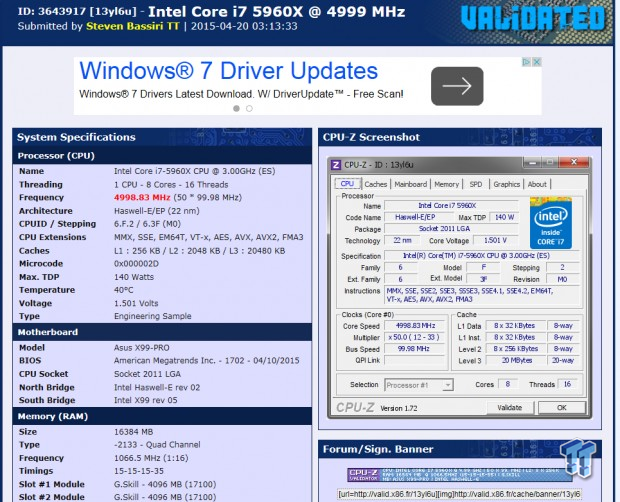
5.0GHz is the maximum of our CPU on this board and other X99 Motherboards. It is clear that CPU overclocking is pretty good for high frequency.
Maximum AIDA64 Stable Overclock (BIOS settings below for this):
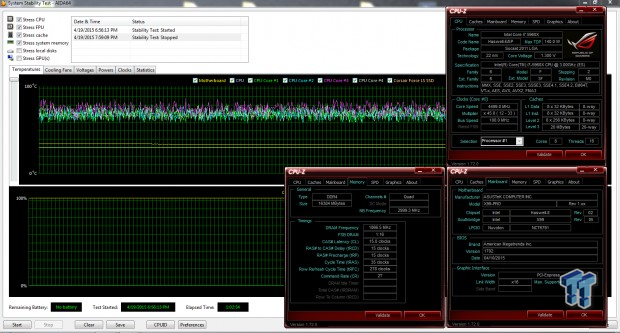
I was easily able to pull off 4.5GHz on the CPU with 3.3GHz cache and a 2400MHz overclock on my memory manually tuning the UEFI.
Uncore/Cache Overclocking
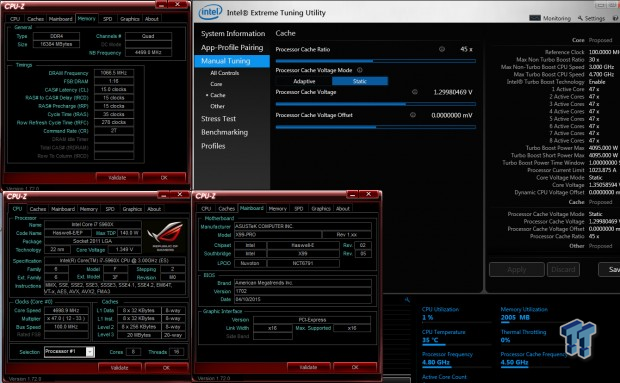
Boards with the extra pins in the socket can overclock the cache further. On the X99-PRO, I was able to OC the cache to 4.5GHz while the core was 4.7GHz.
CPU, Memory, and System Benchmarks
CINEBENCH 11.5
wPrime
AIDA64 AES and HASH
AIDA64 FPU
AIDA64 Memory
PCMark8 Home Test
3DMark: Cloud Gate
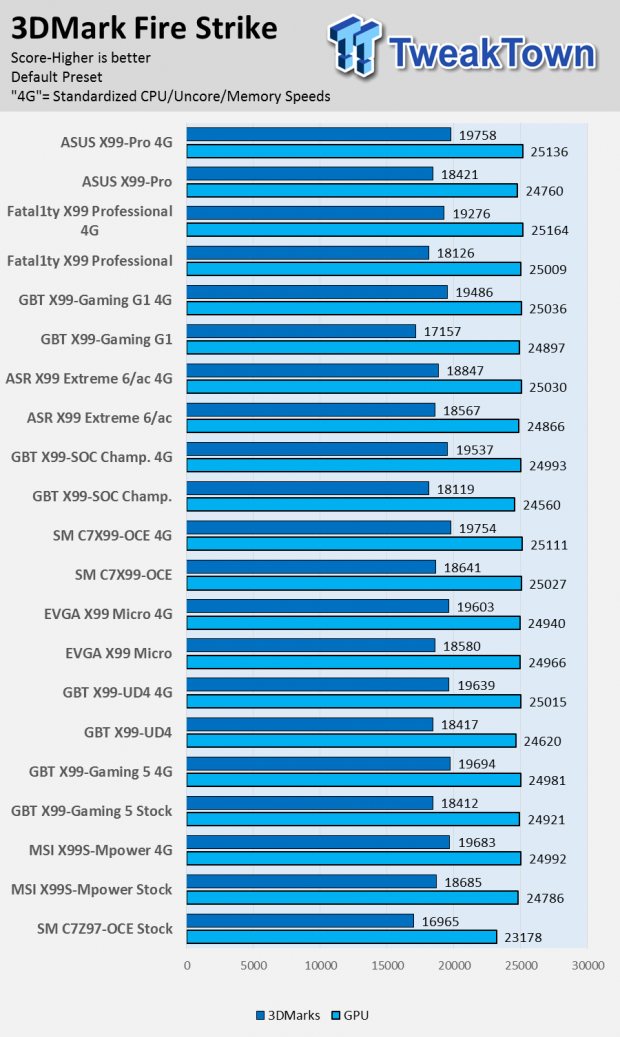
3DMark: Fire Strike
Resident Evil 6
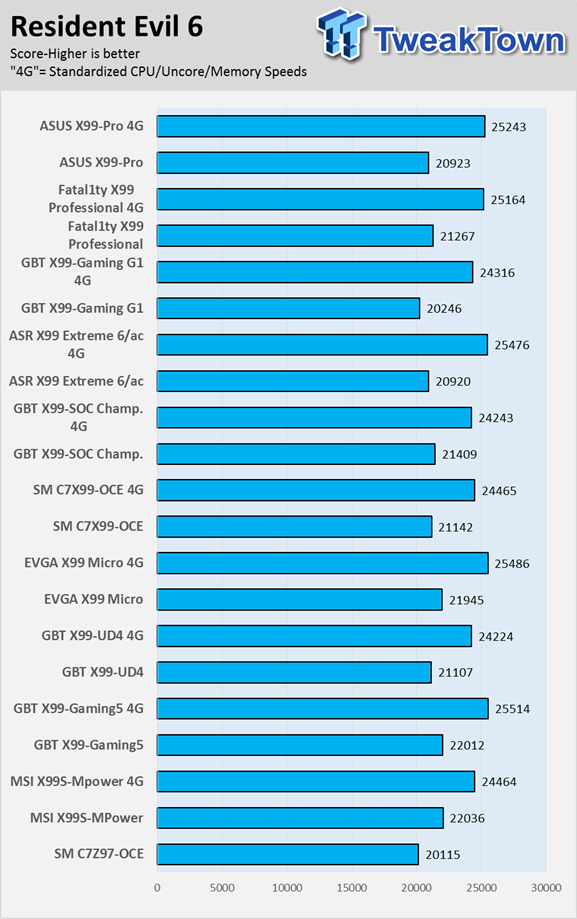
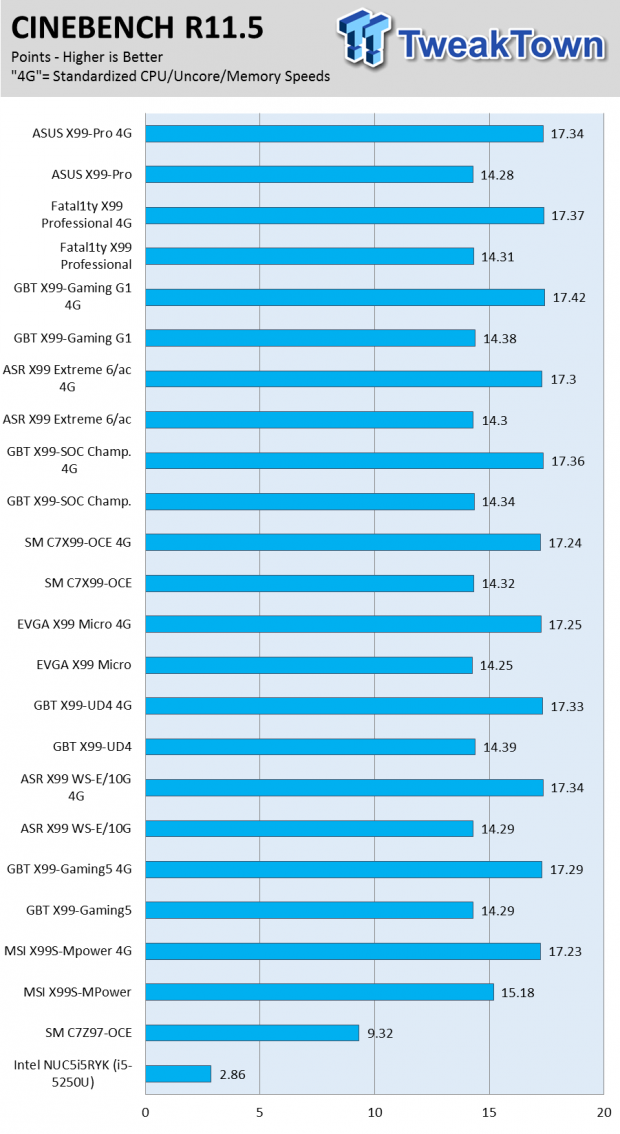
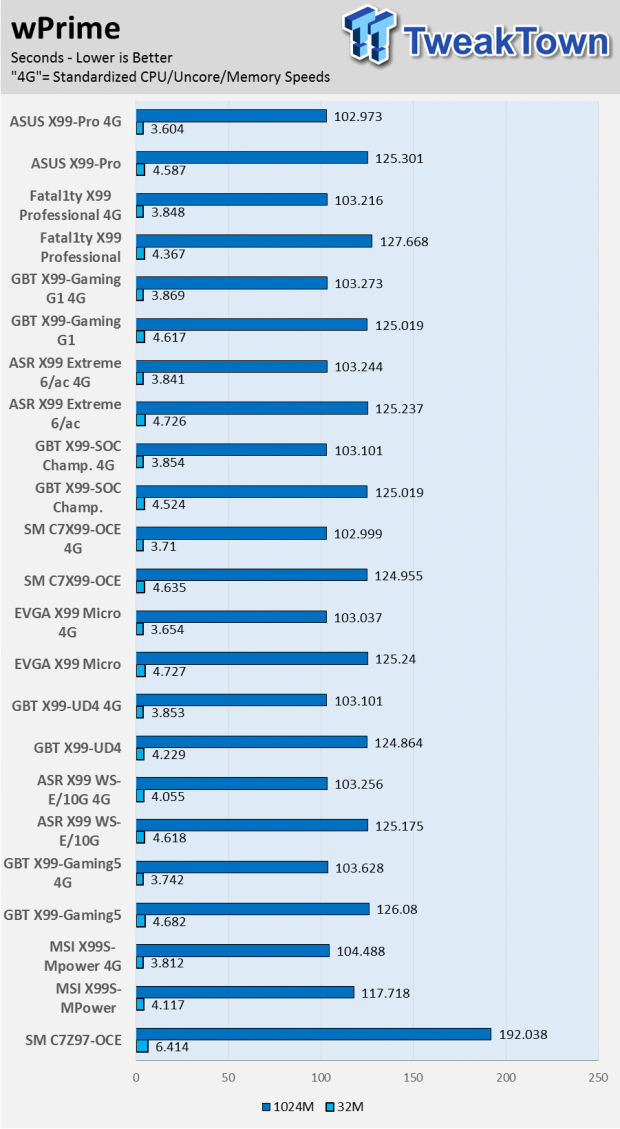
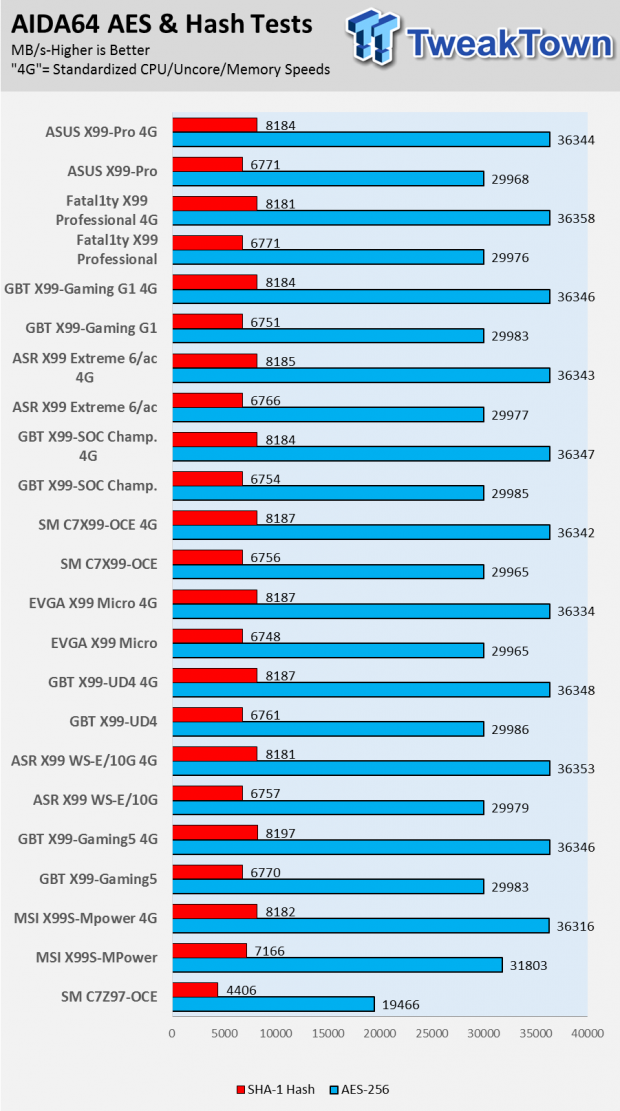
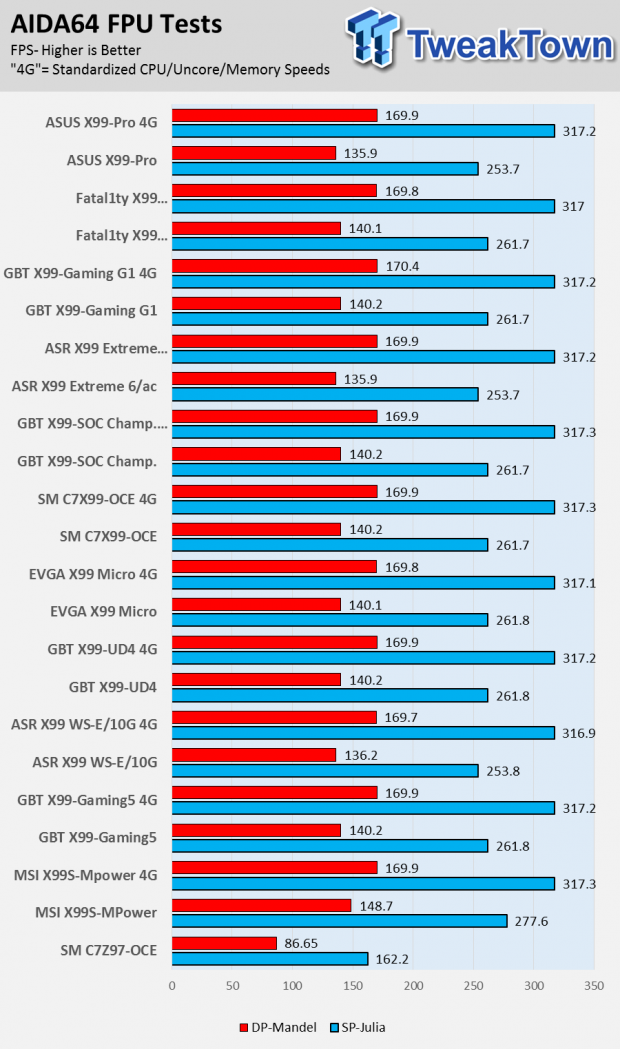
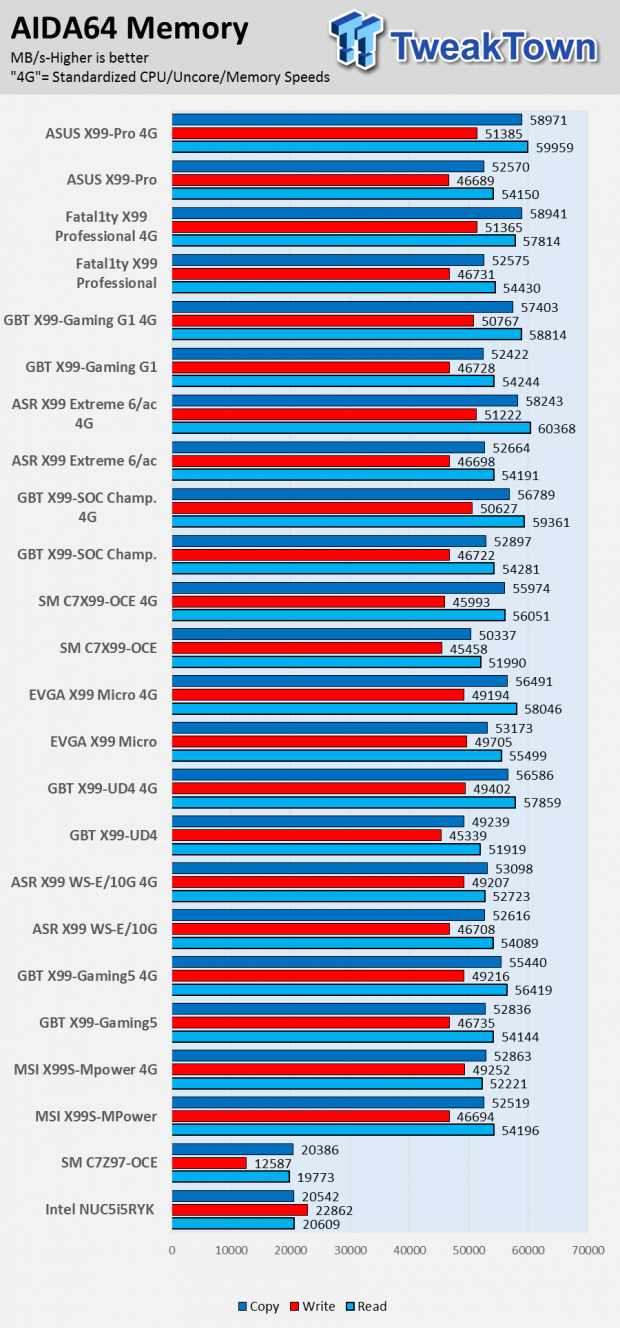
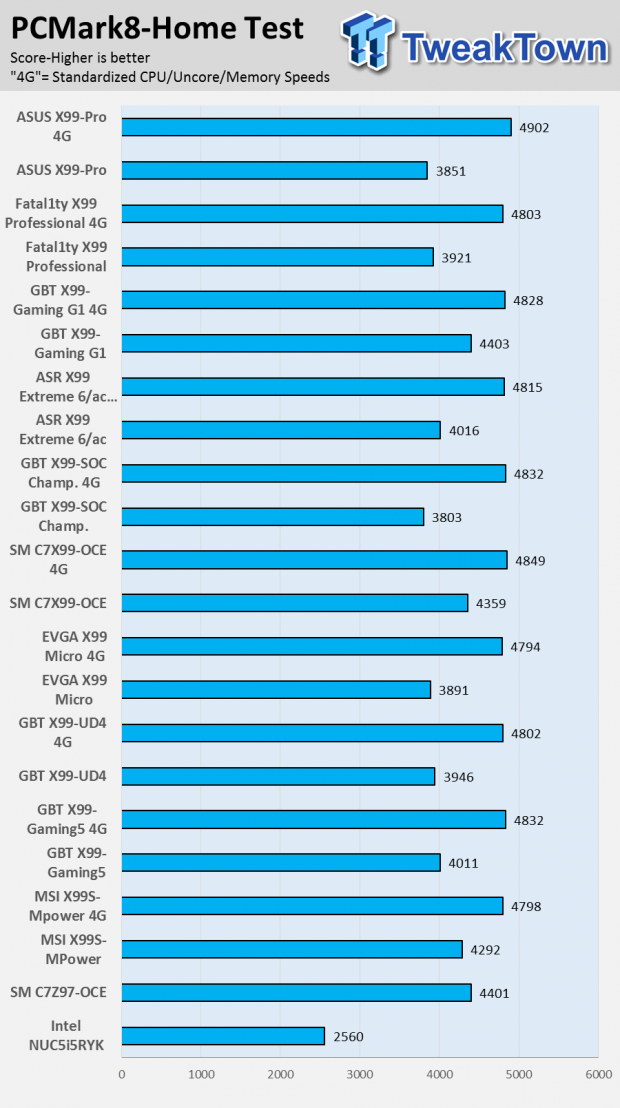
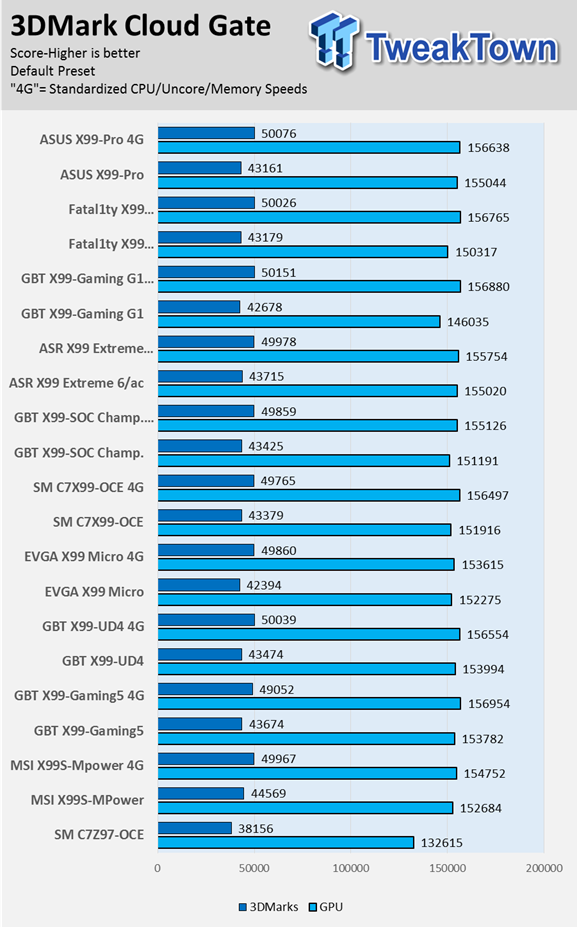
Overall performance is very strong in memory, system, and 3D benchmarks.
The ASUS X99-PRO is no slacker; it's obvious that performance tuning has been done. The X99-PRO one of the fastest X99 motherboards I have tested.
System IO Benchmarks
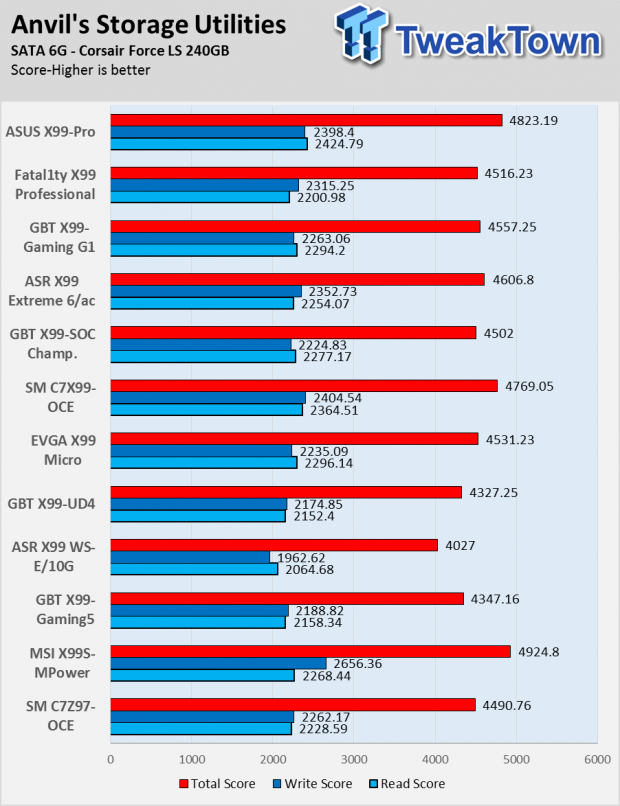
Anvil SATA6G:
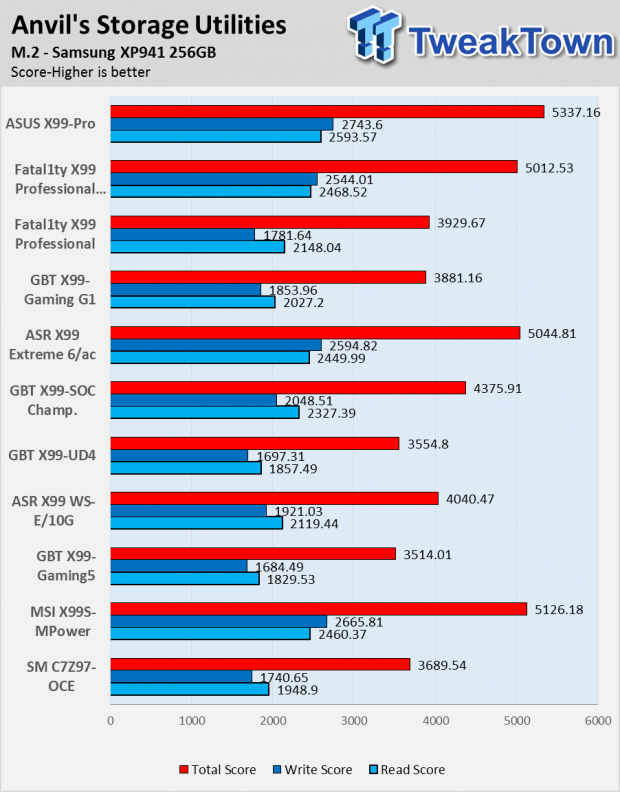
Anvil M.2:
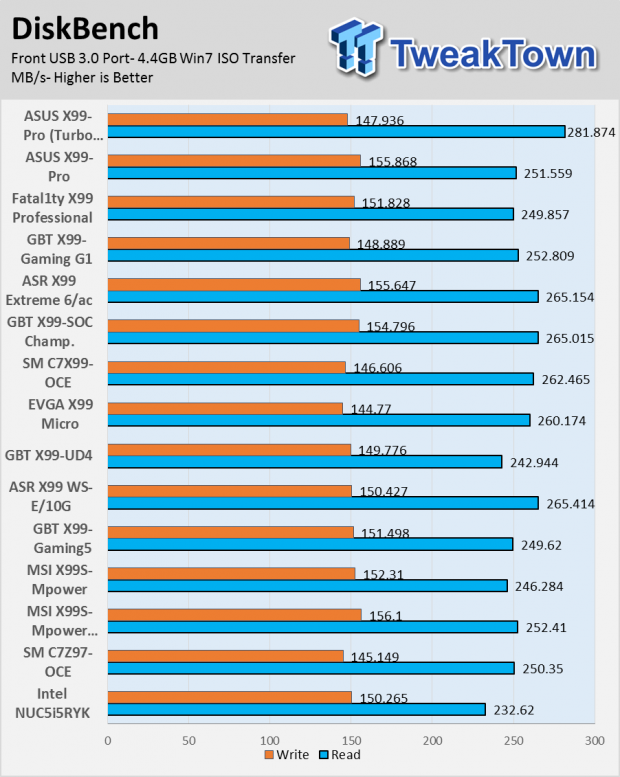
Diskbench USB 3.0:
ixChariot Network Throughput:
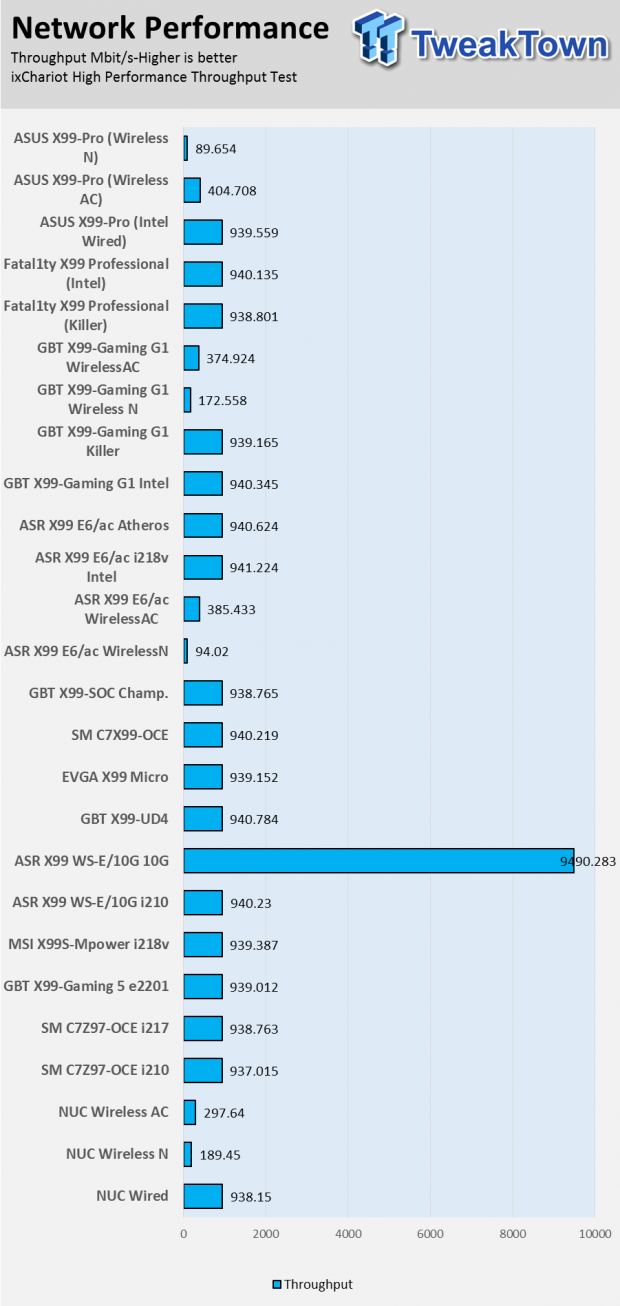
IO performance is excellent. The X99-PRO provides the fastest Wireless AC results I have seen to date as well as the fastest M.2 speeds. USB performance is also top notch, and the USB 3.0 turbo mode which I enabled through software makes a slight difference as well.
Audio RMAA 5.5:
I disable all audio features, set the correct bitrates, and then test the audio with a loopback test.
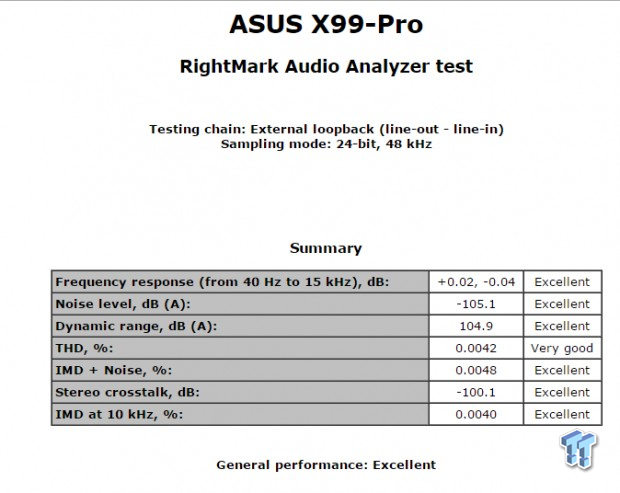
Sound Judgment by Ear: Excellent.
There are 5 ratings for audio: 1. Problems, 2. Okay, 3. Acceptable, 4. Very good, 5. Excellent
Temperature and Power Consumption
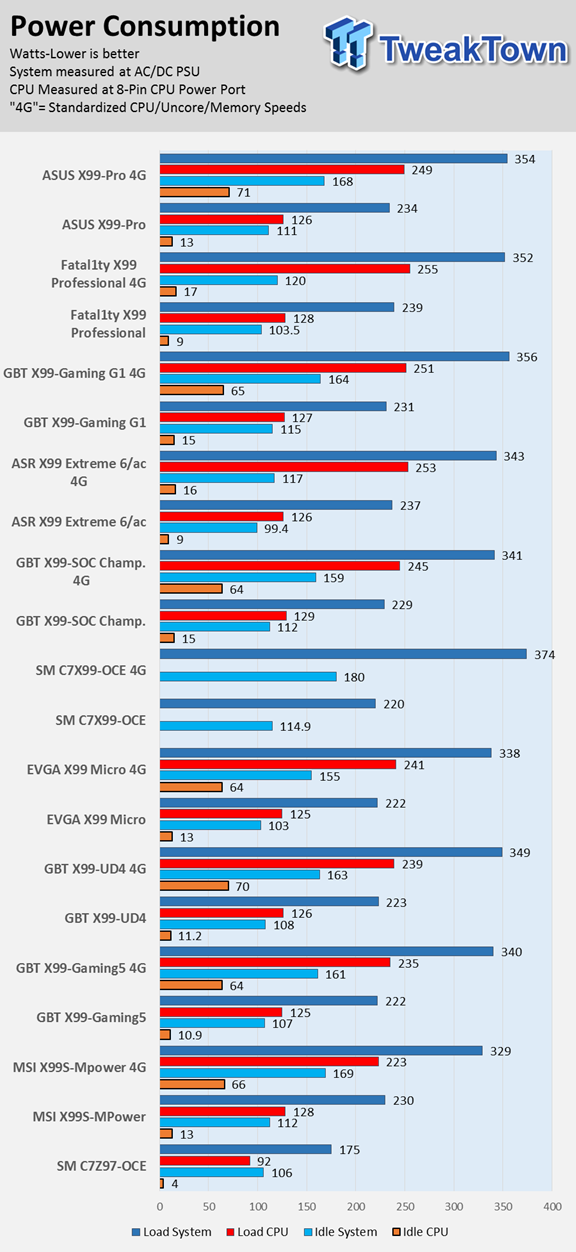
System power usage is measured at the AC/DC PSU (the Corsair AX1200i) which I have connected to another system to measure the test system and as a backup I have a wall meter to verify. The CPU power is measured through the 8-pin connector which is hooked up to a hall effect IC which measures current and puts out a voltage in proportion to the current. That voltage is logged by a National Instruments ADC which logs the DC voltage level, which I then convert into current.
Note on Thermal Images: In the temperature section, we use our Seek thermal imaging camera to capture the surface temperatures of major components on the board; I look at the VRM and then all other things that light up the screen. If there is something to worry about then I will state it, otherwise I will just show the hotter running parts of the board for fun. Unless some component is over 80-90C then there really isn't anything to worry about.
All systems will act differently, so I will look for commonalities, such as how far from the VRM the heat spreads through the PCB and the difference in temperature between the frontside and backside of the PCB. Keep in mind that the majority of the heat from the VRM goes into the PCB as it is a giant soldered on copper heat sink. As long as the front of the board is warmer than the back of the board, the heat sink is doing its job pulling the heat away from the PCB.
Thermal Testing at Stock Speeds:
The image on the left is always at idle and the image on the right is at load.
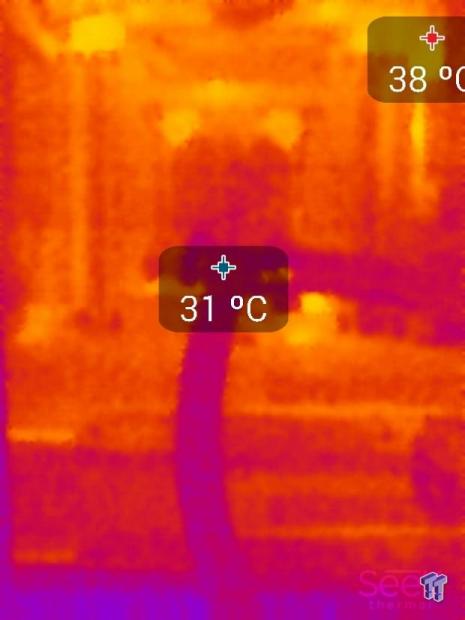
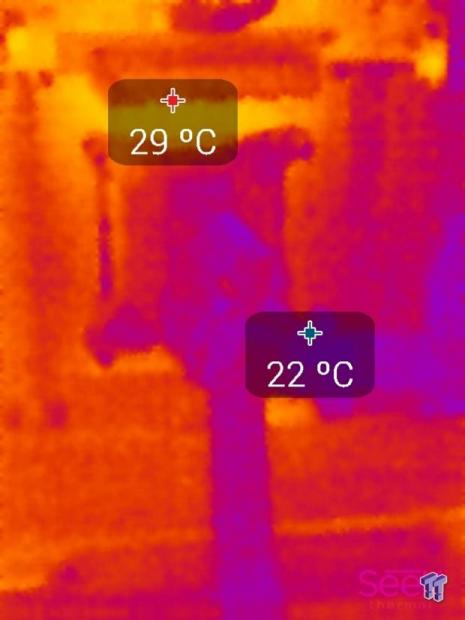
Full frontal.
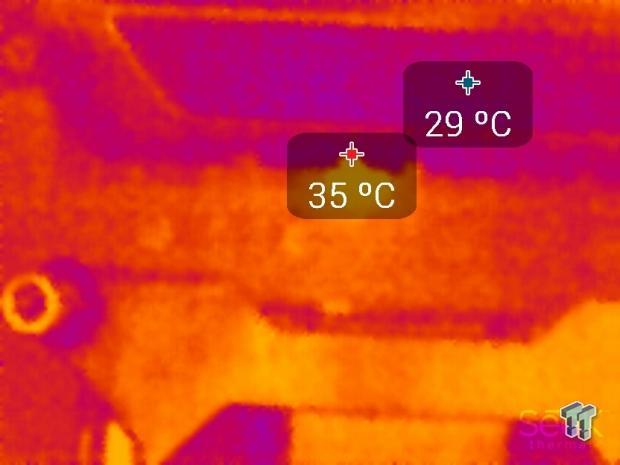
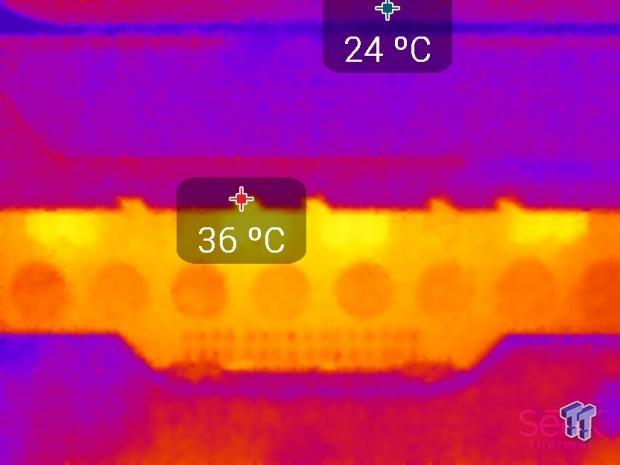
Up-close of the front of the VRM.
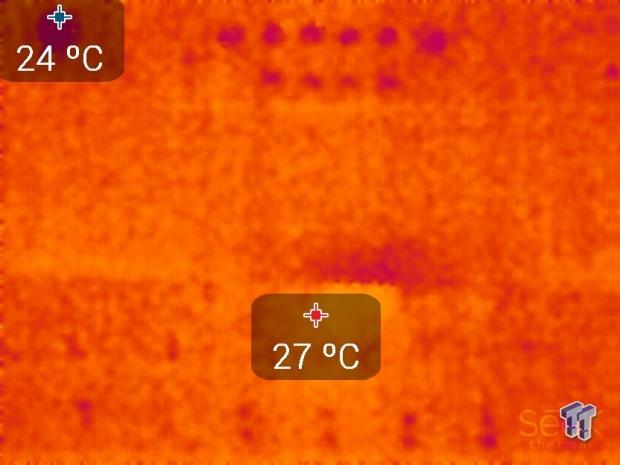
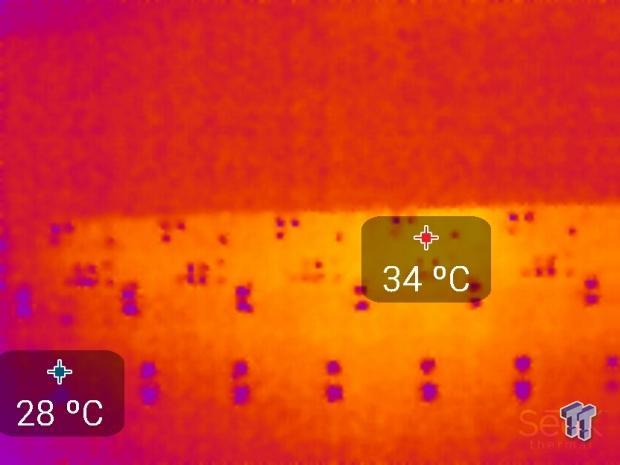
Up-close of the back of the VRM.
Thermal Testing at 4.5GHz Overclocked Speeds:
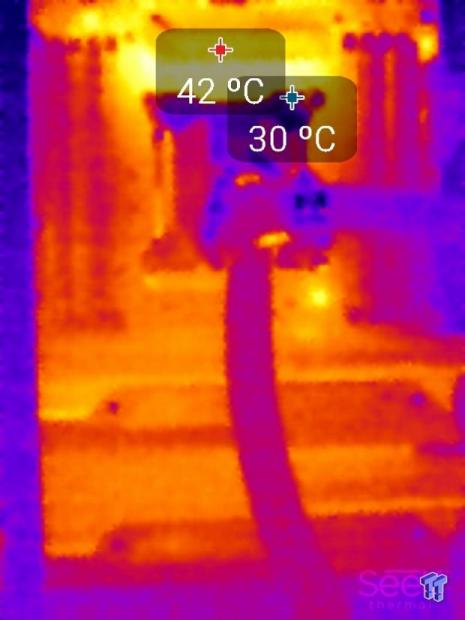
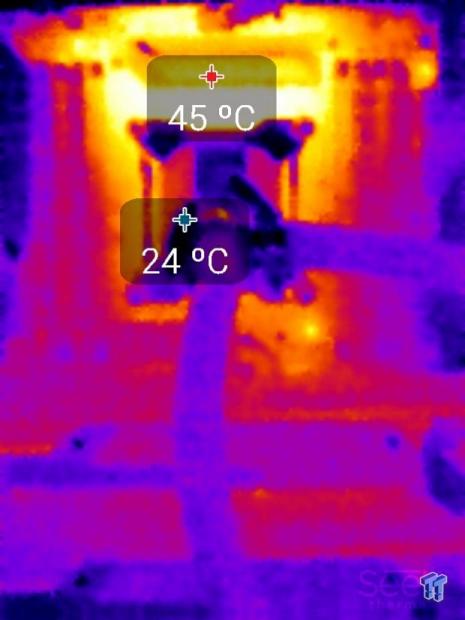
Full frontal.
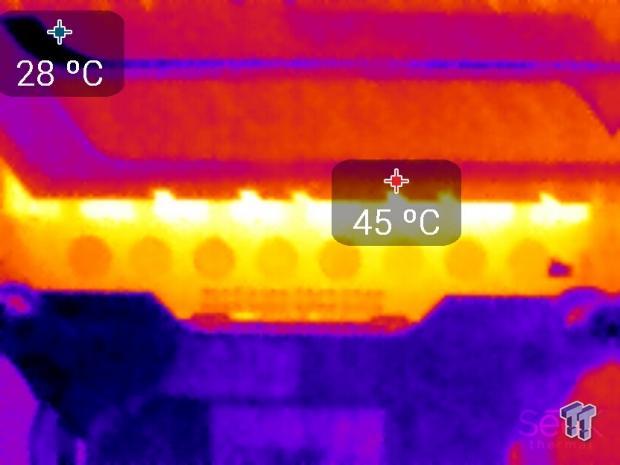
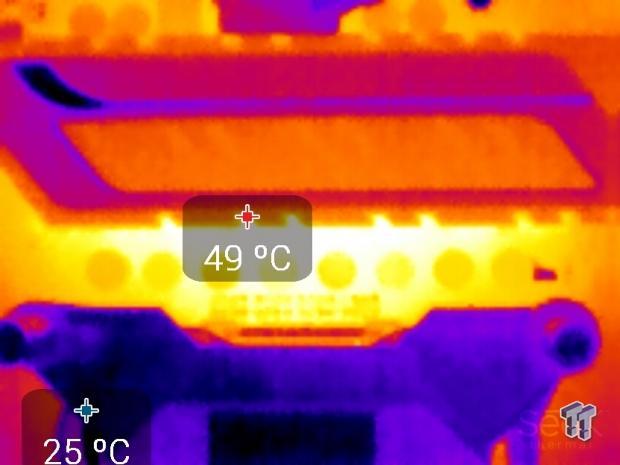
Up-close of the front of the VRM.
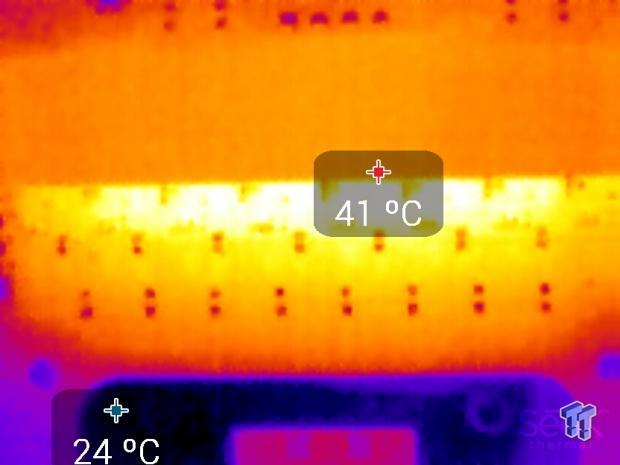
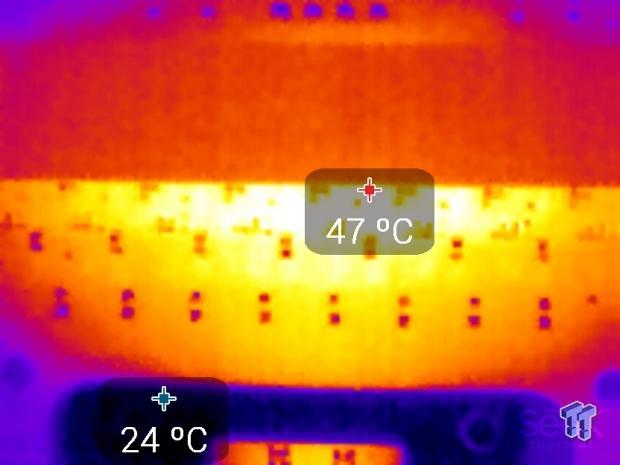
Up-close of the back of the VRM.
At stock, power saving features are engaged, I saw only one phase light up during idle conditions to reduce switching losses. During load, at stock, more phases started to turn on, and it's apparent that the PWM is set to high efficiency mode; temperatures are very nice and low during stock tests. Not all phases heat up to the same temperature, instead it's almost like every other phase is turned on to improve efficiency at stock settings.
At a 4.5GHz OC, temperatures increased slightly when load was applied. Heat seems to be spread evenly across the PCB area, which is a great sign, and the temperature on the back of the PCB was always at least 2C lower than the temperature on the front. This delta between the frontside and backside of the PCB indicates that the heat sink is doing its job so the heat isn't spreading to the back of the PCB. Overall, we see excellent VRM thermal performance.
Final Thoughts
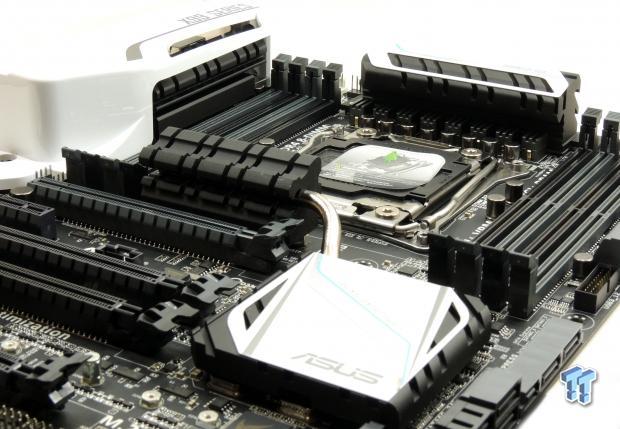
The quality of components on the ASUS X99-PRO are top shelf, and overall I was impressed by circuit layout and design. It's nice to see different PWM methods being engaged depending on the level of current draw, and ASUS did a sound job with the VRM on the X99-PRO. The audio design is also high quality, and RMAA scores reflect that.
The X99-PRO offers a great feature set; however, there are some weak points, the biggest of which is the PCI-E layout (lack of 4-Way support and shared 3-Way support). You have to look at the manual when installing more than one GPU, and keep in mind that if you want 4x PCI-E 3.0 for M.2, you lose the ability to run 3-Way SLI. ASUS does remedy this with the ability to use the Hyper M.2 card at the same time three GPUs are installed, allowing you to install the M.2 drive into the Hyper card and inserting it into the second PCI-E 2.0 16x slot, which should be unobstructed. Other than the PCI-E layout, the X99-PRO has a solid feature set.
While it might not be perfect for people who use three or more GPUs, at $315, the X99-PRO offers some of the best IO performance I have witnessed on the Intel X99 chipset. The M.2 performance is awesome, and the included wireless AC card performs very well. Performance at large, including system benchmarks, makes the X99-PRO one of the fastest motherboards I have tested to date.
Overall, I was very pleased with the X99-PRO; it carries the ASUS name proudly and looks pretty good too.

| Performance (including Overclocking) | 96% |
| Quality including Design and Build | 94% |
| General Features | 90% |
| Bundle and Packaging | 91% |
| Value for Money | 90% |
| Overall | 92% |
The Bottom Line: If you are in the market for an X99 motherboard with excellent performance bundled with premium features, then the X99-PRO is definitely worth a look.
PRICING: You can find products similar to this one for sale below.
 United
States: Find other tech and computer products like this
over at Amazon.com
 United
Kingdom: Find other tech and computer products like this
over at Amazon.co.uk
 Australia:
Find other tech and computer products like this over at Amazon.com.au
 Canada:
Find other tech and computer products like this over at Amazon.ca
 Deutschland:
Finde andere Technik- und Computerprodukte wie dieses auf Amazon.de
Related Tags
