Introduction, Specifications and Pricing
Lately, BitFenix has been trying to keep us busy with a full on assault of new cases that they have released over the past month or so. Most of the designs are similar in nature to what we will be reviewing today. The chassis we are here to review today is a simpler setup; it is a chassis for builders, or even beginners who just don't want to throw a bunch of money into a chassis. We all know there is plenty of need for these types of cases, either to keep overall costs down to pass on to your customers, or for those who feel that spending over $50 for a case is like trying to pull teeth from a bird.
We have seen many of these cost-effective mid-tower designs over the years, but in our minds, it has always sort of been a back and forth between what BitFenix was doing, and what NZXT had to offer. Both have the same basic concept of offering air flow options, only shipping with a fan or two at most. At the same time, they also try to offer things like wire management, tool-free mechanisms, and even color coordinated wires with the traditional black on black theme that most of these cases come in.
The thing is, BitFenix has always tried to offer things using a much different approach to aesthetics than its competition, and this latest sample fits all of the molds we expect from both this class of cases, and what we know from BitFenix in the past.
Join us as we take a break from the huge, and fully appointed monster towers that we usually deliver, and take a step back to appreciate the more economical side of case design. The reason we have you here today is to look at the BitFenix Shadow mid-tower chassis. While this chassis does fall into the below $100 price range, lately we have seen some really stellar designs that we can get in this form factor, and even at some really great prices. So, while this market is always open for more competition, the bar is set mighty high, and we will see soon enough if this chassis from BitFenix should come out of the dark and be seen, or if it should just lurk in the shadows and be forgotten.
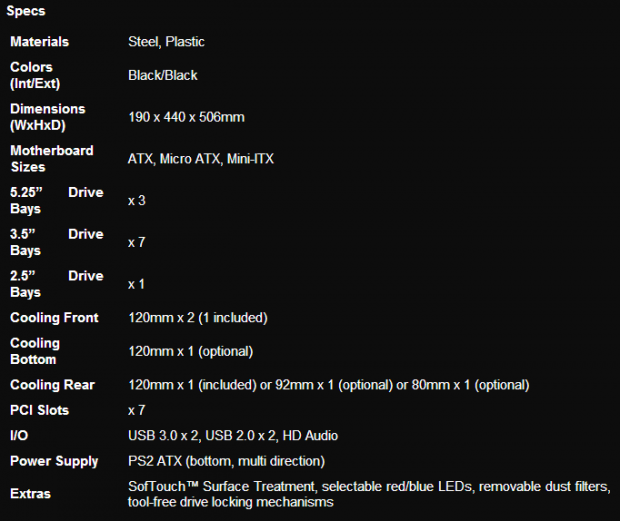
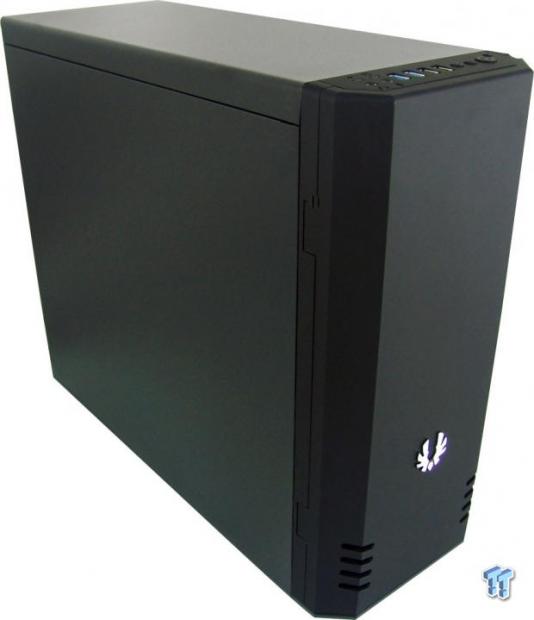
While the BitFenix Shadow is made of steel and ABS plastic just like most other chassis, the external aesthetics are pretty plain. To dress things up a bit, the front offers an angled front door that receives a rubberized coating; and along with a few small vents to either side of it, there is a logo placed low on the front door. As for the rest of the chassis that is easily visible, it is just flat expanses of steel that have a textured black finish applied inside and out. Inside of its more compact dimensions, this mid-tower is still designed to fit Mini-ITX, Micro-ATX, and ATX motherboards.
On the inside you will find three 5.25" bays, followed by seven bays for 3.5" drives, oriented front to back. On the floor inside of the HDD rack, there are holes to screw down a single 2.5" drive. The cooling system consists of a 120mm fan in the front, and another in the rear of the chassis. The chassis also offers optional locations to place an additional 120mm fan in the front, or in the floor. Also, if for some reason you feel the need, the rear fan can be replaced with a 92mm fan.
Switching gears again, the chart takes us to the seven expansion slots, then off to the top of the chassis to discuss the front I/O panel. The chart then goes on to discuss the PSU size, the SofTouch treatment, LEDs, dust filters, and the tool-free mechanisms on all of the bays.
Looking around all of the usual places, we find the Shadow has decent availability, and appears at many different e-tailers. We also see that the pricing is pretty level, no matter where you locate this mid-tower chassis; all of the pricing we saw was on the mark of $79.99 U.S. dollars. While it doesn't take huge leaps and bounds to fill out eighty dollars' worth of casing, when it comes down to cost versus return, it is a limiting factor to some extent. Considering what many $50 cases have to offer, and what newer $100 designs bring these days, we will see soon enough if this chassis is worth the cost, and just how well it stacks up to the rest of the cases in this price range.
PRICING: You can find the BitFenix Shadow for sale below. The prices listed are valid at the time of writing but can change at any time. Click the link to see the very latest pricing for the best deal.
United States: The BitFenix Shadow retails for $79.99 at Amazon.
Packaging

Sticking with the basic packaging we see a lot of, BitFenix uses plain cardboard and black print to save themselves, and their customers some money to invest into the case. On the front of the packaging, we find a very large logo, the name of the chassis, and an address at the bottom for customers to visit to find more information on the chassis.
This side offers the company name and logo at the top, and just above the stripes of black that continue from the front, there is a specifications chart like the one we just discussed.
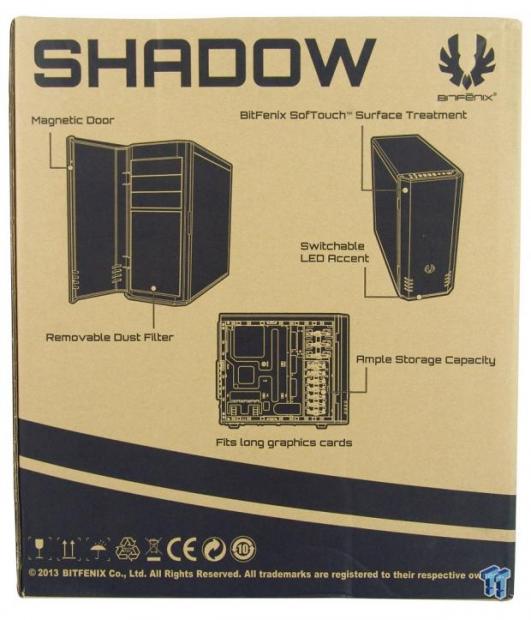
The back starts out with the chassis name at the top, followed by three renderings of the chassis that point out six features on, or in this design.
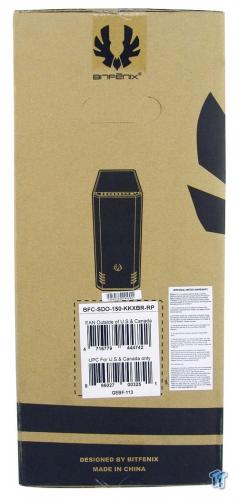
The last panel offers us a look at what the front and top of the chassis look like. Just below that are the stickers for stocking information, and the case's part number of BFC-SDO-150-KKXBR-RP. Also, as far as we know, there is not a version available with a window.
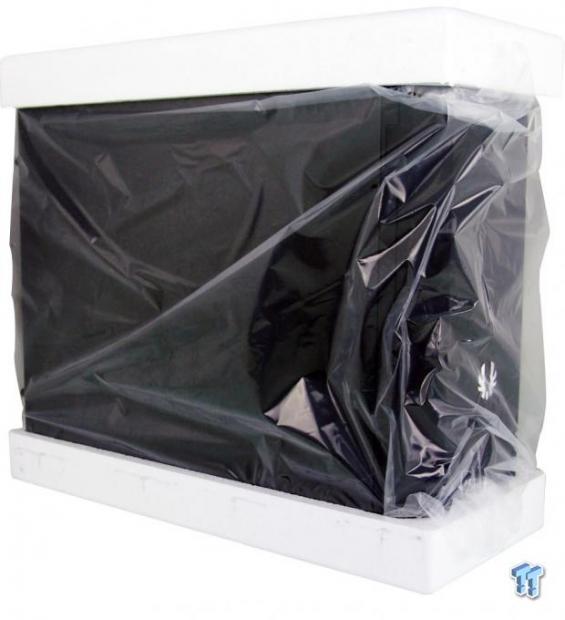
To keep the Shadow safe in transit, there are thin Styrofoam end caps used, and they are much thinner than we are used to. In reality, the chassis is so light while empty that bigger, bulkier end caps would be overkill, as these were not broken in the slightest bit. To keep abrasions from happening to the paint, or the coating on the bezel, the chassis is also wrapped in plastic, which allowed the Shadow to arrive in really good shape.
BitFenix Shadow Mid-Tower Chassis
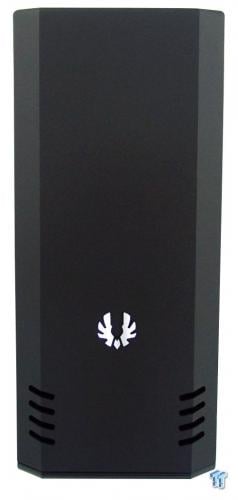
The front bezel is extended outward in the middle, and is angular on both sides, all of which gets the SofTouch coating. The bulk of the door is plain, but there are vents to the sides, just below the logo centered in the door.
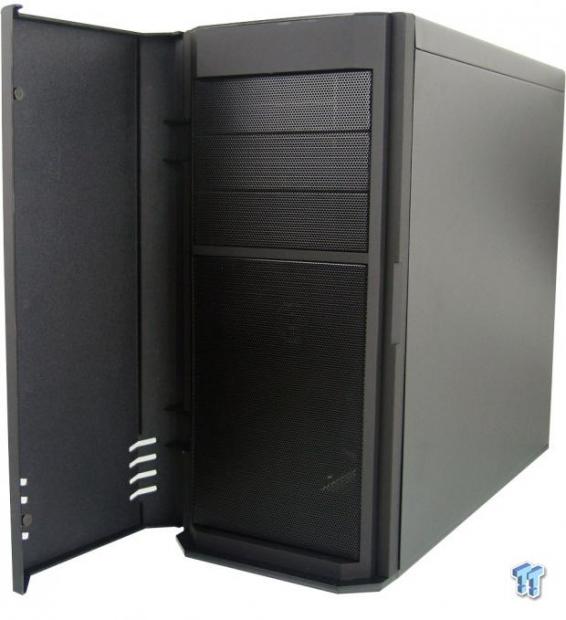
Swinging the door to the left, we see two little magnetic catches to help keep the door closed. The front of the chassis has three bay covers made of mesh, and the larger mesh section covers the intake fans, and is removable for cleaning.
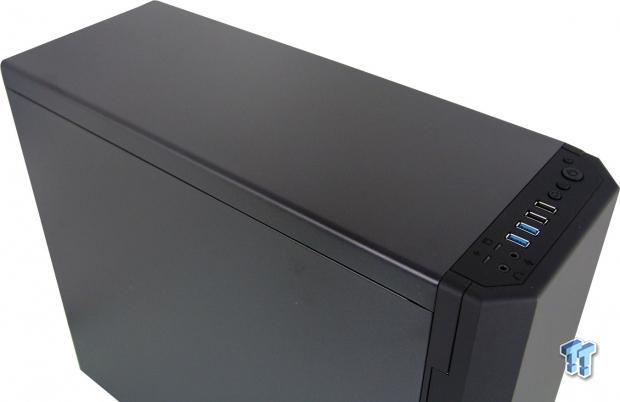
The top of the chassis is just an expanse of black steel with a textured finish. The Shadow holds its front I/O panel where the bezel meets the front of the chassis.
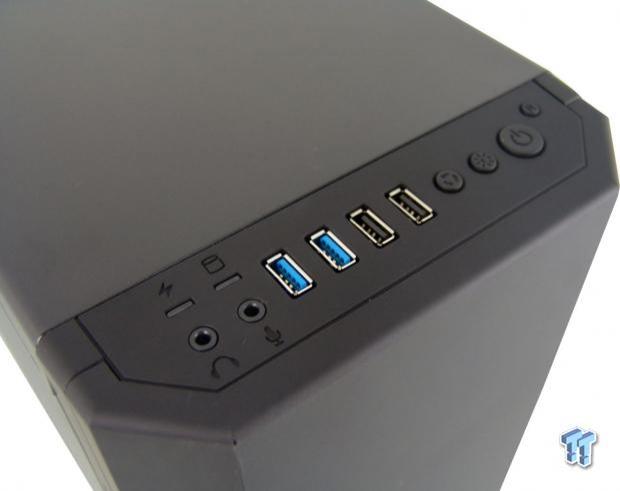
In the panel, we find the power LED, and HDD LED placed above the 3.5mm audio jacks to the left. Moving right, we see a pair of USB 3.0 ports, and a pair of USB 2.0 ports. Things finish up here with a color swap button, the LED power button, the chassis power button, and the tiny rest button.
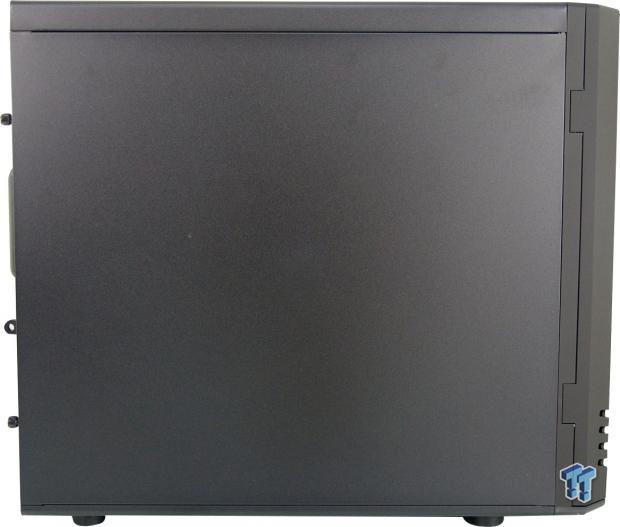
The left side of the chassis doesn't have much more to see than an expanse of painted steel, and the lines where the top, front, and bottom of the chassis meet up with it.
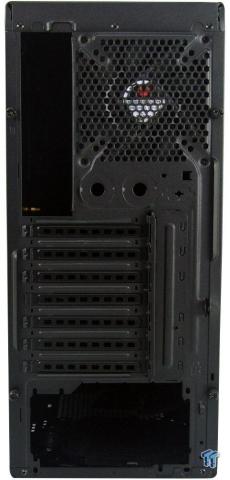
The back starts with the exhaust fan and rear I/O at the top, and just below that is a pair of holes to allow for water tubing to pass through. Moving down, we find seven expansion slots that are accessible from outside of the chassis, leaving the large hole at the bottom for the PSU.
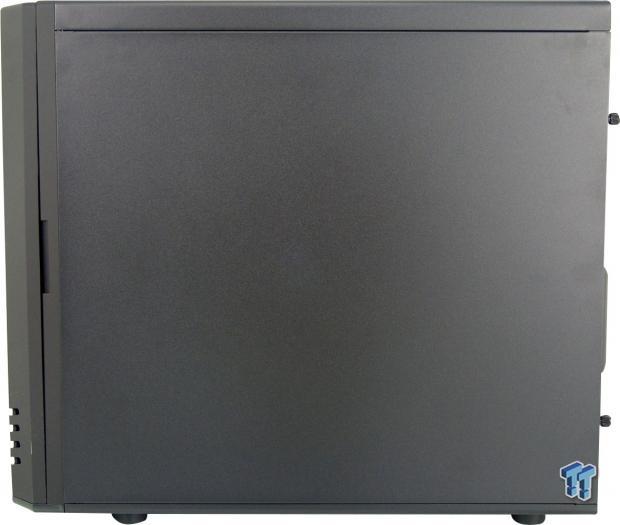
The right side of the chassis is identical to the other side, just completely reversed. We also see that there is no raised section, so wire management may be tight behind the motherboard tray.
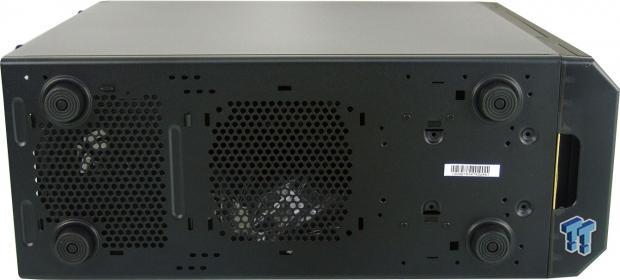
Under the chassis, we see four hard rubber feet to support the chassis, but these do allow the case to slide around a fair amount on smooth surfaces. There is ventilation to the left for the PSU and an optional fan, and between the front feet are the screw holes to mount a 2.5" drive.
Inside the Shadow
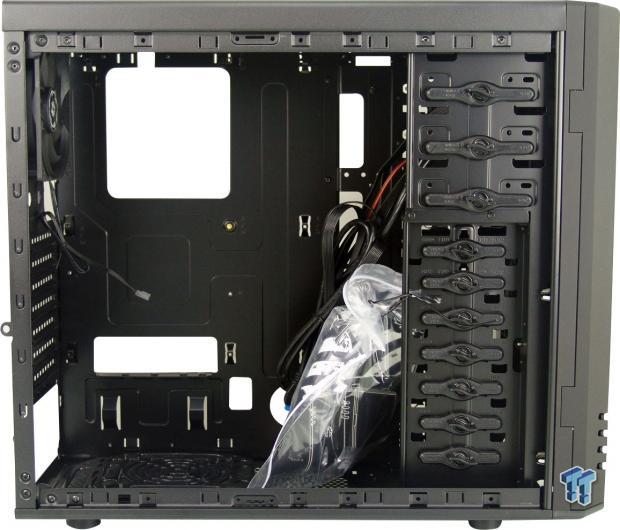
The first glance inside of the chassis is not all that impressive actually. While we don't expect terrific things in more economical cases, the interior is like something out of a $50 solution from yesteryear.
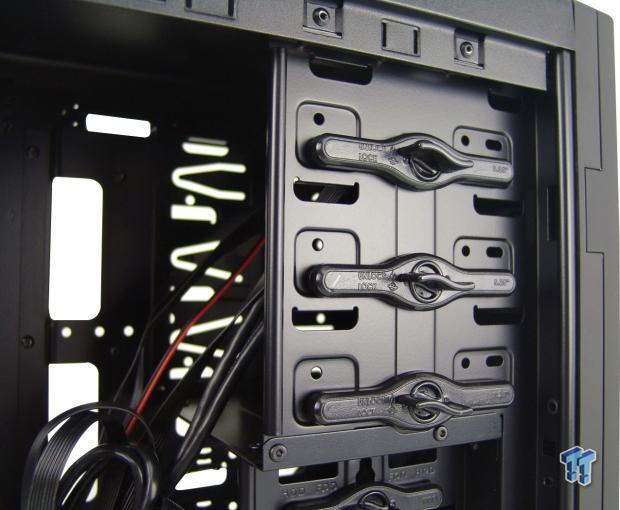
The trio of ODD bays uses some of the most cost-effective twist-locks in the business. While they do work fairly well, there are screw holes to securely mount a drive if you plan to travel with it.
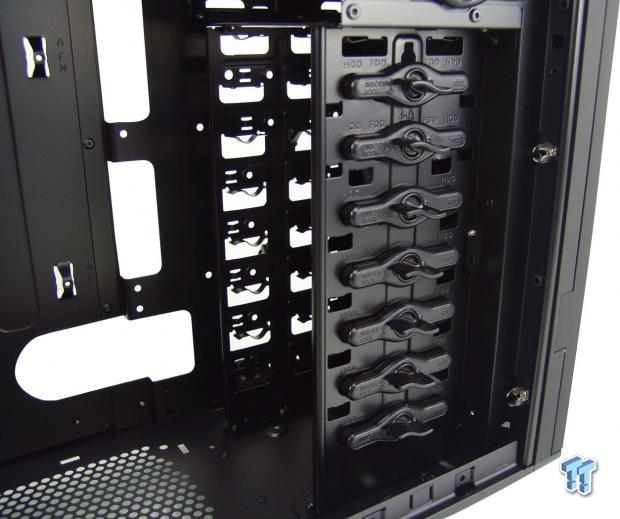
As we move lower, we find the HDD rack is oriented in the same direction. While this helps with air flow, the real issue becomes placement that may or may not block video cards, SATA ports, or access to other things. Twist locks are fine, but there are so many better systems out there, and orienting them ninety degrees would have been much more user friendly.
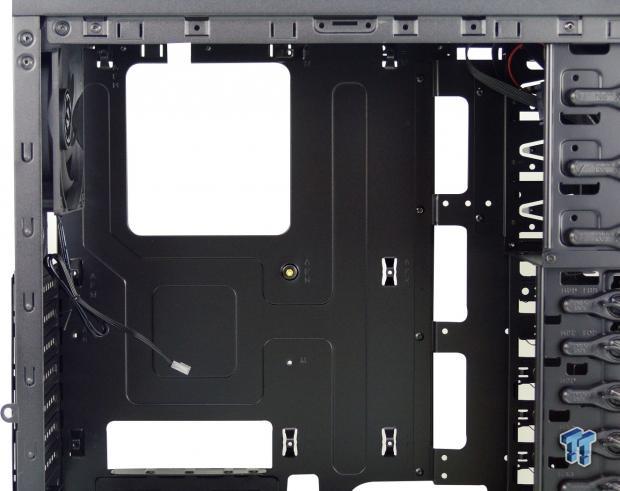
The motherboard tray offers a cut out for cooler access, but it is on the smaller side. Aside from one helper standoff, the rest of the screws mount into raised sections of the tray for an ATX motherboard. Also, even without grommets in them, there are well placed wire routing holes to use.
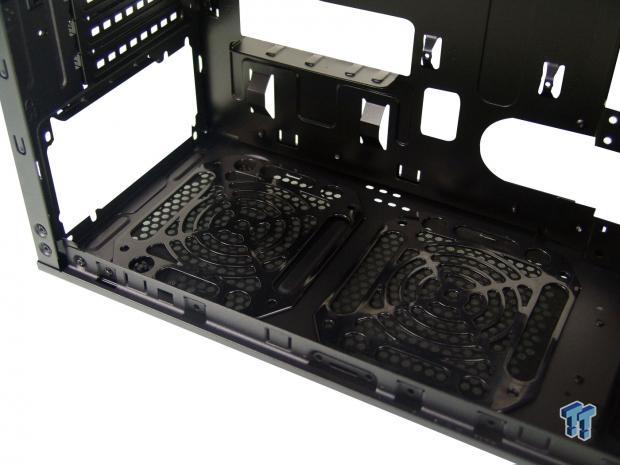
The floor of the chassis has fan filters inside of the floor, which makes accessible cleaning pretty much nonexistent. We also found out later that the PSU we used would not slide in with the dust filter in place.
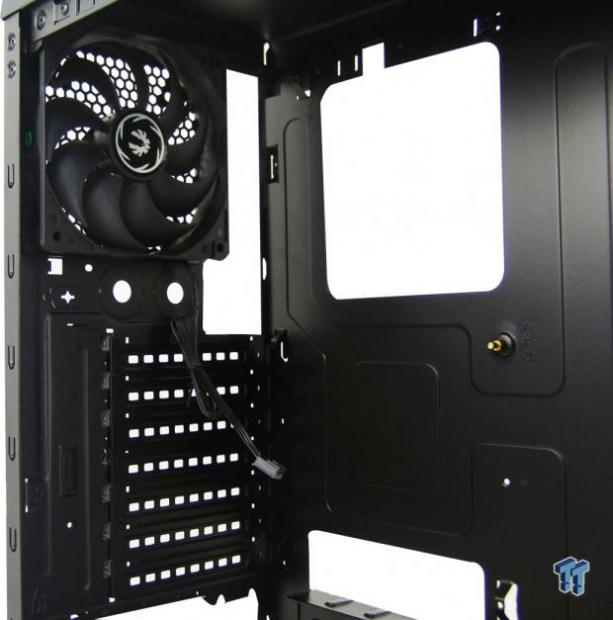
Inside of the back of the chassis, we find the first of two fans working as the exhaust, and it's powered via 3-pin connection. The expansion slots are vented, and replaceable, but again, access for the screws to be used for mounting cards is outside.
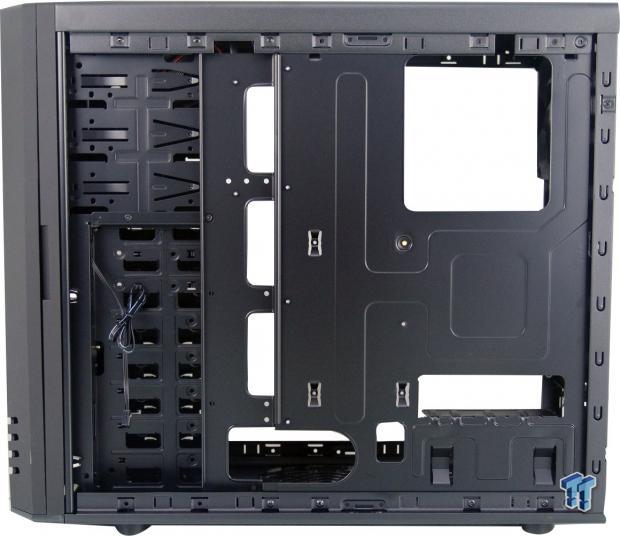
Behind the motherboard tray, there is very little room for any wiring with an inset of 10mm at the most. The wiring is intended to be routed where the tray bends into the case at the left. There is 25mm or more even further left to hide wires.
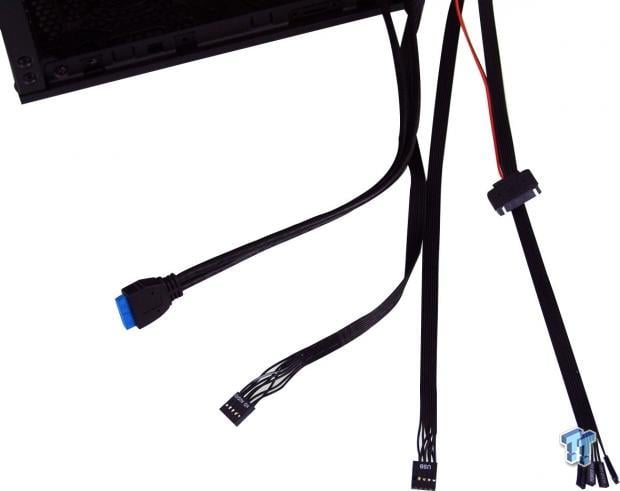
The front I/O wiring is black except for the STAT power connection for the chassis LEDs at the top. The native USB 3.0 connection is the only round cable in the kit; the USB 2.0, HD Audio, and switch and lighting connections are all on the end of black ribbon cables.
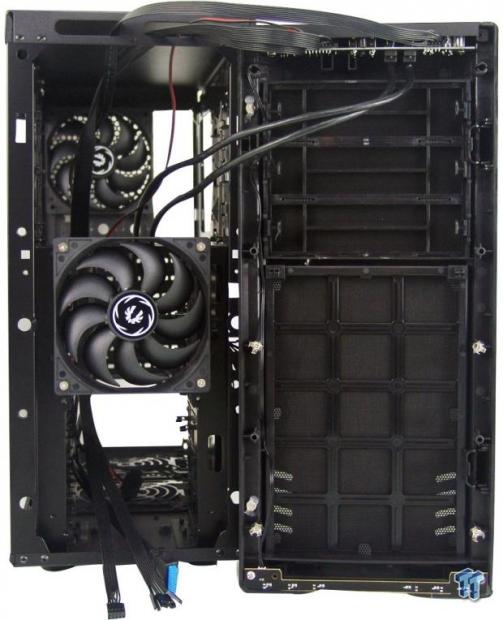
Something to consider when assembling this build is that the wiring is attached to the bezel. With it removed, we can see the second fan pushing air into the chassis for an equalized pressure situation inside. A second fan can be mounted here, and inside the bezel at the bottom is a PCB, and our first indication of where those LEDs are.
Accessories and Documentation
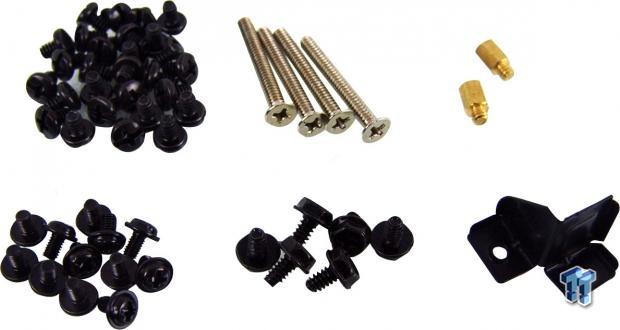
In the bag tied to the HDD rack, we find this hardware. We have the standard 6-32 screws for motherboard and HDD mounting if needed. We also get four long fan screws for the front of the case, and a pair of standoffs for Micro-ATX installations.
The bottom row offers the metric screws for ODD and SSD installation, six screws for the PSU, and two of them are used with the PSU support bracket to the right of them.
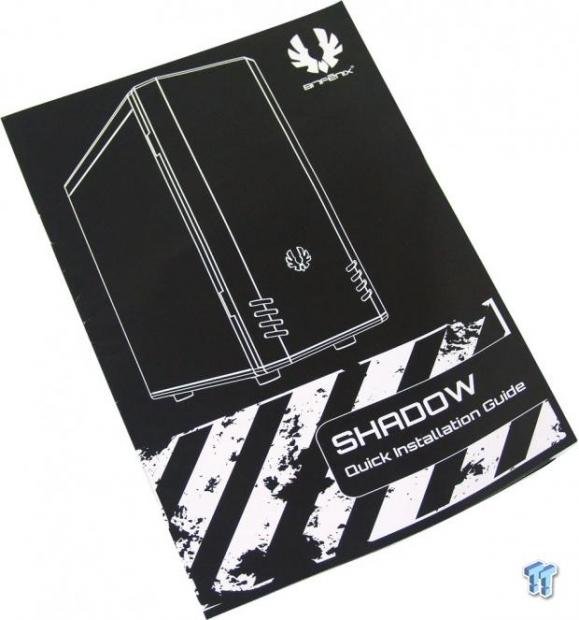
The quick installation guide starts off with a parts list to make sure you are ready to continue on with your build. Once that is checked, this book takes you through each step of the installation, and will guide you from start to finish via images and text.
Case Build and Finished Product
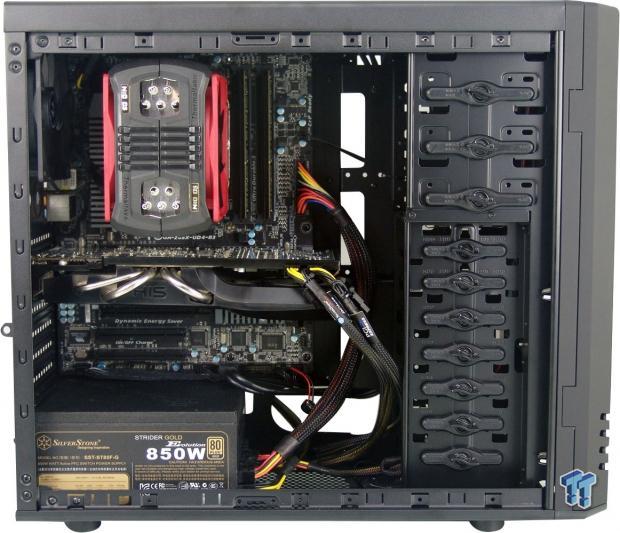
Even with our more minimal setup installed, we completely fill this chassis. The cooler almost did not fit due to the top rail of the chassis being so close to the top of the motherboard, but using an SSD prevented us from having conflicts with hard drives. While it is not the most spacious case, it does offer a pretty clean build.
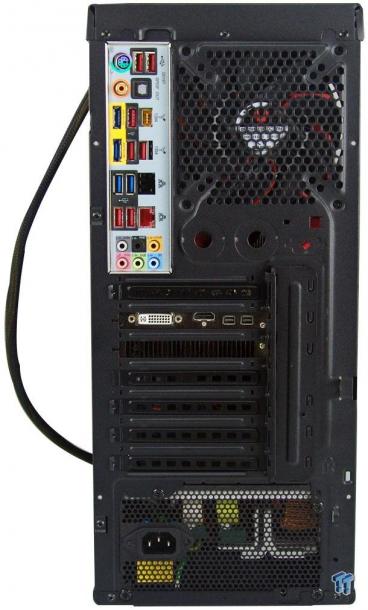
Out back, the dust shield was a bit tight, but we managed to get it in. The video card was simple enough to get installed, and once we completely removed the dust filters in the floor of the chassis, the PSU slid in as we would have expected it to.
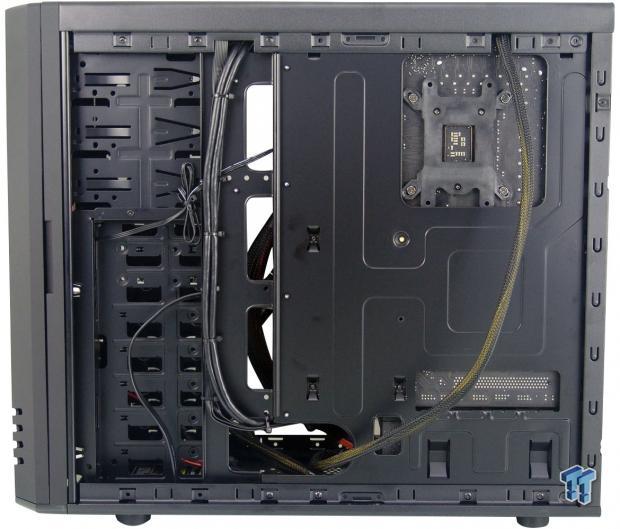
With so little room here, we only ran the 8-pin wire behind the tray. The rest of the wiring tucks neatly near the drive bays, and with the door pivoting at the front and closing like a car door, the 8-pin wire won't be any issue. If running GPU leads, or the 24-pin back here, things off to the left should be fine.
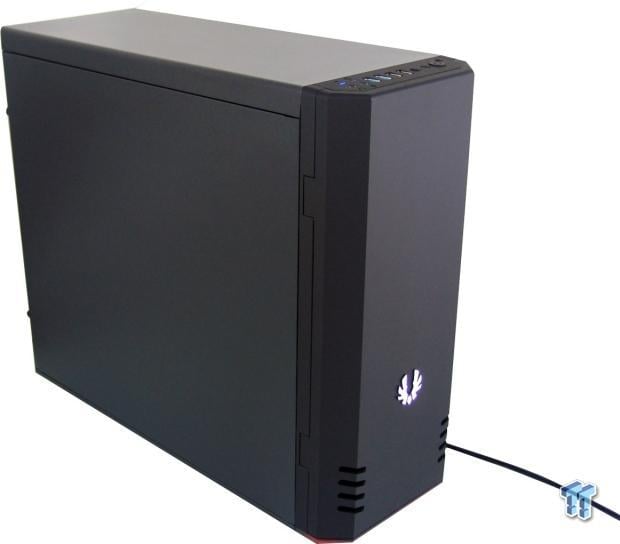
Since the chassis would look identical to this sans lighting, we figured we would skip the unpowered image, and move right into live action. Once the chassis is powered, it is near impossible to hear from a foot away from either the front or the back. We have also turned on the LED switch to get the red glow from the bottom, and the blue LED at the top indicates we are powered on.
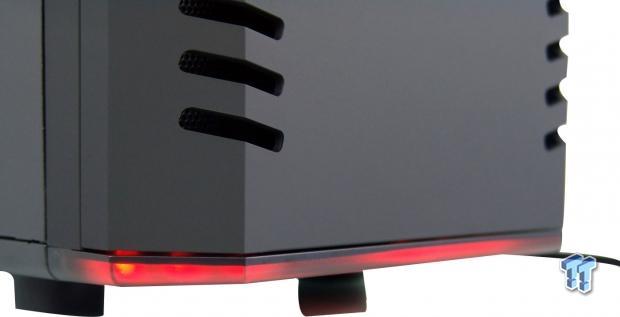
This is the section of the chassis that will allow for LED under glow to the front of the chassis. Without looking at the back of the packaging, or in the manual, it would be very easy to have missed this strip, but it is a cool little feature.
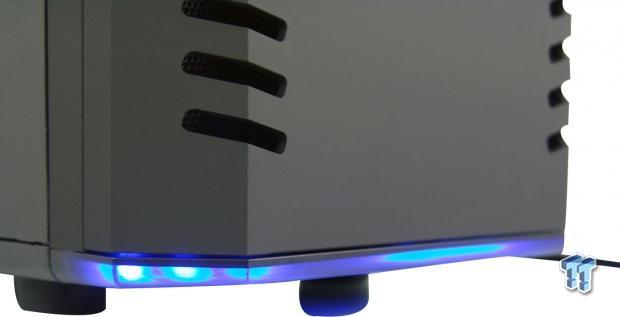
Taking it one step further, if red is definitely not your first choice in ambient lighting, one of the two switches will allow users to swap between the red we just saw, and the blue we see now.
Final Thoughts
We will try to be as polite about this as possible, but we will still be taking a reviewer and potential customer view of this chassis. Don't get us all wrong here, there is a lot to like in the BitFenix Shadow; there really is. The SofTouch front panel is both cool to look at with its angles and vents, all in black to let that logo on the front door pop.
We also like that there is a door, and with no windowed side panel, it really does not matter that it swings to the left rather than to the right. We like that the front I/O has the latest connectivity, and even sort of hides the fact that it has the thin LED panel at the bottom of the door to accent the room. The only thing is, you have to ask yourself: Is the LED strip aspect of this chassis worth $30 to you?
The reason we put it so bluntly like that, and this is where things start to turn south, is that once you open the chassis, you find that you are given a two to three year old design that many of us passed on back then. There is also the fact that some of the most barebones clips are used to give the chassis an overall cheap feel, and the fact that it is so flexible with the panels off does not help to combat initial impressions.
We also assume this is why there is no window, as it would allow a view of the interior, raise sound levels, and show everyone you took a step back in time when buying this chassis. Even with testing showing average thermal results, offering the option for just two more fans really isn't going to do much better for temperatures; at least not as much as an open top chassis would offer.
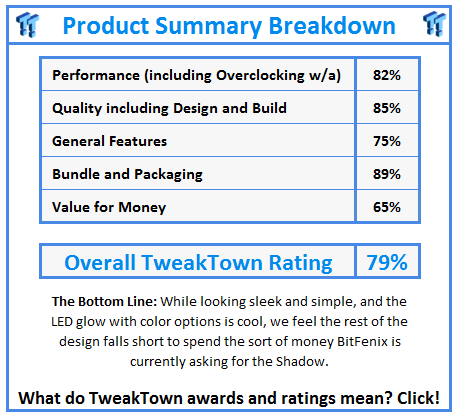
While there are a fair amount of pros to go along with the cons, we feel the biggest killer for the BitFenix Shadow is the current pricing. When we say this is a fifty dollar solution, we mean that with the LED strip included. Since the rest of the chassis is so "old school," we personally wouldn't want to pay more than $30 to $40 for this chassis without it.
While it is a pretty cool looking chassis, we just don't feel the rest of the chassis has enough of what customers really want to justify the price. If you happen to find this chassis on sale, or slightly used at a fair discount, by all means try one out. However, at this sort of pricing, the name sort of foretold its future, as this chassis may be better off staying in the shadows of other, much better appointed case designs in this price range.
PRICING: You can find the BitFenix Shadow for sale below. The prices listed are valid at the time of writing but can change at any time. Click the link to see the very latest pricing for the best deal.
United States: The BitFenix Shadow retails for $79.99 at Amazon.


 United
States: Find other tech and computer products like this
over at
  United
Kingdom: Find other tech and computer products like this
over at
  Australia:
Find other tech and computer products like this over at
  Canada:
Find other tech and computer products like this over at
  Deutschland:
Finde andere Technik- und Computerprodukte wie dieses auf