


Our Verdict
Introduction, Specifications, and Pricing
At this point in our career, we feel like we have seen just about everything there is to do with a case, and yet, there are manufacturers out there that try to push those boundaries all of the time. One of them is Corsair, who has done things we have not appreciated along the way, but most of their gear is top-notch and comes backed with seriously full feature sets. Well, with the world of Corsair going to all things iCUE, it makes sense that it comes to cases full swing and allows Corsair to add in some items to a case that typically would cost a user time, frustration, and a bunch of money to do something like this themselves, and it's likely when you are done, you will not have software to control it all in sync.
This is our first foray into the world of iCUE capable cases, and on paper, Corsair took an already well-accepted chassis line and took RGB LEDs to an entirely new level. Corsair brings out things like RapidRoute cable management. Combine some 160 RGB LEDs in strips surrounding the chassis with a trio of LL120 RGB fans. You get over 200 RGB LEDs to enjoy and potentially customize. Bring in three radiator locations, room for up to ten 120mm fans with some concessions for 140mm fans as well, mix that all up in a striking-looking new exterior, and it seems Corsair is on the right path for success here.
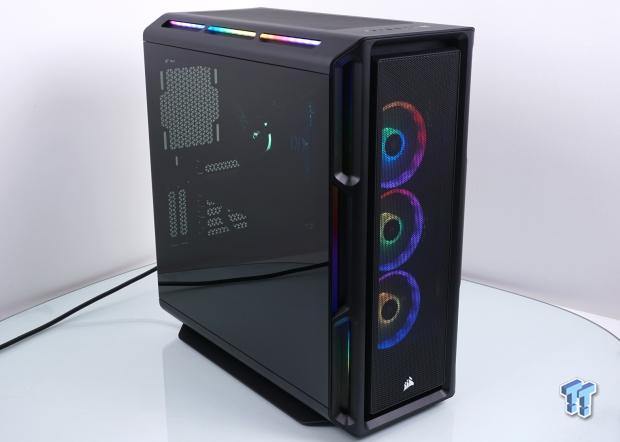
The chassis in question is the iCUE 5000T RGB from Corsair, and this is not just any mid-tower design; it is the first chassis in our hands billed as a Smart Chassis. We get that it may be a bit of a stretch to call it smart, but you have to stand out somehow, and it does do more than 90% of the cases on the market. We will be going on a very detailed trip around, in, and over this chassis, so grab a drink, maybe a snack, and get ready for one of the longest reviews we have ever written.
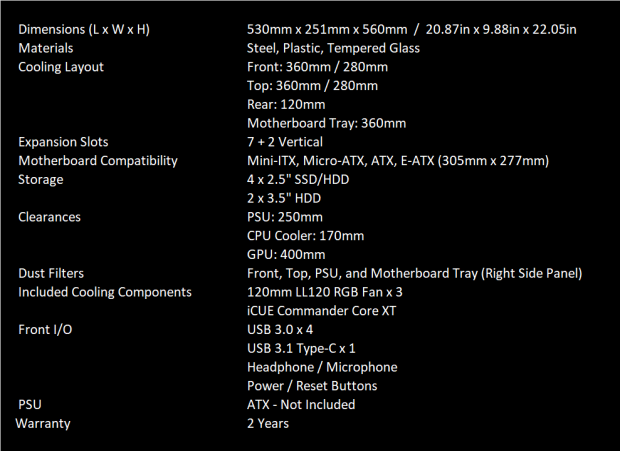
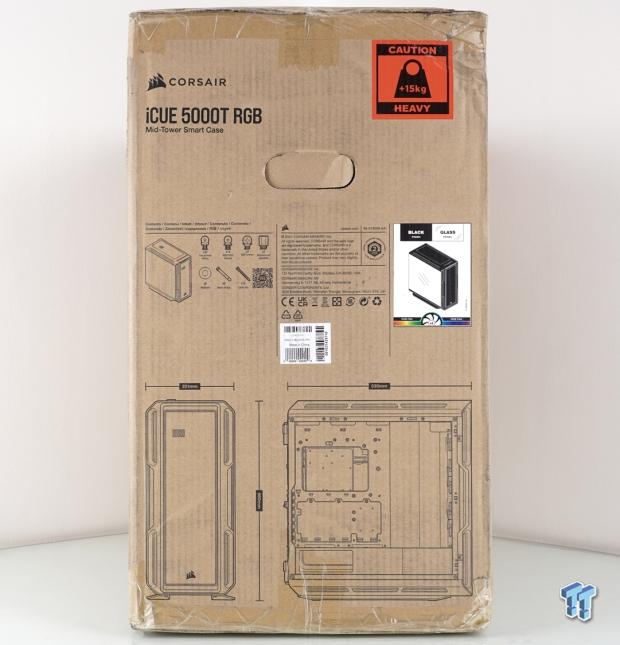
Going by the information on the box and with what was contained in the reviewer's guide, these are the specifications as we know them. Dimensionally, the iCUE 5000T RGB stands 560mm tall, is 251mm wide, and measures 530mm from front to back. Weight is unknown, but we can say it is at least thirty-three pounds, empty. The chassis components are made from steel, plastic, tempered glass, and even some rubber bits here and there. Our chassis showed up with black external treatment, but signs allude to a white option.
Best Deals: Corsair 4000D Tempered Glass Mid-Tower ATX PC Case
Cooling inside of the 5000T can be done in four locations. The front of the chassis ships with a trio of LL120 RGB fans installed, but you can opt for a pair of 140mm fans. The top of the chassis affords the same fan layout. There is a third optional location that supports three 120mm fans, and of course, there is room for a 120mm fan at the back. While Corsair provides us with no fan specifications, a quick trip to the product page shows us they top out at 1500 RPM. They provide 43.25 CFM with 1.61 mmH2O pressure while delivering 24.8 dB(A) noise if these are the retail fans in our chassis!
Also, know that radiator support matches the fan options, but there is one caveat, you cannot use a radiator in the front and on the motherboard tray simultaneously. Otherwise, you can fill it up as desired. Where multiple fans can be installed, there is a dust cover there, and one can be found under the PSU. The only breathing location without a filter is at the back of the case. This chassis uses the iCUE Commander Core XT in concert with iCUE 4 software for complete fan and RGB control.
At the back of the chassis, you will find a total of nine expansion slots, seven normal horizontal ones, and a pair of vertical slots for those wanting that look. You will need to buy an extension cable for that, and there is not one in the box. Inside the chassis, you can house mini-ITX, Micro-ATX, ATX, or E-ATX motherboards, as long as the E-ATX does not surpass the 305 x 277mm limits. Speaking of limitations, the CPU cooler can be 170mm tall, GPUs can be 400mm long, and the PSU is shown to be limited to 250mm, but that depends on if you use the HDD cage or not.
Our Latest Mid-Tower Cases Review Coverage
The front I/O of the chassis is up to date, sporting four USB 3.0 ports and a USB 3.1 Type-C to go along with the 3.5mm jack and buttons to reset or power the PC. Beyond all of these things, the last bit to know is that Corsair backs the iCUE 5000T RGB for two years after the date of purchase.
We saw the 5000D Airflow, which this case is based on, and that started at $169.99, but to be honest, we were not sure what Corsair was doing with that case and did not review it that favorably. Even with a bit of "history" with this series of cases, we walk into it open-minded, but there is one fact that cannot be overlooked and is what will raise the bar to the highest standards as we look over the iCUE 5000T RGB, and that is the near shocking price. Corsair has set the MSRP for this chassis before its release at an astounding $399.99 to get what you are about to see. That's right! $400 for a mid-tower chassis. With that being said, you can see how our hands are virtually tied, as we expect nothing but the best at this pricing level!
Packaging
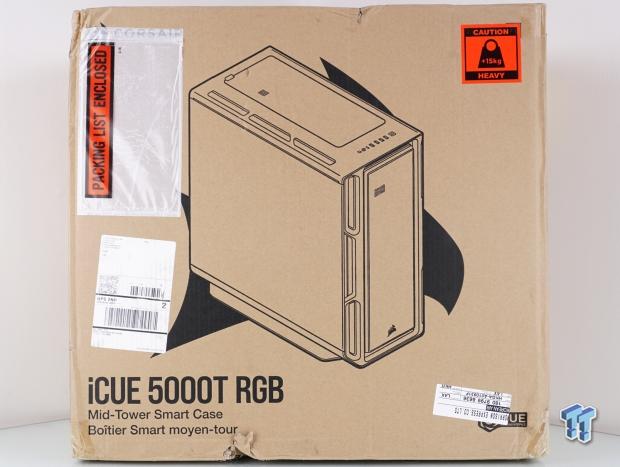
While FedEx did a number on covering the left portion of the panel, we can still see a rendering of the chassis over a Corsair logo front and center. Near the bottom is where Corsair displayed the iCUE 5000T RGB name, and while not sure who placed it, there is a sticker denoting an excessive amount of weight which is something Corsair does not divulge. However, at 15+ kilograms, we can do the math to conclude it's more than thirty-three pounds.

The right side of the box starts with the company and product names at the top, with a pair of stickers about weight this time. Under the handhold cut into the box, we see eleven versions of the specifications we discussed earlier in this review.
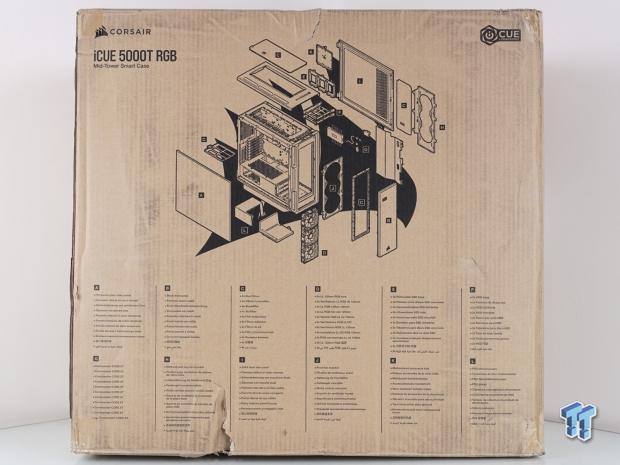
Corsair starts around the back with the names in the upper left-hand corner, and over half of the panel is used for the exploded diagram of the iCUE 5000T RGB. Below the diagram are eleven languages covering the list of parts from A to L, corresponding to the letters noted in the rendering.
The left side of the packaging starts as all the rest do, but we get quite a bit of information under the handhold. Beginning with an included parts list, we see what comes with the iCUE 5000T to help us install our hardware. We then see warranty and company info along with a sticker noting the model and serial numbers, while the second covers the color of the case, the material used for the side panel, and that it is RGB. Finishing things off, the bottom offers a head-on and a side view with measurements to help you confirm its size, should space be cramped where it needs to reside.
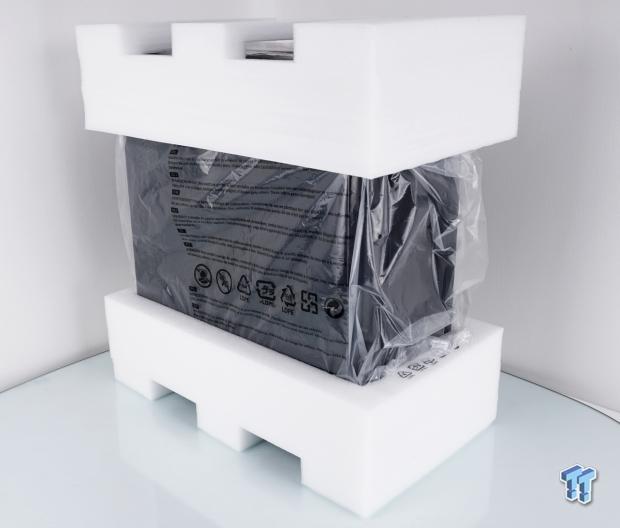
While we have no issues calling out that the box of our iCUE 5000T is completely trashed with obvious damage shown, and with the box out of square, it is not out of the realm of possibilities that the chassis inside also took on damage. We are happy to report that nothing of the sort has happened. Between the plastic liner and the thick, dense foam end caps, the heavy chassis took the hits and rolled with them, no pun intended. What we have is an unblemished chassis under this inner packaging, ready and waiting for its debut.
Corsair iCUE 5000T RGB Mid-Tower Smart Chassis
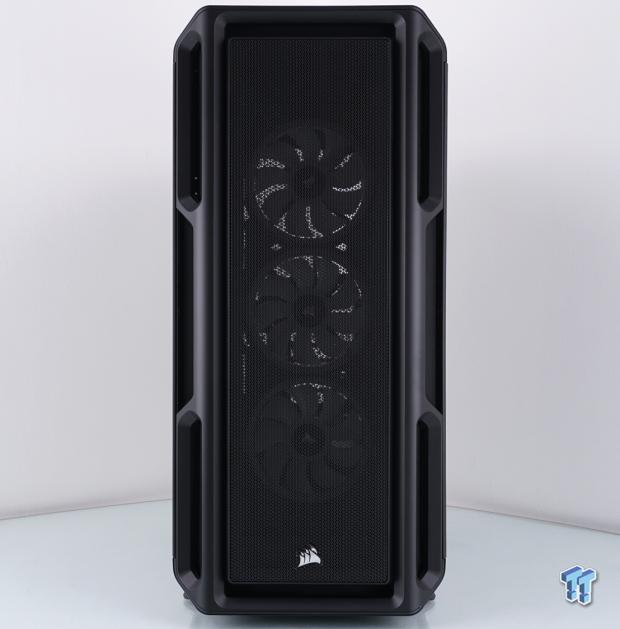
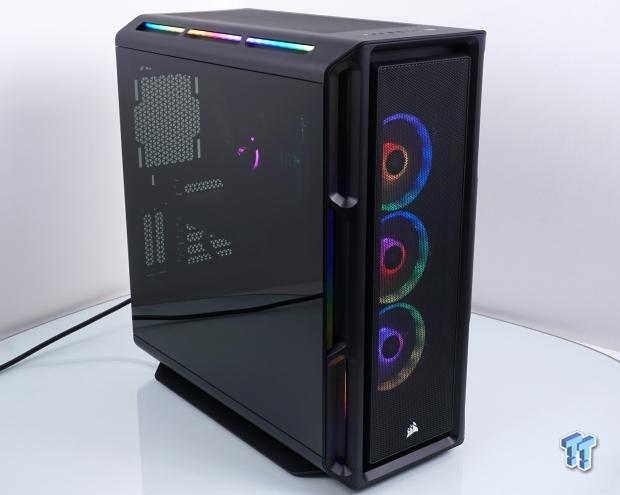
Looking dead into the face of the iCUE 5000T RGB, we find that the center of the bezel is wide open with its black mesh insert made up of tiny triangles, where they placed the only external logo or name found outside of the chassis, done with the metal Corsair logo near the bottom. Around the mesh is plastic shaped with three larger openings on each side, well-rounded curves, nothing too aggressive looking. We also like how the corners are angled and done smoothly, which plays well with the rest of the styling.
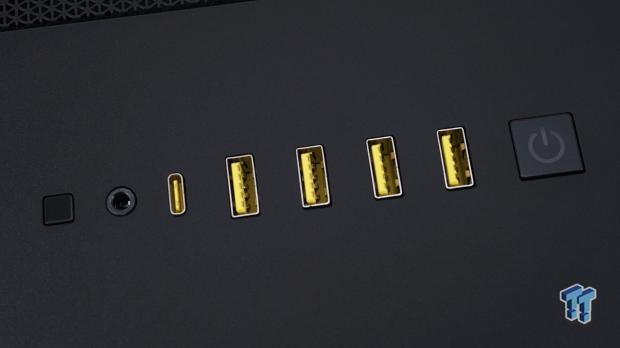
As you move from the front of the chassis to the top, you immediately run into the front I/O panel. In it, we found a reset button, a microphone/headphone combo jack, a USB 3.1 Type-C port, four USB 3.0 ports, and a power button with a flickering white LED to denote storage drive activity.
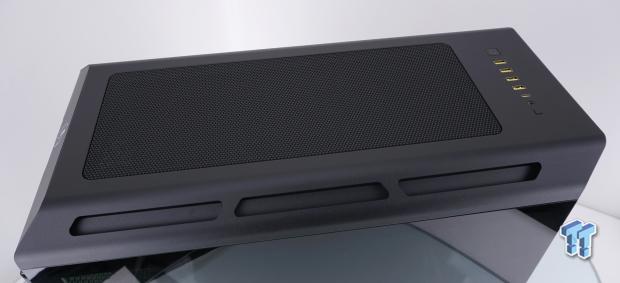
Taking in the entire top of the chassis with this view shows us quite a bit. For starters, there are matching openings on the sides of the top to mimic the bezel. The entire top will come off, as does the mesh panel in the center, to allow access to the cooling portion at the top of the iCUE 5000T RGB.

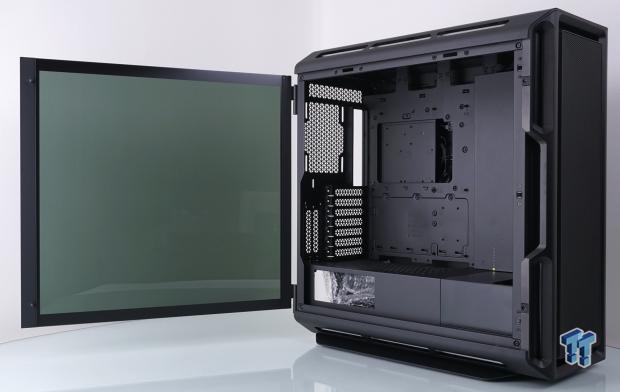
As we pan down to the left side of the chassis, we see that the bottom frame portion of the chassis matches the top and front of the case with styling, while it's supported on feet, we would expect from the likes of a Cosmos case. That is not a dig on Corsair, as we like wide sturdy feet in cases. The bulk of what you see is a 3mm tempered glass panel backed with a thin metal frame that helps solidify the door panel while also offering a way to attach. We also see hinges, so these doors will swing open and are likely easily removed.
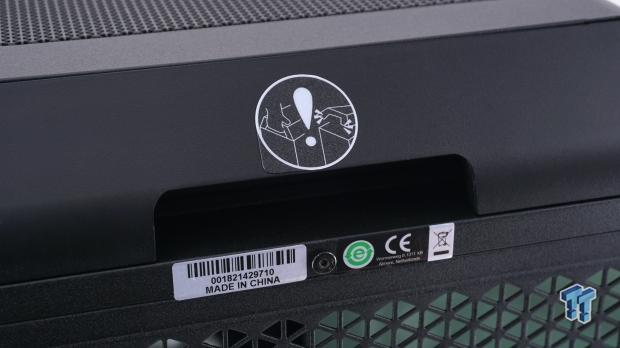
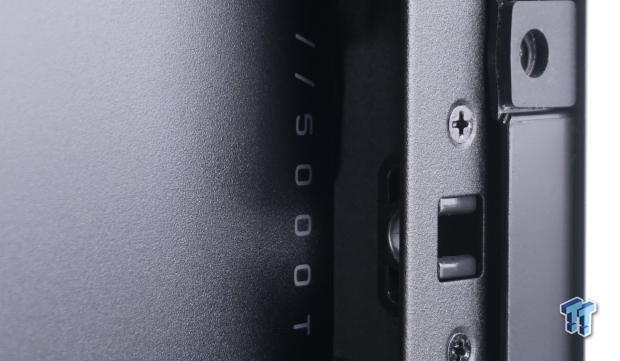
We noticed this sticker as we spun the chassis to view the back. It is there to remind you not to use the opening to carry the chassis, as the weight of the case itself will allow the locks to release, spilling the case and contents on the floor.
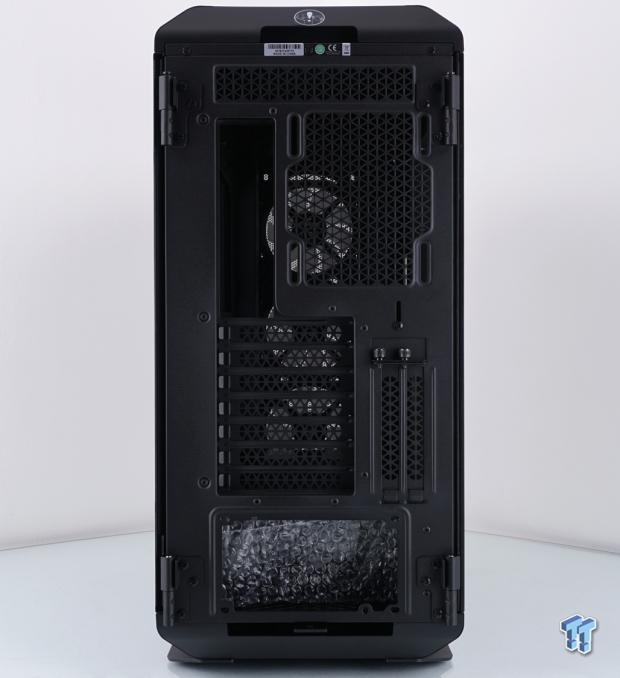
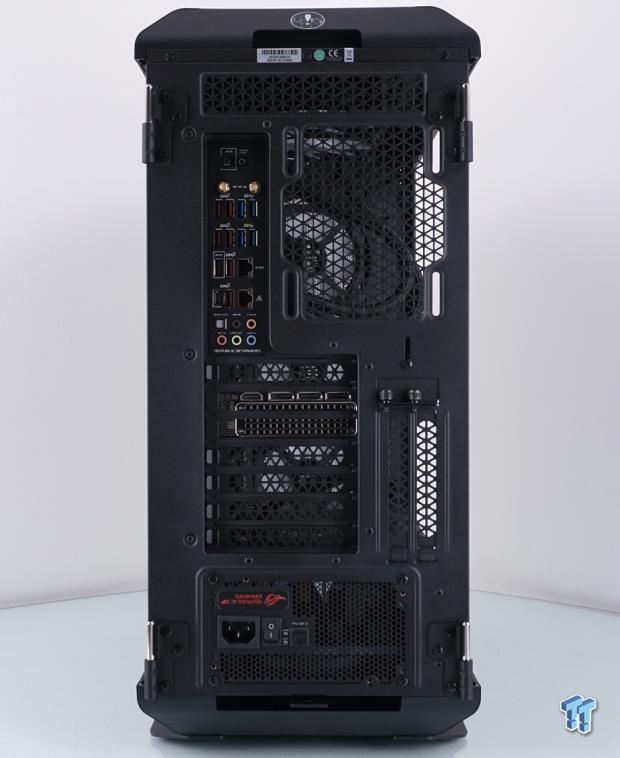
When it comes to the back of the iCUE 5000T RGB, the top starts with some open ventilation above the rear I/O opening and rear fan mounting location, which is also adjustable. Continuing down the line, we run into seven horizontal expansion slots and covers, with an extra pair closer to the glass to support vertical GPU mounting. At the bottom, we see the PSU opening, but it is also when we realized Corsair placed a screw in the top of each top hinge, locking the swinging panels to the chassis, for now.
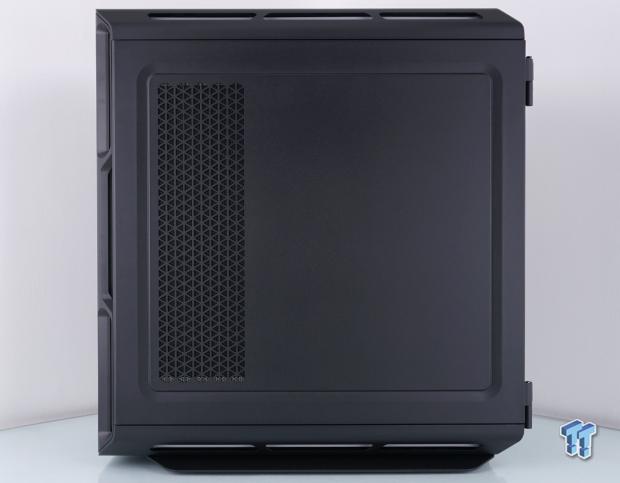
The right side panel of the iCUE 5000T RGB is hung the same way as the glass panel, which allows it to swing open from the front. The panel is indented around the edge, and in that lower portion of the door panel, we see more triangular mesh, this time to allow airflow from an optional cooling location. At this time, we also realized that the center opening on either side of the bezel is to allow hands to pull the panels open.
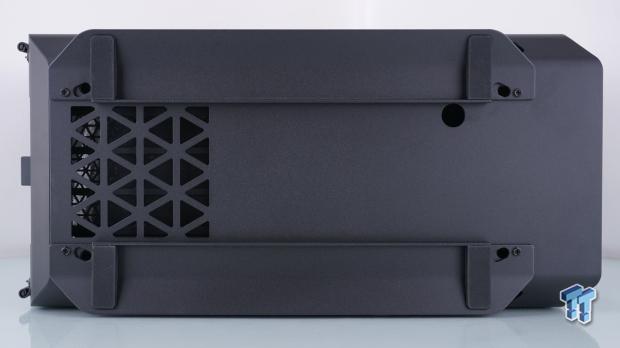
Under the chassis, we find it supported on wide steel feet that are screwed to the bottom of the chassis. Both feet are L-shaped for rigidity, and each uses a pair of rubber pads for grip. There is a large hole near the front that we can only assume is for a loop drain, and the PSU intake zone is wide open with large triangular sections removed, backed by a dust filter, as seen by the tab sticking out from the back of the chassis.
Inside the iCUE 5000T RGB
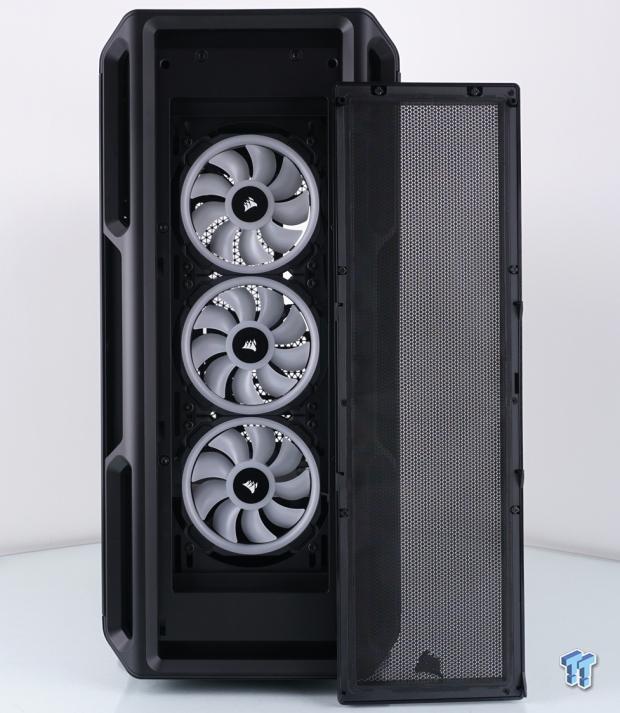
As we move back to the front of the iCUE 5000T RGB, we stuck a finger in at the top of the mesh, and hooking the top, can remove it by gently pulling, then lifting it from a pair of tabs at the bottom for removal when cleaning or changing fans.
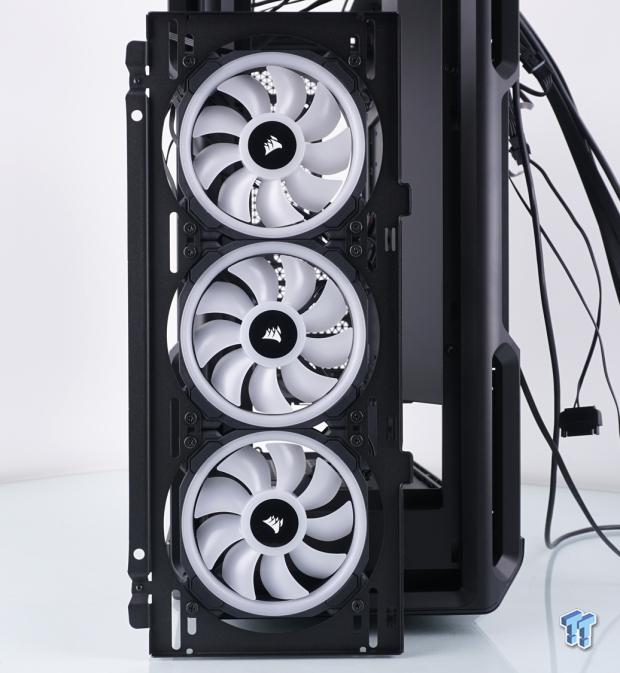
Suppose you wish to take it further by accessing and removing two thumbscrews inside the chassis. In that case, the entire front fan portion is removable to make mounting onto it easier, especially when adding liquid cooling.
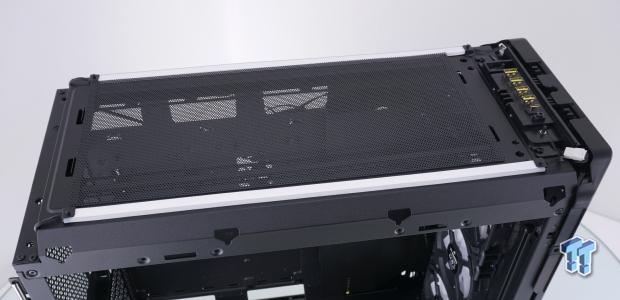
Remember the sticker telling us not to carry the chassis from there? Well, with a bit of effort, the top will pop off, exposing the guts. In this instance, the guts are the magnetically attached dust cover over the top fan mounting locations, but there are RGB LED strips running down both sides of the cover too. We also love that the front I/O stays with the chassis, simplifying wiring.
When you remove the dust filter, you can see tables around the opening that keep the filter in place. Doing this ensures that whether you use 120mm or 140mm fans up here, there is no chance of the filter not covering the fans. Sadly, this portion of the case is not removable.
We mentioned that the iCUE 5000T RGB uses hinges for the side panels, and this is what that affords its buyers. We said the screw in the top two hinges allows the doors to come off, but we did notice that both hinge pins are identical in height, which makes reinstalling the doors a bit harder to do.
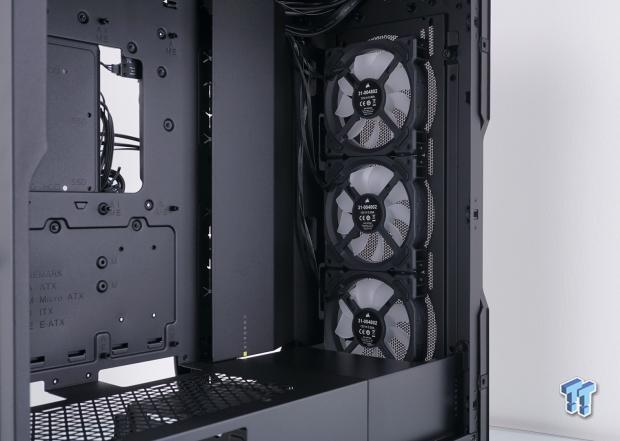
We have shown these fans a couple of times now, and we are told that they are Corsair LL120 RGB fans. Each of them is pre-wired for fan power and RGB connectivity, although it appears it can use some help. Other than that, what we see here is pretty standard and straightforward.

After quite a bit of work, investigating, and trial and error, we did manage to remove all of the optional panels from the chassis. Not only does the angled portion with the Corsair name printed on it come out, but so does the fan frame portion. Tearing the chassis down this far in the front did make us realize how much easier the chassis will be to work with, and then when near completion, we reinstall this portion of the chassis. This is also where the optional cooling is located to have the radiator and fans on the same plane as the motherboard.

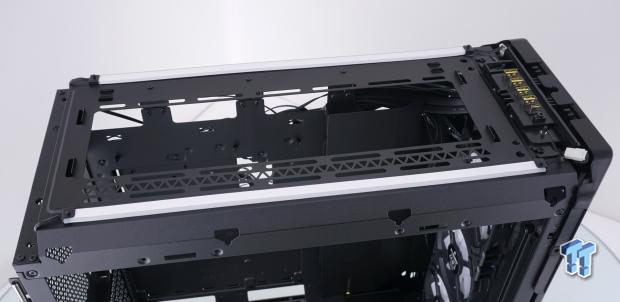
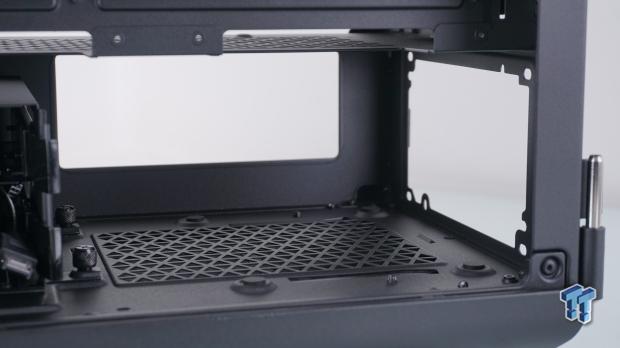
As shipped, the motherboard tray, while marked with standoffs installed for ATX motherboards, we see some things that we are not fond of. There is a trio of large holes above the motherboard and a pair at the bottom, but no grommets. Sadly, there are three holes with grommets to pass wires to the right edge of the motherboard but are covered, and access is tightened due to the cover. The CPU cooler access hole is large too, but you will soon see even that gets complicated.

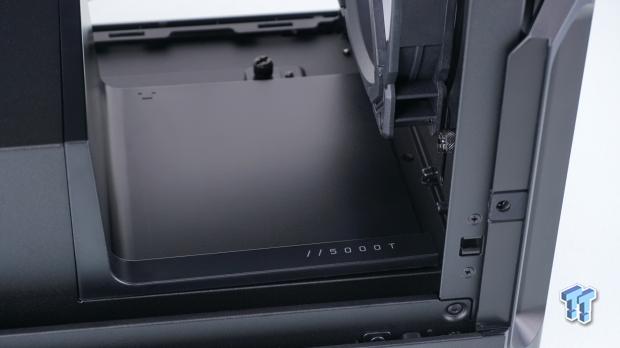
There is a PSU shroud, where the back portion offers more triangular ventilation, and the side is cut open to allow a view of the PSU sticker through it. At the front is a removable plastic section of the PSU shroud, which is made to enable an AIO or thinner custom radiator with the fans while allowing air above and below the plastic.
You may have noticed the chassis name showing up in the previous image, but we feel this placement is ridiculous. With anything else we get, the "//insert name here" has always been visible, but here they partially hide it with the chassis frame. There is an option to change this, but there is more to that story.
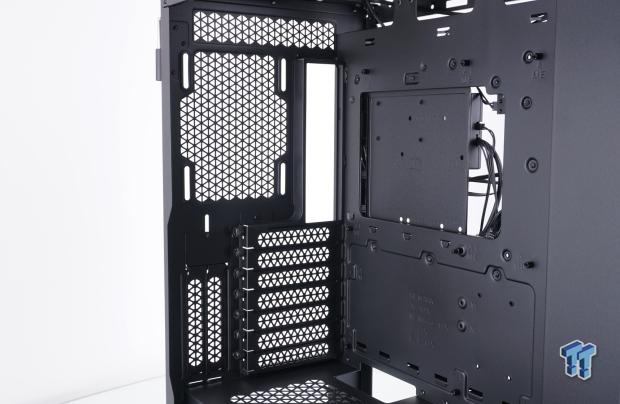
Looking at the inside of the rear of the chassis, we do not find much to discuss. There are removable covers in the expansion slots; they all use thumbscrews, and the back of the chassis is well ventilated, but where is the exhaust fan?
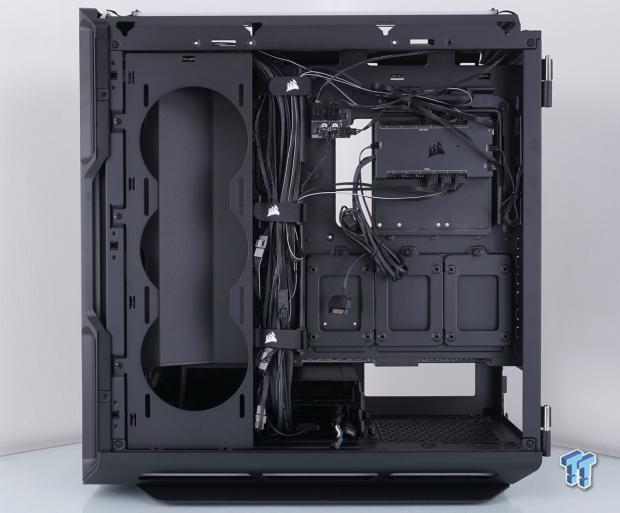
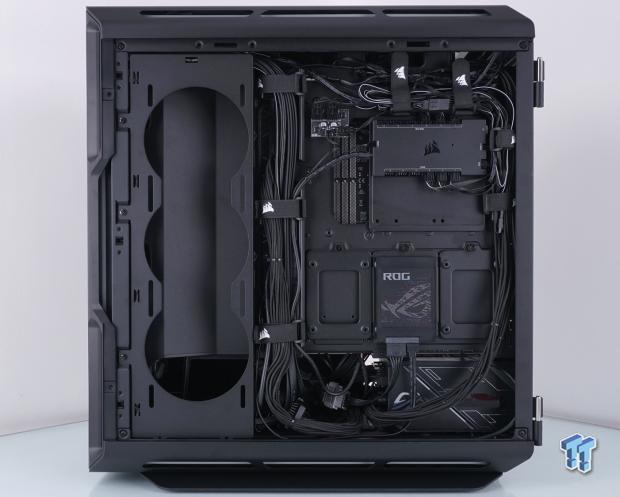
Behind door number two is quite a bit to digest. On the left is the optional three 120mm fan location, and if the cover panel is removed, water cooling is compatible here as well, just not if the front is also populated with water cooling. To the right of that, we see the bulk of the chassis wires stuffed into the wire management trail, held down with Velcro straps. There is a second nest of cables too, but those come from the fans and hub.
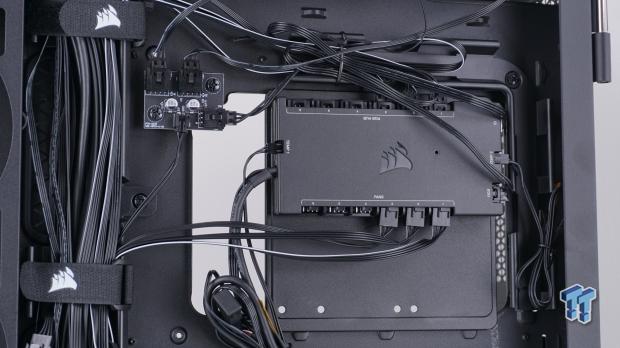
The hub, in this instance, is the iCUE Commander Core XT. It is capable of powering up to six fans and delivering RGB control to them. The hub is mounted to the old SSD plate from earlier revisions and is surrounded by another wire management trail. The only downside to this is that once wired and strapped in, we hope we never need access to our CPU cooler backplate, as we have to pull the board out once this is all wired neatly.

Even though the Commander Core XT used the SSD plate, Corsair offers three other 2.5" drive trays lined up under the access hole and close to the PSU, making wiring them easier and cleaner. These trays use a thumbscrew and tabs to be locked into the tray, and there are some supplied screws to use here.
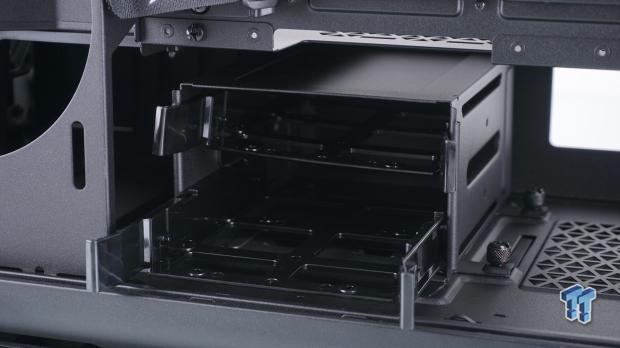
For some reason, the specifications state only four locations for 2.5" drives, but the reality is five are offered. Two of them are contained in the 3.5" drive cage, which can be used for 3.5" drives if needed. The cage is also removable, or it can be slid forward in two more positions.
The PSU opening accepts the PSU through this side of the case and supports the PSU with small rubber pads stuck to the chassis. As it stands, we know we will have to move the HDD cage at a minimum to fit the PSU we use.
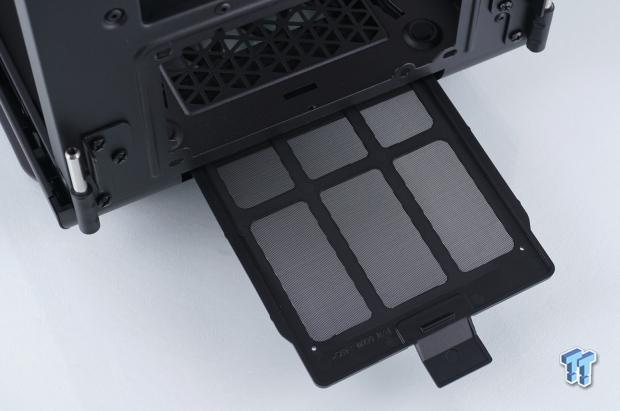
Since we were here discussing the PSU, we figured it was the perfect time to show off the PSU dust cover that slides out the back of the iCUE 5000T RGB for easy cleaning.
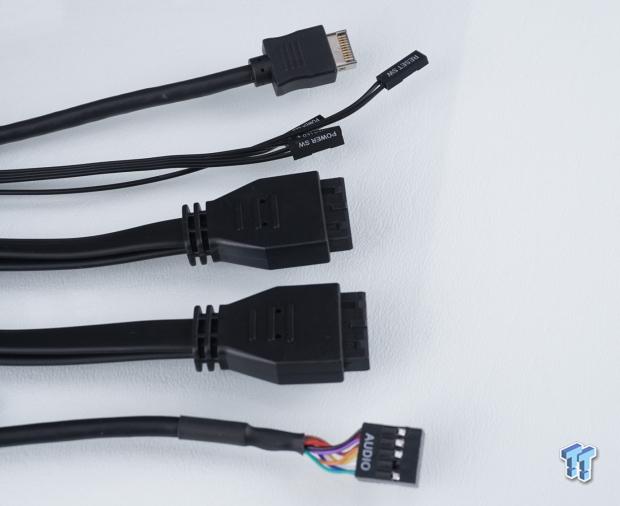
We have in this image the chassis wiring, and specifically that. There are more wires inside the chassis for the iCUE Commander Core XT, but we omitted them due to the shortness of the cable and inability to get them into an image cleanly. However, we see the USB 3.1 Type-C connector, the front panel switch and LED wiring, two native USB 3.0 connectors, and an audio cable without the HD in front of the audio.
Accessories and Documentation
Installation and Finished Product
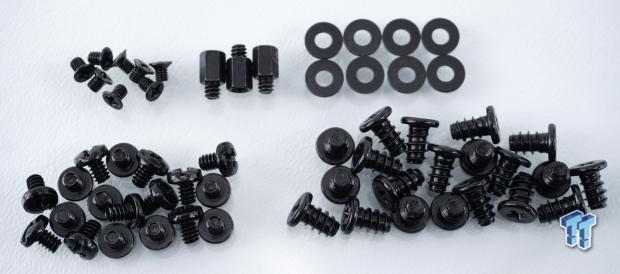
There is a hardware box that shipped inside the HDD cage, and upon opening it, we found this for the hardware. There are eight countersunk M3 screws for 2.5" drives, although not enough to populate the trays, let alone all five locations. There are three extra standoffs, and for some odd reason, we get eight washers, which we have no idea why they are here. We then see the 6-32" screws for HDD, PSU, and motherboard installations and a ton of standard fan screws.

To help with wire management, Corsair ships an extra six straps to work with their plastic trail wire management system, and four of these will fit in the one surrounding the fan hub. For all other areas, you can use some of the ten zip-ties to help keep wires out of sight and stuck where you want them.
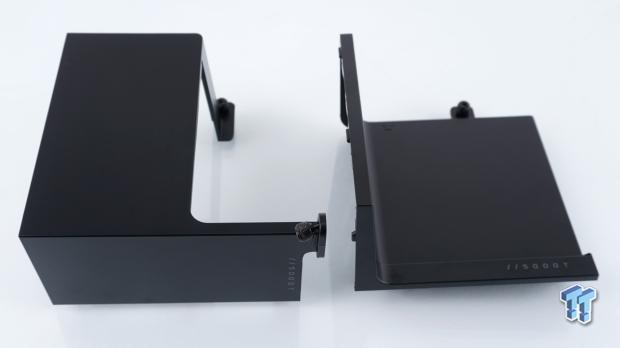
We mentioned a second option for the front of the PSU shroud, and the part on the right is what was sent. Compared to the stock one on the left, the plastic is lowered and widened for more room to direct the intake airflow up and into the main chamber. While we like the -_- seen at the back edge of the cover and the new //5000T name placement, it comes with an issue.
Once installed into the chassis, it does not ride flush, and it sits closer when the thumbscrew is not locked into the chassis floor, but that pressure tweaks this cover, making it an eyesore and not worth using to us. We would rather run without if we needed more room in the front than to see this every time we open the door!

With this being an early sample, the literature was not ready yet. So rather than a manual or a chassis guide in some form, all we found was the safety information on disposing of the bits in certain states.
Test System, Installation, and Finished Product
- Motherboard: ASUS ROG DARK HERO (AMD X570) - Buy from Amazon
- CPU: AMD Ryzen 5 3700X - Buy from Amazon
- Memory: Team T-Force XTREEM ARGB 3600MHz 2X8GB
- Graphics Card: NVIDIA GeForce RTX 3070 FE - Buy from Amazon
- Storage: Sandisk Extreme II 120GB SSD
- Case: Hydra Bench Standard
- Power Supply: ASUS ROG Thor 850W - Buy from Amazon
- OS: Microsoft Windows 10 Home 64-bit - Buy from Amazon
- Software: AMD Ryzen Master, AIDA64 Engineer 6.32.5600, and CPU-z 1.94.0 x64
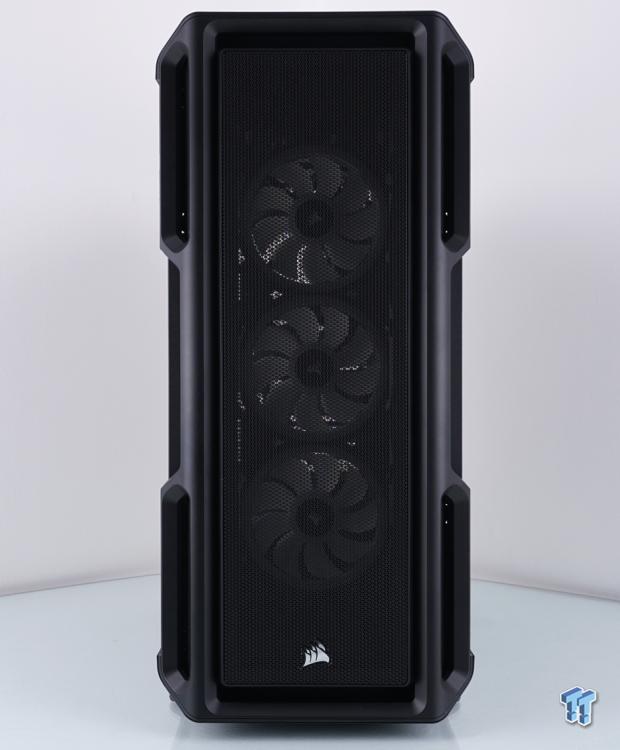
With the build completed, we started back at the front of the chassis one more time. No matter how many times we show it, what stage it's in, it always looks the same since there are no bay covers or anything to disrupt the looks that Corsair worked so hard to perfect.
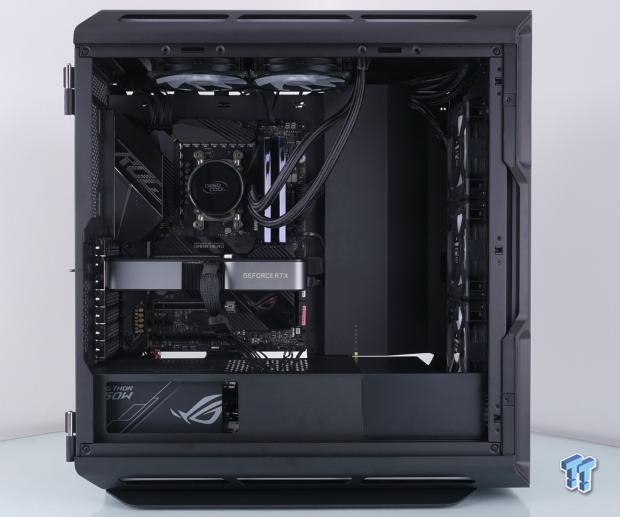
With all of our gear installed, we do not lack room anywhere inside this chassis. The AIO was installed up top with a ton of space before we hit the top of the motherboard. There is much more room in the front for whatever you want to add, or if you want to swap to the optional cooling location, we find you can use a 360 on the motherboard plane and still use a 240mm AIO up top. The motherboard fit with ease and was mostly easy to wire cleanly, and the GPU hangs level and secure, as it should.
The back of the chassis fills in nicely as well. The rear I/O is filled and aligns well with the chassis, as does the GPU in the middle. The PSU rides a bit high in the saddle when it slides into the chassis, in fact, enough that we have to pry on the PSU to align the holes. We eventually won, but not something we expect to find in a high-end chassis.
We took some time wiring the chassis and the PSU cleanly, and that portion looks amazing behind the motherboard tray. However, with so much wiring from the hub to the fans, we grabbed it, stuffed it in the trail, and strapped it into place. While Velcro straps and gutting this controller are not impossible, you can see how it can be seen and restrictive when attempting to access the CPU cooler backplate.
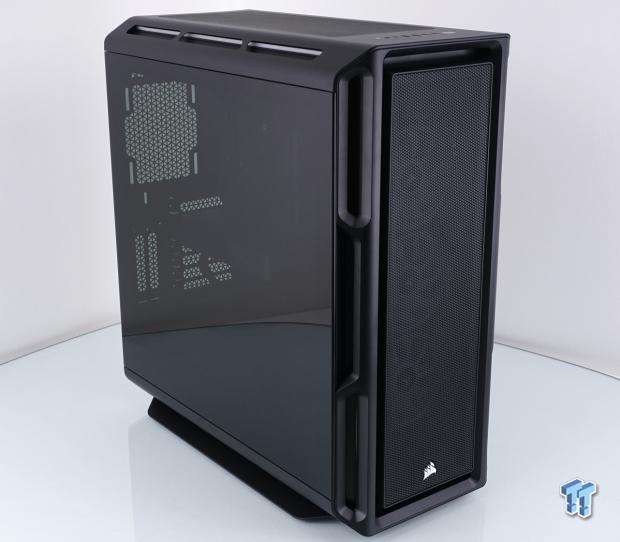
As dark as the side panel is, the appearance finished is nearly the same as when we got it out of the box. From this angle, we can make out the GPU and its power cable, there is the slightest hint of the head unit, but otherwise, unless we power it up, there isn't much that changes visually.
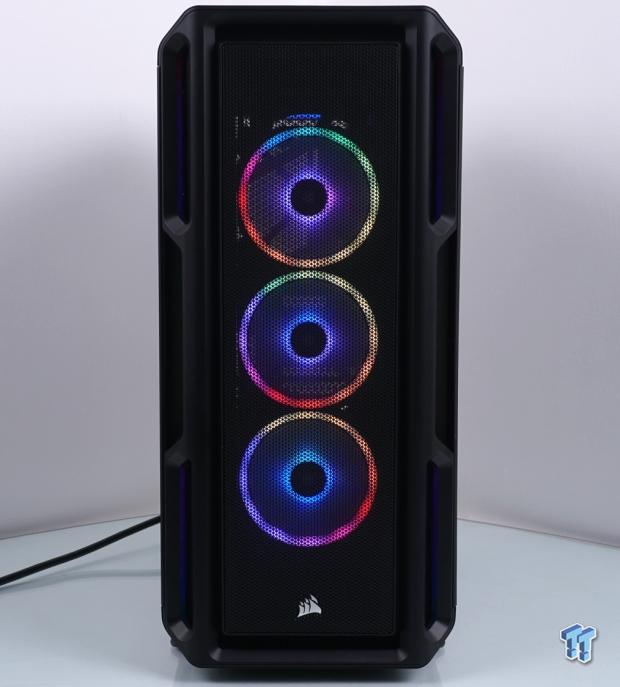
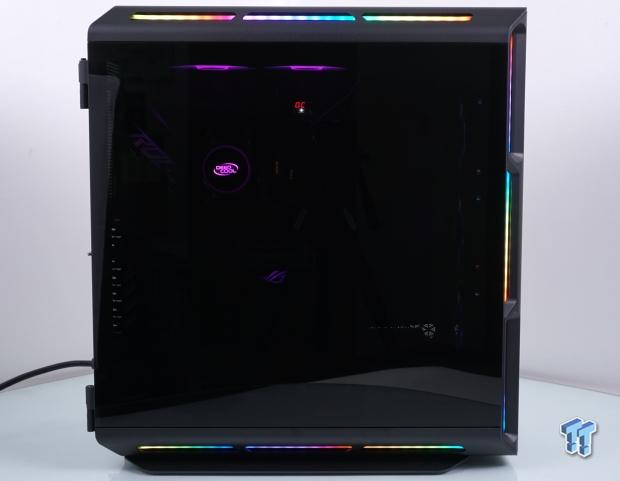
With a trio of LL120 RGB fans in the front of the chassis, the light show is superb. Looking beyond the fans peeking through the mesh, we can see a flood of light coming out the openings on either side of the bezel. If we turn the chassis to the side, you find that the iCUE 5000T is shipped with RGB LED strips on the top, down the front, and along the bottom, which is repeated on the other side.
Corsair says there are 160 LEDs to play with here before messing with the fan LEDs. We also love that everything is glowing when you view this system from an angle. Not only do you see it from the strips, but in a dark room, anything near the wall gets flooded with an RGB glow as well.
iCUE 4 Software
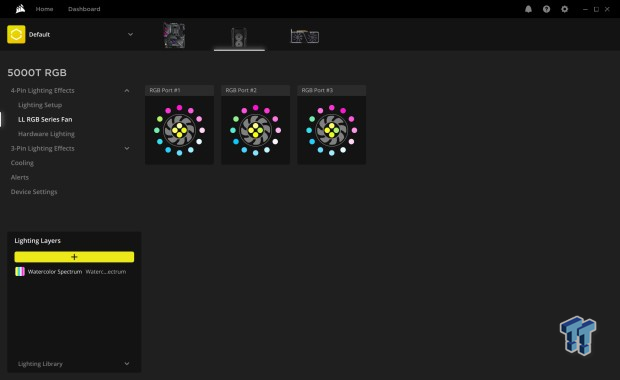
To get here, we followed a link to the latest iCUE, downloaded it, installed it, opened it, and clicked on the 5000T icon at the top. Once there, we are dumped into what you see in this image. We are in the 4-pin effects portion listed on the left, specifically in the LL RGB Series Fan portion, where we can start thinking about changing the LEDs or controlling fan speed.
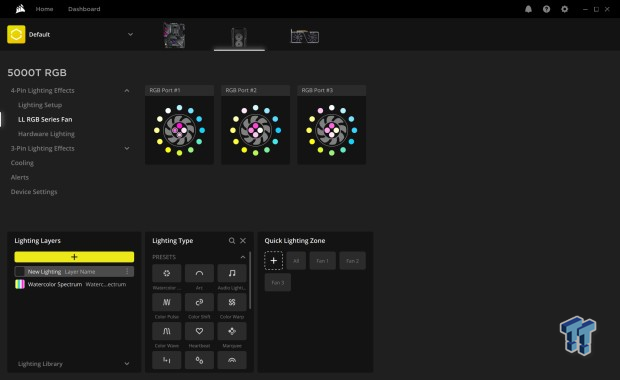
By clicking on the +-bar in Lighting Layers, we start to see some options. Once you add a layer at the left, you can pick from one of the nineteen preset options or select custom or Lighting Link. For now, we will stick to the basics. Once the type of lighting is selected, you can apply it to all or apply it individually.
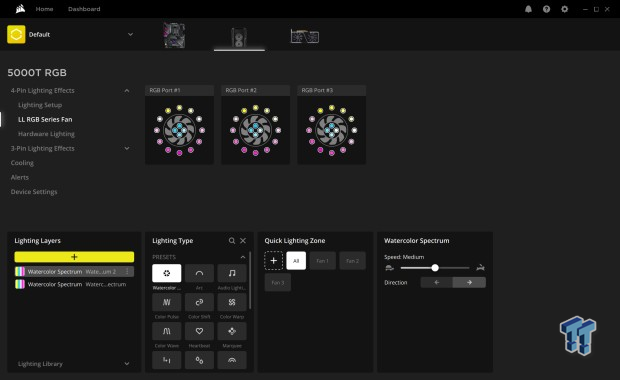
Once the previous steps are taken, you can then do things like changing the speed of the mode, changing directions, changing colors on certain ones, alternate colors, adding layers to what is there, and so on. The 3-pin lighting effects are similar, but that portion controls the six RGB LED strips, down to a per LED basis, just like the fans offer.
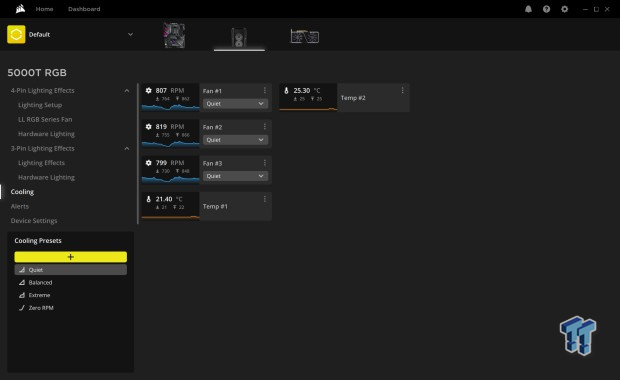
The cooling section is where fan speed can be changed. Out of the box, it runs the fans in Quiet Mode, but you also have Balanced, Extreme, and Zero RPM modes. You can adjust them via adding a preset or using the dropdown menus in the smaller windows to the right. We also got a pair of thermal sensors with the Commander Core XT, which we placed at the front and back of the case to watch how they function.
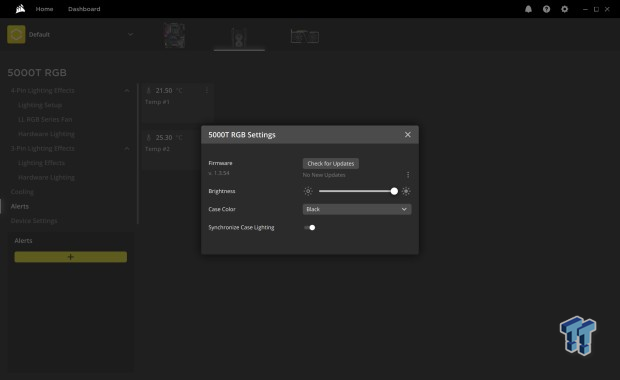
The last bit that deals with the iCUE 5000T RGB can be found by clicking on the gear icon at the top right. This is where we can check that the Commander firmware is using the latest version, along with a brightness slider, an option for case color, so the icons match your chassis, and a switch to sync lighting, and unticked is desyncing the fans and strips.
Final Thoughts
As to the majority of this chassis, we like what we see, love some of the additions, the aesthetics and styling are new yet not tacky, and overall, you will be hard-pressed to run out of room in this mid-tower chassis. We love the optional cooling where fans can sit on the same plane as the motherboard, and if not, there are still plenty of options for any cooling enthusiast. Many cases have RGB lighting, in the form of fans or some accent lighting, but this is the first chassis to hit our bench that has taken it this far out of the box. Our Cosmos 700P was close, but even Cooler Master did not take it to this extent.
Not only is there a metric crap-ton of lighting in this chassis, but it also is fully customizable down each individual LED. With so many in play, that means potentially hour upon hour of messing about with various lighting ideas. The case is sound and solid in most regards, and even something as trivial as the choice of feet has us enjoying Corsair's choices during the development process. Corsair went over this chassis with a fine-toothed comb and tried to iron out every last detail in almost all aspects.
Sadly, there were various points where we thought to ourselves, this isn't right, this is a bit frustrating, and almost downright, this should not be in a chassis of this cost. Simple things come to mind. It was hiding the name of the case, so your friends have to play "Where's Waldo" as they try to discover where it is. The fact that access to the HDD cage and to remove the PSU cover's plastic portion all have hidden thumbscrews, and to top that off, one of the cage screws were secured way too tight, making things even tougher, and the hole for the plastic PSU cover part was stripped out of the box.
Then there is the optional cooling area, which is good on paper but not how it ended up. You have to pull the wire management, pull screws from the cover under that management, yank the cover, and go on about your day after reinstalling things you should not have to. Then again, there is the mess with the CPU cooler access hole too, where you either have to make sure not to wire anything permanently, or you will need to pull the motherboard to change coolers.
Again, not something we should be seeing. Then, to top it all off, we get an optional plastic PSU cover option, and the name placement is far superior, but the part does not fit the chassis as intended. At this point, we will stop beating this horse and try to move on in a better light.
Testing thermals was much like testing an AIO from Corsair, where we used all three modes of active cooling. While the various options to set the fans have different fan curves that react differently, all modes get the fans close to the maximum 1600 RPM. The results we found are as follows.
Quiet mode delivered us loaded thermal results that leave the CPU +3.2°C Δ over open-air, yet the VRM has a -2.6°C Δ, and the GPU averages a +0.6°C Δ. The chassis fans topped out at 1600 RPM, give or take a few RPM between fans, and delivers 38 dB into the room.
Balanced mode resulted in the CPU with a +3°C Δ, the VRM with a -3°C Δ, and the GPU with a +0.5°C Δ. The fans ended up at 1600 RPM again, which means the maximum noise level does not change.
Using the Extreme option, the results were better. This time the CPU shows a +0.8°C Δ, the VRM gives us a -5.8°C Δ, and the GPU delivers a -1.2°C Δ.
Overall, we cannot complain about much after thermal and audio testing. Audibly, we have had more silent cases, but not cooled as well. We have also had louder cases and still did not cool as well as the iCUE 5000T RGB. So, when it comes to noise, Corsair isn't bad, and at 38 dB to get the performance we saw, we are more than OK with that. Thermally, the iCUE 5000T RGB is one of the better cases we have seen when moving beyond a pass-fail test system. While it may have some issues along the way, the iCUE 5000T RGB almost lulls you into forgetting about much of the smaller stuff, as you enjoy the looks and performance more and more, the more you use it.
Even so, with a sense of forgiveness in our hearts, there is still too much going on in the complaints department for what Corsair is asking for this case. With an MSRP of $399.99, plus tax, things need to be correct out of the box, no messing around, no excuses! The reality is, we see things we find in cases that are $50 to $100. Even with all of the add-on lighting and fans, we don't see lighting and a complicated additional cooling location winning users over, considering it accounts for $300 worth of the cases features by the math we are speaking of here. Of course, it is not that simple when it comes to the design and costs, but it certainly feels like a mediocre design at this price.
Our advice at this time is to hold on when looking at the iCUE 5000T RGB, as it could be an amazing specimen, but just not as it sits. A few fixes here and there, and Corsair would have a stellar product, but as it sits, there is way too much invested in obtaining this chassis to overlook so many things. Hopefully, by the time you have access to one, Corsair may have addressed what we found. Then again, maybe not, and if that ends up being the situation, we would look elsewhere with our $400!
 Lian Li B4-mATX Review: a compact mATX SFF case with excellent airflow and premium features
 Ocypus Sigma F36 BK ARGB Cooling Fan Review: high airflow and unified design in one frame
 PCCooler CPS RZ820 Display Review: a flagship-level CPU air cooler with an LCD screen
 MOAIPLAY ORA PRO G1 850W ATX 3.1 PSU Review: high efficiency and 10-year warranty for $119.99
 NZXT H6 RGB+ Compact Dual-Chamber Chassis Review
 Another RTX 5090 power connector melted, and even ASRock TempGuard failed to save this one
 Reverse scam: Redditor orders a Ryzen 7 7800X3D but gets blessed with a 9800X3D instead
 Colorful iGame Shadow II DDR5 memory with CXMT ICs hits 8600 MT/s
 ASRock says there are no plans to sell its Taichi 10th anniversary concept components
 Sony CEO sells $4.7 million worth of stock days after PlayStation announces disc phase out
 Black Flag Resynced is a win for Ubisoft, pirate remaster achieves 2 million sales in 24 hours
 Giveaway: Win an NZXT H6 RGB+ Case, Kraken Elite AIO, RGB Fans and 1200W PSU
 Ubisoft responds to Black Flag Resynced DLC critics by telling them they're 'not a requirement'
 NVIDIA is reportedly preparing the GeForce RTX 5090 SE to sit between the RTX 5080 and 5090
 id founder John Carmack comments on sad fate of studio
 Micron 6600 ION 245.76TB Enterprise SSD Review - Best in Class Programming Speeds
 MOZA MA3F EFCM Flight Control Module Review: authentic Airbus A320 autopilot panel for simulators
 Turtle Beach Stealth Pro II Wireless Gaming Headset Review - Premium Sound, Fantastic Features
 MOZA MGX1000 Instrument Panel Review: a realistic Garmin G1000 replica for immersive flight sims
 Simagic Zeus Formula Steering Wheel Review: premium build and advanced inputs for F1 racing
 GIGABYTE X870E Aero X3D Dark Wood Review - A woody goody
 The Super Mario Galaxy Movie (2026) 4K Ultra HD Blu-ray Review
 KTC H49S66 5K2K (5120x1440) 49-inch 180Hz Gaming Monitor Review
 HighPoint Rocket 1604L Gen5 x16 NVMe Software RAID AIC Review: half the price with full 59 GB/s speed
 Next Level Racing ERS3 Haptic Seat Review: immersive sim racing comfort with integrated haptics
 Don't sell your Windows laptop until you do these things
 6 PC cleaning mistakes to avoid for safer hardware maintenance
 Phison and Intel Take Aim at Local AI's Memory Wall with aiDAPTIV
 How to Remap Keyboard Keys in Windows using Microsoft PowerToys
 7 tips to organize your Windows files for faster, easier access
 Intel Arc G3 Extreme first impressions with MSI's Claw 8 EX AI+ - Incredible power for an extreme price
 How to fix Wi-Fi Adapter Not Working on Windows laptops: troubleshooting tips
 Hisense U7SG 4K TV: Modern Entertainment for the New Age
 6 underrated Microsoft Word features worth using to boost your productivity
 Level Up Your PC Gaming with these Fantastic ASUS Prime Day Deals on GPUs, Motherboards, and More