


I have always loved hacking, not the hacking that gets you into people's systems undetected to play spy games, but the kind that has you modifying things like game consoles to accept copies of game discs you backed up or in the case of the original Xbox, taking the internal 10GB HDD and replacing that with a 300GB drive and then taking things further by installing every game you own on that drive, so you never need the discs again. As time has passed, companies like Microsoft have held a very firm stance on modifying their hardware and made it quite difficult to do, so who would think that upgrading the internal storage of their Xbox One could be so damn easy? Rest assured your warranty is gone once you open your console.
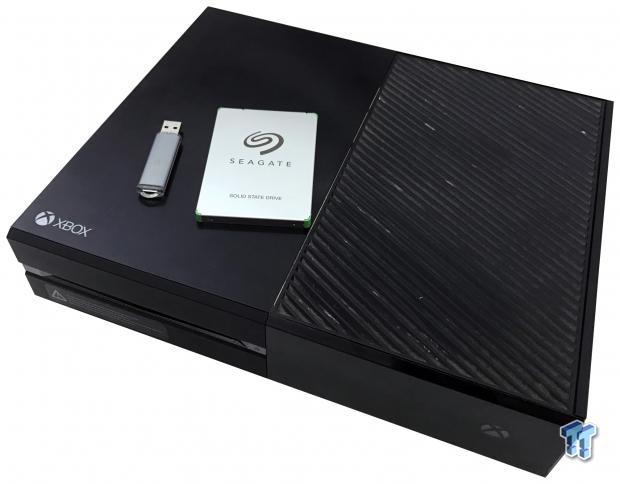
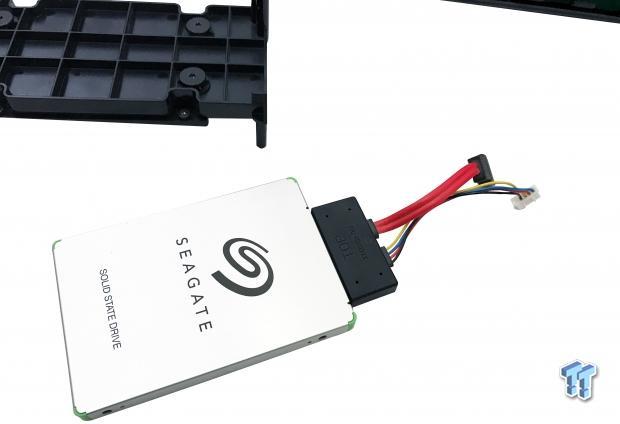
Let's get right down to it. For this to work, you will need three things. A drive you intend to use as the new Xbox internal storage, we chose the Seagate Nytro Client 140, which just so happens to be what you will find inside the Game Drive SSD they launched earlier this month. You will also need a flash drive with Parted Magic installed and bootable and of course, an Xbox One. I should mention here that I do not know if the Xbox One S will work with this guide, I have done this method with 10+ original Xbox One consoles so I do know it works.
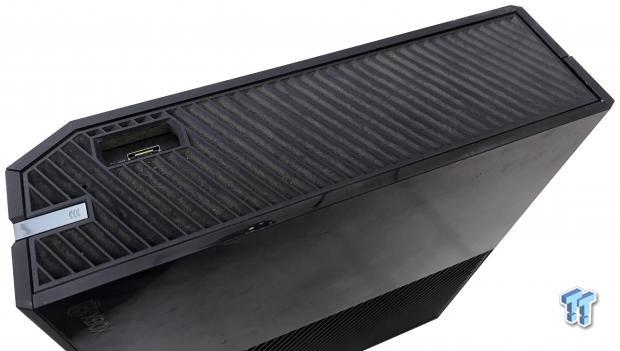
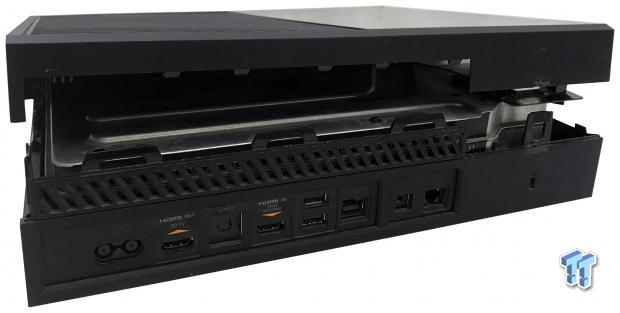
To peel open your console, you will want to start on the end with the USB port. Just pop the black vented cover up, and it will come right off.

We will then push this locking plate over and out.
Flipping the console over to the back, grab a sturdy spudger or flat blade screwdriver and pushing on the seams will pull the halves apart.
Don't get too rambunctious with the halves here; we need to spin the console around to the front.
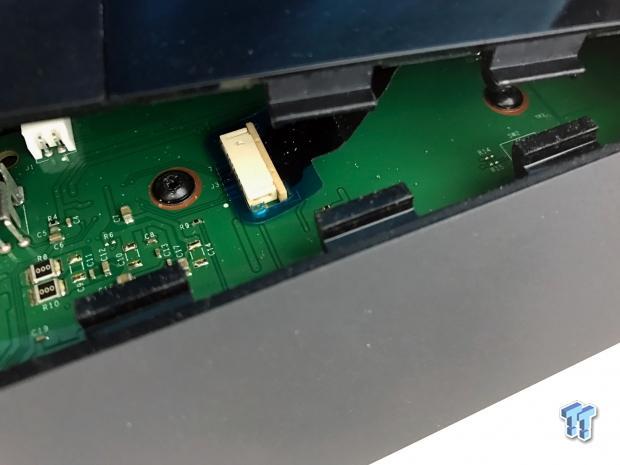
The front bezel is connected by this thin flat cable. Be careful not to rip it just pull the loop over the connector and pull it out.
Our Latest TweakTown Guides
- 6 Mistakes to Avoid When Buying a Windows Laptop
- I capped Windows Update's bandwidth with Delivery Optimization, and my downloads stopped choking
- I use this decade-old free tool that finds files faster than Windows Search does
- I install and update most of my apps with this Windows command now, and I stopped downloading sketchy installers
- I stopped digging through Windows menus after I set up this one folder
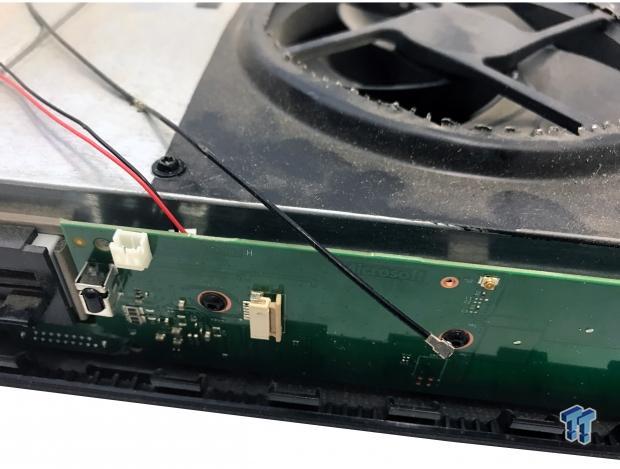
Unplug the Wi-Fi antenna and speaker connections from the daughterboard.
After removing the screws from the case, slowly open and unplug the Wi-Fi card cable at the top left.
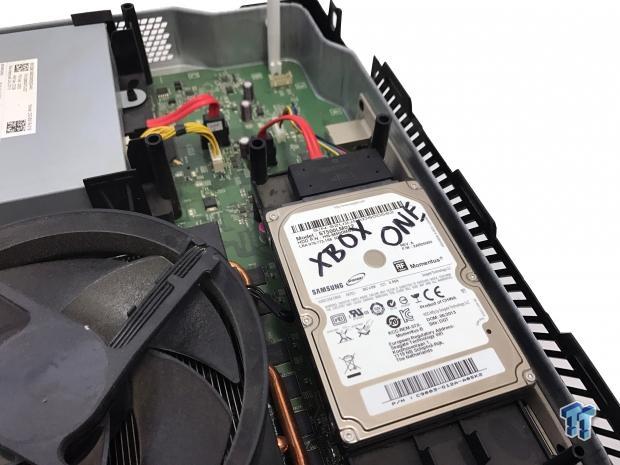
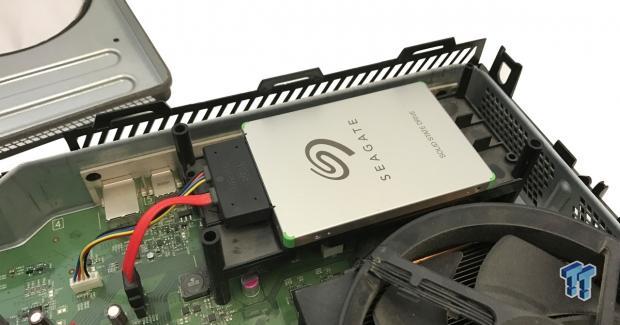
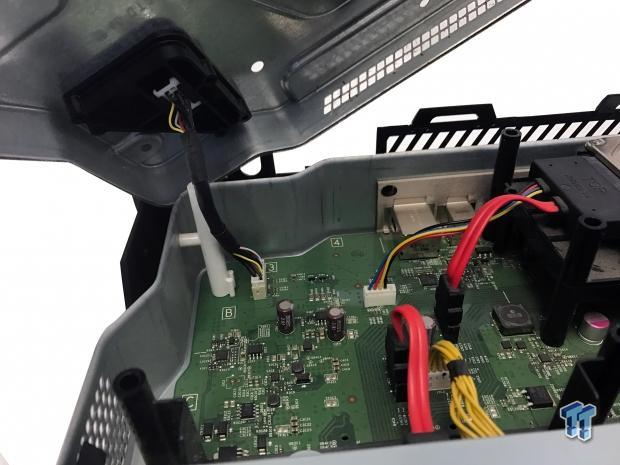
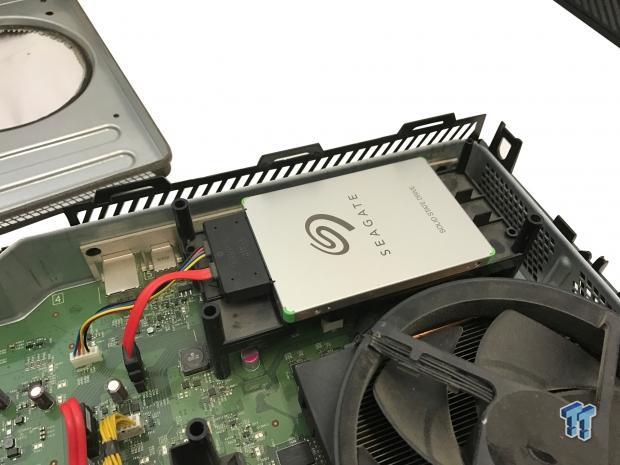
OK, we have the drive here ready to come out. Unplug the SATA and power connections for the drive.
We can now remove it from the caddy by removing the bottom row of screws.
Software Side
At this point, we have the Xbox hard drive removed from the machine, we have the drive we intend to use, and we have Parted Magic on a USB stick. From here, you will need a desktop PC, unplug any OS drives you have connected to this machine and plug in only the two drives we are working with in this guide. It's worth noting that the drive you intend to use as your Xbox one drive needs to be greater than or equal to the source drive (500GB or 1TB - whatever your console is).
Moving on from here, at this point, we have both drives connected to our PC and the USB stick with Parted Magic installed placed in a USB port on the rear of the system. Boot from the USB stick, go to extras on the EFI menu and click Clonezilla x64. A second note, if the drive you are using as a replacement for your Xbox is larger than your source drive, you will want to boot into the full version of Parted Magic.
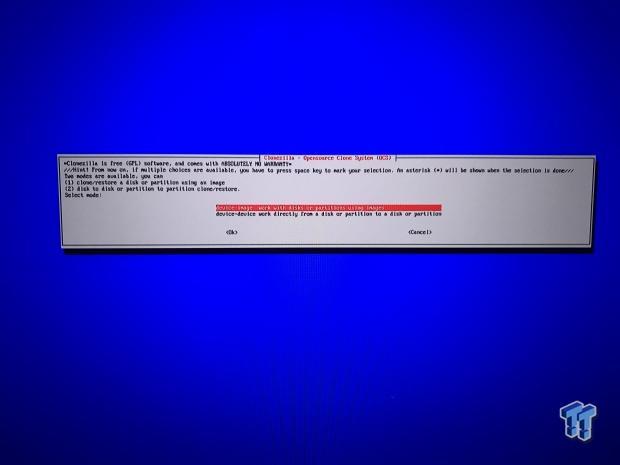
On with the show, for those that went straight into Clonezilla, we first have the menu above. For those that needed to boot into Parted Magic, make sure your destination drive is clean and open Clonezilla. We are then going to work device to device, the second option.
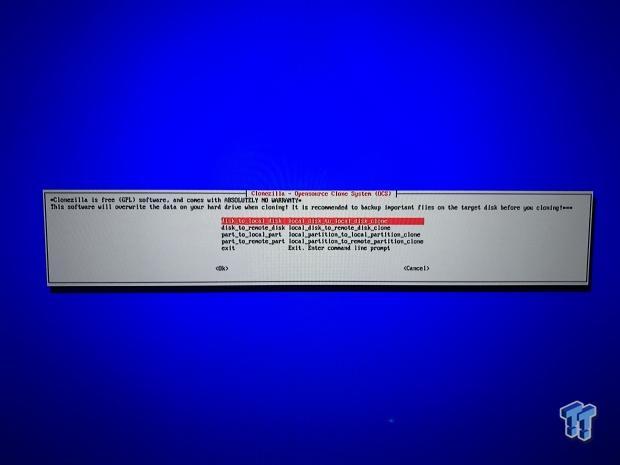
Local disk to local disk.
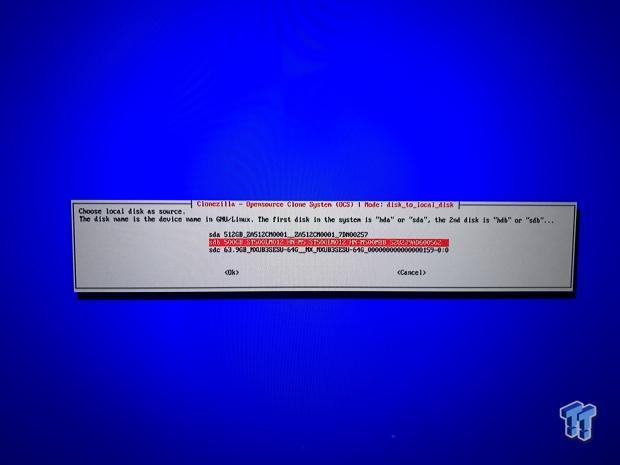
We first choose the stock Xbox HDD as the source.

The Seagate SSD as the destination.
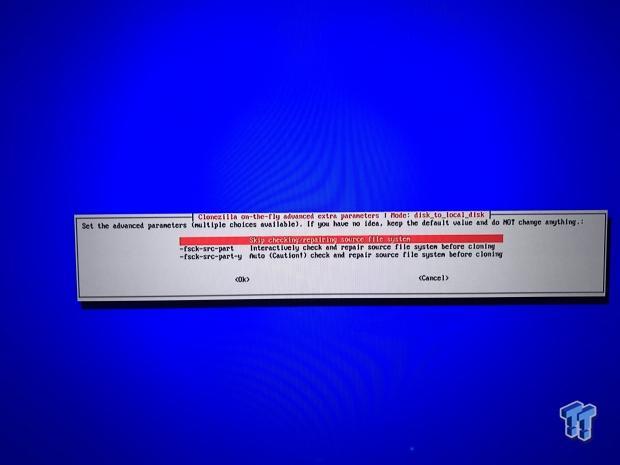
We skip repairing or checking source filesystem. At this point, Clonezilla will replicate the source drives filesystem onto the destination SSD. You should see seven NTFS partitions, I believe.
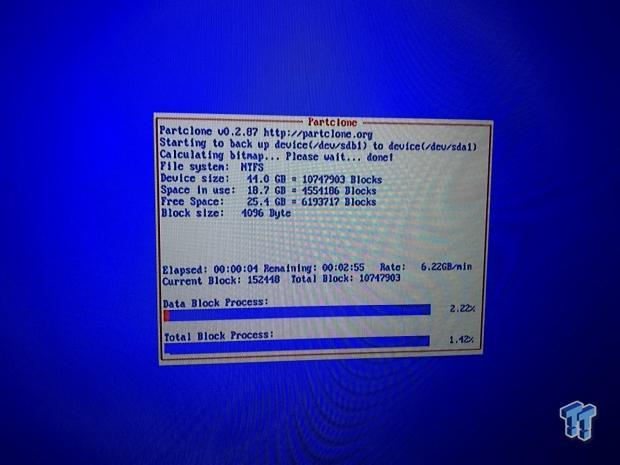
This next part of the process will take the longest depending on what you have on your stock Xbox One drive. When I do this process, I always backup all games to an external solution then delete them off the internal drive to minimize the amount of data needing to be copied. You can plan on 30 minutes for this process on a bone stock empty hard drive.
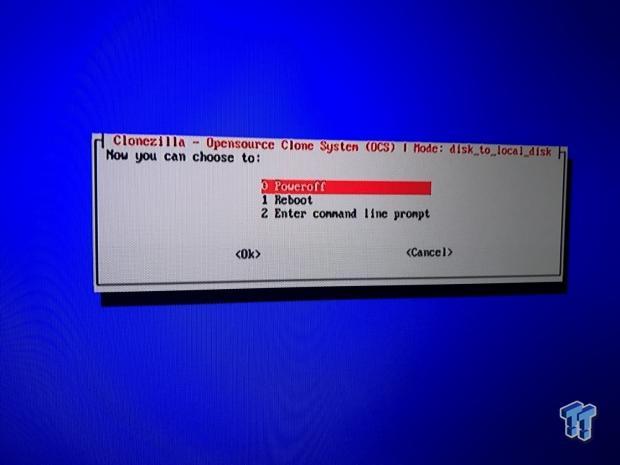
After the process completes, you will have some cleanup command scroll through in the command prompt area. You will then see the screen above, feel free to shut down your system, place your stock Xbox One HDD in the drawer for safe keeping, and go back to the Xbox to install our new drive.
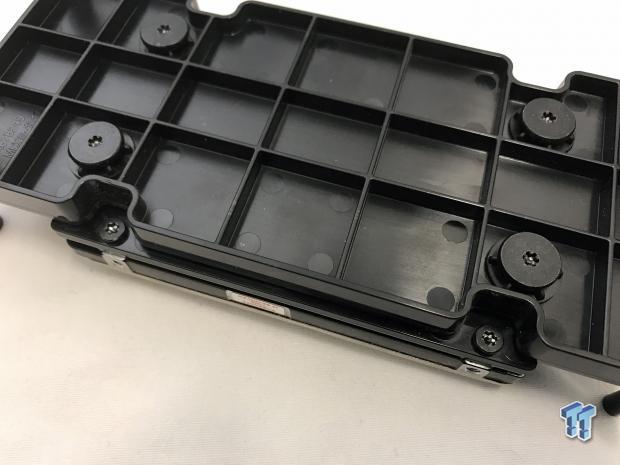
Installation is simple, put the new drive in the caddy, secure it with the screws, and place it back in the Xbox.
Here we are ready to button our console back up.
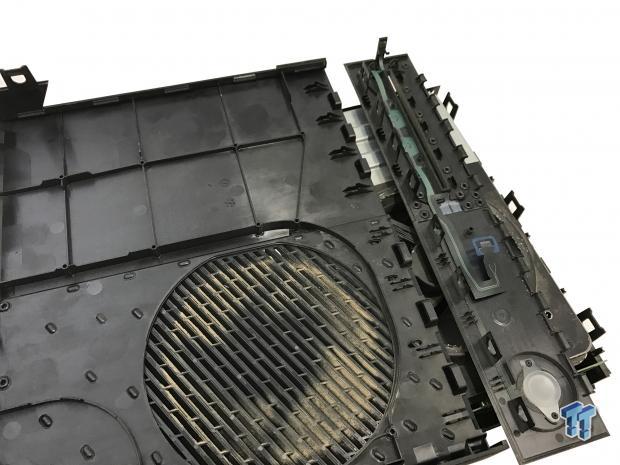
You can also take this opportunity to blow out all the dust that has collected over the months and years. We then, to make things easier, separate the front bezel from the top plate. Place the front bezel on the chassis of the Xbox and slide the thin, delicate cable back into place and pull the loop back over the connector. You then angle the front bezel slightly away from the console and snap the top cover back into place. The rest is the reverse of opening mentioned in the beginning.
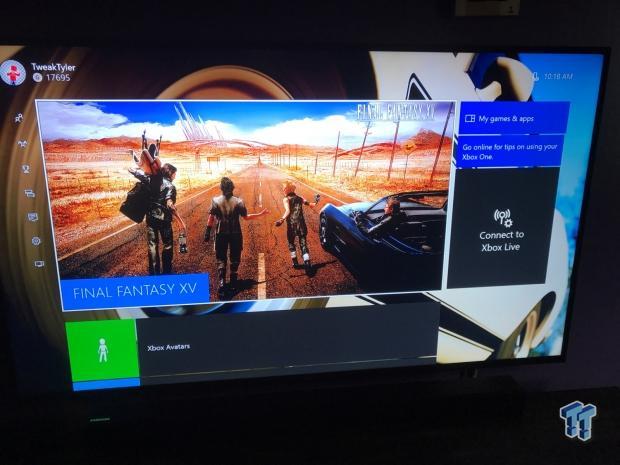
We can now fire up the Xbox and make sure everything is working as intended.
For those of you that did install a larger drive, once you finish the Clonezilla process, you will need to open the partition manager and drag each of the smaller partitions you see on your new drive to the right until you get the unused space of the drive next to the data partition of the drive. You can then expand the size of the data partition to consume the full capacity of the new drive.
If you have questions, leave a question or comment below, and I'll get back to you.
 6 Mistakes to Avoid When Buying a Windows Laptop
 I capped Windows Update's bandwidth with Delivery Optimization, and my downloads stopped choking
 I use this decade-old free tool that finds files faster than Windows Search does
 I install and update most of my apps with this Windows command now, and I stopped downloading sketchy installers
 I stopped digging through Windows menus after I set up this one folder
 Atari and Universal Pictures partner to create a movie based on Pong, Asteroids, Missile Command, and more
 Microsoft confirms every Windows PC is trackable and how it can lead to your arrest
 Microsoft confirms LG has responded to its monitors silently installing spyware on Windows 11 PCs
 NVIDIA is reportedly increasing the prices of its GeForce RTX GPUs due to rising memory costs
 Snapdragon X Elite laptop runs Cyberpunk 2077 using an RTX 4060 eGPU with the help of an RTX Spark development driver
 No amount of backlash will change Sony's mind on disc cancellation, says ex-Santa Monica dev
 The PS6 controller could eliminate stick drift by using magnetic joysticks
 Xbox confirms free game streaming with ads, clarifies how it'll work and ethos around monetization
 Ex-PlayStation boss can't understand why there isn't a Bloodborne remaster for PS5, but he hasn't given up hope yet
 AMD's Ryzen AI Embedded X100 Series processors are built for autonomous robots and physical AI
 Thrustmaster T.Flight HOTAS 5 MSFS Edition Review
 SteelSeries Arctis Nova Pro Omni Wireless Headset Review - One Headset to Rule Them All
 SteelSeries Arctis Nova 7 Wireless Gen 2 Headset Review - New and Improved, But Is It Enough?
 AMD Ryzen 7 7700X3D Review - Days of Future Past
 Samsung 990 2TB SSD Review - Ninth Gen QLC at PCIe Gen4 Speeds
 ASUS ExpertBook Ultra (Panther Lake) 14" Business Laptop Review
 ASUS ROG Raikiri II Xbox Wireless Controller Review - Ready to Take Control
 MOZA FMP18 Panel Bundle Review: authentic F/A-18 Hornet cockpit controls for flight sims
 Micron 6600 ION 245.76TB Enterprise SSD Review - Best in Class Programming Speeds
 MOZA MA3F EFCM Flight Control Module Review: authentic Airbus A320 autopilot panel for simulators
 Hisense U6SF 65-inch MiniLED TV: High Performance Meets Leisurely Convenience
 Don't sell your Windows laptop until you do these things
 6 PC cleaning mistakes to avoid for safer hardware maintenance
 Phison and Intel Take Aim at Local AI's Memory Wall with aiDAPTIV
 How to Remap Keyboard Keys in Windows using Microsoft PowerToys