AA:SF Tweak Guide - Introduction
Introduction

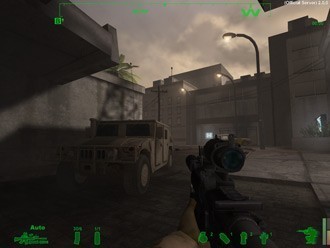
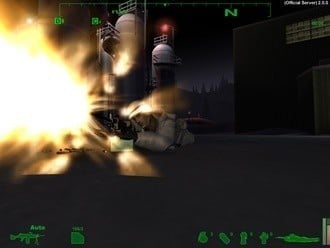
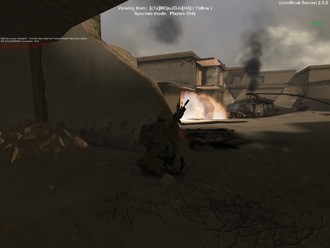
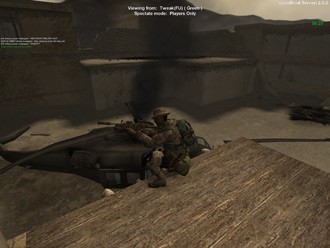
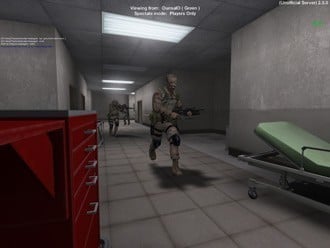
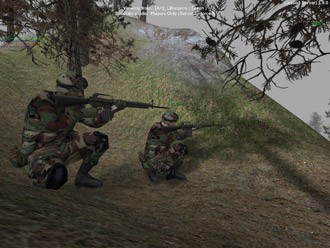
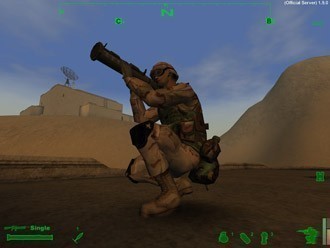
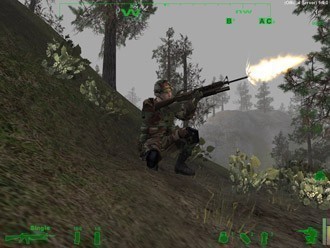
America's Army is a 3D online game centered around the US Army. The game was developed by US Army and US Dept. of Defense experts to "provide civilians with an inside perspective and a virtual role in today's premiere land force". The full version of the game is available completely free of charge courtesy of Uncle Sam. It has undergone many iterations and the current version of the game is extremely professional, highly realistic and rivals any online first person shooter in both gameplay and state-of-the-art graphics.
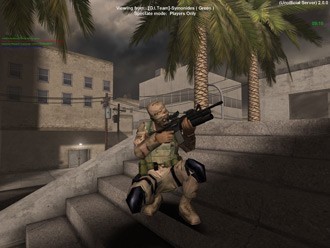
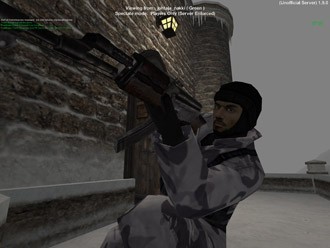
Recently the developers of America's Army released Version 2.0 of the game, introducing Special Forces. This has proven to be incredibly popular, and adds a new dimension to the game. There are several new weapons including modifiable guns, new roles for players, new maps and new gameplay elements. The game continues to improve with each new version, and if you haven't tried it yet, it is definitely worth downloading.
I've prepared this guide as a means of bringing together important America's Army resources, as well as providing details on how to adjust your game settings - both those available in-game and those in the .ini files - to let you maximize your enjoyment of the game. Whether you're new to the game or a long time player, there should be something for everyone so read on!
Note: This guide has been substantially updated, and contains information for the latest version of America's Army which is Version 2.0.0a
AA:SF Tweak Guide - The Essentials
Optimizing Your System
Before you do anything else, first head over to my System Optimization Guide and read through it from start to finish. It has all the resources you need to optimize your system for running any game, including details on how to update your BIOS, install the latest drivers correctly, stress testing an overclocked machine, links to Tweak Guides for every version of Windows, and much more.
In particular, if you run Windows XP, try my two XP Guides:
Windows XP Tweaking: From Reformat to Relax
Windows XP Tweaking: From Relax to Righteous
I really can't stress how important it is to optimize your system, especially by using the first WindowsXP guide listed above. You will resolve many problems and greatly improve your overall performance by making sure all the Windows settings are correct, and by stripping away unnecessary resource hogs.
Download the Game
If you don't have America's Army, you can download the game for free from the Official America's Army Site or America's Army Files, or from Fileshack or Fileplanet. The latest version of the game is Version 2.0.0a, the full version of which weighs in at 650MB. If you already have an earlier version, there are several patches available to update to 2.0.0a which can also be downloaded from one of the sites above. Note that America's Army is a free game, so while some sites might offer you the option of paying for a download, that is a premium service. If you don't wish to pay, download from one of the other sites listed above - they offer the same files and are absolutely free.
If you have problems with errors after patching an earlier version to 2.0.0a, a solution can be found here. For user account-related errors see the Personnel Jacket section below.
Generally speaking if you're updating from a much older version of America's Army it is recommended that you do a "clean install". That's done by going to Control Panel>Add/Remove and uninstalling the game. Once you've done that, go to the program's folder (typically C:\Program Files\Army Operations\ or C:\Program Files\America's Army) and completely delete it and all of its contents, just to be safe. Now install the full version of America's Army. Note that uninstalling the game will not mean that you'll lose your online soldier and his honor and training - that is recorded on the central AA server, and so long as you remember the username and password then you can access that character and his full history from any computer with AA on it. Also note that America's Army is an online-only game. While you can practice offline, you'll need to be online to login, save your training mission results and play online. See below.
Personnel Jacket
If you're new to America's Army it's important to create an online soldier. This is done by firstly making sure you're connected to the internet, then run the game, chose the Personnel Jacket button and click on the Create Account button. Follow the prompts given and you'll be taken to a site where you can register a new account.
Once you've created a new account, or if you have an existing account, you will need to enter the details in the Soldier Login section. Enter your username and password exactly as they were registered, make sure to tick the "Remember Username/Password Box" and click the Login button. You should see a "Transmission Completed" message after a few seconds meaning you are logged in. If you are having errors logging in, there are several possible causes and solutions:
Cause: The central authorisation servers are down/having problems (e.g "Timed Out", "Communication Error").
Solution: Try again a little while later.
Cause: The "Error Unknown" message may be caused by an account transition issue.
Solution: There are several things you can try.
Cause: Your account may not exist, or you entered the details incorrectly, or entered non-permitted characters in your name.
Solution: Make sure you have a registered account which has not been banned, enter the details exactly as they appear in your registration email, and don't use these non-permitted characters in your name: \ / : * ? " | < >. Note also that you cannot login or play online as "Enter Username Here".
If you keep having connection problems or getting strange error messages when running the game then read the Official America's Army FAQ for more troubleshooting help on specific errors or problems.
Training
If you're a new player, you need to understand that America's Army requires training before playing online. It may seem tedious at times, especially when attempting for Special Forces qualification, but in keeping with the game's overall theme, it is designed to familiarize people with the concepts and methods involved in being in the real US Army.
To enter training, click on the Training button. There are five sections under the Tours drop box - you must complete Basic Training before you can play any mission online. If you complete the Marksmanship component of the Basic Training to a high level (i.e. hit 36 or more out of 40 targets) you will also qualify to complete the Advanced Marksmanship course - Sniper school.
Once you've completed Basic Training you can then attempt the various tours and complete all the missions therein. It's important to be persistent and try to complete all training as without completing certain Tours you will not be able to play certain roles or use certain weapons in the game.
For example, if you do not complete all of the Medic Tour, you cannot be a medic within the game. If you do not complete (or don't have access to) the Advanced Marksmanship Tour you cannot select the Sniper role in the game. And finally, if you do not have 15 or more Honor (see below) and complete both rigorous components of the Special Forces Tour, you cannot play as a Special Forces soldier on the Special Forces maps online.
Joining an Online Game
Once you've completed Basic Training, you can join other people in playing America's Army online. To do so, you must go to the Deployment screen in the game. To view a list of online servers where you can play, click the Refresh List button in the Internet (default) screen. Note however that you must select the "Enable Punkbuster" box at the bottom right of this screen in order to be able to see and play on Official Servers and most Leased Servers. Punkbuster is a cheat detection program which you can find out more about here.
You can tell when the game has refreshed all the servers by looking at the progress area at the bottom left of the screen (e.g 256 Servers, 14% complete). Now try to find a server with a low Ping (See Network settings under the In-Game Settings section for more details), highlight it, and if there is an open slot then you can either double-click on it to join, or press the Join button at the bottom of the screen. Again, note that you may need to complete certain Training missions to join certain maps, such as the Special Forces (SF) maps.
The Score System, Honor and ROE
One of the unique features of America's Army is the Honor system. Your Honor is represented by the number to the left of your name on a server when you press F1. This represents a combination of experience and playing time, although it is not necessarily a reflection of skill. You may wonder exactly why your honor is going up or down, what influences it, and what it influences in the game.
Without getting into too much detail, Honor is affected by your score when playing on Official servers, and Leased servers which are honor-enabled. The more enemy you kill, the more objectives you guard/achieve, and the more times your team wins mean the higher your score, and this contributes to achieving higher honor.
Conversely, if you don't follow the Rules Of Engagement (ROE) such as attacking and/or killing teammates or civilians - whether accidentally or on purpose - you will get ROE points which detract from your score. A negative score will slow down or reverse your progress towards higher honor. If you are kicked from a server due to high ROE and end up in Jail several times then this virtually guarantees that you will lose honor points. You can find out more about ROE by pressing the Support button in AA, and clicking on the Overview button.
Honor plays a large part in determining whether you get your weapon of choice in the Weapon Selection phase of online play, as well as the requirement for 15 Honor or more to be able to play as a Special Forces soldier. If you want your honor to increase, you need to play as though you were in the real Army - be very careful not to violate ROE and try to achieve the team's objectives as often as possible and your honor will steadily rise. The America's Army Manual has a section which details how to identify friend and foe, and is also useful in familiarizing yourself with weapons details such as the fuse time on grenades and the possibility of misfiring an RPG-7. I strongly urge you to read it (See the AA Manual section below).
Here are the points (score) needed for each point of Honor for each Honor Range:
01-10: 500
11-20: 1,000
21-30: 2,500
31-40: 4,000
41-50: 6,000
51-60: 9,000
61-70: 13,000
71-80: 23,000
81-90: 43,000
91-99: 83,000
So for example if you have 13 Honor you will need to gain 1,000 points (net of any ROE) to go up to 14 Honor. If you have 53 Honor, you will need 9,000 points (net of any ROE) to go to 54 Honor, and so on.
If you want to see how many points you have left before reaching the next honor level, go to the America's Army Website, click on "Your Account" at the top right of the screen, click on Maintain Account, login using your AA username and password, and you will see all the details of your account, including how many points you have left before gaining another honor point.
You should also register for the ArmyOps-Tracker, and regularly visit the AAOTracker site to check out your various AA game statistics.
AA:SF Tweak Guide - The Essentials (Cont)
The Essentials - Continued
Weapons Modifications
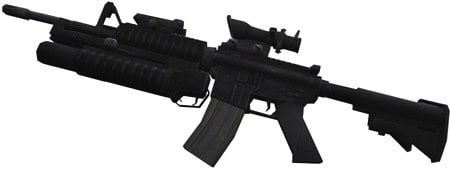
If you've passed the Special Forces Tour (See Training above) then you will have a section called Weapons Mods available under the Personnel Jacket screen. Here you can choose the personal modifications your SOPMOD M4A1 carries when playing on Special Forces maps. Even if this screen is available to you, unless you've passed all Special Forces training and have 15 or more Honor you won't have access to your modified M4 online.
There are six sections on the gun where you can attach a modification - 5 rails and the barrel. Each rail has a Heatshield by default, but you can add options like the M203A1 grenade launcher or M68 Aimpoint sight. Note that some mod slots only have a Heatshield available at present. Once you've customized your weapon, those will be the options your gun will be equipped with every time you join a Special Forces map online (and use an SF slot).
Some quick tips about weapons mods:
- when you join a Special Forces game, your weapon's camoflage will automatically be set according to the map.
- If you have the Suppressor installed as a mod, you must press a key (default is L) to use it at the start of the round. It is not on by default.
- Use of the grenade launcher mod requires pressing the Supported Fire key (default is H) to bring up/put down - the same as the standard M203 rifle. The same key applies for using the Bipod mod if that is installed instead of the M203A1.
America's Army Official Manual
Unlike most other games, America's Army can be very difficult to comprehend the first time you play online. Which buttons to press, who's friendly and who's foe, where the objectives are and how to get to them are all common questions new players ask when first playing online. While everyone is new at some stage, and we should all try to help each other out, if you're new you should try and make some effort to learn about the game's workings before playing online. To do this, you must first read the manual.
The full game manual is installed along with the game on your hard drive. It can be found typically under C:\Program Files\America's Army\Help. If you can't find the manual on your drive, the latest version can be downloaded as a PDF file from here. There is also a Quickstart Guide which is very handy for new players.
I cannot stress how important it is to read the manual from start to finish, whether you're new or experienced. It is genuinely useful and contains numerous tips, tricks and strategies, as well as pictures of the layout of each online map and a glossary of commonly used terms - these are all things which the best players use to their advantage.
Combined with some offline practice (See below), you will save yourself a lot of ROE, aimless wandering around and constantly asking other players questions - and inevitably being booted off a server. Even if you're familiar with an earlier version of AA, the intricacies of the new features in 2.0 are explained in full in the manual.
Offline Practice
Even though America's Army is an online game, it is highly recommended that you practice offline to gain familiarity with the maps, weapons, and general dynamics of the game, not to mention allowing you the opportunity to thoroughly tweak control, graphics and audio settings. Even after Basic Training you'll need to get a good feel of the layout of each of the maps if you want to play successfully online. Some maps, especially the new nighttime Special Forces maps can be highly confusing and you could wind up killing teammates and racking up a lot of ROE.
To begin offline practice mode:
1. Start America's Army and open the Console (press the TAB or ~ key).
2. Type "Start Mapname" (without quotes) to open a map, where Mapname is the name of a particular map (e.g. Pipeline or Sfcsar). All the mapnames can be found in your \America's Army\Maps directory.
3. To be able to move around and fire weapons, you will have to choose a character class. Type "Class Code" (without quotes), where Code is one of the following:
G - Grenadier (M203)
R - Rifleman (M16A2)
S - Sniper (M82)
S24 - Sniper (M24)
AR - Automatic Rifleman (M249)
M - Rifleman (M4A1)
M4M - Rifleman (Modified M4A1)
M4A1AUTO - Rifleman (M4A1 Automatic)
AT4 - AT4 Rocket Launcher
SPR - Special Purpose Rifle
AK - Opfor (AK47)
AKS - Opfor/Indigenous Forces (AKS74U)
GP - Opfor (AK74 w/GP-30 launcher)
RPK - Opfor (RPK Light Machine Gun)
SVD - Opfor (Dragunov sniper rifle)
MOS - Opfor (Mosin-Nagant sniper rifle)
RPG - Opfor/Indigenous Forces (RPG-7 Grenade Launcher)
V - Opfor/Indigenous Forces (Vss Vintorez)
SF - Special Forces
SL - Squad Leader
FT - Fireteam Leader
RCT - Recruit (no weapons)
Now, if you want to create some basic dummies for target practice, type the following command in the console:
summon agp_characters.NPC_soldier
That creates an inanimate opfor soldier who stands with his arms outstretched. You can shoot him and he won't move or fight back. If you want a bit more of a challenge, open the console and type "Walk" (without quotes). This will animate the dummy - he will start to move and shoot back. Be careful as although the dummy has only basic artifical intelligence he can be fairly accurate! You can also summon other NPCs (Non-player characters), but most will not shoot at you when you type "walk"...they have no weapons:
summon agp_characters.NPC_AirborneInstructor
summon agp_characters.NPC_AirborneSoldier
summon agp_characters.NPC_Ambient
summon agp_characters.NPC_Civilian
summon agp_characters.NPC_Doctor
summon agp_characters.NPC_DrillInstructor
summon agp_characters.NPC_FlightCrew
summon agp_characters.NPC_Nurse
summon agp_characters.NPC_TowerObserver
summon agp_characters.NPC_TowerObserverFemale
summon agp_characters.NPC_VirtualGeorge
If you want to summon up other weapons to use for yourself (they appear on the ground in front of you), try these commands in the console:
summon agp_inventory.PickupW_M16A2_Rifle
summon agp_inventory.PickupW_M4A1_Auto_Rifle
summon agp_inventory.PickupW_M24_Sniper
summon agp_inventory.PickupW_M82_Sniper
summon agp_inventory.PickupW_M870_shotgun
summon agp_inventory.PickupW_AT4_Rocket
summon agp_inventory.PickupAmmo_12gauge_7_rounds
summon agp_inventory.PickupW_AK47_Rifle
summon agp_inventory.PickupW_AK74SU_Rifle
summon agp_inventory.PickupW_MosinNagant_Sniper
summon agp_inventory.PickupW_SVD_Sniper
summon agp_inventory.PickupW_RPG7_rocket
summon agp_inventory.PickupAmmo_RPG7_PG7B
summon agp_inventory.PickupT_M67_Frag
summon agp_inventory.PickupT_M83_Smoke
summon agp_inventory.PickupT_M14_Incendiary
For more information on the commands that can be used in offline mode see the Official America's Army Manual.
Again there's nothing wrong with being new online and your teammates should take this into account and cut you a break. You'll usually find other players are willing to help you out if you show you're eager to learn. But at the same time you also have to put in some effort to learn the maps and gameplay as much as possible beforehand to maximise your (and others) enjoyment.
AA:SF Tweak Guide - In-Game Settings
In-Game Settings
Before we start looking at the settings, I want to point out something about America's Army. The game is based on the Unreal graphics engine (also used in games like Unreal Tournament 2003), and hence uses advanced graphics and audio techniques. As such, you must make sure that your system meets the game's Minimum Requirements. While meeting these requirements allows you to play the game, you should ideally be close to the Recommended Requirements if you expect to have smooth online gameplay. You will notice the recommended requirements are quite steep - that reflects the fact that America's Army is a very system intensive game.
In this section of the guide I provide details and recommendations for in-game settings to allow you to achieve a good balance between audio-visual quality and performance. To access the in-game settings, start up America's Army and click on the Settings button to access the full range of settings. These are then briefly explained below:
Video Settings
Gamma, Brightness and Contrast all affect how bright/dark, washed out or crisp your graphics appear in-game. Adjust these to taste in conjunction with your monitor.
Screen Resolution is also to taste, with the higher the resolution the lower your fps, but the more detailed the image. I highly recommend running the game in Full Screen mode to reduce any display problems or anomalies.
Now, select the Details button to get into more detailed graphics settings:
Textures: Under here are a series of settings for the textures (the surfaces or "skins") of various game elements. They range from UltraLow to UltraHigh.
Terrain relates to the complexity and sharpness of textures used to show the terrain in maps. The higher the setting, the lower your fps, particularly on large outdoor maps like Radio Tower, Mountain Pass SE and Bridge SE.
Weapon and Player texture settings are precisely that - the clarity and detail given to the "skins" applied to weapons and players. The higher the setting the more accurate and detailed these objects appear, but at a cost of reduced fps the higher the setting.
World relates to the complexity and clarity of objects such as trees, bushes, walls etc. The higher the setting the more realistic and detailed these objects appear. Note, if you set this too low, your weapon's iron sights might be too blurry to use.
RenderMap and LightMap, without getting too technical (because I'm not an expert) will improve the appearance and reality of objects in terms of lighting and shadows, with the higher the setting, the greater the performance hit.
Change All allows you to set all of the above to one particular setting quickly (e.g all to UltraHigh or Medium).
Remember that in general the higher the texture settings, the lower your fps will be. However the lower the texture settings, the more blurry, unrealistic and undistinct everything will be, which might give you playing advantages and disadvantages. If you have a newer graphics card, especially with 128MB of video memory, then the performance hit should not be too great from using the highest settings. If you have an older/slower 64MB graphics card, the lower you should set these textures, particularly Terrain, Rendermap and Lightmap settings.
Decals: Clicking the Decals button takes you to the Decals screen. Decals are the marks left by explosions and bullets for example. Increasing the number of Decals means more marks and hence greater reality, but more computer power and hence less performance.
Maximum Decals this setting can greatly affect performance when there are a lot of people firing on the screen, or an automatic weapon (SAW or RPK) is firing. The sheer number of decals generated can lag your graphics. Reducing this setting from the default of 100 can help to reduce such lag.
Door Decal this setting also affects performance if you are close to a door and firing (and/or being fired at) through it, especially when a SAW or RPK is involved. Reducing this setting from the default of 10 (e.g. to 5) can be a good balance of realism and performance.
Fade Door Decals this setting might be annoying for some people. If selected, the decals (damage marks) on doors will disappear after a while. It may distract you if you see a flickering on a nearby door as decals are removed, so perhaps untick it so that decals on doors can only be removed when they're not onscreen and hence not visible to you. If you have performance issues with door decals, try lowering the number of them first.
Advanced: The advanced graphics settings are described below:
Shadow Detail: The options here are as follows:
None - completely turns off all shadows. Can make things look unrealistic, but is best if you're struggling for fps.
Blob - allows shadows (if Projectors is ticked, see below) but makes them much less complex and hence improves your fps. A good compromise of realism vs performance.
Detailed - (again if Projectors is ticked) draws shadows in all their glory, but can give a significant performance hit which varies depending on your graphics card and the number of players on screen. I personally noticed a dramatic decrease in fps (on a 9800 Pro) with this setting in 2.0. While it looks fantastic, it can cause massive lag during large fight scenes.
Trilinear: This makes the graphics and colors seem smoother and cleaner, but can reduce graphics performance. Turn this setting off if you have a slower system or particularly if you have an older video card.
Triple Buffering: Turn this option on to reduce screen "tearing" (when VSync is off) and improve video performance. This can cause problems and glitches for those using older graphics cards, so turn off if you're experiencing problems.
Use Cubemaps: This is a trick used to make some reflective surfaces (e.g water or glass finishes) look like they're actually reflecting what's around them in 3D. Leaving it off can improve performance without any noticeable drop in image quality. If you have a faster system, turn it on.
Use Compressed Lightmaps: If you have an older graphics card, using compressed lightmaps can improve your graphics performance. Compressed lightmaps are smaller and hence take up less video memory, however the colors and shadows in the game will not be quite as nice or crisp and you may see noticeable "banding" in the colors. Unless you're really struggling for fps, leave this setting unticked.
No Client Side Effects: Turning this on will remove certain features like bullet shells, gun sounds, muzzle smoke, bullet impacts etc. Only turn this on if your system is really struggling online and even then think twice.
Disable Dynamic Lighting: Dynamic lighting allows the various lights in the game to react realistically with objects, shining at different angles off weapons, characters and walls based on the light's position. This makes for great effects but can decrease your framerate, so if you really want more fps tick this option. This can also help reduce lag from SAW/RPK fire (since they use tracers which shed light).
Detail Textures: Adds a level of detail or "grain" to certain textures which makes them look much crisper when examined close up (e.g the walls of the buildings in Radio Tower). However this can reduce your fps, so untick for more fps if necessary.
Use Projectors: Projectors covers a range of images projected onto textures, such as shadows from characters and objects (like tree shadows) and decals (see above). The noticeable effects of unticking this option include removal of such shadows and decals. Only untick Use Projectors if you really need a few extra fps as it can look very unrealistic without it on.
Use Deco-Layers: Use decorative layer textures such as grass. Disabling this can improve performance with an obvious reduction in visual quality and atmosphere, but again unticking this is mainly recommended for older graphics cards and those with less Video Memory.
Use Coronas: Coronas are the haloes given off by light sources. Unticking this option can provide a performance boost for older graphics cards, but at the cost of some realism.
Enable VSync: Without going into too much detail, Video Synchronization (VSync) is the synchronization of your graphics card and monitors' abilities to redraw the screen a number of times each second. This is measured in Hz (which is the same as frames per second), and your monitor will have a maximum rating in Hz for each resolution - e.g 1280x1024 at 85Hz. When this option is unticked, your fps will improve slightly, however you may see some image "tearing" as your monitor and graphics card go slightly out of synchronization when the refresh rate exceeds the monitor's abilities. Turn off VSync for best graphics performance, however if the image tearing is annoying then tick this option. Enabling TripleBuffering (See above) will help reduce any tearing.
AA:SF Tweak Guide - In-Game Settings (Cont)
In-Game Settings - Continued
Audio
Music and Sound Volume are fairly obvious and should be adjusted to taste.
3D Audio Mode: The available options are covered below:
Software - This is the most basic audio, and uses your CPU to process the sound. It's actually quite acceptable, and does provide good 3D audio. If you have a sound card or decent onboard audio, you can use that instead to provide better quality audio. However software audio will provide the best framerate performance.
Hardware - If you have a sound card, this option will make use of your sound card's hardware capabilities to extend the audio experience. It sounds better than Software 3D, but may reduce your fps slightly.
Hardware + EAX - This option will only work correctly if you have a sound card which supports EAX 3.0 or higher Environmental Audio. This means only Creative SoundBlaster Audigy1 and Audigy2 cards. For all other cards it won't do any harm, but you won't get any EAX and it is effectively like selecting Hardware audio (see above). EAX adds special effects to the sound and gives you advantages such as being able to determine with greater accuracy where people are (true positional), and being underwater or behind walls will sound more realistic (occlusion culling). However with this option enabled, you may notice a slight drop in fps. Note also that you will have to update your drivers (See my System Optimization Guide for more on Drivers and where to find them) for the Audigy to get proper 3D sound without problems.
Safe Mode - This option is only provided for those having sound problems with other sound modes. If your sound problems are resolved by switching to Safe Mode, then chances are you need to update or reinstall your sound card driver, or in the case of some VIA chipsets, install the VIA Latency Patch to reduce crackling for example.
Audio Channels: Depending on your audio hardware's capabilities, you can select the number of audio channels to dedicate to sound and music. The more the number of channels, the clearer and more distinct the sounds. Usually 32 channels is supported by, and fine for, most modern sound cards. Audigy1 and Audigy2 owners in particular with the latest drivers can enable 64 channels for even greater clarity, but with some level of performance hit due to the extra processing.
Reverse Stereo: Does as it implies, it switches left and right speaker output. Not quite sure why you'd want that except to confuse yourself.
Low Sound Detail: If you really need a performance boost, then you can select this option to lower the sampling rate of the sound, in effect lowering its quality. This might improve fps, but mainly on older systems and especially older sound cards, and is not really recommended.
Disable Music: Will turn off all music in the game, and might give a minor performance boost for those with less system RAM.
Message Beep: Selecting this option allows a small beep everytime a message is sent in-game. If you don't like the beeps, unselect this to turn them off.
Network
Choose the type of network connection you have from the four presented - Modem (56kbps or less), ISDN, Cable/DSL, LAN/T1. Note that once you've chosen your connection here, to get the very best ping and hence the least possible amount of online "lagging", you'll need to optimize your Netspeed setting in the console or Armyops.ini file. Instructions on how to do this are in the Advanced Tweaking section below.
Controls
Most of these settings are obvious and depend on personal preference. The quickest way to view and set all your player controls is to click the All button, and work your way through the list to the bottom. Pay particular attention to the Communication section, which has some very important keys. These include the Talk, Teamtalk, Report In and Medic commands which are vital to gameplay. One tip I have is if you use a mouse with a middle scroll button, set the Report In function to that button. That is, Report In should have "MiddleMouse" as the assigned key. Now every time you want to report in, you can simply click (press down) on the middle mouse button - quick and easy, and prevents a lot of confusion and teamkilling in the game. Also pay attention to the Action button, as you will be using this to open/close doors, pick up weapons and activate objectives.
Under the Options button, it is recommended that you tick the Auto-Swap from Grenade option so that you automatically switch back to your primary weapon after throwing a grenade. The Toggle Lean option when selected will mean that once you press a lean key, you will remain leaning until you press the lean key again. If unselected, pressing lean will mean you only remained leaned left or right as long as you're holding the lean key down.
Input
Mouse Sensitivity: The higher the number, the more sensitive your character movements will be to mouse movements. This setting only applies to the actual game movements and not moving the mouse around the user interface. There is no "correct" setting...it all depends on your mouse, the surface it's on, your general Windows mouse speed and your preference.
Menu Mouse Sensitivity: Just like the above option, the higher the number, the more quickly your cursor will move in response to a mouse movement in the user interface (menus, settings screens, etc.). If you experience some lagging while using the interface this is normal, and is a known issue with this version of AA.
Invert Mouse: Ticking this setting will mean that pushing your mouse forward will make you look down, and pulling your mouse backward will make your character's view tilt upward.
Reduce Mouse Lag: If you have issues with your mouse "lagging" on screen during play, then ticking this option will help resolve them. Unfortunately it will also reduce your performance to some extent, so if you have no mouse lag problems leave it unticked for an increase in fps. The best way to resolve mouse lag is to make sure you have a good ping, and more importantly that you optimize your Video/Audio settings for consistently high fps.
Enable Joystick: Fairly obviously, if you have a joystick connected and wish to use it with this game, you'll need to tick this option, otherwise leave it unticked if you're using the default mouse and keyboard configuration.
HUD
The HUD is the Heads Up Display - the area around the screen which shows important information about your soldier and his surroundings. You can choose to hide various elements of the HUD here. Select which to disable according to taste, however I recommend you leave most unticked if you want to be truly effective. You can also change the HUD color and Alpha (color brightness) here, as well as the shape of your crosshair. None of these options have any noticeable effect on graphics performance, so choose whichever suits you best.
Parental Control
Selecting this button gives parents the tools to set up a language filter, turn off all blood in the game, limit play to MILES (simulation laser-tag) servers only, and disallow the ability to play as an advanced marksman (sniper). Once the chosen settings are ticked, a password protection system stops kids from overriding them. Most people don't realise that the Language Filter is selected (on) by default, so if you don't want to use this filter, untick it and make sure the Password and Confirm fields are blank, then click on Set to remove it so you don't see **** everytime someone swears.
Well you're done with the in-game settings. Come back and fine tune them as necessary, but for now we move on to the advanced settings which can't be accessed through the in-game menus.
AA:SF Tweak Guide - Advanced Tweaking
Advanced Tweaking
You can change more than just the settings available under the in-game menus by editing two .ini files called ArmyOps.ini and User.ini in your \America's Army\System directory. First however, make copies of these files and keep them as backups so you don't lose all the default settings. If you do somehow lose these files, the files Default.ini and DefUser.ini contain the system default settings. Do not delete or alter the two default files - the system requires them to remain unchanged.
Also note that changing the ArmyOps.ini and User.ini files (as detailed below) is not considered a cheat or hack, either for Punkbuster purposes or by other players. Even [DEV]Abraxas has stated that the .ini files are there to be changed. It is simply customizing the game settings to maximize your system's performance.
ArmyOps.ini
Now open ArmyOps.ini with Windows Notepad or any other text editing tool and edit the following sections. Those that can be changed using the in-game settings aren't listed below:
[Engine.GameEngine]
CacheSizeMegs=32
This value represents the amount of System RAM set aside for holding AA game information. The more of the game is held in RAM, the smoother your fps due to fewer loading pauses while playing. The Cache size can safely be increased to 64 for all systems. As a general rule and to be safe, subtract around 200MB from your total RAM (for system usage) and set this cache to the remainder. For example, for 512MB of RAM set the cache to =300. If you experience any problems lower the Cache size back to 32. And once again note that this tweak will not dramatically increase fps - it is designed to reduce loading pauses in-game.
UseSound=True
Set this to False if you want to disable all sounds. Obviously not recommended, however the option is here if you want it.
[Engine.Player]
ConfiguredInternetSpeed=10000
This is a vital setting. It determines your network rate in bits per second. Tweaking this setting can improve lag problems.
For 56K modems, depending on your connection speed try values between 2400 and 3000 for optimal ping. As a rule of thumb, try and match your average connection speed (in kbps).
For ADSL/DSL/Cable and faster connections try higher values, ranging from 6000 - 8000. You can try the default value of 10000 but I find this is just too high to maintain a steady low ping
Remember that depending on the ping of the server you join, where it's located, who else is playing and how many others, you may still experience some lag regardless, particularly at the start of each round, or when lots of people join. Also remember that servers have a cap on this rate, so even if you set it very high it may still be limited by the maximum bandwidth the server is set to allocate to each player.
Something interesting to note is that your frames per second (fps) are limited by your netspeed. Netspeeds below 5000 will noticeably cap framerates for those with faster machines. For example, I get 60fps maximum with a netspeed of 5000, but 90fps maximum with a netspeed of 8000. You can adjust Netspeed "on the fly" using the Netspeed command (see Console commands below) to find which network rate gives you the best ping and framerate on the current server.
[ALAudio.ALAudioSubsystem]
Use3DSound=True
This should be set to True for most people, as it uses your sound card's 3D sound capabilities. However I found that despite having an SB Audigy, this was set to False for me by default. Setting it to true helped get rid of some audio glitches, so check to see if that's the case for you.
UseDefaultDriver=False
If set to True, this will use the default sound driver which comes with AA. If you have an advanced sound card like an Audigy 1 or Audigy 2, setting this to False will use your sound card's specific drivers, which should yield better performance and sound quality.
CompatibilityMode=False
If you're still experiencing audio problems, and you've updated your drivers (see above) and tried a range of other tweaks, then setting this to True may help resolve problems.
UsePrecache=True
This will pre-load sounds into memory while loading maps. Setting this to True is the best option for most people, as it avoids the small lags and hitches in-game if sound is loaded up during gameplay.
[D3DDrv.D3DRenderDevice]
HighDetailActors=True
Set this to True for a slight performance loss but graphics quality improvement.
SuperHighDetailActors=True
When set to True, this allows the highest quality of detail on the "actors" (i.e. people) in the game. Set this to False if you need the performance boost.
UsePrecaching=True
When set to True, the game will attempt to load textures and information into memory before it is required. This prevents loading pauses/stuttering during the play and is recommended that it be left to True.
UseHardwareTL=True
If your graphics card has onboard Transform and Lighting (T&L) set this to True. Most recent graphics cards do feature T&L, so unless you have an older card don't set this to False for best graphics performance.
UseHardwareVS=True
Similar to T&L above, this option makes use of the hardware Vertex Shader on modern graphics cards. More recent graphics cards feature Hardware VS, such as the GeForce3 onwards (but not the GeForce4MX), Radeon 9600 and so on. If you have an older card set this to False, otherwise leave at True for best graphics performance.
DesiredRefreshRate=60
If you have VSync enabled (See In-Game Settings) then your refresh rate will be limited to whatever this setting is. To reduce monitor flickering and eyestrain, you should set this value to the highest refresh rate supported by your monitor at your desired resolution. For example, your monitor may support a maximum refresh rate of 85Hz (85fps) at 1280x1024 resolution. This setting is at 60 by default, but you could set it to 85 to make full use of your monitor's capabilities and ease the strain on your eyes.
Use16bit=False
If your system is not very fast, or you have a very slow graphics card, then setting this option to True will mean the use of less colors (16bit colors vs 32bit colors) and hence slightly better performance. Note that you will see more "color banding" - that is the gradations in color will be much more noticeable. If you wish to use 16bit then it is recommended you enable the setting below as well.
Use16bitTextures=False
If you've enabled 16bit color, then using 16bit textures will improve performance without making things any worse. However if you're using the default 32bit color and enable 16bit textures you will notice a drop in texture quality with color banding as mentioned above.
Remember, settings that can be adjusted in-game aren't provided above. Use the in-game menus to make those changes. Also, a lot of the settings in ArmyOps.ini will not have any effect on the game. They are part of the Unreal game engine but not implemented in the game.
User.ini
Make changes to the User.ini file using notepad under the following sections:
[AGP.HumanController]
SkinTonePref=
This setting is blank by default, and you are randomly assigned a skin tone when joining a server. In earlier versions of AA, if you wanted to pick a particular skin tone, you could assign a value of Light, Medium or Dark to this setting, but it is currently disabled until a future version.
Face=
OpFace=
In earlier versions of AA you could edit these settings to change your character's face (e.g. to have a camoflaged face) - once again this feature is disabled until perhaps a future version of the game.
[Engine.PlayerInput]
MouseSmoothingStrength=0.300000
Represents the extent to which mouse smoothing occurs on your movements. I experimented with various values but didn't notice any difference on my optical mouse. If you are experiencing problems with your mouse smoothness, try varying values up to 1.000000.
MouseSamplingTime=0.008333
This setting effects how fast/slowly your mouse moves by taking samples at more/less frequent intervals (in seconds). As this number increases from the default the slower your mouse will seem as samples of your mouse movement are taken less often. Experiment with this setting if the default sampling time doesn't seem to help your mouse speed.
DoubleClickTime=0.250000
This setting controls the length of time in seconds during which a double-tap of a movement key is registered. In particular, since the sprint function in America's Army is tied to a quick double-tap of the Forward key, if you press W (default Forward key) twice within 0.25 seconds then it will register as the signal to start sprinting. Increasing this value will mean more time during which two presses of the forward key will trigger a sprint. I recommend setting this higher than the default, say to 0.400000 so that you can more easily engage the sprint mode. If you want to turn off double-tap sprinting altogether, set this value to 0.000000.
Note, if the above section and/or some of the settings are not in your User.ini, first change some of the mouse settings in the In-Game Settings, exit the game and check back in this file.
Console Commands
To bring up the console, press the '~' or TAB keys. The following are basic commands you can use in the console. Type the command and press return:
Stat Fps - displays your frames per second (fps) in the top corner. Type the same command to turn it off.
Stat Net - displays your ping and packet information. Type the same command to turn it off.
Netspeed [rate] - Sets your network rate in kbps (See ConfiguredInternetSpeed description above) while you're on a server. First join a server and open the console. Then use the Stat Net command to show you current ping and network rate (netspeed). Next try various netspeed values to see which gives you the best ping.
Flush - Flushes the game engine caches. Best used to fix texture corruption or graphic anomalies while playing. Note this command has no effect on Ping or connection-related lag, it should only be used if you experience graphical anomolies.
Open xxx.xx.xx.x:xxxx - connect directly to a server with the specified IP and port number. If you don't enter a port number the default will be 1716.
Disconnect - Disconnects from the current server.
Reconnect - Reconnects you to the last connected server.
Votekick [playername/playernumber][reasonnumber] - Votes to kick a particular player for a specific reason. Note that you don't need to enter the player's full name. Sometimes players use convoluted names which are hard to reproduce, so to avoid having to type their name out just type "Playerlist" in the console first, and use the number listed next to the player's name instead. The list of reason numbers is provided below:
1. Player is idle
2. Player is intentionally violating ROE
3. Player has used foul or abusive language
4. Player is spamming chat
5. Player is camping
Note that you cannot use reason #2 (ROE) unless the player in question has some ROE.
Playerlist - Shows all the players on a server, whether actually playing or just spectating. You can use the number listed next to the player's name in a votekick in place of their full name.
Reasonlist - Shows the votekick reason list (see above) in the console.
Exec [filename] - Executes the commands in the file with the specified name.
Set Input [key] [command] - Will bind commands to particular keys. E.g. Set Input N ThrowWeapon will make using N (key) throw your weapon (command).
Commosendmessage [messagenum] - Will send the message with the number in your current message state. E.g. Commosendmessage 1 will say "Move Out!" if you're in the Radio messages. You can bind specific keys with messages. For example:
Set Input P Commosendmessage 9 - will bind the "Negative" message to your P key.
Exit - Will close America's Army and return to the desktop.
Demorec [filename] - Starts recording a demo with the filename specified.
Stopdemo - Stops the recording of the current demo.
Demoplay [filename] - Plays back a previously recorded demo with the filename specified.
You can close the console again by pressing ~ or TAB.
Note that there are several Admin console commands which can be used by the server administrator to perform a range of functions, from kicking a player to forcing a change of class on the player. You can see a full list of console commands (including Admin commands) here.
AA:SF Tweak Guide - Conclusion
Conclusion
There you go. I hope the guide helped answer some of your questions about this great game, and helped you get the best performance and image quality out of America's Army on your machine. I sourced most of these tweaks from the Official America's Army Forums and from my time spent researching and writing my Unreal Tournament 2003 Tweak Guide - since America's Army is based on the Unreal game engine.
Anyway, enough tweaking, now it's time to get back into the battlefield and perforate some Opfor. Double time it soldier!!
If you have any comments or suggestions, or tweaks or resources you believe should be inserted in the guide I would love to hear from you. Email me by clicking my name at the top of this guide. And if you see me online, say "hi!" - I play under the nick PersianImmortal and I usually try to be a team player :)
Useful Links
Here are some great sites which contain more helpful information on America's Army such as the latest news on the game, strategy guides, AA community discussions, and useful utilities. I highly recommend you check them out:
America's Army Official Forums
MilitarySim
ArmyOps Tracker
CrazyDog's world
AmericasArmy Files
PhantomScript Utility
AA Keybind Utility
Note I've also recently written The Simple Antialiasing and Anisotropic Guide, and on page 5 of that guide I provide image quality and performance comparisons for America's Army using various levels of Antialiasing and Anisotropic Filtering. If you get a chance read the guide for more information.
Check here back often as this entire guide is constantly maintained to have the latest and greatest info on this game!

