Introduction
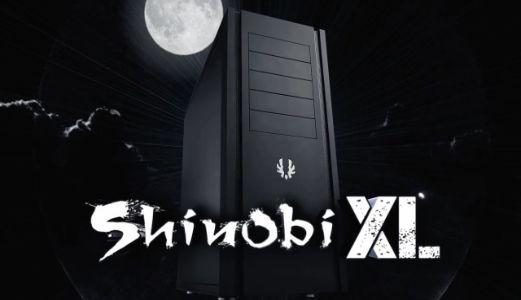
BitFenix is a company that over time has come up with some really great designs and additional components for cases since I have got to know them. As far as chassis design goes, the Colossus, Outlaw, Raider, Survivor and even the Shinobi were all great cases in their own right and always delivered a style that sets BitFenix apart from quite a few of the other manufacturers who just seem to be slapping together the same thing time and time again.
On top of that BitFenix tries to think about other aspects of the build as well and is why they offer Alchemy LED kits and sleeved cables and why they develop the Recon and Hydra Pro fan controllers, USB 3.0 front panels, assorted Spectre fans and bay adapters and covers. This makes them an almost one stop shop for a themed build with any bit of kit you could want to install.
I assume most of you have seen the Shinobi I reviewed right around this time last year and this new chassis is a take on that design, but in reality it mostly keeps just the aesthetics using the defined lines and SofTouch coatings, it even has a similar mesh panel on the top, but even that is different. There is a complete redo of the interior, not just an enlargement of the original design, but that isn't all. There is this new feature on the latest submission called a SuperCharge port, along with something called a FlexCage that I want to get to know a little better since these are something I have yet to see on any BitFenix offering.
The chassis we are about to delve into today is the Shinobi XL from BitFenix. As I addressed this chassis is a mix of a lot of new things mixed in with the style and features that have been a huge success for BitFenix up to this point. There is no need to completely change something that isn't broken, but even though the name may say Shinobi, this is a chassis that can stand on its own and offers way more than what the original design brought to the table.
What I do like already is that this isn't just an enlargement and BitFenix is sticking to their words and trying to innovate and create new things with each and every release. Come and see what BitFenix has in store for us this time with the Shinobi XL full tower chassis.
Specifications, Availability and Pricing
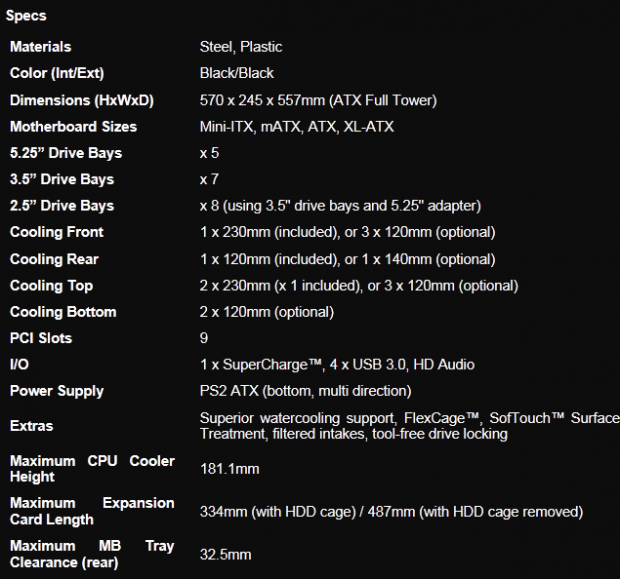
Externally with the Shinobi XL it keeps the all black theme with just a simple brushed aluminum "Fenix" on the front, along with five bay cover this time and of course the wide vertical mesh grooves that come from the Shinobi are present. At the top there is a well appointed I/O panel that includes this SuperCharge port and a vast expanse of steel mesh that is surrounded by more plastic with the SofTouch coating and again the grooves continue here as well. The SuperCharge port can deliver 2.5 amps of power to keep any mobile device charged for use and quickly recharges or "SuperCharges" them when they are about to die.
On the left of the chassis there is a large window in the version I received, while the right of the chassis is plain and black. There are fan filters that can be found on all of the intakes to the chassis comprised of a PSU filter, two 120mm fan openings in the bottom of the chassis are also filtered, along with a large filter in the front to cover the 230mm fan directing air flow into the chassis. On the back of the chassis you have four water cooling holes and nine expansion slots.
Internally you can install up to five 5.25" drives or devices and under that is room for up to seven 3.5" drives that also allow for 2.5" drive mounting. While each drive bay uses the same plastic trays as we expect from BitFenix, the steel cage is removable this time with the removal of a few screws and this is what is called the FlexCage. The motherboard tray has eight wire management holes, seven with grommets and sixteen tie points for the wiring. The tray also has holes in it that are clearly marked for mini-ITX, micro-ATX, ATX and XL-ATX motherboards, although an XL-ATX board will negate a lot of the management options. To cool the chassis BitFenix includes a pair of 230mm Spectre fans along with a 120mm version and they all receive power via 3-pin fan connectors with no adapters included. One of the 230mm fans is used as the intake fan at the front, while the other 230mm fan is strapped to the roof working as an exhaust fan. The 120mm fan is also acting as exhaust and is placed in the back of the chassis with great alignment to air coolers.
It seems like it was quite some time ago, mid-April maybe that I was told these cases were on their way to the US shores. Even so, I am still not able to locate either the Window version like I have or the plain non-window version that came first. I do recall being told that the MSRP would be right around $149, which isn't too bad for all the case you get. For those of you reading in just about any other market the Shinobi XL is listing at a few places. If you are paying in Euros, expect around 140 €, for those still going with the Pound, expect near £120. Now you have to realize that the pricing I have found and was told are based on the plain BitFenix Shinobi XL and not the version with the window as you are about to see it. With this addition I would expect pricing to jump $20-30 for the chassis I received.
Packaging
Done by manufacturers to keep the money in the chassis and not in the packaging, BitFenix uses the black screening on cardboard to display the company logo and the name of the chassis on the front of the box.
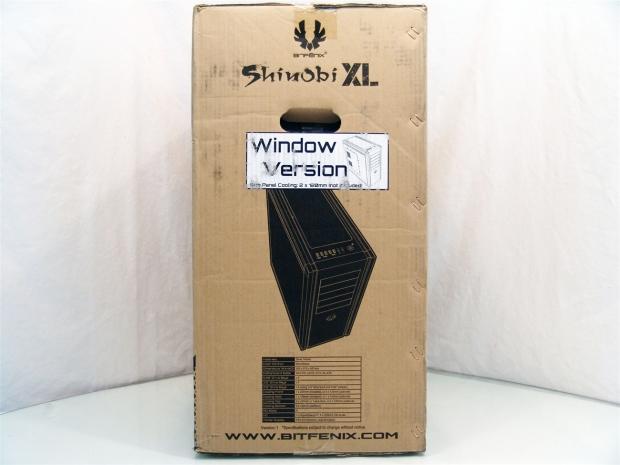
On the side there is a large sticker on the box claiming this is the Window Version of the Shinobi XL. Below a drawing of the chassis there is a full list of the chassis specifications.
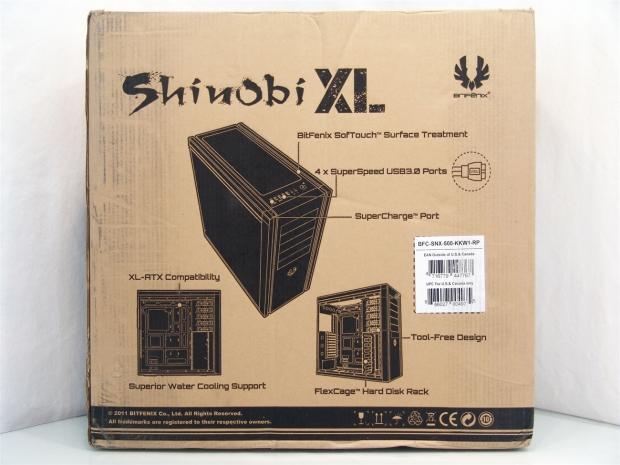
On the back BitFenix points out the SofTouch finish, the four USB 3.0 ports and the SuperCharge port. At the bottom of the panel there is a rendering of the interior of the chassis denoting the motherboard compatibility and water cooling support while the one on the right covers the tool-free design and the FlexCage.
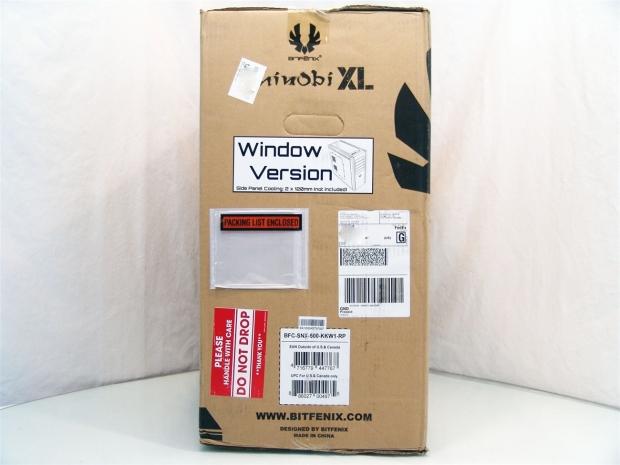
This side of the box would have been rather plain without all of the stickers applied for transit. Even with a few "Do Not Drop" stickers on the box, the currier managed to still crush the corner at the bottom pretty good.
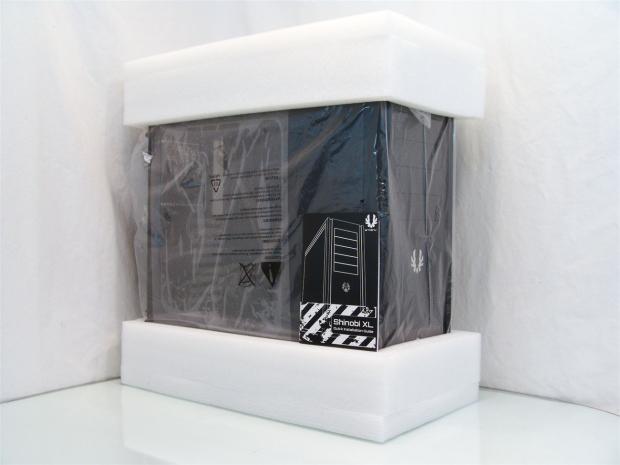
Even with the solid hit to the corner of the box, the chassis is safe and sound in the high density foam used to support the Shinobi XL in its travels. There is also a plastic liner used along with a sheet of static cling plastic to protect the window and the chassis from vibrations. The manual is shipped floating around in the box, so make sure you grab that for later.
BitFenix Shinobi XL Window Version
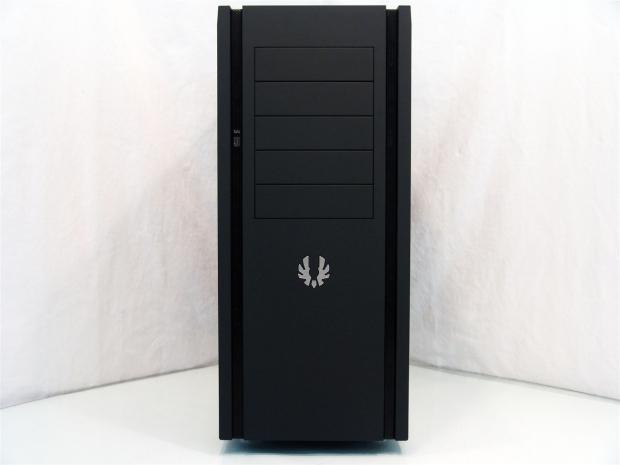
The front of the Shinobi XL offers five bays behind the covers and a brushed aluminum "Fenix" surrounded with the flat black look of the SofTouch coating. Keeping with the Shinobi name, the sides have the same inserted mesh grooves that keep things in the family.
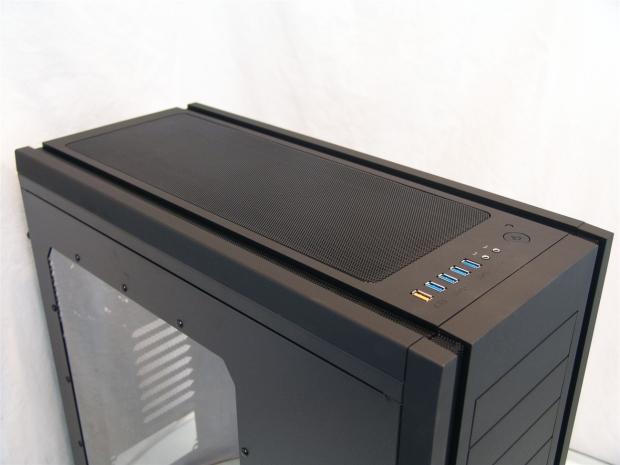
The top of the chassis offers an I/O panel at the front edge and pretty much the rest of the top of the XL is covered with mesh to allow the chassis to breath, as well as possibly a triple 120mm radiator if you plan to water cool.
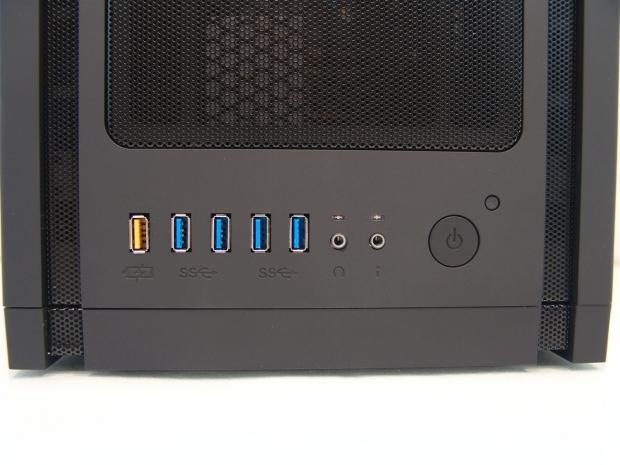
The I/O panel offers the yellow SuperCharge port for charging mobile devices followed by four USB 3.0 ports. There are also 3.5mm jacks for the headphones and microphone under the power LED and the HDD activity LED. On the right is a very large power button and a tiny little reset button.
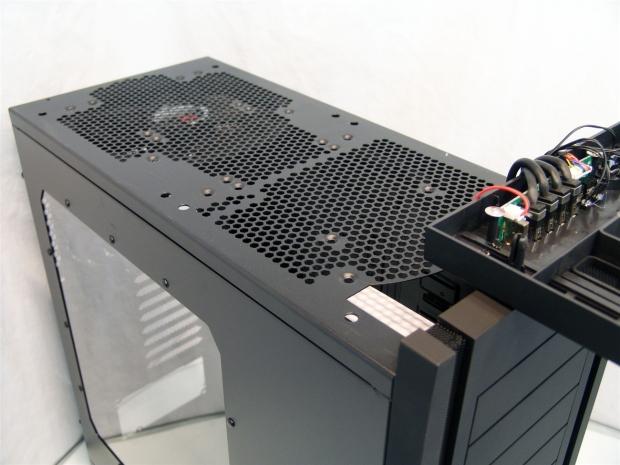
Be careful of the front I/O wiring, but the top is fully removable to allow you access to the screw holes in the steel roof of the XL. Here you can run a pair of 230mm fans, a trio of 120mm fans and yes that means a triple 120mm radiator will fit and there is plenty of room before you hit the motherboard.
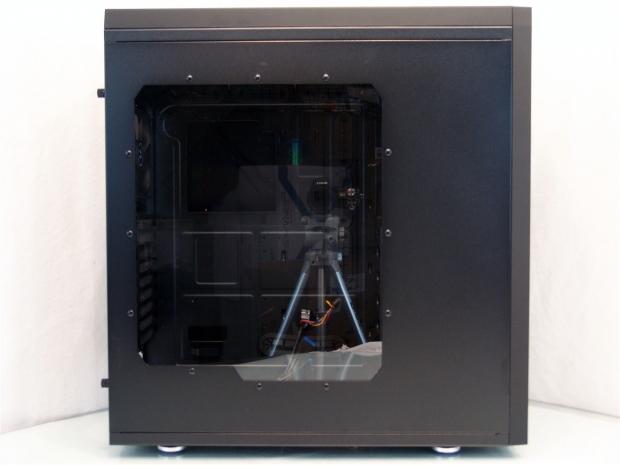
Obviously this is what makes my Shinobi XL the Window Version. This large window is held to the steel with plastic push-pin type locks and surprisingly in a chassis from BitFenix, there are no fan holes added to this window. I prefer my windows without fans, so this is a nice thing to find.
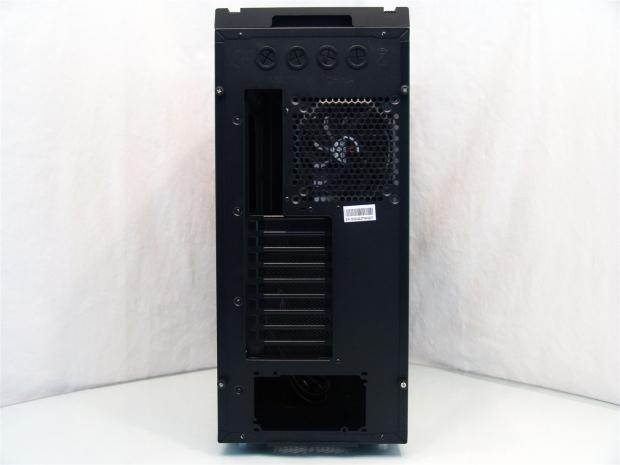
In the back of the Shinobi XL, at the top you can see where to grab to remove the top panel just above the four water cooling holes. You then have the 120mm exhaust fan, nine expansion slots and the large hole to install the PSU at the bottom.
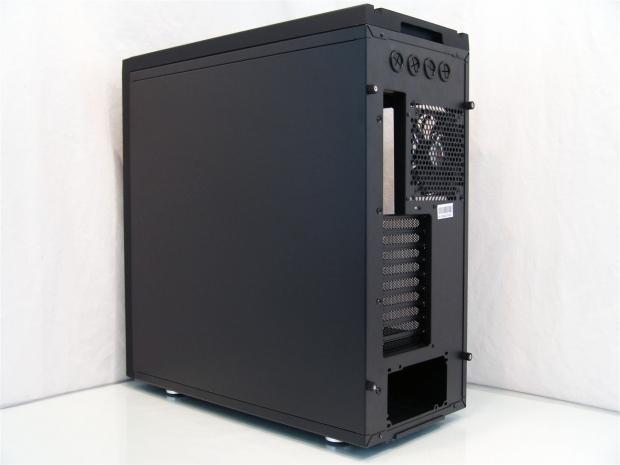
Both doors are held in place with large thumbscrews and the right side panel of the XL is plain and offers not much more than the textured, painted, black expanse of steel.
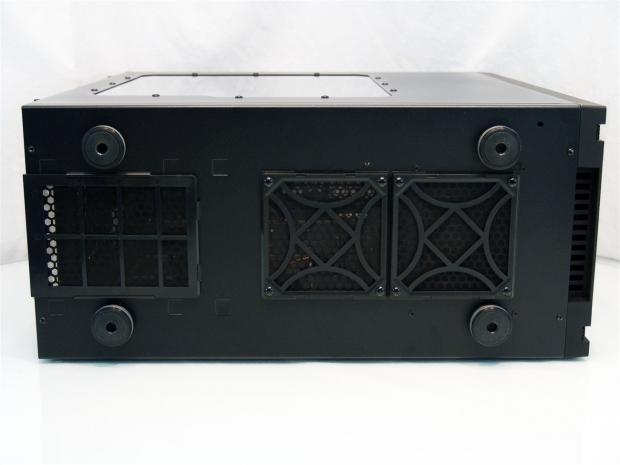
Under the chassis there are three fan filters, one for each of the two optional places for 120mm fans, as well as under the PSU to keep things dust free inside. The four plastic feet are trimmed with a ring of brushed aluminum to match the logo on the front and near the front feet are four of the screws to remove the Flex Cage.
Inside the BitFenix Shinobi XL Window Version
[Img]15[/img]Removing the front panel shows us a few things. If you want to use more than one 5.25" device you need to remove the break out panels. Secondly, the 230mm fan has a dust filter and this fan can be swapped for a pair of 120mm fans (possibly a radiator). The last thing is that the log is removable and other colors can be purchased to replace it for a personal touch.
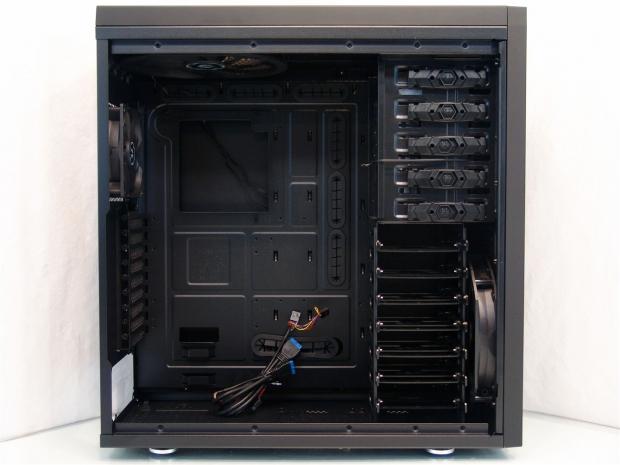
The first look inside the Shinobi XL shows that the wiring is tied together and passed through a management hole to keep it from doing any damage during transit. It's hard to see, but the wire tie holding the hardware box that is in the optical bays is there.
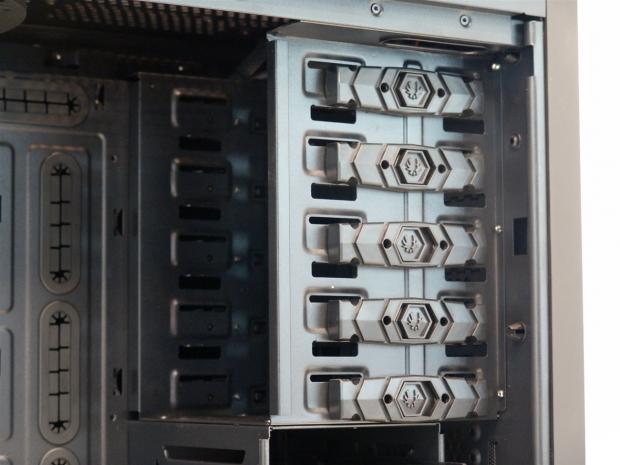
Speaking of these bays, there are five in total and they use these tool-less clips on both sides of the bays. Slide the logo back to release the locks, slide a drive in and then slide the logo to the right as you push on it and it clicks as it locks the drive into place.
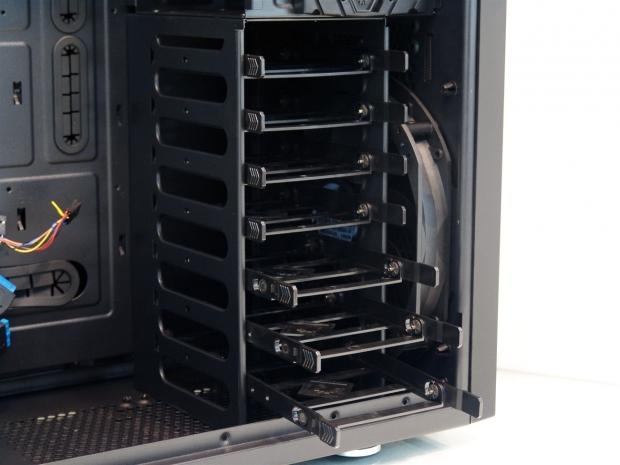
Here we have the FlexCage system. There are seven bays with plastic tray that accept both 2.5" and 3.5" drives and these trays just slide out to use them. To remove the FlexCage entirely there are four screws on top, three in the back and four in the bottom that need to be removed before this cage is set free.
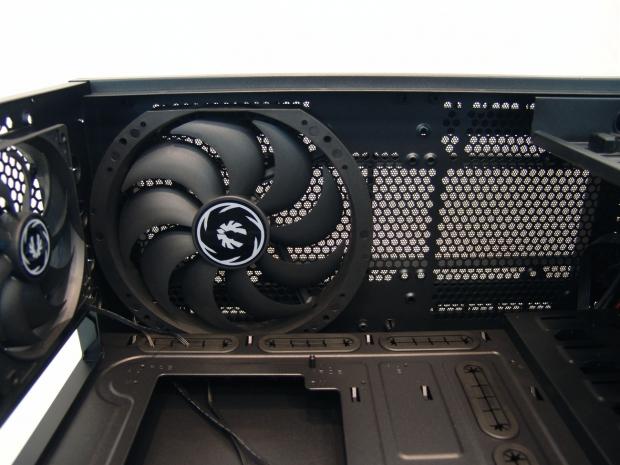
Above the motherboard tray there is roughly 30mm from where the top of the motherboard is until I hit the bottom of the Spectre fan. So for water coolers out there, there is roughly 55mm of room for radiator and fans.
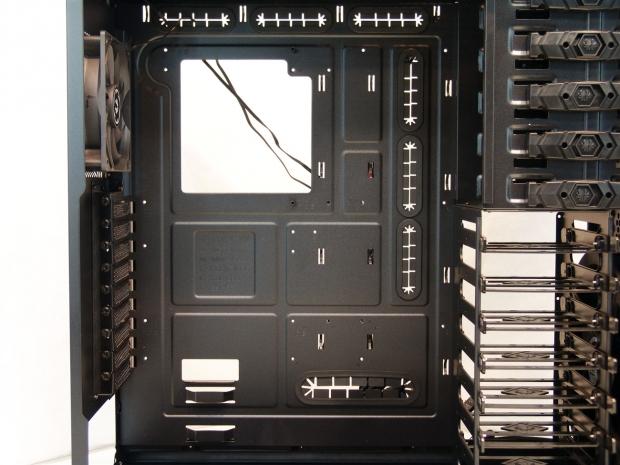
This motherboard tray has everything you need, right where you need it. With eight places to pass wiring, double that amount for places to tie wiring to, a large well placed CPU black plate access hole and compatibility for many motherboard form factors; I don't think they left anything out.
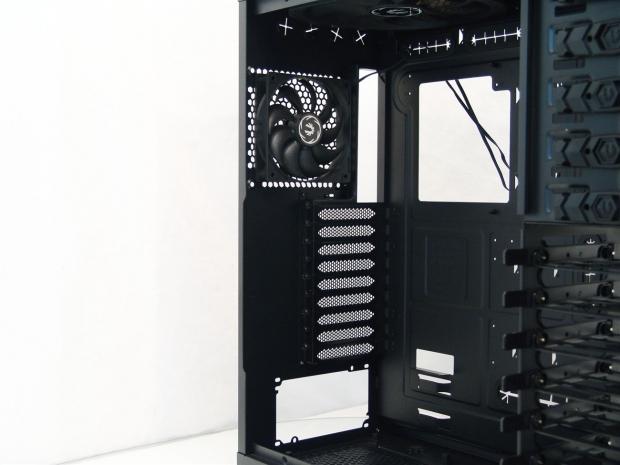
Inside the rear of the chassis the 120mm Spectre fan hangs above the nine ventilated and replaceable expansion slot covers, all of which are held into place with thumbscrews to secure them and your cards.
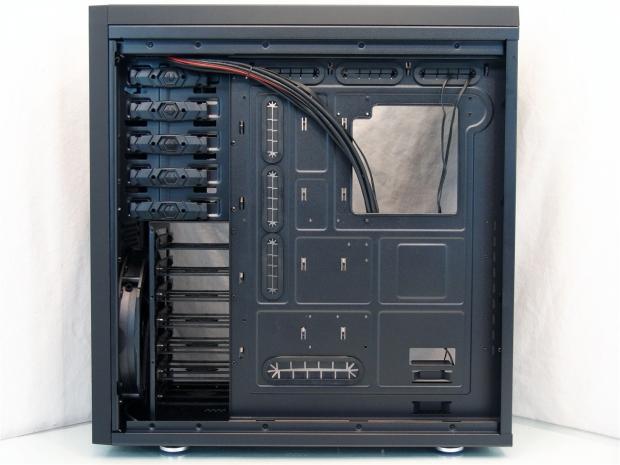
Behind the motherboard tray there is over 30mm of space in most areas to be able to easily route any cabling or the wiring from the front I/O panel. I plan to have a bit of fun wiring this chassis, with all the options the gears are already turning with how easy this is going to be.
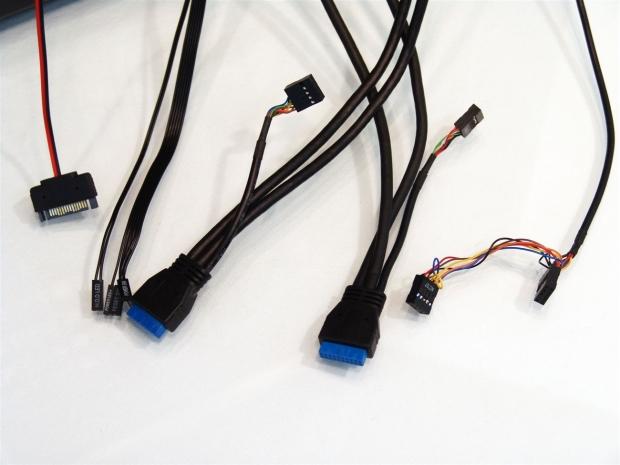
The included wiring is all black, even the ribbon with the power, reset, HDD activity and power LED. The SATA connector on the left powers the SuperCharge port and you get two native USB 3.0 connections with USB 2.0 tails attached. That just leaves the HD Audio and AC'97 connection on the right to finish up here.
Accessories and Documentation
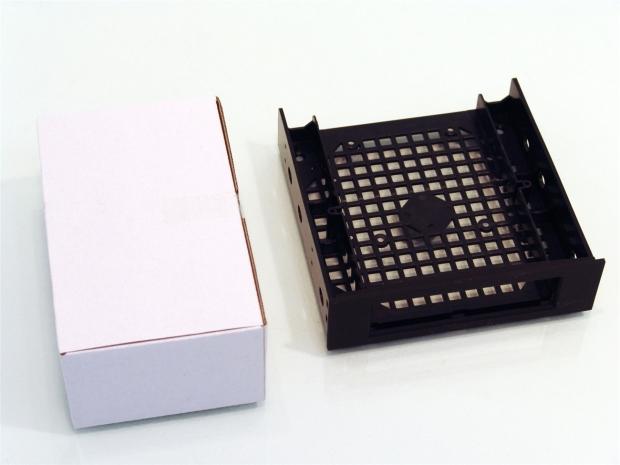
When I removed the white box of hardware from the optical drive bays I noticed something black falling out of the bays when I released the wire. BitFenix included a 3.5" to 5.25" adapter for those who still use floppy drives or maybe have a card reader you want to install.
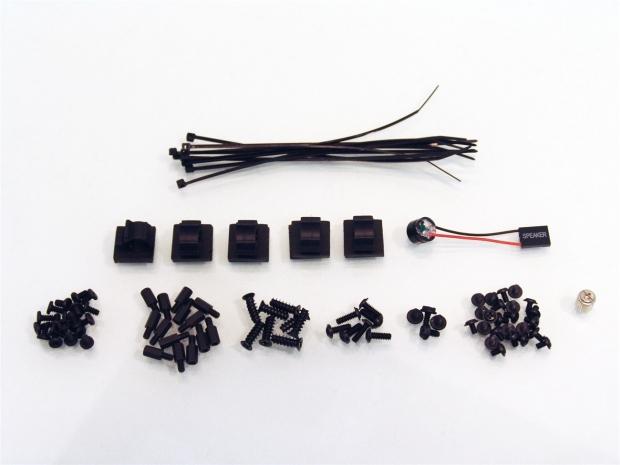
Inside the hardware box you will find ten wire ties, along with five clips to stick wherever you want to help with wire management. There is a motherboard speaker included along with the motherboard/3.5" drive screws, risers, fan screws, fan filter in the floor screws, PSU screws, 2.5" drive screws and a socket to aid in riser installation.
Here is the BitFenix Shinobi Xl quick installation guide. Again staying in black and white saves money, but that isn't to say there isn't useful information to be had in this monochrome manual.
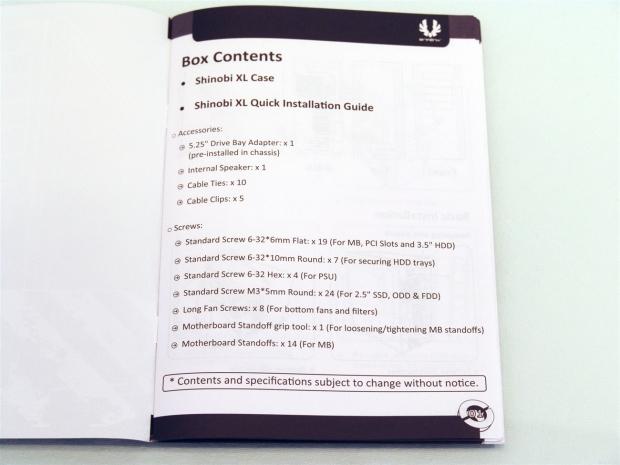
The guide starts off with a list of the contents as far as the chassis, this guide and all the hardware we just went over so you are sure you are ready to continue on with the build.
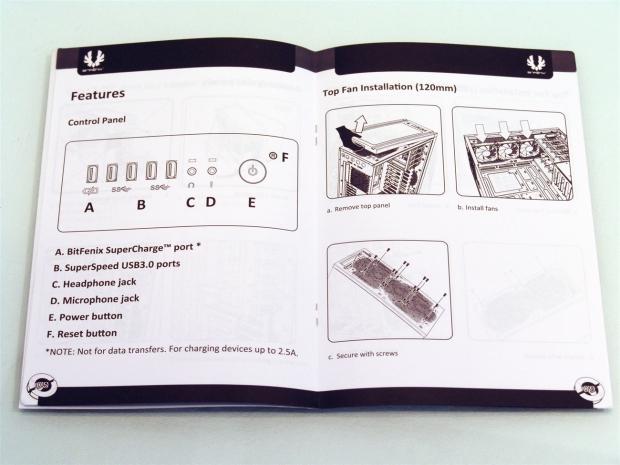
There is a bit of explanation about the chassis previous to this, but I liked that they show the I/O layout and warn you that this is not a transfer port. On the right is how you gain access to the top fan to swap them out or whatever trips your trigger for cooling in the roof of the XL.
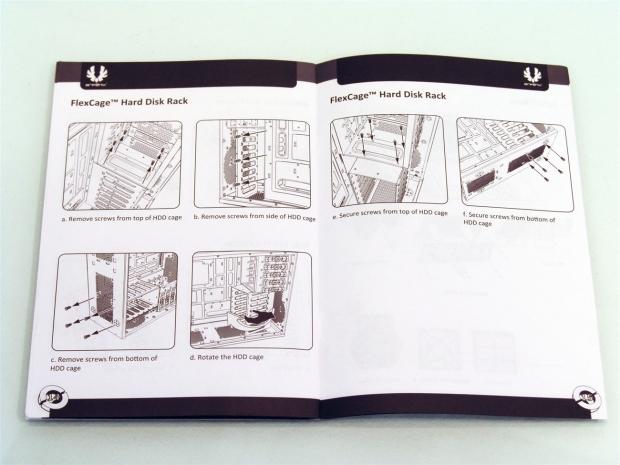
There is also a very detailed section on the removal of the FlexCage system. You need to pull the trays out, remove eleven screws and then twist the drive cage out. ProTip: Remove the fan filters under the chassis before twisting the cage.
The Build and Finished Product
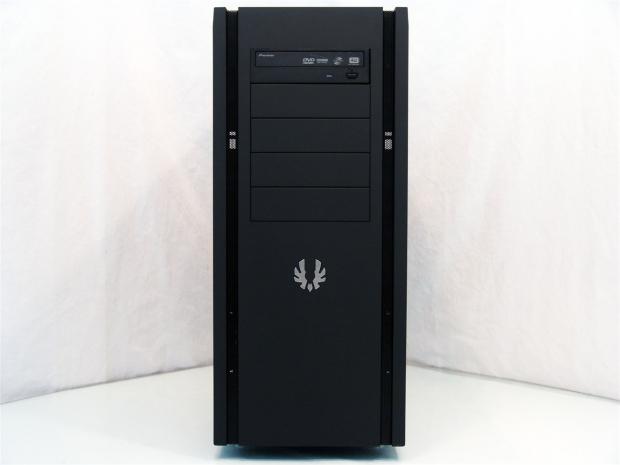
Something is amiss dimensionally in the ODD bays. This has to be the toughest time I had not only trying to slide the drive in the metal frame, but I also found the tool-less latches used screws that were too long as well. I eventually got the drive in and to be honest the front of the Shinobi XL looks really good.
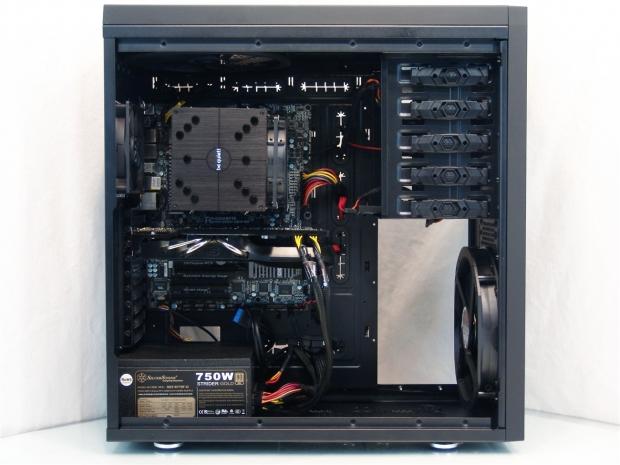
I had absolutely no issues inside of the chassis with my time in the XL. Since I use an SSD, I removed the FlexCage and mounted my SSD to the floor of the ODD bays. This case is really large and this ATX build with the HIS Radeon HD 7950 are made to look tiny inside of the Shinobi XL.
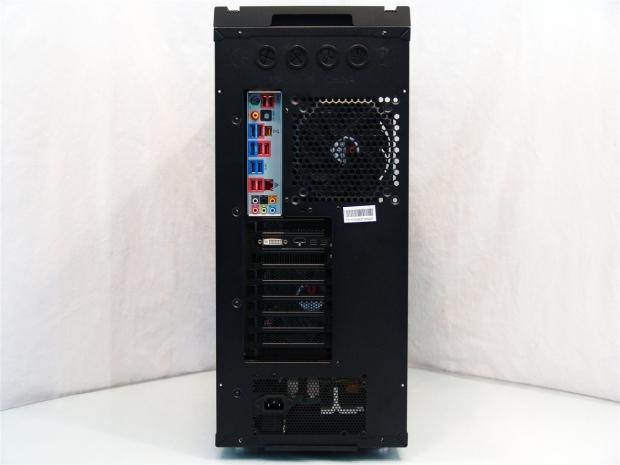
The back of the chassis also offered no issues with the rear I/O plate, the mounting of the card or even the PSU, everything went smooth as silk.
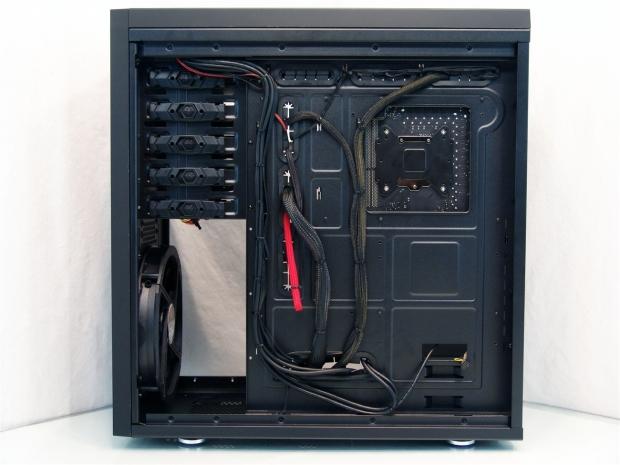
I dug into my stash of zip-ties and went to town with the wire management behind the motherboard tray as I said I was going to. With all the room and what seem like limitless tie points, I had a great experience making it as clean as possible - BitFenix makes it so easy.
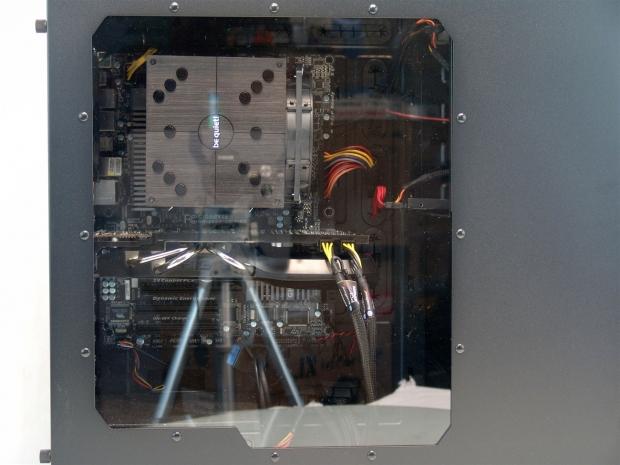
For those wondering what sort of view the window offers once the build is completed; here you have it. The window is as large as it can be without making you look at the drive bays and I like that it isn't a basic square, the little touches are what add up in the end.
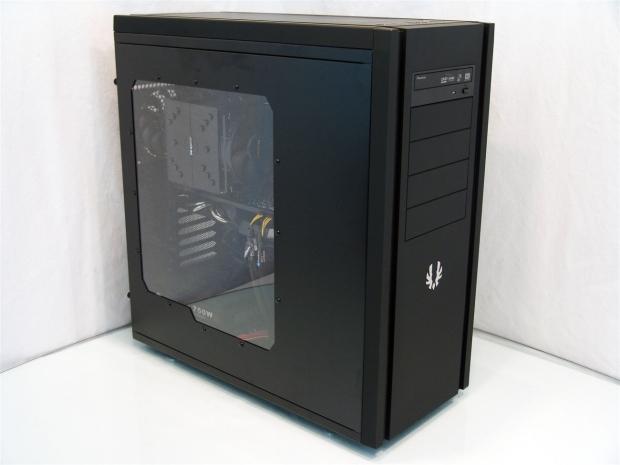
This is last look at the completed BitFenix Shinobi XL before I add power and put it through the paces.
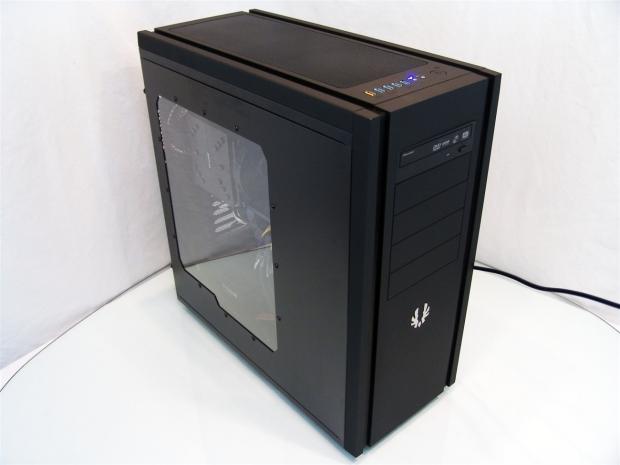
Once power is added there is hardly any noise audible from the range of taking this image, I had to be within six inches of the case to hear anything and I am pretty sure it is the 120mm fan since I could only hear noise from the back of the Shinobi XL. As for the lighting, well there is only the HDD activity and the power LED that illuminate with bright blue LEDs at the top of the chassis.
Final Thoughts
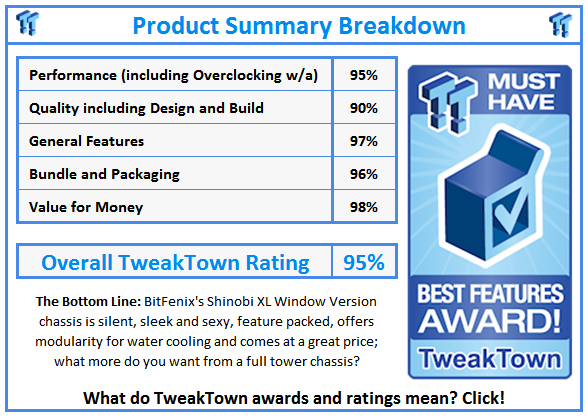
Ever since I received my Colossus from BitFenix, it never ceases to amaze me the things they think up and design. More directly trying the XL we just looked at, the original Shinobi was a win on the outside, but looking back now, the inside of the chassis as well as the feature set wasn't all that good compared to the way the Shinobi XL is put together. Granted I did have an issue with the ODD bays, but as you could see in the build images, I ended up winning that little battle. That being the only issue I had with the chassis through disassembly, the build and getting this build fired up, everything just sort of falls together in this full tower design that rightfully carries the Shinobi name.
The feature and there are many with this chassis. There is the fact that this is a Window Version of the XL and there is the removable FlexCage, and even though it is a little complicated to remove and install, I am glad to see BitFenix offer the flexibility for either unimpeded airflow or potentially a spot for a double 120mm radiator. Offering the SuperCharge port is really handy for those who either always charge various devices or maybe yours just takes too long. The 2.5 amps supplied via a SATA power connection will speed up any charge, hence the name SuperCharge. The deep offset of the motherboard tray, the way the doors close like a car door and the plethora of options to manage wiring in any way you can possibly see fit, BitFenix really went the extra mile. The fact that again we get 230mm Spectre fans to cool the chassis is a huge plus for not only airflow, but it makes the use of this case a near inaudible experience.
I know I am likely forgetting a few things, like all the access built into the chassis for water cooling and the ability to take on builds from mini-ITX to XL-ATX makes this a good solution for any build really as long as you have the room to use the Shinobi XL. Without the window this chassis will eventually list in the States for right around $150. The windowed version may end up costing a bit more, but to be honest, this is a chassis design that most other companies would be at the $199.99 mark or beyond once the window was added.
At that price I would say the BitFenix Shinobi XL would be worth every penny, to be able to get a version of this chassis for around $150 is a steal. What really won me over in the end, is while this version does offer a window, there wasn't any flashy lights or annoying LED placements to blind you from across the room and this large volume of chassis is very well ventilated as it ships from the factory and gives you the ability to put three radiators inside the chassis if you plan correctly.


 United
States: Find other tech and computer products like this
over at
  United
Kingdom: Find other tech and computer products like this
over at
  Australia:
Find other tech and computer products like this over at
  Canada:
Find other tech and computer products like this over at
  Deutschland:
Finde andere Technik- und Computerprodukte wie dieses auf