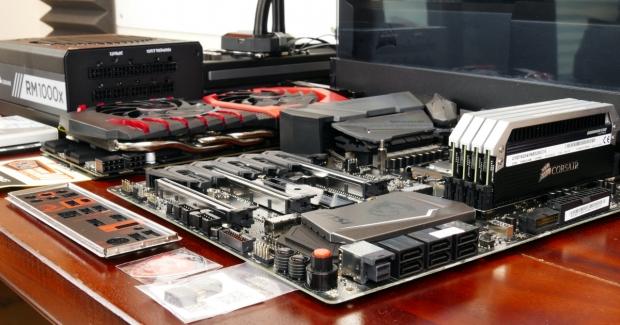
MSI Gaming Build Part Selection
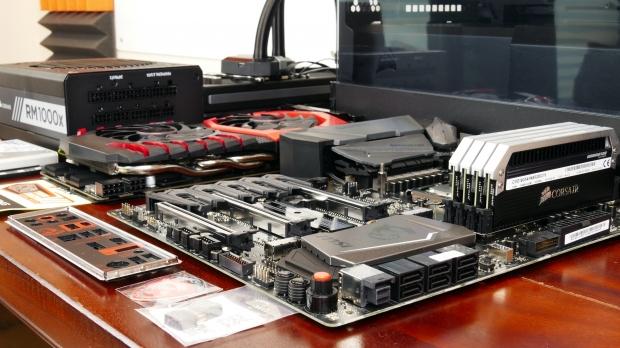
We decided to team up with MSI to bring you our first sponsored build guide featuring the MSI Z270 Gaming M7 and MSI GTX 1080 Gaming X 8GB. The purpose of this build guide is simple; we will go over the component selection, physical build optimization, UEFI optimization, software optimization, and finally overclocking.
The guide will offer both a shallow and deep dive into the build so that both novice and experienced users can optimize each part to get every last drop of performance. If you have never built a computer before, this guide doesn't necessarily cover how to build a computer, but MSI's motherboard manual does. Pages 3 to 12 of MSI's Z270 Gaming M7 manual detail how to build a PC.
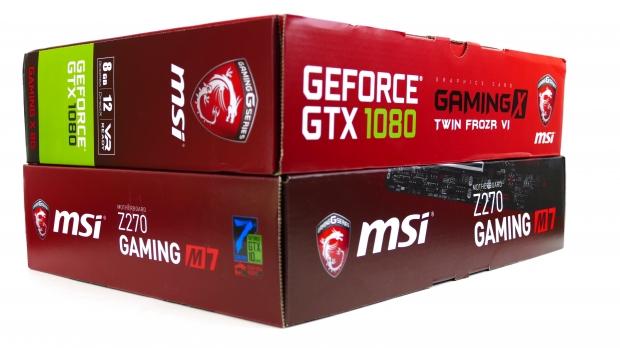
The guide will focus on two of MSI's top products; the GTX 1080 Gaming X 8GB featuring the Twin Frozr VI cooler (Review Here) and the Z270 Gaming M7 motherboard (Review Here). MSI is one of the top vendors for enthusiast-grade motherboards and graphics cards, and that's because of their commitment to producing gaming oriented products.
The build we are going to walk-through has been designed and optimized to feature some of the fastest available components, and these two products are some of MSI's best and most popular. The graphics card has been optimized to operate at extremely low noise levels while providing top notch performance, while the motherboard is designed to support the latest technologies and easy configuration (including overclocking).
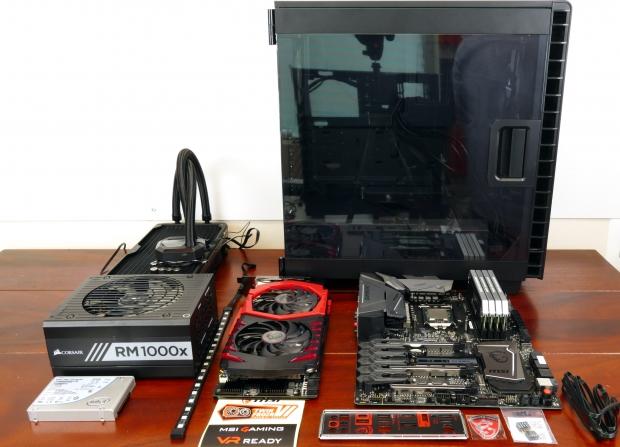
The rest of this build was done with components I chose to reduce bottlenecks and optimize compatibility; you can change the part selection depending on your needs. I will discuss each part, why I chose it, and what you might want to change.
Test Setup
- CPU: Intel Core i7 7700K - The LGA1151 socket paired with an Intel Z270 chipset motherboard can take full advantage of the 7700K and 7600K. If you don't do much in terms of multithreaded work, the 7600K might be a preferable alternative. The IPC of Skylake (6700K) and Kaby Lake (7700K) are almost identical, and you can use either CPU. However, the 7700K overclocks much easier and supports a few more features (Optane).
- Motherboard: MSI Z270 Gaming M7 - The MSI Z270 Gaming M7 is one of the most popular MSI gaming motherboards, offering many great features for its price. It has almost every modern feature you could want and offers many unique MSI features. When you buy a vendor's most popular product, you are almost guaranteed they will support it better than their more unpopular ones and that the community approves of it.
- Cooler: Corsair H115i GT - Buy from Amazon - I used this cooler because I had an extra, but I wanted to make sure to use a double radiator AIO. While some users prefer to use their custom built water cooling setups, I decided to go AIO to save time and peace of mind (leaks). I have been a fan of Corsair's AIOs, and their performance is good enough to overclock Intel's 10-Core 6950X, so it should be good enough to cool our 5GHz 7700K. You can use whatever cooler you like, just remember that the overclocking limiter for modern Intel CPUs tends to be cooling.
- Memory: Corsair Dominator Platinum (4x4GB) 3200MHz - I had this kit on-hand, as the 32GB version just replaced it in my review test-bench. Memory compatibility is one of the most common issues that leads to failed boots, instability, and just random problems. If you want to be 100% sure that the kit you purchase won't cause problems, stick to MSI's Memory QVL.
- Video Card: MSI GTX 1080 Gaming X 8GB - Based on NVIDIA's famous Pascal architecture, this GTX 1080 offers 8GB of GDDR5X, a hefty Twin Frozr VI cooler, and custom PCB. Cooling is what sets many GPUs apart, and MSI is known for having some of the highest performing and quiet coolers around.
- Storage - Boot Drive: Samsung 950 Pro 256GB - Samsung makes some of the fastest NVMe-based M.2 SSDs, and MSI's motherboard can take three of them at the same time. The Samsung 950 Pro is an excellent choice for a boot drive, so is the 960 Pro. If you are on a budget, Intel's 600p offers a lot of storage for a small price. I highly recommend you get an SSD (SATA or PCI-E) for the general experience enhancements they provide.
- Storage - Game and Movie Storage: Intel 750 400GB U.2 - I wanted to highlight the U.2 connector onboard, and I had an extra Intel 750 on-hand I had been itching to use in a multi-purpose build for local file storage (I use a NAS for local permanent storage). I realize that 400GB isn't enough for a large game collection (I mean, AoS is 86GB alone), so you might want to replace the 750/add a 2TB storage drive. I will warn you right now; some SATA ports will be disabled when some M.2 ports are used, that is not MSI's fault but rather a platform limitation to allow for M.2 RAID. I will cover how the ports are switched on the next page.
- Case: Corsair Carbide 400C - The Carbide 400C is a compact, elegant, and well-built case. It has great cooling potential, easily fits a dual radiator AIO, and I like the tinted side panel. It doesn't have any front bays for optical drives or other devices, so if you need those or want a bigger case, you might want to choose something else.
- Power Supply: Corsair RM1000x - The RM1000x offers fully modular cabling, 80+ Gold certification, a 10-year warranty, and a zero RPM fan mode. Power supplies are one of the first things to go on high-performance PSUs, so look for something with a decent warranty. The RM1000x is overkill for this build unless you plan on adding a second GTX 1080 Gaming X 8GB in the future for SLI, which is why I chose it. If you are not planning to upgrade down the line, stick with a 600-800W PSU with a good name, solid efficiency, and a good warranty.
- OS: Microsoft Windows 10 - Buy from Amazon - Do we really have an option these days? In my opinion it's a decent OS, and the learning curve is short if you have never used it.
- Monitor: ASUS PA328 ProArt 32" 4K - Buy from Amazon - It's the monitor I use daily, and this build will replace my daily rig. The machine we are building will be able to play games at 4K (3840x2160), so a 4K monitor isn't a bad idea.
- Keyboard: Corsair K70 LUX - Buy from Amazon - Also part of my daily machine. It has RGB LEDs too, and they are tastefully done.
- Mouse: Corsair M65 PRO RGB - Buy from Amazon / Read our review - Also part of my daily machine.
Pricing
The cost of our configuration is roughly $2,200, but your number could differ greatly. Our configuration uses one of the most expensive AIO coolers, a very expensive PSU, and about $500 of storage. The motherboard costs roughly $239.99, while the GPU costs $629.99. You might also choose to go with cheaper memory if you want to save a few dollars.
I would estimate on the low-end you could build this system for close to $1500, and at the high-end, you could easily spend over $3000 by adding in another GPU in SLI, higher density memory, better cooling, more storage, and so on.
MSI Z270 Gaming M7 Walkthrough
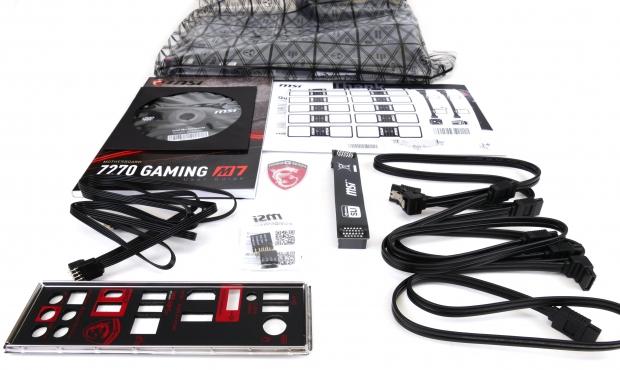
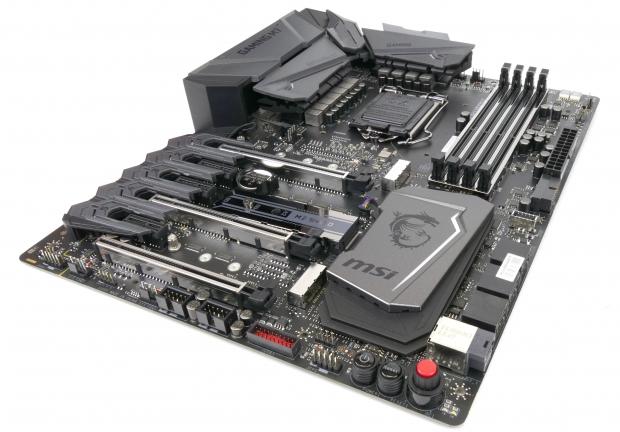
The accessory package offers a lot regarding getting your system setup. M-Connectors make using the front panel headers much simpler, the package includes more SATA cables than most people will need, and cable labels let you track what cables are attached to what ports.
The IO shield is fully labeled as well, and an RGB LED Y-Cable allows you to attach two RGB LED strips to the onboard RGB header. One other unique aspect of the Z270 Gaming M7 is its color scheme. It has a very neutral color scheme, so you can choose whatever color theme you want to go with. I chose red. The motherboard also has six fan headers that offer PWM/DC modes of operation, two of which can auto sense PWM/DC mode.
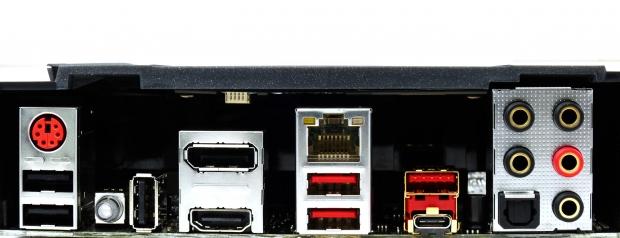
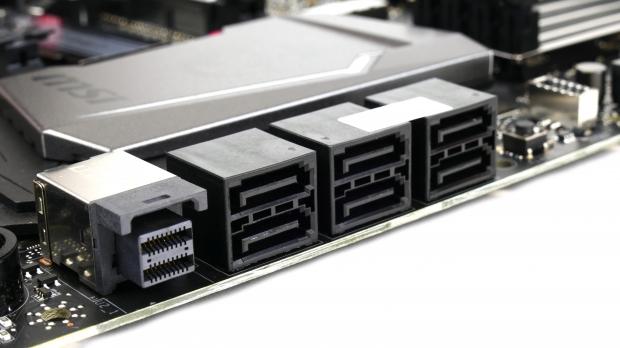
The IO panel has a few features worth noting. First is a clear CMOS button, which is easy to press in case your system fails to boot. I also like how MSI has used their red LED illuminated LAN port, so you can easily find it in the dark. The USB 3.1 type-A and type-C ports are gold plated as are the audio connectors. The motherboard offers a good amount of storage with the six native SATA6Gb/s ports, a U.2 port, and three M.2 slots.
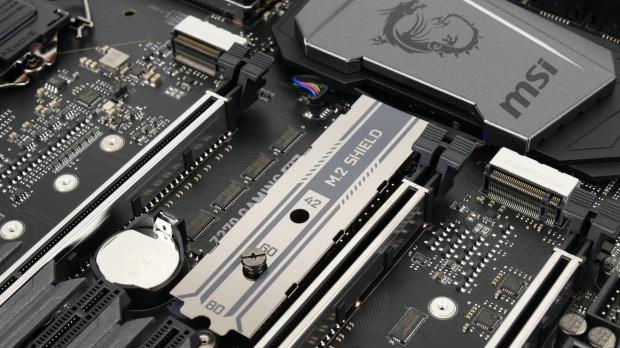
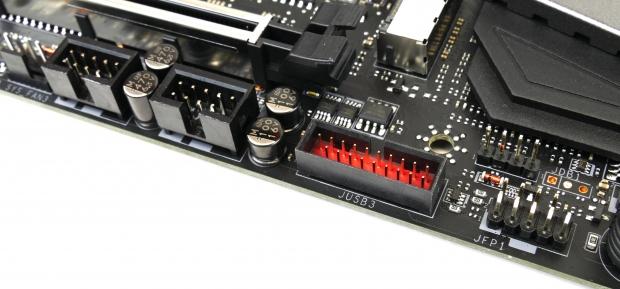
The M.2 slots are all reinforced, the metal shield around the port is for EMI protection. There are two USB 3.0 internal headers situated in different positions in case your cable isn't very long. The motherboard also offers two USB 2.0 internal headers, which can be useful for hooking up accessories like Corsair Link.
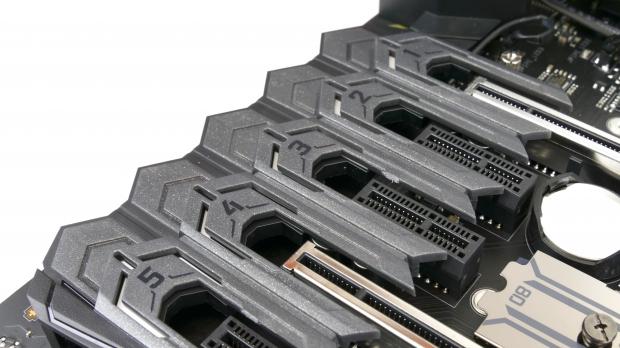
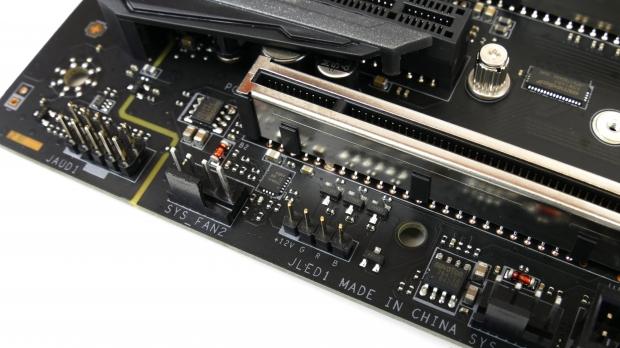
MSI has designed a hybrid audio/PCI-E slot cover, and each slots front section is illuminated. Under that cover are two hidden secrets. The first secret is that MSI used two ALC1220 codecs so that both the rear and front audio headphone jacks get 120dB SNR through the built-in amplifier in each codec (first time I have seen anything like it).
The second secret is a VR Boost EMI cover that covers up some circuit to improve signaling to rear USB for VR devices. Under the bottommost PCI-E slot is the RGB LED header we will connect our RGB strip to. The PCI-E slots are also reinforced with a metal shield that is supposed to help reduce damage from heavy GPUs and offer EMI protection. The RGB LED header has an eFuse protection chip, so if you screw up the polarity of the RGB strip, the motherboard will be protected.
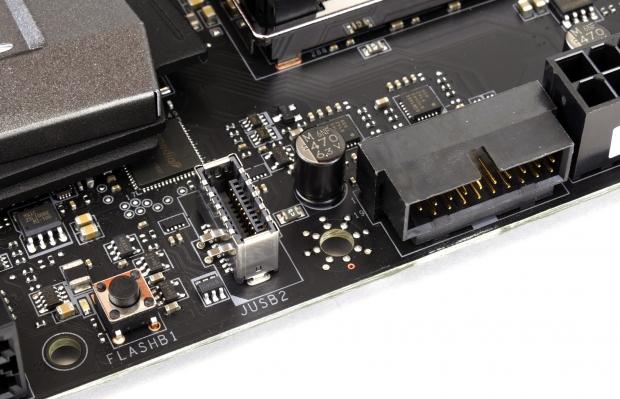
The new USB 3.1 type-C internal header is not as common as you might think; MSI's Z270 Gaming M7 is one of few motherboards to offer this new header. A right-angled USB 3.0 header helps improve the look of the system by allowing the USB 3.0 internal cable to peek out instead of loop into the motherboard. MSI also offer USB BIOS recovery through their BIOS Flashback+ feature, all you have to do is insert a USB stick with the BIOS file into the right angled USB 2.0 port on the IO panel and press the FLASHB1 button to recover a corrupt BIOS.
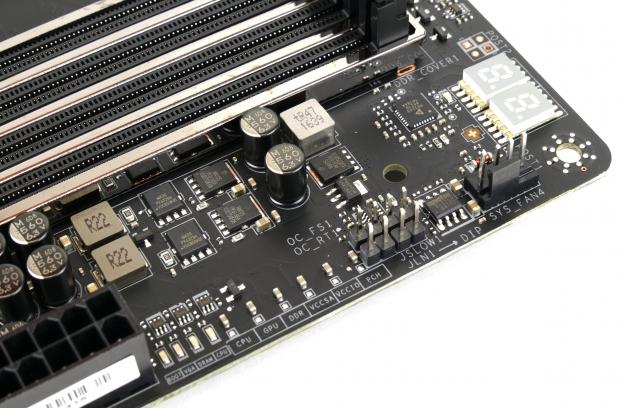
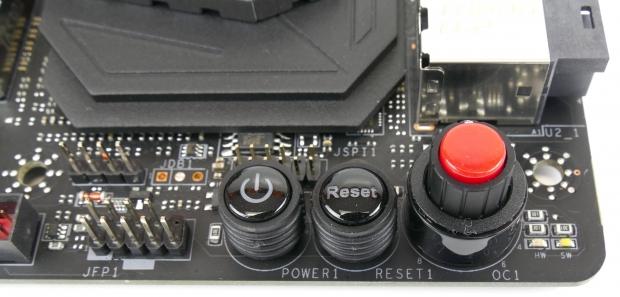
The Z270 Gaming M7 also offers many overclocking features. The POST code display located at the top of the motherboard provides diagnostic capabilities during boot up, but after boot, it acts as a temperature meter for the CPU.
One of the more overlooked features of the motherboard comes in the form of the four jumpers grouped into eight pins. They are labeled OC_FS1, OC_RT1, JSLOW1, and LN1. To enable any of the features, you can attach a switch to the jumper pairs. The jumper OC_FS1 forces you into the BIOS upon reboot, OC_RT1 will reapply your settings and try to boot again, JSLOW1 will take the CPU and cache into x8 mode, and JLN1 is used to boot under extreme cold. Many of these jumpers are for extreme overclocking, but they are nice to have in case you want to get into more extreme overclocking down the road.
The Game Boost knob is located in the lower corner of the motherboard, and near it are two LEDs to indicate SW or HW control mode. In HW control mode, you can turn the knob to engage one of many overclocking profiles. Power and reset buttons are also provided for users who will use the motherboard on a test bench. You might have also noticed that the motherboard screw ports have an interesting solder design around them, and that is to improve ESD protection by increasing the motherboard's ground layer contact with case metal through the standoff screw.
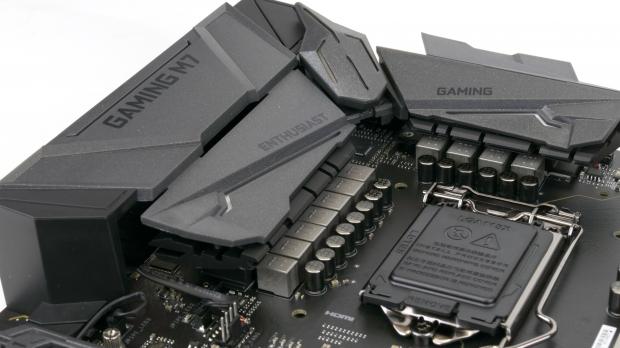
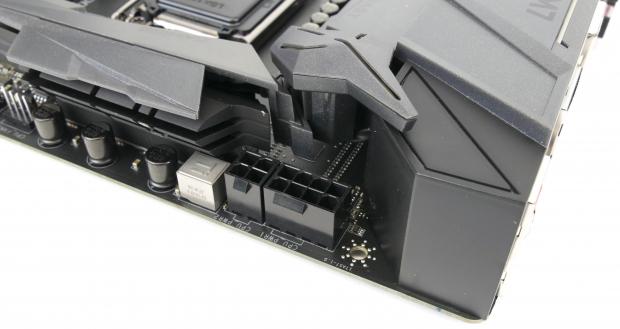
The motherboard uses an 8+2 phase design for the CPU VCore and iGPU; this is more than enough to ensure proper Kaby Lake overclocking. MSI's VRM is based on MSI's Military Class V technology. Titanium (Ti) branded chokes, Dark Cap, and Dark Chokes makeup MSI's Military Class V feature group and offer high longevity. A single 8-pin CPU power connector provides 300W of power, MSI's increases this to 450W by adding an extra 4-pin CPU power connector. The extra power connector is not required for operation.
MSI GTX 1080 Gaming X 8GB Walkthrough
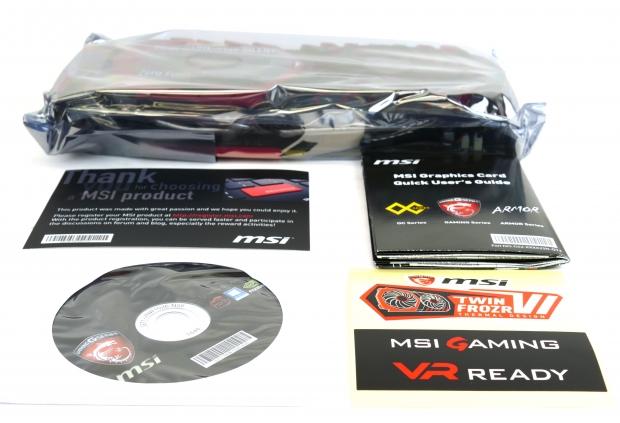
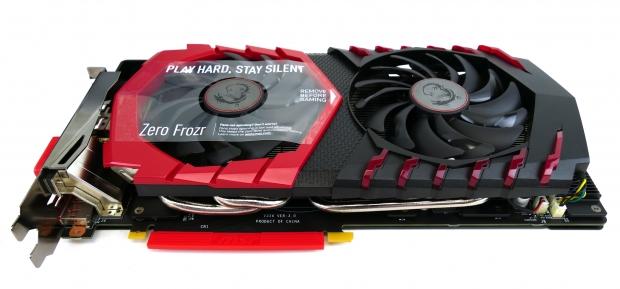
The accessory package of the MSI GTX 1080 Gaming X 8GB, like most other GPUs, consists of a driver DVD and a quick installation guide. However, MSI has stepped up its game and added two stickers highlighting the most fabulous parts of the GPU; VR gaming capability and the Twin Frozr VI heat sink cooler. MSI also includes these little slips for customer engagement, encouraging you to register.
MSI's aftermarket Twin Frozr VI heat sink cooler follows in the footsteps of its predecessors, offering extremely quiet high-performance gaming. High-performance and silence don't always go hand-in-hand, but MSI's Twin Frozr VI does just that, like Anthony, TweakTown's GPU guru, highlighted in the title of his review of the card.
Make sure you remove the piece of plastic tape around the first fan before you install the GPU, it's there to let you know that the fan will only spin up if it needs too. That means if you see the fans on the GPU not spinning, don't worry, that is how the system is designed. If the GPU temperature is below 60C, the fans will turn off, and the fans only start spinning at temperatures above 60C.
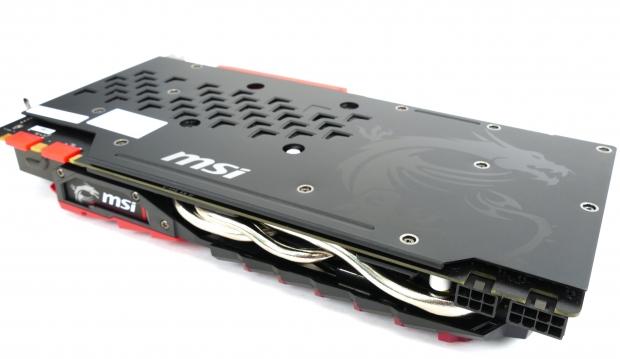
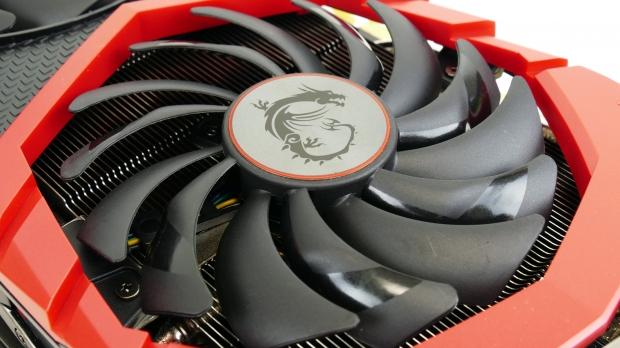
When you look into a case at your graphics card, you only see the back of its PCB, and many people would rather see an elegant brushed aluminum backplate than solder points. MSI's custom backplate with their gaming dragon offers a nice touch to this GPU masterpiece. MSI's unique TROX fans, in this case, TORX 2.0, use a novel dispersion fan blade that offers a steeper curved blade to accelerate airflow. It's one of the leading factors resulting in the cooler's quiet design, offering 22% more air pressure than traditional fan blade design.

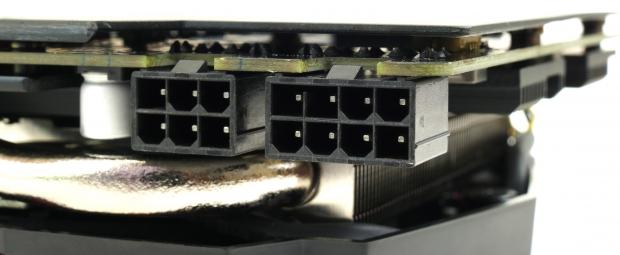
MSI also integrated multiple RGB LEDs into the visible portions of the graphics card to enhance its aesthetic value in your system. The MSI logo as well as parts of the shroud light up in RGB colors. The lighting style can be set to steady, breathing, flashing, sound reactive, or off. The GPU has two power connectors, one 8-pin, and one 6-pin, offering more than enough to unlock extreme overclocks.
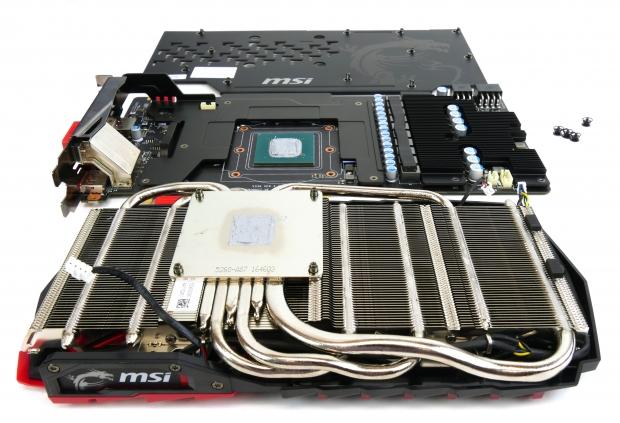
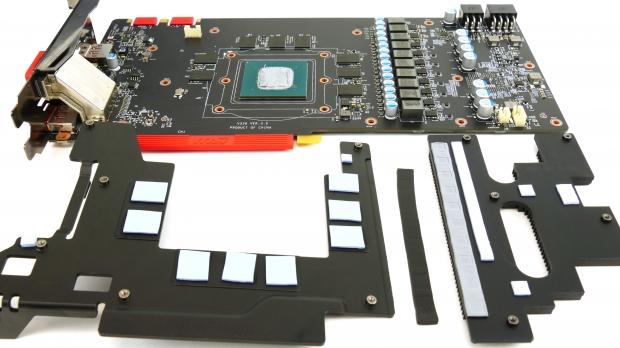
The heat sink is what makes this GPU special, and the copper base plate is attached to multiple heat pipes ranging in size up to 8mm thick. These heat pipes move the GPU's heat to special deflector fins that enlarge the overall surface area. Each memory chip and all VRM components are cooled by special heat sink plates. The VRM heat sink even has micro-fins so that it can benefit from surrounding airflow.
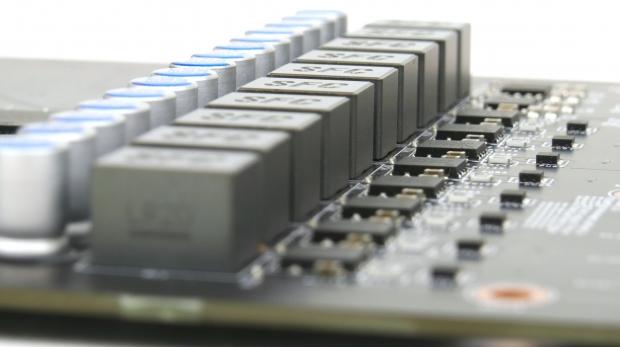
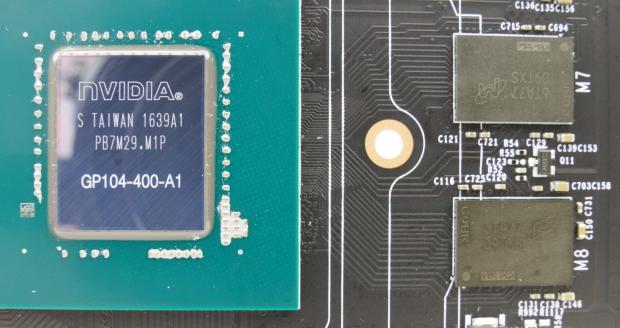
MSI also implemented a custom-tailored PCB design with their Military Class components. The GPU's core gets its own 8-phase VRM, and the memory gets a 2-phase VRM. The GPU also uses Micron's new GDDR5X memory chips.

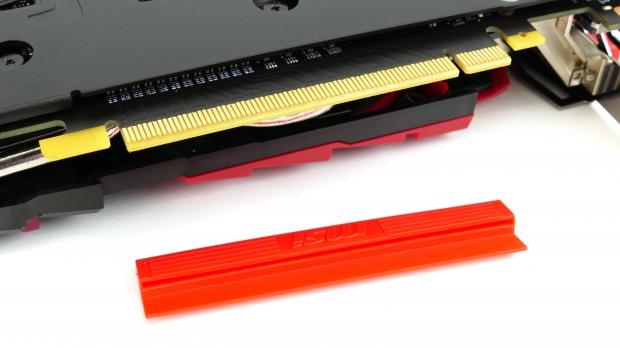
The GPU's PCI-E connector and IO ports are protected by plastic dust covers. Make sure you remove the PCI-E cover before installing the GPU. It would be wise to leave the covers on the unused IO connectors.
Build Tips for the Beast
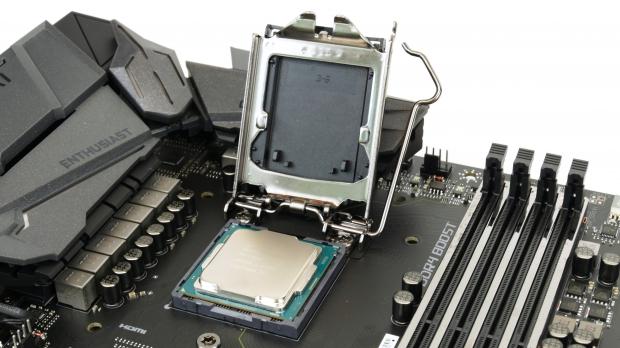
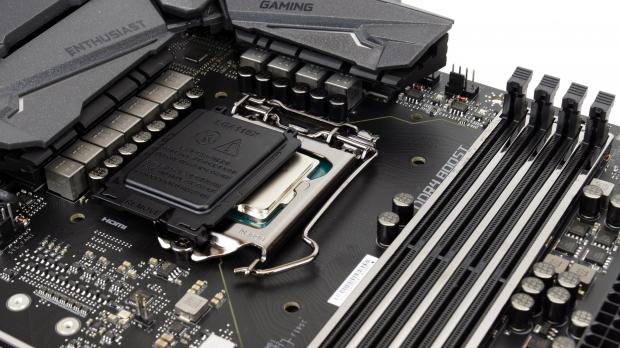
Over the course of a year, I deal with thousands of varying configurations of hardware, most of the time I have to troubleshoot incompatibilities on my own. With that type of experience I do my best to reduce headaches, and the first step is to organize the order in which hardware is installed.
The first thing I always do is install the CPU into the motherboard while the motherboard sits on the motherboard box. I handle the CPU with two fingers on the top and bottom edges of the CPU because the LGA1151 socket has little gaps at the top and bottom to facilitate your finger's grip on the CPU. Once the CPU has touched the pins, I just release my fingers. Then I will leave the socket cover on while I re-secure the socket mechanism. The socket cover will pop off once you clasp down the socket lever. Put the socket cover back in the motherboard's box; you might need it one day.
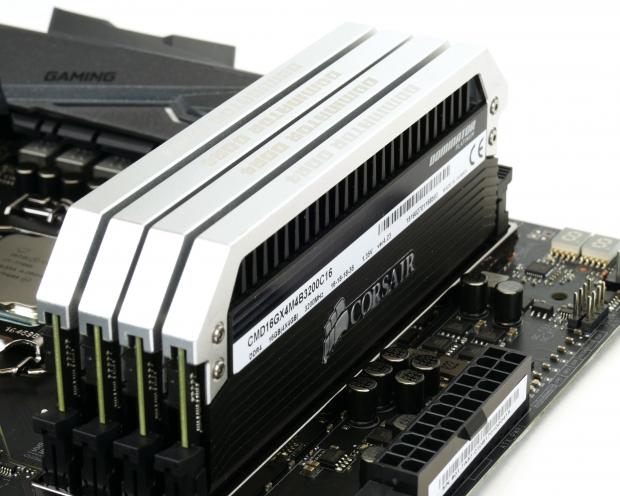
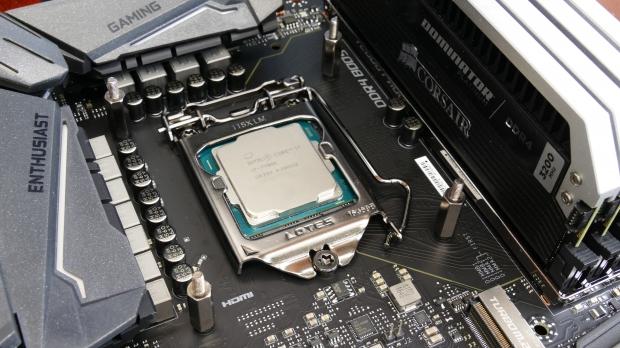
The next step is to install the memory, but sometimes, if the CPU cooler's mechanism is big, it's best to install that first. In our case, I just went for the memory first. Make sure you install the CPU cooler's hold down mechanism before installing the motherboard in the case.
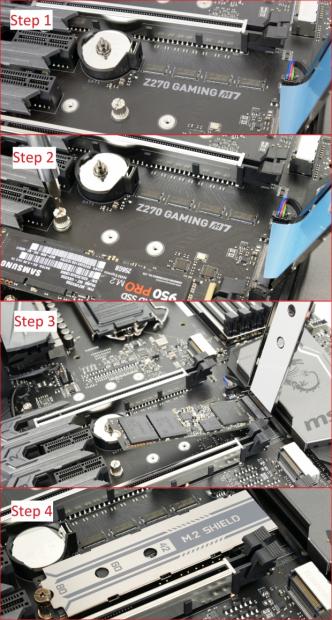
I made a little step-by-step image for those who might be confused with how to take advantage of MSI's M.2 Shield. Let me start by saying this article is meant to teach you how to take advantage of the feature and doesn't test it out. That being said, the M.2 Shield is most useful on M.2 drives that are single sided, such as the Samsung 950 Pro.
Step #1 is to remove the screw that holds down the shield and pull it up.
Step #2 is to re-position the standoff to match the length of your M.2 drive; you just need a Phillips head screwdriver.
Step #3 is to install the M.2 drive, I opted to remove the M.2 drive's sticker, but you don't have too. I also removed the blue film that protects the thermal pad. Step #4 is to screw down the M.2 Shield. All done! In most cases, the M.2 shield looks a lot better than the sticker the M.2 drive came with.
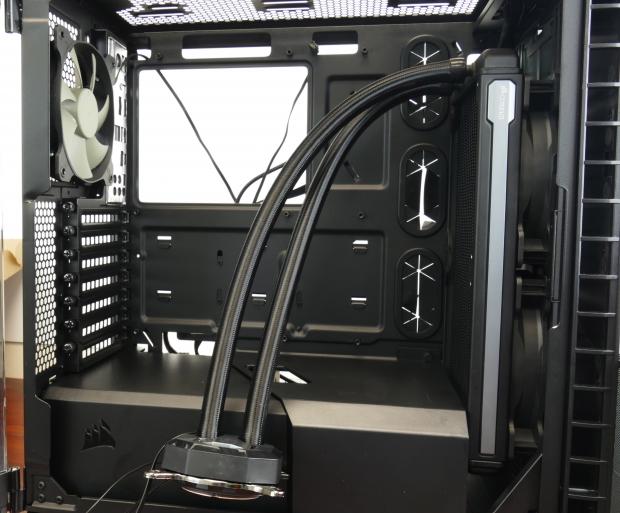
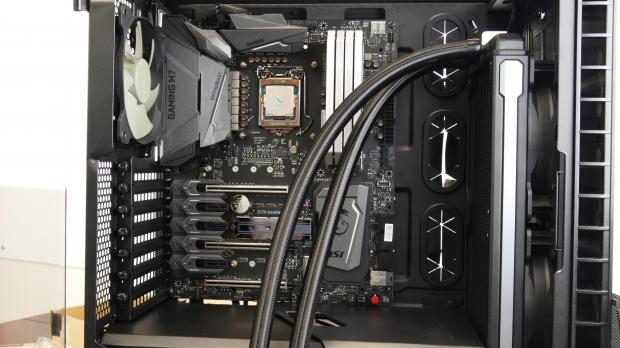
I prefer installing the AIO's radiator first, to ensure the hose will reach and to avoid damaging the motherboard if my grip on the radiator is lost. Before you install the fans, make sure you know how you want air to flow in your system. The typical airflow method is for air to come into the case from the front and bottom and exit out the top and rear. I also removed the two included case fans and will use them for exhaust, while the two high-pressure fans from the AIO kit will be used as intake fans.
You should also install the PSU at this time. I held off on installing the top exhaust fan until the motherboard is installed because there is almost no clearance between the top of the motherboard and the bottom of the top exhaust fan. Keep in mind, you also need to plug in the CPU power connector, and that can be a tight fit with the top exhaust fan already installed. You always want to plug in the tighten connectors first, such as the 8-pin CPU power connector. Don't forget the thermal paste. In many cases your AIO or heat sink will come with a layer of thermal paste, if it does, you do not need to apply your own.
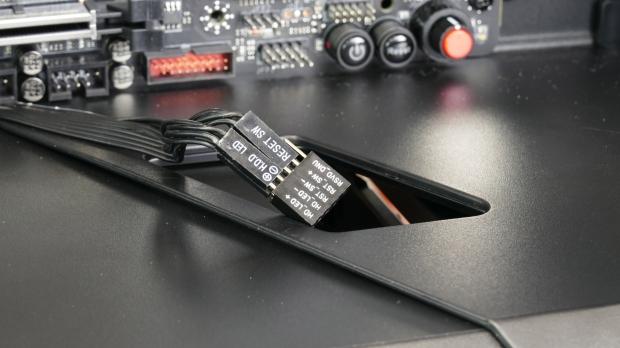
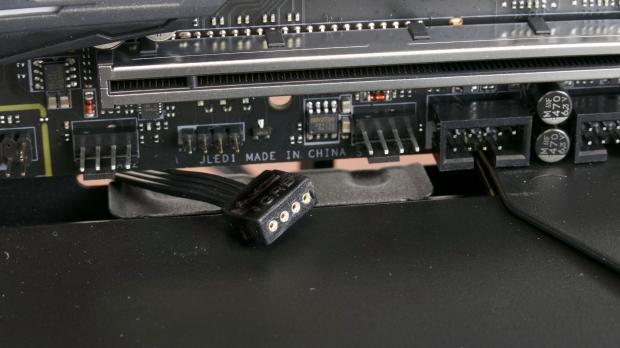
MSI's M-Connector makes installing the case headers very easy, as reading motherboard silkscreen markings can be confusing. You just plug in the case headers (like for the power button) into the M-Connector, and then you plug the M-Connector into the front panel connector jumpers on the motherboard. I used MSI's RGB LED Y-splitter/extension cable, pay attention to the polarity. The arrow on the extension cable is for the +12v pin, which is the left-most pin on the motherboard.
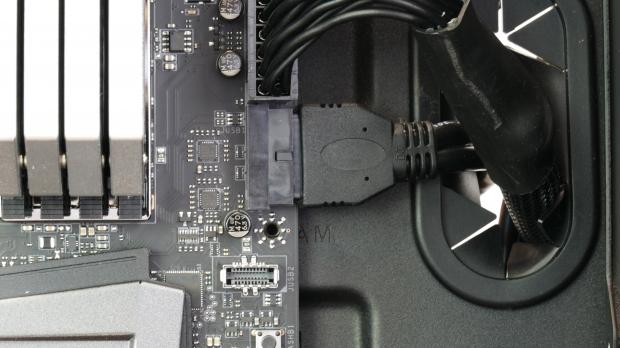
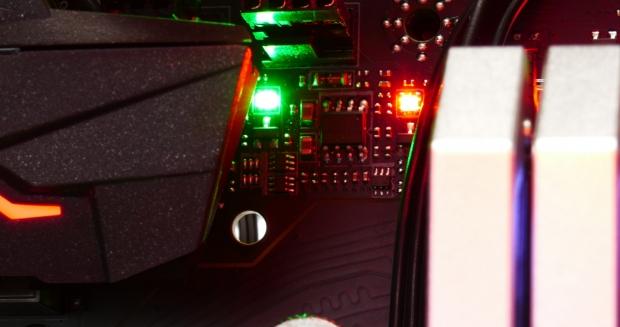
The right-angled USB 3.0 header has re-drivers to improve signal quality, and it allows for much less of the cable to peek out compared to your traditional straight USB 3.0 headers. It's time to install your fans and plug them in, if possible it's best to use the CPU_FAN1 and PUMP_FAN1 headers since they auto detect between PWM/DC mode, but all headers have the ability to support either type of fan (just not automatically). The two headers that support auto-sensing mentioned earlier also have adjacent RGB LEDs that will illuminate green if a DC mode fan is installed or red if a PWM mode fan is installed. I will cover fan control more in depth later in the guide.
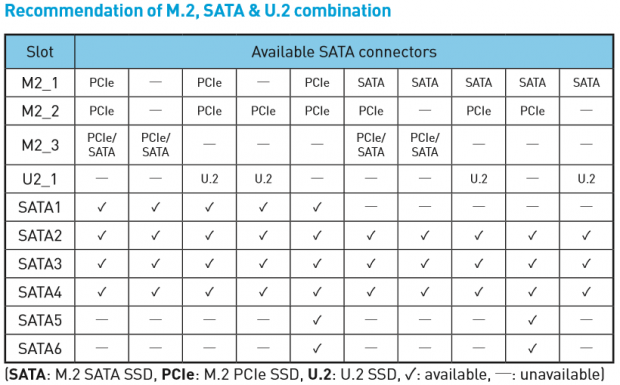
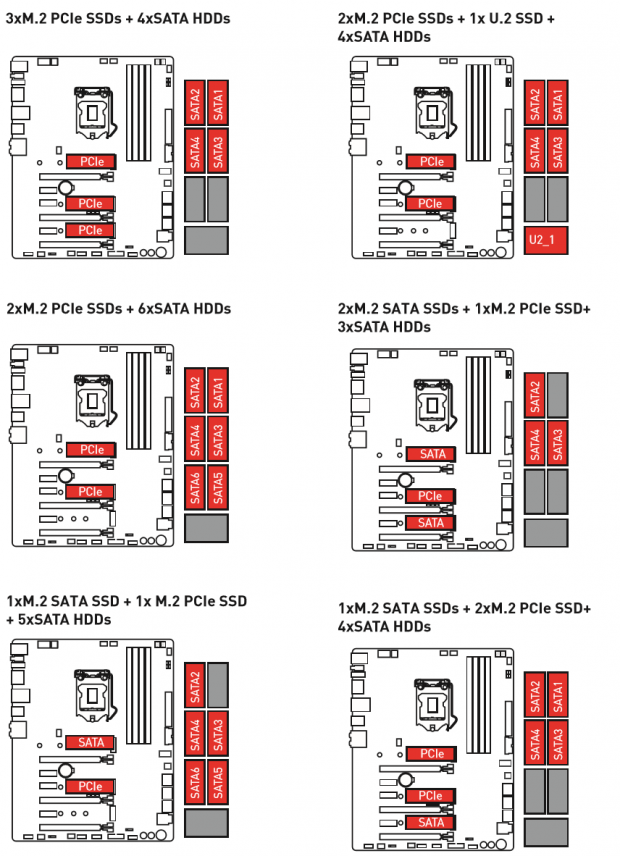
Intel's Z270 PCH has over 20 High-Speed IO ports, many of which can either operate at PCI-E or SATA. The flexible nature of these ports allows MSI to provide the motherboard with six SATA6Gb/s ports, a U.2 port, and three M.2 ports, and it's what allows RAID of M.2 and U.2 ports. However, it also means that not all ports will work at the same time. MSI has done an excellent job of not only providing a chart of port exclusivity but also diagrams in the manual or different possible configurations. It's important you follow the chart and diagram when you install your SATA devices.
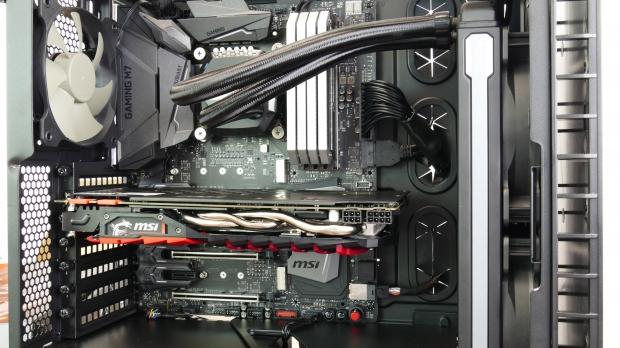
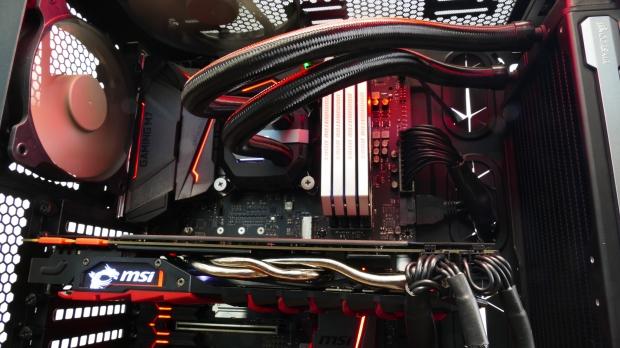
Once everything is plugged in you can power her up, and watch the debug LEDs located above the 24-pin power connector or the POST code display at the top right corner. The manual describes what each POST code means in case you get stuck at one of them. Don't forget your GPU's power plugs or the CPU's 8-pin power connector! I installed the RGB LED strip at the top of the case shining down on the hardware.
MSI's CLICK BIOS 5 and BIOS Update
UEFI Overview
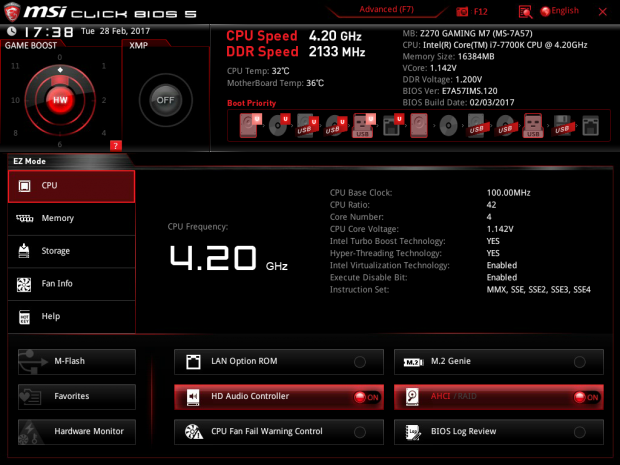
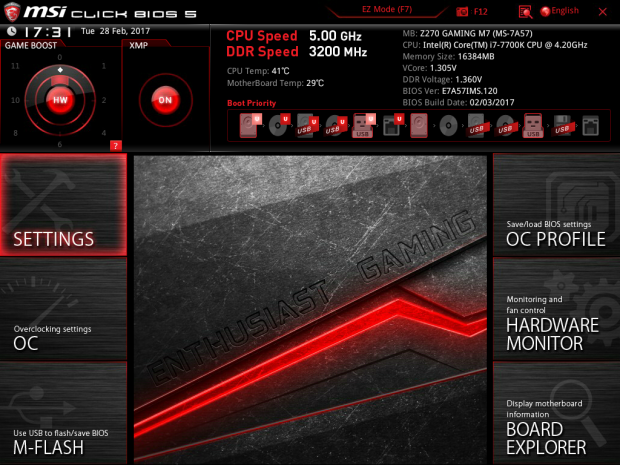
MSI's UEFI is called CLICK BIOS 5 and offers two modes of operation. An "EZ Mode" is for novice users who have never really entered a BIOS before, and an "Advanced" mode is for more experienced users. To switch between the two BIOS types, press F7 or click the top-center portion of the screen. MSI's UEFI allows both mouse and keyboard selection of most settings, and you have the option of changing boot priorities through the bar below live system status in EZ mode, or through a traditional menu in Advanced mode. Hardware Monitor (fan control), can also be accessed through either of the two modes.
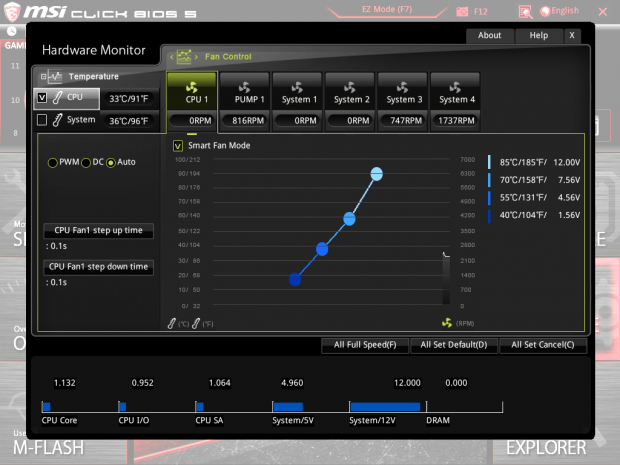
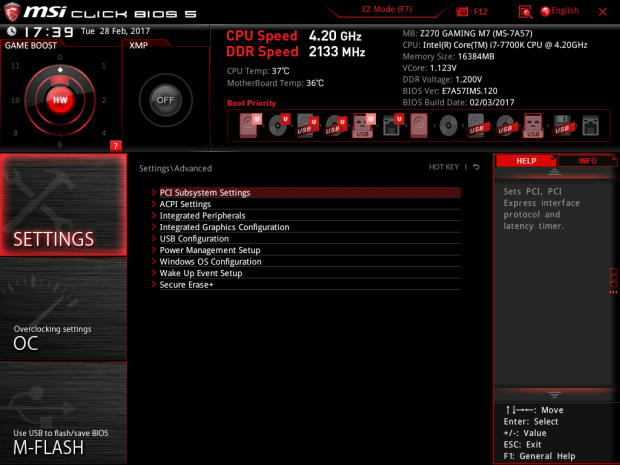
Hardware Monitor offers excellent control over fan speeds and is very easy to setup. I will dive into the details of Hardware Monitor in the next section of this guide. The settings menu in advanced mode allows you to control advanced system settings, such as disabling ports or configuring integrated graphics.
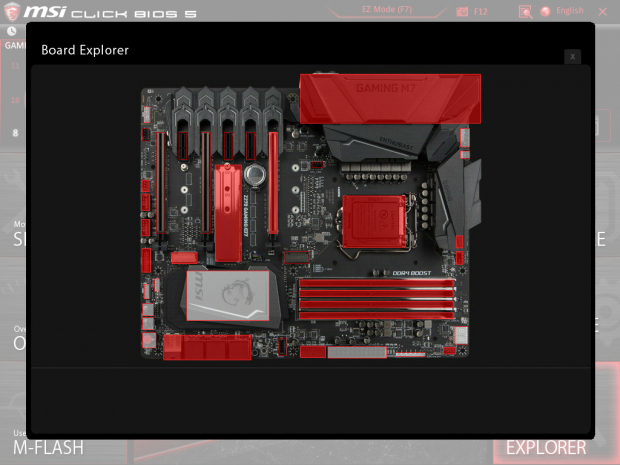
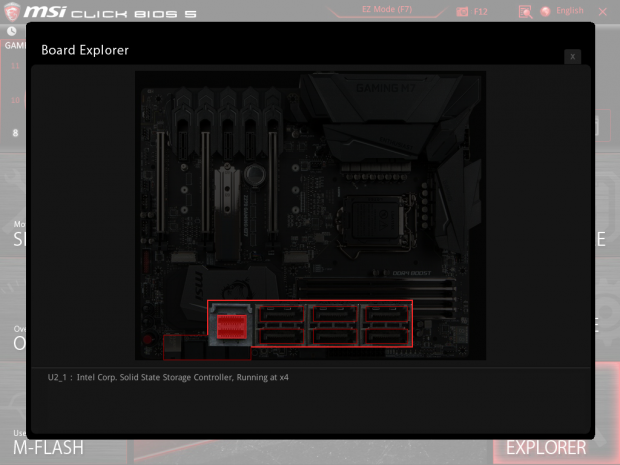
Board Explorer is a neat feature of the UEFI, and hovering over a port or object will bring up details. Board Explorer is capable of recognizing individual USB devices and even the SPD of the individual DIMMs, so you know exactly what is connected to your motherboard.
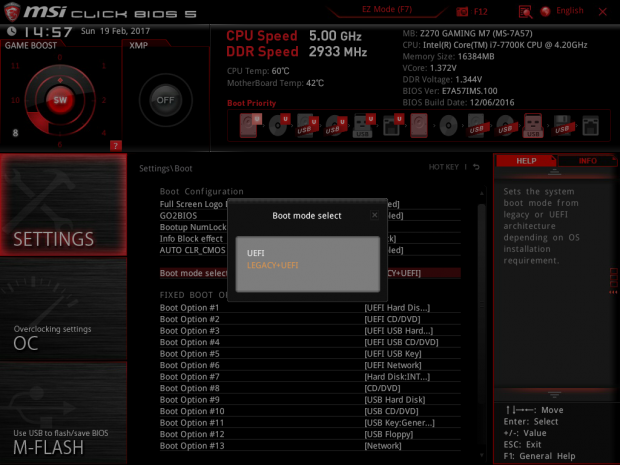
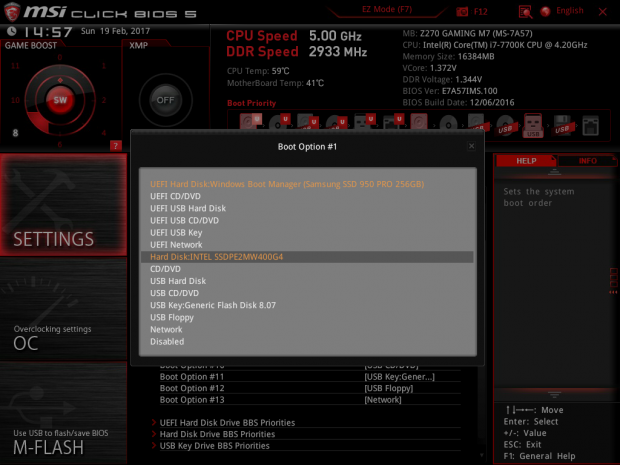
Other than overclocking or setting up fan control, most people enter the UEFI/BIOS to choose the boot order of their drives and devices. If you are installing Windows 10, I would stick with UEFI installation mode. Once you have installed Windows 10, you will notice that a new boot device pops up called Windows Boot Manager, and that is what you want as your first boot device. Windows 10's installation can communicate with the UEFI and makes things quite simple.
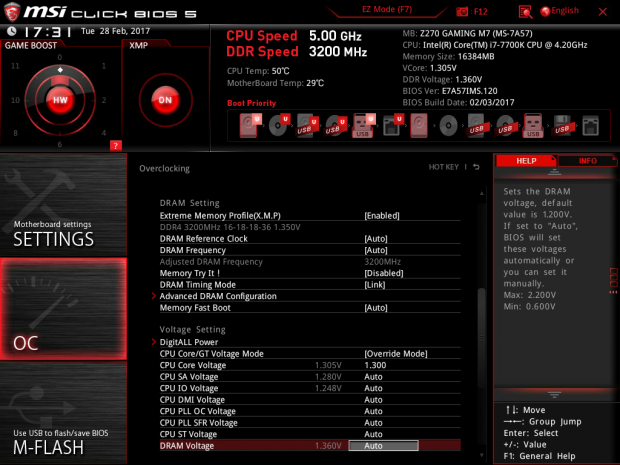
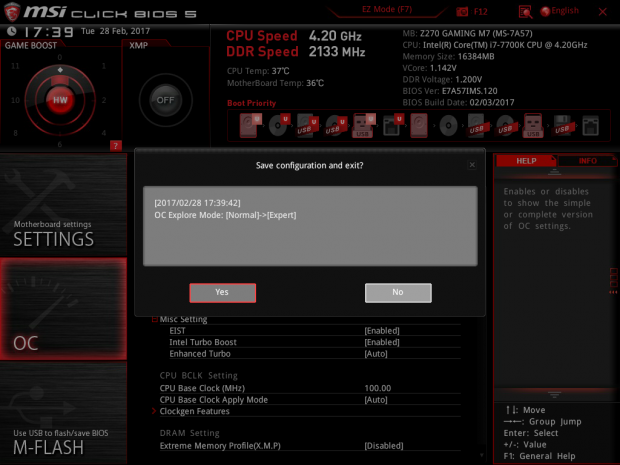
Overclocking can be done automatically through the GAME BOOST knob at the top left-hand corner of the screen, or through manual overclocking in the OC menu. One nifty feature of MSI's UEFI is the list of changes made when you try to exit.
Manually Updating the BIOS
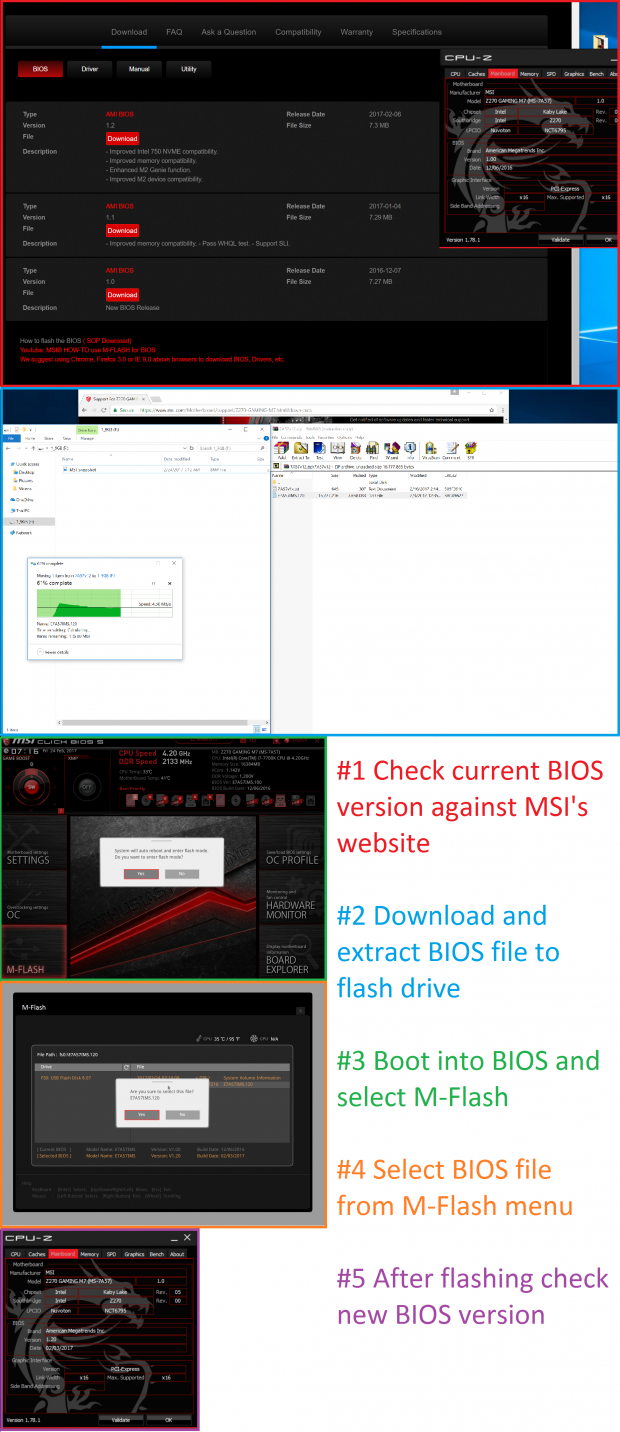
I made a nice little step-by-step image for you to follow to manually update the UEFI. There are many ways to update the UEFI, but I prefer using the UEFI's built-in BIOS flashing tool. You can recover a corrupt UEFI by using MSI's USB Flashback+, and the manual has good instructions on using that feature. For manual flashing, you can download MSI's latest UEFI/BIOS version from their official website and load it onto a USB drive. Then you will enter the UEFI, click on M-Flash, and the system will reboot and enter into M-Flash mode.
In M-Flash, the utility will scan your USB stick for a BIOS file and ask you if you would like to update using the file. Click yes, and the system will attempt to flash the UEFI. Do not, no matter what, interrupt this process. If the flash is interrupted the BIOS will become corrupted, and you will have to use USB Flashback+. One thing I always like to do after a flash is load optimized defaults and then save and exit the BIOS and proceed as usual.
Fan Control and RGB Setup
Fan Control
I prefer setting up my fans in the UEFI because that way there is no need to install Windows-based software to control fans. However, Windows-based fan control software can also be advantageous because Windows programs have more capabilities than the constricted UEFI. I will now show you both on MSI's Z270 Gaming M7.
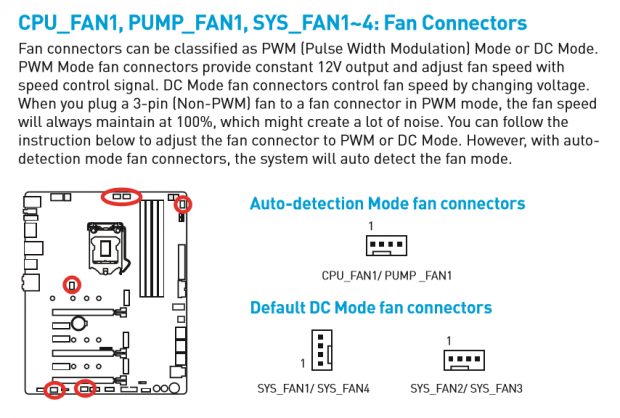

MSI's motherboard has six fan headers, and while all of them can operate in either PWM or DC mode, the two at the top-center of the motherboard (CPU_FAN1/PUMP_FAN1) automatically detect the type of fan used and adjust their mode accordingly. MSI's manual does a decent job of explaining the difference between PWM and DC/Voltage mode headers/fans. However, more simply, in DC mode the motherboard controls the fan speed by regulating the power to the fan while in PWM mode the motherboard feeds the fan the maximum voltage level and a PWM signal and the fan self-regulates.
DC/Voltage mode headers can control both DC and PWM fans, but PWM headers can only control PWM fans while DC fans in PWM headers will always run at 100%. MSI's six fan headers can accept and control both types of fans. The benefit to PWM fans is that they operate much smoother at low speeds and avoid the "clicking" noise that voltage mode fans experience when they aren't given enough power to get started. That is because PWM fans are designed to self-regulate, so they know their motors' characteristics better. However, DC/voltage mode fans (always 3-pins) are typically the included case fans, and PWM fans are typically more expensive. To make use of all fans, you need a motherboard with headers that support both types of fans, such as MSI's Z270 Gaming M7.
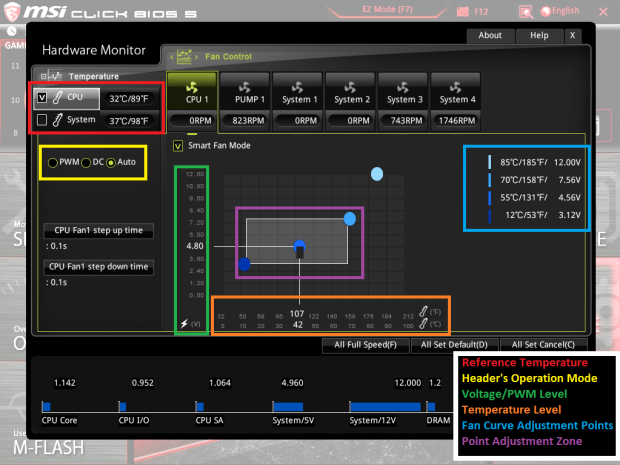
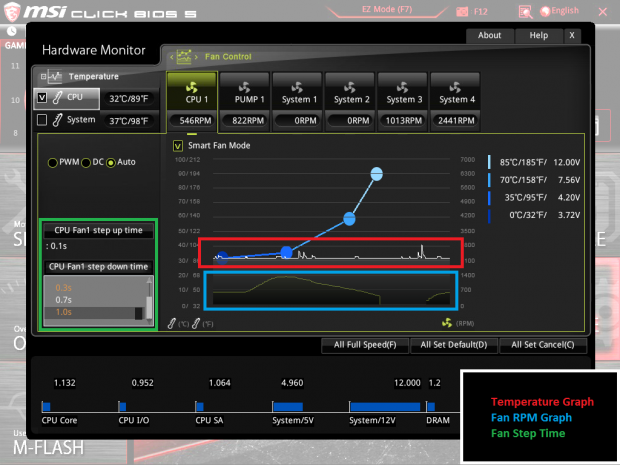
MSI's fan control GUI is setup in an easy to comprehend fashion. Each of the six fans has its own tab, and each can reference either the CPU or system temperature for Smart Fan Mode curve control points. You can manually select between PWM and DC mode. The vertical (y-axis) of the graph is a voltage level for DC/voltage mode fans (image on the left) or a percentage/PWM value for PWM mode fans (image on the right). The horizontal axis (x-axis) is always temperature.
To move a point of the curve, you just click and drag the point. For instance, if you want the fans to stay quiet until the CPU temperature reaches a critical level, you can take the first three points down, with the third at 30%/4v at 65C, and the fourth point at 100%/12v at 80C. The temperature/speed point list is located to the right of the graph. MSI's GUI also offers real-time temperature and RPM monitoring.
To make things more interesting, you can also choose the step-up and step-down time interval between points. Increasing this value allows the fan to more slowly ramp up or down, so if your load (and temperature) is fluctuating rapidly, fan noise doesn't need to necessarily follow suite.
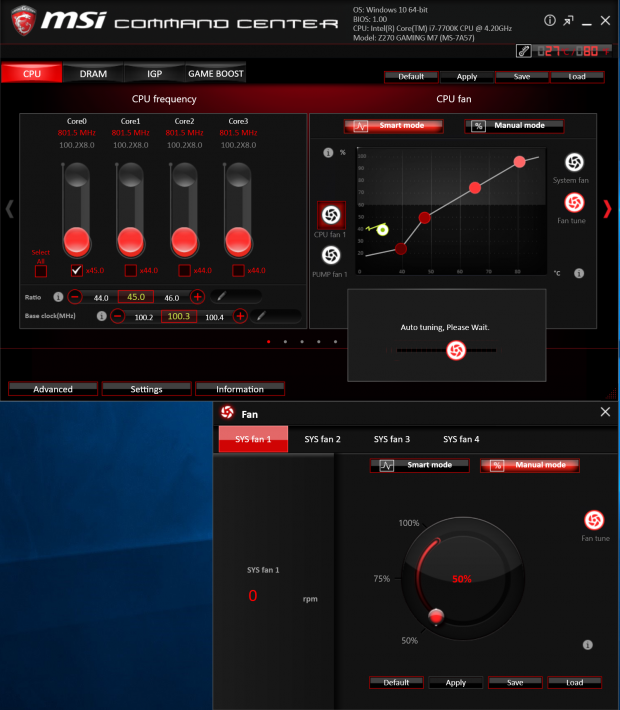
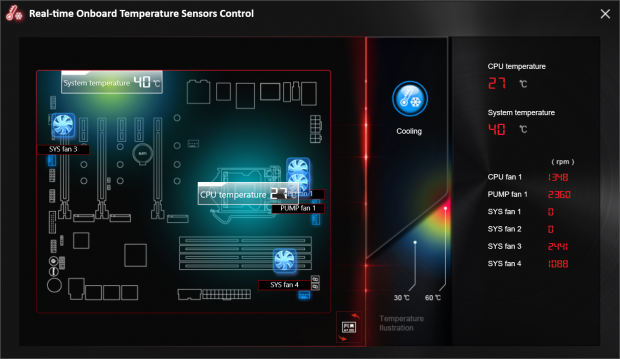
MSI's Command Center fan control is not much different from UEFI's GUI. However, it does have an auto-tuning feature, where the motherboard will calibrate the fans based on their minimum and maximum RPMs at different voltage levels to determine optimal operating range. A nifty motherboard diagram is also available and shows where the system temperature sensor is located (near the audio section and below the GPUs), as well as what fan headers are plugged in.
RGB LED Control
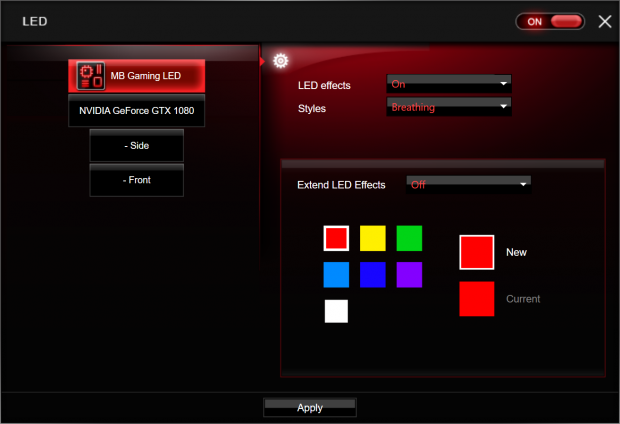
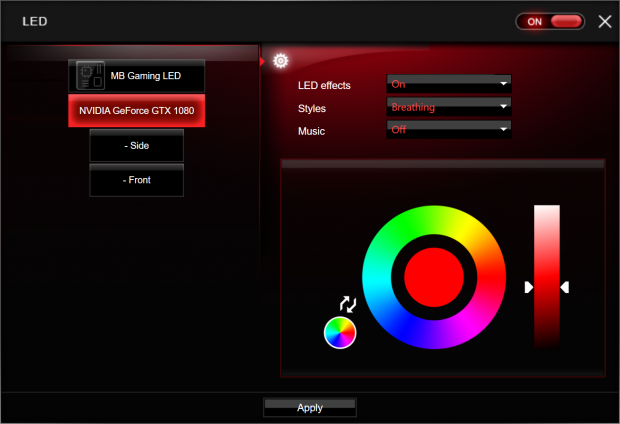
MSI's Gaming App has a LED section where you can control the RGB LEDs built into the motherboard and connected to the motherboard's RGB LED header, and the RGB LEDs built into the GTX 1080 Gaming X GPU.
MSI's RGB LED lighting scheme is called MYSTIC LIGHT, and you can find many vendors of RGB LED strips that specifically support MSI's technology. There are currently six modes of operation; off, static, breathing, flashing, double flashing, and random. If you are connected to the same local network as your phone, MSI has an application for your phone that allows you to control the RGB LEDs directly from there. MSI also offers MYSTIC LIGHT SYNC, that allows you to sync the RGBs in other supported products from other brands (such as a keyboard or CPU cooler).
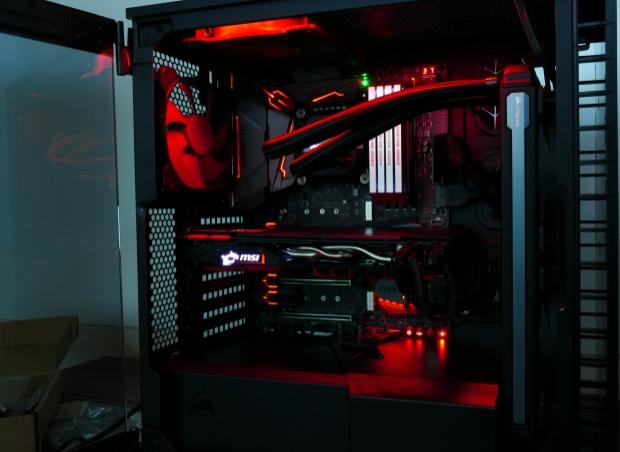
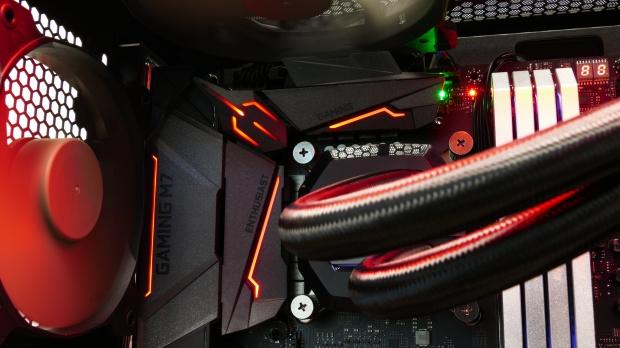
I placed a magnetic RGB LED strip at the top of the case shining down on the system, and the light diffused really well. One thing I have to admit is that MSI's built-in RGB LED lighting is tastefully done, and the light is evenly distributed.
Automatic and Manual CPU Overclocking
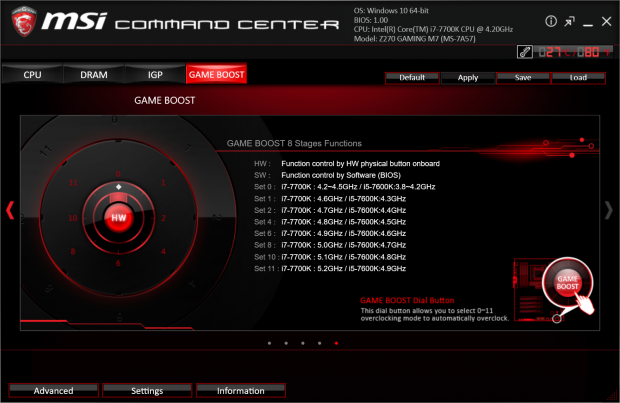
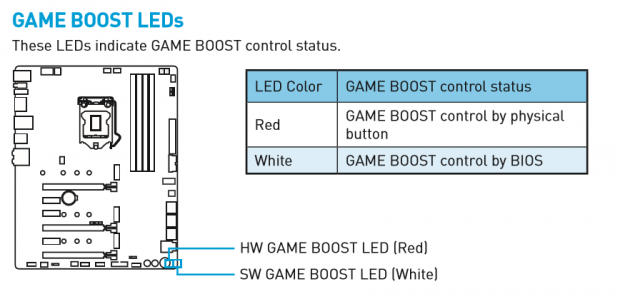
MSI's OC Genie was a very well-known automatic overclocking feature that accompanied many high-end MSI motherboards. OC Genie has been replaced with Game Boost. As we saw earlier, there is a GameBoot knob that resides in the lower right-hand corner of the motherboard for "HW" auto overclocking, a software knob that resides in the upper left-hand corner of the UEFI as we saw in the UEFI section, and also in the GAME BOOST menu in MSI's Command Center as seen above.
The HW (hardware) knob and SW (software) knob in the UEFI and Windows are all identical. To see if GAME BOOST is in HW or SW mode, look near the physical knob, and a red LED (HW) or white LED (SW) will be illuminated, or look at the center of the software knob. The software OC in the UEFI and the one in Windows do sync so that you can disable or enable from either locale.
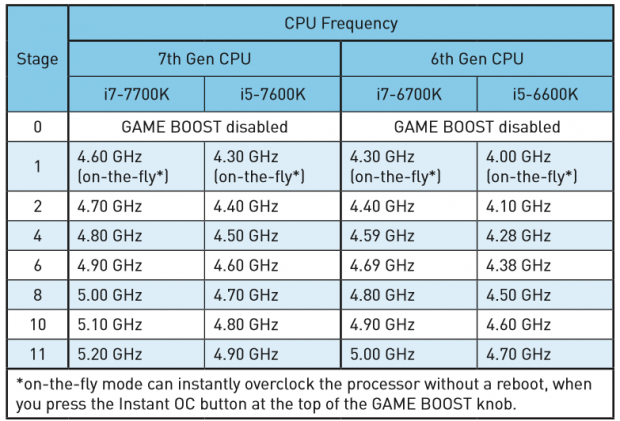
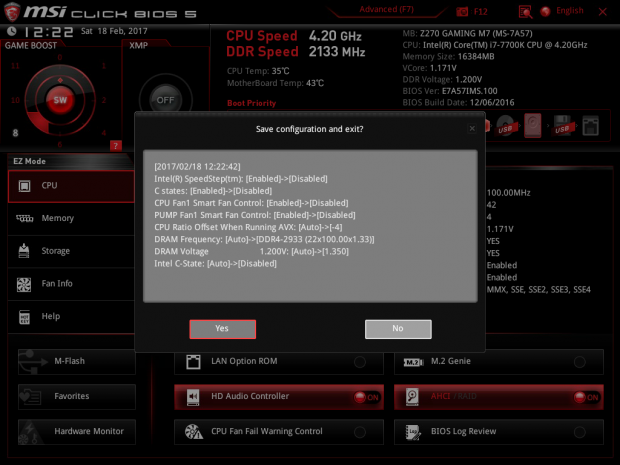
The manual has the overclocked levels next to the level of overclocking applied depending on your CPU. I went with level 8 for my 7700K because I know it can do 5GHz. After applying the SW OC in the UEFI and exiting, we see the changes that the level 8 made to the UEFI. For starters, MSI disables any power saving options, so the CPU will always run 5GHz, it also disabled both auto-sensing headers smart fan control (so those fans run full-speed), set an AVX offset of -4, increased memory speed to 2933MHz, and set a VCore of 1.35v. The AVX offset will down-clock the CPU to 4.6GHz (50 minus 4) if the CPU encounters any AVX program such as HandBrake. The VCore is set 0.05v higher than my CPU requires with a 0 AVX offset, this is done so that most 7700Ks will be able to run at this frequency.
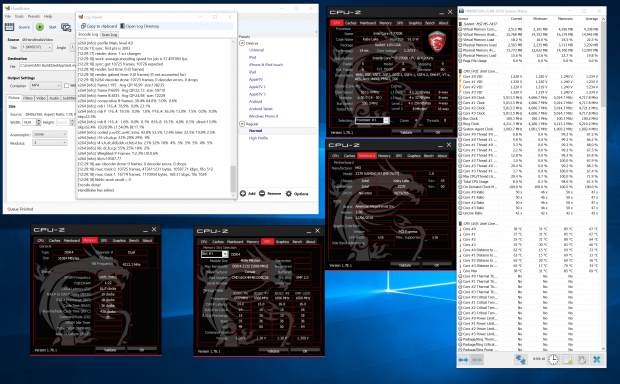
I was able to boot up just fine and run my tests with the Level 8 auto overclock.
Manual CPU Overclocking
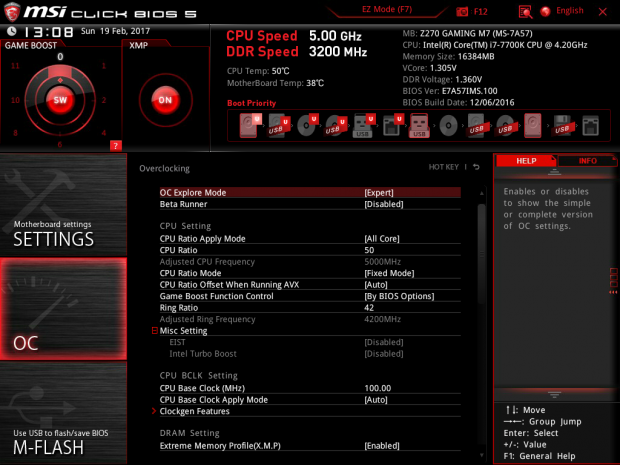
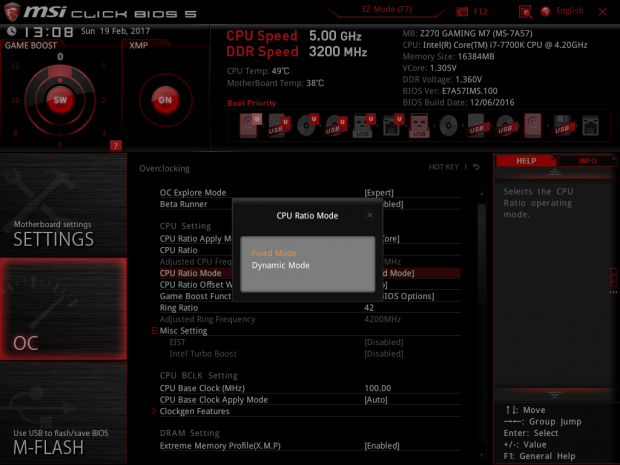
Manual overclocking of the CPU is best done in the BIOS/UEFI. The first thing I did was set OC Explore Mode to Expert. I did this because a few options appear that make things a lot easier, such as CPU Ratio Mode and CPU Core/GT Voltage Mode. I set all my cores to 50x, and since I know how this CPU overclocks, I didn't set an AVX offset because it's not needed. I would start at 4.8Ghz with a 7700K and 1.3v, and work the multiplier upwards. If your CPU can handle any program that doesn't use AVX but crashes when running a program that uses AVX, then it would be smart to set an offset, I would start with -2 (lowers 200MHz when AVX is encountered) and go lower if required.
CPU Ratio Mode is unique to MSI, and it's basically a single setting to control multiple settings (Turbo, EIST, C1E, C-States). If you set the CPU Ratio mode to Fixed Frequency, the CPU multiplier will not drop when the CPU's load is reduced. Instead, you will always run at 5GHz. If you set the CPU Ratio Mode to Dynamic, the CPU frequency will vary with load to save power.
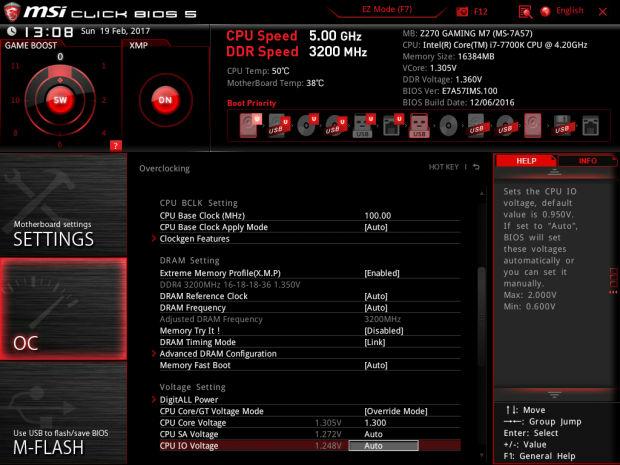
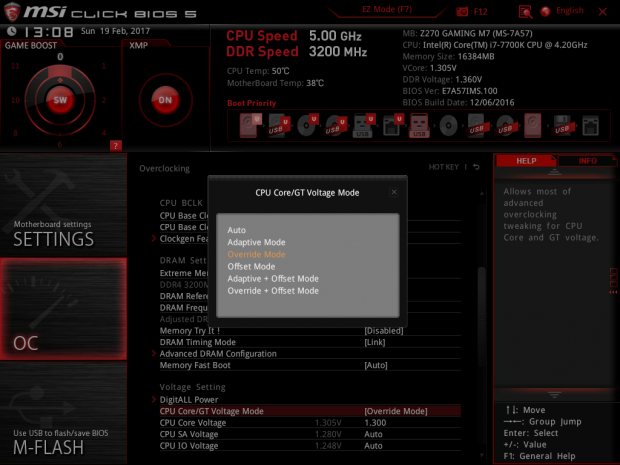
I applied XMP to my memory, which will take it to 3200MHz and apply the correct timings. I also set the VCore to Override (best to use Override if you are using Fixed CPU Ratio Mode), and the VCore to 1.3v. MSI offers multiple CPU VCore/GT Voltage Modes. Adaptive Mode will scale CPU voltage with frequency (best to use Adaptive with Dynamic CPU Ratio mode), Override will always push the voltage you select, and Offset will allow you to add or subtract an offset to the VID (default VCore) of the CPU at any given ratio. MSI also has Adaptive + Offset (could help scale back over-aggressive adaptive VCore) and Override + Offset (you can choose the VID). Your offset can be negative.
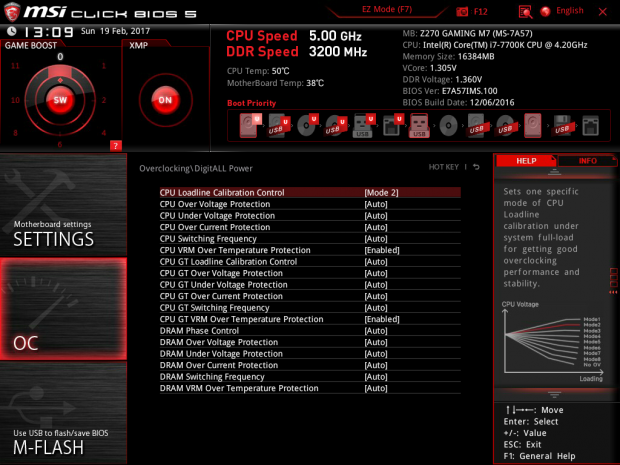
I went into the DigitALL Power menu so I could manually set Loadline Calibration. MSI is offering nine modes, with the lowest mode offering the most VCore compensation. Loadline Calibration (LLC) was developed to combat the VCore's droop under heavy load, which is there to keep the CPU within recommended power ranges and to avoid spikes in voltage. However, that droop causes a lot of instability when overclocking, and users figured out that removing the droop didn't greatly impact CPU life, so a few years ago LLC became a standard VRM option that is a must for overclocking.
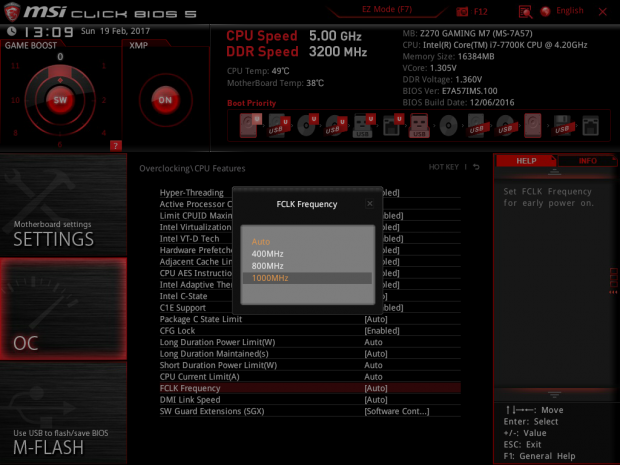
I usually set the second most aggressive level, and in this case, it keeps my VCore hovering right around 1.3v (what I set). If your system shuts down immediately after applying a load on the CPU, you should increase over voltage protection or over current protection thresholds. If your system throttles the CPU, you should increase over temperature protection thresholds. I didn't need to touch any of the protection mechanisms, MSI has good auto-rules that increase those when you overclock. I also like to manually set the FCLK to 1GHz (default is 800MHz). FCLK can be found under the CPU Features menu; it helps improve 3D performance a tiny bit.
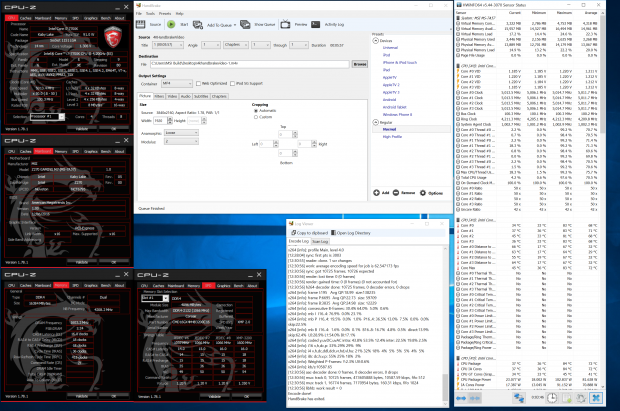
My manual overclock came out wonderful, and we saw some solid increases as well as lower temperatures compared to the automatic overclocking. Automatic overclocking has to overcompensate so that all CPUs can reach the set expectations, manual overclocking takes more work but offers a higher reward.
GPU Overclocking and Final Overclocking Results
GPU Overclocking
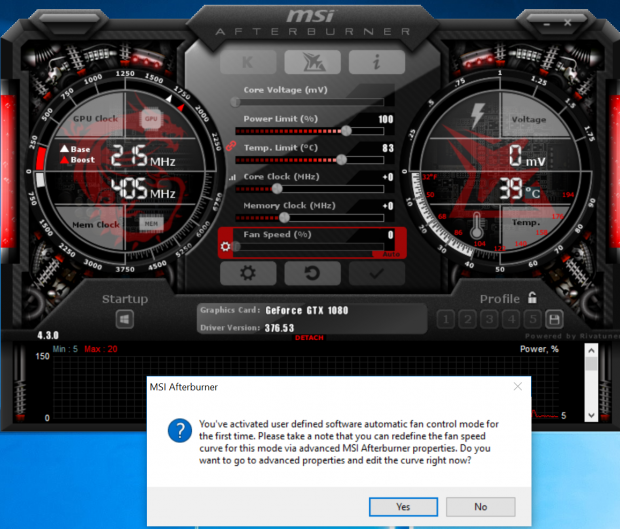
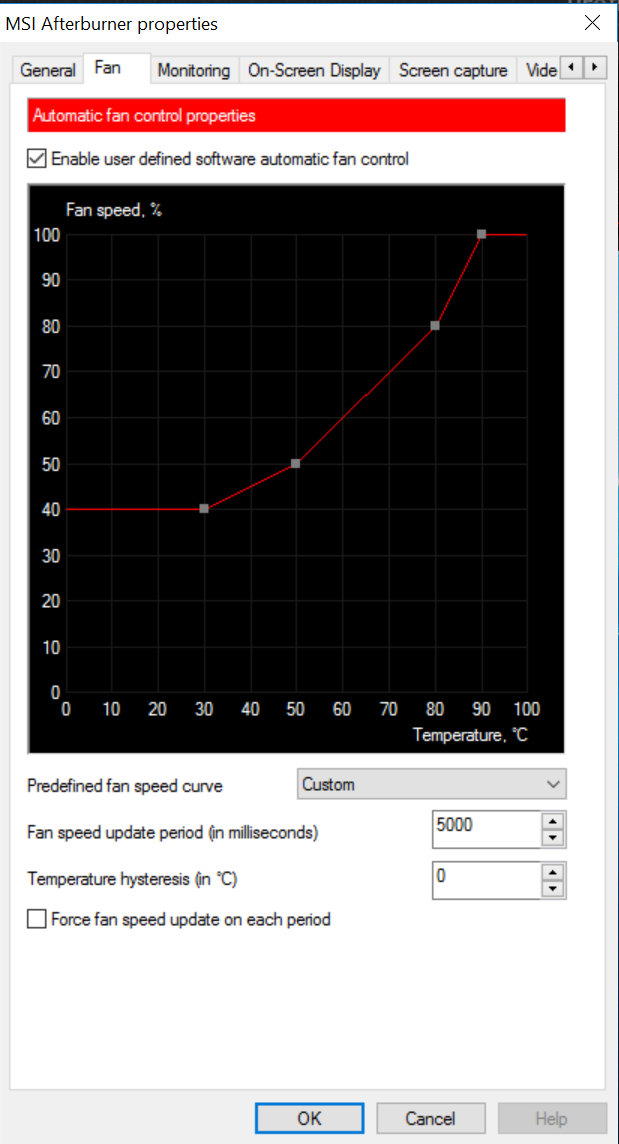
MSI's Afterburner software is perhaps the most famous GPU overclocking software around. While CPU and memory overclock can be done in either Windows or the UEFI, you can only OC the GPU in Windows. Afterburner also allows us to manipulate the GPU's fans, and since we are using an MSI GPU, things work in harmony. You can set the fan speed to scale on its automatic curve, or you can activate a manual fixed level or a manual applied curve. I set the curve shown above so that the GPU's fan speed would ramp up quickly.
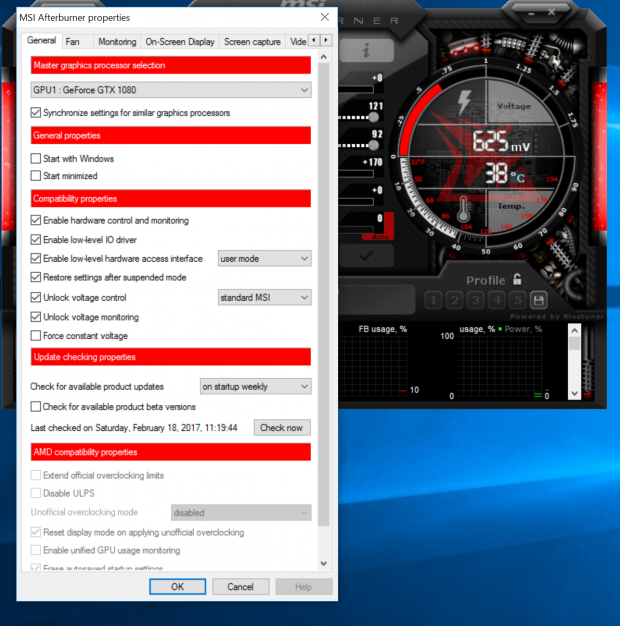
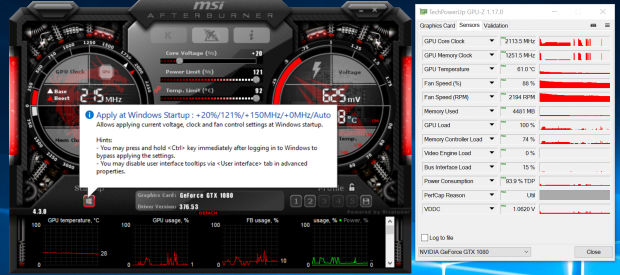
Under Afterburner's General Properties tab, you will find two unmarked boxes near "unlock voltage control" and "unlock voltage monitoring." Be forewarned, overclocking voids your GPU's warranty, and unlocking the voltage can cause damage. I wanted to see how far I could push the GPU, so this isn't a 24/7 overclock, just me experimenting. The GTX 1080 Gaming X is already powerful enough, so if you want to run it daily with an overclock, I wouldn't unlock voltage control. If you click the little Windows icon under the word "StartUp," Afterburner will automatically apply your overclock at startup.
I ended up with a +150MHz on the core, but that required a 20% boost in voltage. I also maximized power and temperature limits. I would assume for a daily overclock you would end up with around +100MHz or slightly more without additional voltage. To test my overclock, I ran GTA:V's benchmark, and compared results. I also used GPUz to log the maximum frequencies and temperatures along with other criteria to compare against stock results. If you get any type of artifacts, the screen freezes, or the driver crashes, then you need to back down the frequency or increase the voltage. The new GDDR5X doesn't overclock much, and when it does, gains are very minimal, so I opted to only touch the core frequency.
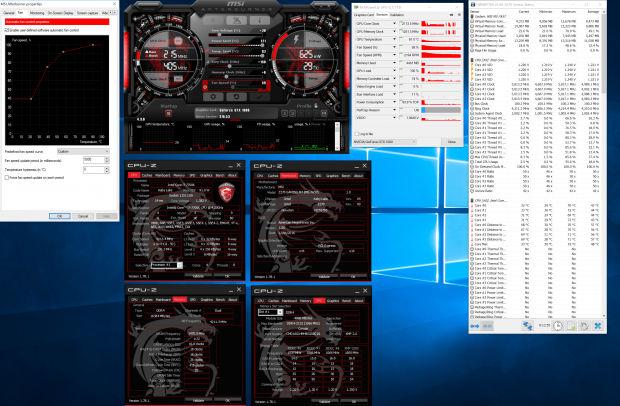
My final overclock is seen above, and we see that GPUz logs a maximum core boost OC of 2113MHz, with a maximum GPU core temperature of 60C. However, the additional voltage I used is too high for comfortable 24/7 use (but I know some of you live on the edge).
Final Overclocking Gains
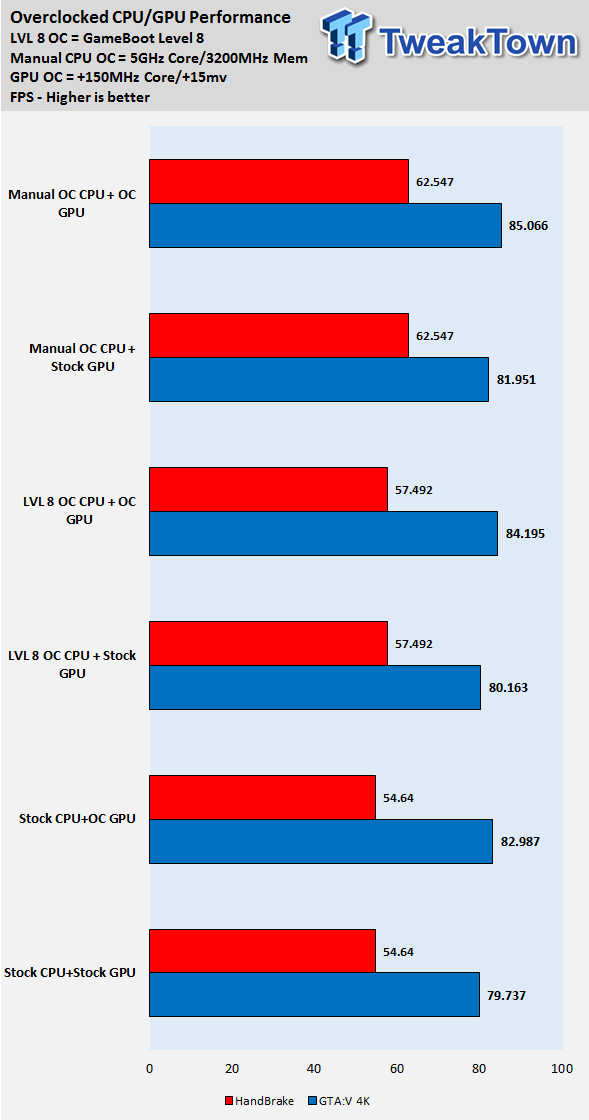
I have condensed all of the overclock results (all combinations of auto OC, manual OC, and GPU OC) into a single graph. Handbrake encoding of a 4K 6GB video file was used to gauge CPU performance, while GTA:V's built-in benchmark was used to gauge 4K gaming performance.
At stock, the system is extremely quick and blazing fast, 4K gaming is very easy to accomplish. The CPU runs HandBrake (it has AVX) at 4.4GHz at stock, 4.6GHz with the Level 8 auto OC, and 5GHz with my manual OC, and the gains are quite big when comparing the manual OC to stock performance.
Gaming is another story, but we do gain the most performance when you overclock the GPU compared to just overclocking the CPU. Overclocking does pose some risk and voids some warranty, but it can provide decent increases if you want them.
MSI's Software
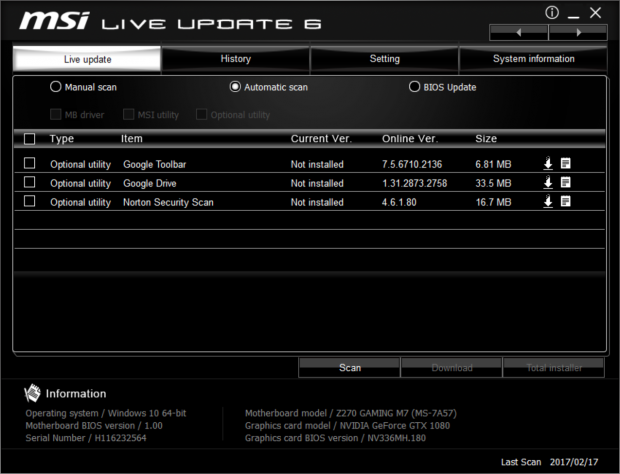
MSI has a plethora of software to compliment both the motherboard and GPU and some of their software, such as the Gaming APP, actually control both at the same time. If I want to take advantage of all MSI software, all I have to do is download and install MSI's Live Update 6, and tell it to update and install all drivers and MSI applications. It will automatically install everything. However, you can always pick and choose what you want to install and what you don't.
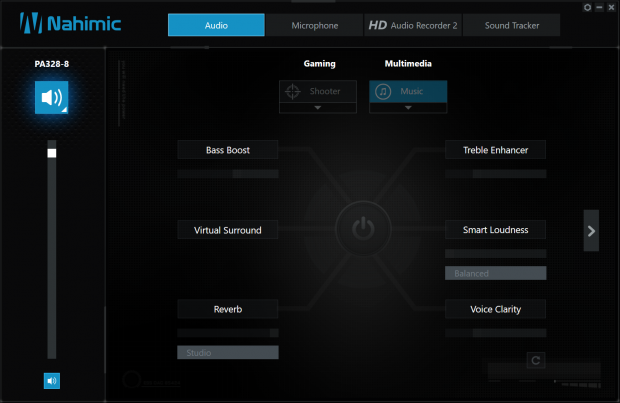
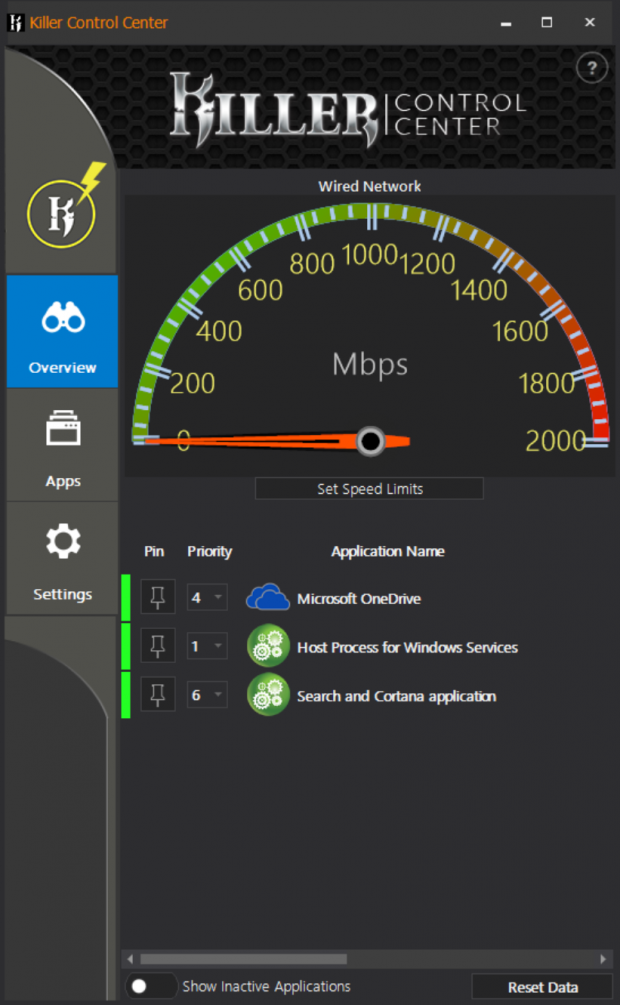
MSI teamed with Nahimic a while back, and the software to enhance sound effects is included with the Z270 Gaming M7. It's quite impressive software and adds some decent sound enhancements. MSI is also using Killer's latest e2500 gaming NIC, included with the NIC is Killer's Control Center (you can install the drive only too) to help prioritize network traffic.
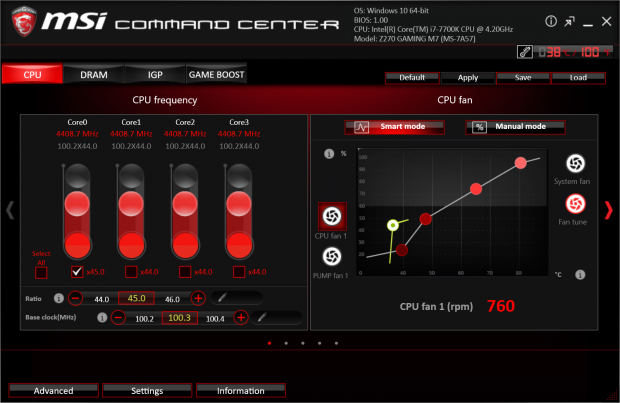
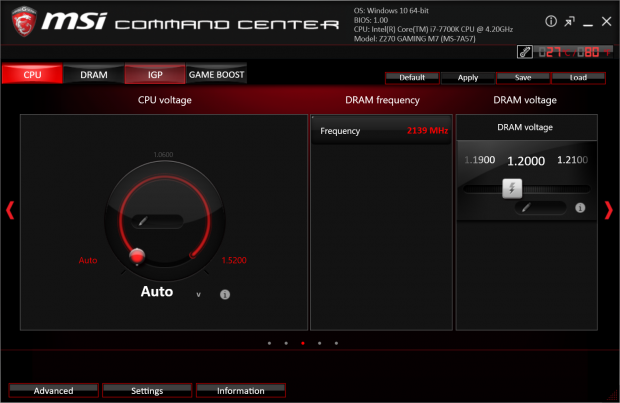
MSI's Command Center is where you will find manual and automatic overclocking. Windows based fan control is also found in the Command Center.
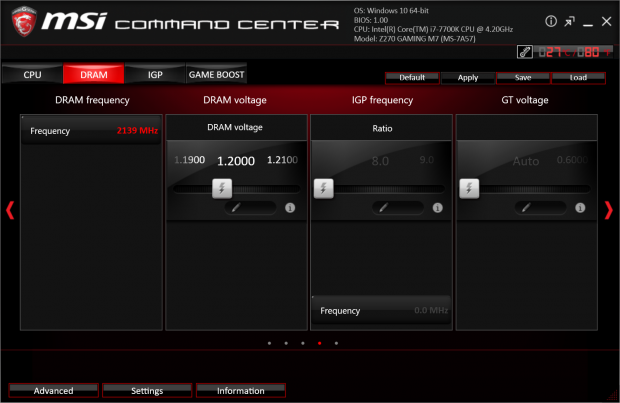

Overclocking CPU, memory, and iGPu can be done in the Command Center.
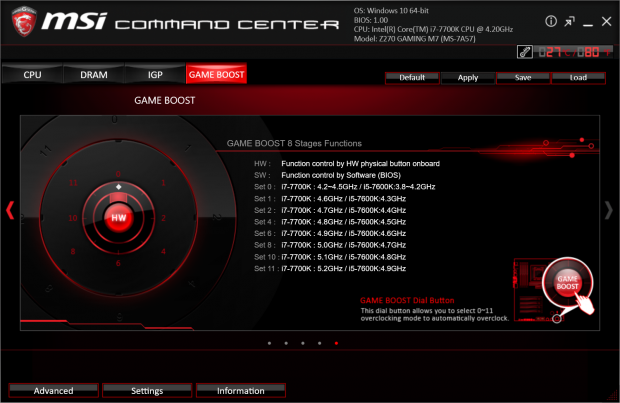
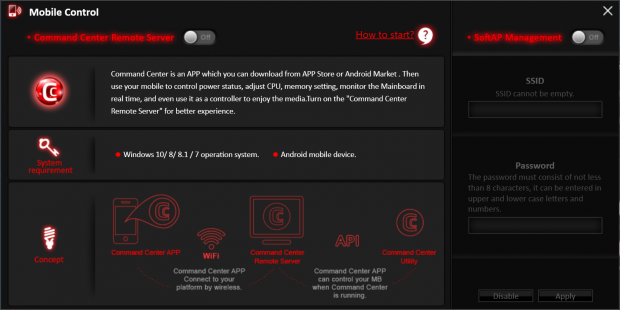
Game Boost automatic overclocking is also located in Command Center. Command Center can also be controlled by your mobile device as long as the PC and your device is on the same WIFI network.
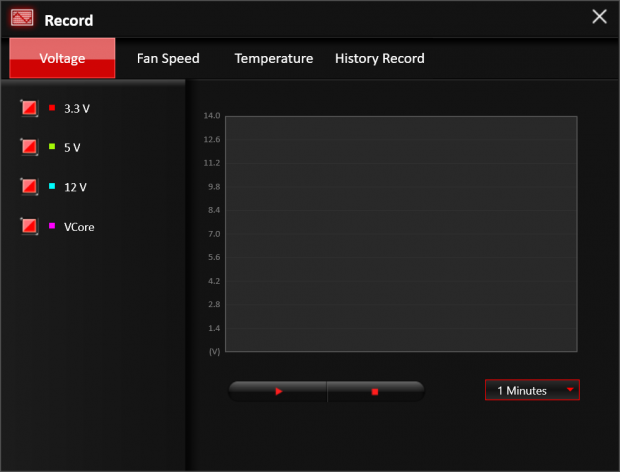
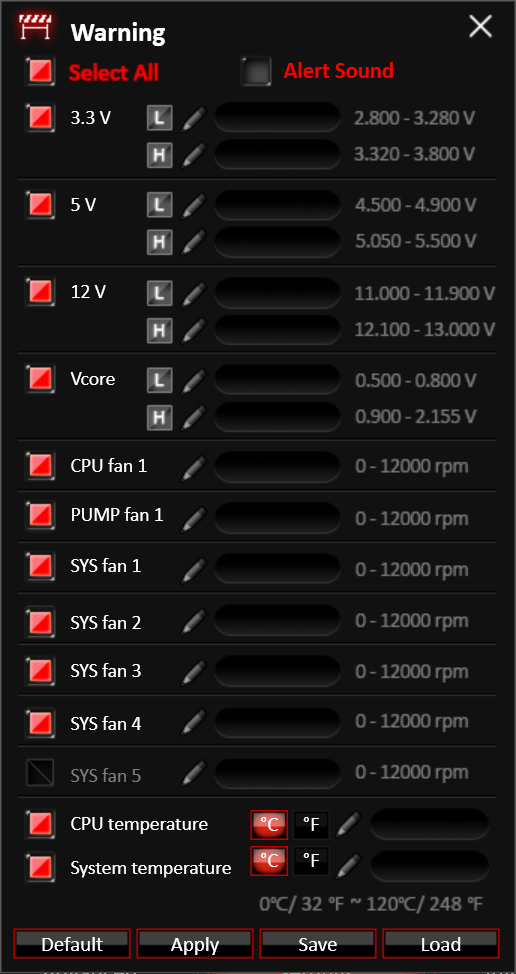
Logging of different system parameters is also present in Command Center, and you can set warning levels with an alert sound if the PC's parameters go out of preset limits.
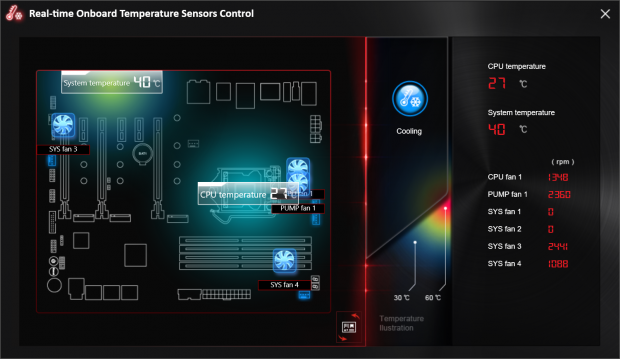
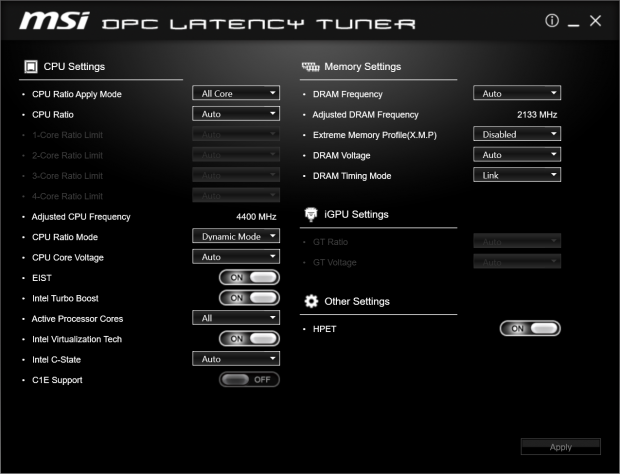
Real-time reporting from onboard temperature and fan RPM sensors is also available. DPC latency is a concern of those who do system-critical tasks, and MSI has devised a program to help reduce DPC latency.
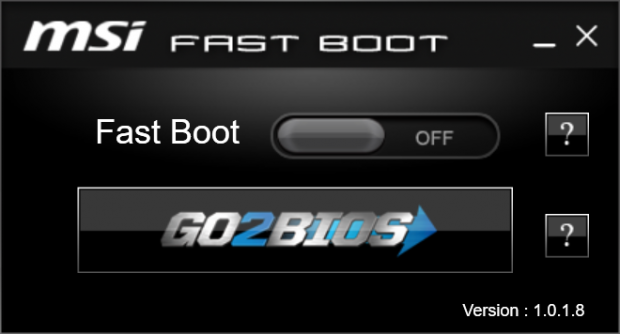
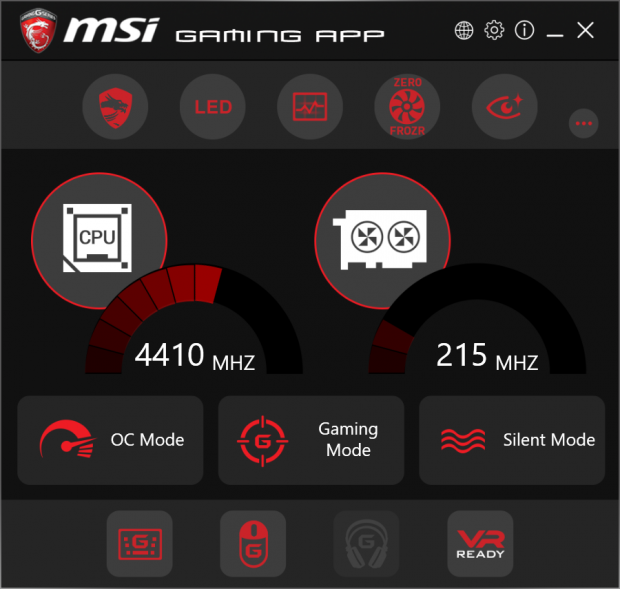
MSI's Fas Boot program can speed up boot or take you into the UEFI upon next reboot. MSI's Gaming App is a newer application that centralizes many gaming related motherboard and GPU features.
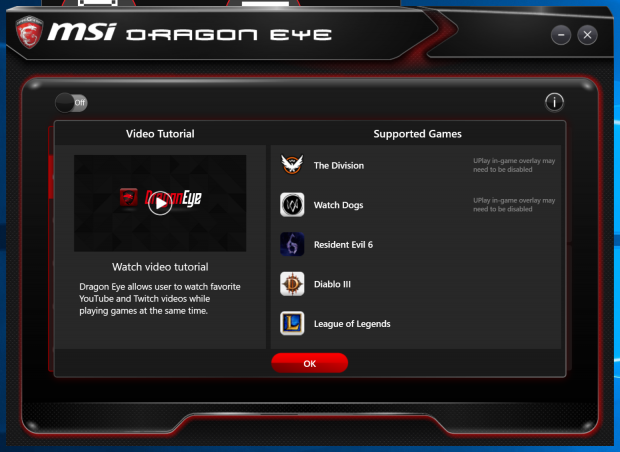
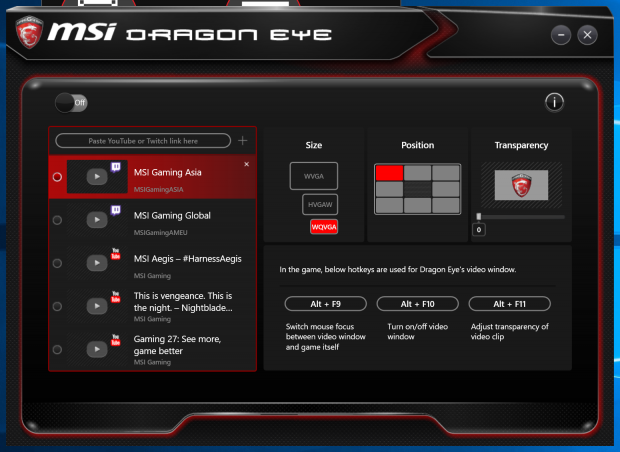
MSI's Dragon Eye allows you to watch YouTube or Twitch streams while you play a game.
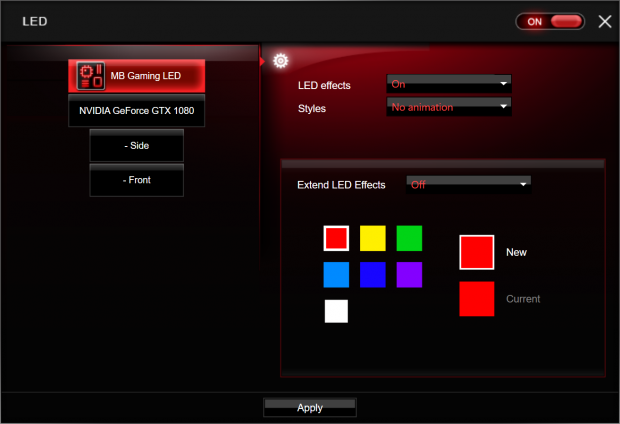
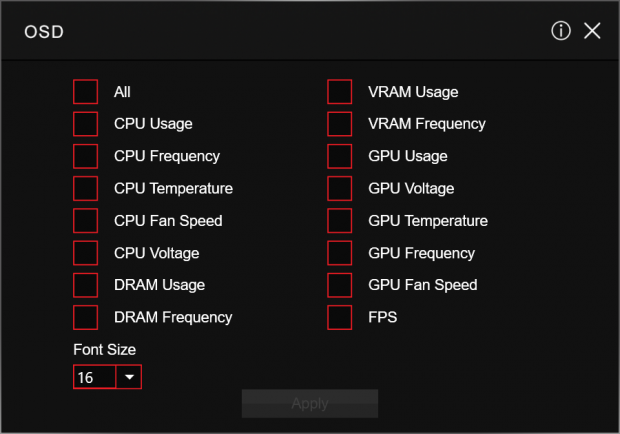
The LED menu lets you configure the RGB LEDs on the motherboard and GPU; it also allows you to control the RGB LED header. MSI does include a built in on screen display (OSD) program so that you can monitor vital statistics while in-game.
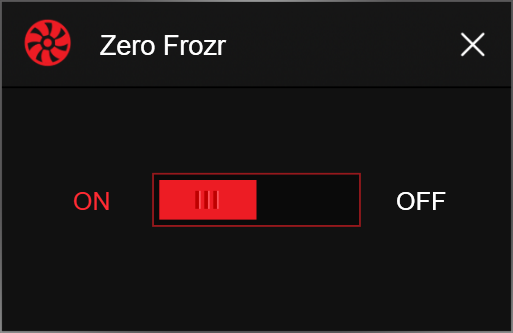
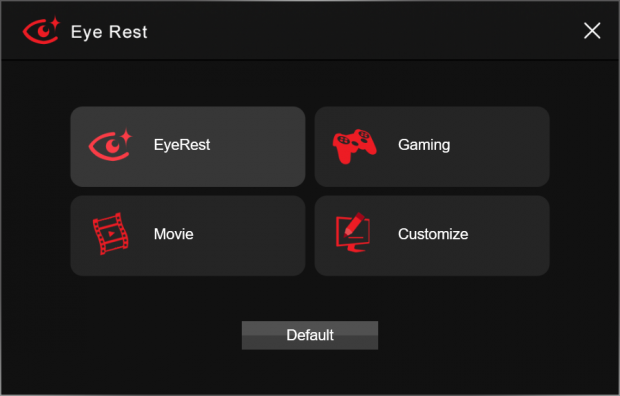
The Gaming App is also where you can disable the GPU's Zero Frozr feature, and where you can select the type of application you are running to help your eyes rest.
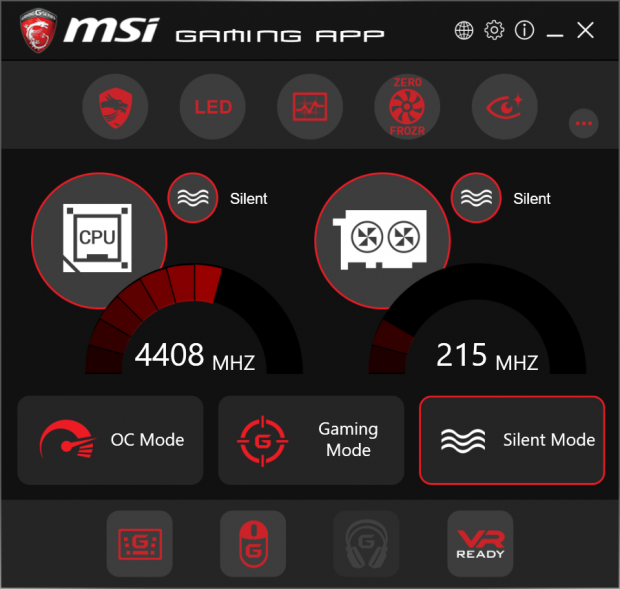
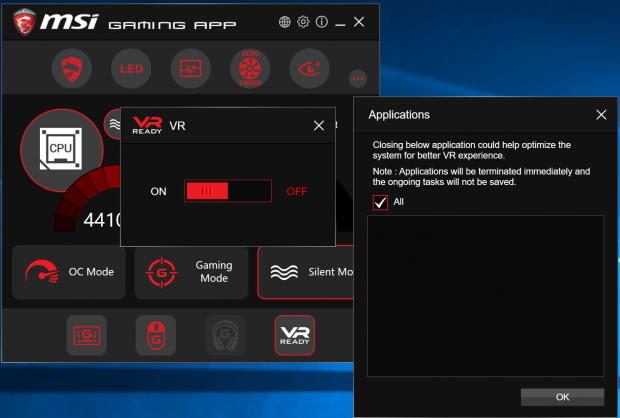
The Gaming App also has generalized profiles; the silent profile will reduce CPU and GPU fan noise levels. MSI's VR Boost will improve CPU, GPU, and motherboard performance when a VR game is encountered.
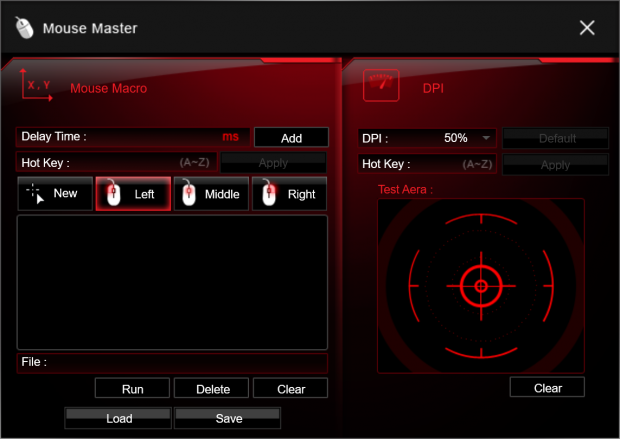
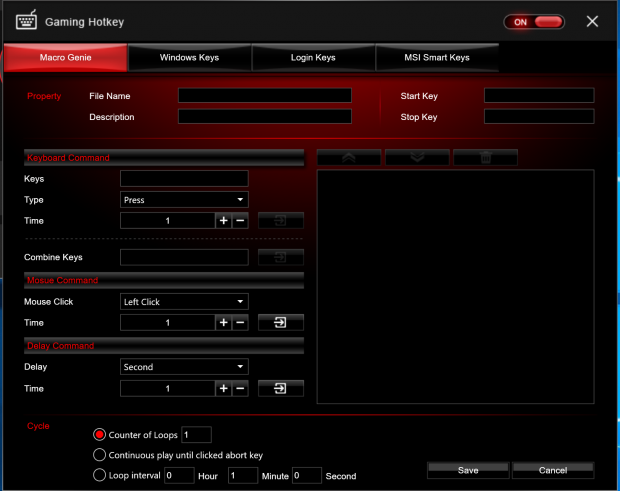
MSI's Mouse Master helps you fine tune your gaming mouse's performance, while MSI's Gaming Hotkey allows you to setup keyboard macros.
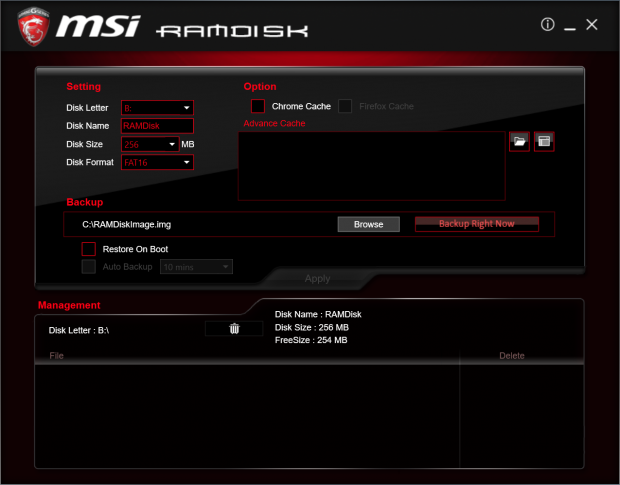
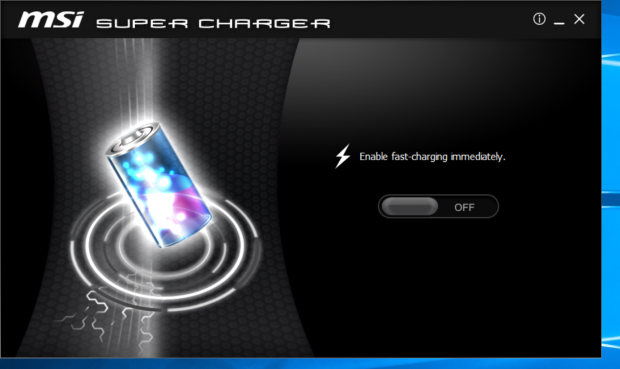
Want a fast scratch disk? MSI's RAMDisk is there to turn extra RAM into a drive. If you want to charge your iPhone faster, Super Charger enables quicker USB charging.
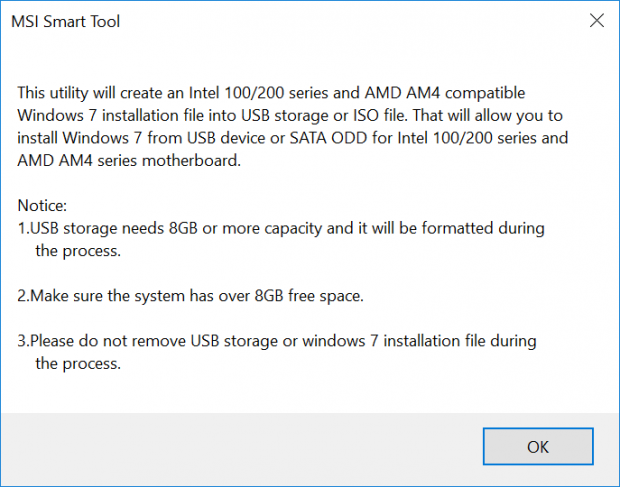
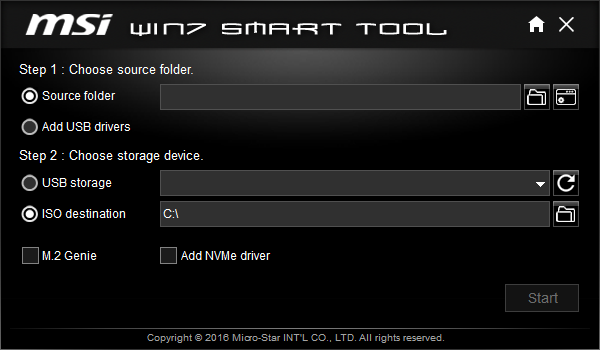
MSI realizes that many users want to use Windows 7, but are limited because of installation requirements put forth by the latest Intel and AMD chipsets. So they designed their own "Smart Tool," allowing you to create a Window 7 installation disk from an ISO image.
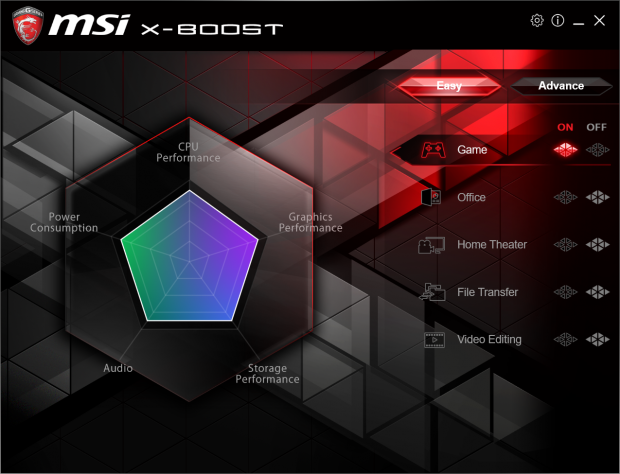
MSI's X-Boost software optimized total system performance characteristics for different operating scenarios. Gaming is the core function of the hardware, so it's balanced.
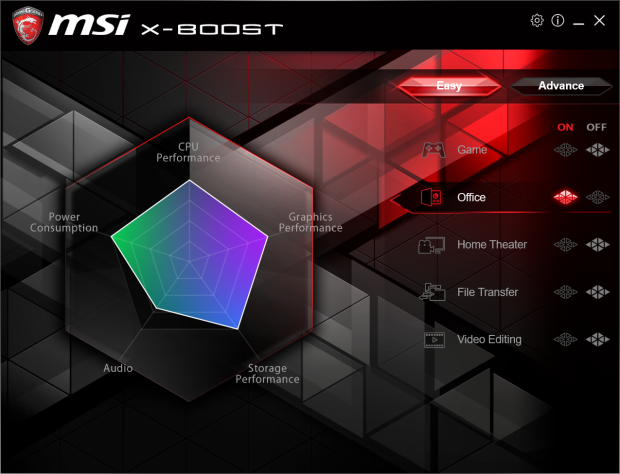
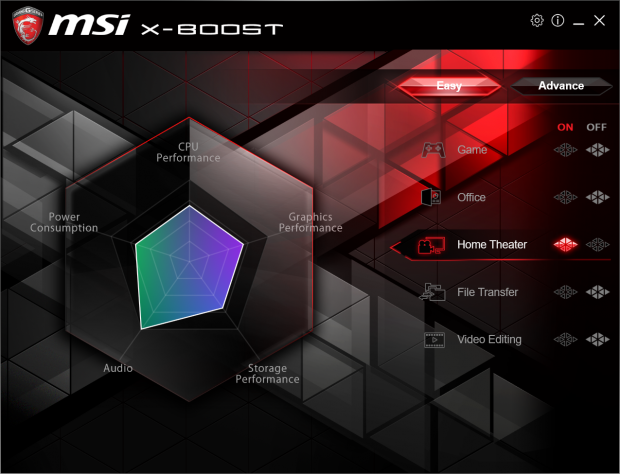
If we shift into office mode, the system prioritizes storage performance over audio performance. If we shift into Home Theater mode, the system increases audio performance while gently reducing the performance of the rest of the system. X-Boost software is designed to optimize power for whatever task you are doing.
Finale
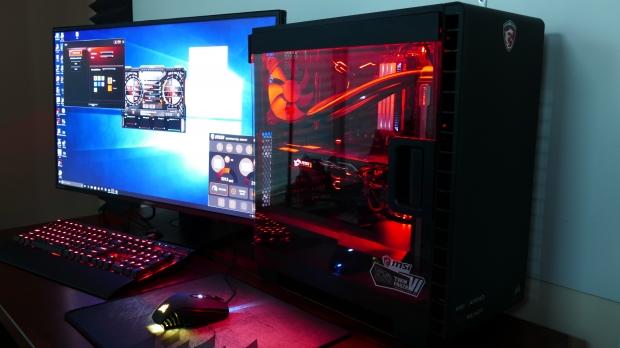
I hope that this build guide has taken you through all the steps required to make full use of both the Z270 Gaming M7 and GTX 1080 Gaming X 8GB gaming products from MSI. Together, they produce a very powerful combo designed for excellent 4K gaming performance. They also look really great together inside a chic, well-groomed build.
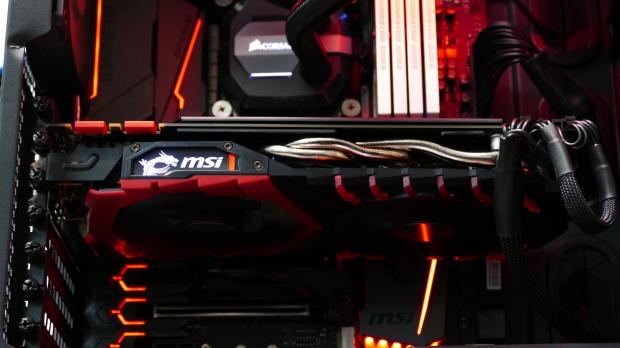
You could have built this PC in a much more cost-effective fashion using the same motherboard and GPU but different CPU, memory, PSU, and storage. Our configuration allows for a second GPU, but if you are satisfied with one, you should go with a lower wattage (around 650-800W) PSU. If you aren't planning on overclocking the memory, DDR4 2133MHz kits are much less expensive than the 3200MHz kit we used. You can also go with a 7600K instead of the 7700K, but stick with Kaby Lake if you want to go with Optane in the future.
One good thing about MSI's inclusion of three M.2 slots and one U.2 port is that Optane is expected to release in the M.2 and U.2 form factors. You are covered as long as you don't fill up too many slots. Regarding storage, we didn't go as extreme as we could have. In fact, we could RAID M.2 drives, or even two Intel 750s through MSI's M.2 Genie.
The MSI Z270 Gaming M7 offers excellent feature options and an easy upgrade path, while MSI's GTX 1080 Gaming X offers solid 4K gaming performance. Together they lay the groundwork for a very extreme VR/4K focused build. We hope you enjoyed this guide.

