
The Bottom Line
Introduction, Specifications, and Pricing
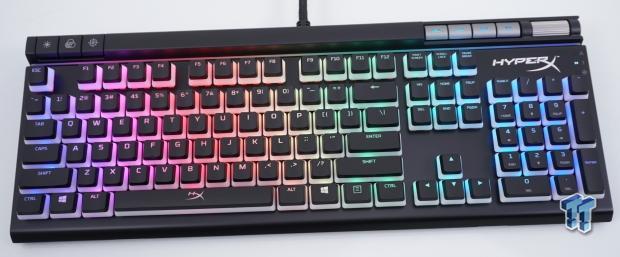
The HyperX Alloy series, while it started pretty ordinary, as far as the mechanical keyboard was concerned, at that time, HyperX delivered enough style and accessories to draw in the masses. In the earlier models, we got Cherry MX switches, where the original Alloy keyboard provided only a single color of LEDs, which were later adapted to RGB illumination. With the earlier models, they also shipped with a keycap puller tool, a wrist rest, and a set of eight silver keycaps with texture to allow you to feel your way onto the proper keys for gaming. However, in the four or so years since the original to carry the Alloy name was released, the market changed, and so does their latest entry!
The smaller changes that have happened are changing the multimedia keys from black to silver, to help them stand out against the sea of black caps and the exposed steel plate. The extra keycaps and wrist rest are no longer included. We get RGB backlighting, but also get new modes and reactive settings which previous models do not possess. For some reason, HyperX reversed the order of the lock LEDs on the right of the keyboard, and the switches now sport transparent bodies to help deliver a massive amount of light! Speaking of switches, HyperX moved away from Cherry MX since they now have their own switches, and digging a bit deeper, the PCB has also changed, and even the MCU is different this time around! While the list of changes eliminates some old favorites, the quest was to push things to a new level in mechanical keyboards, and deliver users what they desire, right out of the box, without looking elsewhere.
The most significant change to the new Alloy Elite 2, which we are currently covering, is that this is the first mechanical keyboard to be shipped with a full set of ABS, double-shot, Pudding (style) Keycaps, which we absolutely love, and have become very popular over the last year or two! While a glance at the Alloy Elite 2 will show you something new is afoot, HyperX takes things well beyond aesthetics when it comes to the engineering and design of this latest keyboard from HyperX. We applaud the path that HyperX has taken over the past few years, to make their mechanical keyboards stand out amongst all other mechanical keyboards, we have a feeling you will thoroughly enjoy what it is HyperX has for you now!
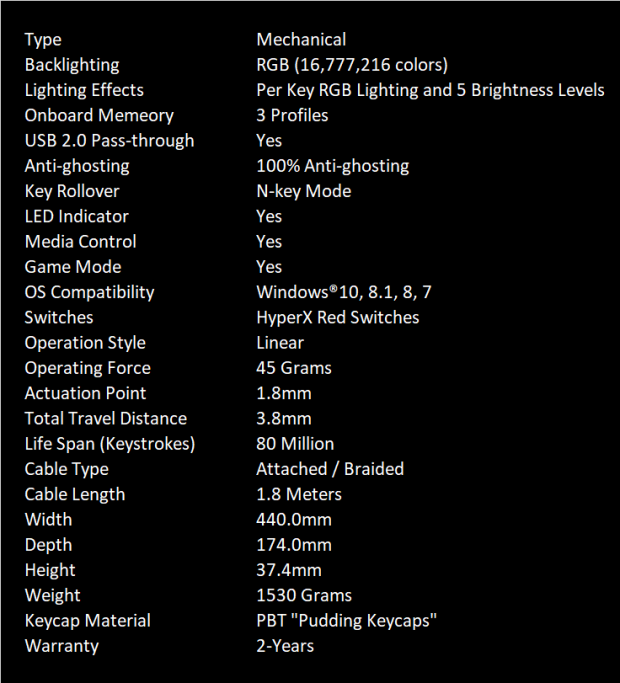
We made the chart more compact, but all of the information contained in it is directly copied from the product page. Following what we see in the chart, we start with this keyboard being mechanical with per-key RGB illumination over four brightness levels and the ability to turn them off. The Alloy Elite 2 includes things like three onboard profiles, a USB pass-through port, anti-ghosting, NKRO support, lock indicator lights, multimedia control, and a gamer lock mode. The last bit of the preliminary specifications is that this is a Windows device with support from Windows 7 through Windows 10.
On a deeper level, we start to discuss things like the HyperX red linear switches used. These switches require 46 grams of force to compress, and at 1.8 millimeters of travel are actuated, with 3.8 millimeters of overall travel to the bottom. The lifespan of the Alloy Elite 2 carries a higher number over the older Cherry MX based models, where now, eighty million clicks are the norm. The cable that exits the back is thick due to the Alloy Elite 2 offering a pass-through port, it has a braided covering, it is 1.8 meters in length, and terminates with two USB 2.0 connectors.
Dimensionally, the Alloy Elite 2 is 440mm wide, it is 174mm from front to back, and without the feet extended, it stands 37.4mm tall. We also hope you do not have plans of moving this 104-key mechanical keyboard around much, as it weighs in at 1530 grams!
There are two last things to cover. First and foremost, the Alloy Elite 2 comes with a full set of Pudding (style) Keycaps, similar to what we have reviewed, but instead of PBT, these are ABS plastic. The second thing that closes the chart is that the Alloy Elite 2 is backed with a two-year warranty covering defects in quality or unexpected failure.
Back when the original Alloy Elite first hit the market, it came with a $109.99 price tag. While we did get things like extra silver caps and a wrist rest, by today's standards of what the market expects of a keyboard, it would be a harder sell today! However, even though the Alloy Elite 2 will cost you $129.99 to obtain it, we feel that the price is justified in what has been done, both behind the scenes and aesthetically in front of your face!
Chad's Peripherals Test System Specifications
- Motherboard: ASUS Prime X299 Deluxe - Buy from Amazon
- CPU: Intel Core i9 7920X - Buy from Amazon
- Cooler: Corsair H150i Pro - Buy from Amazon
- Memory: G.Skill TridentZ RGB 3600MHz 32GB - Buy from Amazon
- Video Card: EVGA GeForce GTX 1080 Ti Hybrid SLI - Buy from Amazon
- Storage: Samsung 960 EVO 250GB - Buy from Amazon
- Case: Cooler Master Cosmos C700P - Buy from Amazon
- Power Supply: Thermaltake Toughpower DPS G 1050W - Buy from Amazon
- OS: Microsoft Windows 10 Professional 64-bit - Buy from Amazon

| Today | 7 days ago | 30 days ago | ||
|---|---|---|---|---|
| Loading... | Loading... | |||
|
* Prices last scanned on 12/31/1969 at 6:00 pm CST - prices may not be accurate, click links above for the latest price. We may earn an affiliate commission from any sales.
|
||||
Packaging, Accessories, and Documentation
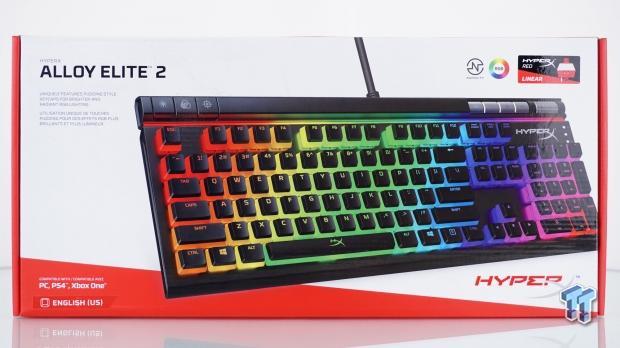
The packaging for the Alloy Elite 2 from HyperX is an eye-grabbing and attention-getting rainbow of bright colors, a pop of brilliant red around the edges, all popping off of a marbled white backdrop! At the top left, we see the keyboard's name, along with mentions of the keycaps, and bright RGB lighting. At the bottom-left are mentions of PC, PS4, and Xbox One compatibility and its English (US) layout.
The image of the Alloy Elite 2 in all its glory takes up the bulk of the room, leaving us with notations to NGenuity software, the RGB lighting, and use of HyperX red linear switches at the top, with HyperX at the bottom.
The first of the long side panels of the box offers the basics. On the left end, we see the HyperX Alloy Elite 2 Mechanical Gaming Keyboard name, and what we do not see at the other end is the HyperX logo.

Both of the smaller ends are identical and offer no more than the HyperX name/logo, a bar to separate right from left, and the Alloy Elite 2 name.

The last of the box's sides offers us a list of contents, which states we get a keyboard and a guide. We then run into the system requirements, which are easy to fulfill, but more importantly, if you wish to use the NGenuity software, you will need Windows 10 and an internet connection.
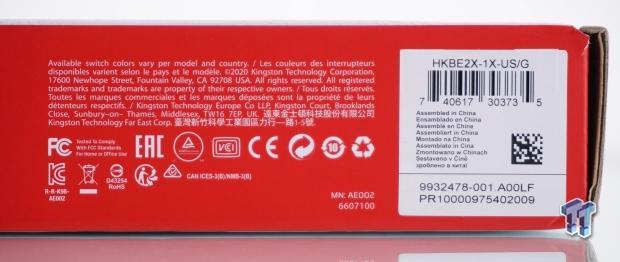
At the right end of that same side, we run into the legal information, compliances, and such, but also is where we run into the product sticker sporting the HKBE2X-1X-US/G model number, shows where it was made, and also offers the serial number.
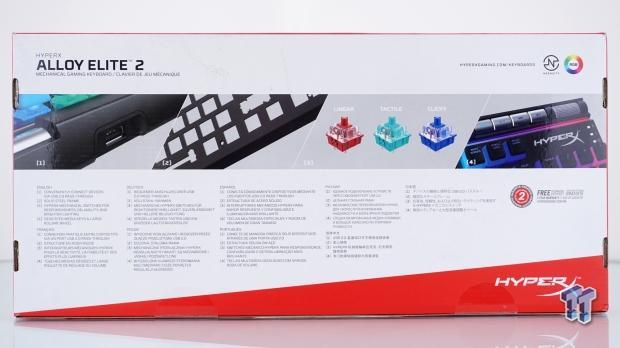
On the back of the packaging, we see the name and iconography we saw in the front, but four images warrant your attention this time. The first image covers the pass-through port and shows its location, where the second image shows the solid steel exposed frame. The third image explains that this keyboard can be found with red linear, aqua tactile, or blue clicky HyperX switches, while the last picture is to display the multimedia keys. Under the last image is a white "2" in a red circle, which is the years of warranty coverage.
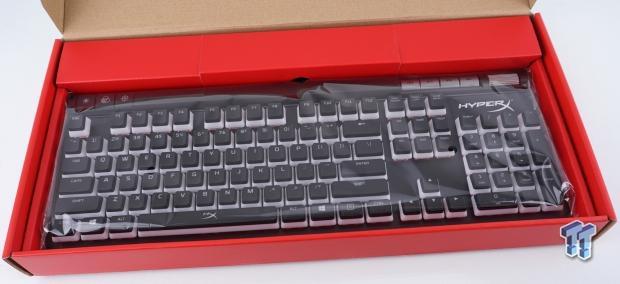
After cutting through a pair of clear anti-tamper stickers, we gained access inside the box, where we find the Alloy Elite 2 surrounded in red cardboard, snugly holding it in place. To keep the color off the keyboard and keep scratches at bay, a bag covers the keyboard to ensure it arrives in the best possible condition, as ours did.
Under the keyboard, you will find detailed information on the warranty terms in many languages at the bottom of the box. To the right are things we cannot read due to a language barrier, but we do see the address of where to learn about the NGenuity software, but it is obtained through the Microsoft Store and runs like an app and less like traditional software.
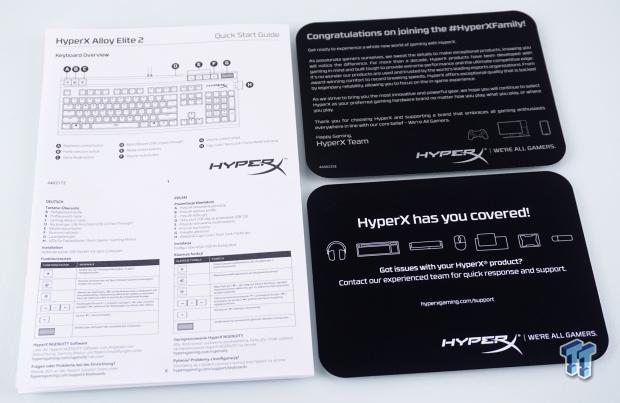
The Alloy Elite 2 ships with literature, and on the left is the quick start guide that explains the layout and has the address to obtain the software again. To the right is a message from the HyperX team and what their mission is. Below is another insert, which delivers an address to obtain support for those who "got issues."
HyperX Alloy Elite 2 Mechanical Gaming Keyboard
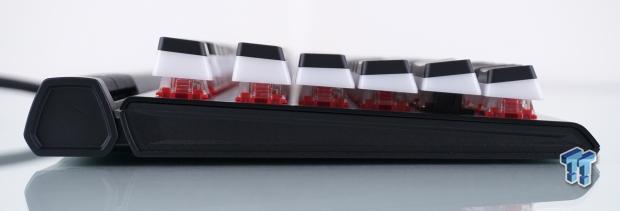
Starting at the bottom of the keyboard's left edge, we see the same frame we have seen in its predecessors, but what is above the exposed steel plate has changed. Not only do we see red frames and clear tops on the switches, but we also see the double-shot ABS keycaps with the high contrast white and black sections.
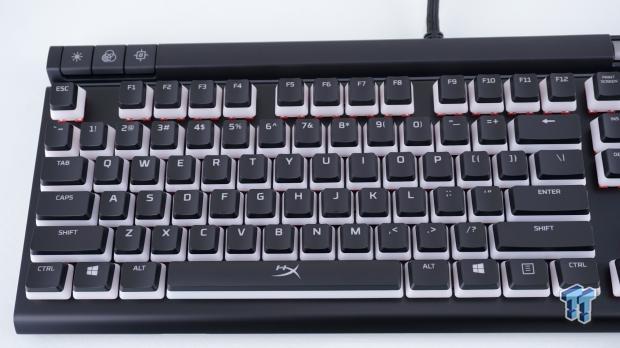
The seventy key section on the keyboard is what we are looking at first, and we cannot get enough of this high contrast appearance. The fonts found on the keycaps are pretty standard, but we see the "HX" on the space bar as a bit of a showpiece.
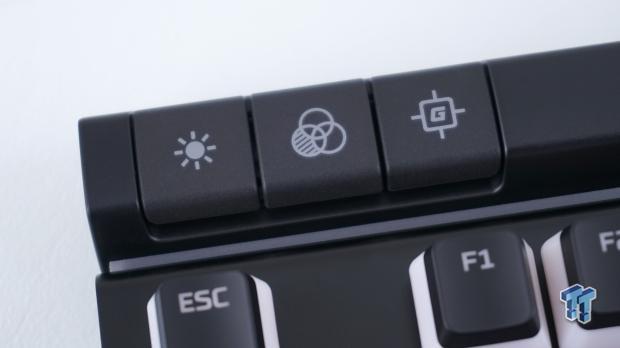
At the top-left corner of the keyboard, three buttons do various things. The first button with the sun icon allows you to turn off the RGB lighting or display it in four intensity levels. The triple circle icon allows the user to swap through the three profiles on-the-fly. The last of the buttons with the "G" in crosshairs is the Game mode button, which locks specific keys from use while active.
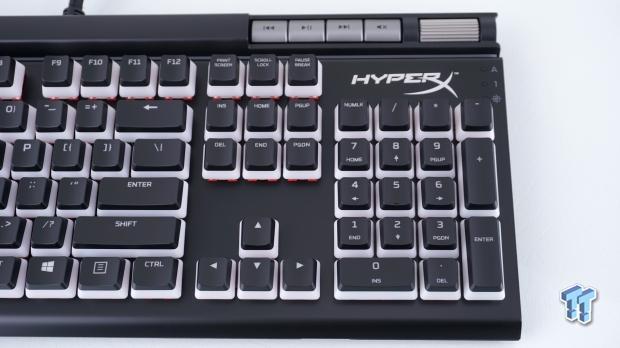
The thirty-four buttons left at the right end of the keyboard share that same high contrast appeal, and minimal double-duty of the keys. Command and arrow keys are as expected, as is the number pad, with the additional set of arrow keys for left-handed gamers and some of the commands offered as dual-layer functionality.
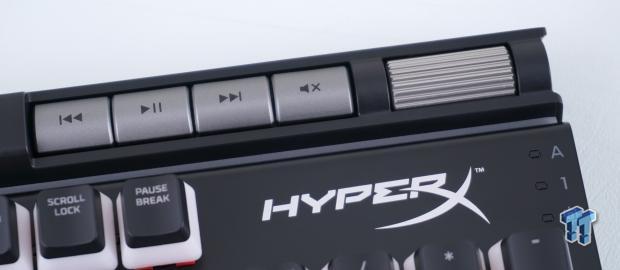
The top-right corner of the Alloy Elite 2 has a few things worth pointing out. Most apparent are the large, silver, multimedia buttons, where you can select the previous track, play or pause the current track, skip to the next track, and mute the sound. If you want to adjust the sound level, you use the roller bar to the right. Below that, we see the HyperX name, painted onto the steel, and to the right, in reverse order of earlier models, we see the caps lock, number lock, and game mode indicator LEDs
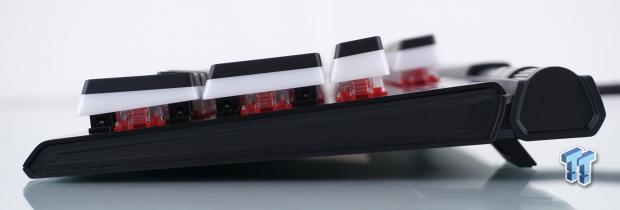
As with the left end, the right end looks much like the original Alloy Elite, but we cannot express enough, just how good the look is from every angle of the Alloy Elite 2 has delivered so far! With the feet extended, we do have a much more ergonomic friendly angle of attack on the keycaps now.
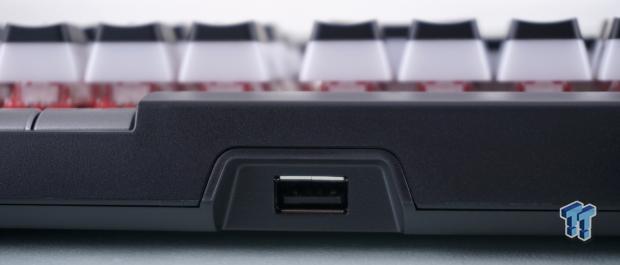
Between where the cable exits the back of the Alloy Elite 2 and where the multimedia keys are found at the top, is where the pass-through port is located. The port us USB 2.0. so you will get decent speed for thumb drive transfers and is a great way to tidy up a desk by using this for a mouse or headset connection point.
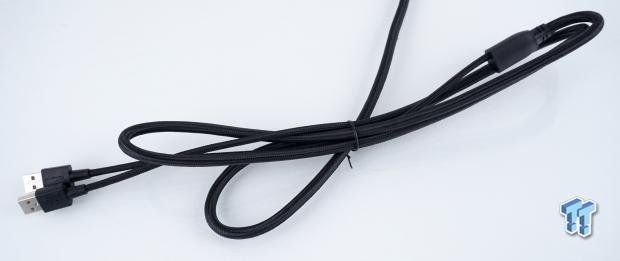
As the cable leaves the back of the keyboard, it is a thick dual-cable covered with black braided material. That continues to a break-out connection, where the wires separate and terminate in standard USB 2.0 connections. Still, sadly both show a USB icon, rather than many offering a USB icon for the pass-through functionality and a small keyboard icon for product functionality.
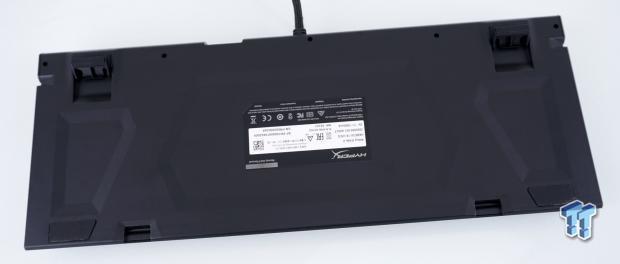
Four rubber feet support the highly stylized lower portion of the keyboard frame. This is the same as previous models and includes the wrist rest attachment points at the front edge. While it seems odd to have the sticker on upside down, when at the desk, if you flip the keyboard to see the bottom, the sticker is then appropriately oriented.
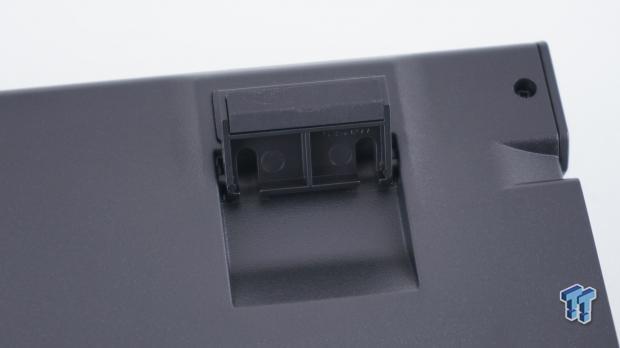
While we can appreciate the rubber foot on the extendable foot, we also realize this is a heavy keyboard, and will likely get slid more than lifted when moved. We feel that the lack of a solid lock-point once extended will allow these feet to collapse easily, where, had they opened to the sides, we would not be discussing this.
Inside the Alloy Elite 2
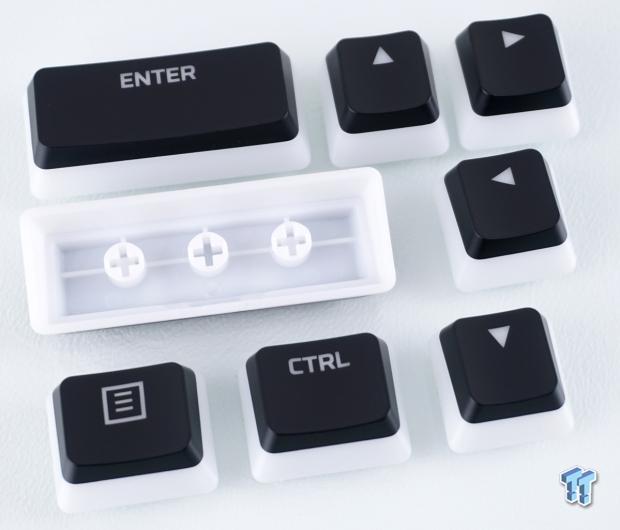
Starting our journey behind the scenes, we pulled a few of the keycaps to get a better look at the Pudding (style) Keycaps. The material is ABS, not PBT, and the tops of the switches are smoother than their PBT cousins. They are still made with a double-shot process, where the white plastic is molded first, then the black portion is injected on top of that.
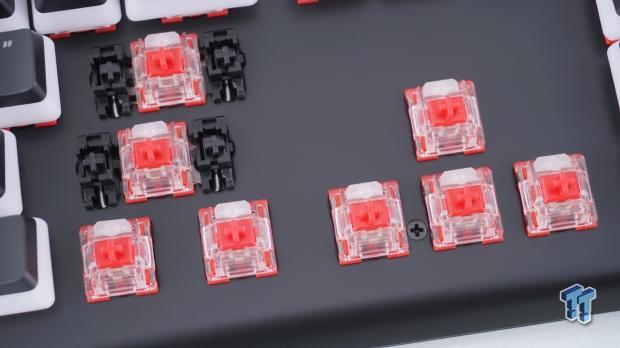
The HyperX red linear switches have transparent bodies, which allows the RGB LED at the back of each to shine through them, flooding more light onto the steel plate. The larger keycaps are supported by helper stems that sit atop the built-in torsion bars.
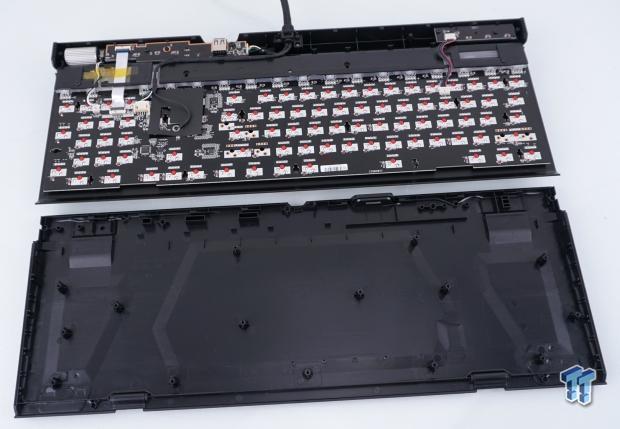
Removing more than a dozen screws from the top, and five screws from the back, we could get inside of the Alloy Elite 2 and have a look around. The lower portion of the frame uses standoffs and the edges of the frame for some support, but it is the steel top that delivers all of the rigidity.
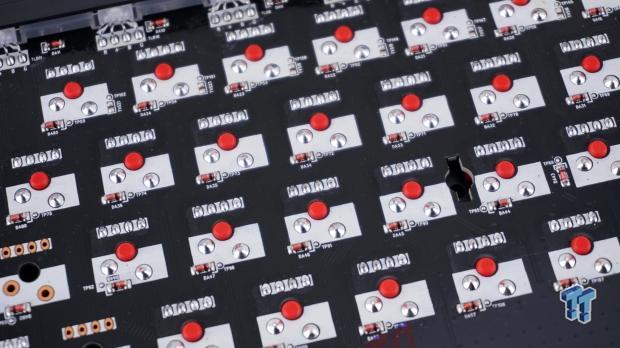
Zooming in on the PCB, we noticed that the layout of this PCB is much different from the earlier models of Elite offerings. We see only minor signs of flux being used, across the entire plain, and the soldering is clean and precise.
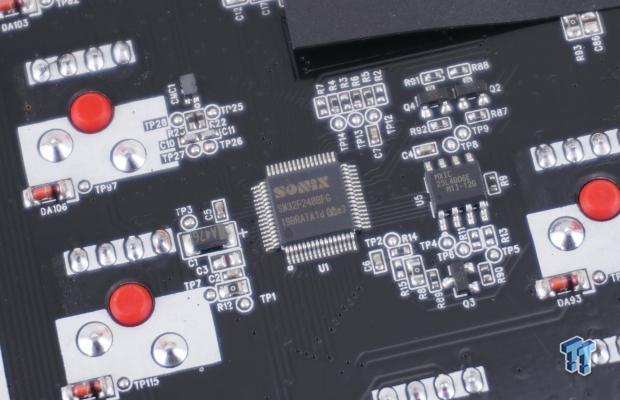
Older version of the Alloy Elite sported NXP MCUs at the helm, but this time around, we find a Sonix SN32F2488FG processor. More specifically, this is the 32-bit ARM Cortex-M0 MCU with enough storage to keep three profiles stored onboard, without the need to have software for the functionality of said profiles later.
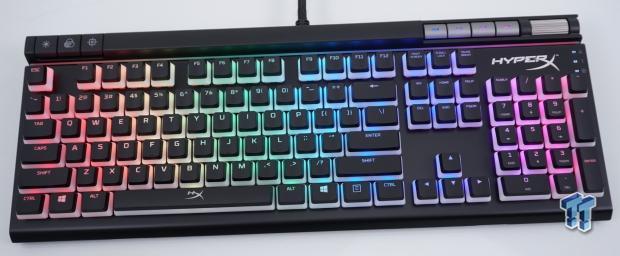
Let the light show begin! Not only do the Pudding (style) Keycaps look amazing, but when placed on a keyboard with as brilliant illumination as the Allow Elite 2 delivers, the light floods not only the keyboard, but also the first three feet around it! We like the accent strip above the keys, and we also like the fact that the multimedia keys follow the lighting mode. As for the lock indicators, they are always white when active, and easy to spot in your periphery.
NGenuity (Beta) Software
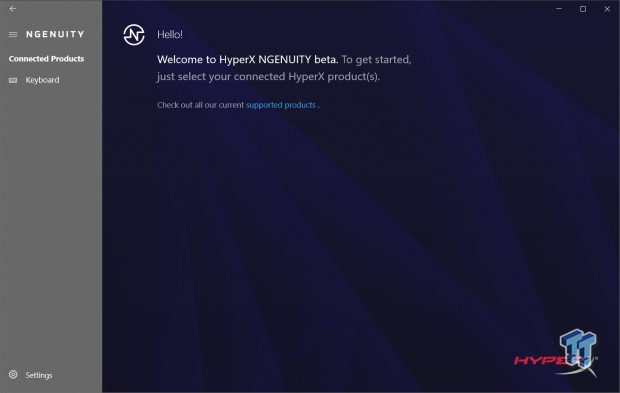
Once the software section is found on the HyperX site, you are taken to the Microsoft Store when you click on "download," where the beta version of NGenuity is available. Once downloaded and installed, once opened, the first screen looks like this, where to get into the actual software, you must click on the word keyboard at the left, where we were prompted to take a firmware update, and we did.
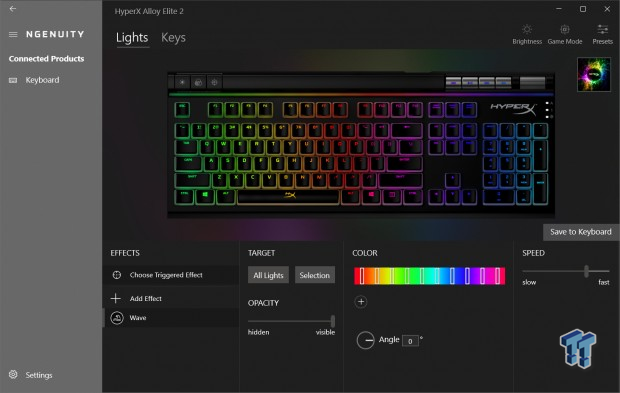
After completion of the firmware update, we were able to click on the "keyboard" and get into the lights section by default. It is here that you have the option to choose not only the overall lighting effect, but you can ass a triggered effect as well. You can display a rainbow of lighting, but you can get flames, explosion, or fade effects around those keys when the key is pressed. You can set lighting for targeted areas where the entire keyboard can be done at once, in groups, or on a per-key basis.
That leaves us with the color bar for selecting static and reactive colors, you can change the angle, and you can address the speed of the effects here. You will also want to be sure to save any adjustments via the "save to Keyboard" box above the speed slider.
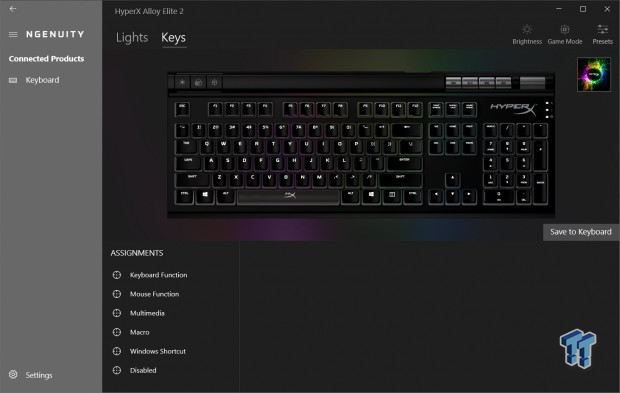
Under the heading of keys, this is where you can remap, add functionality, reassign already found features, create Macros, create shortcuts with keypresses for software, and even disable keys you do not want to bother you. Click on any key on the keyboard, and pick one of the types of changes to make, and make a key do almost whatever you can dream up for it to do.
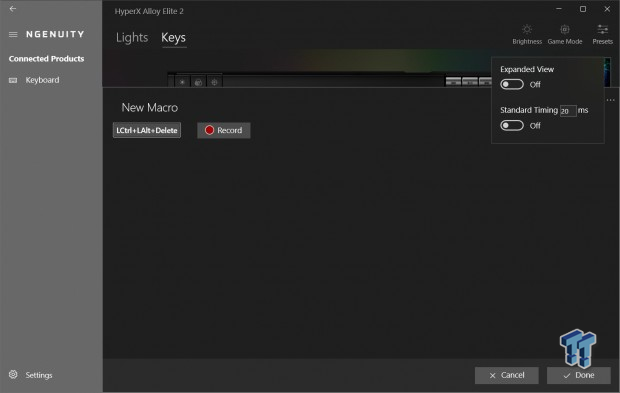
The Macro menu is rudimentary. It is easy enough to pick a key and get into the menu. Even clicking record and programming the Macro is straight forward. The triple dots on the right open the menu to expand the view or address delay timings, but we see no way to import or export Macros or edit on a per-function basis. You have to delete it and start over from the beginning.
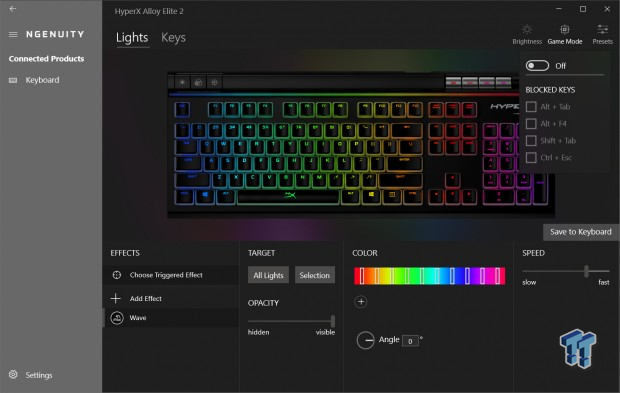
At the top right of all of the windows, we have seen the Brightness, a simple slider to adjust the RGB LED intensity with more adjustment than the button on the keyboard, so we skipped an image of that. However, the Game Mode button has options that need to be seen. You can turn the function on and off through software rather than using the keyboard button, and via checkboxes, you can select what functions are disabled when the lock is active.
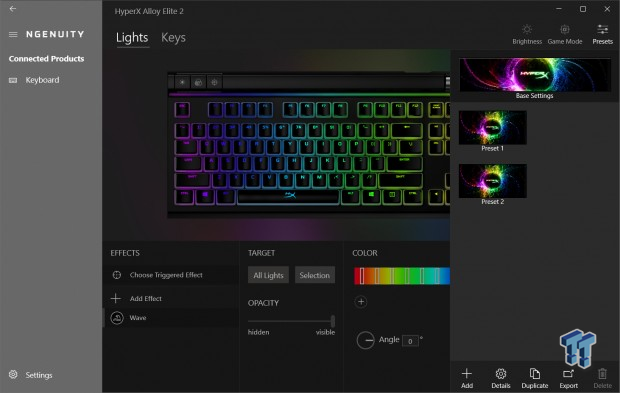
The colorful box at the top-right, which we have seen in the last two images, is where you adjust profiles, via a dropdown menu when clicking on the colorful circle around the HyperX logo. The first profile is the base settings by name, but the profile can be customized, just like the pair that follows. By clicking on the profile, it is selected for programming.
Still, you can also change the profile's image and tie it to a program that, when selected, that application runs automatically, based on which profile is active. Unlike the Macro menu, you can add more profiles, save them by exporting them to PC storage, and change what is stored on the keyboard. You can duplicate a profile for further testing before breaking the profile you know already works flawlessly.
Gaming and General Impressions
DOOM Eternal & PUBG
When it comes to rapid movements in a game like DOOM eternal, we can get around the maps as we should, but the red linear switches require too little force for our resting fingers. While all of the movements we intended to transmit were indeed sent to the game, the shift key and the space bar were also taking actuation just from resting there.
This is not the fault of the keyboard or the switch type, we play a bit heavy-handed, and with the HyperX red switches, they do make much less noise to be picked up over the headset than our typical choice of blue switches, and with more time and a bit more effort, we could retrain our hands to play more gently with these 45-gram switches.
In something like PUBG, our movements are much more deliberate and less "run for your life" like it is in DOOM. We found ourselves with many less accidental actuations of keys in a slower-paced FPS, and remapping controls for both titles allows for customization of any play style. For those that use Macros in-game, you will need to put some time into the programming part of the process, but once dialed in, they are handy for various MMOs and MMORPGs.
Windows and Productivity
As a daily driver, our fat fingers were adding in letters and numbers here and there for the first few days. Still, as we get near the conclusion of this review, a dozen days or so later, we are very fluent with the red linear switches, and are much more confident with the Alloy Elite 2 at this time to write until our hearts are content, or return emails without screwing up, as well as looking like we know what we are doing with a keyboard in various means of social media. We also find the dedicated multimedia buttons a treat.
We tend to have to hunt around in the dark with keyboards that deliver it in the dual-functionality of another key. Where on the Alloy Elite 2, they are bright, easy to reach, and in no way confusing when the lights in the room are off! It is also in writing, where we tend to sort out vibrations and flex in design, and even if you type with a keyboard in your lap, your fingertips will be tingle free, as HyperX built this like a tank!
Final Thoughts
Deep down, the Alloy Elite 2 shares much of its design, thought process, and features of those that came before it, but in our minds, HyperX changed everything beneficial to do so! We did lose the extra silver keycaps, and we did lose a wrist rest, but with the Alloy Elite 2, we do not need for either of them! With what is gained from moving away from Cherry MX switches, some thirty-million more strokes per key as the most significant benefit, how can one complain there? The PCB design is new to fit both the additional RGB and HyperX switches.
Quality control is excellent inside and out. We even found a more contemporary model MCU in control of everything, and we are just getting started. There is the move to the Microsoft Store like other manufacturers are doing as of late for software. There is an intense amount of brightness that can be had from the RGB LED lighting system, which is not only fully customizable but looks fantastic through the Pudding (style) Keycap set. In the brightest of lights or the darkest of rooms, the HyperX Alloy Elite 2 is undoubtedly fantastic looking!
Looks and a list of features is one thing that draws in customers, but when it all comes down to brass tacks, it has to function well first! HyperX not only carries on the series with this latest addition, but did so in a way that takes nothing from the fact that it is a brute of a keyboard, and ready and willing to take on the roughest treatment, and bounce back with a grin, almost asking to be abused! While heavy, and due to it being a 104-key layout, it will take up a fair bit of room, and moving it around can collapse the feet if you are not careful, we still feel that this keyboard delivers quite a bit of bang for the buck.
If there is one other thing we should address, it would have to be the Macro menu. While we do not claim to be an expert in what works for a Macro menu, we feel that HyperX could have added a few more features, such as per function editing, and a straight forward way to import Macros from the PC from previous devices, or the ability to store a ton of them when not using them. It all seems a bit washed over to us. However, it can be made to work, so it is not a deal-killer, just a bit more work for the user!
With what we have seen of the Alloy Elite 2 from HyperX, we feel that they are one of only a few manufacturers at the top of their game when it comes to mechanical keyboards! They seem to deliver the most intense RGB LED illumination. They provide features that everyone appreciates while not stepping into the realm of adding keys or making the keyboard any larger than it has to be.
At $129.99, we see no issue with the cost, and the fact that you get these awesome keycaps, along with everything else, means you will not have the urge to spend yet another $25 on keycap sets very similar to what is already shipped on the Alloy Elite 2. In our minds, HyperX has stepped up to the plate and knocked it out of the park!
Chad's Peripherals Test System Specifications
- Motherboard: ASUS Prime X299 Deluxe - Buy from Amazon
- CPU: Intel Core i9 7920X - Buy from Amazon
- Cooler: Corsair H150i Pro - Buy from Amazon
- Memory: G.Skill TridentZ RGB 3600MHz 32GB - Buy from Amazon
- Video Card: EVGA GeForce GTX 1080 Ti Hybrid SLI - Buy from Amazon
- Storage: Samsung 960 EVO 250GB - Buy from Amazon
- Case: Cooler Master Cosmos C700P - Buy from Amazon
- Power Supply: Thermaltake Toughpower DPS G 1050W - Buy from Amazon
- OS: Microsoft Windows 10 Professional 64-bit - Buy from Amazon

