


Our Verdict
Introduction, Specifications, and Pricing

Back in late 2016, we saw the chassis that started things off for the case we are about to see. Not too many cases stay around very long, as we would be swimming in cases if we did, but for some reason the Primera we saw then struck a chord, and we decided to keep it for a while. Even though we never put it to use in any of our own builds, we still knew it would come in handy.
Not too long after reviewing that chassis, my niece hit me up for a newer build than she had, and the light went off to build in that chassis again. What we found was that not only was the build process just as easy as we remembered the first time, we also got to see her eyes light up when she first glanced at that white chassis with blue LED accents all over it.
That sort of feeling must have been wider than we expected, as SilverStone has rereleased the chassis. However, the PMO1 of that time is no longer the best of that series. From what we have gathered, rather than just a shiny black or shiny white version, this time there are three additions to the series of Primera cases.
You can now get the chassis in matte black, and both shiny versions come with the option to have the right side of the chassis sport a fire or ice unicorn. Since SilverStone took the effort to bring the PM01 back, they also adopted a couple of the latest trends as well. I mean who wouldn't want to see that chassis with tempered glass on the side, and an evolution to RGB fans and LEDs inside of the chassis.
SilverStone has sent us the SST-PM01B-RGB chassis to get our opinion on, but there are four other models to ponder. We have a feeling that many will gravitate towards this design, and if you are into graphics, SilverStone has you covered there as well. However, we do feel that the SST-PM01C-RGB, in its matte finish, will be the eventual winner to outsell the rest.
You may notice that this review is a bit condensed, as we have seen ninety percent or so of the chassis before, but we will be sure to stop and take the time to explain everything new as we make our way to it. If the original PM01 was up your alley, we are certain that the PM01-RGB mid-tower chassis will have you pining for it as well.
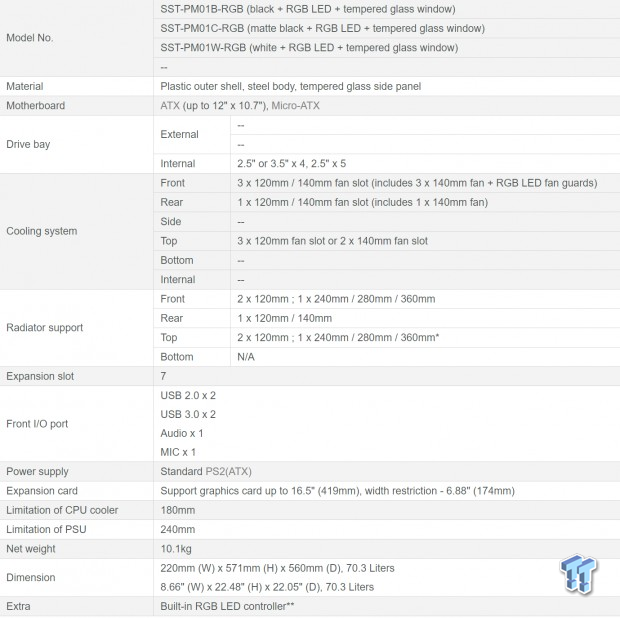
In the chart provided by SilverStone, we see mentions of only the shiny black model, the shiny white one, and the matte black version. This is because these are all PM01-RGB cases, whereas the ones with unicorns on them are of the PM01-FX line, but are shown to also sport RGB LEDs, and are all motherboard controllable. The chassis is made with a plastic outer shell on the top and the front of the chassis, where the bulk of the chassis is made of steel.
Our Latest Mid-Tower Cases Review Coverage
Of course, with the update, the entire left side of these cases are covered with heavily tinted tempered glass. The PM01-RGB is 220mm wide, 571mm tall, 560mm deep, weighing in at 10.1 Kilograms, empty. On top of the chassis, the I/O panel is broken up into two parts. One side has the power button, where the other side delivers the pairs of USB 2.0 and USB 3.0 ports, the HD Audio jacks, as well as a button to control the RGB, LED lighting.
Inside of the chassis, we find room for four 3.5" drives, using the three HDD bays and optional location on the floor, but SSDs have five dedicated locations in the chassis as well. At the back of the chassis there are seven expansion slots, and below that, a standard ATX PSU can be installed.
Limitations are not bad at all in this chassis either. Video cards can be 419mm long depending on the cooling installed in the front of the chassis. CPU coolers can be 180mm tall, which covers most of the market. The PSU can only be 240mm long, including the wires, as the HDD cage is not removable.
Out of the box, the chassis ships with three 140mm fans in the front of the case, which are RGB LED illuminated, and the rear of the chassis has another 140mm fan, but it is not LED lit. In both of those locations, there is the option for 120mm fitment as well. The top of the chassis will also house three 120mm fans or two 140mm fans.
As to the water cooling support, the front of the chassis can fit a 240mm, 280mm, or 360mm radiator, the thickness of which is only restricted by a slide open cover in the PSU cover or video card length. The top of the chassis will support a 240mm, 280mm, or 360mm radiator too, but the thickness can be an issue if memory or VRM heat sinks are too tall. As for the back of the chassis, both a single 120mm or 140mm radiator will fit, and there are no options for the floor of the case.
Newegg will sell you the original PM01, but we see no signs of the newer version there. We next looked at Amazon, and found that all five versions are up for grabs. All three of the PM01-RGB cases are currently selling for $159.99 no matter which color you want to pick. As for the PM01-FX cases, they do demand a bit more money, but the artsy side panel graphics will only add $30 to the price. Knowing what we do, since we essentially have seen this case before, we will say, for what SilverStone packs into the newest PM01-RGB cases, we do not think the price will bother you in the slightest.
Chad's Chassis Test System Specifications
- Motherboard: ASUS Maximus IX Code Z270 (buy from Amazon)
- CPU: Intel Core i7 7700K (buy from Amazon)
- Cooler: NZXT Kraken X62 (buy from Amazon)
- Memory: Team T-Force Night Hawk RGB TF1D48G3000HC16CBK
- Video Card: NVIDIA GeForce GTX 980 (buy from Amazon)
- Storage: Samsung XP941 256GB (buy from Amazon)
- Power Supply: SilverStone SST-ST85F-G (buy from Amazon)
- OS: Microsoft Windows 10 Home 64-bit (buy from Amazon)
Packaging
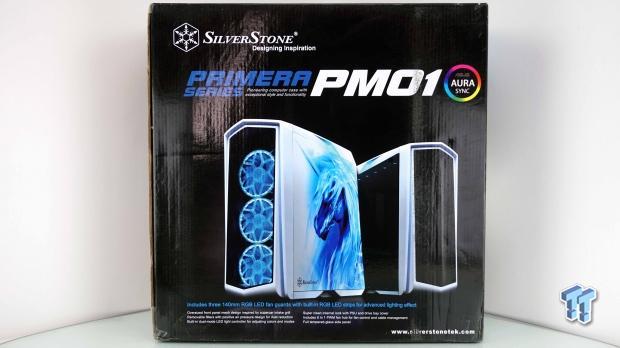
Right on the top of the box, it states that this is the SilverStone Primera Series PM01 with ASUS Aura Sync, but there is support for all RGB motherboards. We also see that the image of the chassis is one sporting the unicorn graphics. We also see that not just the fans, but LED strips are also RGB compatible.
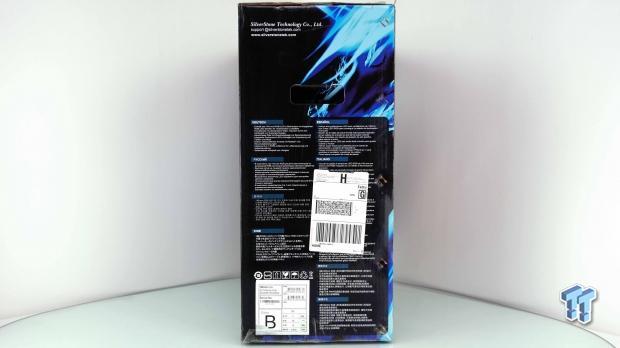
The black and blue design carries over to this side panel. It is here where the chassis features are listed for ten other countries, and is also where the company information sticker has been applied.
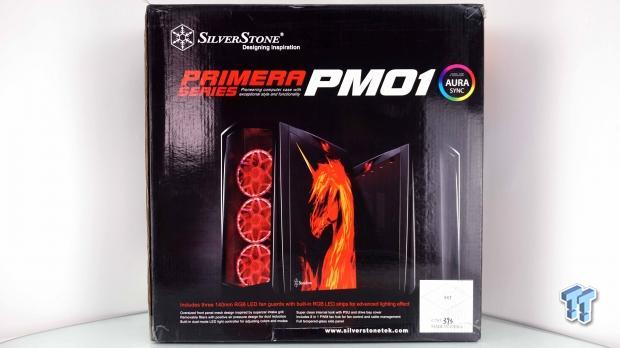
The back of the box shows us the black version of the PM01-FX with the unicorn of fire. All of the rest of what is seen is the same as was shown on the front.
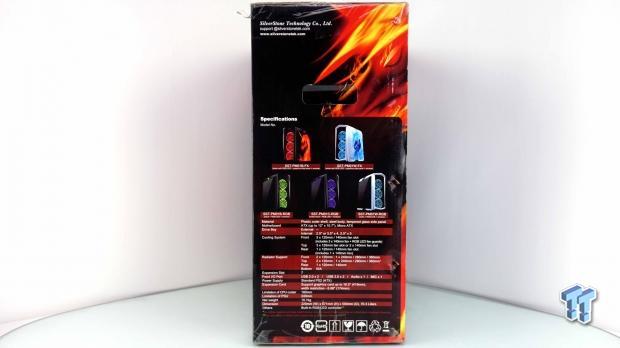
The last panel not only shows all five versions of the chassis along with the specific model number, but it is also where SilverStone has placed the specifications chart. There is nothing in this chart that we did not cover on the last page.
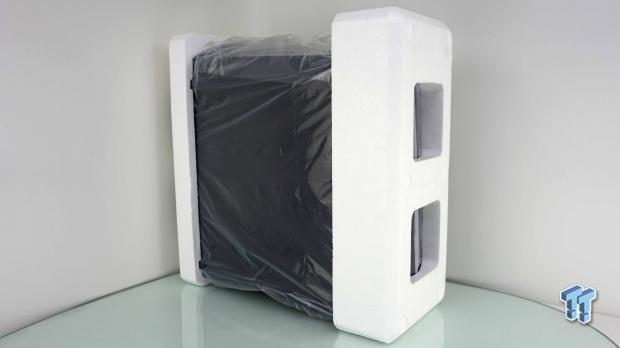
Inside of the box, we find that the top and front of the chassis have plastic stuck to them to protect the shiny bits. The tempered glass panel has two layers of plastic stuck to either side of it, ensuring it will not get scratched.
After wrapping the entire chassis in a plastic bag, we then have thick Styrofoam used on the front and the back of the case. It has all worked wonders to deliver a chassis in pristine condition, but all that plastic has made this chassis a bit of a dust magnet.
SilverStone Primera SST-PM01B-RGB Mid-Tower Chassis

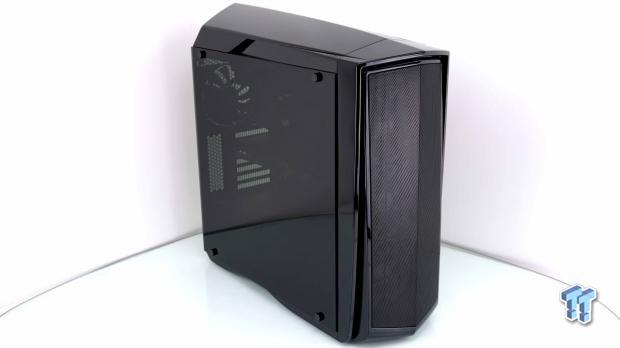
The front of the chassis is angled away from the center and is wide open for ventilation. The bulk of the bezel is made from steel mesh, with only enough shiny plastic around it to make it structurally stable.
On top of the chassis, just behind the bezel on the left side, we find the power button with power LED inside of it, and a smaller LED which is there to show the HDD activity.
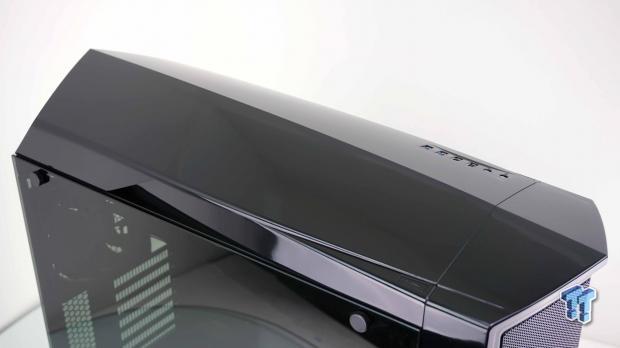
Stepping back, we can see that the top of the chassis is similar to the front, with a body line down the middle, and both sides slope away from it. On either side, there are what appear to be wind tunnels of some sort, but are cut away so a large light can be installed behind them to add a glow to the outside of the chassis.
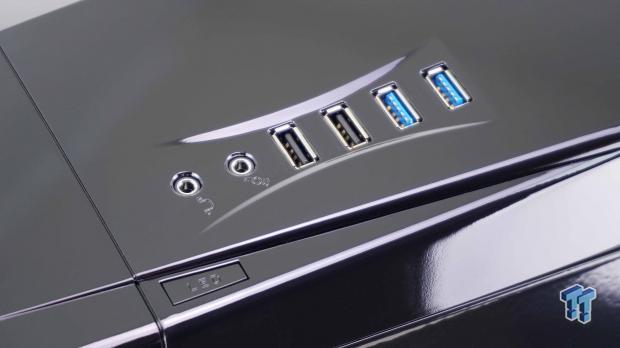
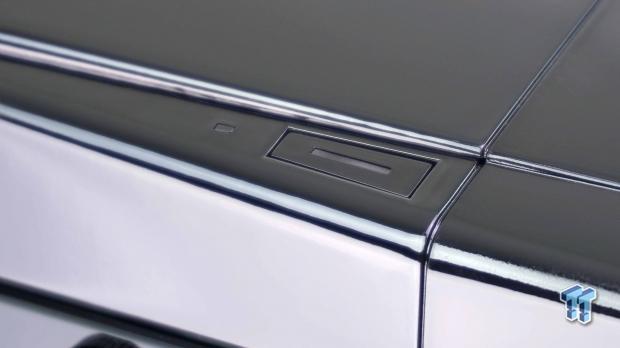
On the right side, again just behind the bezel, we find the rest of the front I/O. There are the audio jacks, a pair of USB 2.0 ports, and another pair of ports, this time USB 3.0/ On the edge of the chassis, there is also an LED button, as SilverStone wants everyone to have RGB LED choices, even if the motherboard used does not support it.
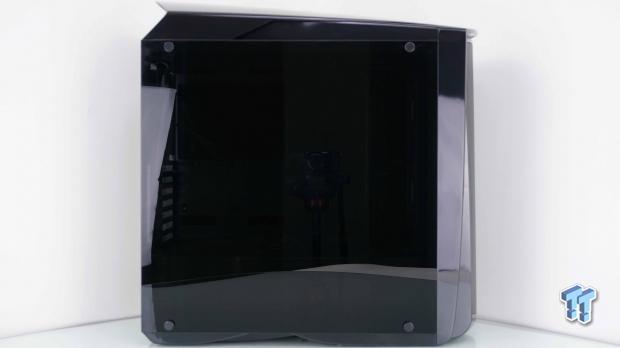
The left side of the chassis shows that the top is higher in the back than at the front, and we see shiny plastic at the top and down the front of the chassis. The rest of the panel, down to the shiny plastic feet, is a tinted tempered glass panel which is screwed onto the side.
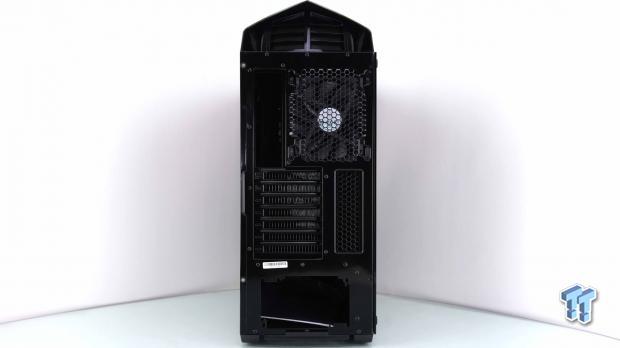
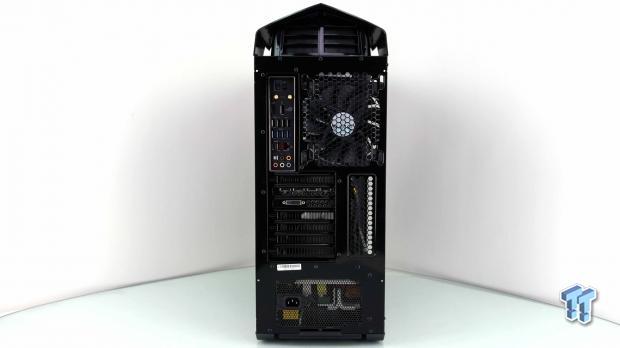
Since the top of the chassis is solid, SilverStone made vents at the back to allow hot air out of the chassis. Below that is the rear I/O and exhaust fan, a set of seven expansion slots with passive ventilation next to it, and the PSU location at the bottom.
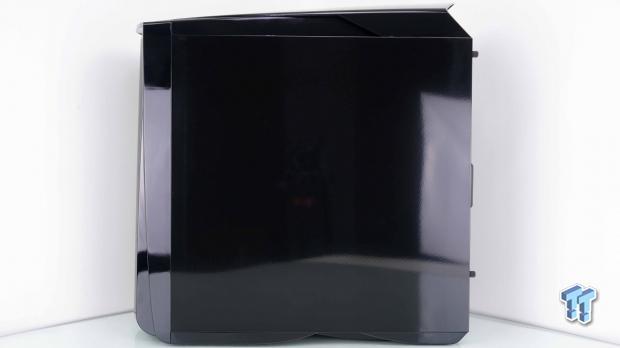
The right side of the chassis sports a shiny black, painted steel panel. The high gloss finish goes along well with the shiny plastic parts, and unifies the design.
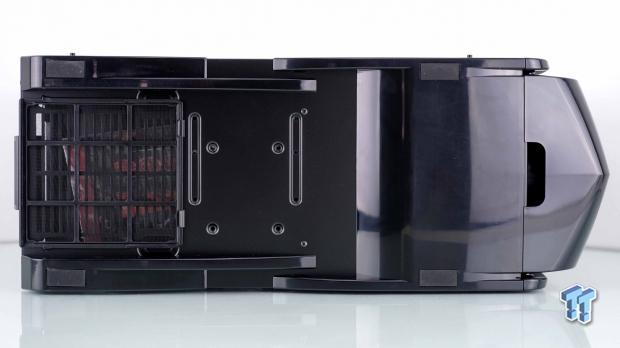
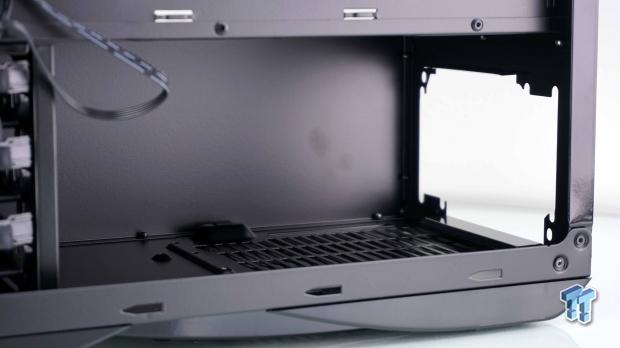
Under the chassis, we can see that the large feet have rubber pads on them for grip, and between the pair at the back of the case is where the dust filter for the PSU is, and it slides out the back. There is an optional location for a 3.5" drive near the middle, but the front of the chassis has a large cover blocking access to remove the HDD cage if it weren't riveted into the frame.
Inside the Primera PM01B-RGB
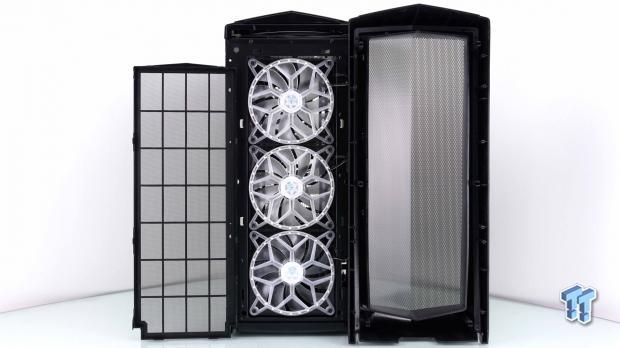
Once the bezel is removed from the front of the chassis, we can then unclip the dust filter that protects the fans. Behind the filter, we spot three highly stylized fans, where there is a similar design to the SilverStone logo, and all parts of the fan are clear to help with the glow of RGB LEDs.
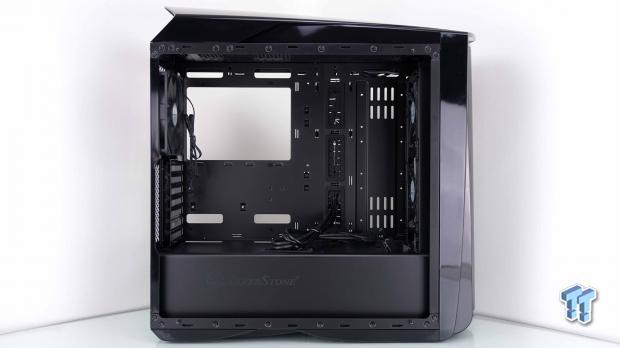
The inside of the chassis is divided into two sections. One larger section for the main components, while the thinner section blocks the view of all things we do not need to see.
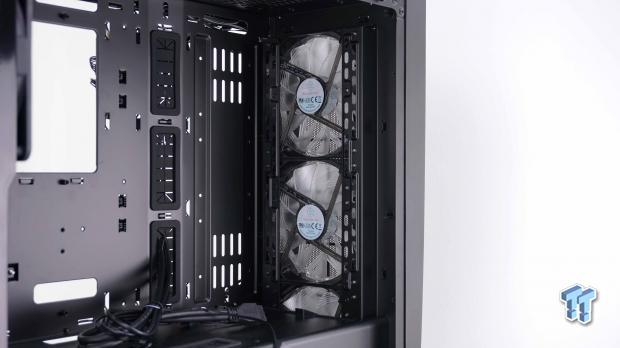
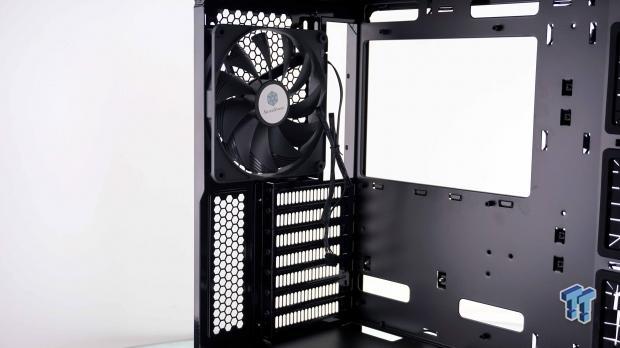
Inside the front of the chassis, we can see that the fans are mounted on the tabs, but we can also see many holes as well as other tabs to support various configurations of fans or radiators.
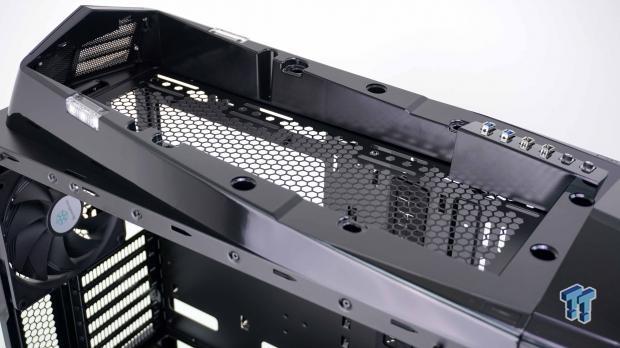
Removing four small screws, two from each side of the chassis, we were then able to lift off the shiny black cover on top of the case. Removing it is the only way to gain access to mount extra cooling in the top of this tower. Also, notice the large light near the back. This is under the scoop, and there is one on each side of the PM01.
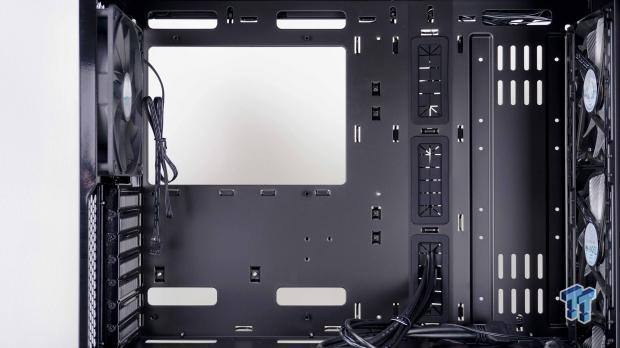
The motherboard tray offers seven ways to pass wires, and three of the holes have grommets in them. The CPU cooler access hole is huge, there are sixteen wire tie points, and to the right of the motherboard, we could install a trio of SSDs.
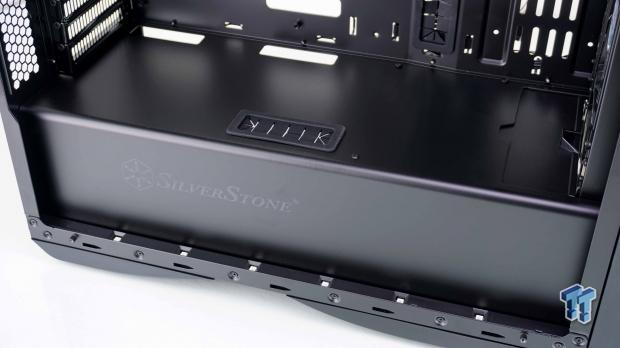
The PSU cover is painted to match the rest of the interior, and also has the SilverStone name and logo painted on it. There are two holes near the motherboard for front panel wires, and just behind the front fan, part of the cover will slide back to allow a radiator header to fit.
Inside the Primera PM01B-RGB Continued
The back of the chassis houses a single 140mm fan, which is black, powered by a 3-pin fan connection, and is not LED lit in the slightest. The seven expansion slots are accessed from the inside of the chassis and use Phillips head screws to secure the cards.
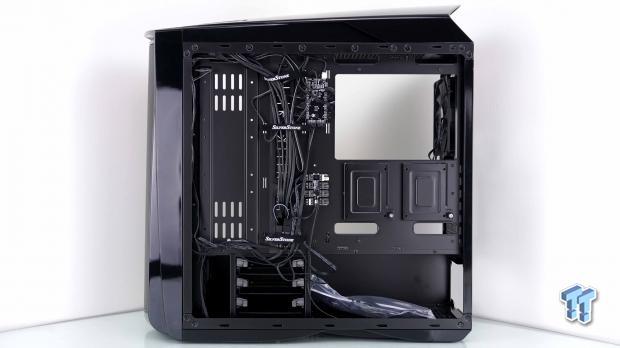
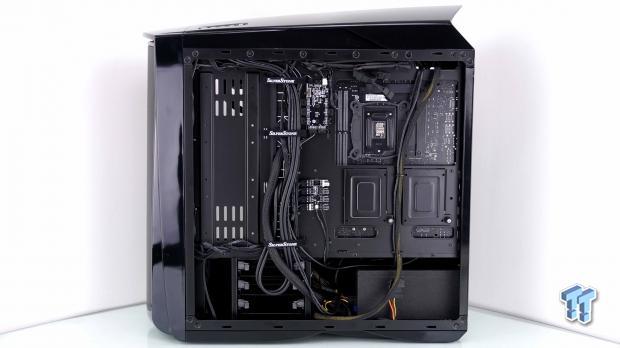
Behind the motherboard tray, there is at most 15mm of room to wire in. We see that there are straps to hole the wires on the left side, and most of the wires go to the RGB LED hub at the top, or to the eight-port fan hub at the bottom. We also spot the pair of hidden SSD trays, which makes for a total of five SSD locations.
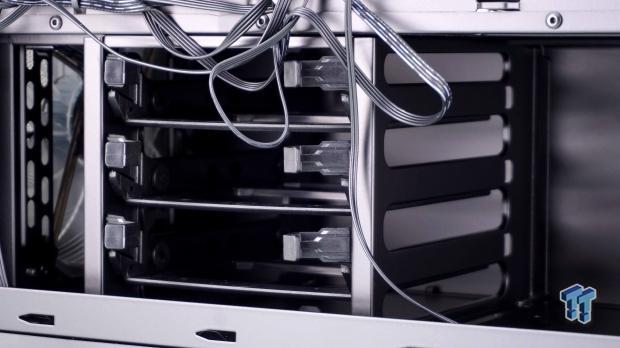
Under the PSU cover, at the front of the chassis, is the HDD cage. It utilizes plastic trays with the need of screws, and these three spots, along with the one on the floor, makes room for four 3.5" drives.
Since the HDD cage is not removable, the clearance for the PSU is set in stone. In most instances, the 240mm of space offered is enough for the PSU along with room to store some extra cable length.
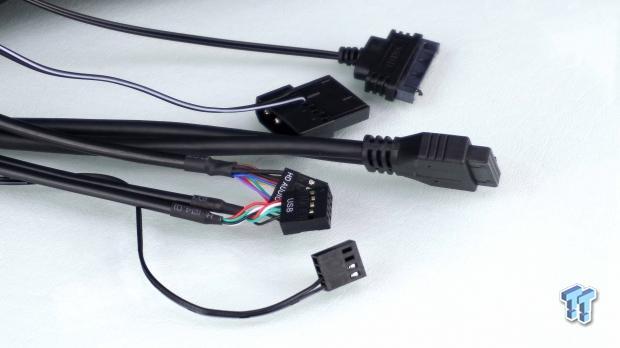
All of the wires inside of the chassis are black and at the top of the pile we see there SATA power lead for the RGB hub, and the 4-pin Molex lead powers the fan hub. We then run into the USB 3.o cable, the HD Audio and USB 2.0 cables below that, and the fan leads to take the signal from the motherboard and deliver it to the fan hub. The front I/O buttons and LEDs come with shorter wires which do not reach below the chassis, but we were able to make them work for our build.
Hardware & Documentation
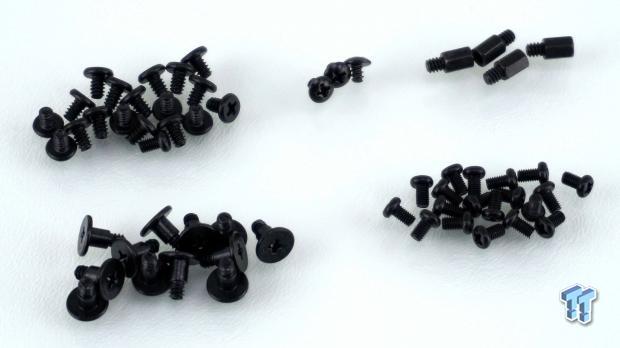
Packed all into one bag, we have separated out all of the screws and such. At the top, we see screws for the motherboard and PSU installation, and three, course thread, screws which do not show up in the manual, and four standoffs, three of which need to go in the chassis. At the bottom we see a bunch of screws to mount 3.5" drives into the plastic trays, and to the right is a handful of screws to mount 2.5" drives into the chassis.
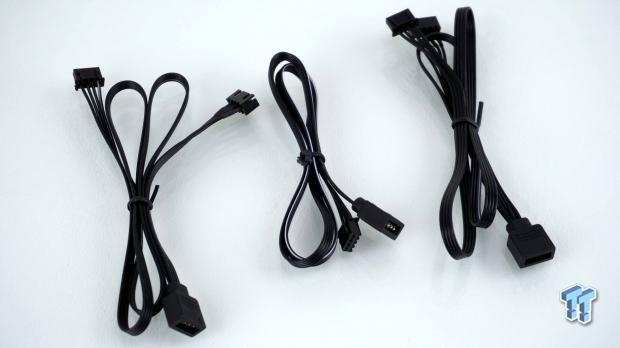
The cable in the middle is how one will grab the RGB signal from the motherboard, and connect the other end to the RGB hub. The pair of cables to either side of it is for delivery of the RGB signal, but from a single input into a Y-splitter to run multiple devices.
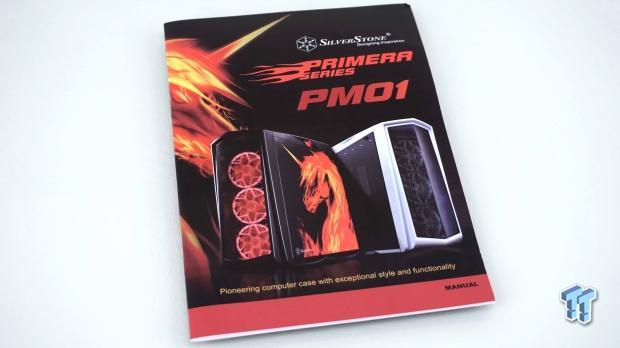
The manual is well written and covers everything you need to know. From the parts list, on through the step-by-step breakdown and installation, you will be hard-pressed to be left pondering anything.
Case Build & Finished Product
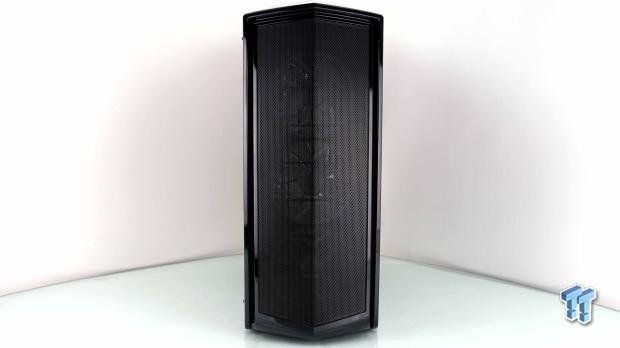
Without any optical bays in the chassis, there was no need to break up that sleek steel mesh running down the front of the chassis. The PM01-RGB looks just as good as it did when we started, but wait; it does get better.
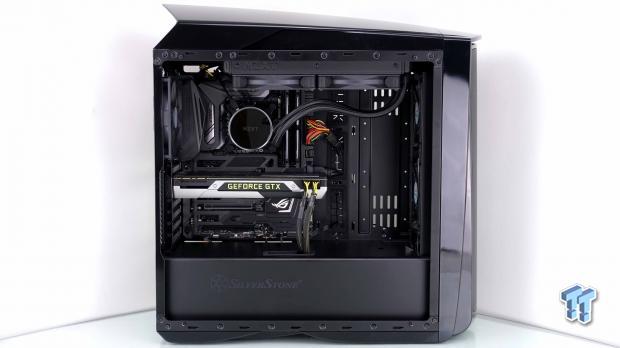
The cleanliness of the build is superb. All we see are the ends of the PSU cables, with a great view of the motherboard, video card, and cooler. While the glass panel is quite dark, any view you do see of the inside of the chassis is brilliant and tidy.
We did not run into an issue with the dust shield placement, but we did have to press the back of the chassis inward to mount the video card. As for the PSU, we slid it in from the right side, rested it on the pads to support it, and screwed it into the chassis.
Our OCD would not allow us to leave the wiring mess that SilverStone shipped the chassis with, so with a bit of time, we were able to combine it all and have most of it secured with the straps on the left.
We had to get creative with the 8-pin cable too, but the bulk of wires to the left may have been too much. When putting the panel back on, we did have to use both arms to get all the tabs to secure so we could screw it back on to the chassis.
With the chassis back together and ready to be fired up, if not for the light coming through the back of the chassis, we wouldn't see anything at all. All shiny and black like it is, it is like a tower of obsidian housing your gear.
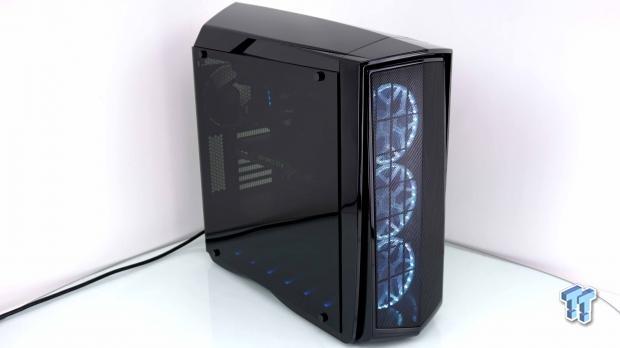
Once powered, the view through the glass does come to life, as we see the LEDs from the cooler and the video card, but also those built into the frame of the chassis. The front fans are nice and bright, but the lights at the top of the chassis, in the scoops, are much tougher to see from this angle.
Final Thoughts
Some might say that it is about time that SilverStone jumped on the wagon, and offered tempered glass and RGB illumination. To us, we do feel that this is true, and the way in which they have done it, and the chassis they chose to do it with, it all just makes sense. Aesthetically, we love the shiny black, and it goes well with the tint of the tempered glass.
We love the RGB nature of the lights, where you can have a parade of various colors, or set a theme across all of your parts. We cannot lie, this chassis is a dust and fingerprint magnet, but man when it is clean it is a sexy beast. As shipped, airflow is sufficient, and with that, there is not a bunch of noise associated with it either. With the fans maxed out, the most we got was a 33 dB reading a foot away from any of the fans.
The layout inside is good. There are plenty of options for storage, many options for cooling, whether with fans or using water cooling. Everything fits as it should, the wiring is made simple, and with a bit of effort, the build will look as tidy as what you saw with our build.
It is rare that we run into a chassis that gets the job done this well, looks this good, has plenty of light to keep anyone happy, and only has one small issue that we find worth mentioning. If we had to pick out something, the fact that we had to flex the back of the chassis to mount the video card is what stands out. The thing is, it wasn't a massive move that needed to be made, we are talking a millimeter or two until the holes were aligned.
At $159.99, it is the upper echelon for a mid-tower chassis with all of the bells and whistles, and we do feel that SilverStone has given us just about anything we could ask for. We do not feel that in any way a customer would be disappointed in the purchase. What we will say, is that if you are a fan of the custom artwork or a huge unicorn buff, the PM01-FX is a chassis worth looking at for only $30 more.
As it sits, for those looking for a chassis that steps away from square and brings plenty of style points into the mix, the PM01B-RGB Mid-Tower Chassis we just saw from SilverStone gets our recommendation. It is unique, it is feature rich, and we can assure you that most of your friends have nothing like what this Primera RGB chassis delivers.
Chad's Chassis Test System Specifications
- Motherboard: ASUS Maximus IX Code Z270 (buy from Amazon)
- CPU: Intel Core i7 7700K (buy from Amazon)
- Cooler: NZXT Kraken X62 (buy from Amazon)
- Memory: Team T-Force Night Hawk RGB TF1D48G3000HC16CBK
- Video Card: NVIDIA GeForce GTX 980 (buy from Amazon)
- Storage: Samsung XP941 256GB (buy from Amazon)
- Power Supply: SilverStone SST-ST85F-G (buy from Amazon)
- OS: Microsoft Windows 10 Home 64-bit (buy from Amazon)
 Lian Li B4-mATX Review: a compact mATX SFF case with excellent airflow and premium features
 Ocypus Sigma F36 BK ARGB Cooling Fan Review: high airflow and unified design in one frame
 PCCooler CPS RZ820 Display Review: a flagship-level CPU air cooler with an LCD screen
 MOAIPLAY ORA PRO G1 850W ATX 3.1 PSU Review: high efficiency and 10-year warranty for $119.99
 NZXT H6 RGB+ Compact Dual-Chamber Chassis Review
 Intel and AMD are locking Chinese customers into long-term CPU deals as server chip prices climb more than 40%
 Ubisoft CEO says Sony's PlayStation disc shutdown will not disturb the industry too much
 Vibe coding is flooding the App Store with new apps - on track for record submissions in 2026
 Geekbench 7 is out with CUDA support, smarter multi-core scoring, and new AI workloads across all major platforms
 GTA 6 physical copies in Japan have a 170-day expiration date
 Ubisoft believes remakes can be more profitable than new releases, after Black Flag Resynced exceeds expectations
 AMD is preparing the 8-core Ryzen 7 9800HX3D CPU for laptops with 96MB L3 cache
 Blizzard fires World of Warcraft game master for abusing god-like powers
 GIGABYTE adds CXMT DDR5 support to AM5 motherboards, supporting speeds up to 8200 MT/s
 Xbox 360 tech powers backwards compatibility on PC, original Xbox games use Xefu emulation
 Thrustmaster T.Flight HOTAS 5 MSFS Edition Review
 SteelSeries Arctis Nova Pro Omni Wireless Headset Review - One Headset to Rule Them All
 SteelSeries Arctis Nova 7 Wireless Gen 2 Headset Review - New and Improved, But Is It Enough?
 AMD Ryzen 7 7700X3D Review - Days of Future Past
 Samsung 990 2TB SSD Review - Ninth Gen QLC at PCIe Gen4 Speeds
 ASUS ExpertBook Ultra (Panther Lake) 14" Business Laptop Review
 ASUS ROG Raikiri II Xbox Wireless Controller Review - Ready to Take Control
 MOZA FMP18 Panel Bundle Review: authentic F/A-18 Hornet cockpit controls for flight sims
 Micron 6600 ION 245.76TB Enterprise SSD Review - Best in Class Programming Speeds
 MOZA MA3F EFCM Flight Control Module Review: authentic Airbus A320 autopilot panel for simulators
 How to Turn Your Windows Laptop Into a Second Monitor with Miracast and Wireless Display in Minutes
 6 Mistakes to Avoid When Buying a Windows Laptop
 I capped Windows Update's bandwidth with Delivery Optimization, and my downloads stopped choking
 I use this decade-old free tool that finds files faster than Windows Search does
 I install and update most of my apps with this Windows command now, and I stopped downloading sketchy installers
 Hisense U6SF 65-inch MiniLED TV: High Performance Meets Leisurely Convenience
 I stopped digging through Windows menus after I set up this one folder
 Don't sell your Windows laptop until you do these things
 6 PC cleaning mistakes to avoid for safer hardware maintenance
 Phison and Intel Take Aim at Local AI's Memory Wall with aiDAPTIV