
The Bottom Line
Introduction, Specifications, and Pricing
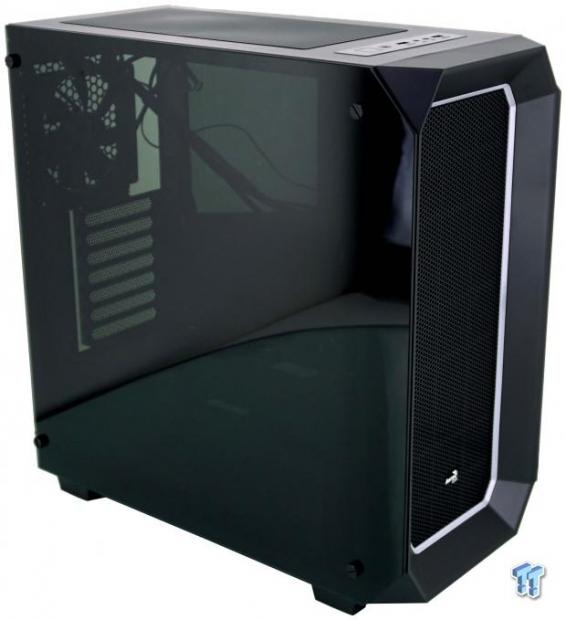
In all the time we have been looking at cases and delivering a verdict, we find that before now, we have only seen one case thus far from Aerocool. That submission was back in 2013 when glitz and glamor were the trends of the day, and it seemed like the more aggressive the styling, the more successful the chassis was. While many still do select cases that are not the typical cubist designs, today the market has swung to wire management, RGB lighting or LED lighting in general, PSU shrouds, hidden drive bays, and tempered glass as key features which sell cases now.
With that in mind, we see that Aerocool has been busy, and is offering a new group of cases under the name Project 7. At this time, there are two cases in this series, one of which we are showing you know, and we also have the second in the series we will be hosting shortly after. These new cases are a departure from what we have seen in the past, and hit on all of the features listed above, as well as incorporating a couple more to try to gain an edge in a market, which is already full to the brim with choices.
Today we will be looking at the P7-C0 (Black Edition) Mid-Tower Chassis from Aerocool. The premise of this case is to deliver a chassis which offers a futuristic and modern design, brings forth LED lighting, has tempered glass panels, water cooling support, and on all basic levels can contend with many other cases. While some may say that this chassis is nothing surprising or trend-setting, we can say that Aerocool is on a whole new path of chassis design, and has stepped into the modern era. For those of you not looking to break the bank, but still admire what the latest trends in PC chassis development, we urge you to stick around and see what Aerocool is up to now.
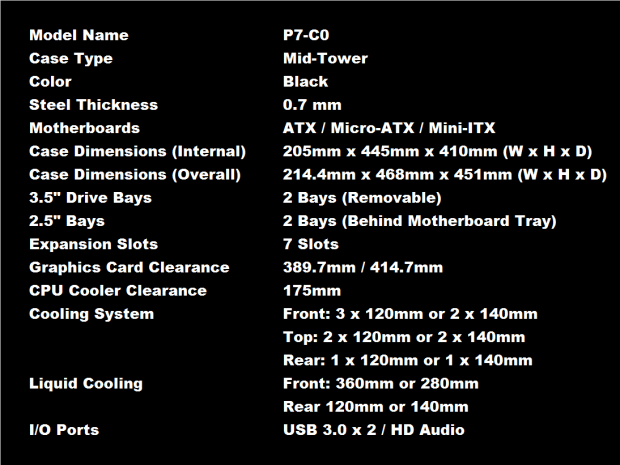
In this chart, we see that the P7-C0 is a mid-tower chassis, which at this time comes in black as the only option. The chassis is made from 0.7mm sheets of steel, and various components are made of ABS plastic as well. Inside of the P7-C0, an ATX, Micro-ATX or Mini-ITX motherboard can be installed. The chassis is 214,4mm wide, it is 468mm tall, and it is 451mm deep. Aerocool also offers internal dimensions but also addresses important clearances. Lower on the chart, we can see that there is 389.7mm of room for a GPU, or 414.7mm of there is not a fan installed in the front of the case to restrict it. As for CPU coolers, there is room for 175mm of CPU air coolers, which covers most of the options available. There are no optical bays, but there is a removable cage which holds a pair of 3.5" drives, as well as a pair of trays behind the motherboard tray for 2.5" drives. At the back of the chassis, there are seven expansion slots, all with easy to remove and replaceable covers.
Cooling options are fairly decent for this chassis too. In the front of the P7-C0, there is room for a trio of 120mm fans or a pair of 140mm fans to start. The top of the case allows for a pair of 120mm fans or 140mm fans as well. The back of the chassis is limited to a single fan, but you can use a 120mm or 140mm fan there. As to water cooling support, there is room for a 360mm or 280mm radiator in the front, while at the top a 240mm or 280mm radiator can be installed as well. The back of the case is also water cooling friendly, and the beautiful thing is, if you use thin radiators, all locations can be populated simultaneously. The P7-C0 is shipped with a single fan pre-installed, which is a 120mm fan used to exhaust the chassis. The fan of choice is capable of 1200 RPM, 36.4 CFM, 1.32 mmH2O, and with a 20,000-hour lifespan, is rated to deliver 26.5 dBA of noise.
While these cases do exist on the Aerocool website, we also find listings in retail outlets ahead of the release we were asked to meet with this review. Aerocool had sent us some literature, where we were shown the MSRP of $104.99, which isn't all that bad of a price to ask. However, if you look at Amazon, we see that listing is priced at $109 at this time. Venturing over to Newegg, we found the best deal to be had at this time, where the P7-Co is listed for just $93 and is currently in stock to purchase. At $104.99 we could easily find worth in the Aerocool P7-C0, but the fact that it can be had under that magic $99 mark makes it all that much better. Stick it out with us; we do feel that many will appreciate what Aerocool is up to now and that the P7-Co is more than adequate to satisfy today's more discerning customers.
Chad's Chassis Test System Specifications
- Motherboard: GIGABYTE GA-Z68X-UD4-B3
- CPU: Intel Core i7 2600K (buy from Amazon)
- Cooler: Corsair H80i GT (buy from Amazon)
- Memory: G.Skill Ripjaws F3-12800CL6D-4GBXH
- Video Card: ZOTAC GeForce GTX 970 AMP. Extreme Edition (buy from Amazon)
- Storage: SuperSpeed 128GB SSD
- Power Supply: SilverStone SST-ST85F-G (buy from Amazon)
- OS: Microsoft Windows 7 Ultimate 64-bit (buy from Amazon)
Packaging

We are going to call this the front of the box, as it presents things in a more secretive fashion. On a plain cardboard box, in which the entire panel has been printed in black, we find the Aerocool name and logo at the top, with a showing of the Project 7 series in the middle. It also states they are exploring the unknown, and to answer the question near the bottom, this chassis is "what's next." We also see that the P7-C0 is offered with tempered glass on both sides.

The next panel we run into is this one. We see that the box should not get wet, that we have the correct end up, that it should be handled with care, and that it is fragile. This panel is also where Aerocool provides the specifications for the chassis and is where we copied ours.
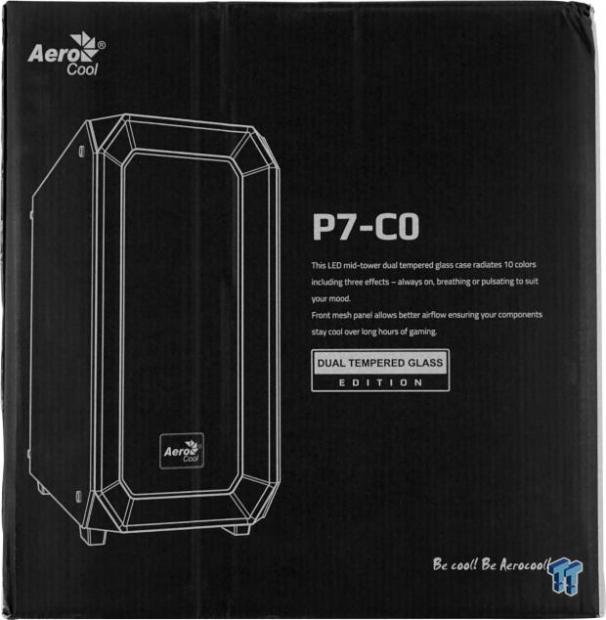
While this could be the front, we thought it best to save it for later. The Aerocool name and logo are present, but this time we also find a large rendering of the chassis, offset to the left. To the right of that, we see the chassis name along with a few features which should pique your interest. In the bottom-right corner, we also find the Aerocool company tagline; "Be Cool. Be Aerocool."

The last of the external panels are where Aerocool offers a list of six key features found with this design. There are mentions of the lighting, the design, use of tempered glass, superior cable management, PSU cover, and removable dust filters. If English is not your first language, Aerocool is sure to offer the features in a total of twelve languages.

The internal packaging is typical of what we expect inside of the box. There are Styrofoam caps used at the top and bottom to protect the chassis if it were to be dropped or has something heavy sat on it. Inside of that, there is a plastic liner which protects the paint, while shiny surfaces, as well as the tempered glass panels, have clinging plastic applied to them, all in efforts to be able to deliver the P7-C0 in the terrific condition ours is.
Aerocool Project 7 P7-C0 Mid-Tower Chassis
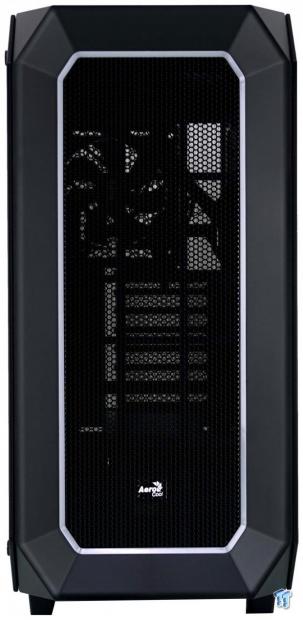
The bezel of the P7-C0 is slick to look at with the angled sides surrounded all of that mesh in the middle. Not only have the corners been cropped off too, but the white ring surrounding the mesh is where the P7-C0 displays the RGB LED lighting effects with the press of a button.

Just behind the bezel, on the top of the P7-C0, we find the front I/O panel. It has been dressed up by using shiny plastic to make it, with the embossed naming of the ports. From the left, we see the backlit power button, with a tiny LED mode and color switch button, which has an even smaller HDD activity LED next to it. The right half is made up of a pair of USB 3.0 ports on either side of the HD Audio 3.5mm jacks.

The top of the chassis is made from steel, which has been painted black with a textured finish. Most of this panel is used for optional cooling and has a tight mesh dust filter in place, which is magnetically attached to the chassis.

The left side of the P7-C0 is nearly all glass, except for where we can see where the angled sections meet the bezel. The tinted and tempered glass is held in place with the use of thumbscrews and grommets, allowing the view to be sleek and clean.
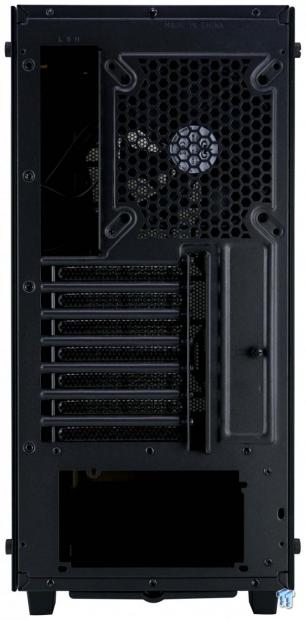
The rear of the P7-C0 uses the typical layout, with the exhaust fan and rear I/O above the expansion slots, and the PSU found at the bottom. We also see that the expansion slots are externally accessed, and the metal cover plate it shipped in the open position.

The right side of the P7-C0 is a mirror image of what we found on the left. The glass is tinted to impede the view of wires and things we do not want to see, uses thumbscrews to secure it, and also has the angled sections at the front.

The chassis is supported by rectangular plastic legs, which all have rubber pads applied to them. There is a removable dust filter for the PSU, and at the front, we find optional HDD mounting grommets, as well as a pair of screws which help to remove the HDD cage.
Inside the P7-C0

The front bezel will pull off the chassis via a gap at the bottom of it, and it exposes the front of the chassis. On the front, we see a full-length dust filter, which is magnetically attached at the right, and swings open to the left, at which time the tabs come out for easy cleaning. Sadly though, there is a wire connected to the bezel, which powers the LED ring and does not go far once the wires are managed.
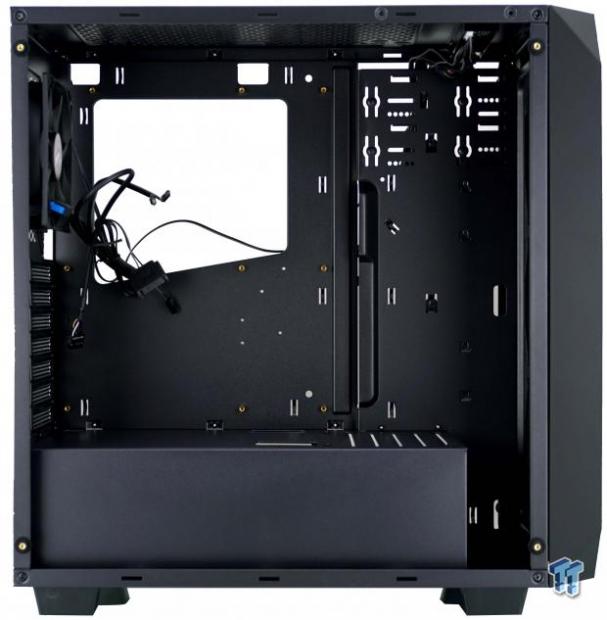
Upon initially looking into the P7-C0, we find that the entire case is one large open area, that is, except for what is covered with the PSU shroud. Also, so far, no hints of paperwork or literature.
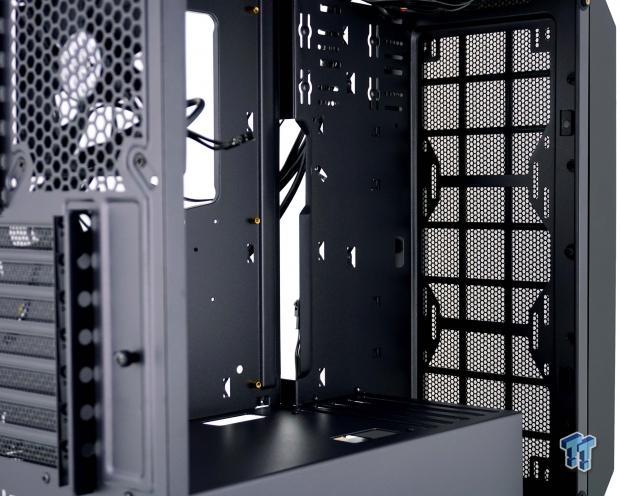
Inside of the front panel, we find that there are no fans to be found pre-installed. However, you do have the option to use a trio of 120mm fans or a pair of 140mm fans, and there is also room for a thin radiator for the 360mm option, and for smaller ones, you could opt for thicker radiators.

Once we removed the dust filter, we can see all of the mounting holes as well as the open honeycomb mesh used. At either end are short slots for 120mm and 140mm fans, while in the middle are longer slots to help with various screw offsets on radiators.

The motherboard tray comes with all of the standoffs in place for use with an ATX motherboard and has a large hole for CPU backplate access. There are twelve locations with tie-points, and the right third of the tray is inset with a large gap running down it to pass wires through to this area.

The PSU shroud is plain looking, but the idea is to block the view of what goes under it, and it does that well. There is a gap at the front to allow for cooling with holes in the front edge of the shroud and louvers at the top to keep HDDs cool. While most of it is an expanse of textured black steel, we do see three holes to aid in wiring the motherboard as well as providing a location for GPU power leads.
Inside the P7-C0 Continued

The back of the chassis is the one place you will find a pre-installed fan, this 3-pin powered 120mm one. Since the expansion slots are accessed on the outside, Aerocool is left with no option for passive ventilation next to it, due to the use of the sliding steel cover plate.

Behind the scenes, we see that the left side of the case is open and deep, which allows for excess wires, but is also where the two SSD trays are screwed into place. As for the right side, clearance is not as much, but there is still plenty of room to run the 8-pin lead to the top, and not affect door placement. The bottom is open and is where we located the box containing the hardware as well as the manual.

The HDD cage uses steel trays with rubber grommets to be used for 3.5" drives, while 2.5" drives screw directly onto the steel. Two drives can be placed here, or if you need more room for the PSU or other goodies, the right-side wall of the cage is removable, which opens up this area completely.

The floor of the chassis offers wide slots for the PSU to draw air through, and the PSU will rest on plastic legs with rubber pads on top of them. There is a fair bit of room for longer power supplies as it is, but you may want to pre-wire modular units before you attempt to slide them in here.

The wires, which start at the front I/O panel are long in the P7-C0 and have no issues reaching their intended targets on the motherboard. There is a SATA power connection for the LED system, just the HDD activity, and power switch connections, but there is a native USB 3.0 lead and the HD Audio lead as well.
Hardware & Documentation

The bulk of the hardware comes separated in individual bags, which are marked as to their intended usage. There are nine motherboard screws, twenty screws for 2.5" drives, and even though it states CD ROM, there are no such bays in this design. Aerocool also provides us with twelve HDD screws and a set of five screws for mounting the PSU with.

Aerocool also wanted to make sure most, if not all, of your wire tending needs are taken care of, and have supplied the P7-C0 with ten zip-ties for this purpose. For those of you who do not have plans to fill this chassis with an ATX motherboard, Aerocool also provides a standoff socket to ease the pain of removing those you do not need.
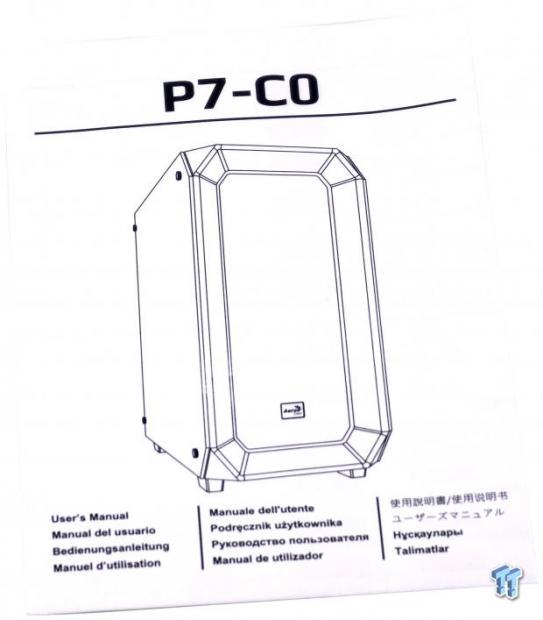
The manual is a single piece of paper which has been folded into eight sections so that it fits into the hardware box. On one side it shows the chassis, the wiring, a parts list, and starts into how to open the chassis and where to put the PSU. On the reverse, instructions continue with component placement, as well as showing some of the cooling options.

Since we will be showing only one of the many choices, we thought it best to snap an image of the end of the manual too. Here we are shown that by holding in the LED button, we can switch between always on, breathing, and pulsating modes. By quickly pressing the button, you can cycle through the ten color options, where you can select white, navy, purple, pink, red, orange, yellow, green, cyan, or blue as a solid color to be displayed on the front bezel.
Case Build & Finished Product
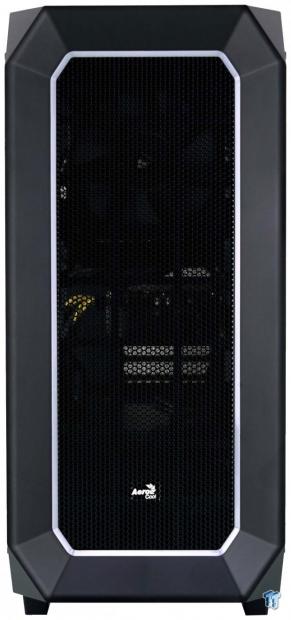
Externally, the view of the front of the chassis has not changed one bit. However, due to the openness of the mesh and the dust filter, we can see the fan for the AIO hanging at the top, we can make out the end of the GPU, and can also see the wires that power it.

The motherboard installed easy enough, and the AIO fit nicely in the front. The AIO shows how thick you can go and still use longer video cards, but no matter how much we fiddled with it, we could not take the sag out of the card. The view is clean and unimpeded from all but the essentials, and we know this is what customers are looking for.
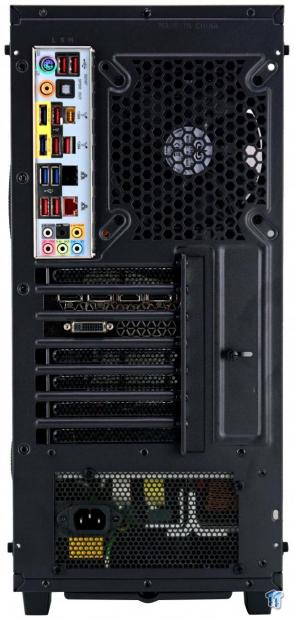
The dust shield gave us no issues when trying to snap it into the case. The video card aligned perfectly with the screw holes, and the cover functions as it should. The PS, while resting on the pads, lines up well and was easy to mount as well.
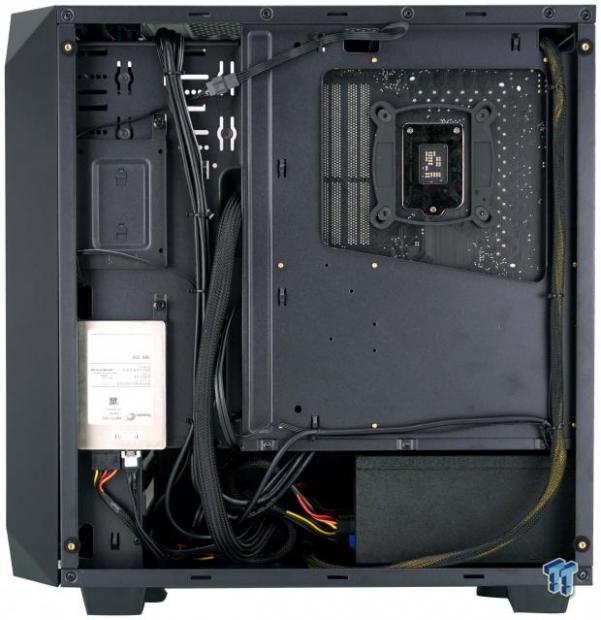
We found that wiring the P7-C0 couldn't be more on point. We did remove the HDD bays or a bit more room on the left, but the groups of wires tie down to the motherboard tray. This way if you do get a glance at them through the tempered glass door, the view looks as good as it does on the other side.
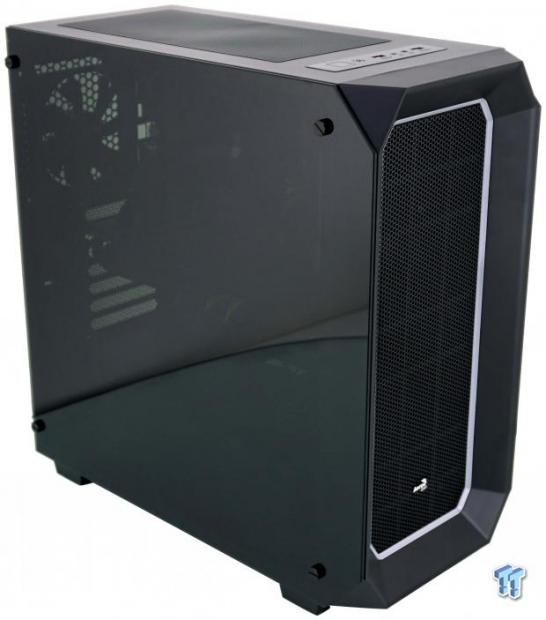
The panels back on the P7-C0, you get a sense of just how dark the tempered glass is. We can just make out the video card, and only due to the angle and backdrop color, we can see the rear exhaust fan; not much else.
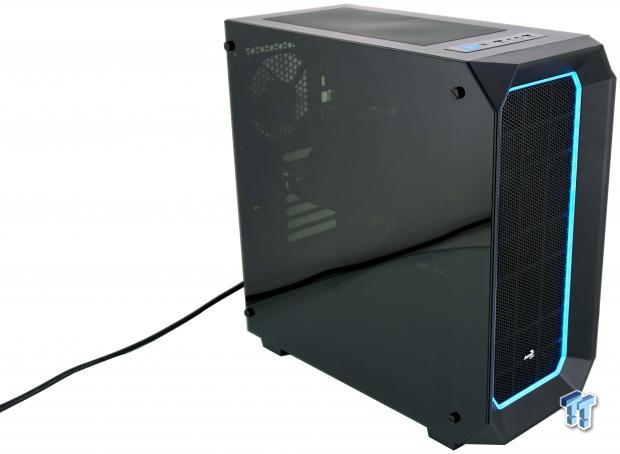
Plugging the PSU into the wall, pressing the power switch, and tinkering with the LED switch, this is what we thought would show best. We chose a color for the bezel which is similar to the power switch led color. There is an occasional red flash of the HDD LED too, but even with the Zotac and Corsair logos lit at this time, we can barely see them inside of the case.
Final Thoughts
Aerocool had done an about face when it comes to cases, at least since the last time we were graced with a sample from them. Comparing the two is night and day different, and in the right direction, we must say. The PC-07 is solid, structurally stable even without the side panels; it is aesthetically pleasing, it has lights to play with and lots of dark tinted tempered glass.
With only one fan, the noise level is kept at 33 dB when the fan is turning at full speed, and from a distance, it will be much less audible. The interior is modular, there are a few options for mounting drives inside, and the finished product offers a clean interior, which is easy to wire manage, and leaves the video card, motherboard, memory, and the cooler all in full view, with not much else to be seen.
There are a select few things we did not find to our liking. We do wish there were rubber grommets, but only as a personal preference. The tint level in the glass makes it a non-issue, and with rolled edges around the management holes, there is no worry of shorting anything. That leads us to the second issue. The level of tint used in the tempered glass. We get that being dark it delivers a clean and modernist design, which is what Aerocool said they were doing. However, we would like less tint to be able to see where all the money went for the build.
You could try to add interior lighting, but you would need the brightest the market offers, and a lot of it to make any visible difference. The last thing to mention was the not-so-great thermal performance. While the chassis is well ventilated, that single 120mm fan and less than 40 CFM, it has a hard time of ridding heat from this system. Of course, this can easily be remedied with additional funds for fans, but then the overall price can go up exponentially as well.
As it stands, the way the P7-C0 is shipped to the door, there is a lot to like, and only by picking it apart were we able to find a downside. Even with the $104.99 MSRP, we feel that Aerocool is not out of reality in that request, and we do feel many would gravitate to it at that price. What is awesome, is that right now, you can jump over to Newegg, and grab this chassis at just $93. Aerocool has done a complete one-eighty and has delivered us a chassis we would recommend to many. Project 7 seems to be a great line up for Aero-Cool, and in this P7-C0 mid-tower chassis, there is loads of value to it, modularity, and options to be a chassis that can stand the test of time.
Honestly, we cannot wait to get our hands-on the next step up in this series and see what else Aerocool has in store for us with their Project 7 cases.
Chad's Chassis Test System Specifications
- Motherboard: GIGABYTE GA-Z68X-UD4-B3
- CPU: Intel Core i7 2600K (buy from Amazon)
- Cooler: Corsair H80i GT (buy from Amazon)
- Memory: G.Skill Ripjaws F3-12800CL6D-4GBXH
- Video Card: ZOTAC GeForce GTX 970 AMP. Extreme Edition (buy from Amazon)
- Storage: SuperSpeed 128GB SSD
- Power Supply: SilverStone SST-ST85F-G (buy from Amazon)
- OS: Microsoft Windows 7 Ultimate 64-bit (buy from Amazon)

| Performance | 91% |
| Quality | 98% |
| Features | 96% |
| Value | 93% |
| Overall | 95% |
The Bottom Line: Aerocool stepped up its case game and comes up with a damn fine case! There are a couple of minor hitches, but nothing that should stop you from buying the sleek, modernist, sturdy house for all of your expensive components.
PRICING: You can find products similar to this one for sale below.
 United
States: Find other tech and computer products like this
over at Amazon.com
 United
Kingdom: Find other tech and computer products like this
over at Amazon.co.uk
 Australia:
Find other tech and computer products like this over at Amazon.com.au
 Canada:
Find other tech and computer products like this over at Amazon.ca
 Deutschland:
Finde andere Technik- und Computerprodukte wie dieses auf Amazon.de
What's in Chad's PC?
- CPU: Intel Core i7 13700K
- MOTHERBOARD: ASUS ROG Maximus Z690 Hero Eva
- RAM: TEAM DDR5-7200 32GB
- GPU: ASUS GeForce RTX 3090 Eva
- SSD: addlink m.2 2TB
- OS: Windows 11 Pro
- COOLER: Fractal Lumen S36
- PSU: be quiet! Dark Power Pro 1500W
- KEYBOARD: ASUS ROG Strix Scope TKL Electro Punk
- MOUSE: ASUS ROG Strix Impact Electro Punk
- MONITOR: ASUS ROG Swift OLED PG42UQ
Similar Content
Related Tags

