
The Bottom Line
Introduction, Specifications, and Pricing
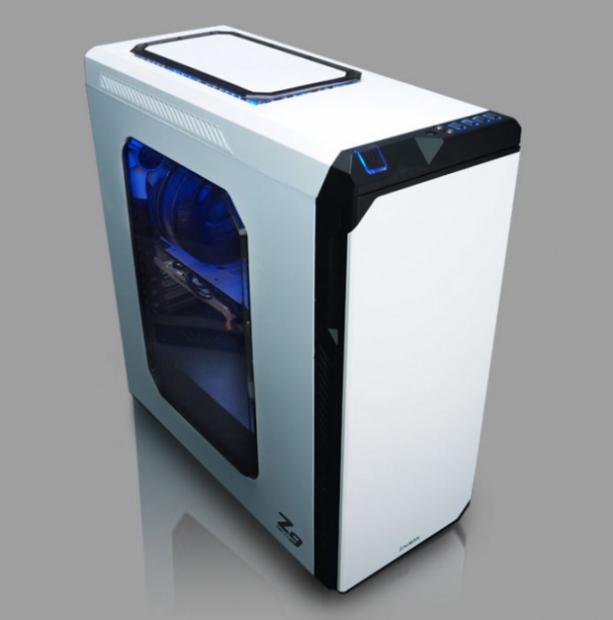
Zalman, a company better known for impressive GPU coolers in the past, as well as a unique style of CPU coolers, yet at the same time, Zalman is trying to compete in the chassis game these days. We have seen only a select few cases thus far from Zalman, and most of what we did see was geared at younger buyers, but as time went by, the cases started to develop and mature, bringing forth designs with more features and modularity. We realize how hard it is even to get into this market and have any success at all, but with what we have seen from Zalman thus far, they are apparently watching market trends and are trying to incorporate new ideas into the latest designs that are released.
As to mid-tower cases more specifically, there are huge players in this game already - Corsair, NZXT, and Cooler Master just to name a few - who have had massive success in this field. The reason for their success is that they hit the market at the right time with new and innovative ideas, delivering feature-rich cases to the masses for a minimal investment. While the bar is already set pretty high long before Zalman made this latest chassis, from what we have seen of this chassis, this is a significant step towards making a big name for themselves in the chassis game, much like we all remember them being in the cooler game. Even if this chassis we are about to display isn't exactly what you are looking for at this time, give Zalman a chance, as they are taking strides in the right direction to deliver the best in chassis features, and at the same time, doing it at very competitive pricing.
While we have seen a couple of the "Z" cases from Zalman in the past, the Z9 NEO mid-tower chassis we have today shares very little with those designs. The exterior of this chassis is more subdued and is on par with some of the larger players in the game as far as the aesthetic appeal is concerned. The inside has been completely retooled to deliver a newly styled motherboard tray, as well as the drive bay systems and where they are located. The Z9 NEO also comes with an option for a white or black exterior, but both versions sport blue LED fans and accents which are impressive, particularly in this price range. So with a lot to cover, we may as well jump[ right in and see what this Zalman Z9 NEO has in store for us.
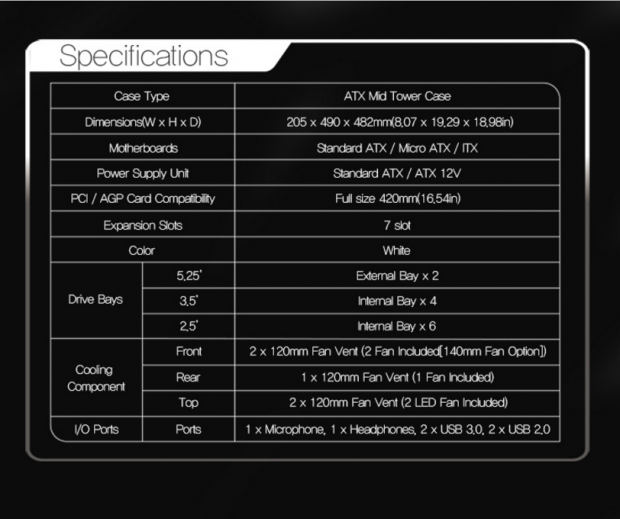
In the chart found on the Zalman website, we are first told that either color version is built as an ATX mid-tower chassis, capable of housing an ATX, Micro-ATX, or Mini-ITX motherboard. This steel and ABS plastic chassis stands 490mm tall, it is 205mm in width, and is 482mm deep, with no mention of the weight. We did catch it on the packaging, though, and it shows there that this is 5.9 kg empty. Inside of the chassis, there is room for up to 420mm of a video card, and with seven slots in the back, there is plenty of room for multi-card setups and soundcards.
The lower half starts off with the drive bays. Here we are shown that there are two 5.25" bays on the front of the chassis, but are hidden by a full-sized front door. On the inside, there are locations for up to four 3.5" storage drives, and in combination with those places, as well as two on the motherboard tray, up to six 2.5" drives can be installed. Moving into the cooling, we see that the front of the chassis is shipped with a pair of 120mm fans to introduce airflow into the chassis. There is also a 120mm fan at the back, as well as two more in the top of the chassis, but only the top two have LEDs. As for the front I/O panel, there is a power button, reset button, HD Audio jacks, and two USB 2.0 and two USB 3.0 ports. To go along with the LED fans, the power button as well as the USB ports all offer thin rings of blue LED backlit plastic so that you may find them easily in the dark.
Pricing is pretty standard across the board, no matter where you choose to buy the Z9 NEO. One thing to note about pricing is that color does have an effect on what that price is, however. If you want black panels and black accent trim, we see that it will cost you $69.99 for that version. If you want the white panels with black accents, like the one we were sent, there is an additional $10 required. Still, though, where it usually takes near $100 do get a mid-tower chassis with a full set of features, while at the same time not looking like a Transformer, Zalman is putting their best foot forward. Based on the specifications given, you may not yet be sold on this chassis, but as you see everything that Zalman packed into this mid-tower chassis, the realization of its value should become apparent.
Chad's Chassis Test System Specifications
- Motherboard: GIGABYTE GA-Z68X-UD4-B3
- CPU: Intel Core i7 2600K (buy from Amazon)
- Cooler: Corsair H80i GT (buy from Amazon)
- Memory: G.Skill Ripjaws F3-12800CL6D-4GBXH
- Video Card: ZOTAC GeForce GTX 970 AMP. Extreme Edition (buy from Amazon)
- Storage: SuperSpeed 128GB SSD
- Power Supply: SilverStone SST-ST85F-G (buy from Amazon)
- OS: Microsoft Windows 7 Ultimate 64-bit (buy from Amazon)
Packaging
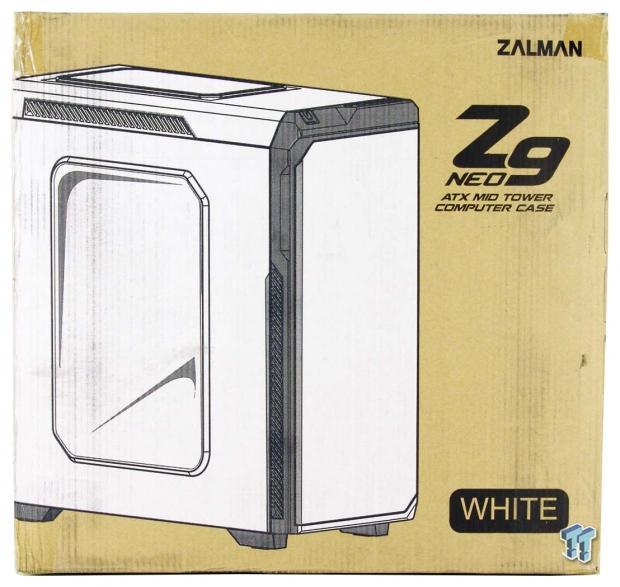
Zalman shipped the Z9 NEO, in white as the large rendering shows, in a plain cardboard box. Along with the chassis off to the left, the Z9 NEO name and a large notation that this is indeed white are also printed on the front panel.

This side panel starts at the top with the chassis naming, just above the handle. Below, the bulk of this side is used to display 12 features and inclusions to this chassis, which has been translated eight times in total. This is also where we gained the weight measurement, just below the listed dimensions.
They saved quite a bit of time and money on this packaging by not doing much of anything to the back panel. Rather than repeating the list of features and offering a large exploded diagram, the company name, the product name, and that it is white is all we find here.

The last panel starts again with the chassis name at the top, but this time, the panel is used to deliver the specifications chart, exactly like the one we just covered. There are also icons and UPC codes on here, but none of this pertains to the customers.
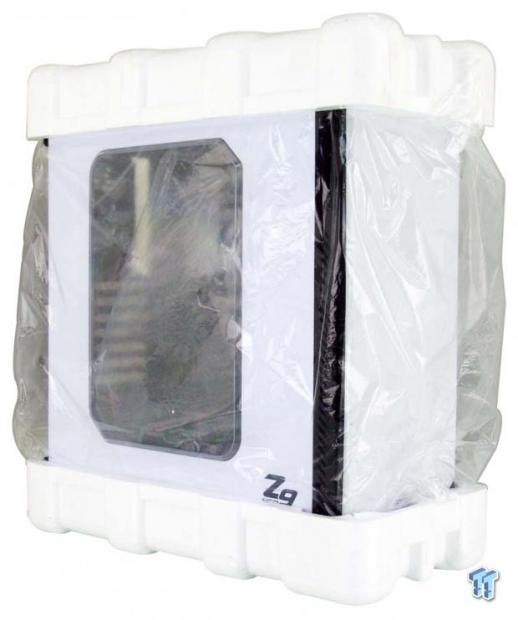
The inner packaging is what we expect to see with any chassis these days. Thick Styrofoam on the top and bottom to handle the bumps, drops, and tumbles, while also being wrapped in plastic to protect the finishes. This Zalman Z9 NEO had a long trip to our doorstep, with no damage, and is in pristine condition to have photos taken of it.
Zalman Z9 NEO Mid-Tower Chassis
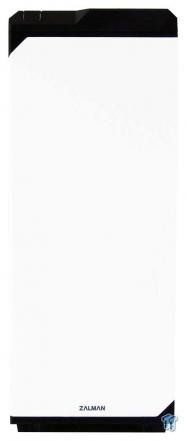
The front of the Z9 NEO is made of a solid front panel, this time, painted white, with black accents at the top and bottom. There is also a tiny Zalman logo painted at the bottom of the front door to let everyone know who made this slick looking chassis.

The door is held shut with magnets, and the inside of the door offers a large section of noise absorbing material. In the front bezel, there are covers over the pair of 5.25" bays, while the rest is opened up for ventilation used as the intake.

The front I/O panel is in the black plastic accent at the top. Front left to right there is a large power button, a bit of angled plastic, the reset button, HD Audio jacks, a pair of USB 2.0 ports, and a pair of USB 3.0 ports. Also, note that rubber caps are placed in the USB ports to keep dust out of them while they are not being used.

The top of the chassis starts off as a solid section of plastic covering the steel innards of this case. As we move to the back of the chassis, we find a raised section of white surrounded by translucent black plastic. This allows the top fans to blow air out of the top, and also allows a bit of the LED light to shine through here.

Angled ventilation along the top, a large window taking up most of it, and the Z9 NEO name painted in gray along the bottom is what makes up the left side of this chassis. We see that in the front there is ventilation to allow air in past the door, and we also notice the plastic doesn't exactly match the paint color.

The panels are held on with thumbscrews on either side of the black painted steel. Down the middle that is room for the dust shield and a 120mm fan hanging next to it. The seven expansion slots have ventilated covers, and mesh next to them for some passive air flow, leaving the bottom of the chassis to house the PSU.
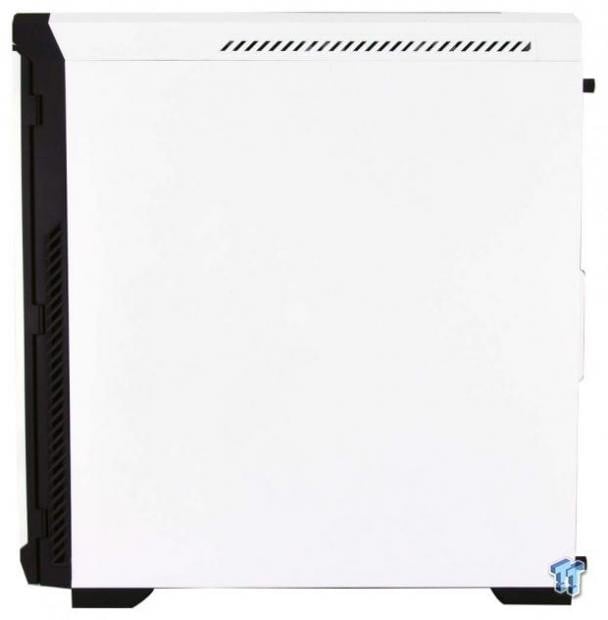
The right side of the chassis offers the same ventilation along the top and at the front. This time, the panel is just a flat expanse of steel, with no naming, and no need for a window.

Under the chassis, there are four large legs that raise the chassis off the floor and have oval shaped pads to keep the chassis from slipping. At the back is a large dust filter for the PSU, which slides out the back, and near the front is potential mounting holes.
Inside the Z9 NEO

Something to consider when it comes to removing the dust filter, or swapping the 120mm fans for 140mm versions, is that the wiring is fully attached to the bezel. As long as you leave some slack in the leads when wire managing, you should be all right, but is something to keep in mind.
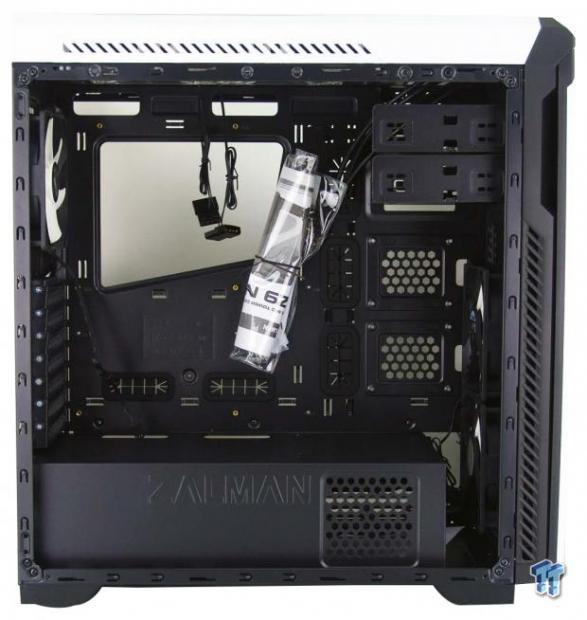
Inside of the chassis, we found that all of the wiring has been tended to and is not floating free in the chassis. We also found the hardware and literature hanging from a back tied to the motherboard tray.

The pair of 5.25" bays are hanging from the front of the chassis, they are not removable, nor are they made with tool-free mechanisms. They do supply thumbscrews to mount drives and devices here to lessen the burden.
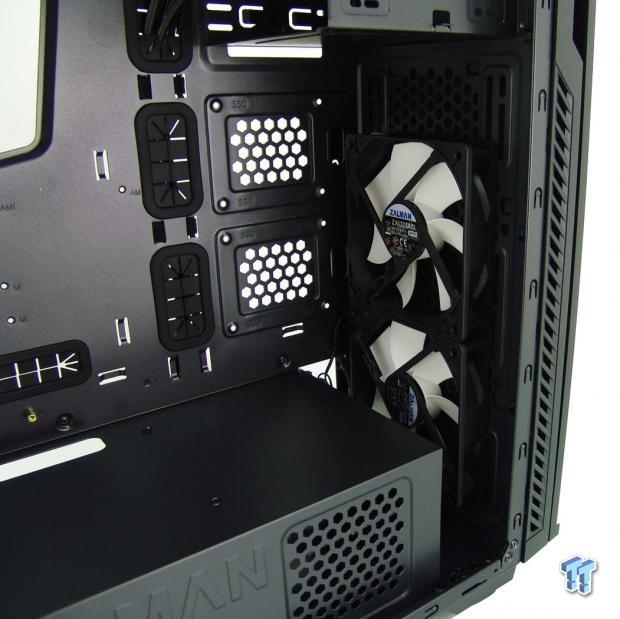
The front of the Z9 NEO is left open to the wind of the 120mm fans installed there. Off to their left, there is a pair of optional SDD mounting locations, and there is a gap to allow water cooling in the front, not conflicting with the PSU cover.
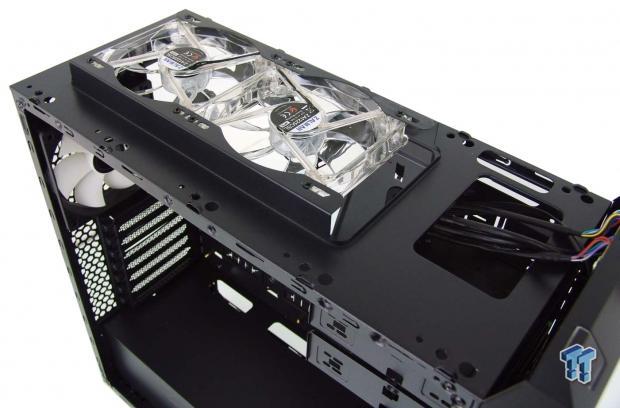
If you remove the front bezel, the top of the chassis can be lifted off, exposing the top of the chassis along with the pair of LED fans. This section is raised to keep the fans from conflict with the motherboard, but it is entirely possible to use a thin radiator based AIO in there.

The motherboard tray is clearly marked for standoff locations, offers a large access hole while providing seven holes around the edges for wiring. Along with 18 places to tie wiring down to, there is also a pair of holes way to the right, which should allow the SSDs to be wired cleanly.

On the floor of the chassis, we find this large PSU cover. There are holes near the back edge to pass wiring through, the Zalman name is embossed on the side, and near the front is ventilation for storage drives.

The back of the chassis sports a white bladed, non-LED fan, just like the pair in the front, but only this one of the three requires a 3-pin fan header for power. Below the fan, there are thumbscrews installed, currently holding the slot covers in place.
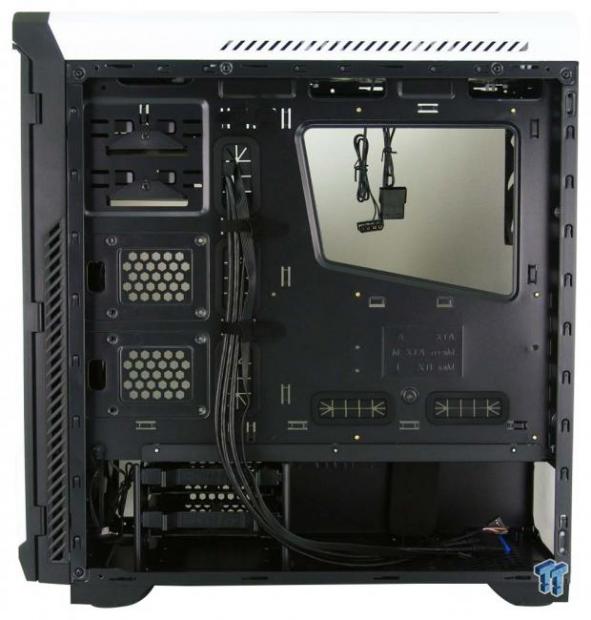
With near 15mm for wiring behind the motherboard tray, running the I/O wiring under the hook and loop straps is not an issue. It is hard to see them for the front fans, but with the leads hanging from the top, these four fans are seen to use 4-pin Molex connections for power.

In the bottom left corner, there is an HDD rack with two trays to accommodate 3.5" or 2.5" drives. To get the fifth and sixth 2.5" drives in, or the third and fourth 3.5" drive installed, you need to recall back to those holes in the floor of the chassis we pointed out on the outside.
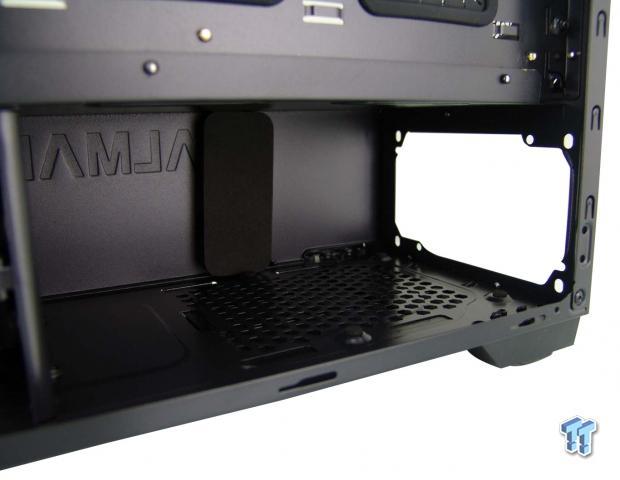
At the back of the chassis, the PSU is meant to be installed. There are elongated rubber pads applied to the floor of the chassis, and these along with steel bumps keep the PSU in line to be screwed in from the back.

Cabling is kept short to try and lessen the wiring mess, but this can be an issue with routing for some motherboards. There are all the connections needed from the switches and LEDs. There is a native USB 3.0 connection, a USB 2.0 connection, and last, but not least, there is the HD Audio cable.
Hardware & Documentation

As part of the hardware, we are offered eight hex-head 6/32 screws to be used with the PSU mainly. Below those are pan head 6/32 screws for mounting the motherboard. That leaves us with the M3 screws to the right for drive mounting, and a group of self-tapping screws, which we are not sure of their purpose in this chassis.
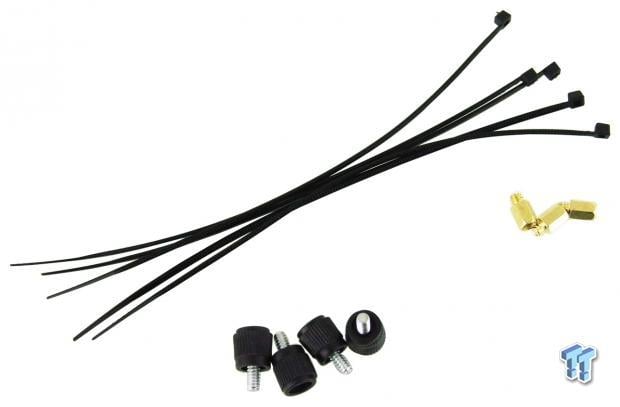
Digging deeper into the hardware bag, we pulled out the five wire ties that Zalman sends along to work along with the straps already in the case. We also found the thumbscrews for the ODD bays and a trio of standoffs that still need to go inside of this chassis.

The manual provided from Zalman is short and sweet. It does show what parts come along with the chassis but does not address for what purpose. As for the build process, the major steps are shown, but we feel they could have done a slightly better job. This manual is also not all English; it is repeated in a few languages as you get deeper into it.
Case Build & Finished Product

Since the Z9 NEO comes with a solid front door, had we installed an optical drive, bay reservoir, or a card reader, you would never know. The door stays shut until it needs to be opened, and with the sound absorbing material on the inside, noise emanating from the front is minimal.

We had plenty of room for the AIO in the back of the chassis, and our aftermarket GTX 970 has plenty of room inside of this chassis. At the top of the motherboard, there is just enough room for a thin AIO to go there, but be sure to have all of your wiring there done before installing what will block access to them.
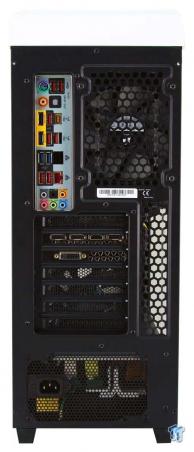
The dust shield popped right into place, there were no issues returning the thumbscrews to secure the video card, and the PSU slides right into place as well. There is nothing out of the ordinary going on back here.

With minimal wiring, we felt that using the hook and loop straps would be sufficient. We did run the fan leads from the top to the bottom to remove the Molex connections from behind the tray, and we found plenty of places to address keeping the wiring out of the way.
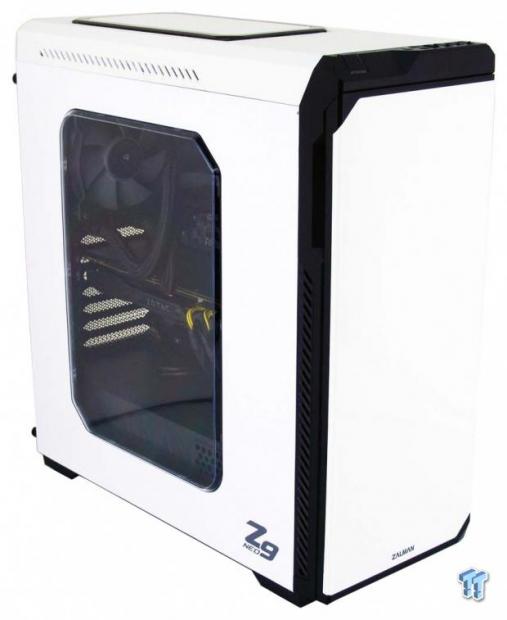
To get here, the left side panel with the window slid right back onto the chassis. As for the right side, behind the tray, we did have a bit of a struggle since they are thin panels, but we did manage to get it aligned and installed.

The view inside of the chassis is great through this large side window, and we can see the Corsair logo along with the Zotac one, and we also get a hint of blue lighting from the pair of fans at the top. The more we look at the Z9 NEO, the more it grows on us.
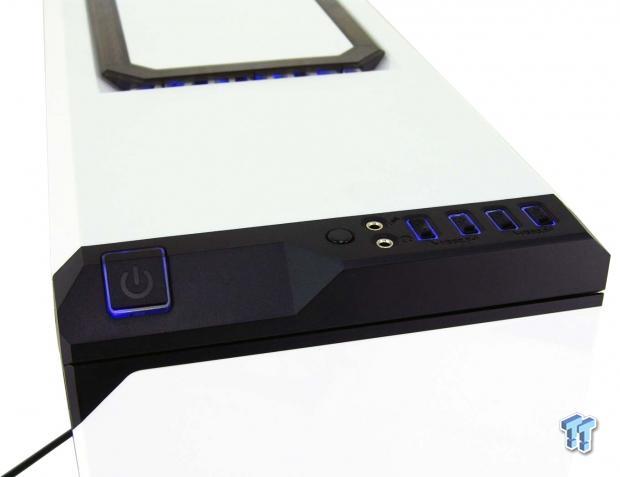
A bit of a bonus to those who admire chassis lighting tricks of the trade, here you go. Not only can you see the fan LEDs through the black trim ring on the top of the chassis, and a similar effect around the power button. What is trick about this chassis is that Zalman continued that theme, and lit the USB ports as well.
As for noise levels, the back of the chassis is where the most noise is produced, and a foot away, the meter showed us 35 dB as a maximum.
Final Thoughts
Zalman has proved they are listening to the market and has taken all of that knowledge gained and delivered the best chassis we have seen from them, hands down. The use of a front door to not only raise the aesthetic appeal, but covering the bays, mesh, and absorbing noises are added bonuses to the design. We like the subdued styling, with only slight angles and nothing too aggressive, and we also dig the black and white version over all black. We also like the work done to the interior. While it isn't perfect for anything you may conjure up to install inside, attention to details was not completely lost on Zalman. The PSU cover, the hidden drive rack, the room at the front for an AIO, LED fans and a ringed pattern that carries on through the entire top, and very minimal noise heard from the Z9 NEO are all great reasons to want one.
As far as issues are concerned, we found one major issue and something that is not an issue but is something we think should have been done differently. As to the issue, it came in the form of the optional SSD mounting locations near the front of the case. As instructed, we connected the SATA leads to the SSD, ran them through the hole for that drive in the motherboard tray, and found that we ran into the front of the chassis long before we ever got the screw holes aligned. This pretty much makes these locations useless for us.
The minor detail we would have changed has to do with the fans. They supplied ample airflow through the chassis; the LEDs are nice, but why in this day and age use Molex connections? Using a fan hub becomes impossible, and hopes of a fan controller to take care of them is out the door too. Simple 3-pin or 4-pin power plugs, please. Outside of these two things, the Zalman Z9 NEO is a great chassis.
To be honest, after seeing this Z9 NEO mid-tower chassis, we feel that Zalman is well on their way to mass success in the chassis game. While they may have fumbled ever so slightly with the SSD locations and fan power connectors, the rest of the features carry us past that. It is well outside of the box of what we are used to seeing in Zalman cases, yet is a chassis that anyone would like. Being able to add in the blue LED lighting scheme, the USB dust covers, a PSU cover plate, and still bringing loads of other features we usually only see from the major companies, and doing so with a minimal investment required is amazing.
At $69.99 for the black version, and $79.99 for the chassis we just showed you, as we said earlier, worth has become self-evident. This chassis packs in a ton of bang for the buck and is also very easy on the eyes. This Zalman Z9 NEO mid-tower chassis is a steal at this price, and Zalman will likely see lots of love for a chassis such as this.
Chad's Chassis Test System Specifications
- Motherboard: GIGABYTE GA-Z68X-UD4-B3
- CPU: Intel Core i7 2600K (buy from Amazon)
- Cooler: Corsair H80i GT (buy from Amazon)
- Memory: G.Skill Ripjaws F3-12800CL6D-4GBXH
- Video Card: ZOTAC GeForce GTX 970 AMP. Extreme Edition (buy from Amazon)
- Storage: SuperSpeed 128GB SSD
- Power Supply: SilverStone SST-ST85F-G (buy from Amazon)
- OS: Microsoft Windows 7 Ultimate 64-bit (buy from Amazon)

| Performance | 93% |
| Quality including Design and Build | 95% |
| General Features | 90% |
| Bundle and Packaging | 91% |
| Value for Money | 98% |
| Overall | 93% |
The Bottom Line: Zalman's Z9 NEO is a real head turner! We know Zalman is not immediately associated with cases, but with sleek clean aesthetics, a new interior layout, and all the main features found in cases made this year, for a little bit less than $80, you just can't go wrong.
PRICING: You can find products similar to this one for sale below.
 United
States: Find other tech and computer products like this
over at Amazon.com
 United
Kingdom: Find other tech and computer products like this
over at Amazon.co.uk
 Australia:
Find other tech and computer products like this over at Amazon.com.au
 Canada:
Find other tech and computer products like this over at Amazon.ca
 Deutschland:
Finde andere Technik- und Computerprodukte wie dieses auf Amazon.de
What's in Chad's PC?
- CPU: Intel Core i7 13700K
- MOTHERBOARD: ASUS ROG Maximus Z690 Hero Eva
- RAM: TEAM DDR5-7200 32GB
- GPU: ASUS GeForce RTX 3090 Eva
- SSD: addlink m.2 2TB
- OS: Windows 11 Pro
- COOLER: Fractal Lumen S36
- PSU: be quiet! Dark Power Pro 1500W
- KEYBOARD: ASUS ROG Strix Scope TKL Electro Punk
- MOUSE: ASUS ROG Strix Impact Electro Punk
- MONITOR: ASUS ROG Swift OLED PG42UQ
Similar Content
Related Tags

