
The Bottom Line
Introduction, Specifications, and Pricing
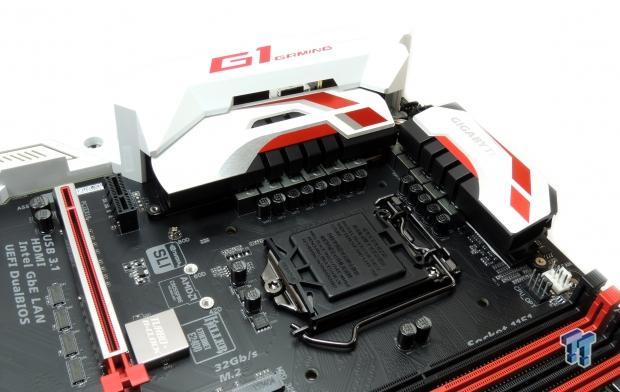
It's no secret that motherboard makers are zoomed in on gamers as their primary target audience for the Intel Z170 chipset. The push by board makers is part of Intel's push towards gamers with their Skylake CPU since PC gaming is expanding and more gamers are building systems with the latest in computer hardware. To meet this rise of 'The Gamer', manufacturers have started to make gaming focused motherboards, but what does that even mean?
A motherboard is a circuit board designed to support the functionality of other components. It isn't a performance producer, but rather a facilitator. Meaning the motherboard is responsible for unhindered performance and support of other components. A gaming motherboard should be designed to support gaming functionality. Including better support for GPUs, higher quality audio, higher quality networking, overclocking support, and even aesthetics that gamers might appreciate.
It's no secret that gamers also like fancy things, they customize characters in almost every game from WoW to GTA: V, so why wouldn't they want to customize their motherboard? The GIGABYTE Z170X-Gaming 7 takes aim at the high-end gamer, let's see what GIGABYTE has done for 'The Gamer.'
Specifications
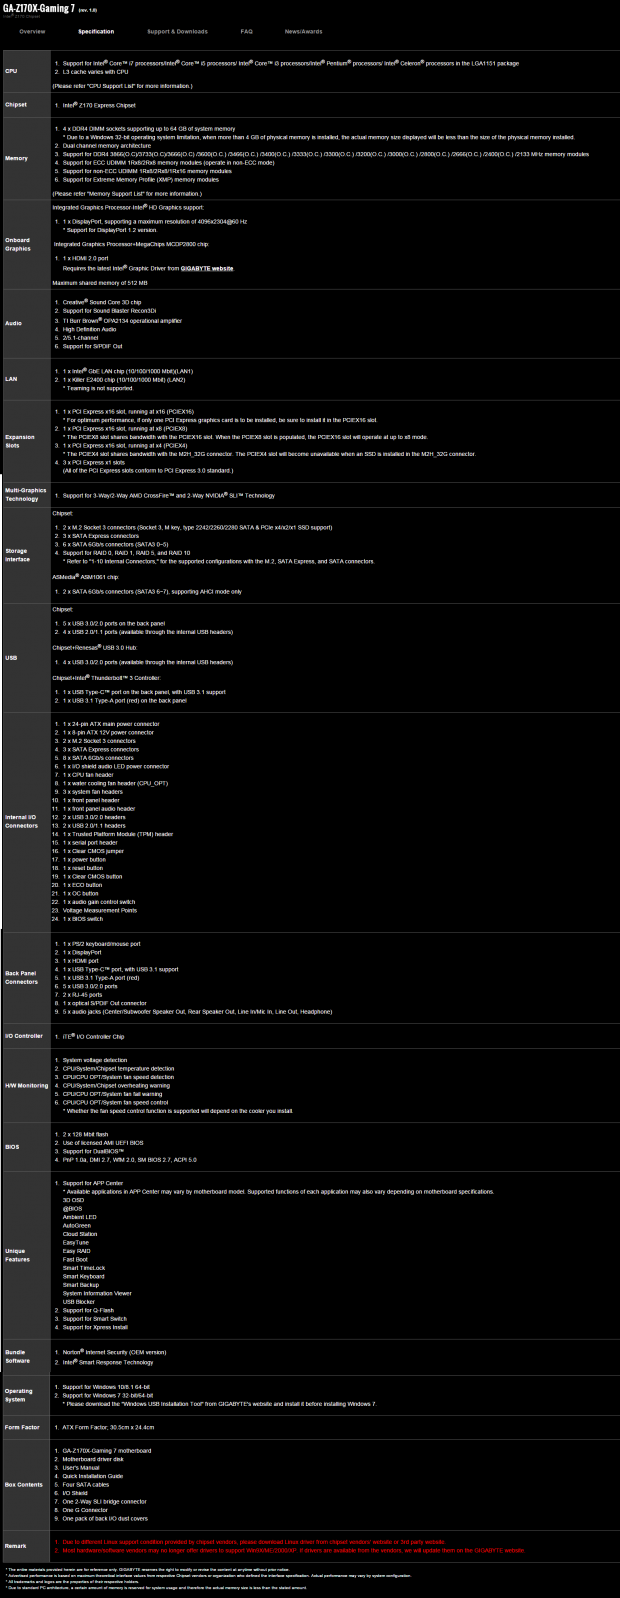
The GIGABYTE Z170X-GAMING 7 has some premium features such as ThunderBolt 3.0 through a Type-C connector that also works as USB 3.1. There is also a USB 3.1 Type-A port, multiple USB 3.0 ports, many SATA6Gb/s ports, two M.2 32Gb/s slots, Core3Di audio, and dual 1Gbit NICs (one Killer/one Intel).
Pricing
The Z170X-GAMING 7 is available from many large retailers for roughly $225 which put's it at the mid to high-end of Z170 motherboards.
Packaging and Z170X-GAMING 7 Overview
Packaging and Overview
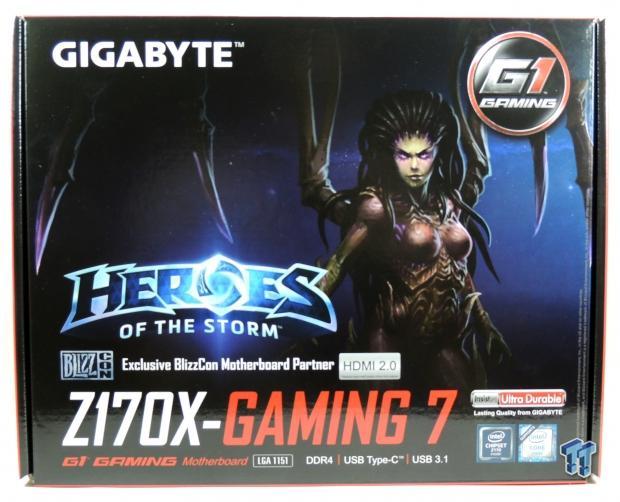
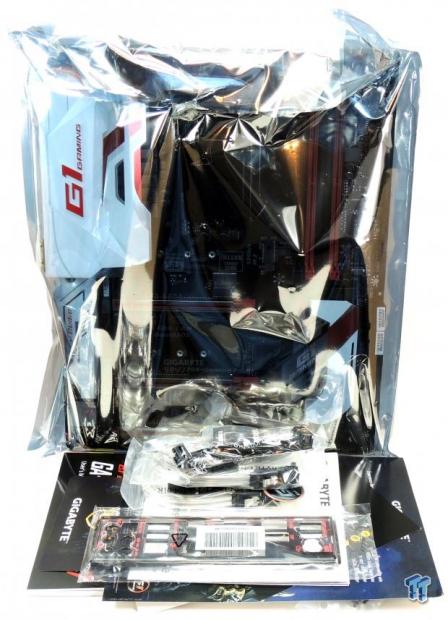
The Z170X-GAMING 7's box (and the rest of GIGABYTE's gaming lineup) display "Heroes of the Storm" marketing. It's an interesting move, as many others target features, quality, and neat graphical designs, but GIGABYTE is choosing a game. Either way, the box picture doesn't matter, what matters is the motherboard, and it is well protected by the packaging.
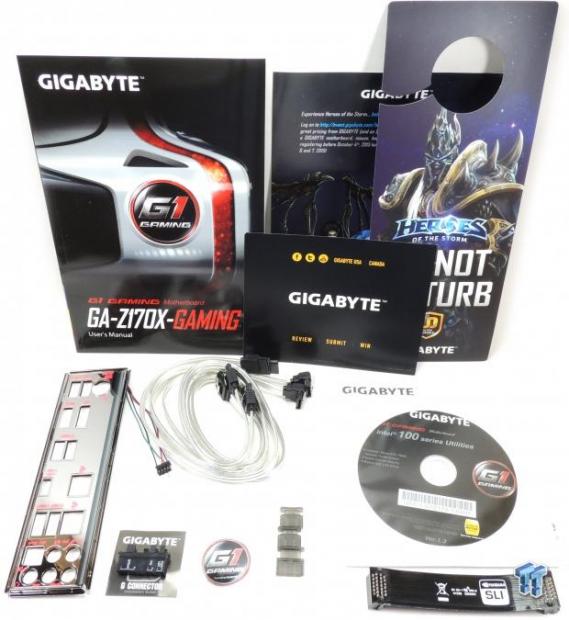
Accessories include RGB LED IO Shield, 4x SATA6Gb/s cables (clear), G-Connector, video output dust covers, Do Not Disturb door hanger, feedback cards, SLI bridge, G1 gaming case badge, driver DVD, and manuals.
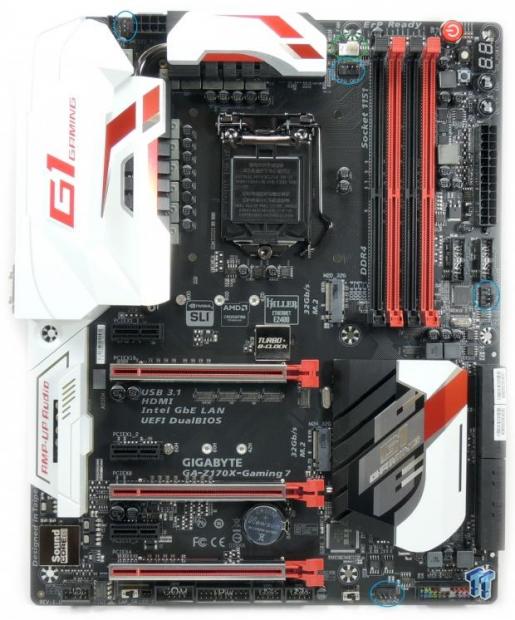
The GIGABYTE Z170X-GAMING 7 has five fan headers. The single CPU fan header circled in green is a PWM mode header, and the four others circled in blue are voltage mod headers. Control of these headers is available through the UEFI and Windows.
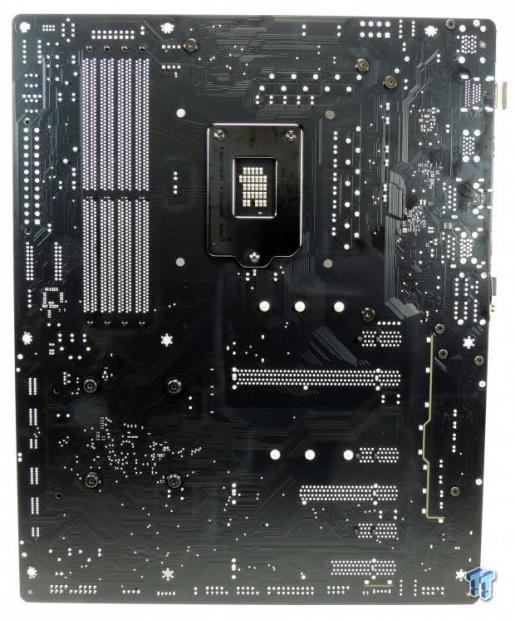
The motherboard has a red and white theme that is super appealing. Most people like the white cover over the IO shield, but GIGABYTE has also extended it over the audio section of the motherboard and added RGB LEDs underneath the PCB and on the IO panel. GIGABYTE's PCI-E 16x slots are also supported by metal braces for heavy GPUs and are a single piece design for maximum durability. The back of the motherboard is bare except for some RGB LEDs that illuminate the audio PCB divide.
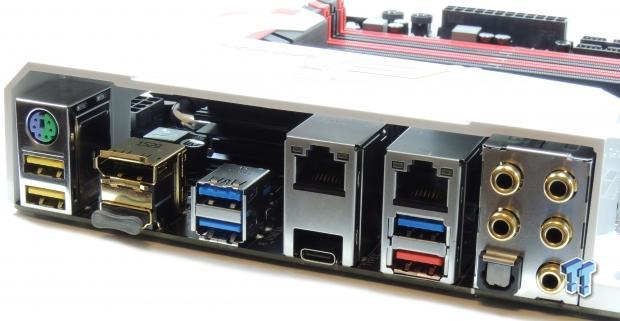
The IO panel on the Z170X-GAMING 7 carries five USB 3.0 ports (two yellow are DAC-UP), PS/2 keyboard/mouse, HDMI, DisplayPort, USB 3.1 type-A, USB 3.1 type-C, two 1Gbit NIC ports, and S/PDIF with TOSLINK for audio output.
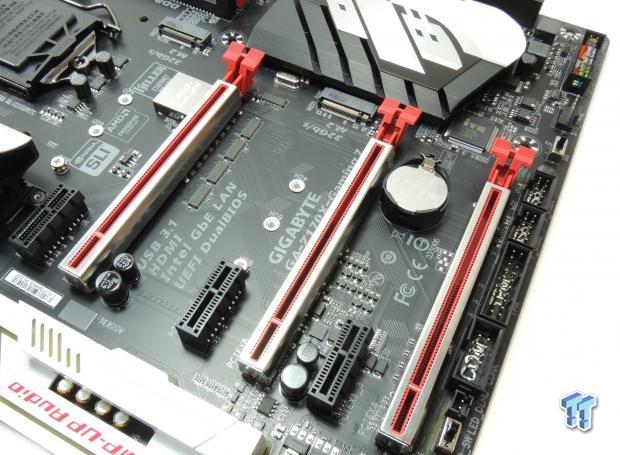
The PCI-E layout is pretty straightforward. The first and second full sized PCI-E 16x slots are hard wired to the CPU and 8x of bandwidth will switch from the top slot to the middle slot if a GPU is installed. The other 16x slot (bottommost) is wired to the PCH, but shares 4x of bandwidth with the M.2 slot closest to it. All PCI-E 1x slots are hard wired to the PCH. PCI-E spacing is a bit lower to support larger CPU heat sink coolers.
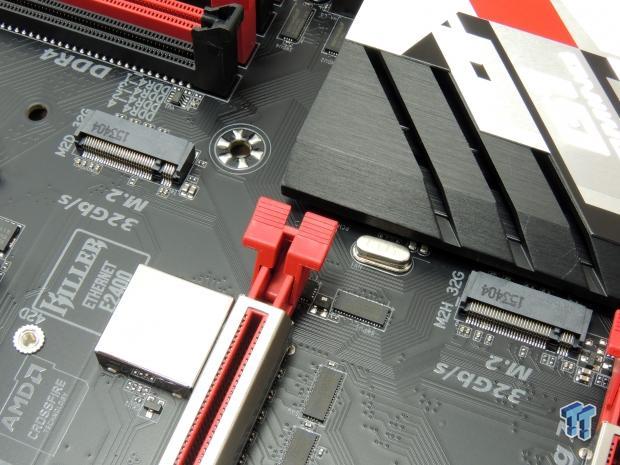
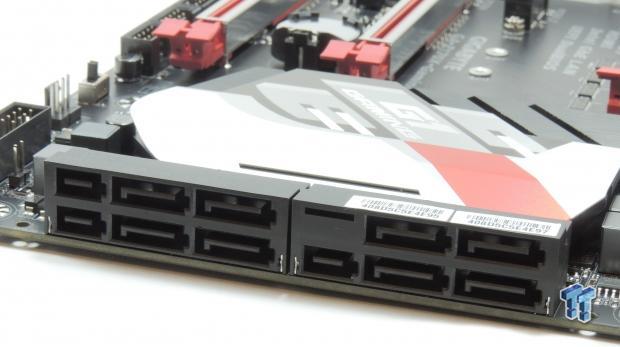
The Z170X-GAMING 7 has two M.2 slots, and they can be used in RAID at 32Gb/s of bandwidth each. There are also eight SATA6Gb/s ports. All PCH SATA ports are also in line with SATA Express connectors, but can be used as normal SATA if you aren't using them for SATA Express. There are two ports from an ASMedia controller. The topmost M.2 slot shares bandwidth with SATA ports 1-4 and the bottom M.2 slot also has an SATA link to one of these ports for RAID capability with the top M.2 slot. That is why GIGABYTE includes the extra SATA controller, because if you use both M.2 slots at 4x PCI-E 3.0, then you will only be left with two Intel ports, so GIGABYTE added the ASMedia controller so you will have four SATA6Gb/s ports if both M.2 slots are being used to their maximum. Not all four of those SATA ports will be disabled if any device is inserted; it depends on the requirements of the M.2 device and on page 32 in the manual there is a decent description of different configurations.
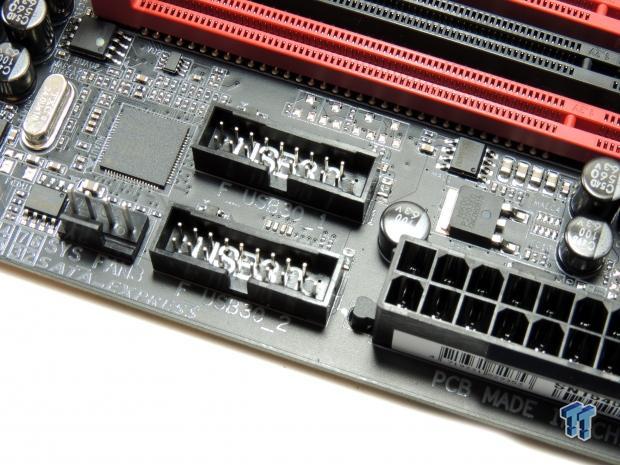
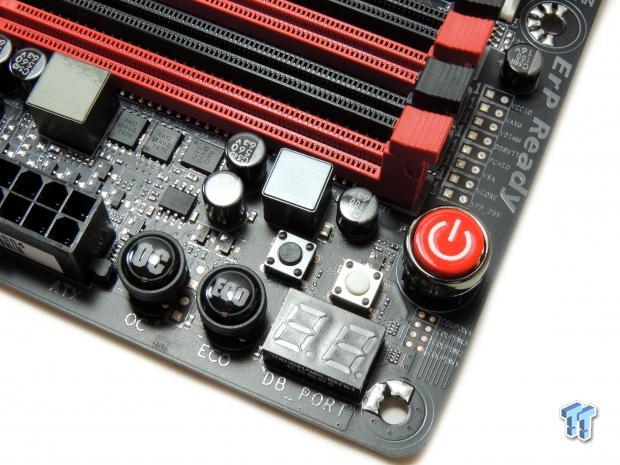
There are two USB 3.0 internal headers located right below the 24-pin power connector. There are also a healthy amount of overclocking features, including power, reset, and clear CMOS buttons along with a POST Code display. Voltage read points are also present, which is a great thing since they are useful for Z170 overclocking. There is an OC button for a preconfigured overclock, and an ECO button in case you want to save power.
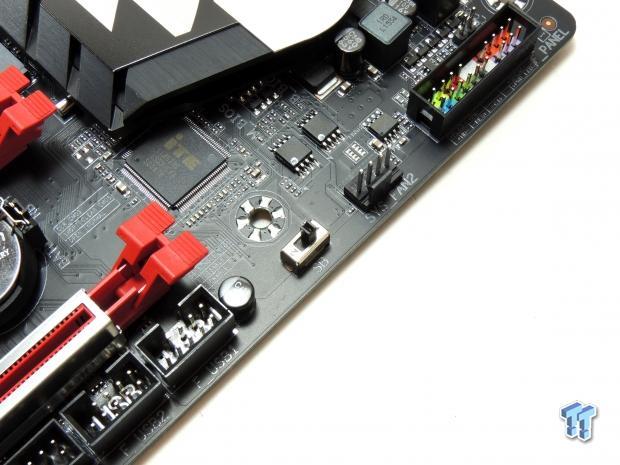
There is a single BIOS mode switch used to disable the Dual BIOS link for debugging and quicker recovery during overclocking (especially BLCK overclocking, like with non-K SKUs).
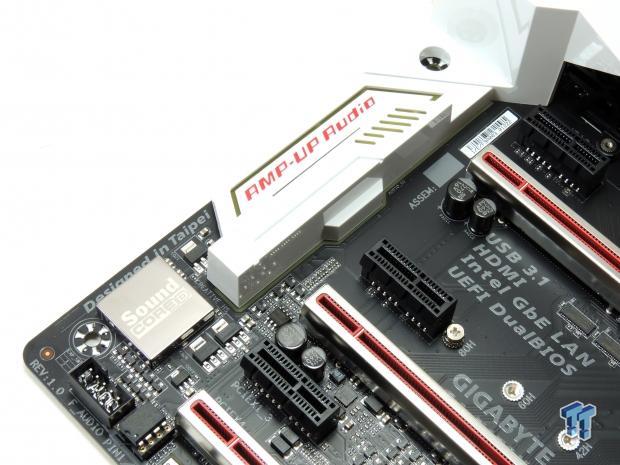
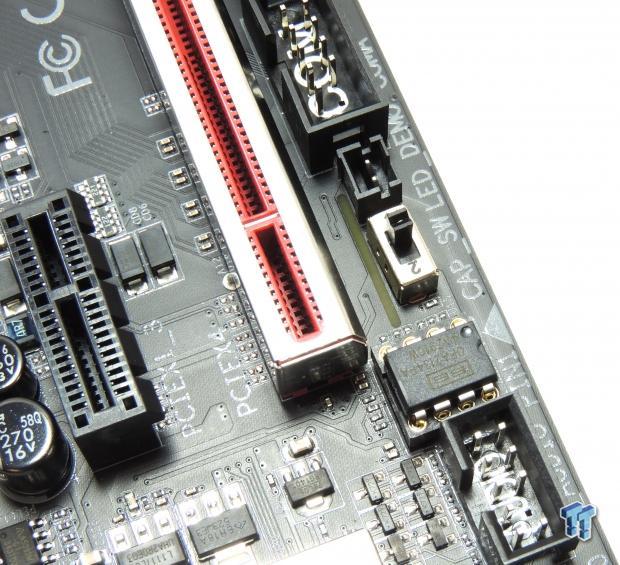
GIGABYTE has kicked the audio section up a notch. I looked at the Z170X-Gaming G1 many months ago, and its audio was top notch. Here we have a slightly similar, yet less powerful, offering. There is a DIP socket for the amplifier, and a CAP switch will allow you to change the amplifier gain in case of issues with the audio.
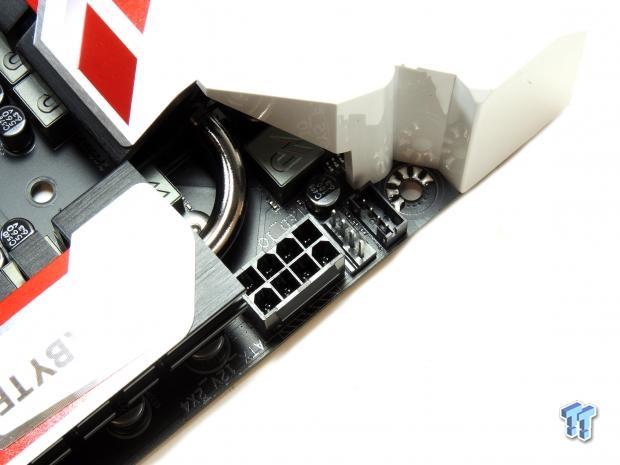
Near the 8-pin power connector is an RGB header for the backpanel LEDs. This port is only meant to illuminate the few LEDs in the IO shield, but if you are a modder, you can probably hack into the header/ wires and get an RGB output for other uses.
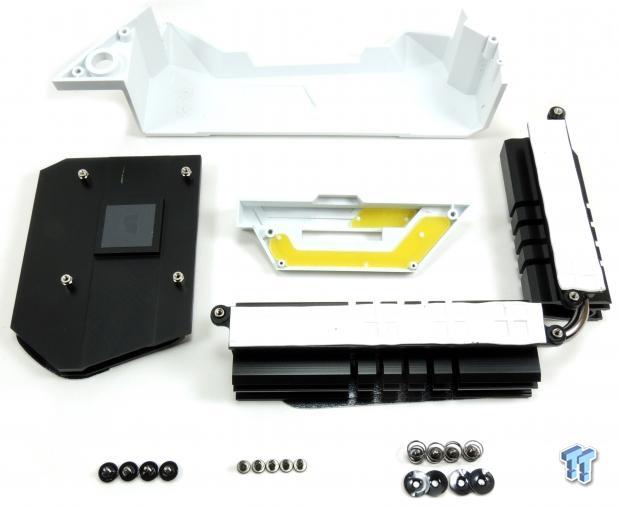
The heat sinks and shield are all screwed into the motherboard and the contact is great.
GIGABYTE Z170X-GAMING 7 Circuit Analysis
Circuit Analysis
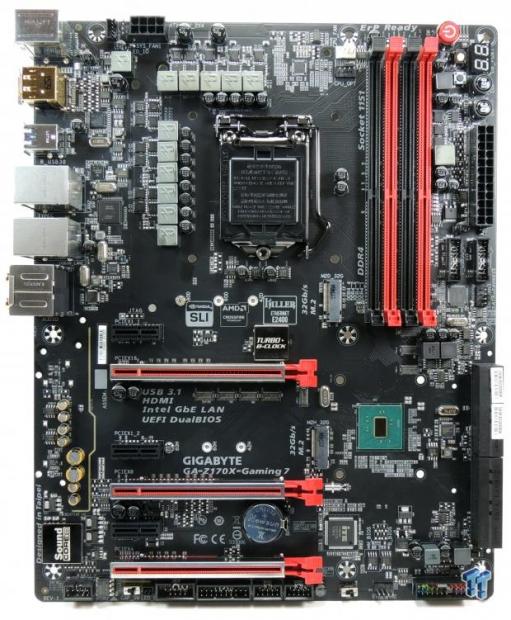
I think all motherboards are more interesting when their heat sinks come off; the Z170X-Gaming 7 looks great.
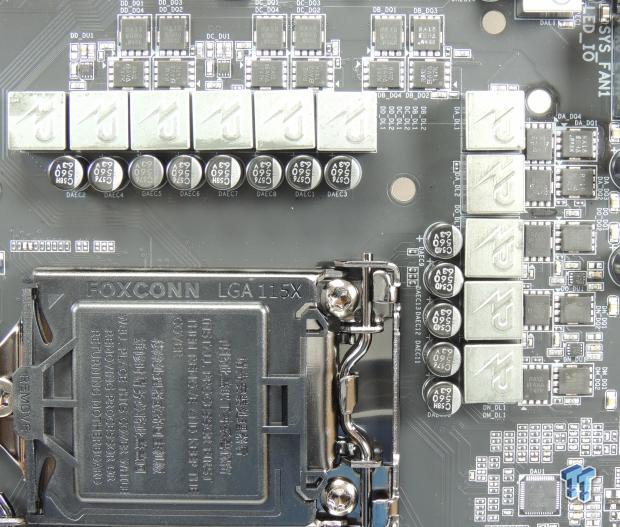
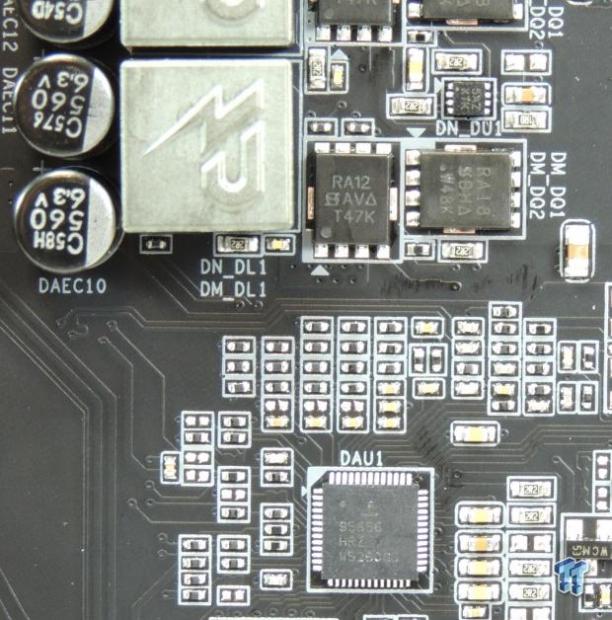
Z170X-GAMING 7 has an 8+3 phase VRM for the CPU core and iGPU. So you can either count phases by the number of switching nodes (always in marketing and almost always used by everyone) or by the actual number of PWM phases (only really purists like me enjoy doing this). In this case, each PWM phase is controlling two switching nodes (high-side FET, low-side FET(s), and inductor), and this is a very common way of increasing phase counts on Z170 motherboards. It results in more switching components, but also the ability to handle much higher power requirements and run cooler at higher loads. Either way, the VRM is controlled by an Intersil ISL95856 Hybrid Digital PWM with multiple outputs and integrated drivers.
The CPU VR utilizes four phases from the PWM, two of which have driver outputs from the PWM and two ISL6625A ("5AZ") drivers are used to supplement the phase count to four. The iGPU phases get one integrated driver, and two ISL6625A are added for a total of three phases (both true and virtual). Vishay SiRA12 are used for the low-side and Vishay SiRA18 are used on the high side. Each phase for the CPU and iGPU gets one of each. GIGABYTE is using custom inductors with the Power logo on it, and their custom 10K polymer capacitors for the output filter.
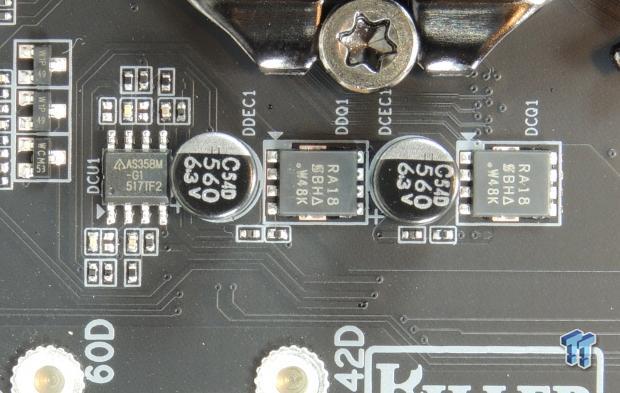
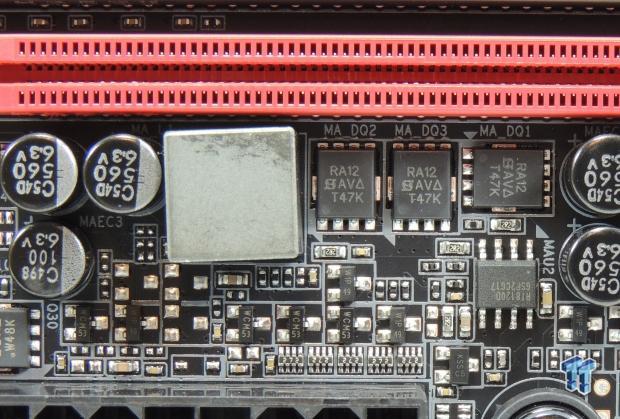
The VCCSA and VCCIO come from a linear regulator like on many other GIGABYTE Z170 motherboards. The memory VRM is a single phase controlled by a Richtek single phase PWM with drivers. There are two low-side MOSFETs and a single high-side for this single phase memory VRM, and they do the job just fine.
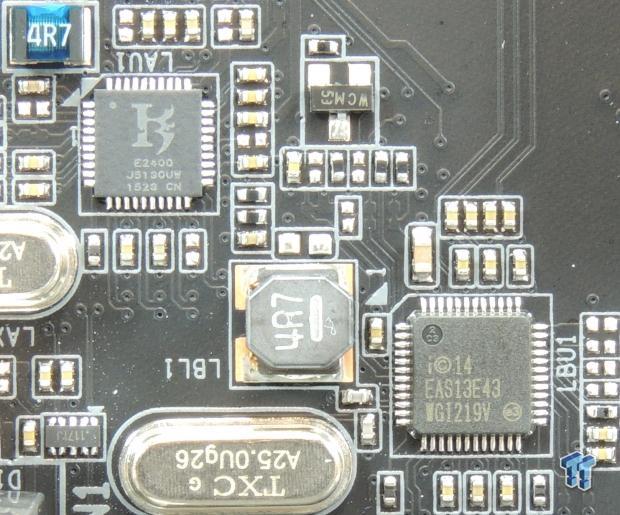
This motherboard also has dual NICs. A single i219v PHY works with the integrated MAC in the PCH for the Intel NIC. A Qualcomm Killer e2400 is also used for the gaming NIC.
GIGABYTE Z170X-GAMING 7 Circuit Analysis Continued
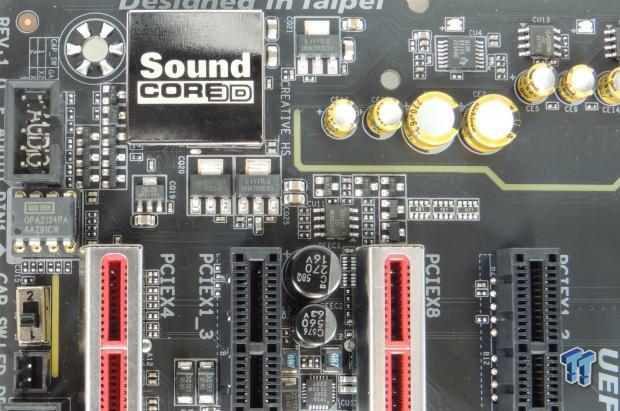
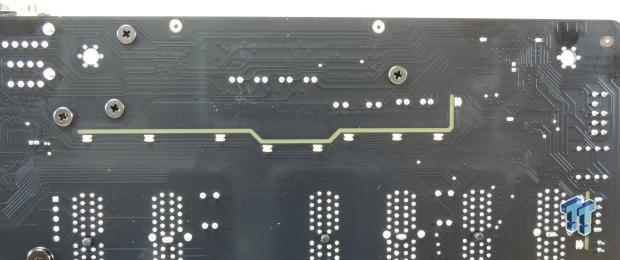
One of the main selling points of this motherboard is the Creative audio. The Core3Di audio chipset (CA0132) sits under the metal shield and is a quad-core audio processor from Creative. A Texas Instruments DRV632 is used as the line driver for the backpanel output, and an OPA2134 amplifier is used for the front panel and sits in a replaceable socket. A TPS65130 provides +/- 15v for the full range of OAMP support. There are also different sizes od Nichicon Gold Series electrolytic audio capacitors and a PCB divide is illuminated by 11 backside RGB LEDs and 5x topside RGB LEDs.
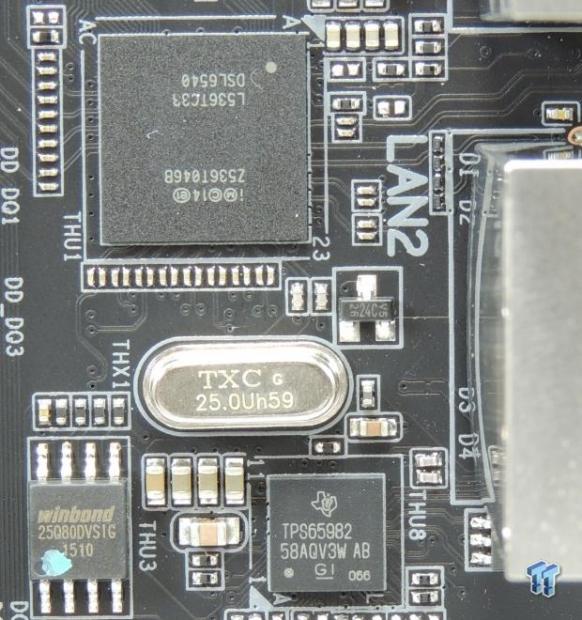
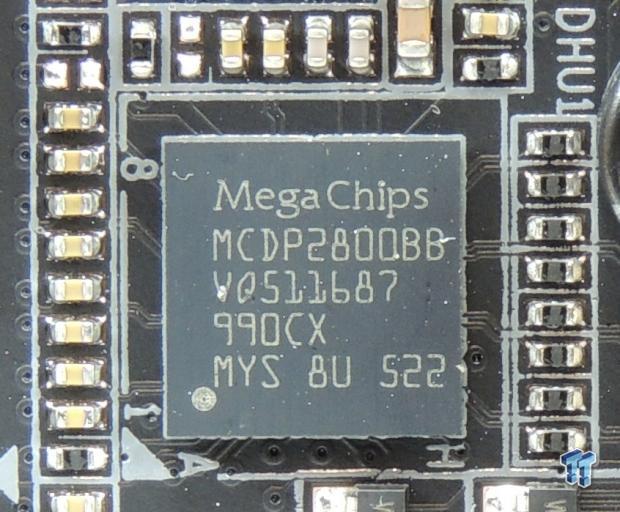
GIGABYTE is one of few manufacturers that use the Intel "Alpine Ridge" USB 3.1/Thunderbolt 3 controller on their motherboards. At Z170 launch, GIGABYTE didn't have TB3 certification, but they had the proper hardware, so they had to wait for certification to occur. GIGABYTE was recently awarded TB3 certification for a lot of their motherboards, so they added TB3 as a specification to the board and have provided firmware updates for the TB3 controller and the HDMI 2.0 chip, both of which are needed for TB3 support. If you buy older stock of the Z170X-Gaming 7, you might need to update the firmware (download programs on GBT's site), but if you buy newer Z170X-Gaming 7s, then they should already have updated the firmware.
GIGABYTE is using Intel's DSL6540 and is feeding it 4x PCI-E 3.0. HDMI 2.0 provides the remaining bandwidth from a MegaChips MCDP2800. The Type-C port can be used for Thunderbolt 3 and USB 3.1 and required the proper power delivery chip and switch; the Texas Instruments TPS65982 provides this functionality. This TB3 implementation is using Intel recommend parts.
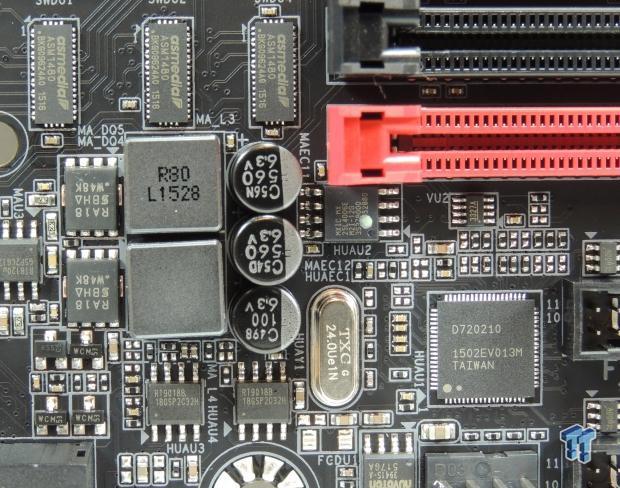
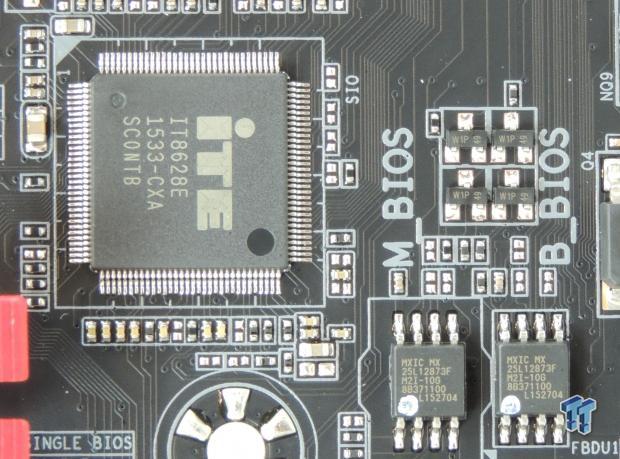
Three ASMedia ASm1480s switch SATA and PCI-E bandwidth to the top M.2 slot. A Renesas/NEC D720210 is a USB 3.0 hub that powers the internal USB 3.0 headers from a single USB 3.0 port. The iTE IT8628E provides SuperIO functionality, and there are two 128Mbit (16MB) BIOS ROMs used for Dual BIOS.
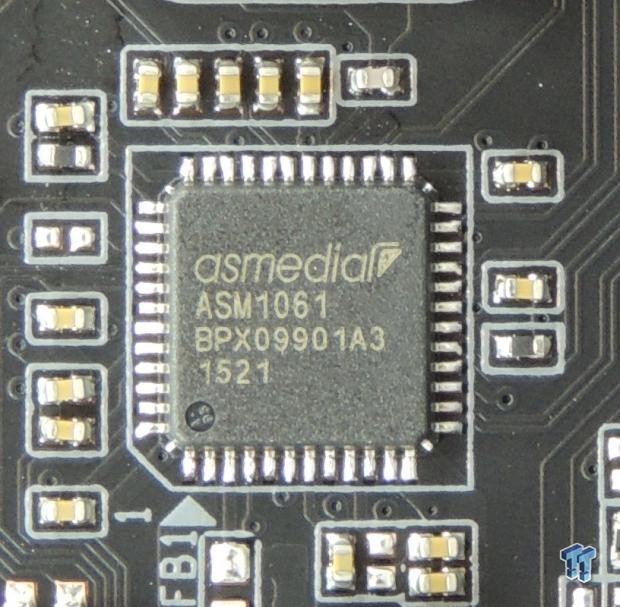
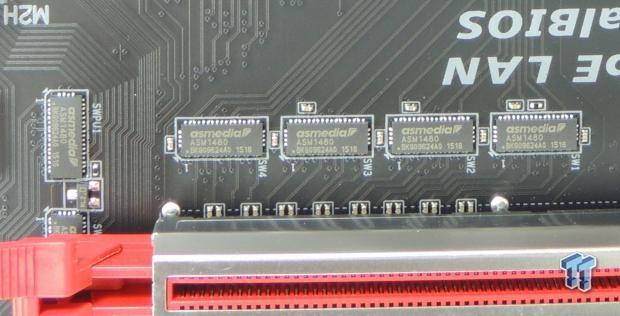
The ASMedia ASM1061 provides two SATA6Gb/s ports. The four ASM1480s in a straight line switch 8x of PCI-E 3.0 from the first slot to the second for SLI/CrossFireX. There are two ASM1480s hiding under the first PCI-E slot's clip, these switch 4x between the last PCI-E 16x slot and the lower M.2 slot, that bandwidth comes from the PCH.
BIOS and Software
BIOS
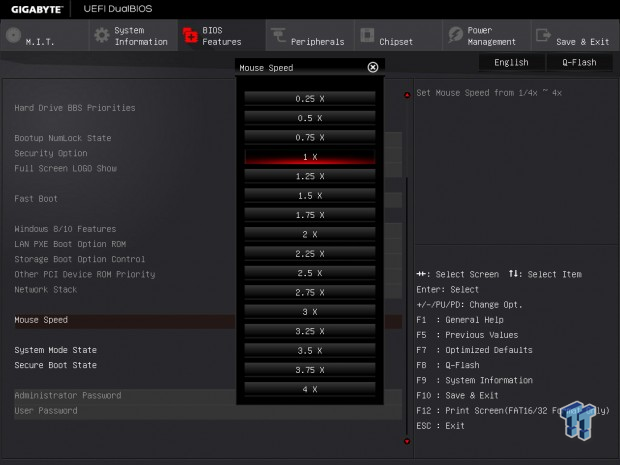
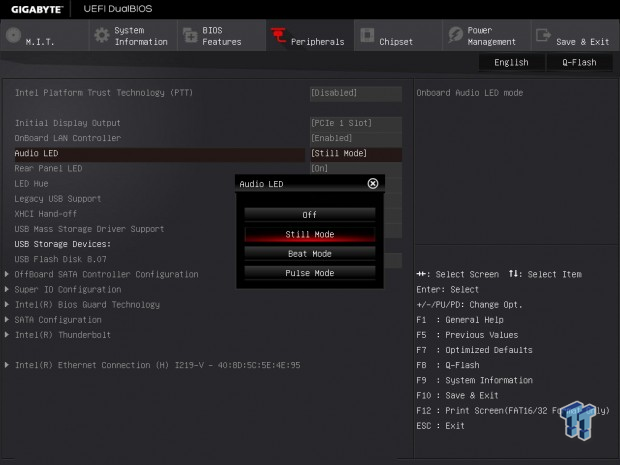
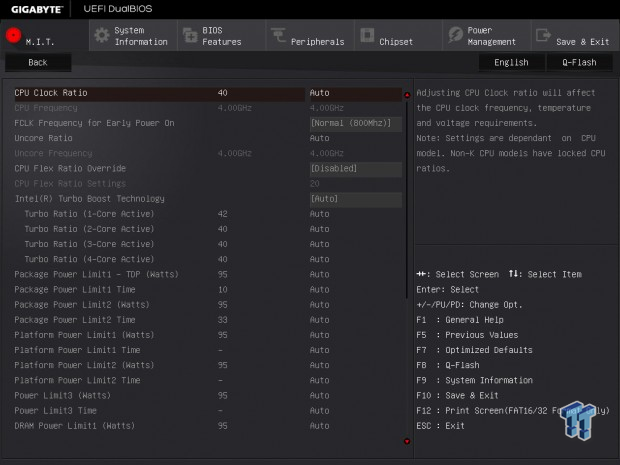
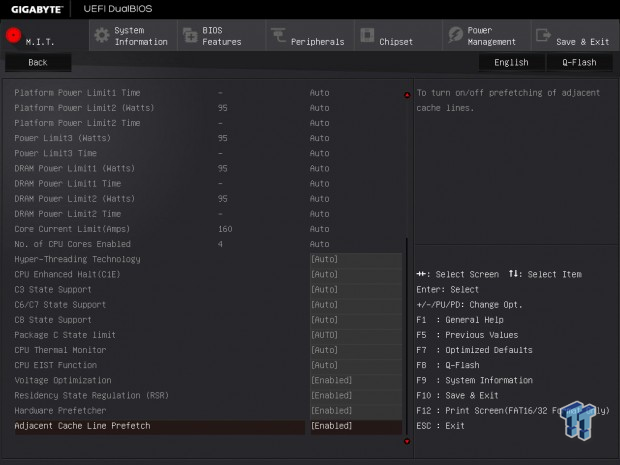
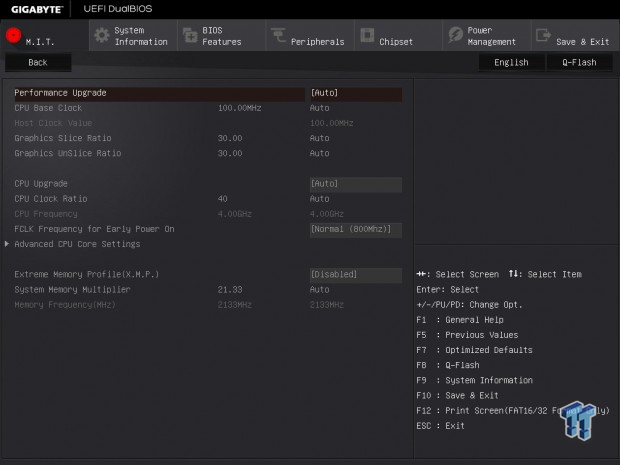
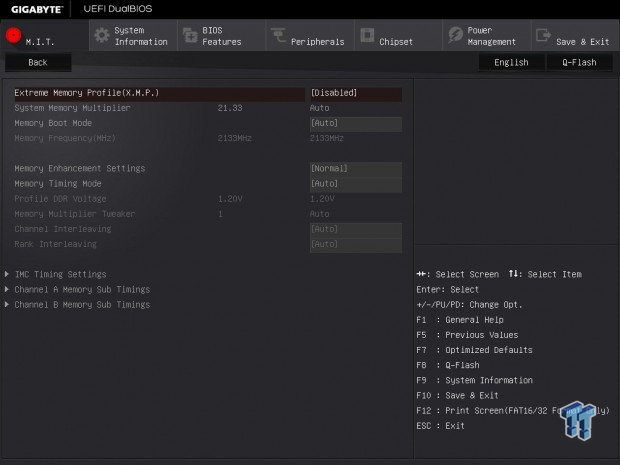
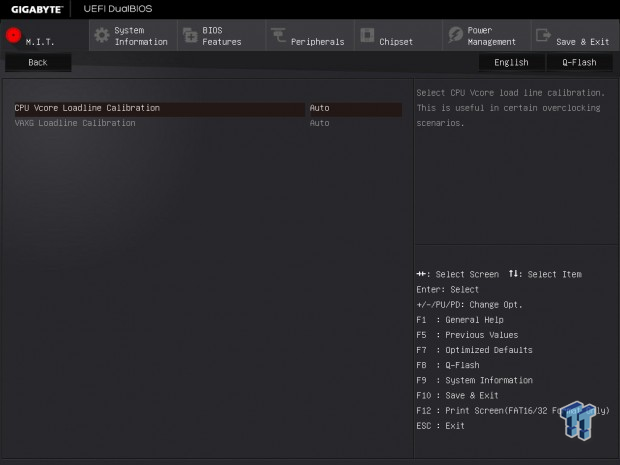
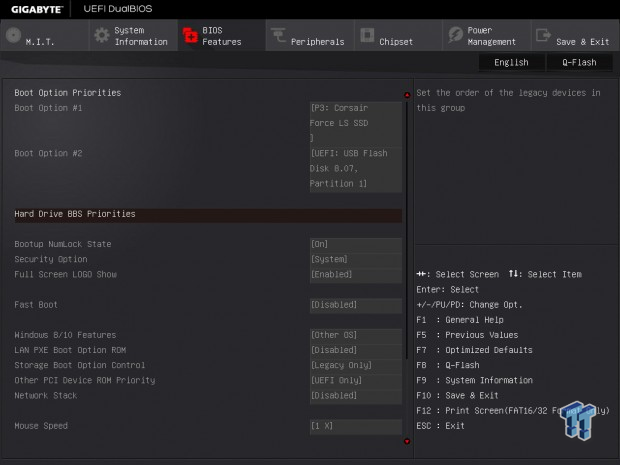
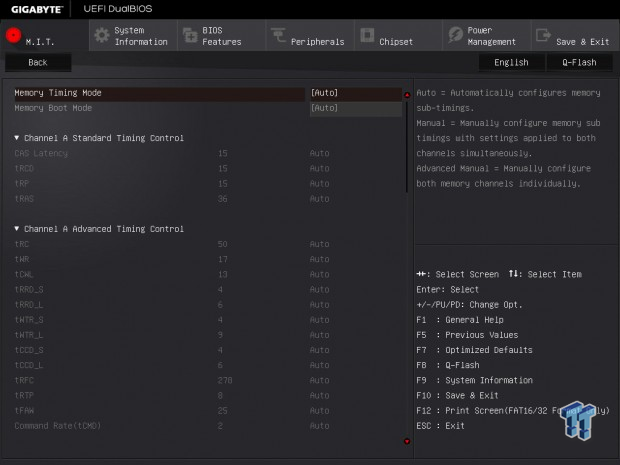
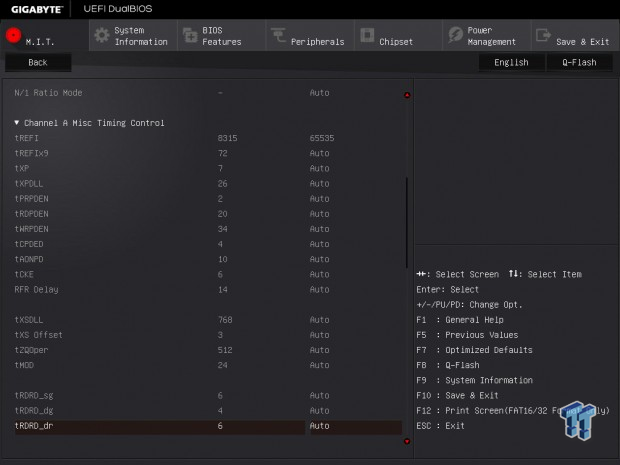
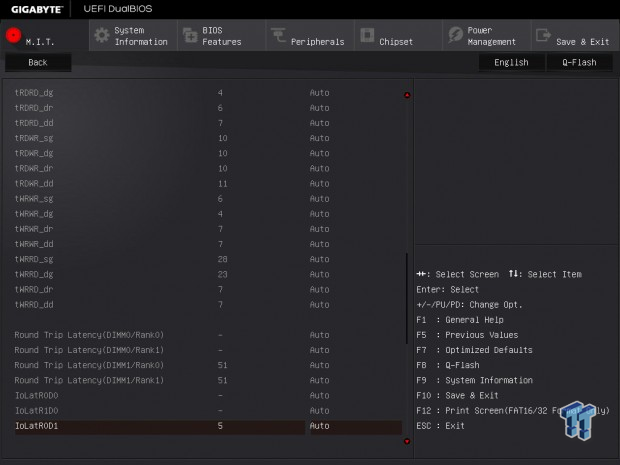
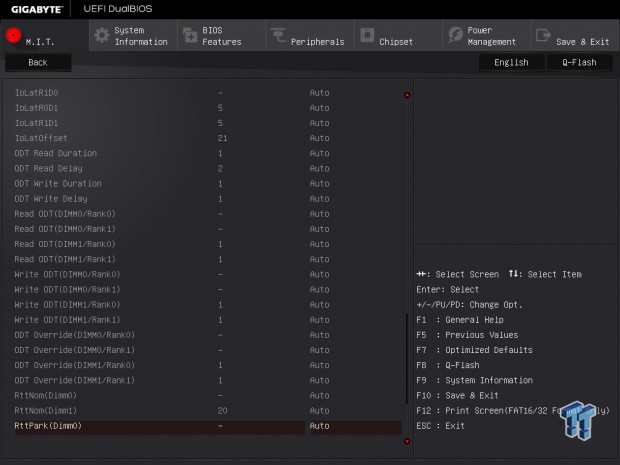
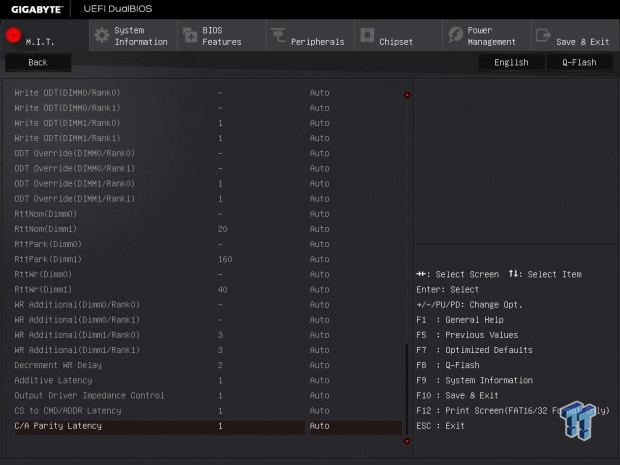
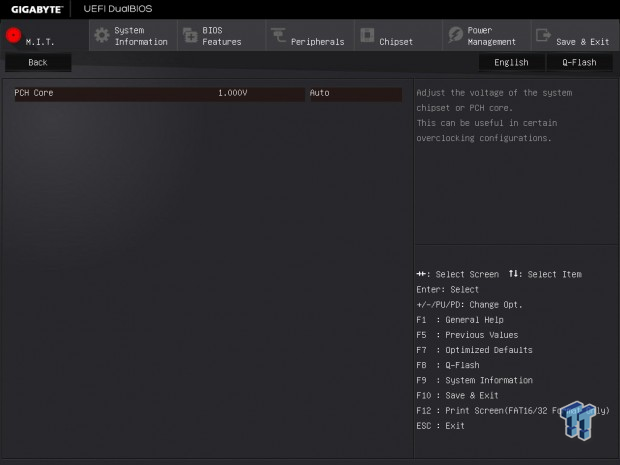
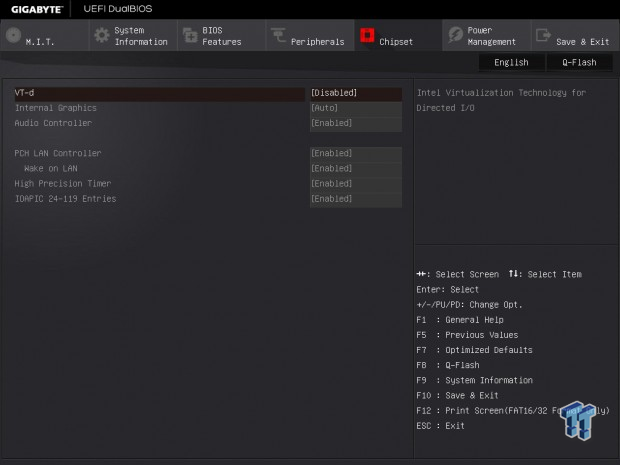
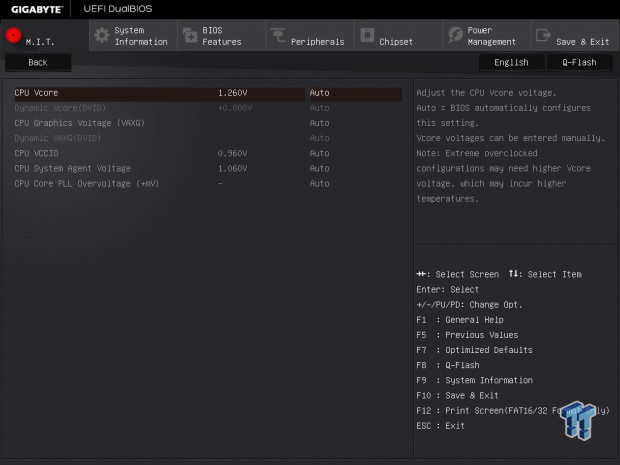
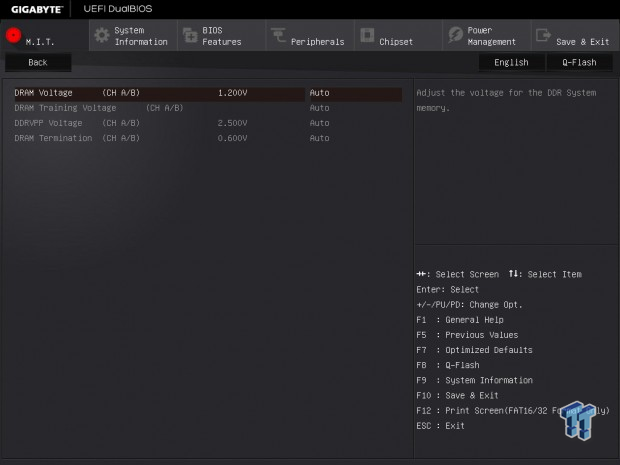
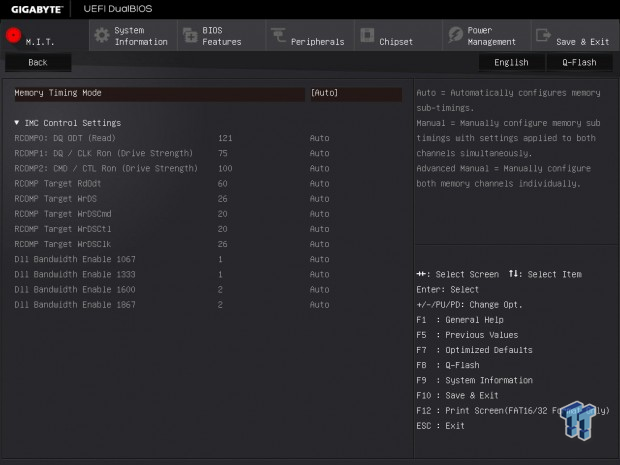
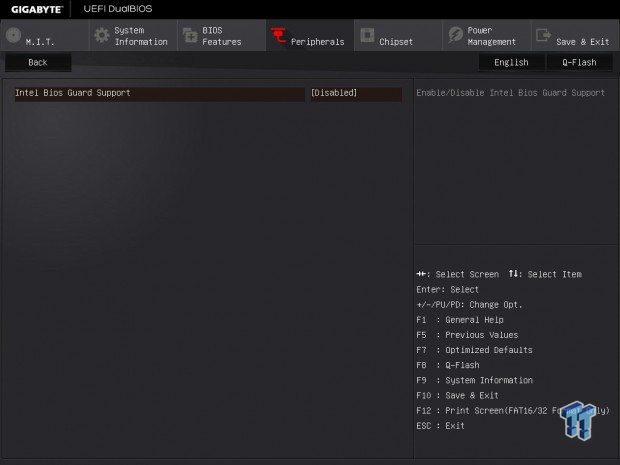
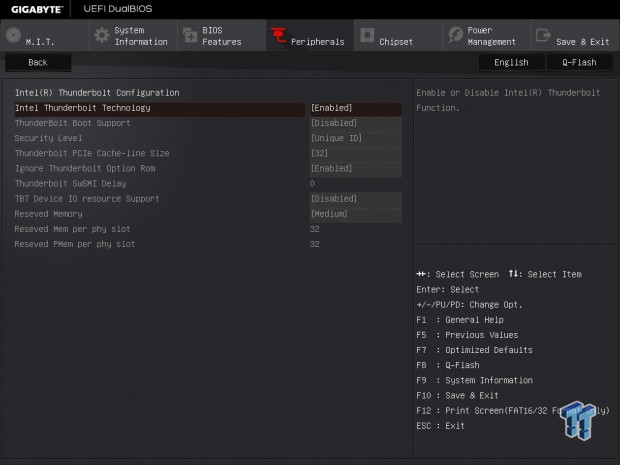
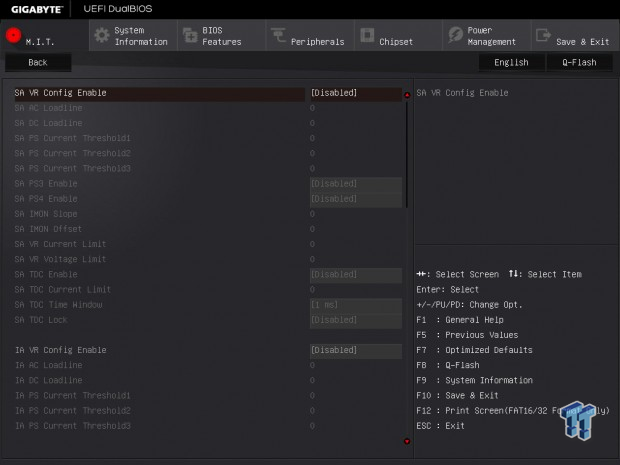
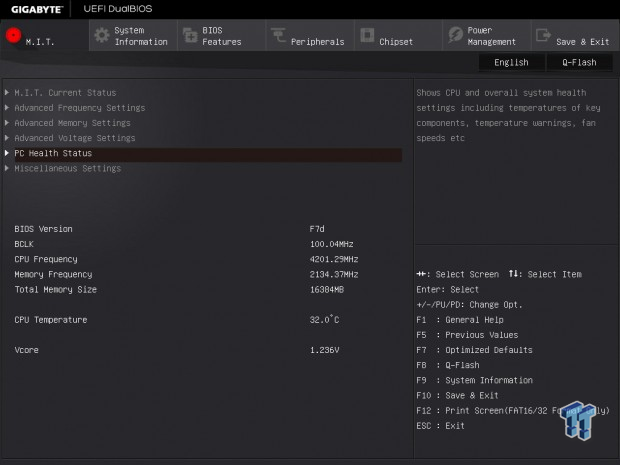
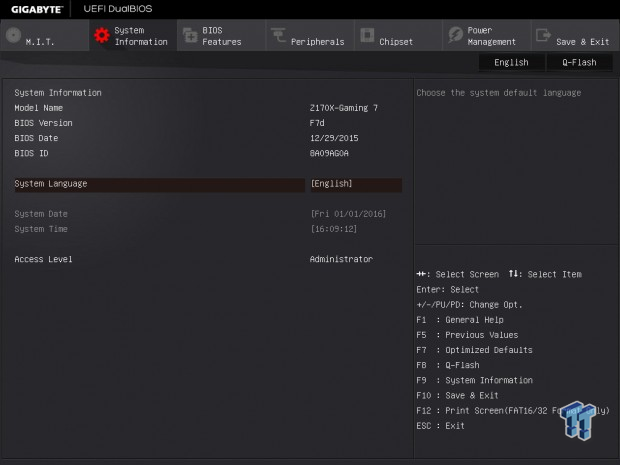
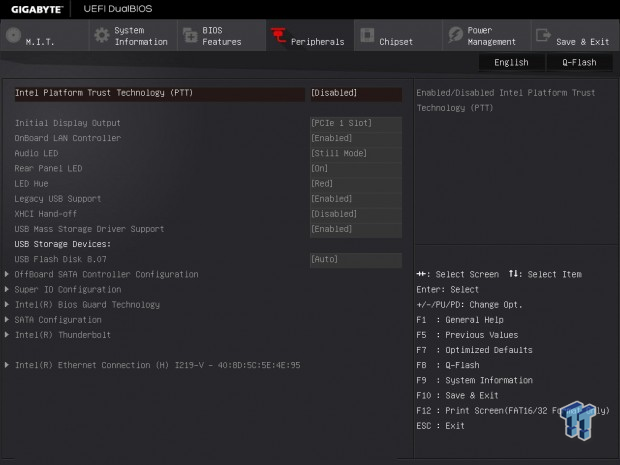
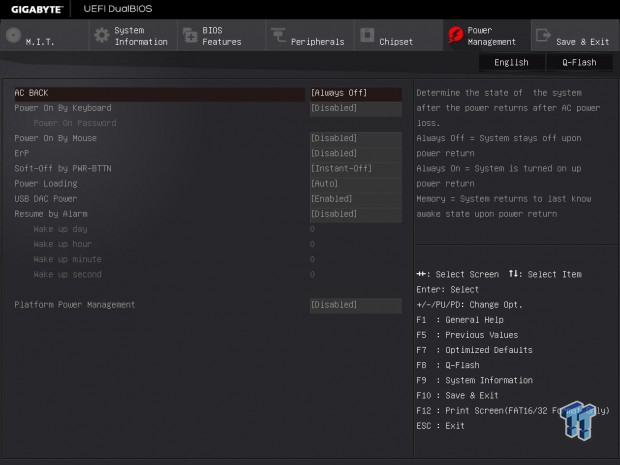
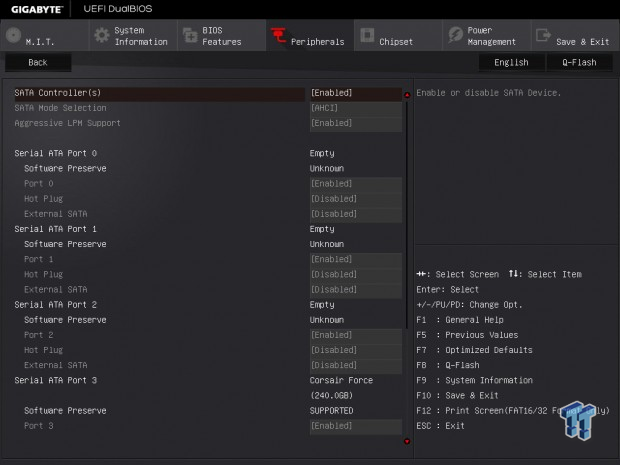
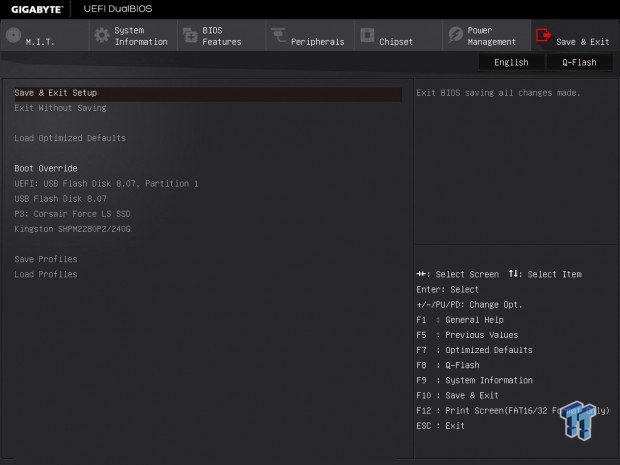
The Z170X-GAMING 7's BIOS is quite mature. There is a single BIOS operation mode that simplifies operation and reduces confusion of which mode to use. Overclocking is straight forward, and the auto rules make overclocking pretty straightforward concerning Turbo Mode and Power Settings. There are also built-in OC profiles if you are into that. A new setting I found in the latest BIOS release is a mouse sensitivity level, and it made a huge difference to the speed of the mouse and its usefulness.
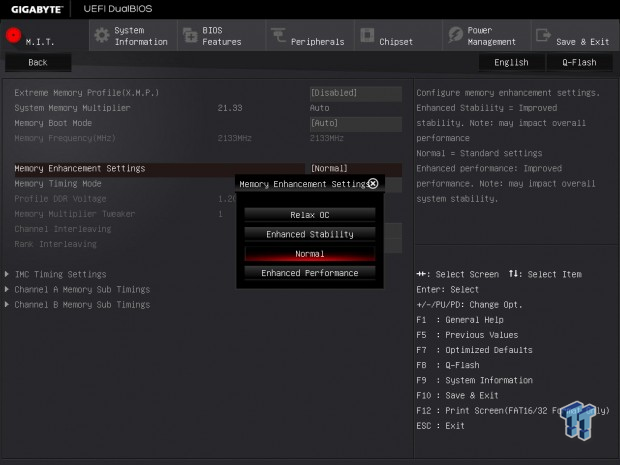
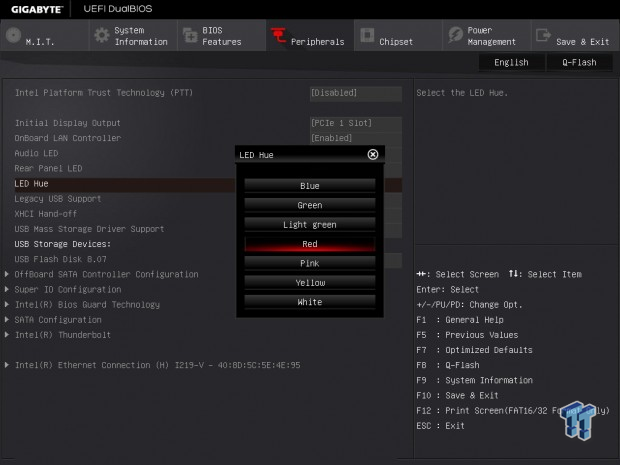
Apart from the basic and advanced memory overclocking settings found on most boards, GIGABYTE has included a memory enhancement setting. The "Relax OC" option makes a pretty big difference by allowing for huge margins by totally loosening up timings, so you can see how far your DDR4 frequency margins can go. For the LEDs on the board and the IO panel, GIGABYTE has included an LED Hue feature allowing you to select a color.
Software
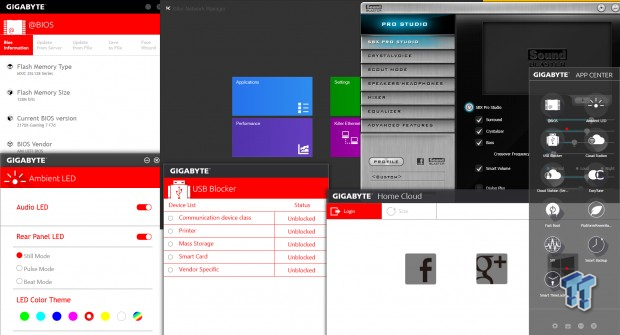
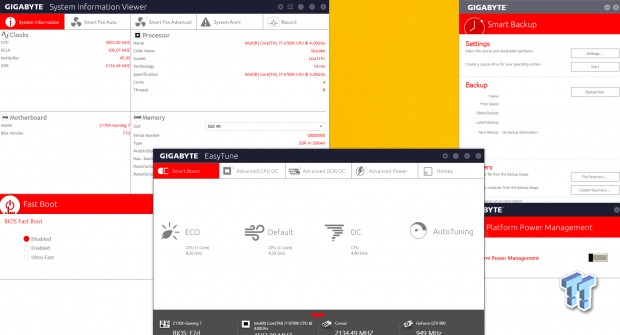
GIGABYTE provides many software titles including @BIOS, Ambient LED, USB Block, Home Cloud, APP Center (with auto update), Home Cloud, EasyTune, System Information Viewer, Fast Boot, Smart Backup, and Platform power management. There are some more, such as firmware update programs for the Thunderbolt 3 and HDMI 2.0 controllers, and some server/client Home Cloud applications.
Apart from GIGABYTE's own software is Killer's Network Manager, which can be installed if the user wants, separate from the driver installation. Creative's Sound Blaster Pro Studio is also included for the Core3Di audio processor.
Test System Setup
Steven's Motherboard Test System Specifications
- Motherboard: GIGABYTE Z170X-GAMING 7
- CPU: Intel Core i7 6700K - Buy from Amazon / Read our review
- Cooler: Corsair H110i GT - Buy from Amazon
- Memory: Corsair Vengeance LPX 16GB (2x8GB) 2666MHz - Buy from Amazon
- Video Card: NVIDIA GeForce GTX 980 - Buy from Amazon / Read our review
- Storage - Boot Drive: Samsung 850 Pro 512GB - Buy from Amazon / Read our review
- Storage - SATA6G Drive: Corsair Force LS 240GB - Buy from Amazon / Read our review
- Storage - M.2 Drive: Kingston HyperX Predator 240GB PCIe x4 - Buy from Amazon
- Storage - USB Drive: Corsair Voyager GS 64GB - Buy from Amazon / Read our review
- Case: Corsair Obsidian 900D - Buy from Amazon / Read our review
- Power Supply: Corsair AX1200i - Buy from Amazon / Read our review
- OS: Microsoft Windows 8.1 Enterprise - Buy from Amazon
- BIOS: F7d
- Drivers: Intel INF: 10.1.1.9, Intel ME: 11.1.1.1162, Intel USB 3.0 Adaptation Driver: 10.0.0.42, NVIDIA Graphics: 353.82, Audio: RC1, Intel LAN: 20.2.4001, Killer LAN: 1.1.56.1343
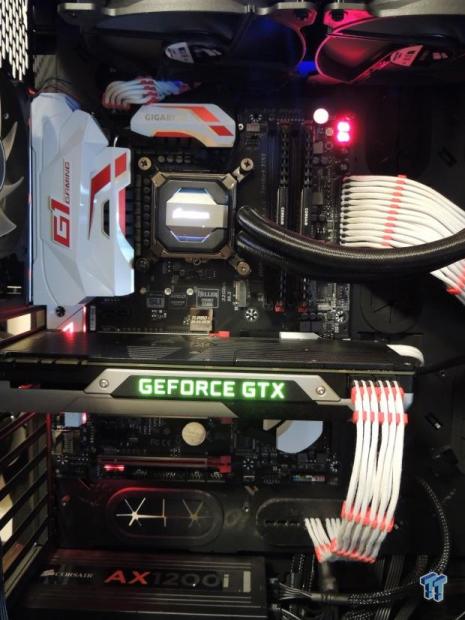
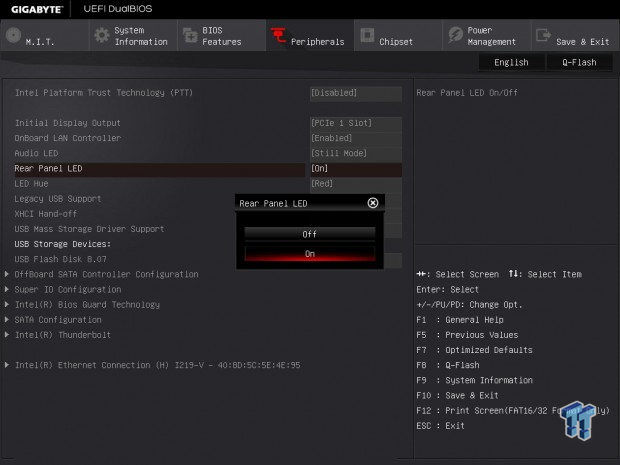
The Z170X-GAMING 7 looks very sleek inside a case. The LEDs are a nice touch, and you can disable parts of the LED system (audio or IO) if you don't like them.
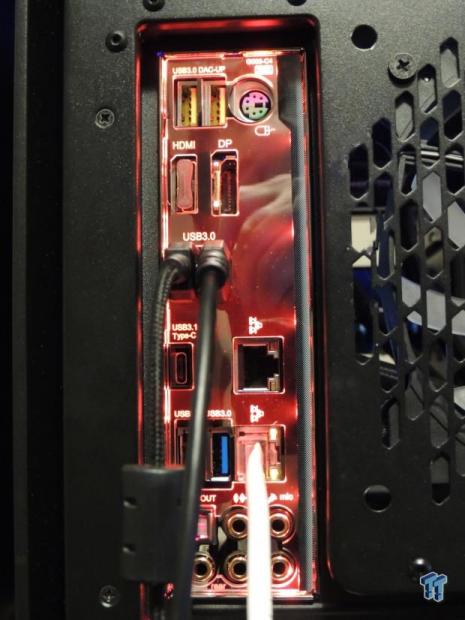
The rear IO LEDs are quite useful for dark corners behind cases. It's bright enough to provide a low-level glow.
The new test bench is designed to test every aspect of the motherboard and IO. I have designed it so that the motherboard sits in a case and is cooled by fans always-on at a constant rate to keep the conditions similar during all tests. I have cut out part of the case behind the motherboard so I can get thermal images of the back of the PCB where the VRM heat spreads. System and CPU power measurements are now digitally logged.
I am also using a Netgear Nighthawk X4 AC2350 for our network (including wireless AC) tests. The latest M.2, SSD, and USB technologies are also being utilized to test the maximum potential of the motherboards that are tested.
Overclocking
Overclocking Results
CPU Overclocking
I have decided to reduce the CPU VCore to 1.4v applied (I will measure real VCore at the output capacitors), and see how high I can validate. On most boards it's 5.0. I have also decided to add real voltage levels compared to what is set for all motherboards, if they don't have voltage read points I will mark where I read the voltage.
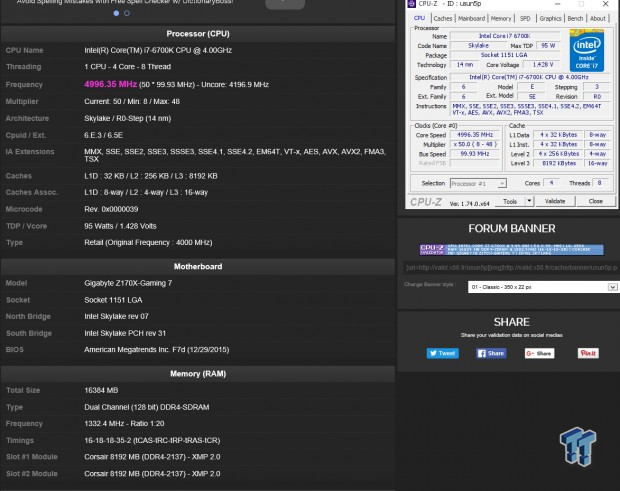
The Z170X-GAMING 7 overclocks where I expected it to; I was able to use GIGABYTE's GTL to change clock speeds on-the-fly.
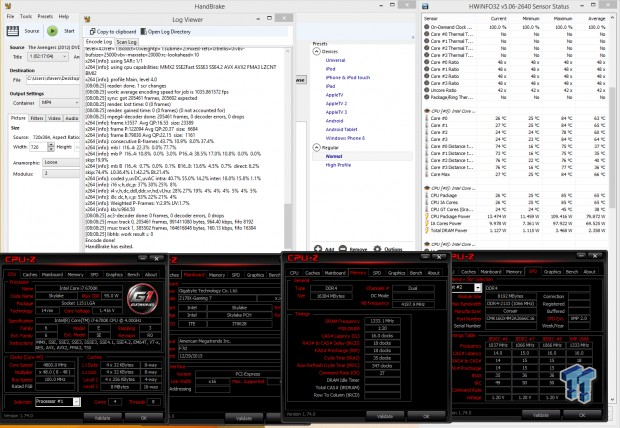
On the Z170X-GAMING 7, I was able to run 4.8GHz with XMP and 4.2GHz cache.
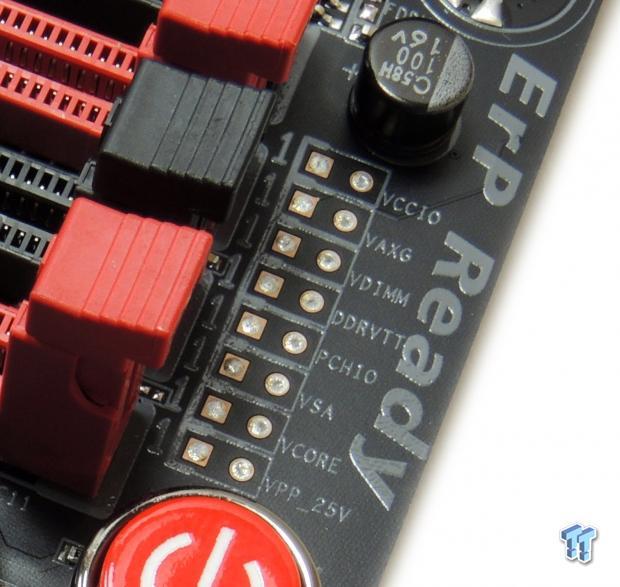

The Z170X-Gaming 7 has onboard voltage read points for checking the real voltage level of different rails. BIOS F6 and previous BIOSes provide good LLC even with just two levels. However, BIOS F7A is a special BIOS which allows BLCK overclocking of non-K SKU CPUs, and it introduced adaptive mode by default and reacts much differently to AVX, so just keep an eye out.
Compatible Memory Overclocking Kits
Test 1: 4x8GB (32GB) Corsair Vengeance LPX 2666MHz C16
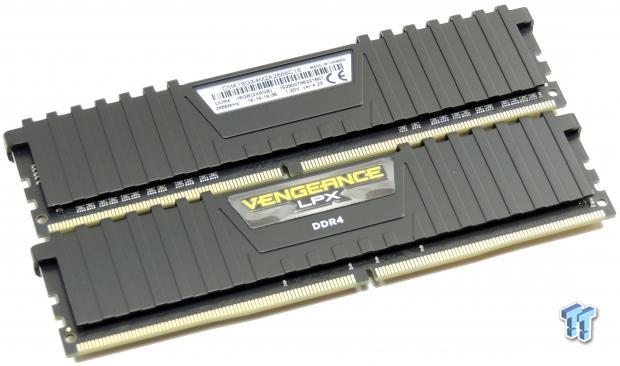
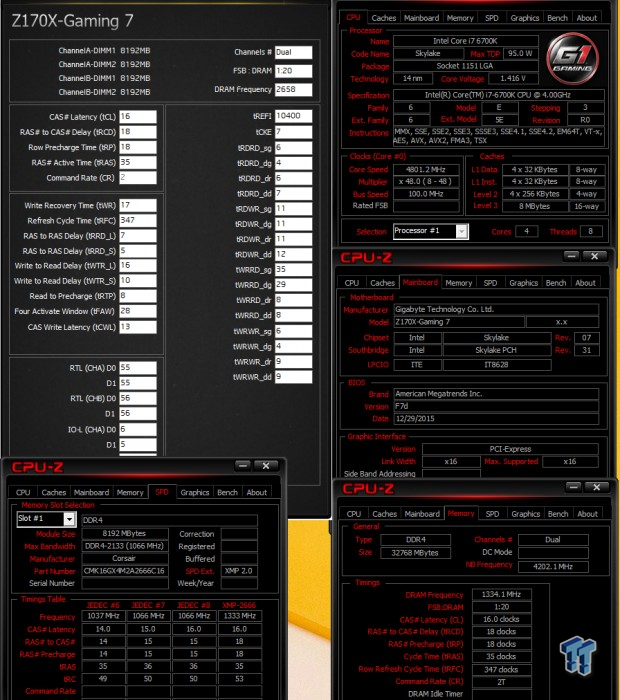
The board was able to boot up on four of these sticks at XMP.
Test 2: 4x4GB (16GB) Corsair Dominator Platinum 3200Mhz C16
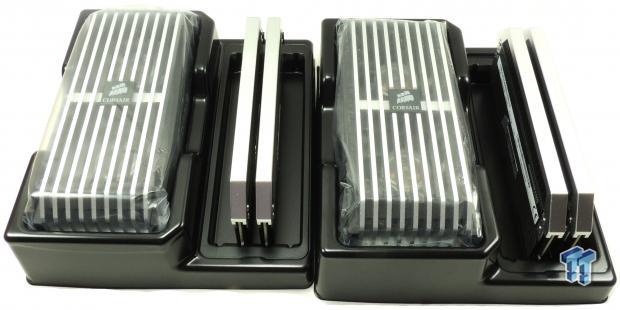
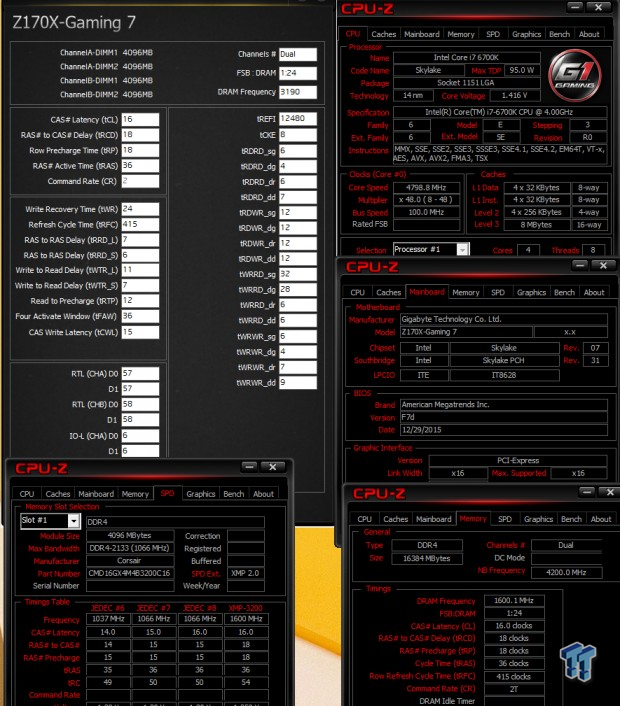
This kit worked just fine with this board and XMP.
Test 3: 2x4GB (8GB) G.Skill Trident Z 3733MHz C17
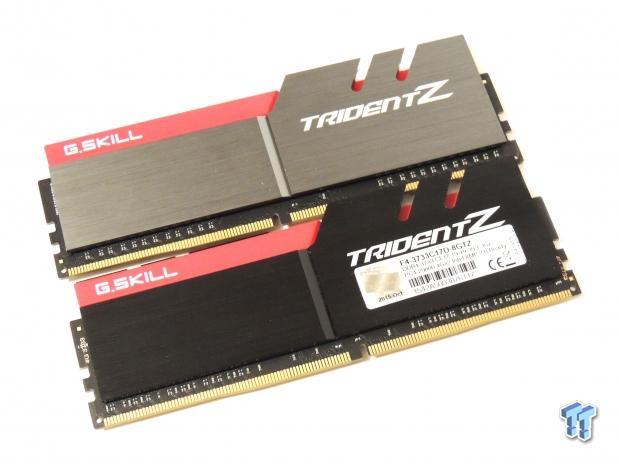
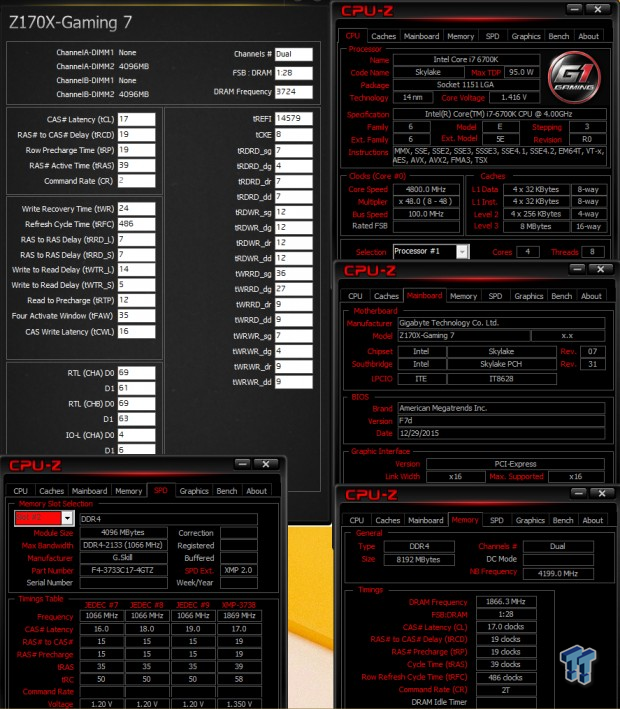
This kit worked with XMP as well, which is great. This board does cost over $200, so I do expect higher speed DDR4 kits to work with XMP at this level of cost.
CPU, Memory, and System Benchmarks
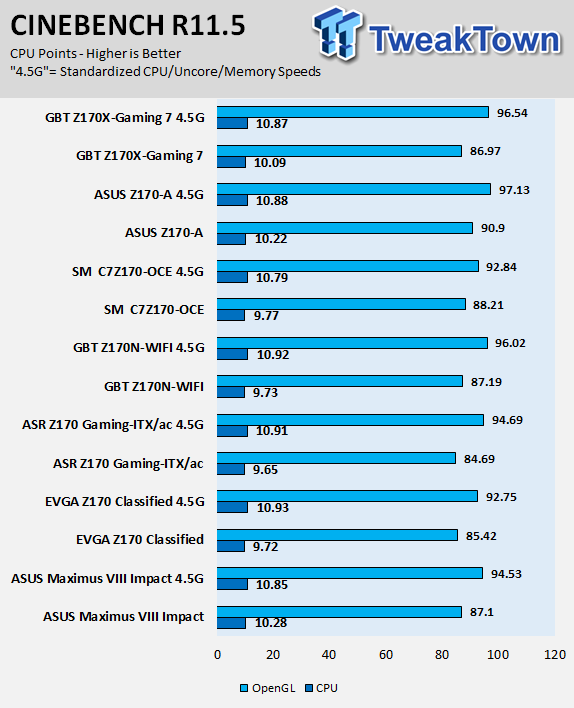
CINEBENCH 11.5
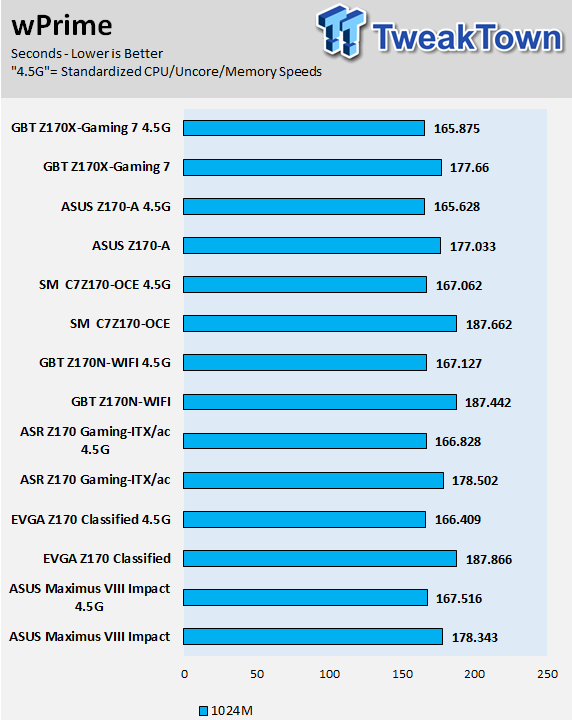
wPrime
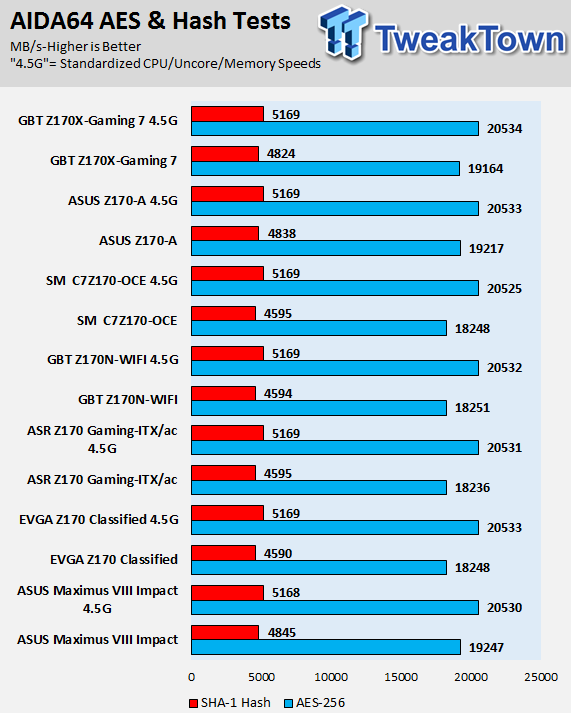
AIDA64 AES and HASH
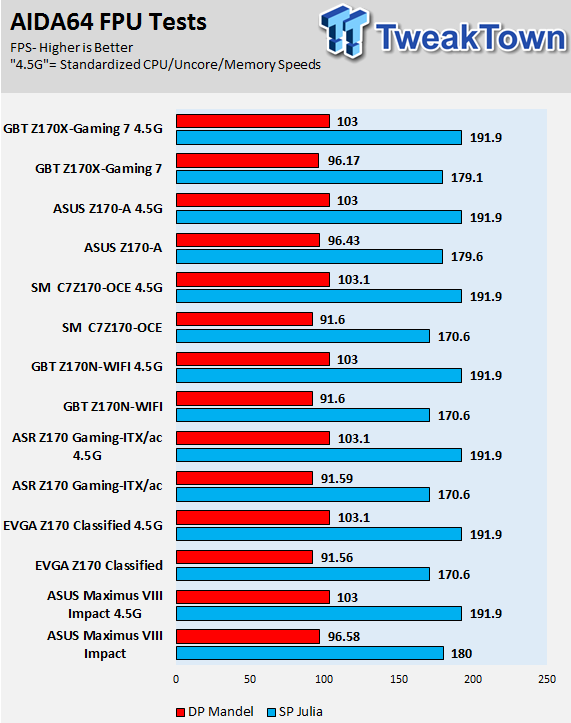
AIDA64 FPU
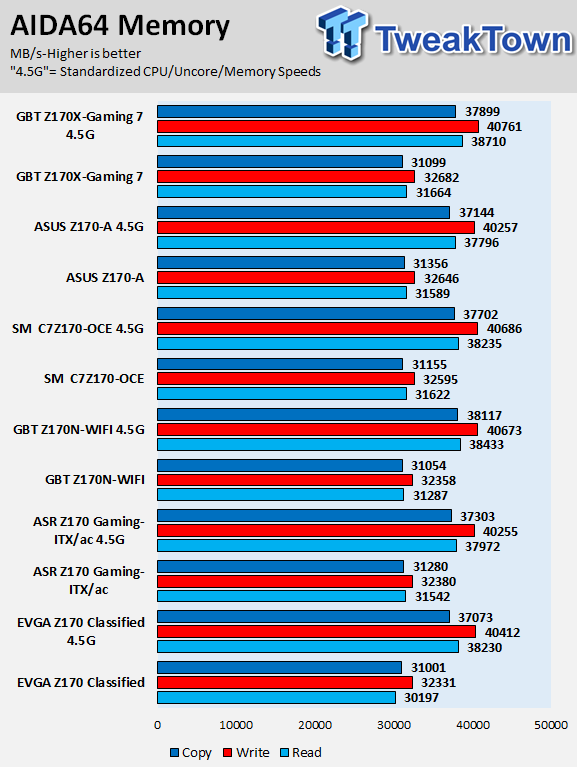
AIDA64 Memory
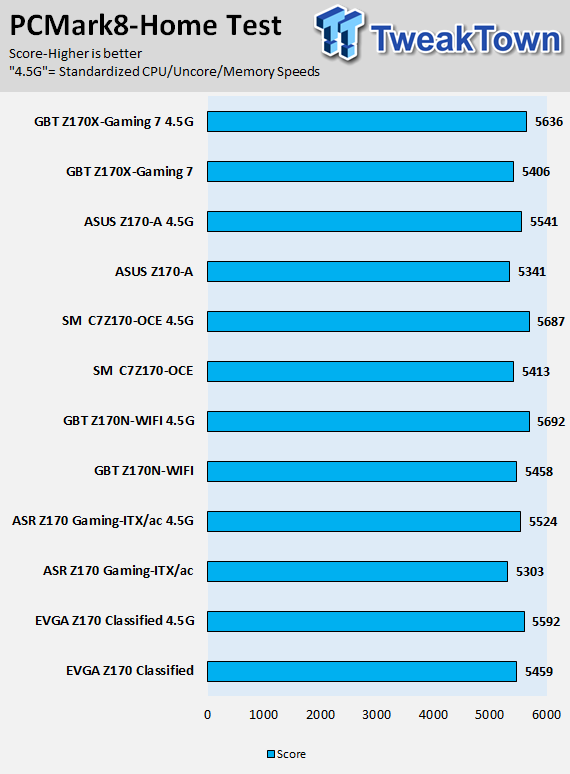
PCMark8 Home Test
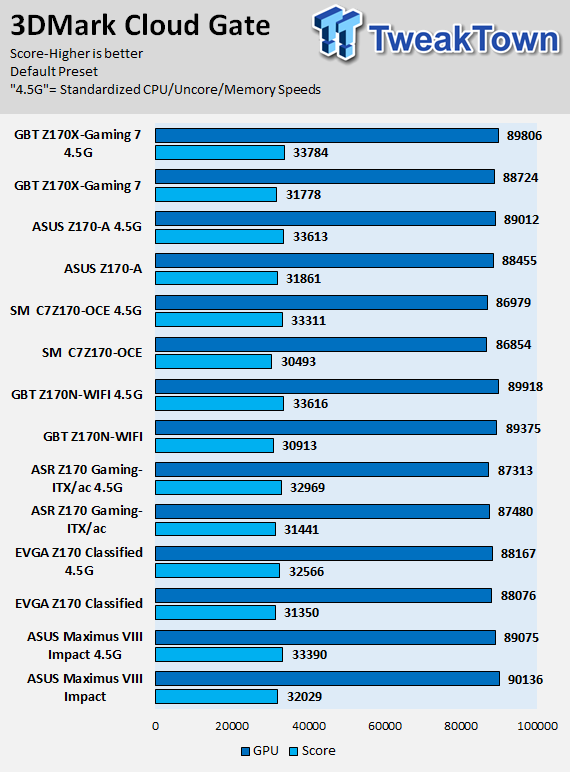
3DMark: Cloud Gate
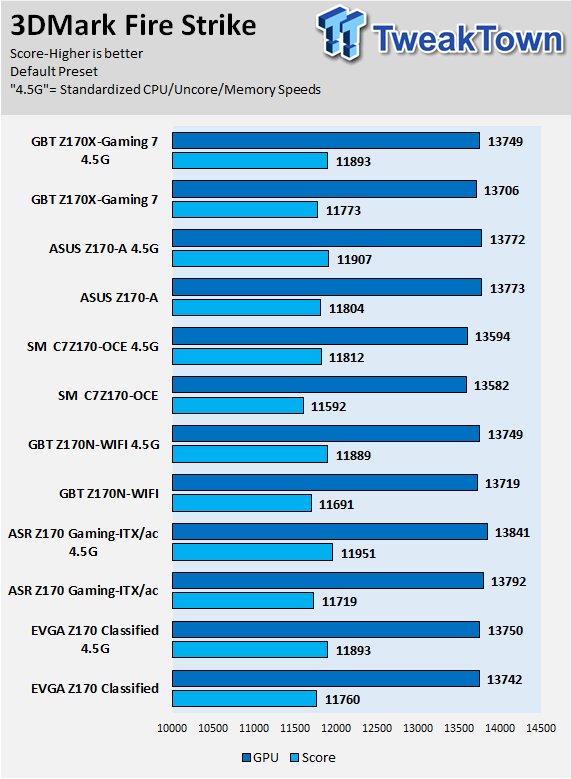
3DMark: Fire Strike
3DMark: IceStorm
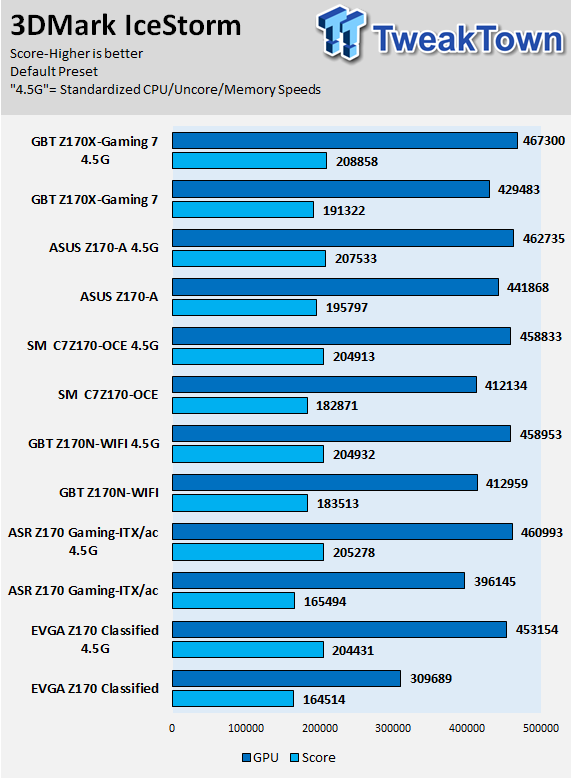
GIGABYTE's Z170X-GAMING 7 has multi-core enhancement enabled, and it does a decent job of keeping up in many areas. The board does slightly better than some others in memory bandwidth and GPU based benchmarks, perhaps because the Core3Di helps offload some resources that the built-in Azalia processor in the PCH usually uses.
Some motherboard reviews put a lot of weight into motherboard CPU, memory, and GPU benchmarks, but for me CPU, memory, and GPU benchmarks on motherboards should be more about finding anomalies, and I do that at standard settings (4.5G in graphs).
System IO Benchmarks
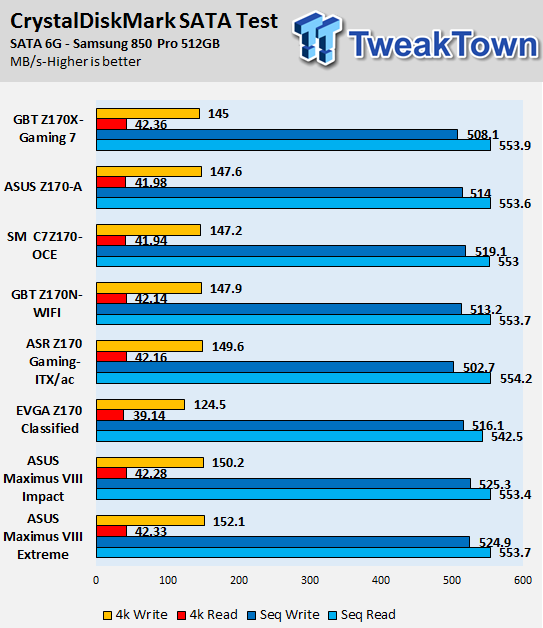
CrystalDiskMark SATA6G:
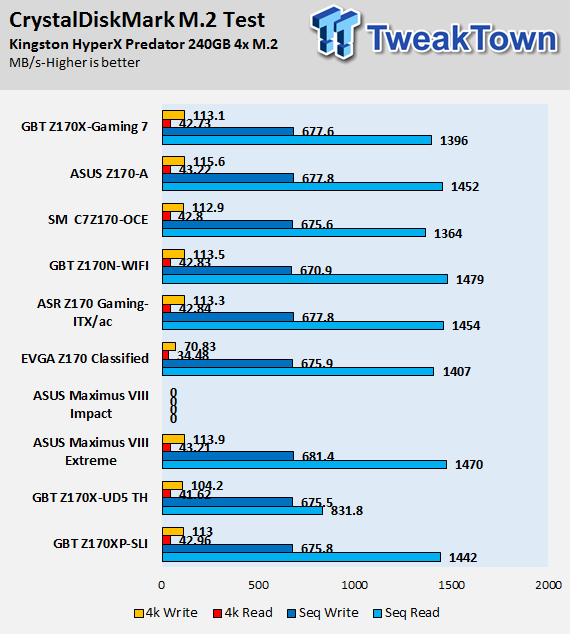
CrystalDiskMark M.2:
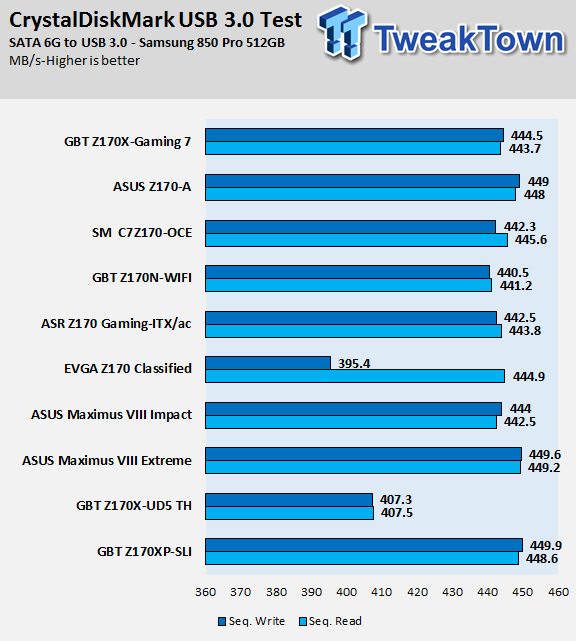
CrystalDiskMark USB 3.0:
ixChariot Network Throughput:
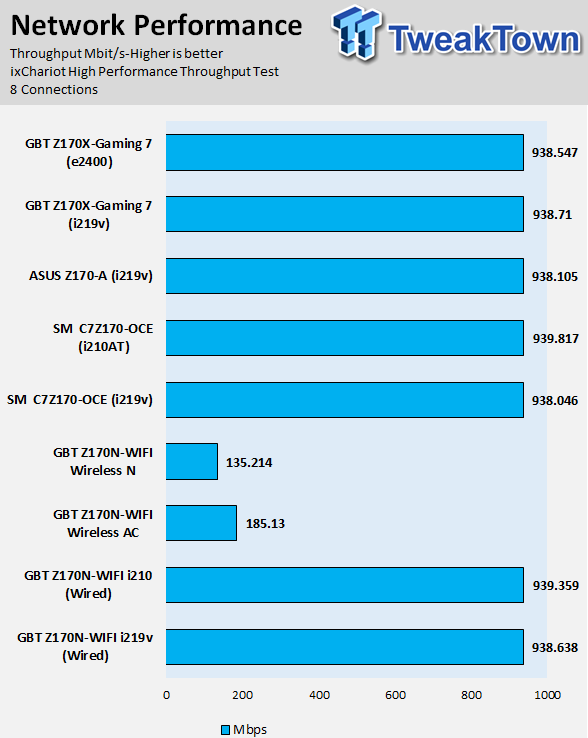
The Z170X-GAMING 7 has good all-around IO performance, and there isn't much difference between the two NICs regarding pure bandwidth.
Audio RMAA 5.5:
I disable all audio features, set the correct bitrates, and then test the audio with a loopback test.
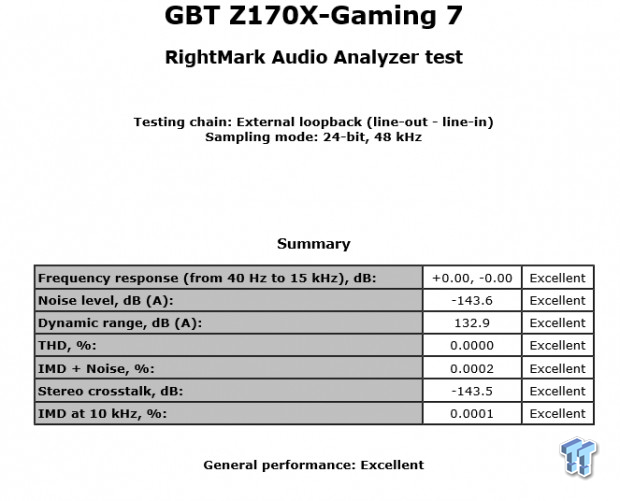
Sound Judgment by Ear: Creative has their own testing guide for RMAA, and it seems to perfect the results every time. I think it's Creative's way of giving RMAA the finger, since testing any other way results in quite odd results, but nevertheless, I ran the test the way Creative guide dictates. The implementation is quite nice, and the Creative chip produces high-quality audio, and GIGABYTE' AMP-UP feature is nifty as well. I liked the audio output, and I would rate it as excellent. There are five ratings for audio: 1. Problems, 2. Okay, 3. Acceptable, 4. Very good, 5. Excellent
Thermal Imaging and Power Consumption
System power usage is measured at the AC/DC PSU (the Corsair AX1200i) which I have connected to another system to measure the test system, and as a backup, I have a wall meter to verify. The CPU power is measured through the 8-pin connector, which is hooked up to a hall effect IC, which measures current and puts out a voltage in proportion to the current. That voltage is logged by a National Instruments ADC, which logs the DC voltage level that I then convert into current.
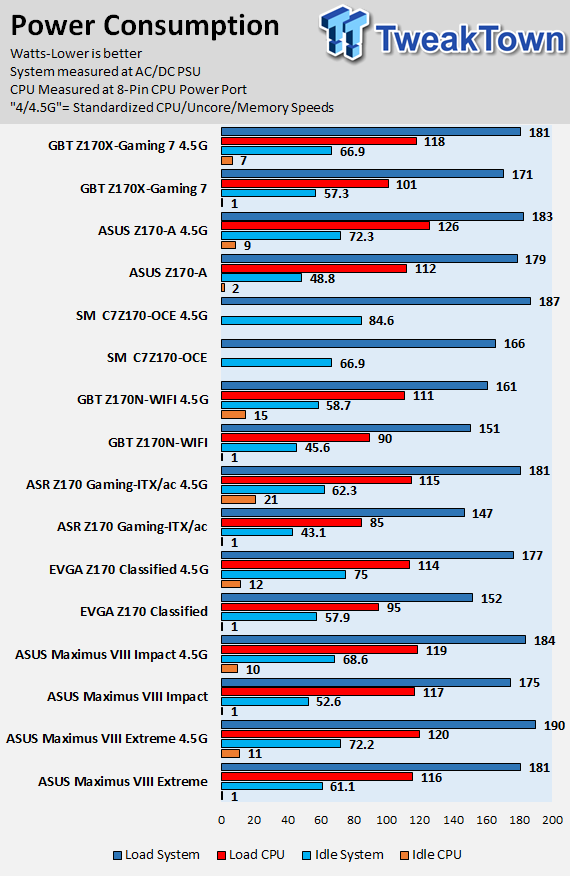
Note on Thermal Images: In the temperature section, we use our Seek thermal imaging camera to capture the surface temperatures of major components on the board. I look at the VRM and then all other things that light up the screen. If there is something to worry about, then I will state it. Otherwise, I will just show the hotter running parts of the board for fun. Unless some component is over 80-90C, then there isn't anything to worry about.
All systems will act differently, so I will look for commonalities, such as how far from the VRM the heat spreads through the PCB and the difference in temperature between the front side and backside of the PCB. Keep in mind, the majority of the heat from the VRM goes into the PCB as it is a giant soldered on copper heat sink. A larger difference in temperature between the back and front of the PCB points towards a more effective heat sink.
Thermal Testing at Stock Speeds:
The image on the left is always at idle, and the image on the right is at load. During ALL TESTS, fans above the VRM that cool the CPU cooler's (Corsair H110i GT) radiator are turned on to high (12v).
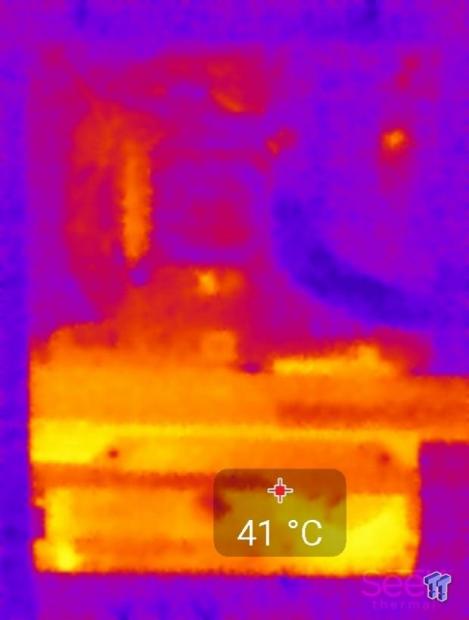
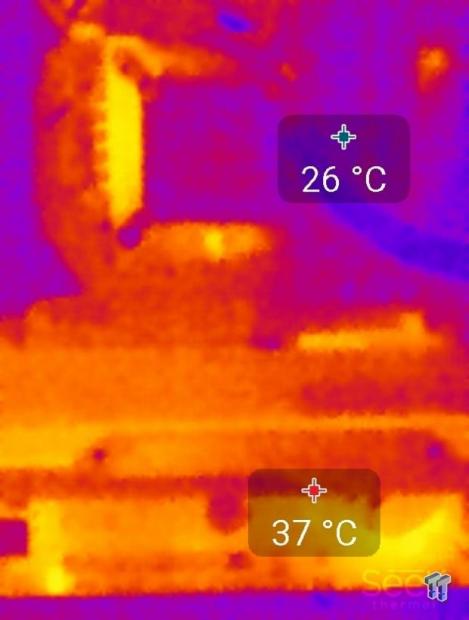
Full frontal.
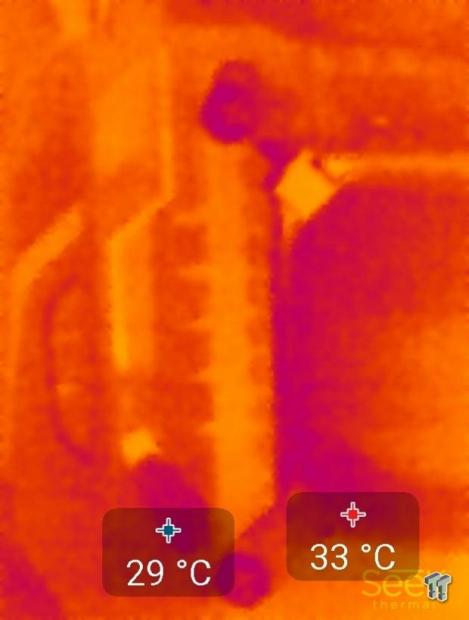
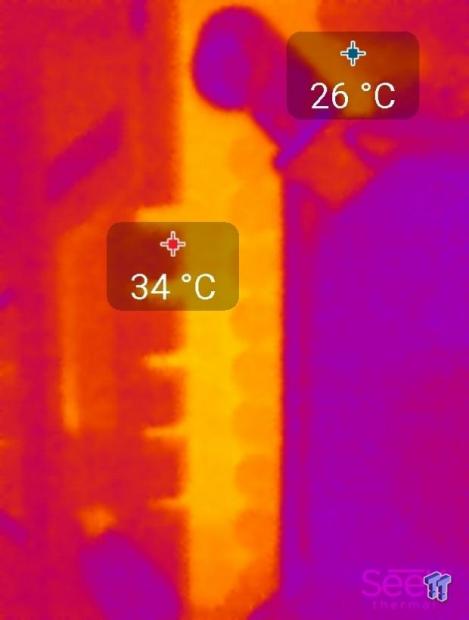
Up-close of the front of the VRM.
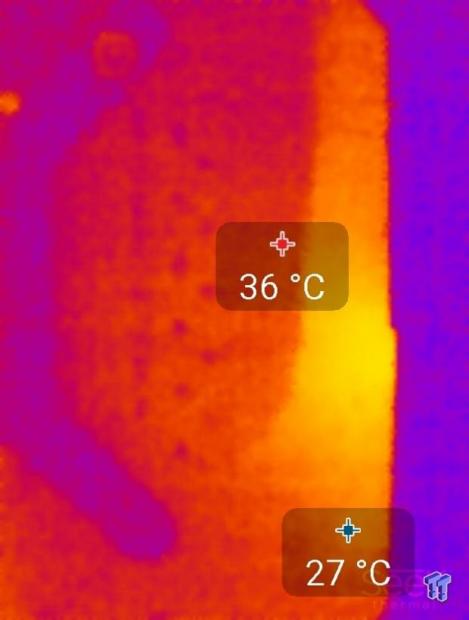
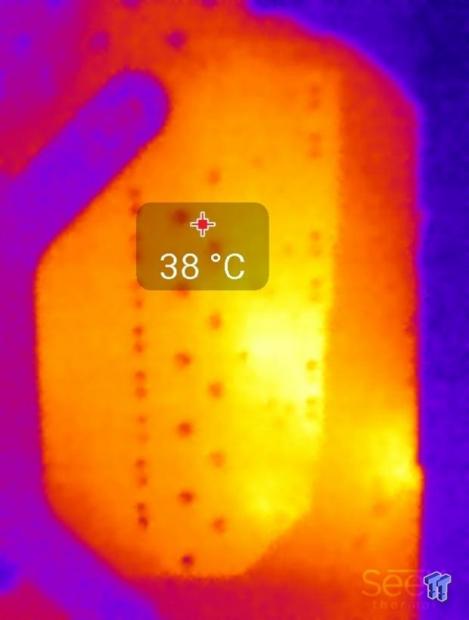
Up-close of the back of the VRM.
Thermal Testing at 4.5GHz Overclocked Speeds:
The image on the left is always at idle, and the image on the right is at load. During ALL TESTS, fans above the VRM that cool the CPU cooler's (Corsair H110i GT) radiator are turned on to high (12v).
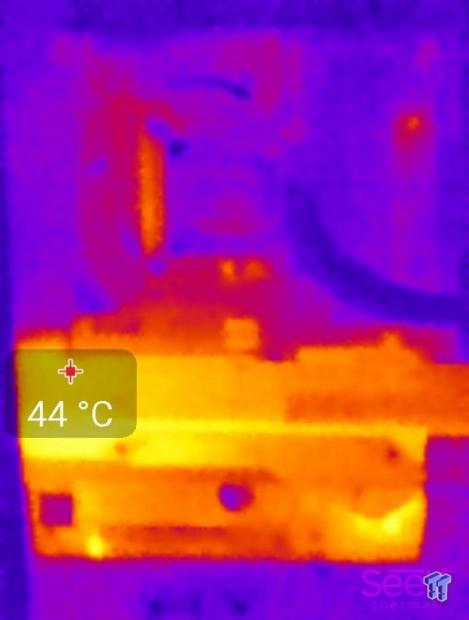
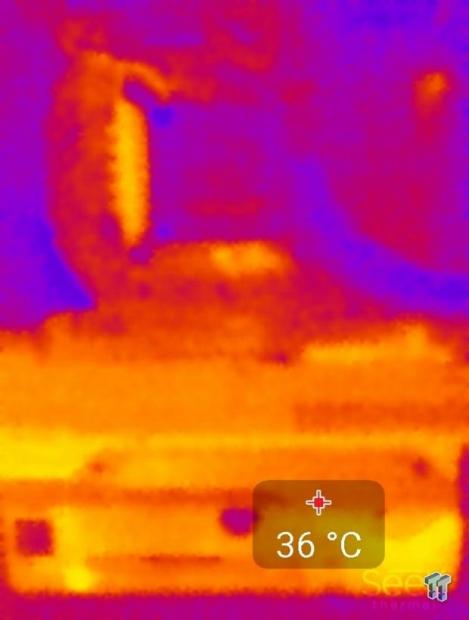
Full frontal.
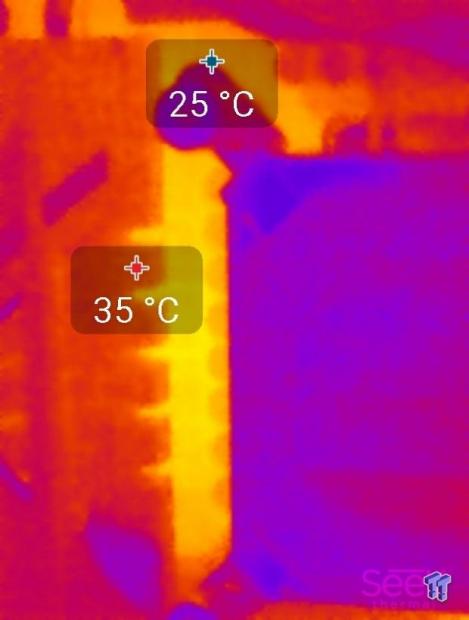
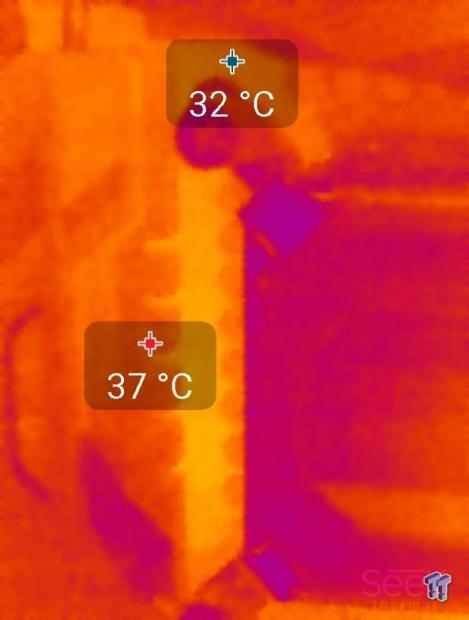
Up-close of the front of the VRM.
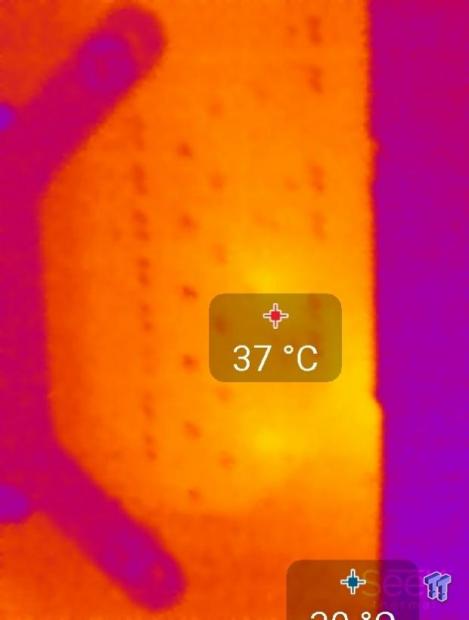
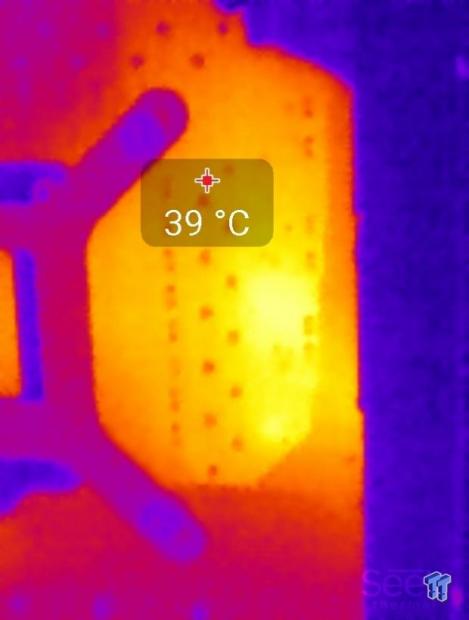
Up-close of the back of the VRM.
The VRM on the Z170X-GAMING 7 is pretty big and facilitates high overclocks without overheating or getting too hot. The large 4 PWM / 8 Virtual phase VRM works well. It makes for lower full load temperatures, but slightly higher idle temperatures. The difference between stock and OC are quite small because the voltage levels are pretty similar, and there is only a small difference in current load between the two configurations.
Anything under 60C is great, 60-80C is acceptable, and anything above 80C is a bit worrisome (if at stock).
What's Hot, What's Not & Final Thoughts
Here are key points about the GIGABYTE Z170X-GAMING 7.
What's Hot
Creative Audio and AMP-UP: The Z170X-GAMING 7 uses a Creative Core3Di CA0132 quad-core audio processor with built-in DACs/ADCs; it's the same chip used on Creative's Core3D discrete sound cards. GIGABYTE's Core3Di implementation on the Z170X-Gaming 7 consists of a line driver for the back output and a replaceable AMP for the front panel output. A special TI power chip, which provides +/- 15v to support a variety of amplifiers, powers the front panel amplifier. GIGABYTE also includes a gain adjustment switch and some high-quality Nichcon Gold series audio capacitors to sweeten the deal.
Dual NICs and M.2: The Z170X-GAMING 7 offers both Intel and Killer's latest NICs. The Qualcomm e2400 is marketed towards gamers while the Intel NIC is targeted at workstation users. Since the board is targeted towards both users, you will have the option to use either. Many boards only have one M.2 connector, but the beauty of the Z170 chipset is that it can RAID M.2 slots, and the Z170X-Gaming 7 has two full speed ports.
RGB LEDs in the Audio and IO: I am a big fan of GIGABYTE's IO shields with built-in LEDs, and this board takes it a bit further by using RGB LEDs for the IO shield. I like being able to see the ports in the darkness that exist behind a computer case. GIGABYTE's audio section cover looks sleek, and the inclusion of RGBs on the bottom to illuminate the divide, and on top to illuminate through the shield provides unique aesthetics.
Intel Thunderbolt 3 and USB 3.1: GIGABYTE provides the Intel "Alpine Ridge" controller that provides both USB 3.1, and if implemented to do so, Thunderbolt 3. At Z170 launch, GIGABYTE implemented the controller with the proper hardware for USB 3.1 and Thunderbolt 3, but only advertised USB 3.1 since it was not officially certified for Thunderbolt 3 at that point. The HDMI 2.0 controller and the proper power and switch chip for the Type-C port are required for Thunderbolt 3.0, and both are present. Recently, GIGABYTE attained the proper Intel Thunderbolt 3 certification for the implementation and now offers firmware updates for both the HDMI 2.0 controller and Alpine Ridge controller, so with those two updates, you will have full-fledged Thunderbolt 3. The Z170X-Gaming 7 is one of the least expensive Thunderbolt 3 motherboards.
What's Not
UEFI Fan Control is a bit basic: GIGABYTE's Windows fan control is extensive, their System Information Viewer application is very versatile and competitive. However, their UEFI BIOS support for fan header configuration is a bit lacking compared to competitors. You have the ability to change between preset profiles for each header individually, but the manual configuration of the fan curve is lacking (the UEFI only provides the ability to set a linear slope). GIGABYTE provides the ability to select one PWM slope amount between 0.75-2.5x, which compared to nice GUIs with multiple PWM slope options seems a bit lacking.
Final Thoughts
GIGABYTE's Z170X-GAMING 7 is loaded with features and connectivity. You have USB 3.1, Thunderbolt 3, Intel NIC, Killer NIC, Creative Audio with Amplifier, and extra USB 3.0 (through a hub) and SATA6Gb/s (through an ASMedia controller). GIGABYTE has also provided OC features that I expect on boards that cost over $200.
The aesthetics of the motherboard are impressive, and the RGB LEDs add a nice touch to the audio section and rear IO panel. Like all motherboards, the board does lack in some areas; for instance, its UEFI fan control is not as extensive as competitors are.
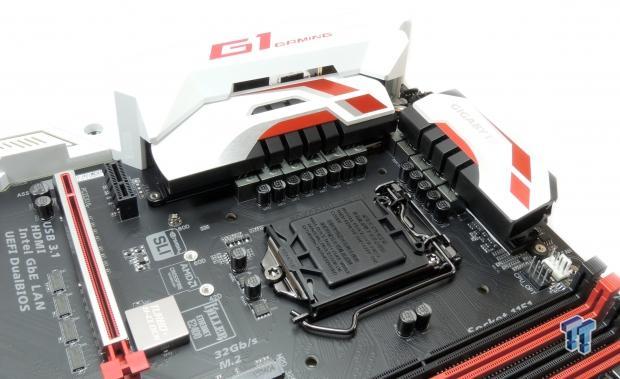
The motherboard comes in at around $225 which brings it into the lower-end of the premium motherboards and high-end of the mainstream motherboards. At this price point, I expect great overclocking abilities, the latest performance features, and rock solid durability. The Z170X-Gaming 7 has all of those things, plus it has Thunderbolt 3, making it one of the most affordable Thunderbolt 3 motherboards on the market. Overall if you are looking for a gaming motherboard with the latest features and solid all-around performance, the Z170X-Gaming 7 is worth a look.
