Introduction
Let's be real honest here. In the realm in which I live, as a reviewer, there is a level of trust that develops as you work with companies over the years. As a guy that is in the position to recommend things to others, I take that aspect seriously. When I put my "seal of approval" on it, I mean it! I don't see any reason to waver in how to explain it, or any issues bringing failures to the forefront when said failures do pass through my hands, just ask Gelid why I haven't heard from them since I failed their GPU cooler. That is an extreme example of my approach with companies and their products. Getting back to my original point, when dealing with various manufactures, a report and a trust is built as you see they are making great strides to improve things, or on the flip side, those that don't show any initiative, I'd rather not bring that material to your attention.
With NZXT I am torn. Over the last few years I have seen great things come from them over many facets of the product lineup. The complete lack of any acknowledgement of any issues with their latest coolers, even though I was to find out later that they were fully aware that the fans sent were out of spec, but allowed me to test it as if it were just like what you would have bought retail, and that wasn't the case at all. I made strides to contact the company directly and was met with no reply, and had to gain my information from the third party PR firm that handles their products. Now that I put it all on the table, you can obviously see the level at where I hold NZXT has been knocked down a few pegs, and their lack of any help up front or after has definitely left a mark, even if just for a short time.
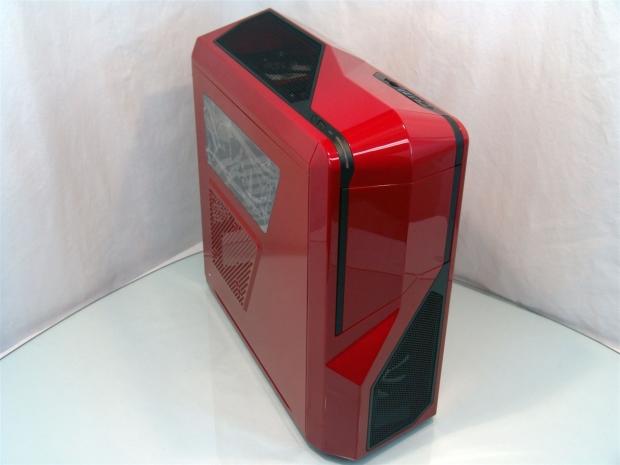
Keeping with all of this honesty, I really took this latest sample for granted as I started the progress of this review. While at first I was thinking I had seen just about everything NZXT has to offer in mid towers with the four cases I did not too long ago, but they had one more ace up their sleeve. Even as I started to grab the images for this Crafted series chassis in the packaging, I was really just going through the motions as I got the images, but as soon as I popped the tape loose and exposed the case, the surprise of a shiny red chassis staring back at me took all of this madness from before away and my eyes widened like a kid at Christmas!
Now that the cloud is lifting, hang with me for a couple of pages as we discuss the specifications and look at the box, because when we get to the red NZXT Phantom 410 inside, I think you will like it as much as I do. Thanks go out to NZXT for offering hope that I can still feel that my recommendations weren't in vain.
Specifications, Availability and Pricing
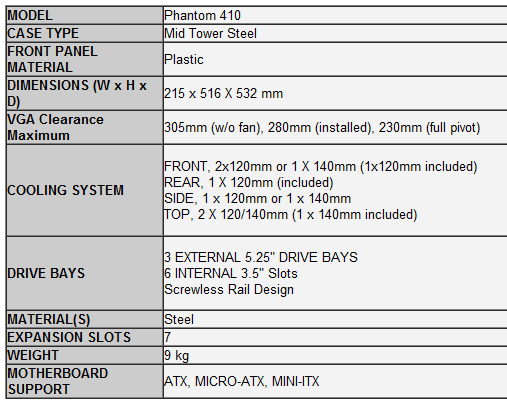
The Phantom 410 is mostly steel for the chassis frame and panels with smaller versions of similar plastic panels on the top and face to give this chassis that unmistakable look of the Phantom name. Instead of being full tower, the Phantom 410 is a mid tower chassis with room for Mini-ITX, Micro-ATX and ATX motherboards inside. With a good idea already of the way it looks, I saw the side panel is much different with the window and mesh combination, but still has a shape that lends to the original design. The most notable thing to me about this chassis, as I received the Phantom 410, NZXT is offering my first look at a red chassis! I know it's been done before, but the color and look of this chassis definitely put a spring in my step with this particular review.
It does use the frame, motherboard tray and optical bays that we saw in the Tempest 410 Elite, there are enough unique features to not only make the obvious external difference, but inside there are new tricks added to set the Phantom 410 above the Tempest. It still holds three 5.25" bays with access to the removable covers behind the door, still being able to be accessed from the outside, so there is little need to remove the front bezel, but the hard drive rack has changed. Two are securely riveted to the floor of the chassis. Above that there is a section of four that can be simple removed with two clips to allow for much longer video cards to be installed. These drives all use black plastic trays that work with both 3.5" and 2.5" drives. The last thing to cover about the interior, aside from the fans, the seven expansion slot covers, grommets, hard drive trays, and the various thumbscrews which are all black, the rest of the interior is painted in a shiny red to match the outside of the Phantom 410.
Cooling in the chassis is handled with three fans as it is shipped from NZXT. There is a 120mm in the front as the main intake to the chassis and this fan has a black frame with white blades, and is visible through the mesh in the front bezel of the case. The rear exhaust fan is a direct match to the intake fan. The black frame with white blades here really stands out against the red interior. The fan you won't see unless you are looking down into the top mesh of the chassis, you will see its effects. This 140mm fan that is installed into the top of the chassis has blue LEDs glowing when it is in use. It is sort of odd that a red chassis has blue LEDs, but it does match the blue LED of the power and HDD activity lights found on the top left corner of this chassis.
As I looked to buy this chassis I found that it is pretty widely available, and in red too. The Phantom 410 also comes in a black and a white version, and all three cases are priced exactly the same. Out of the eight locations I could have purchased this case, the $99.99 listing at Newegg.com is the second best once shipping is factored in. Outletpc.com does have a slightly better deal for $7 less. This pricing does put this in direct competition with the likes of the Corsair, Fractal Designs, and even NZXT's own H2 chassis. I will keep that all in mind as I progress with the review, but I have to just say again, the sheer fact of all this shiny red I am looking at is really slick and I do like it just for that fact alone. Let's see what else should make this the chassis to choose over many others at this price range.
The Packaging
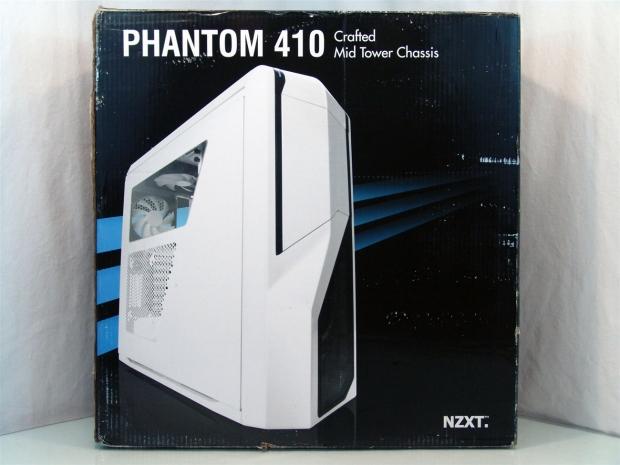
Three blue stripes fade to black as the image of a white Phantom 410 graces the front of the packaging with its presence. There isn't much else to note besides the company name and the notation of this being from the Crafted Series.
Under the "Phantom 410" this side has seven languages of lists for the features you are about to see on the rear of the box.
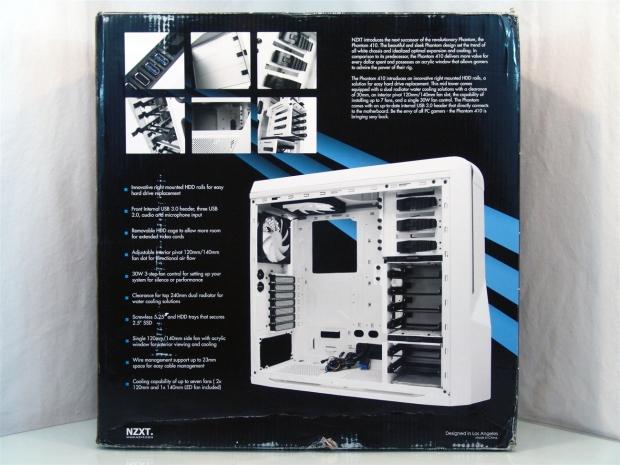
Six images of features, two externally and 4 of internal components are placed next to a brief statement from NZXT about the Phantom 410 and what it offers. At the bottom a list of ten features flank the left side of a large image of the interior of the chassis.
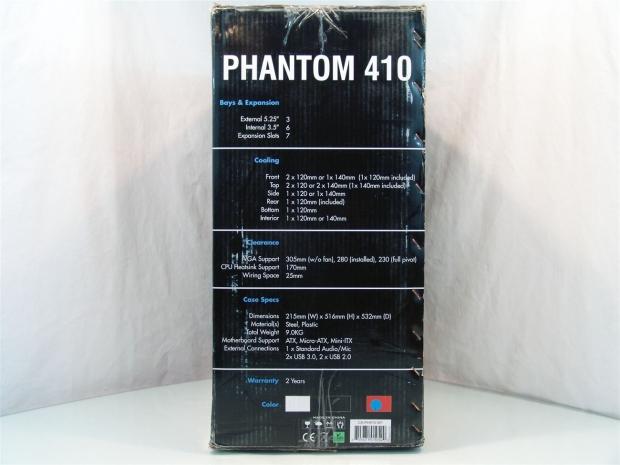
There shouldn't be any issues reading the specifications for this chassis. The font and size of this distracted my eyes this whole time from the more important color selection sticker at the bottom. Seriously, until I opened the package just after this image did I realize this Phantom 410 was red!
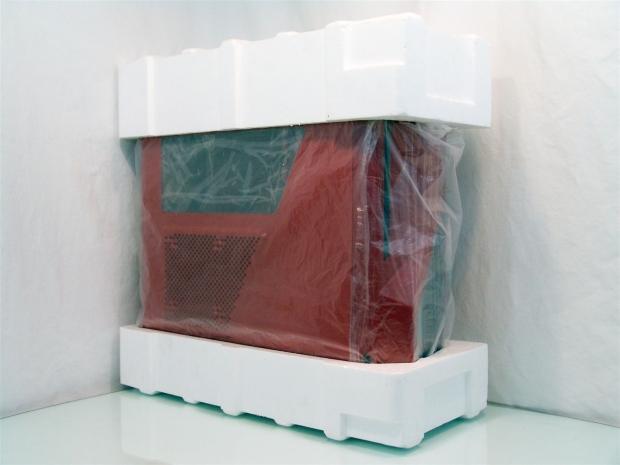
After I picked my jaw up a bit, I lifted the chassis out of the box. There is a thin plastic liner covering the chassis, and the window has clinging plastic stuck to both sides for travel protection. Thick Styrofoam end caps keep the chassis away from the cardboard and are plenty of protection to have delivered me a Phantom 410 in perfect shape.
The Red Phantom 410 Mid Tower Chassis
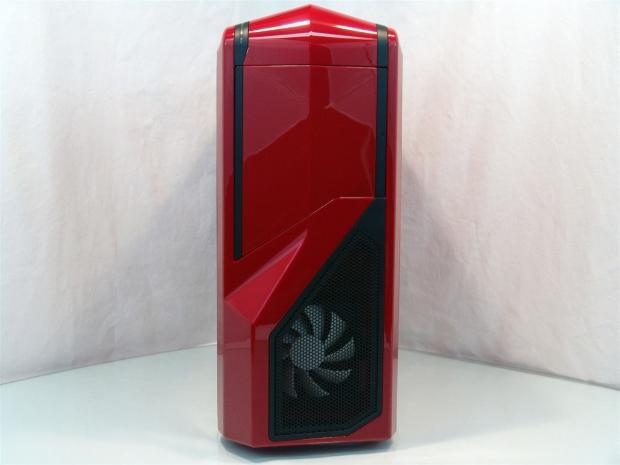
The front of the Phantom 410 takes on the Phantom look down the front with the multiple angles and the door covering the 5.25" bays. Down below there is a large mesh panel that allows you to very easily see the white blades of the 120mm fan behind it.
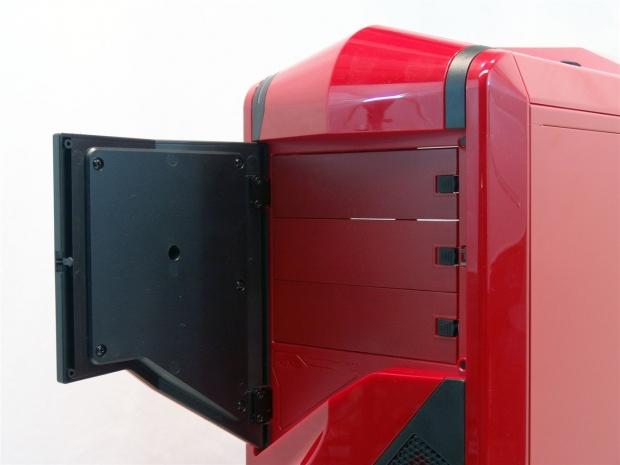
The release mechanism for my door took a very solid push to activate, but once opened it does expose the three drive bay covers that remove with the use of the black slider on the right. Essentially to add devices here, you don't need to remove the plastic bezel to do so.
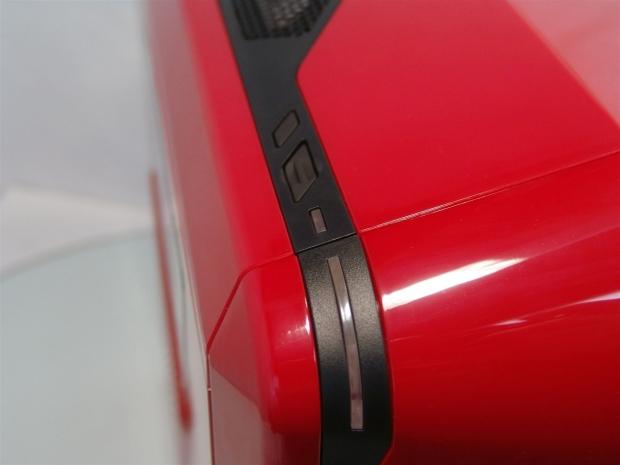
As the front rounds over to meet the top plastic component, on the left side of the Phantom 410 there is the small reset button, large power button, the activity LED and the chassis power light is in the strip that bends around to the front.
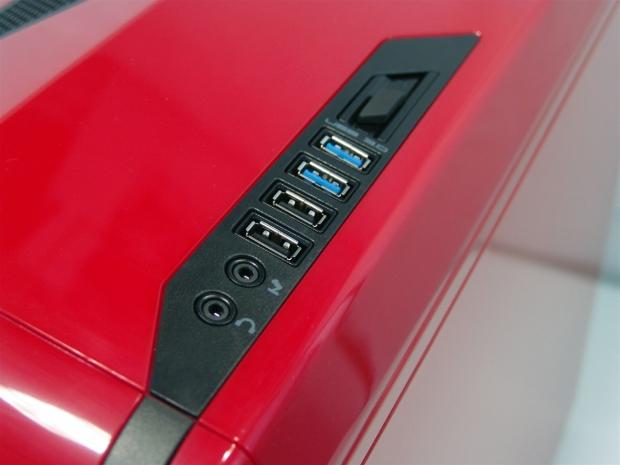
With a ridge separating the sides, the right side offers the front I/O and a fan controller. There are jacks for audio followed by a pair of USB 2.0 ports and again followed by USB 3.0 ports. The fan controller offers three positions and can control up to six fans or 30W worth, whichever comes first.
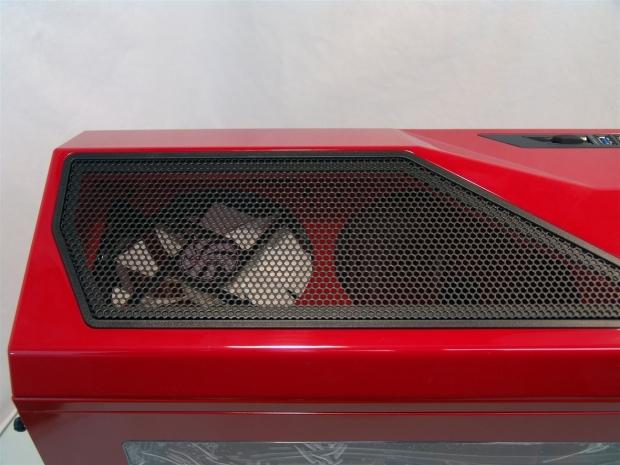
The left side of the top panel at the rear of the chassis has a mesh panel that allows the 140mm blue LED fan seen here to blow out through this. There is room for thinner radiators under this cover if you wish to try your hands at water cooling in this chassis.
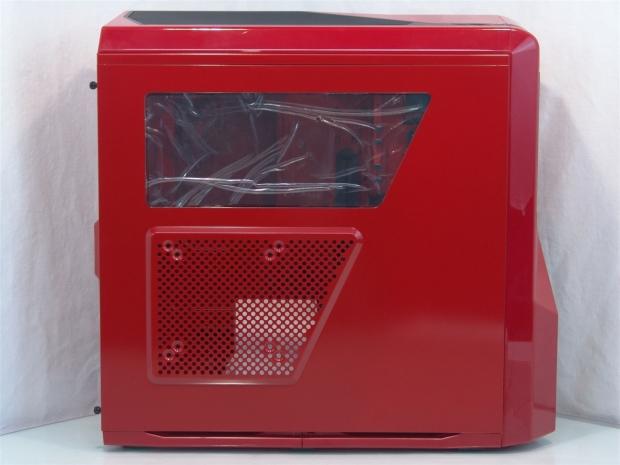
The door panel offers both a window to look at the top half of your system, but the bottom offers mesh for passive ventilation, and has holes for 120mm or 140mm fans. While not exactly like the original, the styling still comes through.
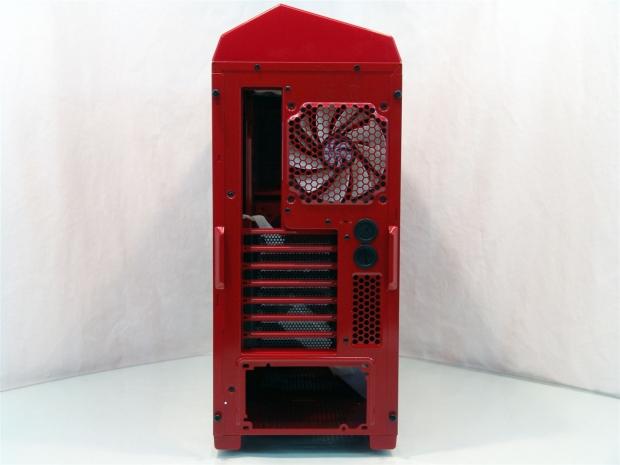
With a red chassis, even the southbound end of a northbound case is somewhat nice to look at. The contrast of the black grommets and expansion slot covers against all that bright red will induce smiles when looked at from any angle.
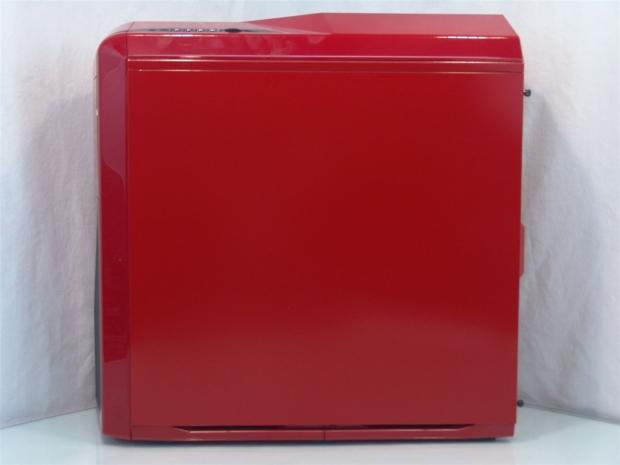
The right side panel of the chassis is flat, but when you get close enough, you will see yourself in the reflection of all this high gloss red paint.
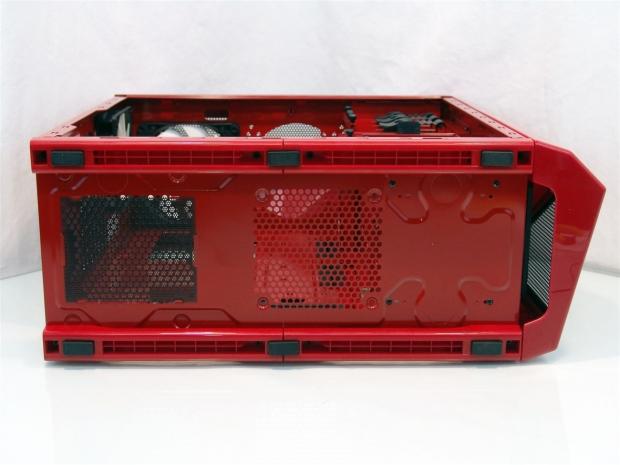
Under the chassis you can see it is supported by rails essentially with six rubber pads applied to best support the chassis while not making or sliding on the surface it is placed on. The power supply gets a dust filter, but the optional 120mm fan mounting position in front of it does not.
Inside the Red Phantom 410 Mid Tower Chassis
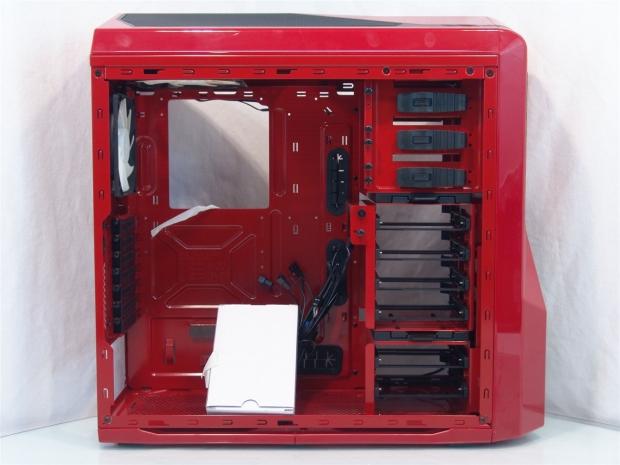
Inside the Phantom 410 we see more of the mix of black on red going on. The hardware box did break loose in transit, the tape just broke. I did find a loose thumbscrew, but it appears it caused no scratches or damages.
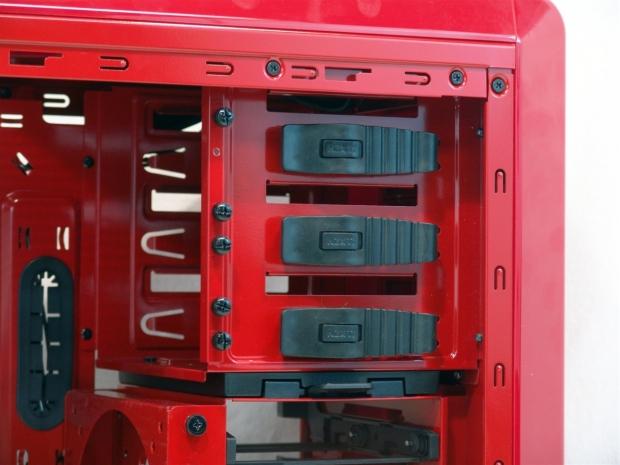
Now I see where that thumbscrew came from! The three optical bays have rubber tool-less latches with metal pins to hold the drive in place. The thumbscrews are kept here for use on the other side, but this way they are always close to where they are needed.
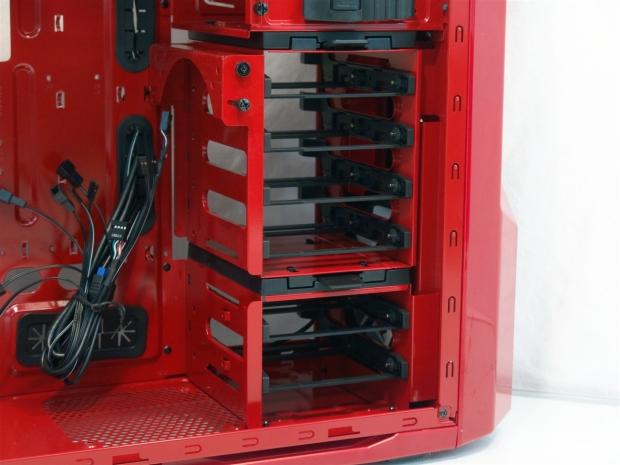
The top four hard drives and trays are built into a removable section with an unusual fan mount on it. This mount actually allows you to angle a fan to optimize what it's blowing on. Under the removable section, the bottom two drive bays are permanent, as they are riveted to the floor.
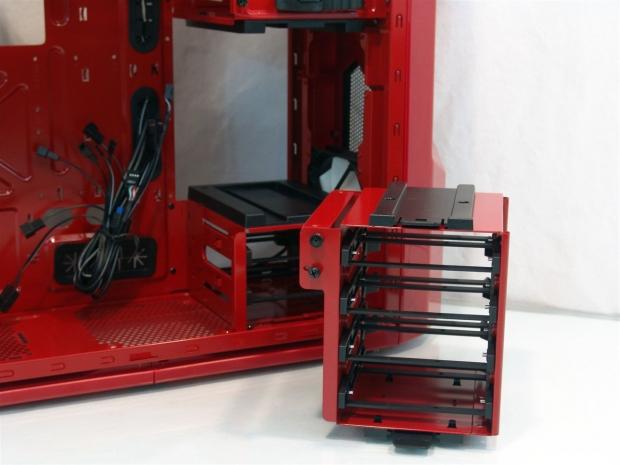
Lifting a tab at the bottom while pressing down on the top clip allows the midsection of the Phantom 410 to come right out. This will allow room for longer graphics cards and the wiring to them.
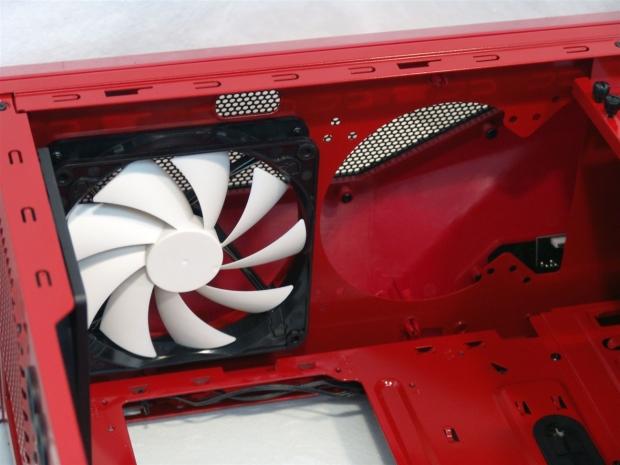
In the top of the chassis there is room for an additional 140mm fan if you wish, but again this area is capable of housing a radiator above the steel with fans here blowing up through said radiator!
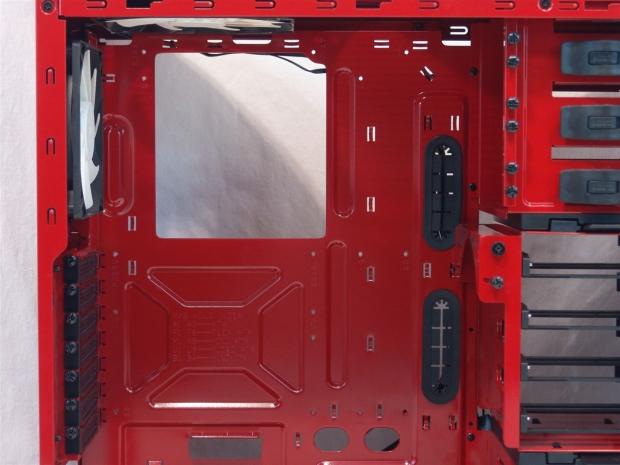
I mentioned the motherboard tray is the same as we saw in the Tempest, but when painted red, it is much easier to see the structural bends and the contrast for the rubber grommets in the wire management holes. There are plenty of options with various tie points and holes to make for a very clean build.
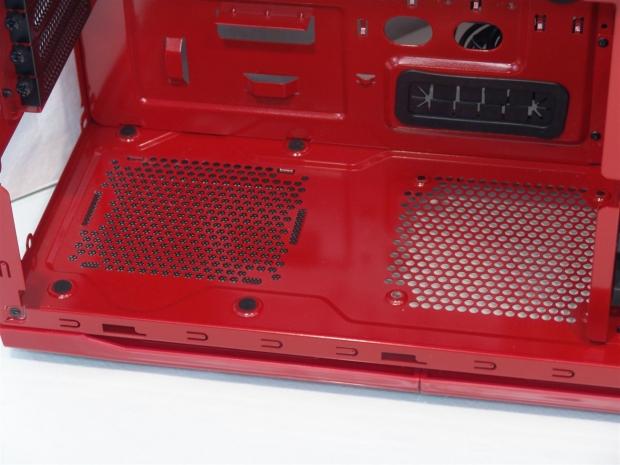
The power supply gets rubber pads to sit on, and to be honest, once I add my power supply, there is no way I am going to get a fan in this hole in the floor. You will need a short PSU to have access to this option.
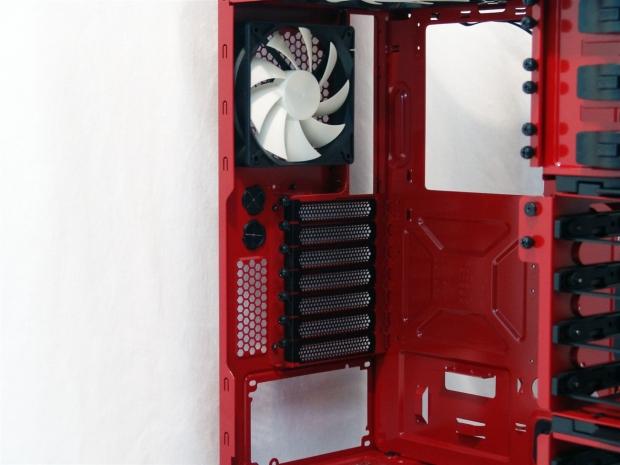
The black and white fan and the black grommets and expansion slot covers even look good from this angle; I really am surprised with how much I find myself falling for this redhead.
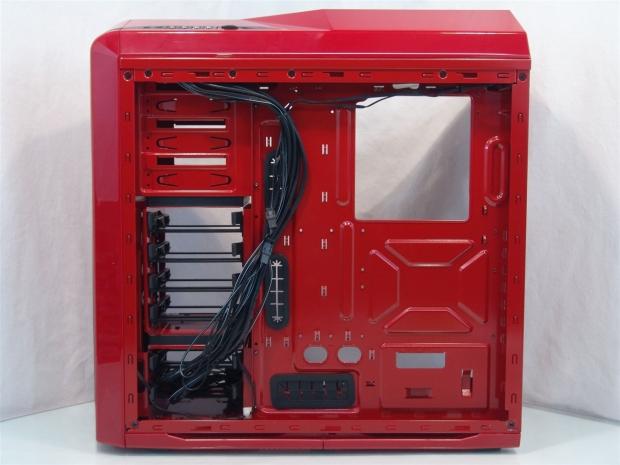
Behind the motherboard tray NZXT takes everything and bundles it together for shipping. This does make it all stick together and stay situated, so that it doesn't damage this paint job. In the shallowest parts you will find 25mm of room for wiring, more in other areas.
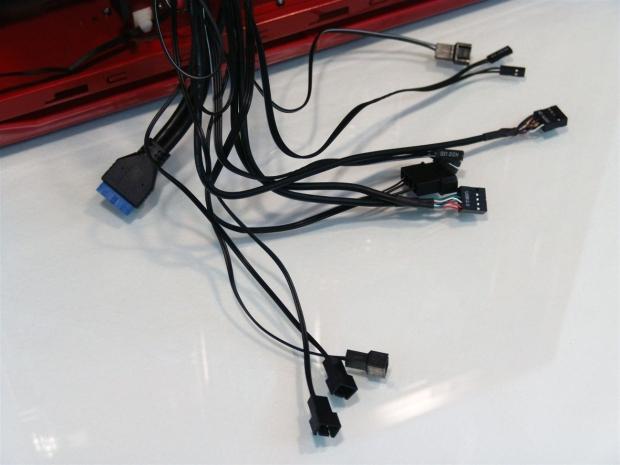
This bundle of wiring has everything from fan connection to the Molex to power the controller for those fans. You also get the entire front I/O wiring all sleeved in black to keep the black on red theme intact down to the last detail.
Accessories and Documentation
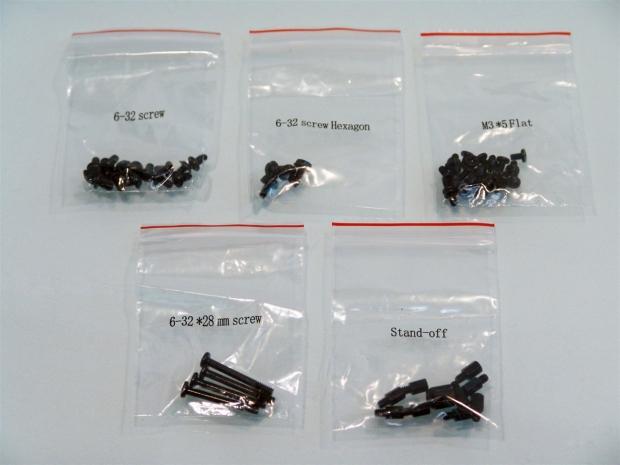
Inside of the white hardware box, I found a bag containing these five bags of individually labeled bags of hardware. You get everything you need from motherboard and PSU mounting screws all the way down to long fan screws to add another fan more easily inside the Phantom 410.
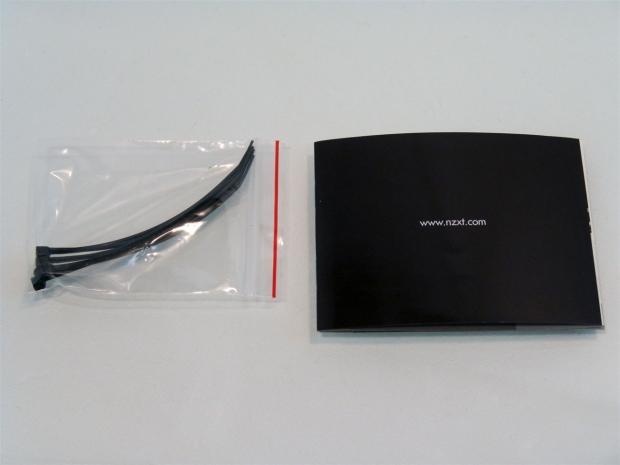
I also found a bag containing five black wire ties, and an NZXT product placement catalogue. I am starting to see this more often, and I can say it's a bad idea to show buyers what else you offer, even if it is just as I received a product. This way you can quickly see what else might fit for the full out NZXT themed builds that are bound to happen in this chassis.
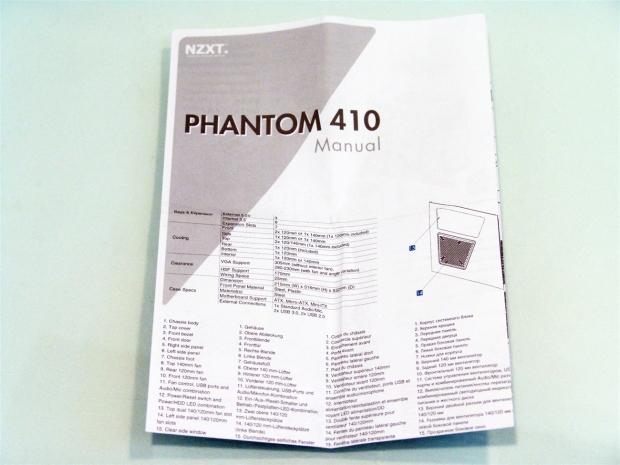
The manual is a fold out that covers the specifications and goes through a checklist of all the parts of the chassis for later identification. There are instructions to get you through the build, but they also include specific instructions on how to release the top and front of the chassis if you need to swap out fans or add a radiator to the top of the Phantom 410. Overall I think with as limited and the space for instructions or guidance is, NZXT covers all aspects pretty well.
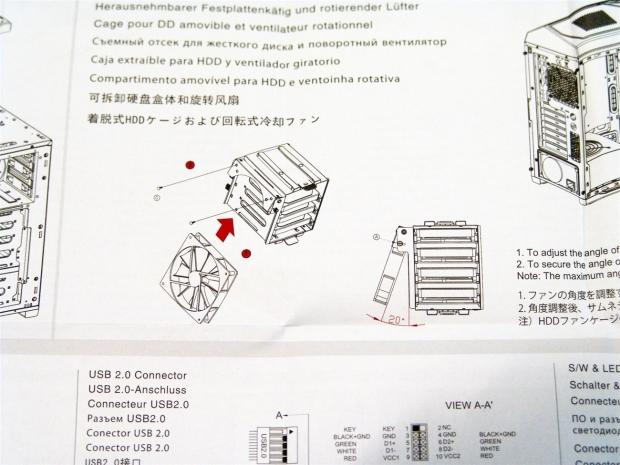
I figure a picture is worth a thousand words, so here it is. Remember when I mentioned that you can angle the fan on the hard drive rack? This uses two screws mounted in the top of the fan to a mechanism that swings out on an angle. There is a set screw on the side that allows full access to all twenty degrees of motion.
The Build and Finished Product
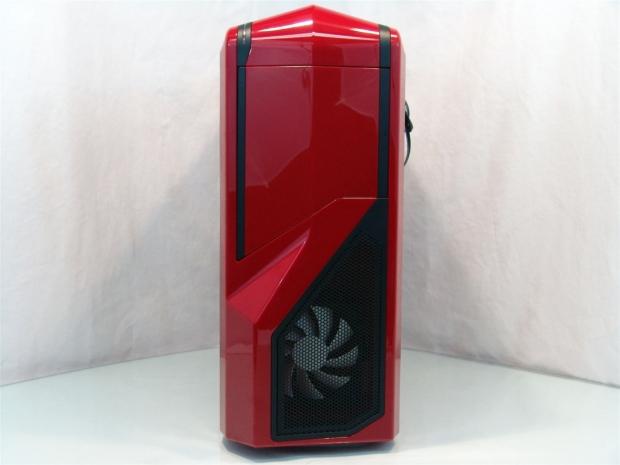
I'm not typically a fan of doors, and I have to say up front, this one swings the wrong way. With the window on the left, the case will sit to my right, and the door will block you access.
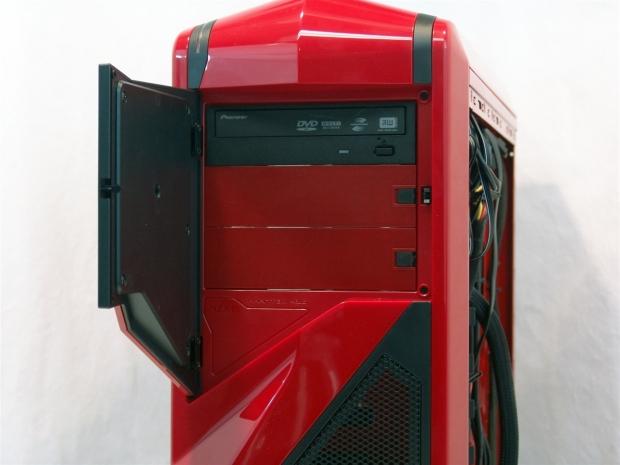
Even so, the removable cover came right off when I released the latch and allowed me to slide the drive into place and is held securely with just the tool-less clip holding it in place. If you plan to travel with this, I would use the thumbscrews provided on the side of these drive bays - they are supplied for a reason.
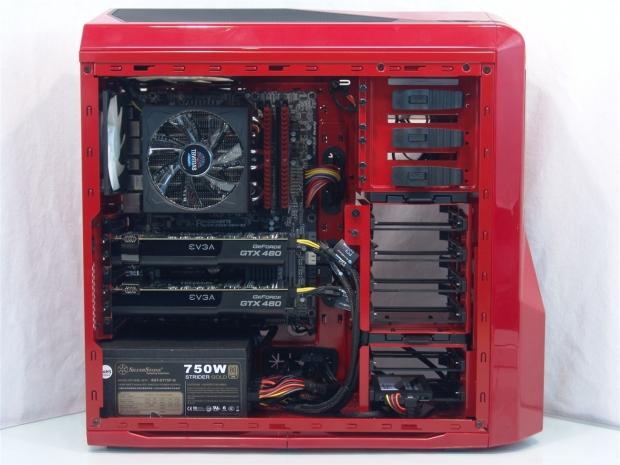
I think I was able to produce a pretty slick looking build in this all red chassis. Everything I had to add to the chassis ended up being either a lot more black or the red stripes of the Mushkin RAM, and fits right in this chassis. I thought about adding red sleeved extensions, but I thought that would be too much.
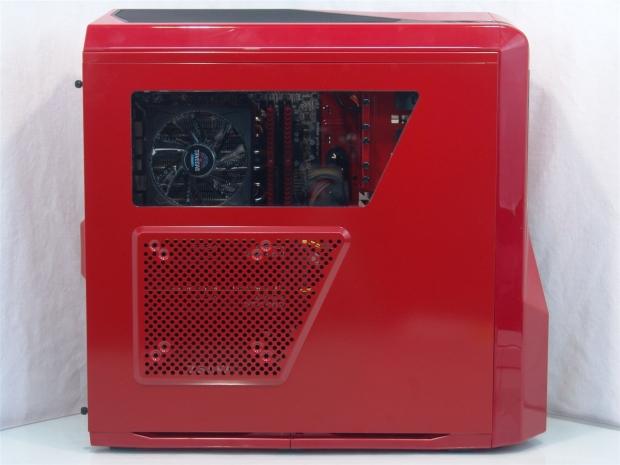
With the door back on, the window gives you a great view of the CPU cooler and memory and extends on past including a view of the side of the optical drive bays. The mesh area blow offers passive flow as it is shipped, but the view of the cards through the mesh shows the fan placement offered is right on point with its location.
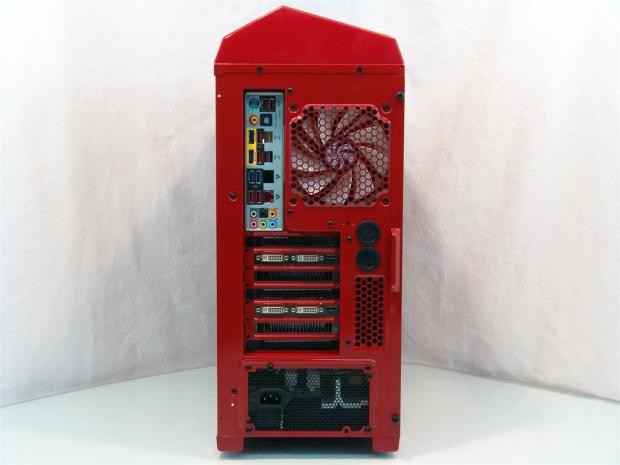
The back of the chassis gets a bit more colorful with the addition of the rear I/O shield and the off while DVI ports showing. The rest, consisting of the GPU brackets and the PSU, are both black and again makes even the back of the case look good.
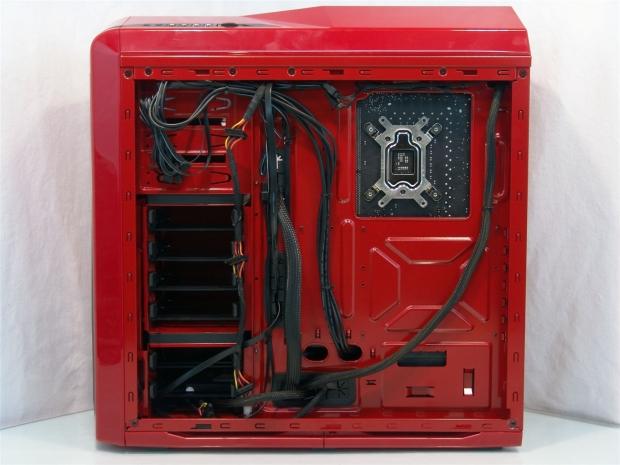
It did take me a bit of time and maybe thirty or so zip ties, but I was able to undo that huge clump of wires, re-route some of them, clean up others, and make room for the 8-pin EPS and 24-pin cables to go in here. As stated in the manual, there is a minimum of 25mm here. Behind the drives and in the trays indented into the motherboard tray there is more room for thicker cables.
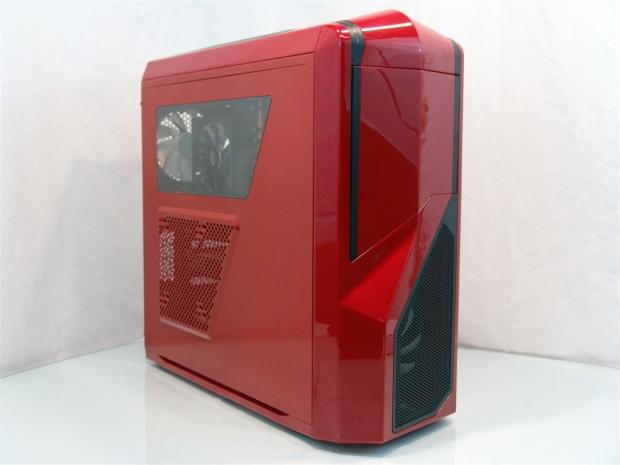
Just another angle, to enjoy the red Phantom 410, before I add some power and put the case through its paces!
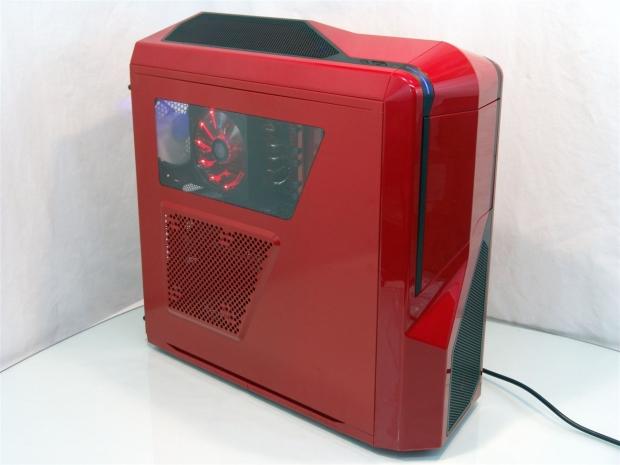
Powered up, the Phantom 410 starts with a glow of blue as the chassis power light comes on with an intermittent flicker from the activity light just behind it. At first, since the fan is set at low speed from NZXT, there was not much of a glow inside of the case from the top fan, but once turned to high speed, you can now see the blue glow on the rear exhaust fan.
Final Thoughts
There are a couple of oddities or irregularities that I have to point out. First be aware that the plastic top and face are a true red, but the steel is slightly lighter in color. With every lot where the paint is replenished, the color may be closer or a bit further away as that batch of paint empties. Even with a slight difference I am still very pleased with the looks of the red Phantom 410. The second thing is that the hard drives are all wired on the left of the chassis. Simply adding extra holes for the locking tabs of the trays would allow the user to wire them behind the motherboard tray with everything else. The last thing I am going to pick on is the lack of changing or even removing the blue LED fan. I can take the power and activity lights being blue, but the blue glow on the inside doesn't add kindly to a red interior. Mentioning what I have is really nit picking at the Phantom 410 for what I like personally, but are all valid points to consider when looking into the purchase of this case.
Putting the case through its paces I was very pleased with the limited noise coming from the Phantom 410 with the fan set to low speed on the controller. Once I pushed the slider into its high position it is still very quiet while offering good cooling to the components inside.
On the inside, adding the removable hard drive section to allow much longer cards while on the outside, making sure to leave room for some water cooling under the obviously Phantom trim applied there. Maybe I am still taken by how good a red and black chassis can look, and it is my first one to actually work with, even so I still feel that for what NZXT expects you to invest to have a little Phantom on your desk, there isn't anything I was really left wanting that wasn't offered in the Phantom 410.
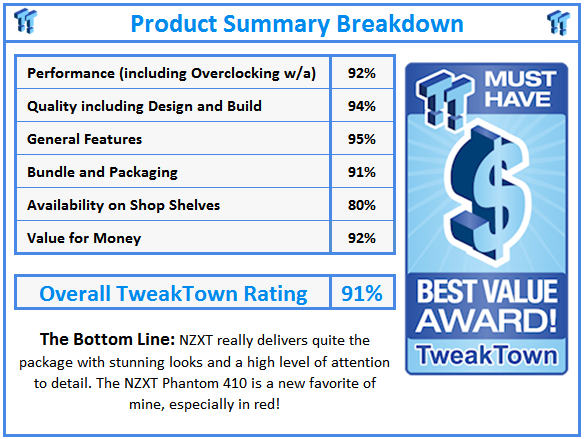
NZXT has definitely lifted my spirits from the last product I reviewed and has shown me, and hopefully you, that even an opinionated guy like myself can be taken back in after a bad experience. The Phantom 410 delivers a full set of features with things like fan control and native USB 3.0, again I wasn't left missing anything, and the fact that all of the wiring is black to the very end helps keep the theme going with this stunning red and black mid tower chassis.
Even if you would rather have the white version, or the black version, there is no way you can ignore the cost. With quite a few cases in the $100 price range, it is hard to stand out against the endless offerings already out. NZXT offers just this, $109.99 at Newegg.com, and I can see all three colors of this chassis soon running out of stock as people flock to buy one of their own.


