


The Nintendo Switch is great for taking in-game screenshots of Zelda: Breath of the Wild's amazingness, but what if you want to back those screenshots up or want to keep your system storage free of thousands of Zelda pics? Here's an easy way to do it.
If you're like me, then you love sharing screenshots. The Switch lets you take screenshots by pressing the capture button on the left JoyCon, and share screenshots individually on Facebook and Twitter. But you can only share one at a time. What if you want to share multiple pics, or make a massive album? Then you need a micro SD card.
Sadly, the Switch does not allow you to back up screenshots to a USB stick because USB devices can't be attached while the Switch is in Handheld Mode. So get a micro SD card and a SD card adapter--any will do, I'm using an incredibly ancient 2GB micro SD card from like 2007--and slide it into the Switch underneath the kickstand. Now that you've expanded the Switch's usable 25.9 GB of memory won't have to worry about filling your precious data, go to the main menu and check under system settings.
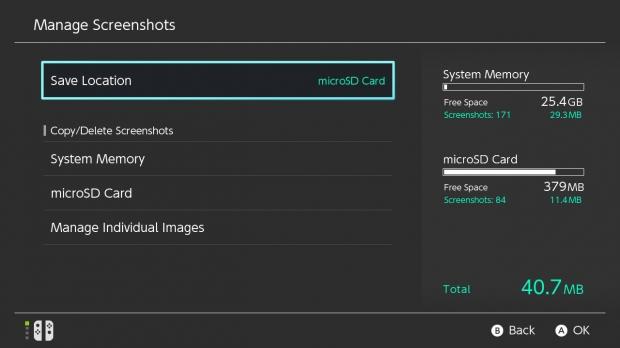
The following path tree will guide you to where you need to be:
System Settings -> Manage Save Data/Screenshots -> Manage Screenshots -> Save Location
Then you'll click Save Location and select microSD Card. Voila! Now all your screenshots will be saved to the inserted card instead of your console.
To access the screenshots saved to your microSD card you'll need a microSD to SD adapter, and, depending on your PC/laptop setup, a SD USB adapter. Most laptops have a slot to slide in SD cards into, so check for one before you grab an adapter. Once the SD card is in your PC, just go to the storage location, grab your pics, and save them to your PC.
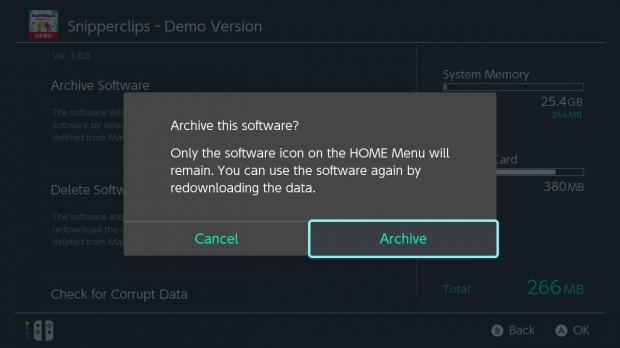
Once your screenshots are copied to the microSD card they'll still be on the system's internal storage, so you'll have to manually delete them. Simply go to System Memory on this screen and click Delete All Screenshots in System Memory--but be careful and make 100% everything's backed up first!
Read Also:Nintendo Switch handheld battery life test results
Remember that the Switch won't let you back up or migrate actual save game data, but I have a hunch this will be added soon. Look out for another article on that subject soon.
Furthermore, you can also transfer all of your screenshots from the Switch's internal memory to the microSD card, and vice-versa.
Just be aware there is no way to select specific multiples of screenshots. For instance, you can't manually select more than one screenshot at a time--it's either one or all.
We hope this little tutorial has helped you, and we look forward to your screenshots, so share some out into the wild!
Also keep an eye out for more Nintendo Switch coverage, including our feature length review on the console. For now be sure to check out our massive Nintendo Switch coverage catalog for more info on the device.
 Switch 2 only supports microSD Express memory cards, you'll likely need to upgrade
 Nintendo Switch 2 game load speed increased by 4x with a new microSD card
 Zelda Notes lets you share items with friends online in Tears of the Kingdom
 Nintendo charging for next-gen Switch 2 game upgrades, some included with Switch Online
 Switch 2's new GameShare: buy 1 game, share it with 3 friends online
 RAM crisis is getting worse, Valve engineer warns
 Xbox's return to exclusives was decided 'very early on' by CEO Asha Sharma
 Xbox console exclusives can include multiplayer games too
 Assassin's Creed Black Flag Resynced sells over 3 million copies, New Game+ is coming
 Modder plays GTA Vice City and GTA III on a TV inside GTA San Andreas
 Enthusiast puts 11 fans and an AiO on an RTX 3080, gains only 4 FPS
 Spotify removed 75 million AI-generated tracks in 2025 as it cracks down on royalty abuse
 YouTuber claims Sony is using social media bots to push back against backlash over its physical disc announcement
 Apple's first OLED iPad mini could launch as early as October
 Ryzen 7 7700X3D outperforms Ryzen 7 5800X3D with just one stick of DDR5, making AM4 a terrible option for your next build
 SteelSeries Arctis Nova 7 Wireless Gen 2 Headset Review - New and Improved, But Is It Enough?
 AMD Ryzen 7 7700X3D Review - Days of Future Past
 Samsung 990 2TB SSD Review - Ninth Gen QLC at PCIe Gen4 Speeds
 ASUS ExpertBook Ultra (Panther Lake) 14" Business Laptop Review
 ASUS ROG Raikiri II Xbox Wireless Controller Review - Ready to Take Control
 MOZA FMP18 Panel Bundle Review: authentic F/A-18 Hornet cockpit controls for flight sims
 Micron 6600 ION 245.76TB Enterprise SSD Review - Best in Class Programming Speeds
 MOZA MA3F EFCM Flight Control Module Review: authentic Airbus A320 autopilot panel for simulators
 Turtle Beach Stealth Pro II Wireless Gaming Headset Review - Premium Sound, Fantastic Features
 MOZA MGX1000 Instrument Panel Review: a realistic Garmin G1000 replica for immersive flight sims
 I use this decade-old free tool that finds files faster than Windows Search does
 I install and update most of my apps with this Windows command now, and I stopped downloading sketchy installers
 Hisense U6SF 65-inch MiniLED TV: High Performance Meets Leisurely Convenience
 I stopped digging through Windows menus after I set up this one folder
 Don't sell your Windows laptop until you do these things
 6 PC cleaning mistakes to avoid for safer hardware maintenance
 Phison and Intel Take Aim at Local AI's Memory Wall with aiDAPTIV
 How to Remap Keyboard Keys in Windows using Microsoft PowerToys
 7 tips to organize your Windows files for faster, easier access
 Intel Arc G3 Extreme first impressions with MSI's Claw 8 EX AI+ - Incredible power for an extreme price