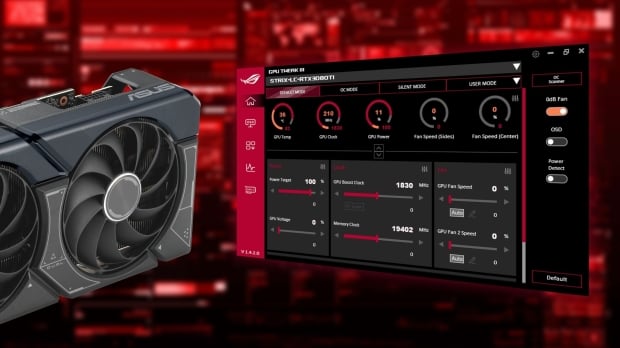
With the ability to build and customize a rig, PC gaming gives gamers a level of freedom second to none. Fire up a game, and you'll find that most game developers offer in-depth options to customize and tweak game settings to optimize performance. But you can go one step further (by going straight to the source) to tweak your GPU and overclock (OC) it to maximize the frame-per-second (FPS) performance you can achieve.
Getting the most out of your rig is a no-brainer, and overclocking is more accessible than ever, thanks to ASUS GPU Tweak III.
The GPU or graphics card is like the engine that powers a game, so keeping it up-to-date driver-wise while maximizing its capabilities will always net you the most significant returns. More frames. For a robust, powerful, and easy-to-use tool to get the most out of your PC gaming, look no further than GPU Tweak III. This guide will present easy-to-follow steps to overclock your GPU while explaining the various options and tech at your fingertips.
We'll also examine GPU Tweak III's more advanced features, customization, and excellent hardware monitoring capabilities. Before we begin, here's a quick primer.
What is ASUS GPU Tweak III?
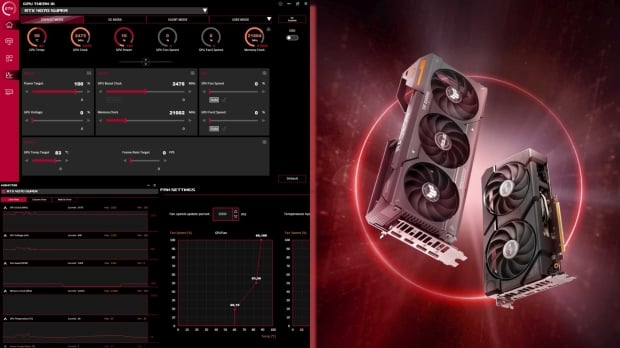
ASUS GPU Tweak III is a complete GPU monitoring, tweaking, and overclocking tool that maximizes 3D performance. It gives you control over GPU settings like power (including voltages), clock speeds, and fan speeds. Real-time monitoring tools provide up-to-the-second information covering everything from GPU temperature to the amount of memory utilized and rendering info like frame time. Monitoring is available in a dedicated window, OSD (on-screen display/overlay), or synced to a mobile device.
Designed for beginners and pro users alike and optimized to work seamlessly with all GPUs, not just ASUS' range of NVIDIA GeForce RTX and Radeon RX graphics cards (including models in the ROG Strix, Dual, and TUF Gaming lineups). No matter the make or model, GPU Tweak III offers one-click access to 'OC' and 'Silent' modes while giving users the freedom to drill down into various settings to create and share their own custom GPU profiles on a per-game or per-app basis.

| Today | 7 days ago | 30 days ago | ||
|---|---|---|---|---|
| - | $890.89 USD | |||
| $699.99 USD | $799.99 USD | |||
| - | $890.89 USD | |||
| $1199.99 CAD | $1199.99 CAD | |||
| - | $890.89 USD | |||
| - | $890.89 USD | |||
|
* Prices last scanned on 2/27/2025 at 5:47 am CST - prices may not be accurate, click links above for the latest price. We may earn an affiliate commission from any sales.
|
||||
A robust 'OC Scanner' tool also analyzes your GPU to find the optimal OC settings. GPU Tweak III supports multiple languages, too, and lets you customize every aspect's look and feel.
Finally, a clean, built-in GPU-Z interface provides a detailed readout of your current GPU hardware specs and OC settings.
What is GPU Overclocking?
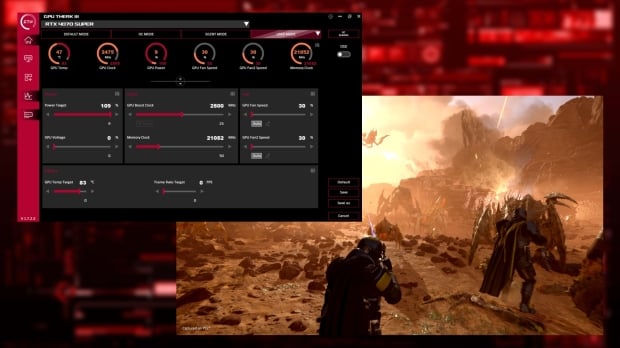
Overclocking a GPU (or CPU) at its most basic level makes it run faster, and this is achieved by increasing GPU Boost and Memory clock speeds. Overclocking also involves adjusting GPU power targets and voltages alongside fan speeds to maximize performance. It's a delicate balancing act that relies on the capabilities of the GPU installed, its cooling, and overall power delivery. No two GPUs are alike, so cards like the ROG Strix or TUF Gaming lineup from ASUS are great for some OC action because of the high-quality components, power delivery, and excellent cooling they feature.
What You Need to Overclock Your GPU
Any GPU can be overclocked, and all you need to get started is an overclocking tool like GPU Tweak III, a benchmark tool to test performance, and the ability to monitor changes made and performance in real-time.
Overclocking Tool (GPU Tweak III): The latest version of GPU Tweak III for Windows can be downloaded directly from ASUS. Select the 'Latest Version' under Stable Versions, which will download a compressed installer file. Unzip the file, run 'GPU Tweak III Install.exe,' and follow the on-screen prompts to complete the installation (you will need to restart your PC once it is complete).
Benchmark Tool for Testing: A benchmark tool stress tests a GPU, and there are several to choose from. You can use one found in a game (titles like Cyberpunk 2077, F1 23, and Call of Duty: Modern Warfare II have built-in benchmark tools) or a dedicated synthetic test like 3DMark TimeSpy, Unigine Superposition, or FurMark. The goal is to run and re-run the same test/sequence to measure performance and stability- a synthetic benchmark tool is recommended for the latter.
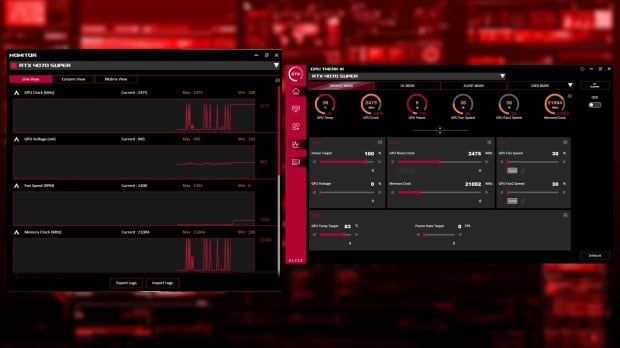
Hardware Monitoring: GPU-Z is a great way to check clock speeds, voltages, and GPU specs like memory speeds to confirm that any OC settings, manually or automatically changed, have been applied. Separate from its built-in GPU-Z tool, GPU Tweak III has a robust suite of stat monitoring that can be brought up with a single click at any point. This provides real-time monitoring to check performance (in frames-per-second), GPU temperatures to see the difference overclocking makes and a range of other stats.
Effortless 'One-Click' Overclocking
GPU Tweak III offers effortless overclocking. It lets you instantly switch between three GPU OC modes with three one-click settings.
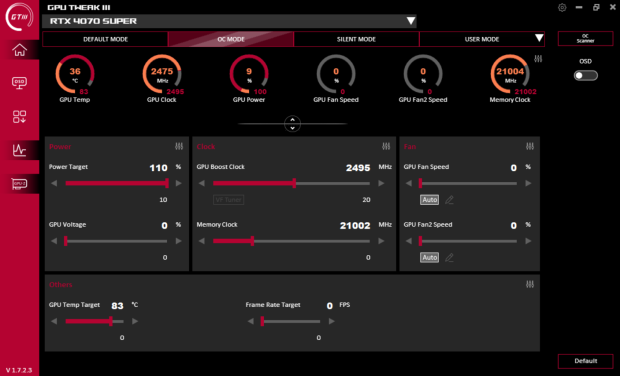
Default Mode: Default Mode sets GPU clock speeds, power targets, and fan curves to the graphics card's default out-of-the-box settings. At any point, click 'Default Mode' to return to the default settings.
OC Mode: A quick one-click Overclock, OC Mode modestly increases GPU Boost Clock speeds and the Power Target for some quick (and safe) OC action. For the GeForce RTX 4070 SUPER, 'OC Mode' increases the reference GPU Boost Clock speed from 2475 MHz to 2495 MHz while increasing the Power Target to 110% (for the GPU to draw up to 10% more power if needed).
Silent Mode: This mode lowers Clock speeds and Power so your GPU runs cooler and quieter without massively impacting performance. For the GeForce RTX 4070 SUPER, 'Silent Mode' lowers the GPU Boost Clock speed to 2455 MHz and the Power Target to 90%.
Use 'OC Scanner' to Maximize Your GPU's Potential
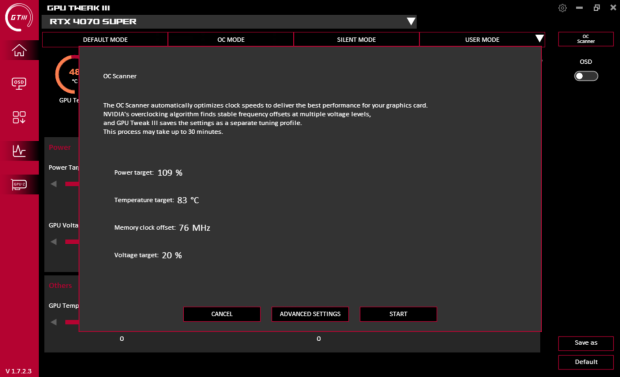
GPU Tweak III's OC Scanner is a powerful tool that automatically optimizes clock speeds for your specific graphics card, and the process can take several minutes. It uses NVIDIA's overclocking algorithm to find stable frequencies and voltage levels, and GPU Tweak III saves the settings as a separate tuning profile. You can also run OC Scanner after you apply tweaks to temperature, power, memory, and voltage targets.
Hardware Monitoring
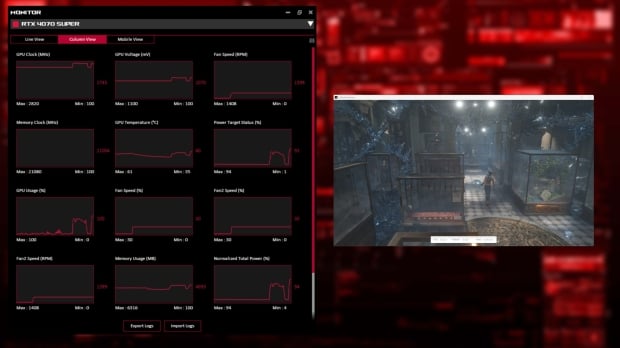
GPU Tweak III includes powerful and fully customizable hardware monitoring tools with three main views. Line View linearly displays each stat with real-time values provided on the right-most side of each graph. Column View is a more compact version that presents multiple stats on each 'line' so you can see more data at once. Mobile View gives you a QR Code you can scan with your phone or tablet to bring up a browser page with all the data instantly.
GPU Tweak III lets you monitor the following stats and export the logs for analysis or reference: GPU Clock (MHz), GPU Voltage (mV), Fan Speed (RPM), Memory Clock (MHz), GPU Temperature, Power Target Status, GPU Usage (%), Fan Speed (%), Memory Usage (MB), Normalized Total Power, and Frame Time (ms). The great news is that for each view, you can arrange the order of stats and pick and choose what to display and monitor.
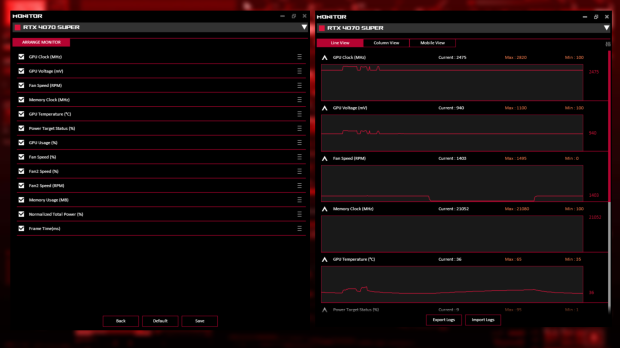
These stats, plus things like FPS (frame-per-second) and current display resolution, can be displayed on-screen when the GPU is in use. You have complete control over GPU Tweak III's OSD settings, like everything else. This overlay and on-screen display are fully customizable to fonts, color, and screen position.
Manual and Advanced GPU Overclocking
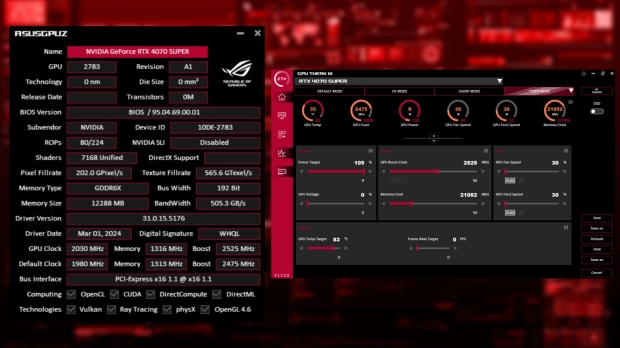
GPU Tweak III's main interface is straightforward. At the top of the display, you can monitor the most valuable stats in real-time: GPU Temperature, clock, power (in %), fan Speed (in % and for each fan), and Memory Clock. These all relate to the GPU settings you can tweak. As with all elements of GPU Tweak III, you can customize what is displayed here by selecting the 'Settings' icon.
Before you begin, run a GPU benchmark like 3DMark TimeSpy or Unigine Superposition in a stress test/continuous mode for several minutes to ensure that your GPU runs at 100% capacity and that temperatures are not getting close to max. For GeForce RTX cards, this is 83 degrees. Monitor GPU Usage and Temperature with GPU Tweak III's OSD (on-screen display). At this point, note your GPU's average and maximum FPS as a baseline for overclocking.
Overclocking is all about making minor adjustments, checking stability to ensure no issues, and monitoring performance to see the difference. In GPU Tweak III, this is achieved by selecting 'User Mode' and following these steps.
Power
- Increase the Power Target to 110% to ensure that overclocking maximizes power draw to maintain higher clock speeds and performance.
GPU Boost Clock
- Increase GPU Boost Clock by a small amount. Click Apply and then Save.
- Open the built-in GPU-Z display to confirm that the 'Boost' under 'GPU Clock' is set to the number you've selected.
- Run a GPU benchmark like 3DMark TimeSpy or Unigine Superposition in a stress test/continuous mode with the GPU Tweak III overlay to monitor performance and stability.
- If everything looks good, from performance to temperatures to clock speeds, repeat these steps for more performance (optional). If you're new to overclocking, increase by 10 MHz increments and repeat the steps until you reach 50 MHz.
Memory Clock
- Increase the Memory Clock by a small amount. Click Apply and then Save.
- Run a GPU benchmark like 3DMark TimeSpy or Unigine Heaven in a stress test/continuous mode with the GPU Tweak III overlay to monitor performance and stability.
- If everything looks good, from performance to temperatures to clock speeds, repeat these steps for more performance (optional). If you're new to overclocking, increase by 10 MHz increments and repeat the steps until you reach 50 MHz.
Fan Settings
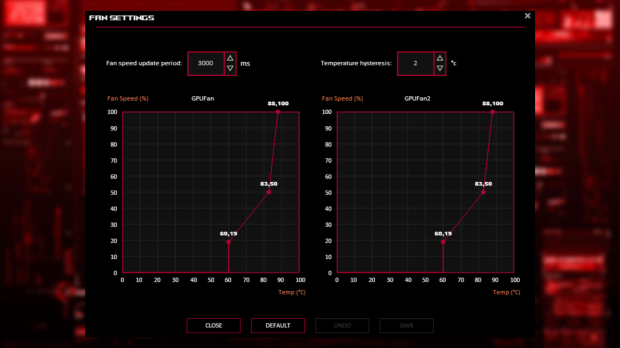
By default, individual fan settings are set to Auto in GPU Tweak III, but if you feel like your GPU is running a little hotter than you'd like, you can manually adjust fan curves to boost cooling. GPU Temp determines Fan Speed (%), and you can change these settings on an easy-to-follow graph. A more aggressive fan curve increases fan speed at lower temperatures.
Using VF Tuner to Maximize Performance
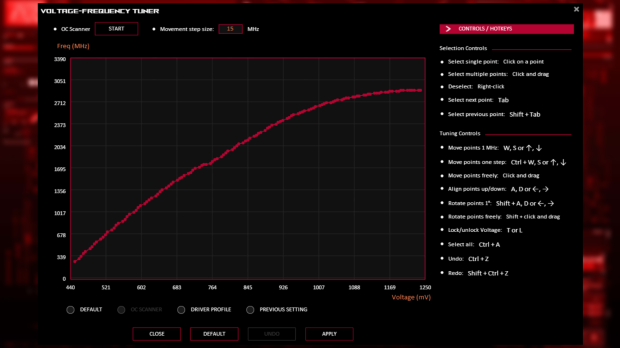
The GPU Tweak III voltage-frequency tuner or VF Tuner appears under the GPU Boost Clock slider. Clicking it opens a new window that showcases the curve based on the GPU's default settings, OC Scanner settings, or current profile.
This is where you can fine-tune performance by increasing and flattening the curve at various points. Re-running benchmarks is the key to ensuring stability for any changes you make here. VF Tuner can also be used for undervolting, which involves lowering the GPU frequency and voltage level. This can lead to a more efficient GPU that will run cooler and quieter while saving power.
GPU Tweak III's VF Tuner tool creates save points. It allows you to quickly bring up previous stable settings, which is important for finding additional performance without running into display artifacts or freezing your system.
Setting Up and Sharing GPU Tweak III Profiles
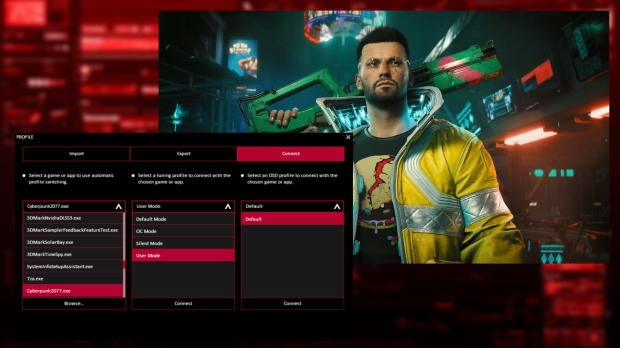
Saving and tuning the OSD profile in GPU Tweak III is simple. Under User Mode, you can create new custom modes and profiles as well as Export and Import settings. When exporting settings, you can choose which mode to save to an external file and then share it across systems and with other PC gamers. Importing is simple: select the tuning file and ensure it matches your GPU.
One of GPU Tweak III's most powerful features is the Connect option. It scans your PC for games and application executable files and lets you manually select an OC profile that will enable the next time you fire it up. This is a great way to alternate between overclocked modes for visually intensive games like Cyberpunk 2077 and Alan Wake II and more silent modes for when you're not gaming or playing a simple game like Vampire Survivors that might not require a lot of GPU grunt.
A fantastic feature of GPU Tweak III is the ability to have your GPU in Silent Mode by default and switch between various OC Modes when gaming by setting up profiles.

