


Introduction
For the more experienced builder of custom water cooling systems, there is a checklist of things you need to complete a loop that automatically comes to mind when you go to get the parts list together. For those not so wise to what it takes, let me go over the general bits you must have to make a loop work.
You need a radiator, fans, tubing, fittings, reservoir (not a must have) a pump, and the blocks to cool the devices you want to cool. Now if you have basic plumbing knowledge, are literate enough to read instructions, and are also mechanically inclined, building a loop takes very little effort to do correctly. For others there are worries about leaks and most are shocked by the price you have to pay to acquire a great custom loop from various retail markets.
That being said, Swiftech is improving its game while also alleviating some of the worries that new builders have, as well as giving the more experienced builders something they can really appreciate. Not only does this new addition to their water cooling lineup look really good, but it mates the pump and CPU block much like what you see in an AIO, but this time with serious intentions, not just enough to get the job done as an AIO would do. This also takes four possible leak points away and makes it now only two. On top of that, you can save all sorts of headaches now in trying to find a way to mod a case to accept the usual suspects for pump solutions. So not only do you have less worry, but you are also saving tons of room, which makes this a perfect candidate for m-ITX builds in the BitFenix Prodigy like I have seen so much lately.
The product we are going to be looking at, tearing apart and testing today is the Apogee Drive II, an integrated pump, CPU block and heatsink combination piece. Now looking at what I could find on the site, and also from talks with Gabe from Swiftech, I have a good feeling that the Apogee Drive II will win your heart as it did mine, by the time I am done here. While this concept has been done before, the performance numbers show that this is more efficient than the HD block I received with the Edge HD kit. Those results were really impressive, so I can only imagine I will be happy with the results here.
As always though, you can't believe everything you read on the internet, so I am going to be bringing you my findings with the bits of kit I was sent recently, as well as strapping the Edge HD kit to this block to see what those results will be, just to keep things on an apples to apples level of testing. Stick with me here, there is a lot to cover with the Apogee Drive II from Swiftech, but I definitely think this product is well worth your time.
Specifications, Availability and Pricing
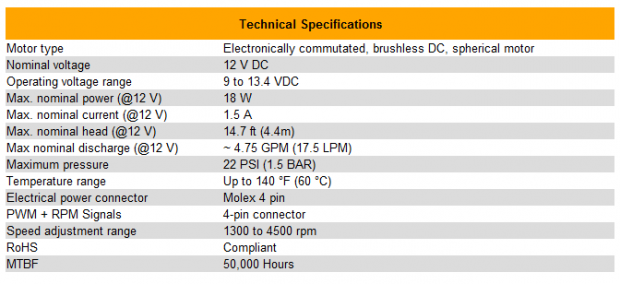
On the technical level, the Apogee Drive II uses the same brushless MCP35X that comes with most of the kits that Swiftech delivers mounted right to the top of the water block. The pump is capable of 4.75 GPM of flow with 22 PSI of pressure and 14.7 feet head pressure. The pumps speed is variable from 1300 RPM to 4500 RPM, but when maxed out, the MCP35X uses 18W of power with a draw of 1.5A. The unit is powered with two connections, one is a Molex 4-pin connection for the pump, but there is also a 4-pin fan header connection that controls the RPM as well as an LED.
That brings me to the aluminum heat sink that is screwed on to the top of the pump. Not only do you get raised fins to help pull heat away at the source, but in the center is a plate with the Swiftech logo that illuminates, and has the option of red, green, and blue for lighting. On the complete opposite end of the Apogee Drive, under the MCP355, you will find a finely polished copper base plate that uses the pump to push coolant over 255 micro-fins/pins to remove the heat dumped there from the CPU.
Our Latest CPU Liquid Coolers Review Coverage
What you are left with aesthetically is a 2.4" cube of black aluminum at the top, black POM in the middle and the thick copper base. This ensures that nothing on this unit will surpass the "safe zone" drawn out on every motherboard socket. The unit we are testing today will allow for mounting on specifically the LGA1156, 1155 and 1366 sockets only. If you would like the LGA2011 or AMD version, Swiftech offers them, so just be sure to shop for the correct version for your needs. On top of those options, what if you already own an MCP35X pump? Swiftech again has you covered and offers a cheaper solution without the pump, where you will get the adapter plate and CPU block to connect to the pump, as well as the top mounted heat sink with the LED logo. The units mount with thumbscrews and back plates making that end of the deal easy enough, and there are even half inch black barbed fittings and plastic clamps included to keep the tubing mounted. You truly do get everything you need in all variations of the Apogee Drive II.
Finding the Apogee Drive II is really easy. Of course you can by direct through Swiftech, or you can hit the major e-tailers of water cooling components. What I am finding is that if you have a pump, and just desire the conversion kit, you are going to have to spend around $62 for the kit, which is very reasonable on its own. Most quality CPU blocks by themselves are going to cost that if not $20 or so more. As for the fully complete, mount and go style of the Apogee Drive II that you are about to see here, it is going to set you back around $135, depending on where you buy it.
Considering the price of the MCP35X on average is right at the $100 level, you are getting quite the deal with this version. With all things factored in, the looks, the features, the simplicity, ease of use, and completeness of the Apogee Drive II, I think that is a smoking hot deal.
Packaging and Hardware

As with all of the other Swiftech products, the money goes to the product and not the packaging. They use a non-descript black cardboard box with a simple sticker on it keeping the price needed for the shipping container to a minimum.
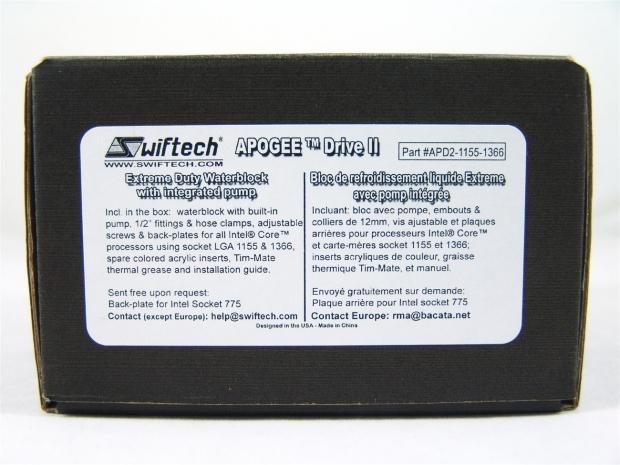
On the sticker you can see in both English and French what product we have, and what is included inside of this box. You can also see that if you do need LGA775 hardware, it will be sent free upon request, so you aren't left out from getting the Apogee Drive II even with older sockets.
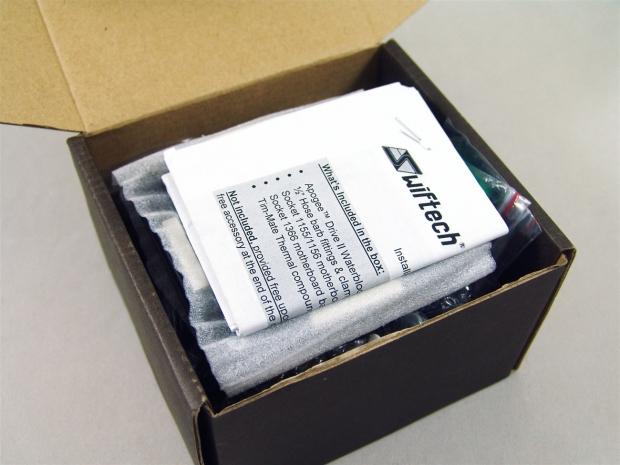
There wasn't a safety seal on the box, but when I opened it, I was greeted with the instructions and hardware sitting above the actual Apogee Drive II unit that is packed in the bottom.
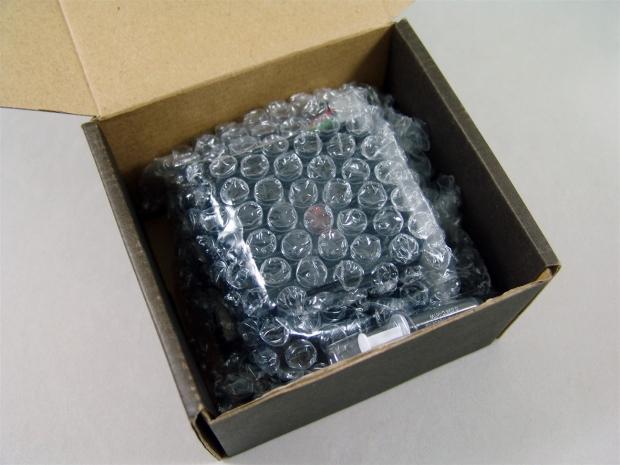
Removing all of the goodies, except it seems I missed the thermal paste, you are now looking at the bubble wrap that surrounds the Apogee Drive II to help protect it, mostly from the hardware in the box.
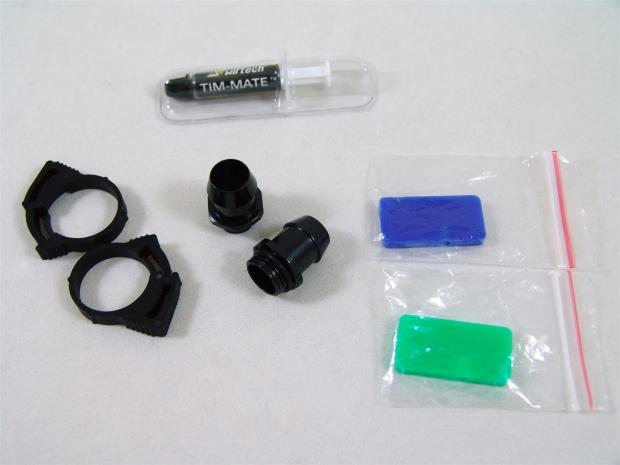
Along with the Apogee Drive II block and pump combo unit, you get TIM-Mate thermal paste, a pair of plastic tubing clamps to go with the half inch barbed fittings. On the right are two plastic pieces, one green, and one blue, and these are to allow you to change the color behind the logo on the top of this device.
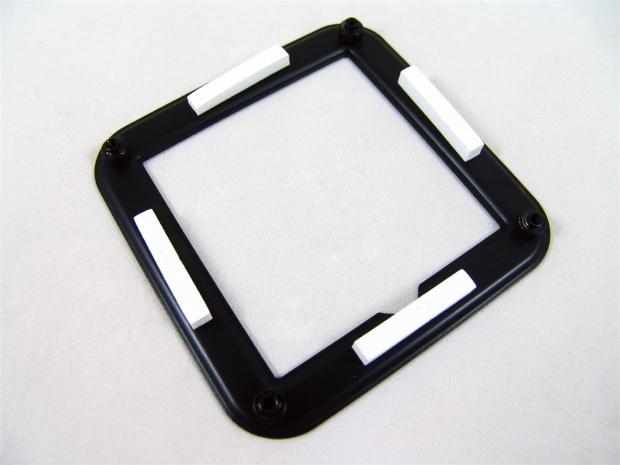
Since the Apogee Drive II ships with the LGA1155/1156 hardware on it, there is an additional back plate with this kit for LGA1366, and that is what you see here.
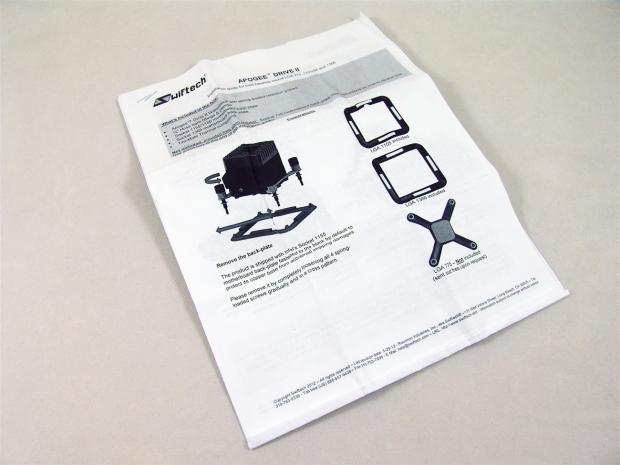
The instructions are very well written and simple to follow. For most users, all you will need to see is the front page that covers the mounting, but in its entirety, this manual will show you how to tear apart, maintain, and even change the logo plate to a color more suited to match your build.
Swiftech Apogee Drive II Integrated Pump and Waterblock
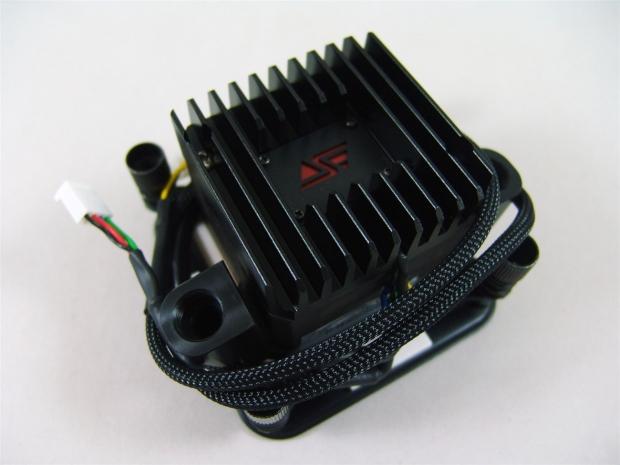
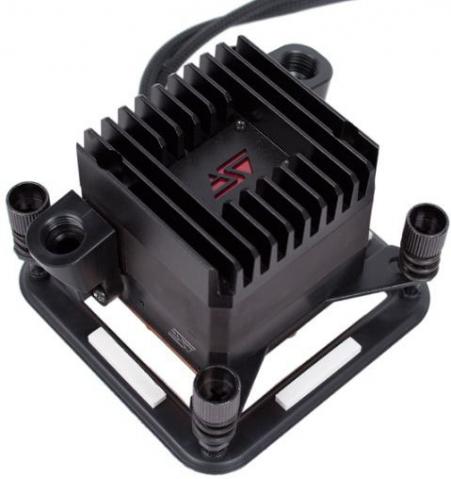
Finally we get our first hands on look at the Apogee Drive II. I don't want to cover too much on it yet, I have plenty of other images for that, so just relax and take it in.
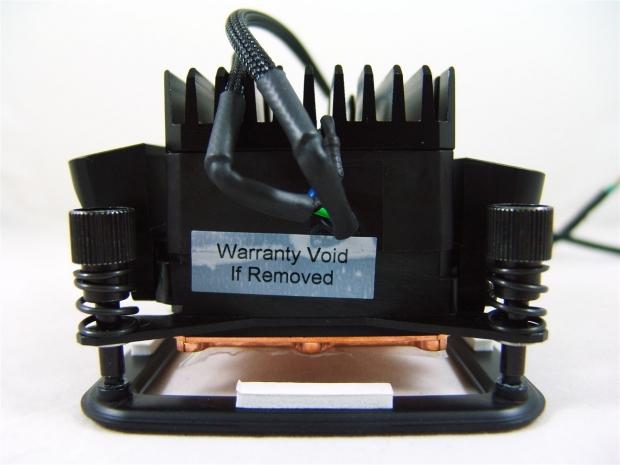
If this was mounted, this would be at the top of the socket. So it makes sense that the 4-pin fan header lead and the 4-pin Molex lead comes out of this side, as it will make connectivity easier and cleaner. There is also a VOID sticker on this side that will show Swiftech if you have tapered with the block once it was pressure tested.
Moving around to the right we see the side of the block that will sit nearest the rear I/O. There is an adjustable fitting on the left with the word "IN" inscribed into the side of the POM next to the Swiftech logo.
The side of the Apogee Drive II that only the video cards would be able to see is plain, just offering us a look at the five layer sandwich that makes up the device.

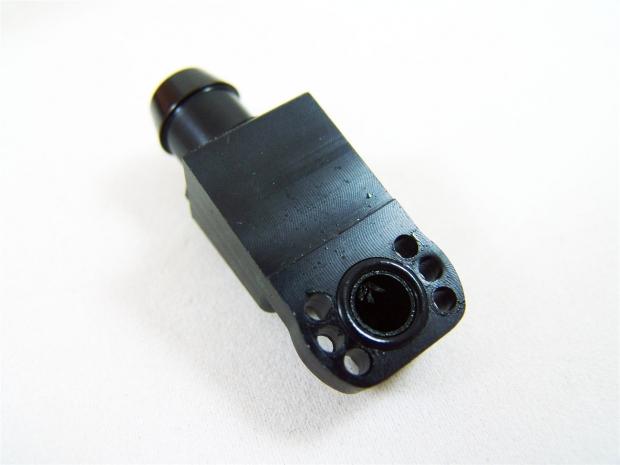
On the outlet side, or the side closest to the memory, there is only the adjustable fitting to be seen. These simply work by removing the screws and placing them in one of the other two sets to help alleviate some of the bending a tube would have to do to make the loop complete.
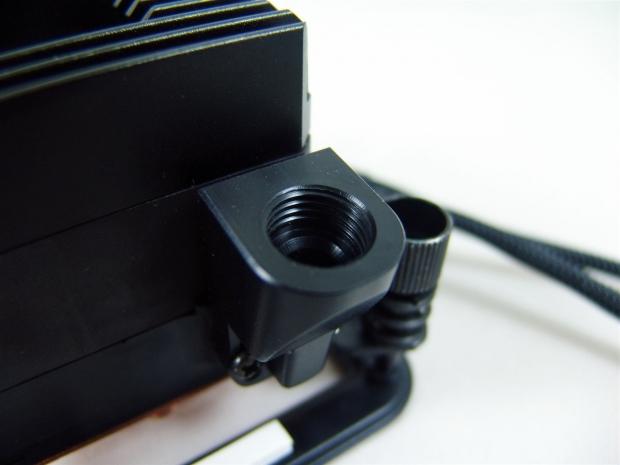
Looking down into the POM outlet, you can see the G1/4 threads are cut very clean with no "garbage" left behind, and the top is very flat to accept the o-ring seal of the fitting.
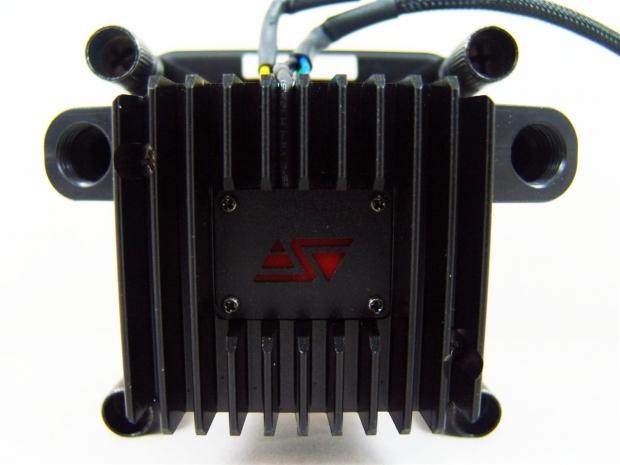
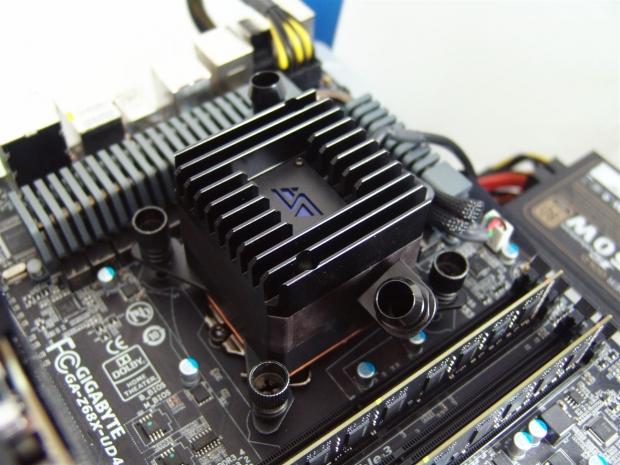
Looking now at the top of the Apogee Drive II, we get a look into the black painted aluminium heat sink that dons the top of the unit. There are 11 thick fins that stem from a base that is screwed to the pump with two screws. In the center you see a screwed on plate with a red logo currently. This will light up once powered.
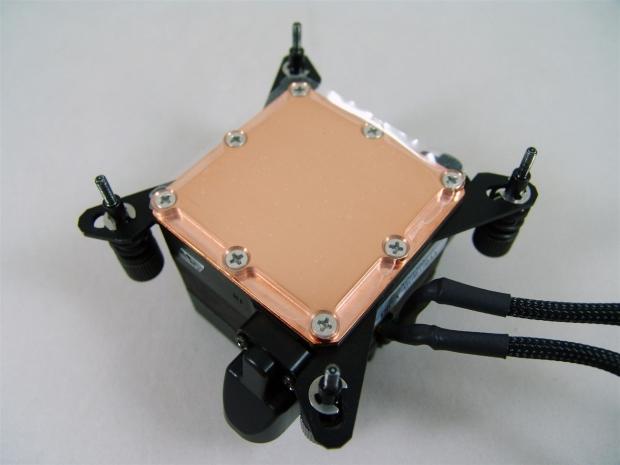
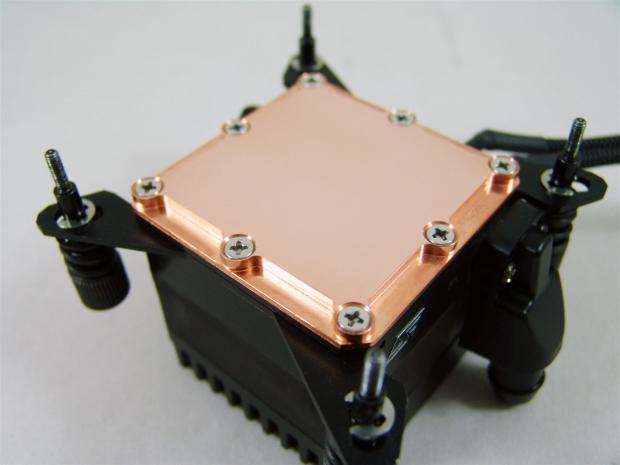
Looking under the ADII you can see eight screws are holding the copper plate to the bottom and these also sandwich in the mounting hardware. To protect the base from scratches, there is a clear plastic stuck to it that you must remove prior to installation.
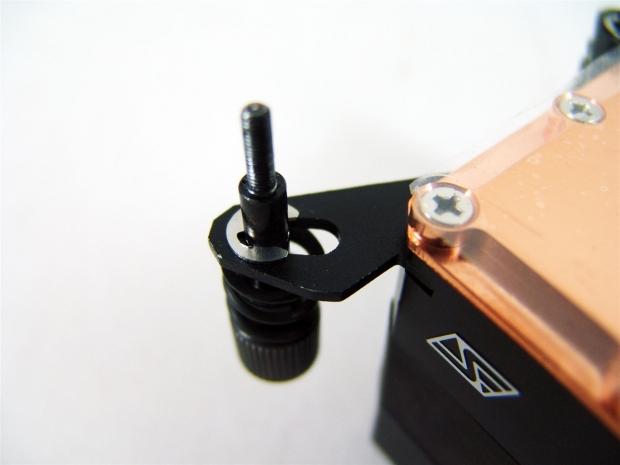
Since this specific version is for LGA1155, 1156 and 1366, the thumbscrews that are E-clipped to the legs are run through holes so that all you have to do is have the correct backplate to complete the installation.
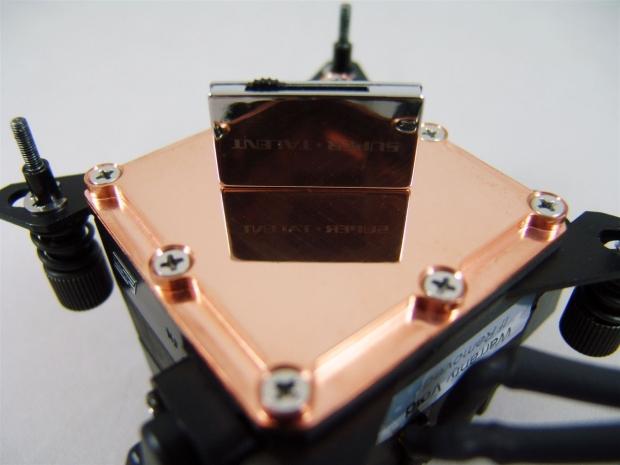
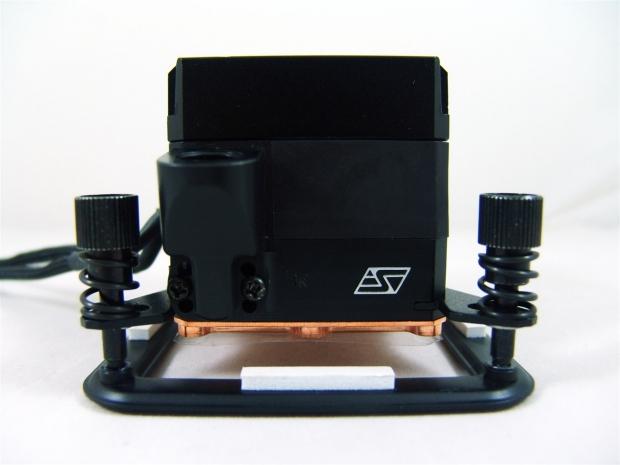
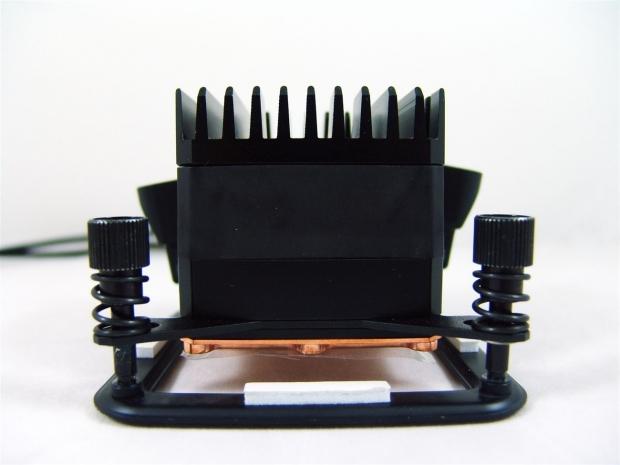
The base as you can see is very finely polished, and there are no remnants of the milling process. I did notice that the center of this base does sit a touch higher than the edges, but that is good as it will flatten out for better contact with the mounting pressure on the socket.
Inside the Apogee Drive II
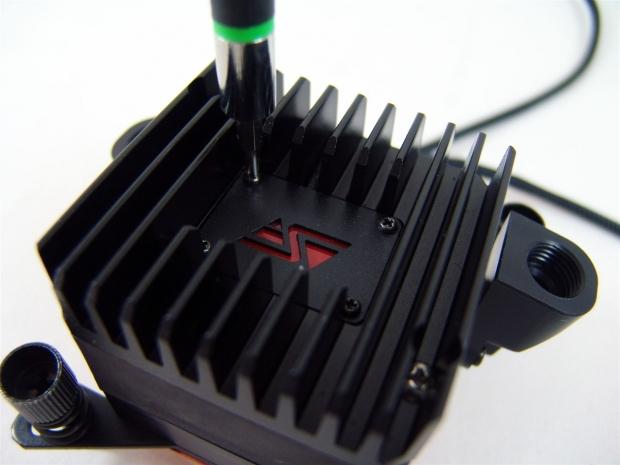
First I wanted to just change out the LED plate, not because I don't like red, I just like blue better. At this point you have to remove the four tiny screws and the metal plate with the logo cut into it will lift out of the way.
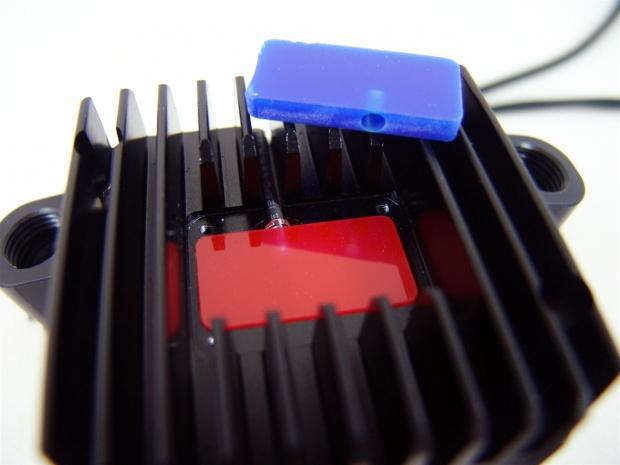
Once the metal plate is out of the way you can now see the LED pushed into the top of the red plastic block. All I do now is lift the red out and install the LED into the hole in the blue block, and then replace the metal plate.
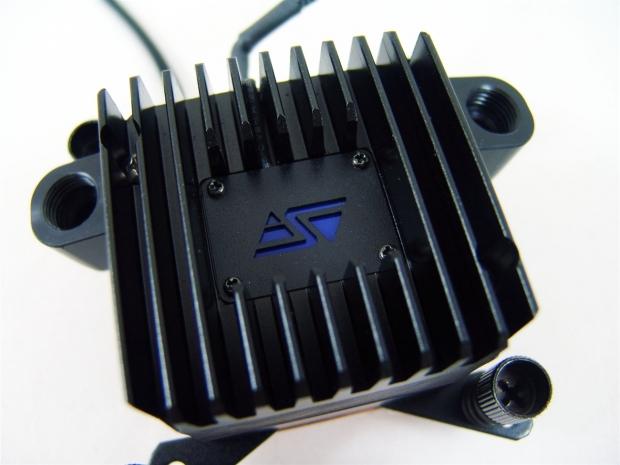
And here you have a blue version of the Apogee Drive II. I didn't go with the green because I don't like it as much personally, but the process is exactly the same.
Since the POM pieces on the side are adjustable, I thought ahead and removed one to set up an angle that will allow this to point toward the GPU in the loop. What I found when I removed it was a bit of "garbage" hanging about inside of it. It came out simply with some tweezers, but it's not something I like to see in something billed as top quality.
With the outlet now back on, you get the idea of how adjustable these pieces are. Of course there are only three positions, but with angled fittings you can go wherever you need to, it is just very handy to have some built in options.
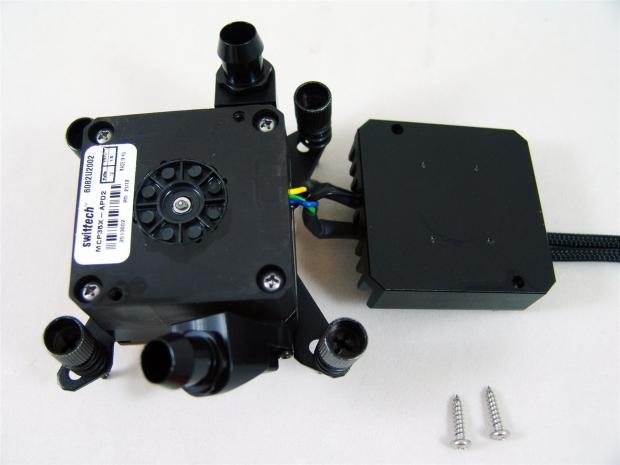
There is really no reason why you should have to do this, but I went ahead and removed the screws going into the pump and this allowed me to separate the aluminum from the pump. Of course there isn't TIM here as it wouldn't do much good, this is just a cover as well as a bit of a functional heatsink for the pump.
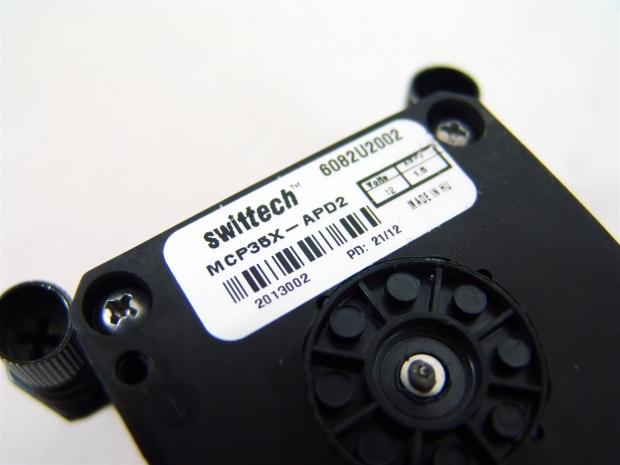
In case you missed it in the last image, I wanted to be sure to show that this is in fact the same MCP35X you can get retail, just that it has been specifically adapted with a top for the water block portion.
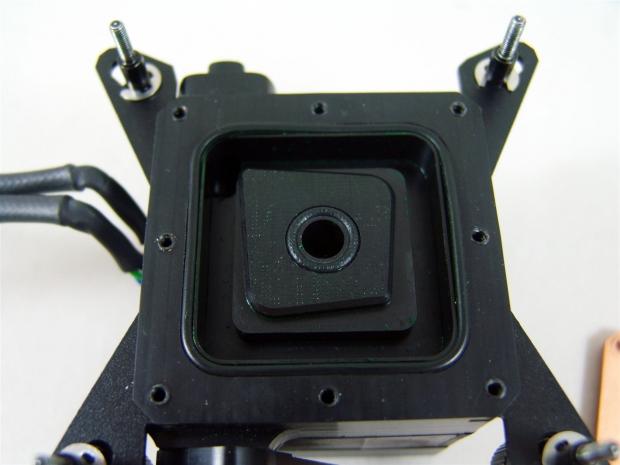
Flipping the ADII over and removing the copper base plate shows the left over green coolant used to pre-test the block before it left for my house. The way it works is to force water through the center into the base plate, and returns in the top left corner and goes to the outlet.
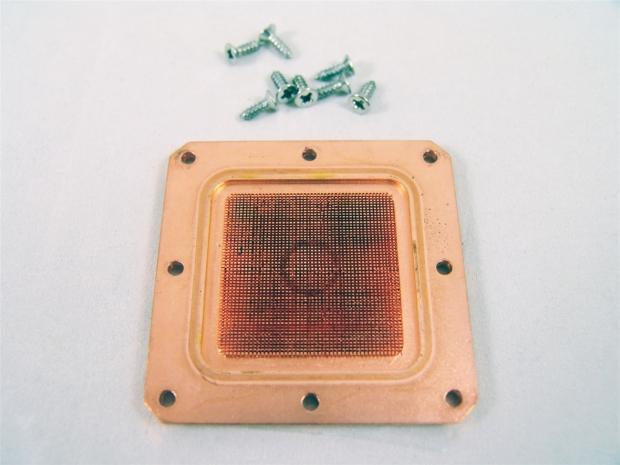
On the inside of the copper base you can see the ring the o-ring left in the center of the 255 micro-pins. That along with close tolerances forces the cooled liquid through all of these fins and is then collected around the outside edges to return as heated liquid.
Since the block was pre-tested, some of the coolant had oxidized the base of the Apogee Drive II. So to be fair, as I usually do, I removed any oxidation and discoloration to give the mating surface its best chance of thermal conductivity.
Installation and Finished Product
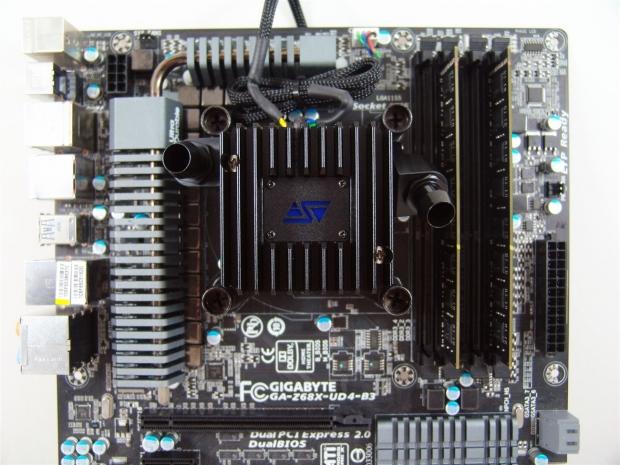
To get to this all you need to do is set the back plate in place and screw the thumbscrews in alternating to keep it level. All I had to do next was tie up a bit of wiring for the 4-pin fan connector I placed on the CPU header. The Molex connection running over the top will get connected later.
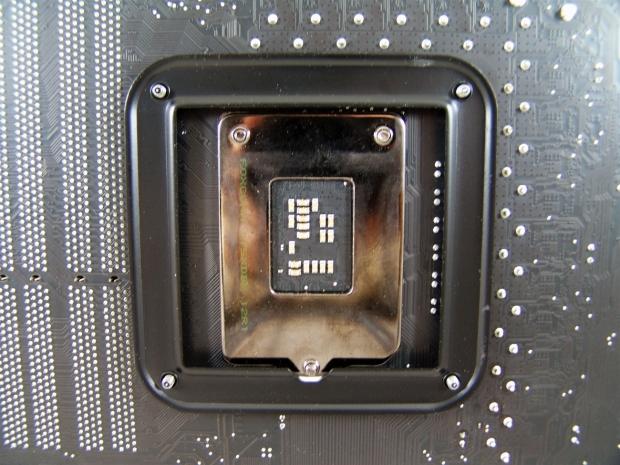
In the back, with the screws all the way in, the only thing you may need to worry about is placing the notch in the correct spot as not to bind on the socket screws. On top of this one, just like the 1366 version, there are four white pads to isolate it from the motherboard.
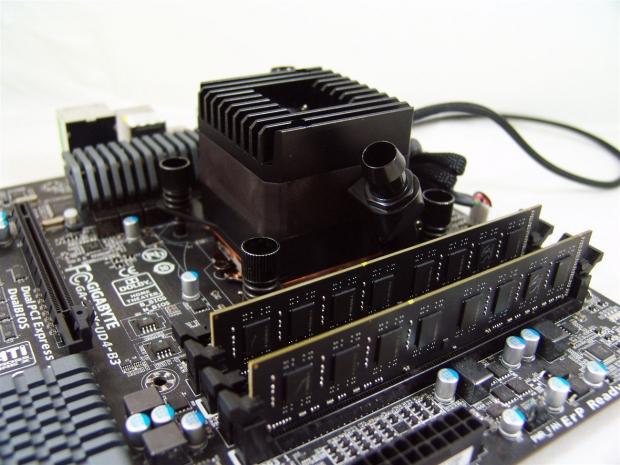
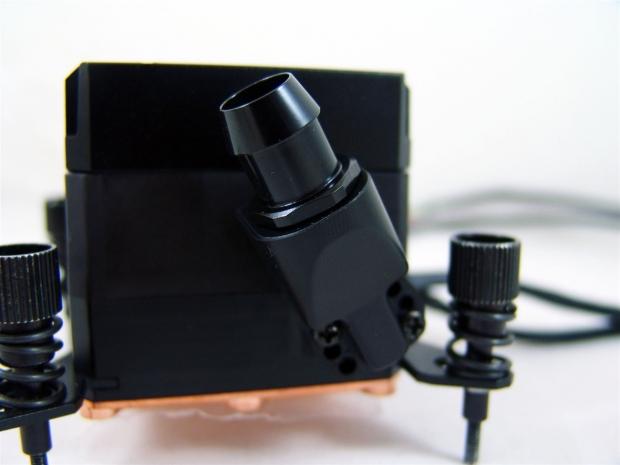
I just wanted to take a picture from this angle to give you an idea of the overall height. What you are seeing is a block with a pump on top that is still shorter than some of those fancy heat spreaders on memory.
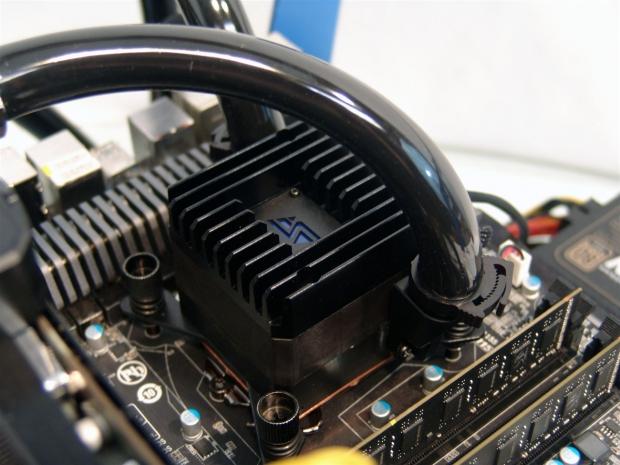
I raised the angle just a bit to show you what I was talking about. Even with the inlet and outlet hanging off the sides, I am well within the CPU constraints, but I can also still populate all of the memory slots.
I went ahead and grabbed some black half inch ID, three quarter inch OD tubing to use for testing purposes. You can see that with the plastic clips provided it is no problem to get them around even the thickest of tubing choices out there.
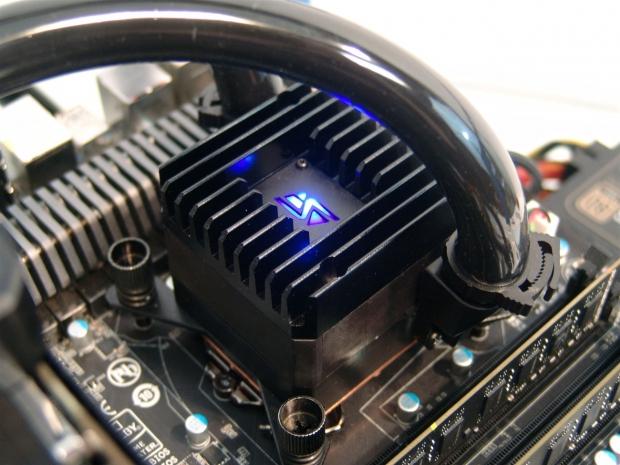
Powering up the PC brings the Apogee Drive II to life. Along with an ever so slight hum of the pump at 4500 RPM, the LED inside of the heatsink illuminates and is pretty darn bright. You can easily see it in any rig as long as the tubing doesn't block the angle of view.
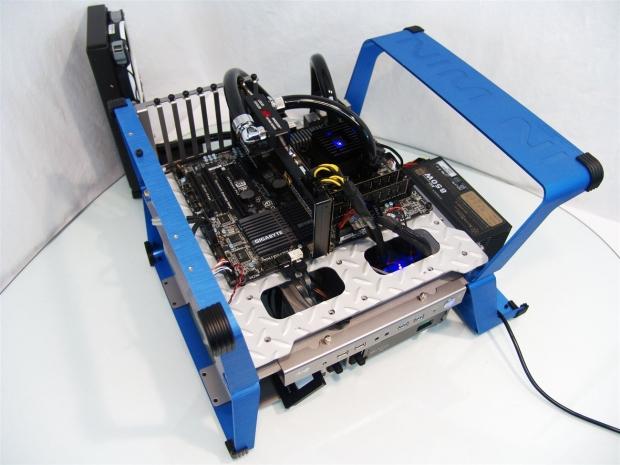
Here we have the loop filled and all the components ready for testing. You may also notice another component that I will be doing the review for here in the next day or so. Keep your eyes peeled for that one.
The Test System and Thermal Results
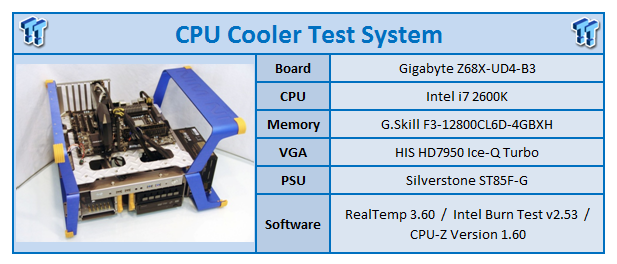
I would first like to thank HIS, GIGABYTE , InWin and AVADirect for supplying products for me to test with.
Testing for the CPU coolers is done with the use of RealTemp to ascertain temperatures, Intel Burn Test to deliver the load to the CPU and CPU-Z to verify the CPU speed and the voltage being used in Windows. All of the testing is done with an ambient temperature of 24.5-25°C and humidity is maintained to 35% sometimes less.
For the "stock" runs, it's more of a plug and play setup where the PWM of the motherboard is in control of the fans speeds for both the idle and load results. Speed Step is active and the processor idles at 1600MHz and loads at 3500MHz for the stock settings. I also set the memory to run at 1600MHz for stock. As for the overclocked runs, I load the CPU at 4.5GHz and idle results are obtained with 7.5V to the fans while the load run is set to deliver 12V to the fans. This allows me to gauge the lowest and highest fan ratings for my charts.
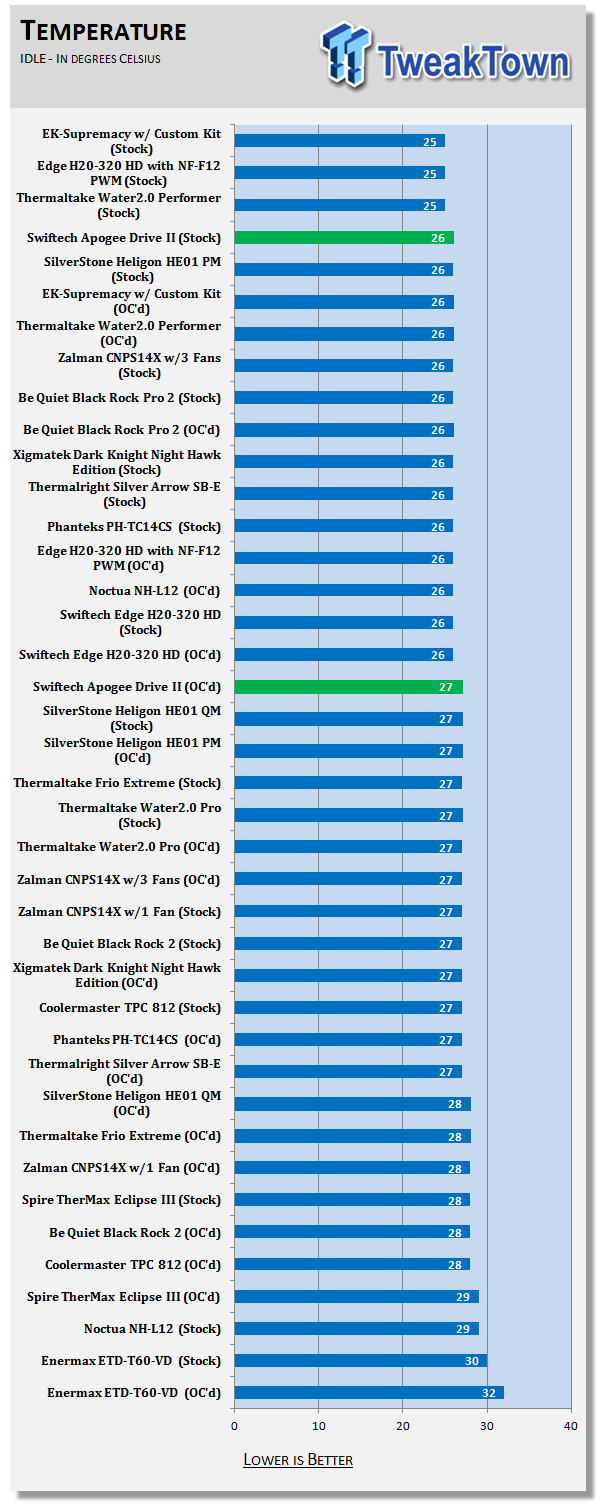
The idle temps were just a touch warmer than the Edge HD testing, but these results reflect the use of the MCR240-QP and those Corsair AF140 QE fans I put on there. I did run the test with the radiator and pump combo from the Edge HD kit with the Apogee Drive II as well. With the larger radiator and now dual pumps in series, I was able to drop the idle temperature to 25 degrees, as well as lowering the overclocked results from the 27 degrees with the MCR240-QP, with the Triple 120mm radiator in play; I stayed at ambient as well.
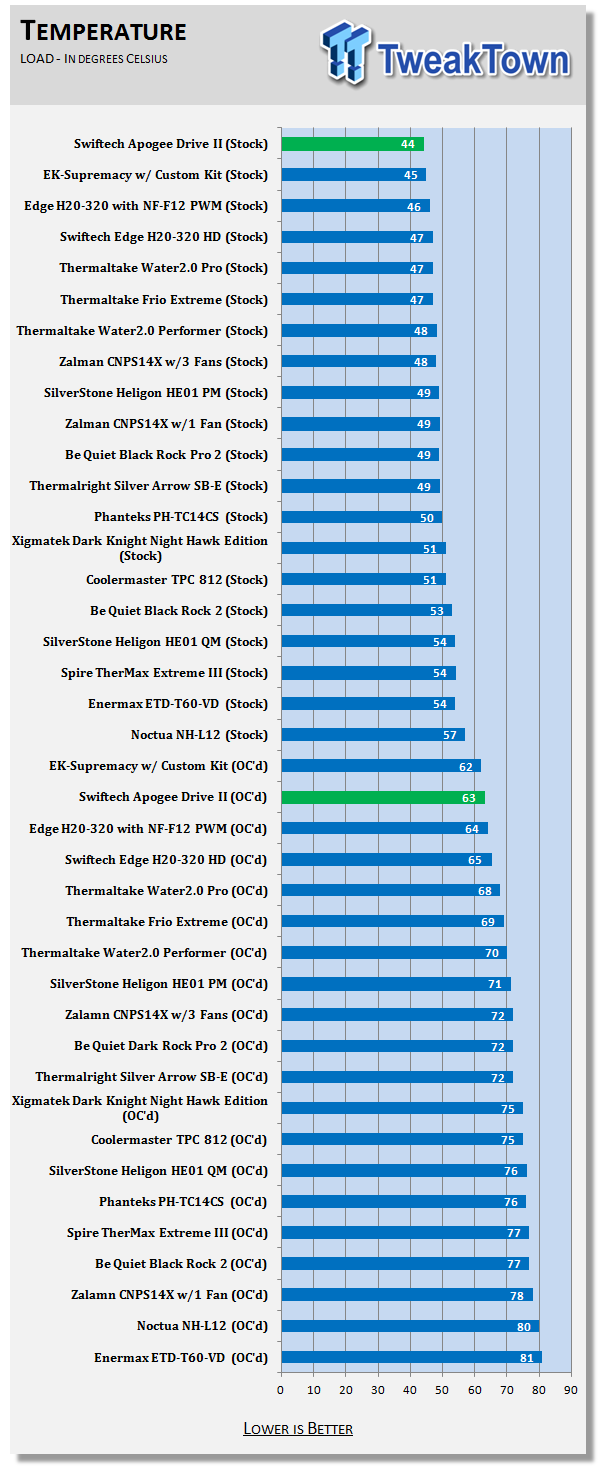
What is the biggest shock to me are the thermal results on the loaded end of it. The results on this chart are with the use of the low RPM fans and MCR240-QP. Even so, with less surface area, slower fans, and virtually no noise at all, the Apogee Drive II was able to take on all comers to my testing and prevail as the current leader. At this level, the switch to the older triple radiator and fans, I was only able to pull another degree lower with my testing. While not a huge amount, it does show that the rest of the setup is as important as the block choice in some instances.
Final Thoughts
Now you are not mistaken, there are no audio results, and here is my take on why I didn't feel it was needed. As for the fans, radiator, case, power supply, and potentially other variables from my system to yours, the results I had with my radiator are likely going to be very different from everyone else's builds. If you want to know specifics, the fans on the radiator were delivering about 35dB of noise to the room, and the block was in audible from three feet away once the loop was bled out. This is why I say there is no real audio to report other than when you are trying to bleed the loop, then there is an obvious whine and spinning whir you have to hear until all of the air is out and the loop is flowing correctly.
I really like what Swiftech did with the Apogee Drive II. It takes away leak points, simplifies loops and cleans up the tubing runs, and adds a stylish component to your build with the flash of LED to dress things up. The performance of the unit was surprising; the Apogee Drive II didn't let me down in the least. I also did end up checking the temperature of the aluminum heatsink on the top, and I have to say it was working very well. With and IR thermometer, I got a reading of 41 degrees at the maximum end with ambient of 25 degrees. Since POM doesn't transfer heat that good, the heat I was seeing was being delivered by the pump. Even so, with this design, there is obviously very little heat dump from the pump into the coolant to achieve such efficient levels of cooling.
I did find a bit of garbage left over from the milling process of the POM in both of the inlet and outlet ports. What is funny is that it wasn't attached, but rather some sort of a snag-zone. I was able to remove the little bits of plastic, but since the block was obviously tested before I received it, I am not quite sure why they chose to stick in there rather than on the micro-pins of the copper base. Since the issue was easily rectified, I won't hold it against Swiftech; this is more of a request for a better eye on the quality control of the products before they leave for the customers.
With the good and the bad out of the way, I will tell you what I think about the Apogee Drive II. I don't really care what system you are building, this is a perfect solution to any water cooling build. I mean, what more do you want from a purchase than to be able to beat the competition? And I mean hands down beat them. As much as I didn't follow the recommendation of the right RPM fans in favor of silence, and using a 2 X 140mm radiator versus a 3 X 120mm I used in all the other tests, the Apogee Drive II integrated pump and CPU water block is just too good to pass up, and will be going into my next build for sure.
Swiftech did a great job with the development, incorporation of ideas and components, and pulled it off to deliver a product that should shock and awe those who thought they had the best CPU block money could buy - that was until they saw this.

 Lian Li B4-mATX Review: a compact mATX SFF case with excellent airflow and premium features
 Ocypus Sigma F36 BK ARGB Cooling Fan Review: high airflow and unified design in one frame
 PCCooler CPS RZ820 Display Review: a flagship-level CPU air cooler with an LCD screen
 MOAIPLAY ORA PRO G1 850W ATX 3.1 PSU Review: high efficiency and 10-year warranty for $119.99
 NZXT H6 RGB+ Compact Dual-Chamber Chassis Review
 God of War Laufey gets a release date and Kratos is making a return
 GTA 6 trailer 3 expected to arrive within two weeks, according to insider
 Thieves stole 16 RAM sticks from Chinese eSports hotels, arrested
 Lisuan LX7G100 GPU achieves playable FPS in system with no Intel AMD or NVIDIA hardware inside
 Elder Scrolls 6 roadmap not affected by layoffs, Bethesda says
 Intel and AMD are locking Chinese customers into long-term CPU deals as server chip prices climb more than 40%
 Ubisoft CEO says Sony's PlayStation disc shutdown will not disturb the industry too much
 Vibe coding is flooding the App Store with new apps - on track for record submissions in 2026
 Geekbench 7 is out with CUDA support, smarter multi-core scoring, and new AI workloads across all major platforms
 GTA 6 physical copies in Japan have a 170-day expiration date
 Thrustmaster T.Flight HOTAS 5 MSFS Edition Review
 SteelSeries Arctis Nova Pro Omni Wireless Headset Review - One Headset to Rule Them All
 SteelSeries Arctis Nova 7 Wireless Gen 2 Headset Review - New and Improved, But Is It Enough?
 AMD Ryzen 7 7700X3D Review - Days of Future Past
 Samsung 990 2TB SSD Review - Ninth Gen QLC at PCIe Gen4 Speeds
 ASUS ExpertBook Ultra (Panther Lake) 14" Business Laptop Review
 ASUS ROG Raikiri II Xbox Wireless Controller Review - Ready to Take Control
 MOZA FMP18 Panel Bundle Review: authentic F/A-18 Hornet cockpit controls for flight sims
 Micron 6600 ION 245.76TB Enterprise SSD Review - Best in Class Programming Speeds
 MOZA MA3F EFCM Flight Control Module Review: authentic Airbus A320 autopilot panel for simulators
 The Ultimate Guide to Personalizing Your Windows 11 Taskbar
 How to Turn Your Windows Laptop Into a Second Monitor with Miracast and Wireless Display in Minutes
 6 Mistakes to Avoid When Buying a Windows Laptop
 I capped Windows Update's bandwidth with Delivery Optimization, and my downloads stopped choking
 I use this decade-old free tool that finds files faster than Windows Search does
 I install and update most of my apps with this Windows command now, and I stopped downloading sketchy installers
 Hisense U6SF 65-inch MiniLED TV: High Performance Meets Leisurely Convenience
 I stopped digging through Windows menus after I set up this one folder
 Don't sell your Windows laptop until you do these things
 6 PC cleaning mistakes to avoid for safer hardware maintenance