Introduction
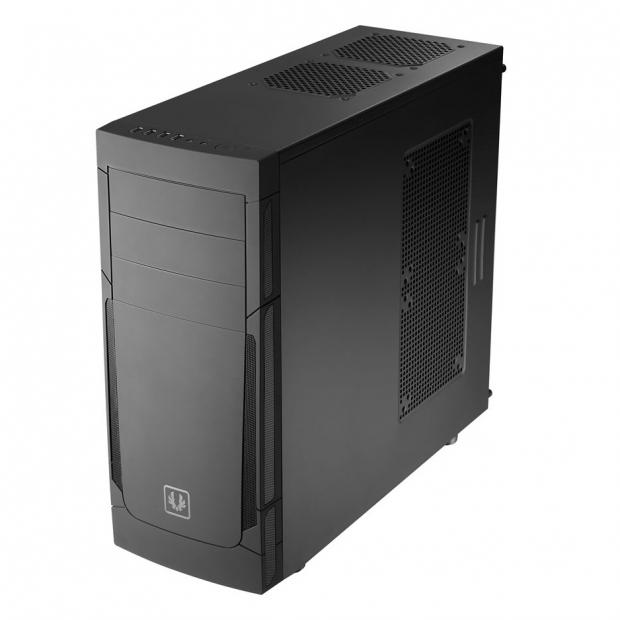
Since I am part of the BitFenix "Inner Circle" at the forums (sort of the BitFenix Illuminati group, where BitFenix enlightens a select few members of its upcoming ideas), this is where I first learned of this basic concept. Not that the normal forum members aren't important to BitFenix, it is just that the Inner Circle members get to look at pre-release designs and comment as to what can make or break sales of a chassis design. Usually it comes down to picking favorites out of a group of four or five concepts, which proves that at every step of the design, BitFenix isn't just looking at the finished product in only one way. In my experience BitFenix is run like a democratic think-tank. So everyone has great ideas which are drawn into concept art and in a very democratic fashion, all ideas are voted on and let the best persons idea speak for itself with the results of the vote.
To date, from BitFenix I have seen some really unusual designs such as the Survivor and Colossus, but in more recent times they have moved to more widely acceptable aesthetics and design layouts. Of the last pair of chassis designs, both are more of the usual suspect when it comes to mid tower cases, yet still have things that make them stand out when scrolling through what seems like an endless list of chassis purchase options. To stand out against the competition, one option is to paint it white to sell massive amounts of cases, because truly, black on black cases are everywhere. Even though BitFenix lowered the bar for stand out aesthetics and general "wow factor", they have, in my opinion, delivered a mid tower gaming chassis that in my mind has a trio of reasons why this new chassis will stand out against the rest.
Of course, with BitFenix, SofTouch is something we expect. The top of the chassis' we are going to look at today, the BitFenix Outlaw, has the entire front bezel receiving the SofTouch coating. This makes all the surfaces that you are going to be using daily finger-print resistant, and with a damp cloth can quickly be cleaned to keep the chassis looking perfect. The second feature that stands out to me is that the Outlaw is a left hand drive chassis. Explaining this will also bring us to the finish of the trio, and that is that they turned the case on its head inside. With a Reverse ATX or Inverted ATX layout, the basic design lends to better thermal dynamics inside of the chassis, not to even touch on the fact that it just looks awesome with all the hardware mounted upside down. With these features in mind, I never touched on the fourth to this list, and that is the sub-$50 pricing that allows anyone to be able to buy something really cool from a manufacturer who has proven to make great things up to this point.
Specifications, Availability and Pricing
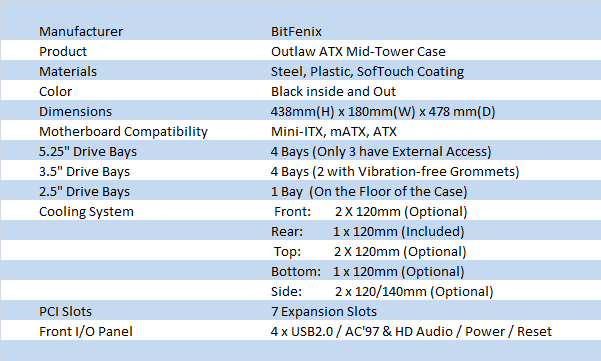
The all steel constructed Outlaw receives a black textured paint finish on all metal surfaces. To go along with all the black of the steel frame and door panels, the plastic front bezel receives a full covering of SofTouch coating that I have really come to love on BitFenix cases. In this bezel there are three external 5.25" bay covers, also coated with SofTouch, and long mesh covered slits that run up the sides for ventilation. At the top of the bezel is where you will locate the I/O panel with its four USB 2.0 connections, audio jacks and power and reset buttons. As I mentioned, this is a left hand drive chassis, which means it should sit on your left, at least for easy access to the internal components.
The internal layout is a bit different than the usual chassis design. Being left hand drive, the motherboard tray is moved to the left side if looking at the chassis head on. To orient the rear I/O in the rear of the chassis, you need to invert the motherboard to do this. Since the bulk of the interior is used for this, that leaves us with the four 5.25" bays, four 3.5" bays and the mounting holes in the floor for a 2.5" drive taking up the left side of the chassis as you look into it. Wire management is still considered, even with the motherboard tray being pushed to the door panel with little room behind it for much more than a fan cable. Management is a bit limited to two small areas behind the 5.25" drives and the 3.5" drives with use of cut outs in the steel frame giving you some ability to put longer wires somewhere out of site.
The cooling inside the Outlaw is very basic as it comes shipped. Inside the chassis there is room for five optional fans as the sixth hole is already covered with the one installed 120mm fan. The top of the chassis will allow for two 120mm fans to be installed, as does the front of the chassis. The floor offers room for a single 120mm fan while the right side panel of the chassis has room for either a pair of 140mm fans or a pair of 120mm fans. On top of all of the air cooling options, there is a pair of holes to allow tubing to pass through the rear of the chassis. For those who plan to water cool in the Outlaw, there are options for you to look at in that respect.
The most important factor to most buyers, no matter how cool the case looks or what it offers, always comes down to the pricing. Taking a look around, I am finding that locations to buy the Outlaw are slim at the moment with only three results coming up via Google shopping. Xoxide.com, AntaresPro.com, and Outletpc.com are the three I was able to locate the Outlaw. AntaresPro has the best initial pricing at $47.25 prior to shipping, but once included drove the price well over $75. The deal at Outletpc.com for $49.98 even with shipping added is the best deal to be had that I can find. They are only requiring an additional $11 to get a case to me, where the others want almost $30 to ship the same chassis. You can always play the waiting game to see if more retailers will take on the Outlaw into their stock, but for those who have to have it now, I took the shopping decision out of it, so let's see what this $61.40 investment gets you!
Packaging
The Packaging
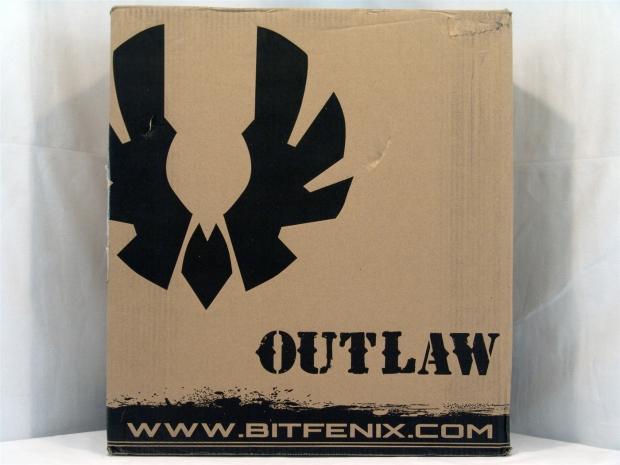
To help keep the money in the case and not the packaging, BitFenix like many others, opted for the elegant brown cardboard and black printing theme. On the front of the packaging it is kept very simple with the Fenix logo, the Outlaw naming and the web address at the bottom.
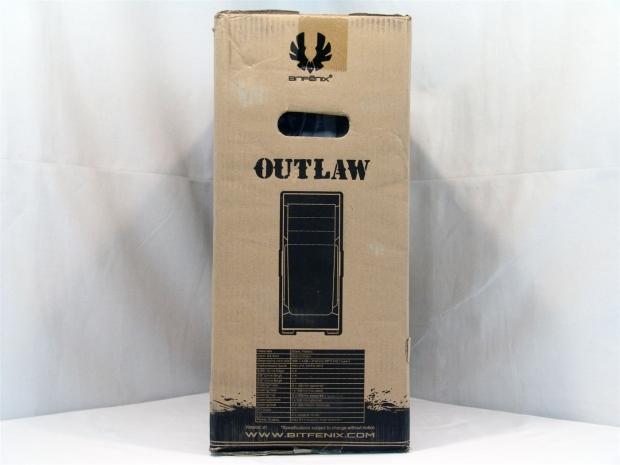
This side gets topped with a logo above the carrying handle. Below is the Outlaw name and a look at the front bezel of the chassis. Even further down the side panel you see they placed a small specifications chart too.
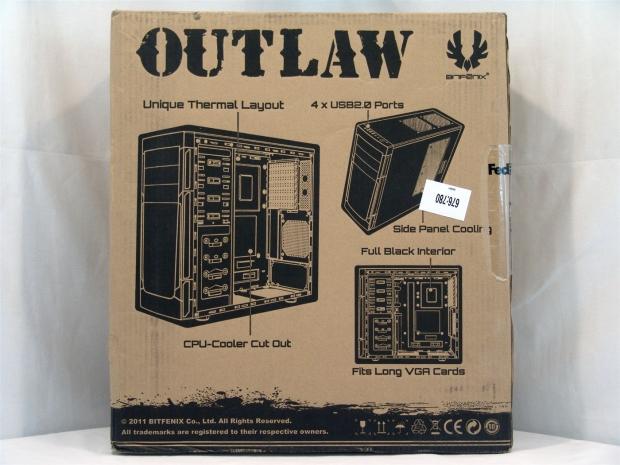
The back of the box is where BitFenix displayed most of the key features of the chassis with illustrations and pointers to be specific. They cover the "unique thermal layout", the CPU back plate access hole, USB 2.0, side panel cooling, coloring, and that it can house longer graphics cards.
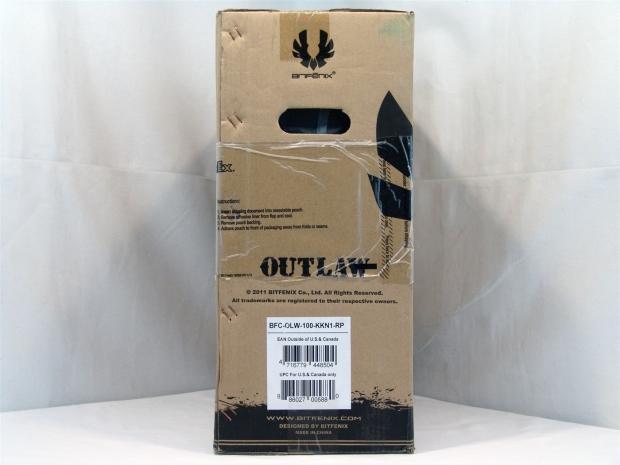
The last side panel has very little to offer aside from the name of the chassis, some legal speak and the sticker at the bottom with the full model number of the chassis included inside the box.
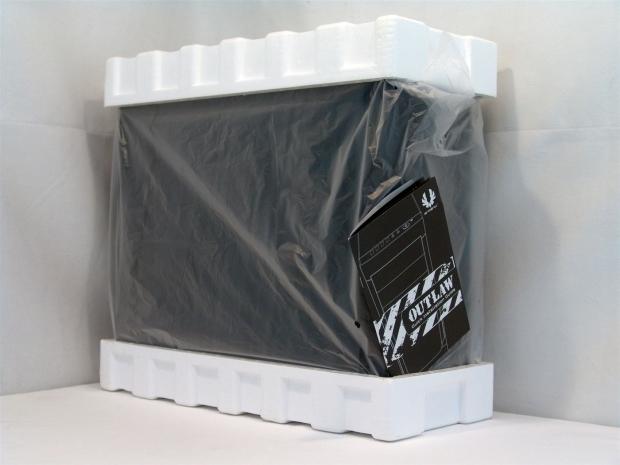
Again, keeping things simple to keep costs down, the use of a plastic liner and Styrofoam end caps to support and center the chassis are chosen. While this did allow me to receive a scratch free chassis, my sample did arrive with slight damage to the PSU area of the chassis. The manual you will find floating freely inside the box, I just stuck it in the foam to be in the image.
The BitFenix Outlaw Inverted Mid Tower Case
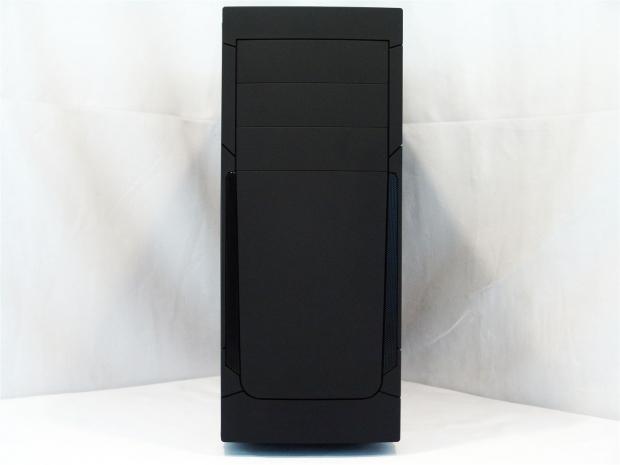
The Outlaw comes faced in plastic, but that plastic has the SofTouch coating which is flat and reflects nothing, so it stays clean looking longer and is super easy to clean. In this bezel there are three 5.25" bay covers, even though there are four 5.25" bays inside the chassis. The lower two thirds of the face is covered with a large panel and mesh in small vents up both sides.
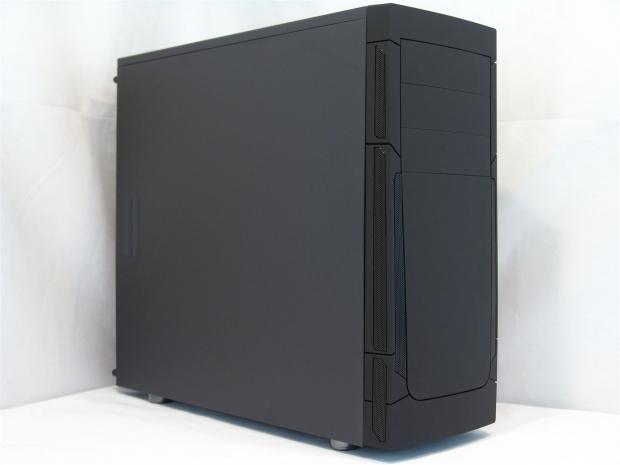
The sides of the bezel also have a bit of additional venting to allow as much air into the chassis using the solid front panel. On the left side, the panel is plain and only has bump-outs at the back to allow for traction with your fingers to remove the panel.
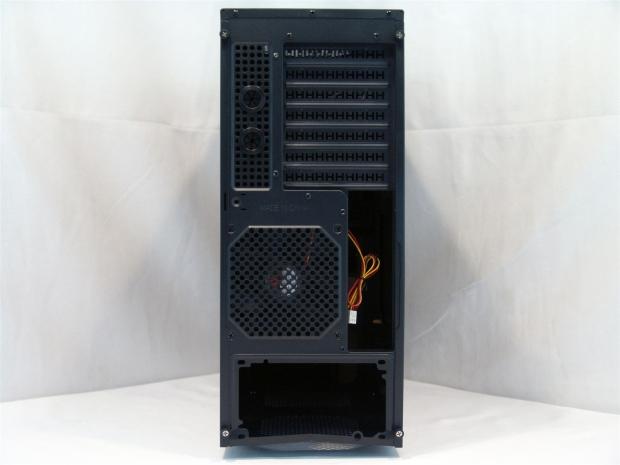
In the back, the top starts off with the seven expansion slots with the water cooling holes on the left of them. Due to its inverted nature, that leaves the exhaust fan on the right of the rear I/O panel. With this chassis the PSU gets mounted in the bottom, and you can see I got a bit of a dent in the floor of the chassis from shipping. This isn't BitFenix's fault, as you may remember, NZXT cases came in the same condition from the same shipper.
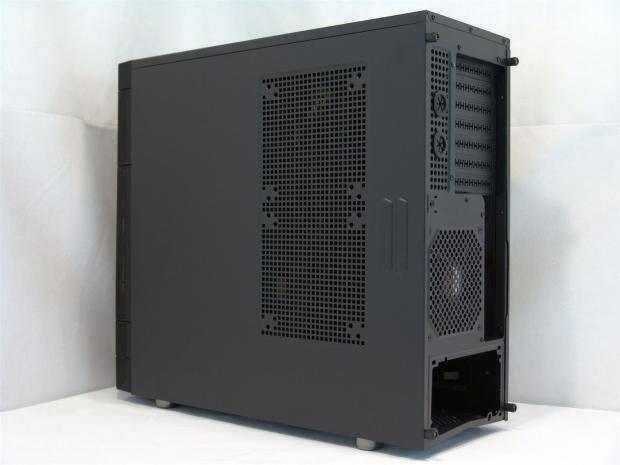
The right side panel is where you will gain access to the components, or rather where you would start to install them. This panel has the same finger pulls at the rear of the chassis, but this panel differs in that you can put in a pair of 120mm fans or even 140mm fans if you should choose to do so.
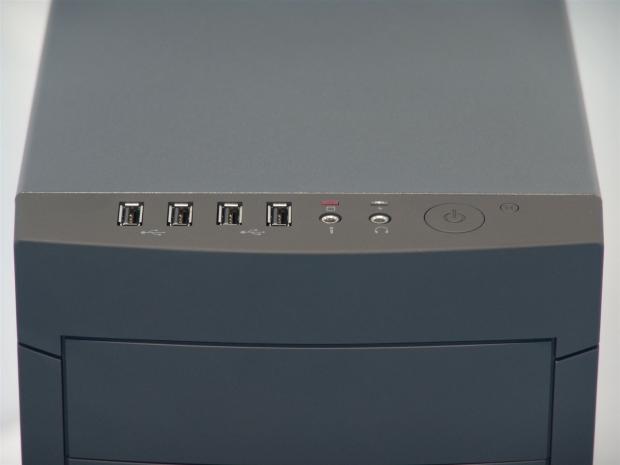
The front I/O is pretty basic and blends nicely into the SofTouch covered bezel. While there isn't any USB 3.0 connectivity, you are given four USB 2.0 ports, 3.5mm audio jacks, activity LEDs and the power and reset buttons.
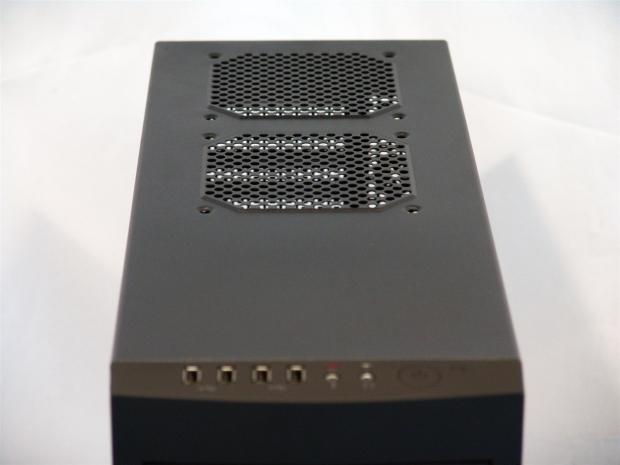
Stepping back to get a look at the top, The Outlaw allows for two more optional fans to be placed here. For these fans, there are only 120mm fan mounting holes, so there are possibilities for water cooling here too.
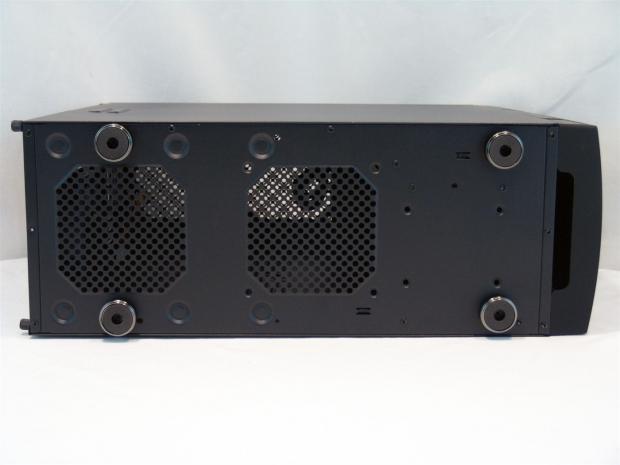
Under the Outlaw the case gets supported with large plastic feet that appear to have a black Nickel coating on the sides and rubber pads on the bottom. Left to right, you have the hole for the PSU fan, room for an additional 120mm fan and four holes at the right to mount a 2.5" drive to the floor.
Inside the BitFenix Outlaw Inverted Mid Tower Case
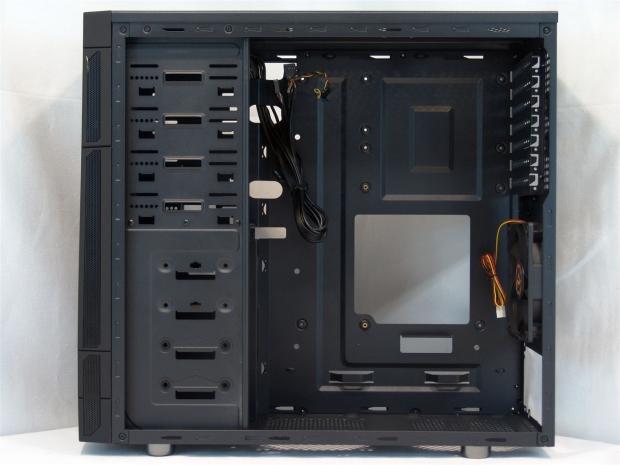
If you didn't quite have a handle on the layout, with the doors removed it is easy to now understand the inverted layout and general size of the room you have to play with inside the Outlaw. One thing to note is that on the side of the hard drive bays, it seems the paint didn't quite cover everything on the right edge.
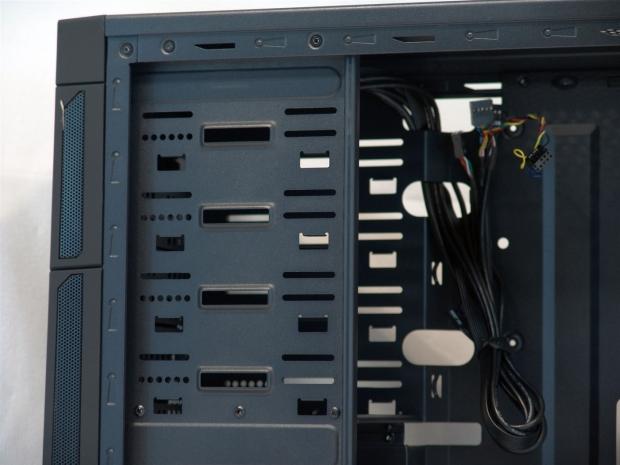
There are four 5.25" drive bays that don't use any form of tool-less mechanism, but thumbscrews are offered for mounting devices. The lowest of the drive bays does not have an external cover; it is actually used to help in fan mounting as you will see soon enough.
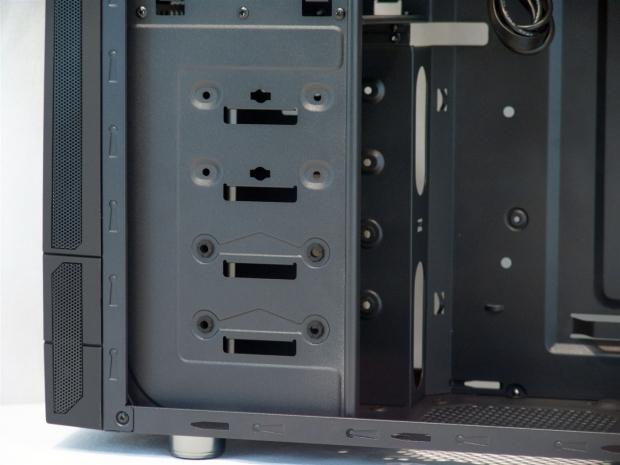
The four hard drive bays also use thumbscrews for mounting, but two of the drive bays have rubber grommets installed to keep drive vibrations at bay. The top two bays do not have the grommets, but you can still install devices there as well. If you plan on a 2.5" drive, it screws into the floor in this rack.
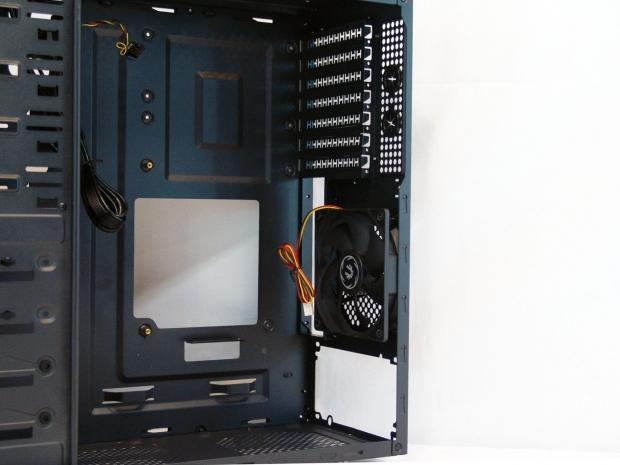
The seven expansion slot covers are break-away, and once removed the covers can't go back into the case. For mounting they again supply more thumbscrews. You can also see the only included fan with its 3-pin power connector.
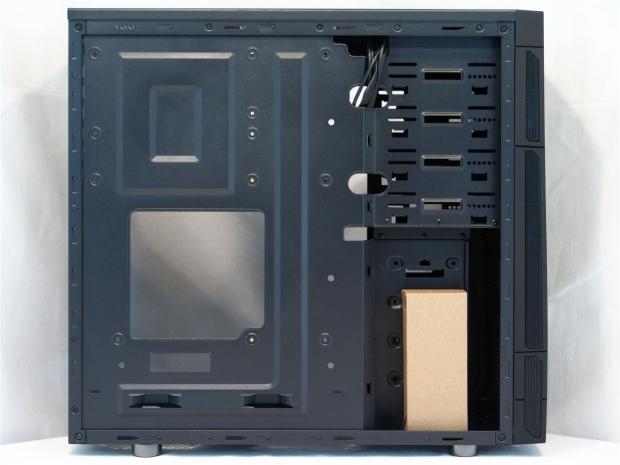
Behind the tray, as I made mention of, there is almost no room for anything thicker than a fan cable, and it's better reach to the right, because the power connector is too thick to fit. On the right however, next to the 5.25" bays there is close to ¾" and next to the hard drive rack there is just more than 1 ½" of room to tuck the wiring. This area is also where you will find the box full of hardware. To the right of it is where, if you wish to, slide in 120mm fans for intake to the case.
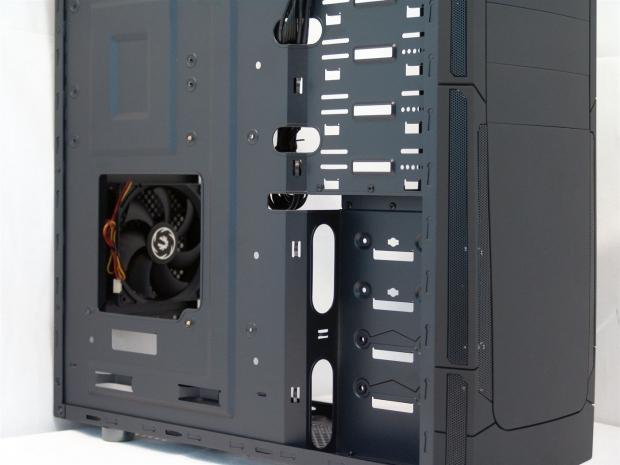
Since wires aren't meant to be behind the tray, the holes and tie down points are all very well placed. They are large enough to allow many thick wires to pass through and you will see with the board in place, that lining these up strategically was a thought in the design.
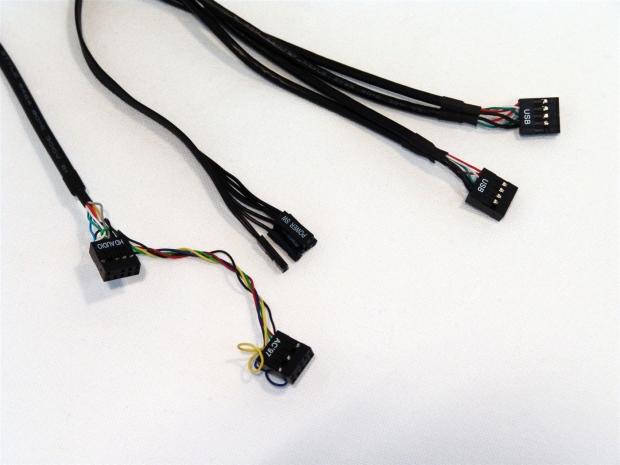
BitFenix gives you connections for the audio, motherboard power, reset and activity LEDs, and the pair of USB 2.0 connections. To help hide them as they run across the top of the chassis, they are sleeved black as far as they can be while still allowing enough flexibility at the end for easy connectivity.
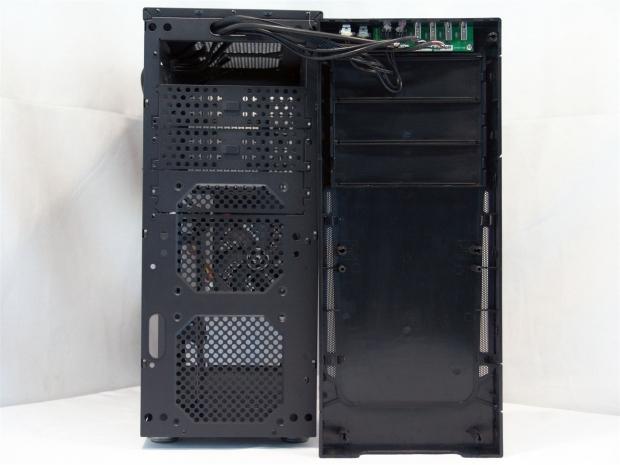
Those wires are connected to the front bezel and are routed through the hole at the top of the steel face to allow the bezel to snap back into place. Looking at the 5.25" drive bays, the bottom three have covers in place in the steel. The lowest of those is actually to help with a dual 120mm fan configuration as the intake to the Outlaw and is why there isn't access through the bezel.
Accessories and Documentation
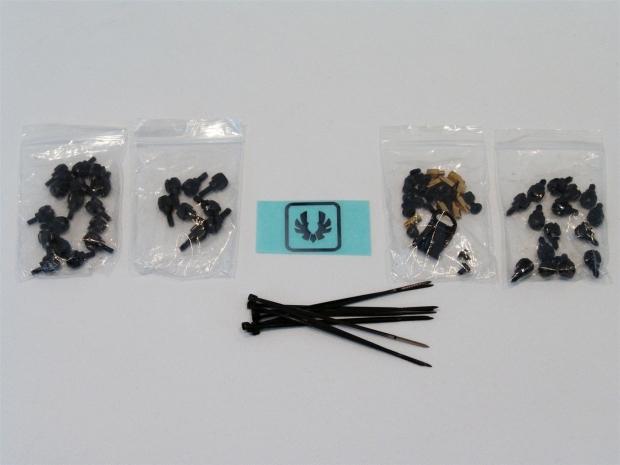
Inside the hardware box, this is the assortment of hardware I received. On the left is the first bag containing sixteen screws for the 5.25" devices. The next bag contains eight thumbscrews for the hard drive bays with rubber grommets. In the middle there is a BitFenix chrome logo that you get to place anywhere you want to on the chassis, and a set of ten wire ties.
The bag following contains the brass risers, the PSU crews, motherboard screws and the lock loop and its screw. That leaves the bag with the pointed thumbscrews for use with the expansion slots and the hard drive bays that don't have the rubber grommets.

The manual we found outside of the plastic liner is full of information. It starts off with a full list of contents and explains the hardware as I did, and even supplies measurements to verify which thumbscrews go to what installation. From there, with explanative text and images that lend well to the descriptions, all the component and optional fan mounting is very well explained as to leave nothing unanswered about the Outlaw.
The Build and Finished Product
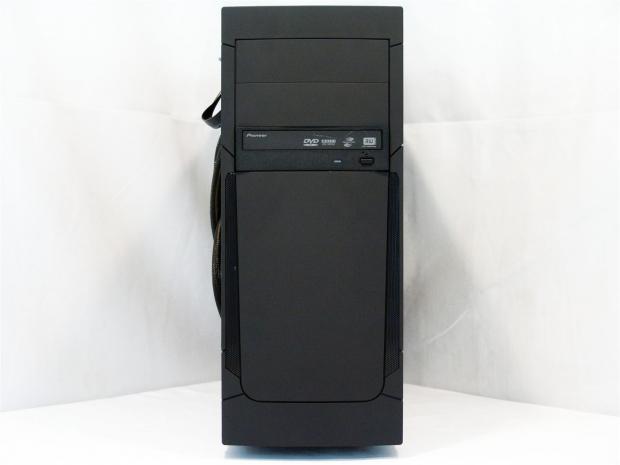
I tried to split the difference of the inset for the optical drive. I assume it is supposed to sit all the way in flush from side to side, but that really took from the smooth round curve that the Outlaw offers. I also did not apply the logo, as I prefer the sleek unbroken appearance.
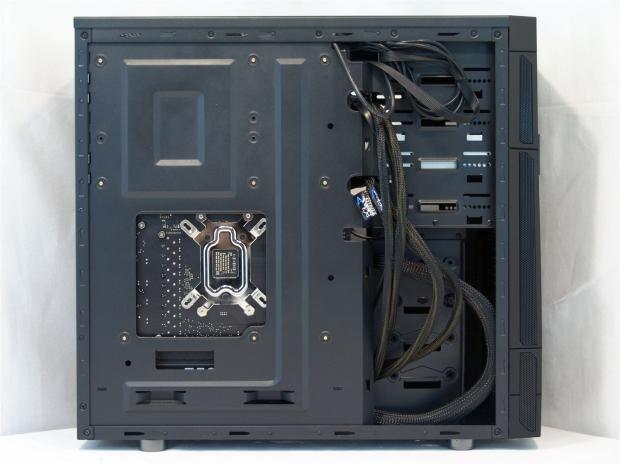
The access hole in the tray is rather large, but may not quite make it for every motherboard. Even though it does get slightly blocked from easy removal, there weren't any clearance issues with it to the tray. On the right side I was able to run the SATA cables, four power cables for the graphics cards, and even hid the bulk of the 24-pin wire in here. Even with all of this you can see there is plenty of room to even hide cabling from non-modular power supplies.
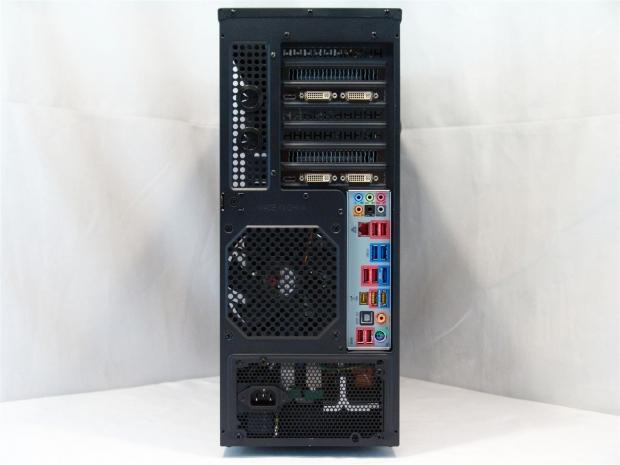
There aren't any issues that came to mind in the back of the chassis. The slot covers were simple to remove with a few twists, the rear I/o plate snapped right in, and with a bit of crafty metal persuasion, I was able to square things up to allow a perfect fit with the PSU.
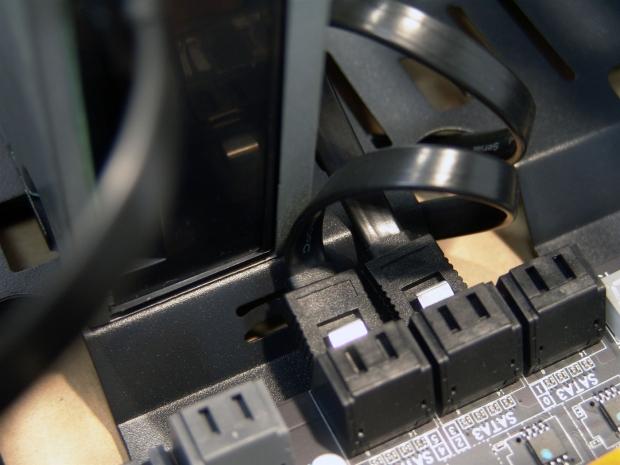
Something to think about as you align all of the hardware in the correct drive bays so they don't case conflicts against the motherboard. The optical drive I use is shorter, and even with this I ran into issues with the orientation of my SATA ports on the board. That brings graphics cards into play as well, you can see they can't be longer than the motherboard unless you are leaving the drive bays open in front of them.
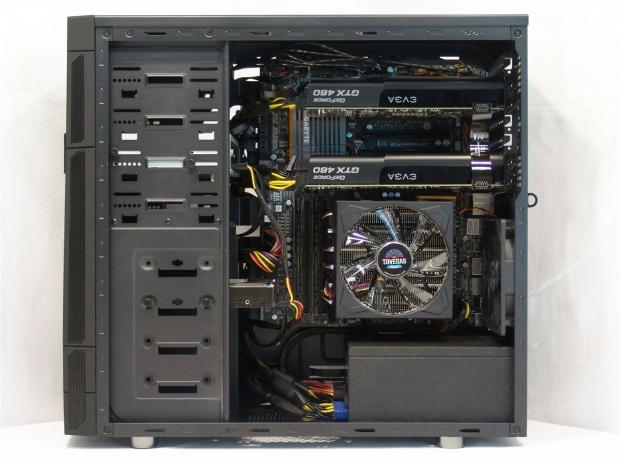
Aside from the close call with the optical drive, I really had not one issue getting everything installed into the Outlaw. As you can see with the inverted position of the 990FXA-UD7 the CPU cooler is at the bottom of the chassis and this puts the much hotter graphics cards up to the top of the chassis. Thermally this is a good idea, as with the cards under the CPU, convection allows the cards to heat the CPU too.
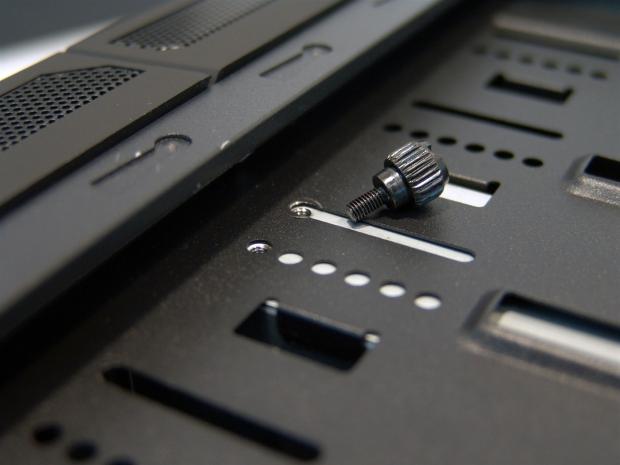
When I was trying to replace the door panel I did find that using screws in the first hole or at the front of the slot will not allow the tab behind the door to lock into the rail. Just something to keep in mind when choosing which holes to use when mounting drives in the 5.25" bays.
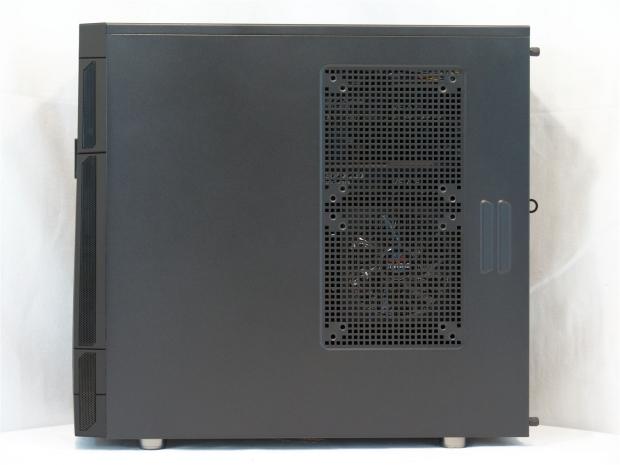
With the situation remedied and the panel now in place, the venting does allow you to see both the CPU cooler and the graphics cards. You of course have the option to install fans her if it fits your needs, but I like passive as well, just as venting.
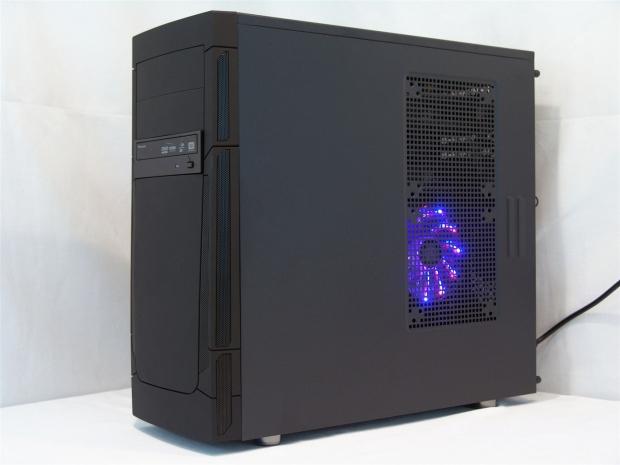
Powered up you are able to easily see the lighting of what is inside of the case. What surprised me a bi, is that even with just the one fan installed in the chassis, temperatures weren't getting out of control, nor were the fans running at full RPM. This bodes for even the almost passive cooling as it's shipped, does really well to allow the fans that are in use to easily get a supply of fresh air.
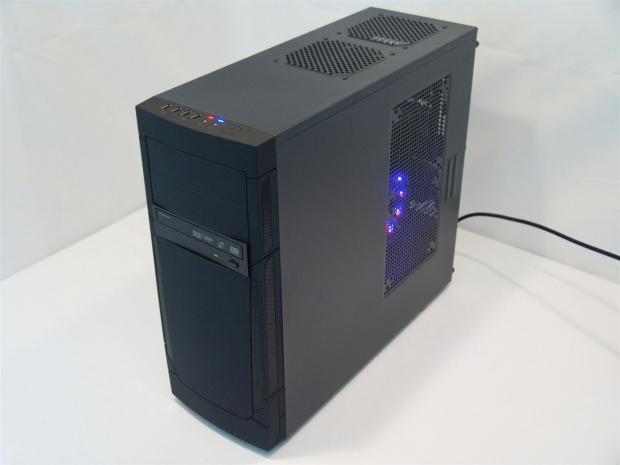
This last image was just taken to show the chassis with all the lighting active. For those who have issues against LEDs while you sleep, the top mounted LEDs will only blind you if you devised a way to sleep on the ceiling!
Final Thoughts
Not too long ago we saw a trio of cases from NZXT that were taking this sub-$50 case segment by storm with the Tempest and Source series cases. Head to head, the BitFenix Outlaw comes out on top while even missing some things included with the NZXT solutions. The Outlaw may be lacking USB 3.0 and it may not have aggressive styling, but the Outlaw definitely isn't the typical case layout, and the sleek and smooth front of the Outlaw is the hands down winner aesthetically. Even with the minor issues I ran into with the Outlaw, the only thing that was anything I can blame on BitFenix was the missing bit of paint on the drive bays. The rest of what I ran into was due to my choices of what I wanted to do versus what the case will allow me to do. Once looked at from another perspective, the latter issues were easily remedied by either moving a screw, or sliding a drive into a different bay. In the end I was pleased with the finished product and the unique internal layout and its thermal based design.
Cooling is a bit lacking as far as air flow is concerned as the Outlaw comes out of the box. The sole reason for this is to keep the pricing down. Simply filling all seven of the optional holes could easily raise the cost $35 to $70 or more depending on the fans you choose. For someone like me who salvage fans from cases and have a big pile of leftover fans, filling these optional fan holes can be done easily and cheaply. Even with only one of the eight fan spots being filled from BitFenix, the openings in the roof, side panel, front bezel and the floor allow for temperatures of both the CPU and GPU to be at acceptable levels. Given things were a bit warmer than usual, I was using a new CPU cooler as opposed to the one usually do, and it isn't as efficient as the previous one, so the couple of degrees of warmth I saw over some of the others is partially there for the blame.
The limited availability is going to be reflected in the score, but should not detract you from your choice in the Outlaw. Sub-$50 pricing has been done in cases as NZXT showed us, but BitFenix showed us that we don't have to expect the same old boring layout for that cost. The Inverted ATX layout is a case design that seemed to have gone out of fashion for some time, and we are seeing it popping up more and more again. BitFenix is the first to deliver us this sort of sleek and elegant look outside, with an inverted layout that will make a standard ATX chassis pale in comparison at this price point. If this case is as interesting to you as it was to me, I say you go over to Outletpc.com with their $49.98 pricing as they offer the best shipped to the door pricing I was able to find, and get the Outlaw Inverted Mid tower chassis! - As I mentioned, even with a couple of limitations, the final product is the best concept and aesthetic appeal combination for the price.


 United
States: Find other tech and computer products like this
over at
  United
Kingdom: Find other tech and computer products like this
over at
  Australia:
Find other tech and computer products like this over at
  Canada:
Find other tech and computer products like this over at
  Deutschland:
Finde andere Technik- und Computerprodukte wie dieses auf