

Introduction

Lately the market has finally opened up, and in mid tower designs these days we can find cases that aren't going to break the bank and come very well equipped. It used to be that $100 might get you an Antec 900 case, and with that you got some cool hard drive cages and a bunch of airflow. The internal layout was very simplistic, wasn't painted, and your ears took a hammering from the noise level that come from inside the case. I really like the fact that manufacturers are realizing that buyers don't have a ton of expendable cash, and are actually trying to offer us some lower dollar products that still offer variations on things found in the much more expensive cases on the market.
Whether you are in the need for a LAN case that isn't going to take up a bunch of room, or if you just don't need all the room a full tower offers in your office, we already know Thermaltake made big waves with the earlier releases in the Element series of cases. This is sort of a cross between an Antec 900 and all the finer points found in the various Element cases. Thermaltake just didn't stop there with this chassis, though. Not only does this new design carry USB 3.0 connectivity and a lot of tool -less features, it is fully painted inside and out, designed well, and offers a huge bonus.
Today we are going to be taking a look at the V9 BlacX Edition chassis from Thermaltake. This chassis offers all I mentioned above in a mid tower frame. Keeping the outside design simple and understated makes this design a bit of a "sleeper"; it doesn't stand right out and say buy me right away. It's only when you look deeper into the feature set and realize that this case also has the bonus of an additional Dual Bay Dock built right into the top of the chassis. I for one am eager to finally get to see this up close for myself, but I am also as eager to show you what you may have missed.
Specifications, Availability and Pricing
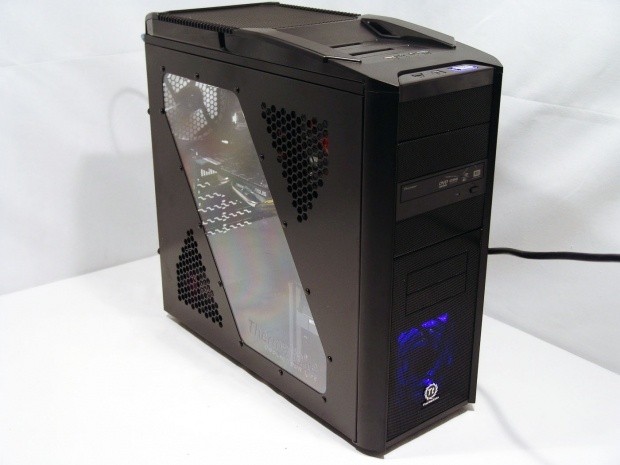
The BlacX Edition V9 comes with a shape very reminiscent of the Antec 900, but don't let the shape fool you. The shape of the top and the all mesh front is where the similarities stop. On the outside of the V9 the plastic of the top and the trim on the front are both textured to pair better with the flat black paint that covers all of the steel body and doors, inside and out. With a 230mm fan behind the Dual Bay Docking Station you get great ventilation with a super cool added feature utilizing room often left empty. While the specs show that these docks fit 3.5" drives, they also accept 2.5" drives as well. The left side panel has both a slanted, rectangular window, and it gets paired with a design stamped into the door. This stamped mesh design along with the window give the case the reason for the "X" in BlacX.
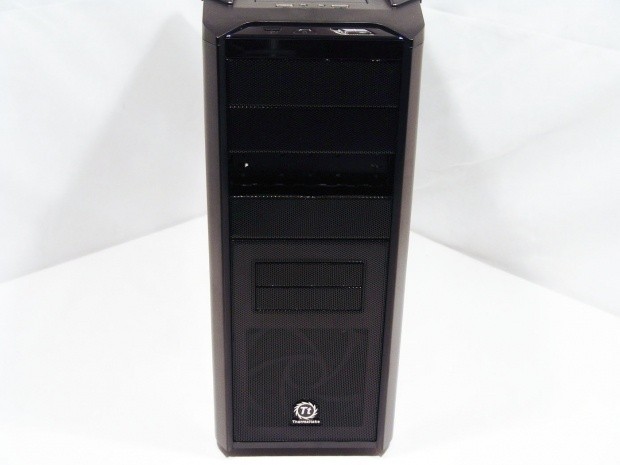
With four 5.25" covers on the front of the case, the specs showing only compatibility for three threw me off my game for a second. I then realized the top drive bay has the bottom of the Dock blocking part of it, and you also need room for the wiring. All three of the open bays utilize a tool-less locking device to lock the drives in. Under these you will then find room for up to five 3.5" hard drives with similar tool-less locks. Between the two are two floppy drive bays that go behind the adapter covers in the front bezel. The motherboard tray does not go to the floor and offers an easy way to run wires at the bottom of the chassis. As for the tray itself, there is a CPU access hole along with four places to tie the wiring down on the right side of the tray. In the back of the case you will find the 120mm exhaust fan with a pair of water cooling holes just above it. The lower half is made up of the seven expansion slots and their tool-less latches.
Paired with the 120mm exhaust fan that gets rated at 1300 RPM with 17 dBA of noise is another 120mm in the front, and the 230mm fan at the top. The 120mm in the front has a dust filter built in, blue LEDs, runs at 1000 RPM and puts out only 16 dBA of noise. The top 230mm fan does a good job of removing heat while it spins at 800 RPM and offers the lowest noise level in the trio at 14 dBA. I have to say things are really looking good for a silent, yet effective cooling solution; something my Antec 900 was not capable of at all.
Searching as I type this out, I am seeing a ton of stores carrying stock of the V9 BlacX, so you won't have any issue at all if you want to buy one. With pricing set at $99.99 at Newegg.com it leaves it on the higher end of average pricing that I saw. With some Googling you should be able to still find a reputable dealer and save a few dollars too if you would like. To sort of put this pricing into a better perspective, I looked for dual bay hard drive docks. Even the cheap ones are in the $30 price range and more specifically, the BlacX Dual Bay Dock from Thermaltake demands over $60. So in essence, you are paying a bit more for the chassis, but with a $60 addition, the dual Bay Dock is almost a free addition for the near $100 USD price point. I feel very comfortable at this point about the pricing, but let's dig a bit deeper and see if anything changes my mind.
Packaging
The Packaging
The front of the V9 BlacX has not only a great image of the chassis to look at, but it offers a bunch of information as well. Thermaltake made sure that we know that there is USB 3.0 compatibility, the Dual Bay Dock, and the fact that this is official hardware of the WCG.
Thermaltake is in many markets worldwide so it only makes sense that they list five key features on this side in twelve various languages.
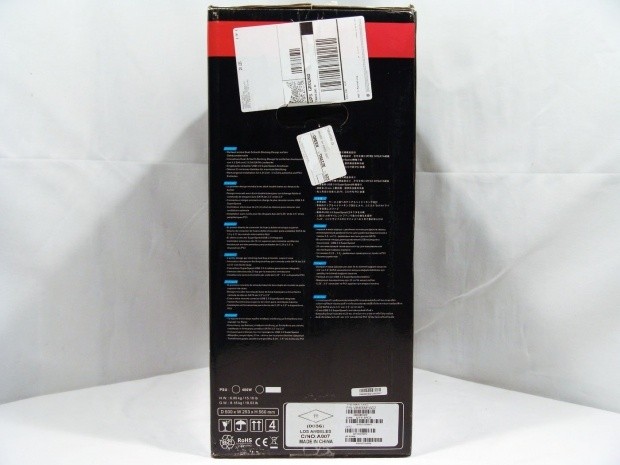
The rear of the box covers all of the features and everything you would want to see prior to purchasing a chassis. The Dual Bay Dock, USB 3.0, images of the tool-less features, everything gets its moment in the sun on here.

The last side shows an image of the BlacX powered up along with the part number of VM400M1WZZ.
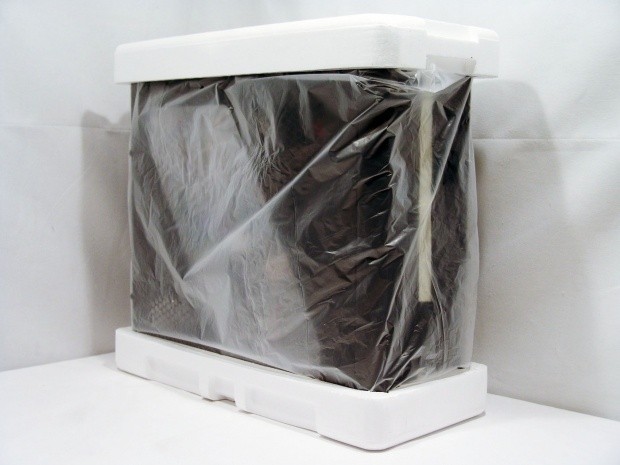
Between the thick cardboard of the box and the liner paired with Styrofoam caps, the V9 BlacX arrived in great shape, even though one of the bay covers got knocked loose in transit.
Under the first layer of packaging, Thermaltake covers the window inside and out with a layer of static cling plastic. The front I/O also gets covered, and is where the tape starts to hold in the drive bay covers. As you can see the second cover is MIA at this point, but I can hear it in there making some noise. I'm sure it just fell in behind the bezel.
The Thermaltake V9 BlacX Edition Mid Tower Case
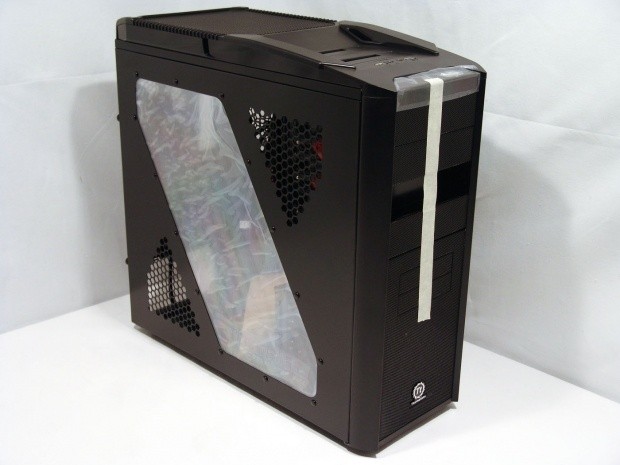
Down the front the bulk of the materials used here is the Steel mesh acting as covers and the intake at the bottom. Down both sides of the mesh are two textured pieces of plastic so that the bezel matches the sides. At the very bottom you will find a chromed logo.
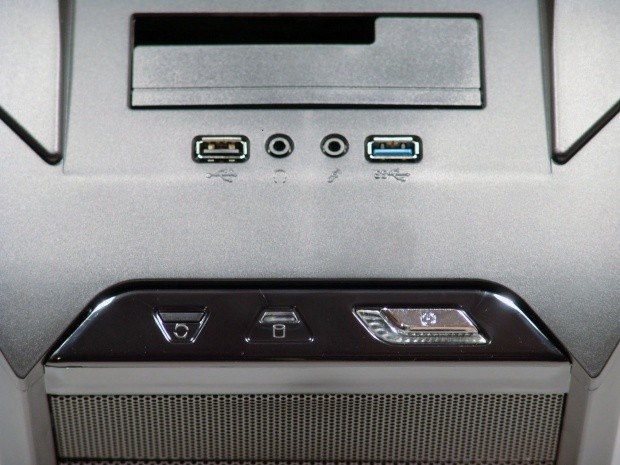
At the top of all the mesh you will find the power and reset buttons with the hard drive activity light between them. On the actual top of the chassis there is one USB 2.0 port, a headphone and MIC jack, and a USB 3.0 port.
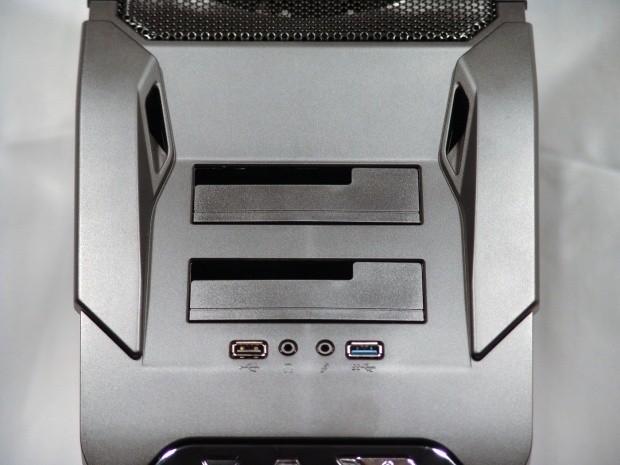
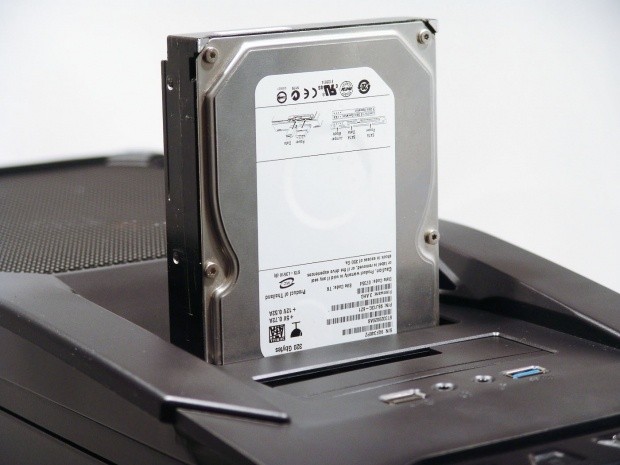
Typically where most cases offer a tray for your cellular phone or USB drives and cables, Thermaltake mounted a Dual Bay Dock to hot swappable hard drive access. This will allow for super easy transfer of games at the next LAN, or even a simple way to clone an OS drive.

Taking another step back you can see there is no wasted space in the top. With everything they already offered up top, they still found room to place a 230mm fan under the mesh to vent the case of warm air.
Looking at the side panel you can clearly see the "X" that the angled window and mesh design make together. The window is screwed into the panel and offers a good view of the interior while the vented sections allow for an inflow of air to the chassis.
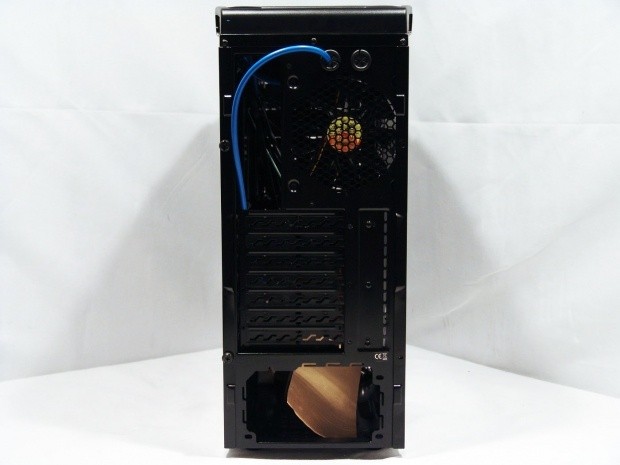
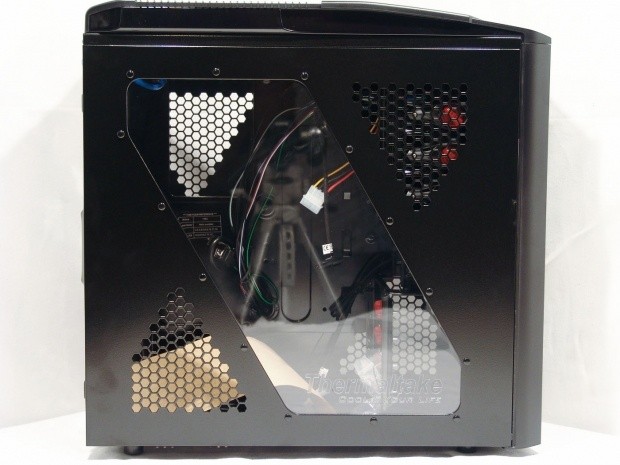
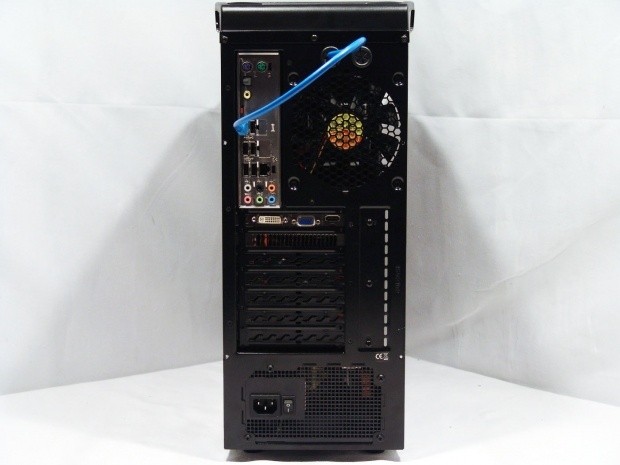
The rear of the chassis is topped with a pair of water cooling holes, and as you can see Thermaltake pre-wired the USB 3.0 cable through one for easy connectivity to the rear I/O. Next to the I/O area there is a 120mm fan to exhaust air here as well. Moving down you run into the seven vented expansion slots and you can see where the tool-less assembly gets mounted next to it. That leaves us with the hole at the bottom to mount our favorite PSU.

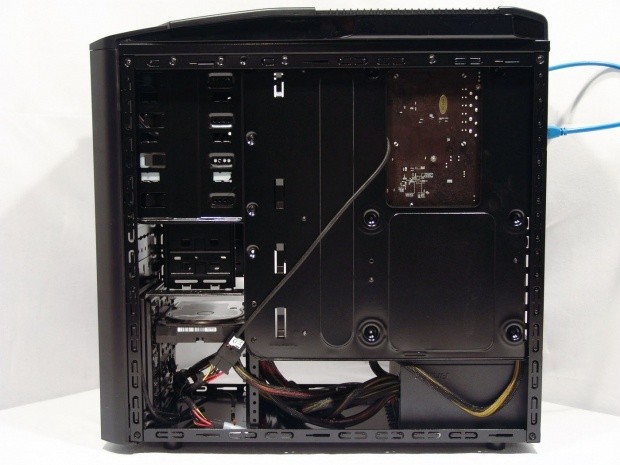
The right side panel is a reverse of the other door panel. It offers both sections of venting as does the other side, but of course there is no window. The "X" theme is carried out here as well with just the indented of steel in the middle versus the window.
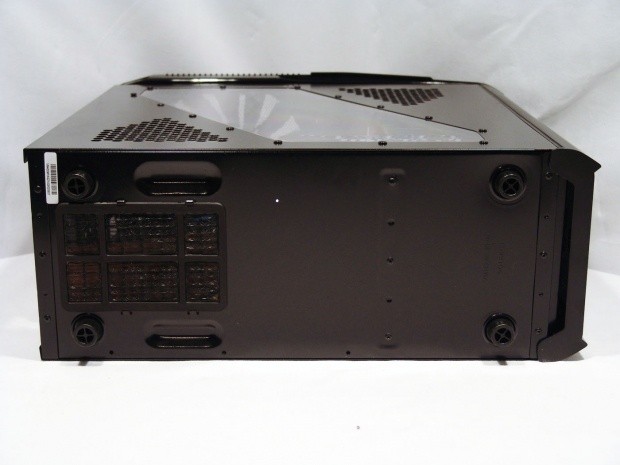
Under the V9 BlacX you will find four large plastic feet to keep the chassis elevated and secure on your desktop. In the rear, under the power supply, Thermaltake offers a removable dust filter to protect the intake of the power supply should you choose to install it with the fan facing down.
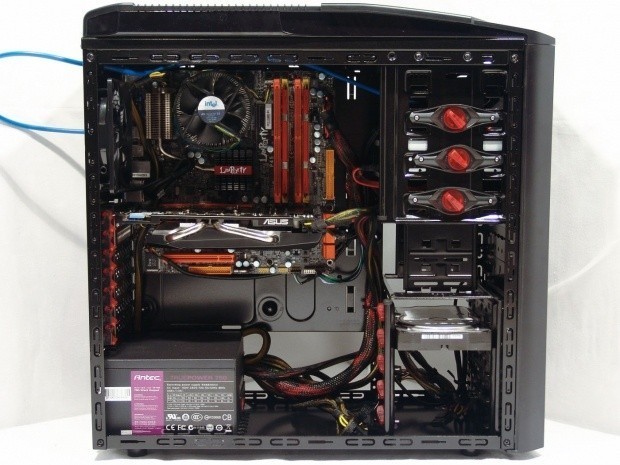
Inside The Thermaltake V9 BlacX Edition Mid Tower Case
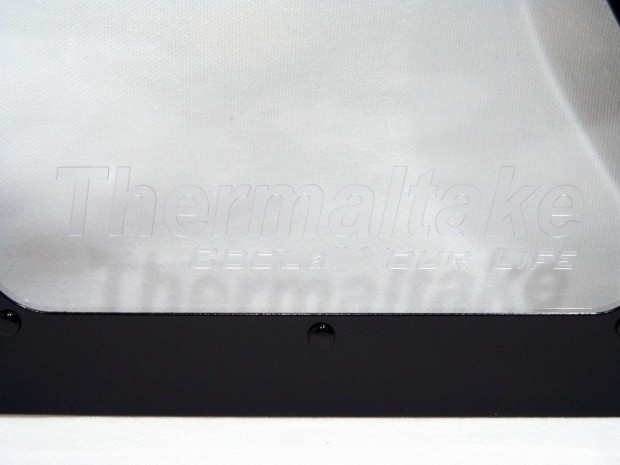
Just in case you couldn't see this from the previous shot of the left side of the chassis. Thermaltake placed both their name and slogan at the bottom of the window.
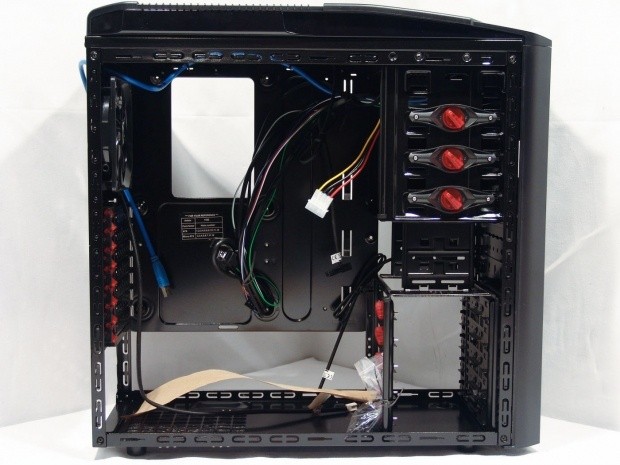
I like the looks of the all black interior and at first glance it looks pretty well apportioned with features and ease of use.
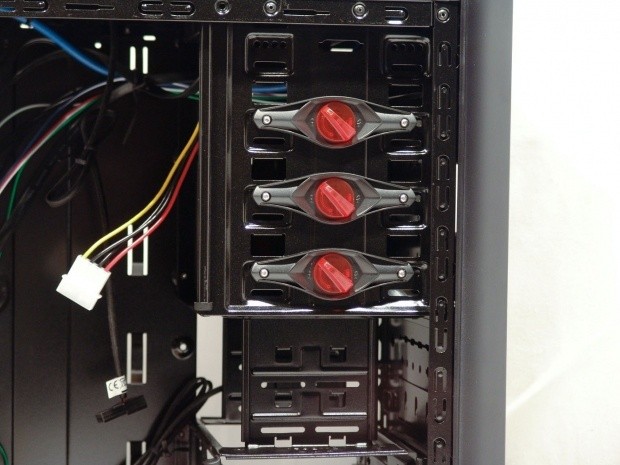
As I mentioned, there are technically four 5.25" bays, but since the Dock takes up part of the first bay, Thermaltake ships the rack with only three tool-less locks. They are clearly marked locked and unlocked on the tabs, and just a simple twist either releases them or locks them back into place. The other side will require you to use screws for a more secure mount, but I found these latches worked very well. Just below the 5.25" bays you will find a pair of 3.5" bays in case you have plans to install a floppy drive, or possibly a smaller bay device such as a fan controller or card reader.
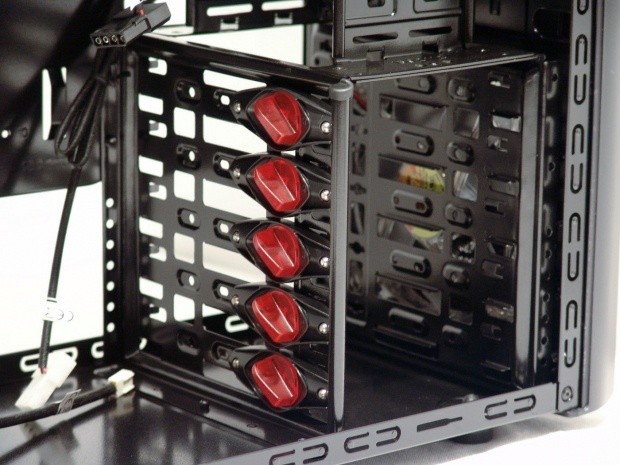
On the bottom of the drive rack Thermaltake offers room for up to five 3.5" hard drives. One thing I am missing here and that is some sort of adapter to install a 2.5" SSD or laptop drive.

The motherboard tray is labeled clearly for the risers you must install. The tray offers six risers as raised bumps in the tray, so you only need to install a few for m-ATX, or the same amount for an ATX board, three. Thermaltake also offers a CPU access hole for those who swap coolers a lot.
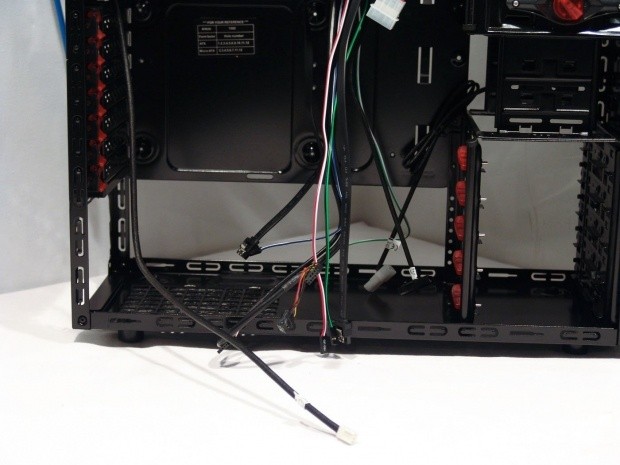
The wiring on the whole is short in length, but as you will soon see, i had no issues with the shorter lengths. Here you have connectivity for the HD Audio, USB, 2.0, fan power leads, and the power, reset, HDD activity, and power LED connections.

Under the 120mm exhaust fan you run into a set of clips that I have yet to see used. While the expansion slot covers will break away when you need to use them, once the card is in place it gets locked with these tabs. To unlock them you simply lift the large tab and slide it to the left. To lock the card into place, slide the latch to the right, align the pin, and then push the tab down to lock it into place.
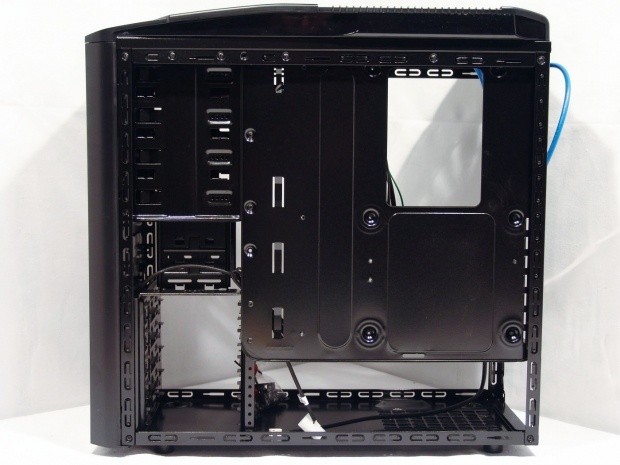
There is plenty of room at the bottom of the case to send wires from the PSU to the hard drives. The motherboard is too close to the door panel to be of any use to hide wiring, and is likely why the tray doesn't offer any holes for wire management.
Accessories and Documentation

In the hardware you will find what is seen here. The clip at the top i found in the manual described as a power clip, and it comes with a pair of special screws. Too bad the instructions don't say where to mount it. You will also get a pair of wire ties and a full set of black screws for drives, motherboard mounting, and PSU mounting. On the far left you will find a set of five risers, even though you will only need three, its handy to have a couple of extras.
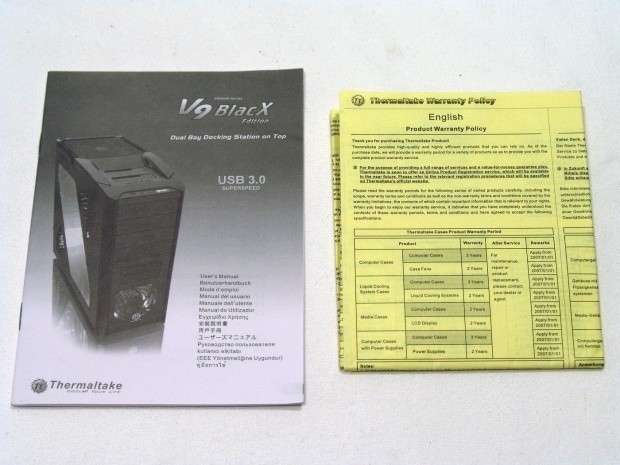
As I just mentioned a few of the finer points are left out of the instruction manual. While I know there is a lot to cover, and they do offer nice renderings and text to get you through the bulk of the installation process, and the manual is multi-lingual, so the extra text takes up quite a bit of the space. On the right you get the yellow folded up section of paper work, and this covers the warranty conditions of the V9 BlacX.
The Build and Finished Product
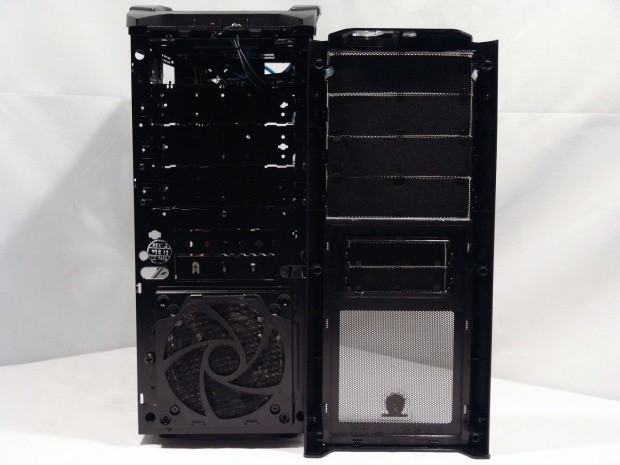
Removing the front bezel I am very happy not to see any wires coming from the inside. This will make changing drives or cleaning the intake fan much easier. This is also the first we get to see of the intake fan assembly. The fan gets screwed into the back of the filter and housing, and then the whole thing is held into place with the large screw on the left of it.

Once the drive is installed and the appropriate cover is removed, you simply push the bezel back in place and lock the six tabs back into the steel frame. With the basic looks of the front of the V9, the drive doesn't break up any lines or color patterns, and therefore doesn't take away from the appeal of the design.
Everything went into place nicely except for the VGA. When I went to install my dual slot card, it just didn't seem to fit quite right. I then noticed a plastic support in the mechanism between the first and second locks that was causing my clearance issue. It wasn't anything I couldn't sort out with a pair of pliers, but something I think got overlooked in the design.
The rear of the V9 fills out nicely, and notice the VGA is straight in the slot. Not only does this mechanism support the weight of the card, but locks it very securely compared to others I have seen.
Behind the scenes I only really needed to run the power adapter from the top fan behind the tray, and this is purely for looks, I could have easily wired it up front. If you look at the bottom by the drives, you can see the 4-pin Molex lead from the PSU goes right behind the drive bays without any issues to the door fitting back on.
Powered up the V9 BlacX has a nice glow of blue LEDs from the front intake fan. That paired with the HDD activity light and the power LED, the case comes alive with little noise, and just a bit more flash.
Time to clone an OS to this build and see what I think after a bit of use! I figured for me it was much easier to use the dock for this, then to have to install the drive internally just to remove it later.
Final Thoughts
When it is all said and done, I can now see why the V9 BlacX Edition chassis got the accolades that it did. The design and feature set that Thermaltake provides covers almost any component you would need to install. While internally I did complain about the lack of support for SSDs, it isn't all that hard to just set one into the Dock, but let's think logically for a moment. Who in their right mind is going to want to let a $200 plus investment sit in the top of their case, ripe for the plucking? That along with the small issue I ran into with the expansion card locks, are the only things I can really beat up the V9 BlacX for in any respect.
This mid tower chassis was a pleasure to use and install my goods inside of. The Dual Bay Dock is a huge bonus to this chassis and offers a level of ease not found in many other chassis' in this size or price range. Granted, the outside is a bit plain, but I like that about the V9. Simple designs with a great layout and features will win over a flashy case with a plain interior and the lack of tool-less latches. I for one am glad to see so many cases using tool-less mechanisms, and I can't wait for motherboard risers to come the same way, then we really can have a tool-free build experience.
So is it worth it? I have to say astoundingly, yes! Considering if you just wanted this dock to add to any chassis you already have, it is going to cost you near $60 and you still have to make room for it. For the $99.99 Newegg.com is asking I feel the price easily justifies itself. I mean seriously, you are buying a case for $40 with a $60 Dual Bay Dock built right into the chassis. With that investment, you get all the latest features found in more expensive cases, and there is still the LED lighting and near silent operation to consider into this. There are tons of places to find the V9 Black Edition, and some places are cheaper than others, but I will still advise if you are in the market for a very well appointed mid tower chassis you seriously consider the V9 BlacX Edition.

 Cooler Master Cosmos Alpha Full-Tower Chassis Review
 SAMA L70 360mm ARGB AIO Liquid CPU Cooler Review
 Corsair 3200D Mid-Tower Chassis Review
 Antec FLUX Pro Noctua Edition Full-Tower Chassis Review
 Montech Sky 3 Mid-Tower Chassis Review
 Sony reportedly looking at cutting PlayStation 6 memory to keep costs down
 Origin Code unveils liquid-cooled DDR5-6200 memory that also has an LCD screen
 GeForce 596.49 WHQL Game Ready driver for Forza Horizon 6 is here
 Razer's new Huntsman V3 TKL 8K is a more affordable version of the Pro, with the same hardware
 Micron ships its fastest DDR5 RDIMMs yet, with 256GB modules hitting 9,200 MT/s and 40% better power efficiency
 Apple adds end-to-end encryption to RCS in iOS 26.5, closing the last big gap with Android messaging
 PS5 shipments dwindle to all-time generational low as Sony braces for console profit impacts
 Sipeed's new K3 RISC-V SBCs can run 30B-parameter LLMs at 10 tokens per second
 Pop superstar Dua Lipa is suing Samsung for $15 million for putting her face on TV boxes without permission
 Subnautica 2 has leaked 48 hours before launch, joining Forza Horizon 6
 Memblaze PBlaze 7 7A40 Ocean 61.44TB Enterprise SSD Review - Oceans of QLC at 3.3 million IOPS
 MOZA SGP Sequential Sim Racing Shifter Review
 COLORFUL iGame GeForce RTX 5070 Ultra OC Review - When Style and Performance Meet
 GIGABYTE Z890 AORUS Elite WiFi7 Plus Motherboard Review - Right in the sweet spot
 PNY GeForce RTX 5080 Slim OC Review - A Compact 4K Powerhouse
 HP OmniBook 7 (Panther Lake) 16" Laptop Review
 ASUS ROG Strix X870E-E Gaming WiFi7 NEO - A Crosshair by any other name
 Thrustmaster T598 Direct Axial Drive Force Feedback Racing Wheel Bundle Review
 MSI GeForce RTX 5060 Ti 16G VENTUS 2X OC PLUS Review
 GIGABYTE's new Ultimate OLED Gaming Monitor Bundle includes Xbox Game Pass
 I automated 5 annoying Windows maintenance tasks, and my PC basically runs itself
 How to Fix Windows 11 Black Screen on Boot or After Login
 The first 8 settings I disable on every fresh Windows 11 install in 2026
 Is Your Ethernet Performance Slower Than Wi-Fi? Here's How to Fix It
 MSI's Project Zero Delivers a Stunning Cable-Free Look to More Gamers
 How to Fix "We Couldn't Find a Fingerprint Sensor Compatible With Windows Hello" in Windows 11
 Why Is My Mouse Moving on Its Own? Here's How to Fix It
 Windows Using Too Much RAM? Here's How to Fix It
 Windows 11 is secretly throttling your apps - here's how to catch it