Introduction
We teased that we were building two new PCs a little while ago now, and we've posted the final image of our new PC on our Facebook page, which had a huge amount of engagement with our fans - you, our readers. Well, here's the full PC, part by part, and some tips on building within the be quiet! Silent Base 800 chassis.
The goal of this system was to have something that would fit all of our goodies inside of it, run either the Acer XB270HU 27-inch 1440p 144Hz G-Sync display or the LG 34-inch 3440x1440 ultrawide monitor. I wanted it to be as close to silence as possible, all while using some of the fastest components we could.
We approached be quiet! to see if they would provide the Silent Base 800, and they did - but it arrived with a new PSU, CPU cooler, and fans. Rather unexpected, but it kicked off this entire silent PC build. I decided to use the air cooler that be quiet! provided, as I didn't want to hear the annoying pump noise from AIO liquid coolers, as I do with my various test bed PCs.
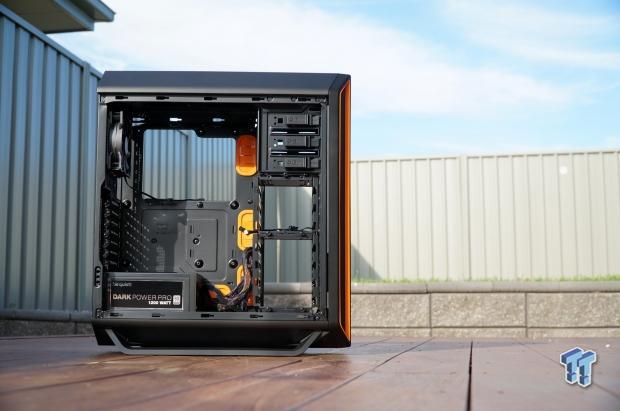
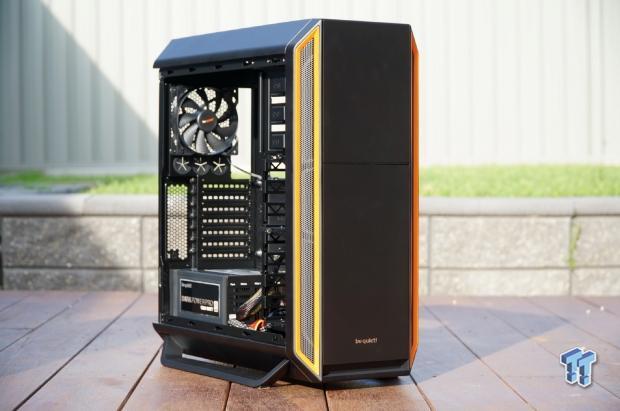
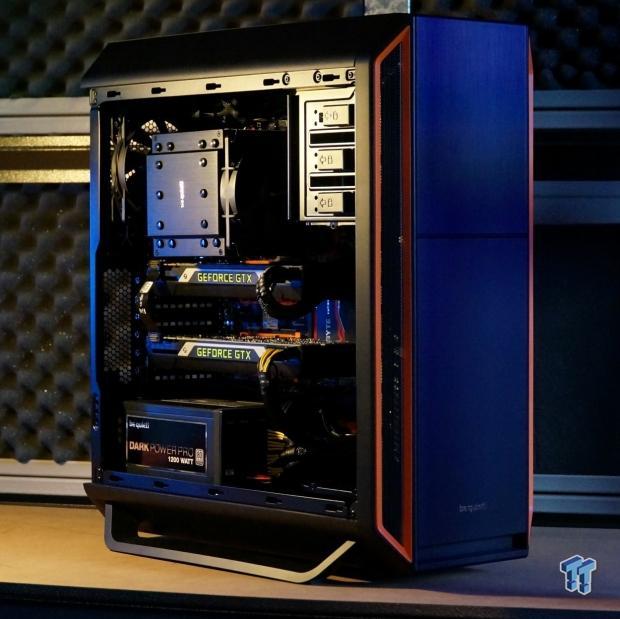
Let's take a look at what we're using here. First off, we have the Silent Base 800 chassis, which we have pictured above. It's a beautiful chassis, with its orange and black theme really looking great. This prompted us to reach out to GIGABYTE for an appropriate motherboard.
GIGABYTE provided their X99-SOC Champion, giving us a Core i7-5830K to use, too. This motherboard is an insane board capable of 4-way GPUs, it has an M.2 slot that we've used a Kingston HyperX Predator M.2 PCIe SSD with.
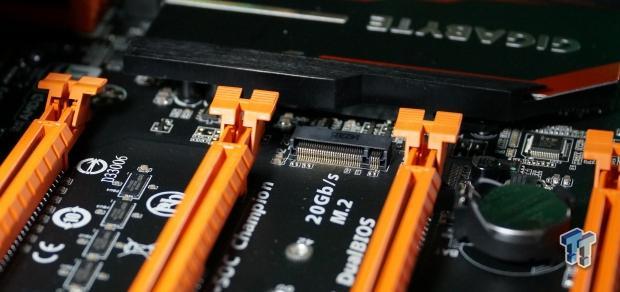
Here's the M.2 slot on the GIGABYTE X99-SOC Champion motherboard, where we'll be installing the Kingston drive.
The Kingston HyperX Predator 480GB M.2 PCIe SSD... this thing is capable of a huge 1400MB/sec reads and 1000MB/sec writes! We're going to be installing Windows 7 and Windows 10, so we'll partition the drive into two 240GB drives.
Installing the CPU, RAM and M.2 PCIe SSD onto the motherboard
For the last few years, I've been exclusively using Corsair's Hydro series AIO liquid coolers to keep my various rigs cool, but I wanted to go completely silent, and dive deep into be quiet!'s product range. The first step of building this new system was getting the be quiet! Dark Rock Pro 3 cooler onto the GIGABYTE X99-SOC Champion, keeping our Intel Core i7-5830K CPU nice and cool, and most importantly: quiet.
Once the CPU cooler is installed onto the motherboard, I cable tied the cable that plugs into the motherboard away neatly. I tied it to the metal of the Dark Rock Pro 3 cooler, keeping it out of the way.
The be quiet! Dark Rock Pro 3 cooler installed onto the motherboard, and to the right you can see that I've removed both of the 3.5-inch HDD bays, giving the entire case much more room, and more airflow. I didn't need the 3.5-inch bays because I'm using 1 x M.2 SSD, and another 480GB 2.5-inch SSD from Kingston.
Here we have the 32GB kit of Kingston HyperX Fury DDR4-2666MHz (HX426C15FBK4/32) RAM that we're using with this system.
Read more at https://www.tweaktown.com/tweakipedia/95/upcoming-projects-includes-two-high-end-pc-builds/index.html
Cable Ties FTW
The two fans at the front of the Silent Base 800 need to be plugged into the motherboard, but I didn't want the cables to be seen. Because I removed the two HDD bays, I couldn't just stuff the cables behind there like I normally could.
Instead, I routed the cable up and behind the 5.25-inch bay, and then to the right, where the front header/power/reset/audio cables are. Then, through the hole, and to the motherboard.
The fan on the back of the Silent Base 800 has its power cable cable tied so that instead of having a cable dangling inside of the case, it's neatly wrapped around the fan itself and then covertly plugged into the motherboard.
We've run the front header cables down the bottom of the case, sitting them in between the motherboard and PSU. This keeps them out of the way, and doesn't mess up the bottom of the case.
Power Supply & 2.5-inch SSD Installation
be quiet! supplied me with their high-end Dark Power Pro 1200W PSU for the system, something that I can't wait to test out. Installing the PSU is nice and easy thanks to its fully modular design.
The be quiet! Dark Power Pro 1200W installed into the Silent Base 800 chassis.
We've cable tied most of the cables onto the main PSU cables, so it keeps it all together and makes it seem like there's one big chunk of cables being plugged into the PSU instead of many cables running into it.
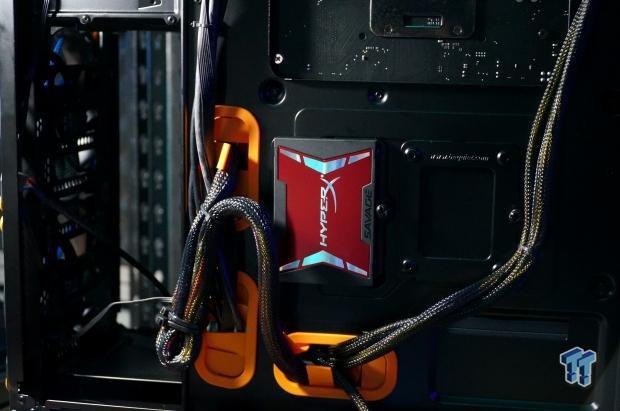
Kingston provided us with one of their 480GB HyperX Savage SSDs, which we're installing into the back of the be quiet! Silent Base 800 chassis.
Here is the Kingston 480GB HyperX Savage SSD installed onto the back of the motherboard tray.
Clash of the Titans
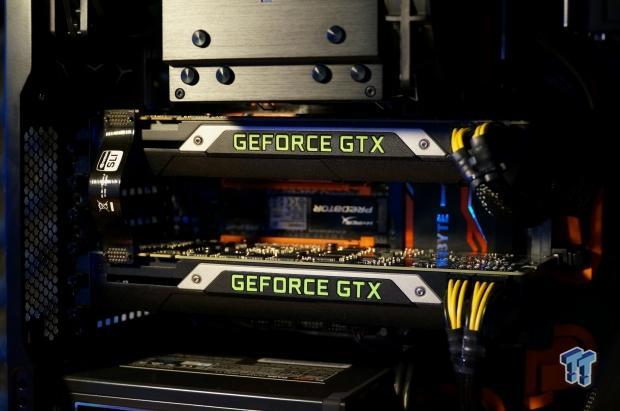
I wanted to put in two of the best video cards that I had laying around, so I chose two of NVIDIA's GeForce GTX Titan X cards for some seriously fast - but quiet - gaming.
Here they are installed into our rig.
The Finished Product & Final Thoughts
I received the be quiet! Silent Base 800, the cooler and fans quite a while ago now (around two months ago) but couldn't do much with it as I needed the right components to go with it. GIGABYTE and Kingston both really stepped up to the plate offering me some hardware that goes so well with the be quiet! products.
The entire system was an absolute pleasure to work with, and is the first PC I've built in a couple of years now. It took me around 4-5 hours total, writing news articles and such in between. This included cable tying it all, and undoing the cable ties to reroute them.
When I very first powered the system on, my nephew who was watching me build it said; "did you even turn that on?" - he was blown away by the system being on, and it not making any sound at all. I turned it off and back on again to prove the point; the be quiet! Silent Base 800 is wickedly quiet.
The next step is installing Windows onto it, and then we're going to use this as our new benchmark PC for everything that's not a video card review. So expect 3440x1440 ultrawide articles, Windows 7 vs Windows 10 articles, and much more from this system. Until then!
Last updated: Nov 3, 2020 at 07:12 pm CST

