The Bottom Line
Introduction, Specifications, and Pricing
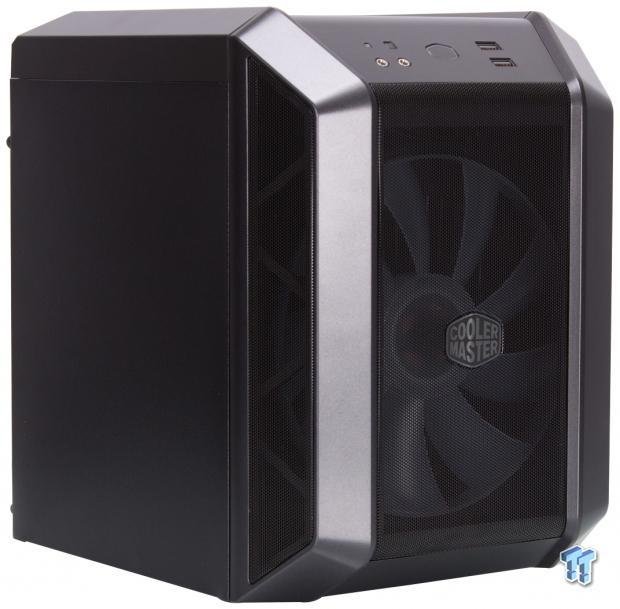
Cooler Master is a company we have not looked at in a while. Today we are looking at one of the smallest of the MasterCase series of chassis. The chassis today is the MasterCase H100, which is a tiny ITX cube which is scarcely more prominent than an ITX board itself.
The MasterCase H100 is made for smaller lower power builds. Cooler Master, when we spoke to them, said the H100 was focused on APU/iGPU builds. I thought this was strange as the chassis has two expansion slots in place, which should support a GPU. Add to this the ATX PSU support, and I feel like there something amiss here. The chassis is noticeably tiny, but I have seen GPUs fit in small chassis, but we will see if we can install a GPU in this one based on its internal constraints.
The key features that Cooler Master highlights in the overview page for the H100 is as follows:
- Compact Mini-ITX
- Fine Mesh Ventilation
- 200mm RGB Fan
- ATX Power Supply Compatible
- Built-In Handle
The built-in handle is excellent and makes this a very LAN friendly chassis, especially when considering the tiny footprint. The ATX power supply compatibility is propped up by Cooler Master as "Full-sized ATX power supplies are supported to improve hardware compatibility and ensure efficient power to the system." This gave us hopes in the fact that GPU's should work well in this scenario for a knockout gaming build.
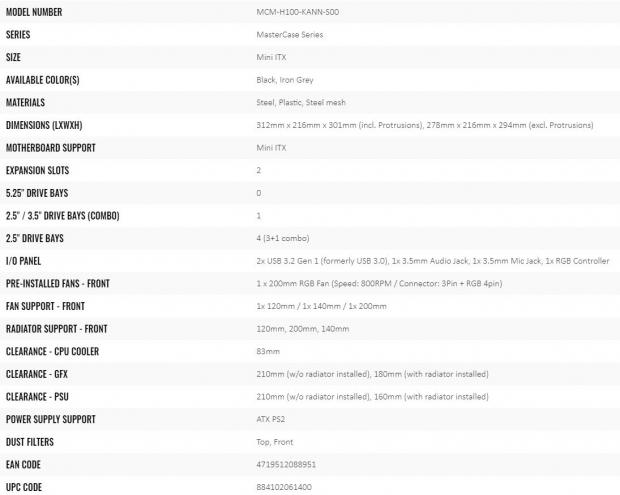
The H100 comes as part of the MasterCase series of chassis. Special note from Cooler Master when they first discussed this chassis is that while it carries the MasterCase H series naming, it is not made to be a high airflow case, which I imagine will confuse some users. The Part Number, if you happen to look for this chassis, would be MCM-H100-KANN-S00. The H100 measures in at 294mm high, 216mm width, and 278mm in length. With that information, we know this is indeed a tiny chassis. This measurement is without the exterior embellishments and focused on the base chassis itself.
Motherboard fitment is isolated to ITX, which I don't think is a surprise based on the form factor of the chassis. 3.5" and 2.5" drive fitment is as follows. 3.5" drive fitment is only one, and it is a combo 2.5" or 3.5" mounting. 2.5" drive fitment is three or 3+1 if you opt to install only 2.5" drives, using the 3.5" combo mounting for 2.5". PSU fitment is ATX style up to 210mm without a front mount AIO/radiator, or 160mm with a front mount radiator installed.
Cooling fitment is minimal in the H100. The fan fitment is only the front where the 200mm RGB fan is preinstalled. Radiators can be from 120mm, 140mm up to 200mm if you can find one like the one from Phobya we have seen before in the 200mm sizing. CPU air cooler height is limited to 83mm, which is small and means mostly stock coolers or something tiny similar to that. The issue I see will be that you either have to opt for a small lower-performing cooler or an AIO/Liquid cooling for the H100 as fitment limitations are a bit trying. Also note that using an SFX PSU with an ATX adapter might be the ticket for you to achieve better component space in a chassis that admittedly should have been SFX powered, to begin with, especially considering the GPU size limitation. Now is the perfect time to note that GPU size without a radiator installed is 210mm, while with an AIO/radiator mounted, it drops to 180mm. This means if running a discrete GPU, you would need a unit that is below 180mm, which is troubling as that strictly limits options to the 2060 or lower range unless you can find a used mITX GTX 1080 card or similar.
The MasterCase H100 is available at Amazon and several other retailers for $69.99, and this places it in quite a unique space. Being mITX, we focused our search down to that and found several competitors to the tune of the Fractal Design Nano S at $57.99 and supports up to four radiators, a full-size GPU, and CPU coolers up to 162mm. The others we find in this area would be the Thermaltake Core V1 at $50.99, which is admittedly long in the tooth but also offers some stout fitment and features. The MetallicGear Neo Mini V2 which is a chassis I am less familiar with but provides a direct price comparison with a sturdy feature set and minimal restrictions. Also, worth mentioning, for $5 - $10 higher, we can also reach the Node 304 from Fractal or the Enthoo Evolv ITX from Phanteks. The H100 is going to have to pull off a lot more than just the MasterCase H series styling to earn a recommendation for your hard-earned dollar.
Shannon's Chassis Test System Specifications
- Motherboard: ASUS ROG Strix Z390-i (buy from Amazon)
- CPU: Intel Core i7 8700K (buy from Amazon)
- Cooler: Corsair Hydro Series H60 (buy from Amazon)
- Cooler: Corsair H100i Pro RGB (buy from Amazon)
- Memory: Corsair Vengeance Pro RGB CMW32GX4M4C3000C15 (buy from Amazon)
- Video Card: MSI GeForce RTX 2060 Gaming Z (buy from Amazon)
- Storage: SanDisk M.2 256GB
- Power Supply: SilverStone Strider Platinum 1000W (buy from Amazon)
- OS: Microsoft Windows 10 Home 64-bit (buy from Amazon)

| Today | 7 days ago | 30 days ago | ||
|---|---|---|---|---|
| Loading... | Loading... | |||
|
* Prices last scanned on 10/26/2024 at 11:00 am CDT - prices may not be accurate, click links above for the latest price. We may earn an affiliate commission from any sales.
|
||||
Packaging

The front of the box, we have a line drawing of the H100. Along with the CM logo and the name across the bottom. The tagline of the H100 is seen here as well listed as "A Little Game-Changer"
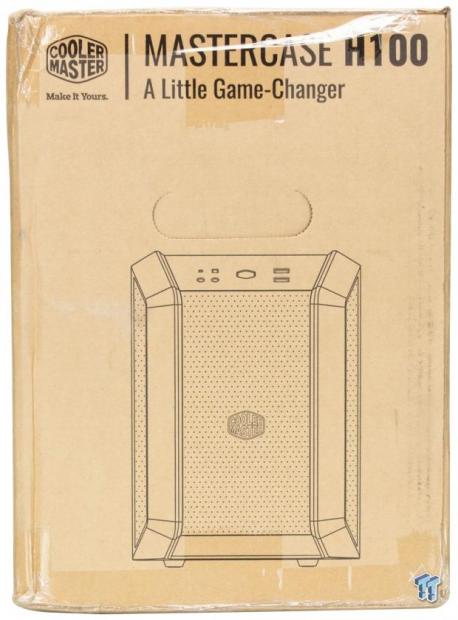
Spinning the box ninety degrees, we see the first of the slightly smaller side has the same but a direct head-on shot of the chassis.

Another ninety degrees, and we find the rear of the box. Here we see a small line drawing of the H100 along with a text block explaining the H100 design. There are also key features listed in eight languages, including English.
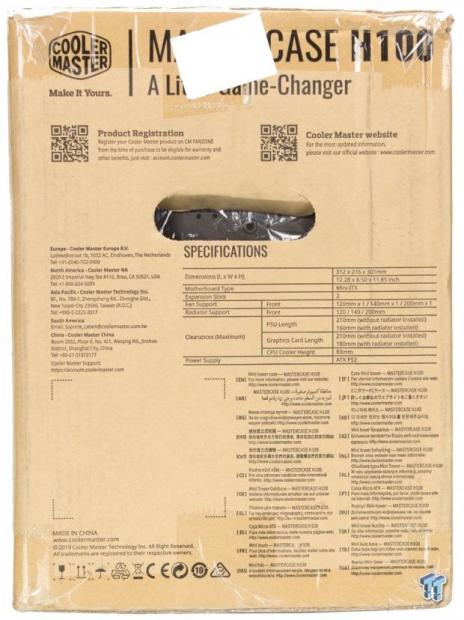
The final ninety degrees spin, we find ourselves looking at the last smaller side of the packaging. Here we no longer have a chassis image, and instead, we see a specification sheet, and some top QR codes leading to the Cooler Master website along with a product registration link. I don't know when the last time I saw product registration information for a chassis, but it's a thing with Cooler Master. Toward the bottom, we have the chassis name and a link to follow for more information. This is translated into twenty-two languages, including English.
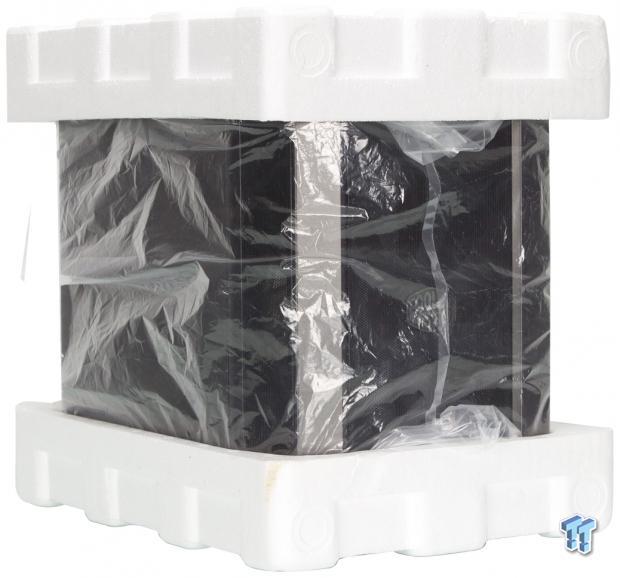
Here we have the tiny H100 pulled from the box. The chassis comes wrapped in a plastic bag, which helps to avoid abrasion from vibration during shipping. The chassis is encapsulated between two hard Styrofoam end caps to help absorb shock during shipping.
Cooler Master MasterCase H100 Mini-ITX Chassis
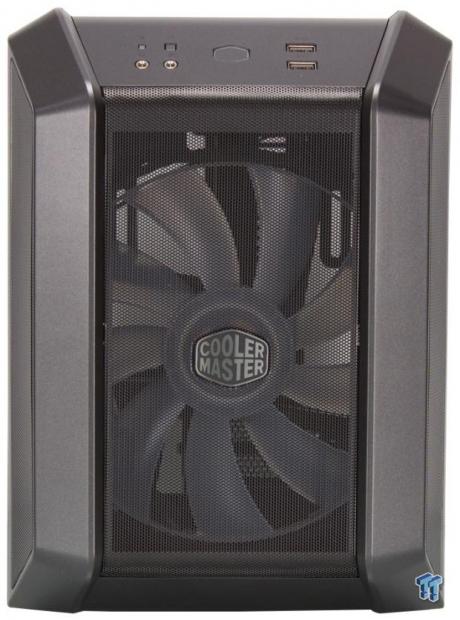
Here we have the front of the H100 chassis, and we see the massive 200mm RGB fan, which is the only source of airflow for the tiny chassis. Above the fan, we see the front panel, which holds the front I/O along with the sides of the front, which carries the H series aesthetic styling embellishments.
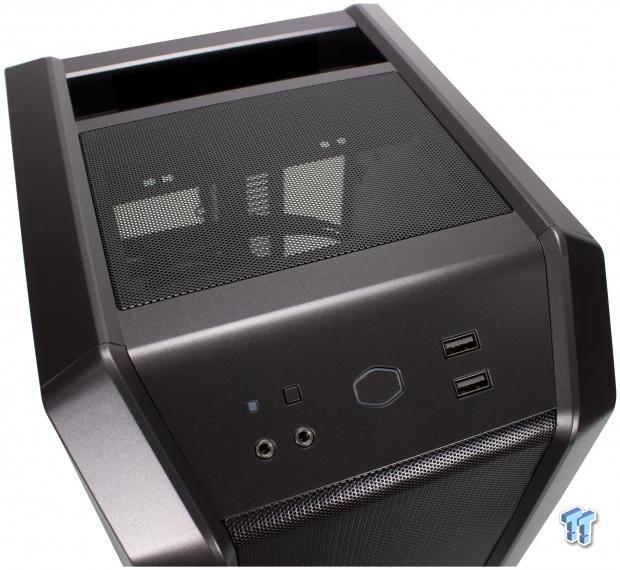
The top of the H100 offers a passive ventilation opening toward the front, while the rear is reinforced internally for the opening you see, which serves as a handle to carry the H100.
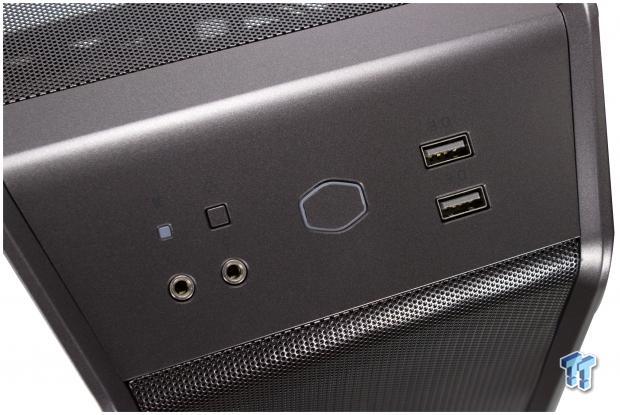
The I/O is on the front 45 degrees from the top and fornt. The I/O is outfitted as follows:
- HDD LED
- Reset button
- Headphone and microphone 3.5mm jack
- Power button shaped like Cooler Master logo with Power LED outline
- 2x USB 3.2 Gen 1 Type-A ports
The I/O is workable, and the reset button can be repurposed as an RGB LED control if your front fan is not connected to the motherboard RGB header.
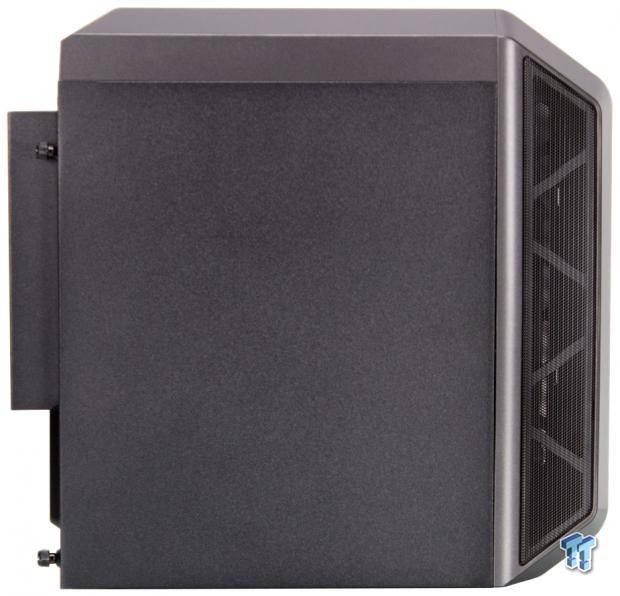
Looking at the primary side of the chassis, we see that the H100 is not a tempered glass or windowed chassis at all. The central panel is solid steel, and we see the ATX PSU mount extending outside of the H100 rear to allow for better PSU compatibility. The front panel we can see more mesh, which allows for airflow ingress into the front massive 200mm fan.
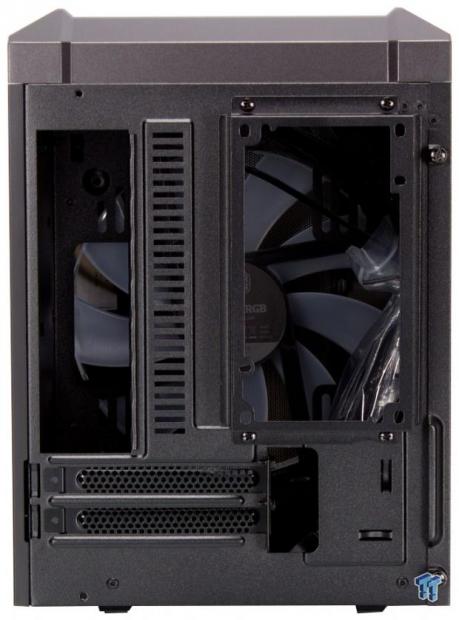
Looking at the rear I/O, we find that the layout is relatively standard, however, we now also see how close the PSU mounting bracket is to the motherboard I/O shield opening. This explains why the CPU air cooler fitment is so limited. We can see straight through to the front-mounted 200mm fan, which shows that the front cooling covers the entirety of the chassis chamber.
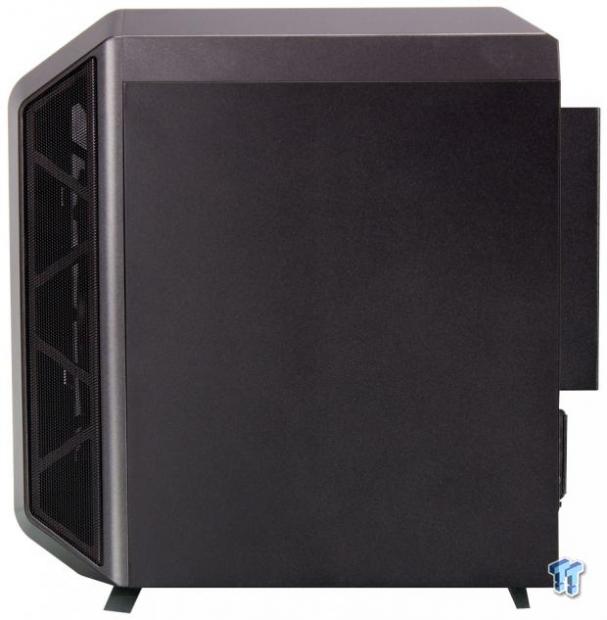
The opposing main panel looks like the opposite side all the same. But with the front panel on the other side now. The panel is solid plastic, though, and does not come off quickly as it is internally screwed to the motherboard tray.
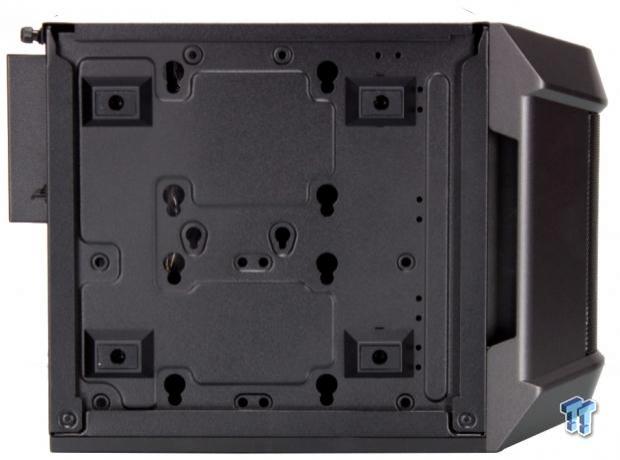
The bottom of the H100 shows four small rectangular plastic feet, which each have their rectangular rubber pads. There are several slotted holes here used for various storage mounting dependent upon your planned, built layout.
Inside the H100
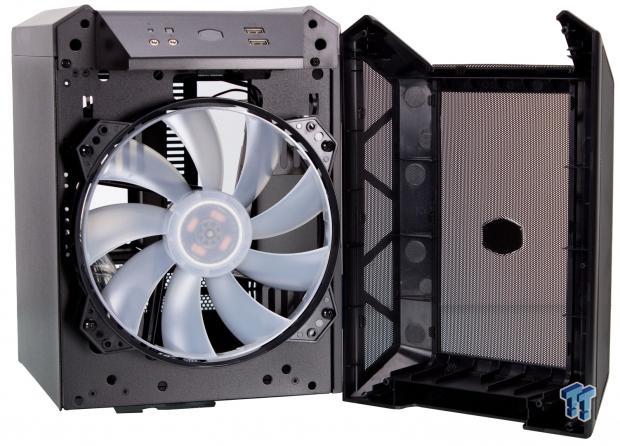
The front panel pulls off with some pressure to release the plastic pins. Once removed, we see the large RGB lit 200mm fan. The front has a fine mesh which should stop larger dust particles but no actual removable filter in place. The front mesh will be cleaned as needed.
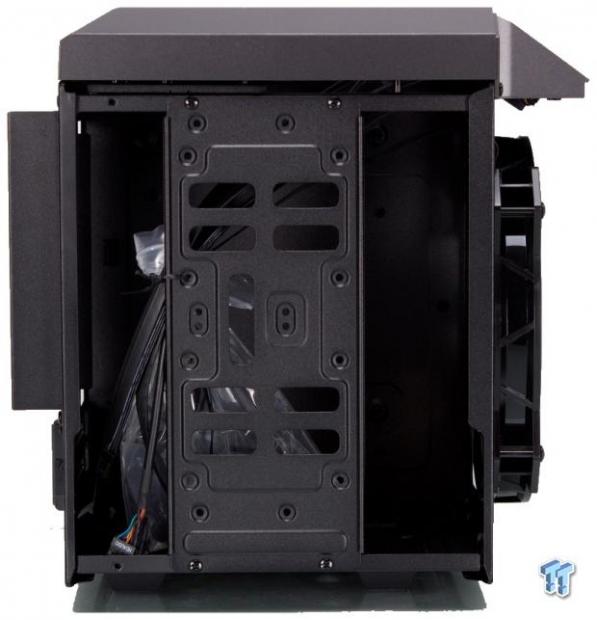
Pulling the main panel, we see the vertically placed storage bracket which is fastened to the main chassis with four screws.
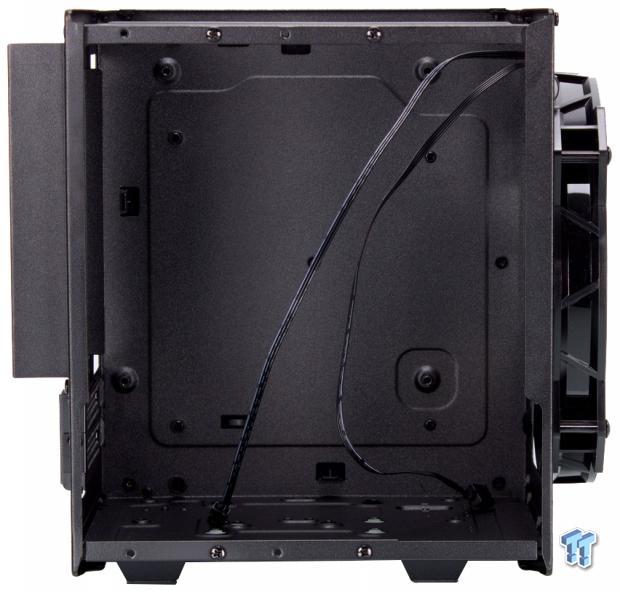
Now, we pulled the front bracket along with the top panel to open up the H100 for viewing. Now we see the four standoffs and nothing else really besides the fans PWM and RGB connectors.
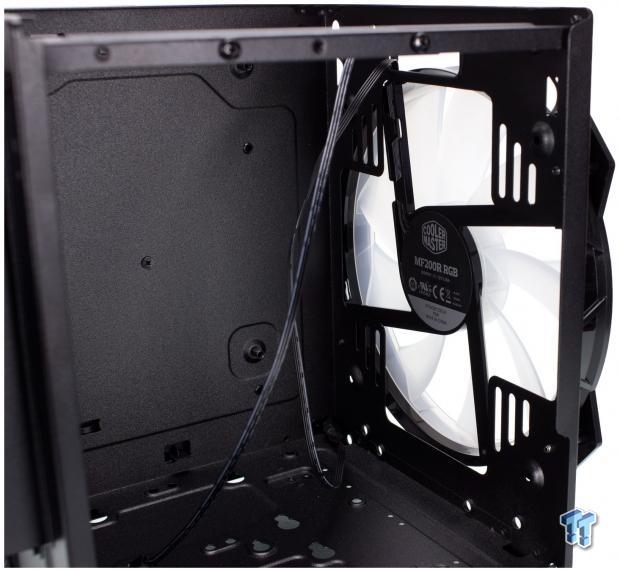
Here we take a look upfront form the inside. We can see that three slotted mounting slots can be used for various size radiators or fans depending upon what you choose for your system cooling.
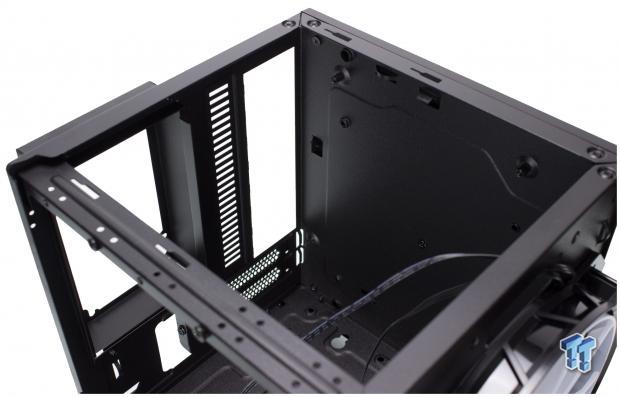
With the top panel removed, we see that the chassis is a metal frame that the exterior mounts to no cooling mounting or anything up top.
Inside the H100 Continued
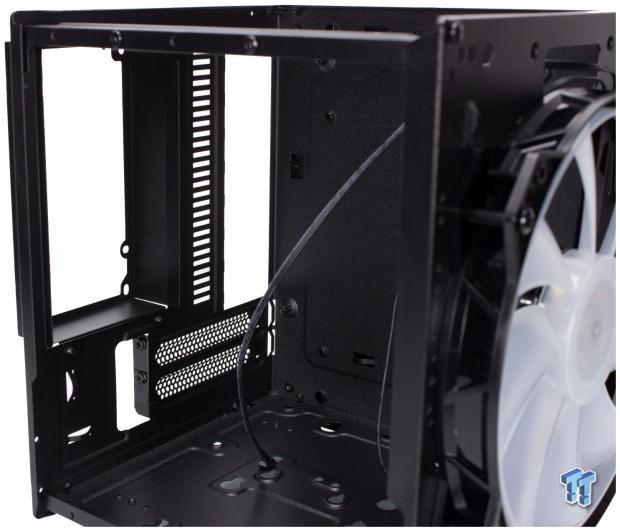
Here we have the rear I/O area from the inside. The expansion slots number two, but if using a GPU as previously mentioned, you will be saddled with a tiny unit, figure 1080p gaming level. Here we also see that the main chamber precisely above the CPU section is the PSU mounting, which is compatible with full-size ATX PSUs. Once again, I would like to mention that if Cooler Master had equipped the H100 with SFX specific mounting, the fitment for CPU cooling would be much better.

Here is the SSD mounting plate, which we removed to take a look inside. The mounting works well to allow for multiple 2.5" drives in place without impeding other devices in the H100.
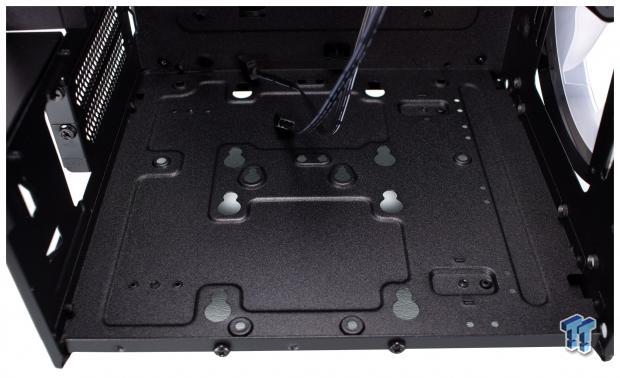
Looking internally at the floor of the H100, we see the slotted mounting for the anti-vibration rubber mounting screw sleeves for mounting drives inside this area.
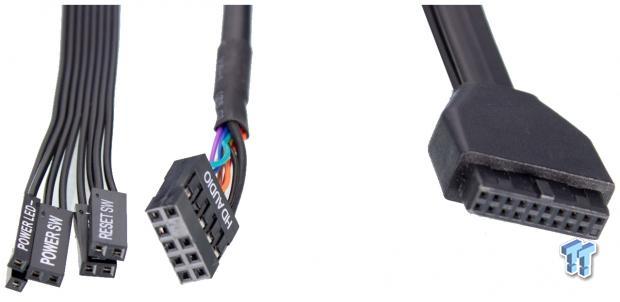
The I/O cabling is very simple, with only a few connectors.
- Power, Reset, Power LED, and HDD LED connectors
- HD Audio connector
- 20-pin USB 3.2 Gen 1 connector (Feeds Type-A ports)
The I/O, while I would love to see a Type-C port, I think it is robust enough to be acceptable for a current-generation system of this stature.
Hardware & Documentation
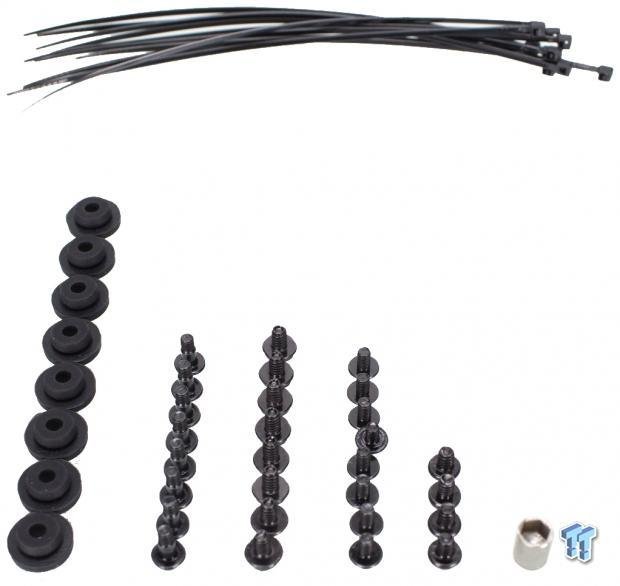
For such a small chassis, the accessory pack is quite varied.
- 10x zip ties
- 8x anti-vibration rubber mounts
- 8x screws for anti-vibration drive mounting
- 8x screws for motherboard and PSU mounting
- 8x screws to mount 2.5" SSD to the vertical plate
- 4x screws to mount 3.5" drive solid to the floor
- Standoff installation tool
The 3.5" drives can use the anti-vibration mounting or the direct mounting depending on your storage arrangement.
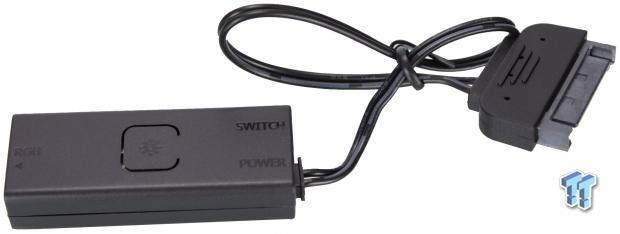
Cooler Master includes a small standalone RGB controller for users who do not have a motherboard RGB port to sync with. This box has its physical button along with a two-prong connector that can be connected to the reset switch, which will allow adjustment of the RGB without the need to open the chassis.

The manual for the H100 is a multi-fold large sheet. Its instructions while essential and multi-language are good enough; most users should have no problem following them to arrange their build.
Case Build & Finished Product
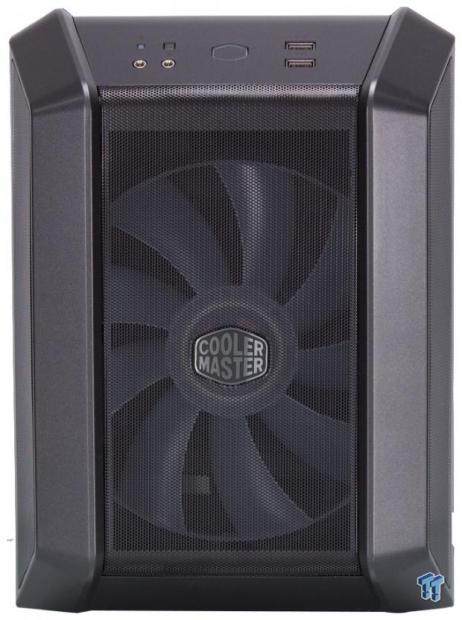
Here we have the build finished, and as you can see, there is not much changed from the front end. The front fan obscures the view through the front same as we observed during the initial unboxing.
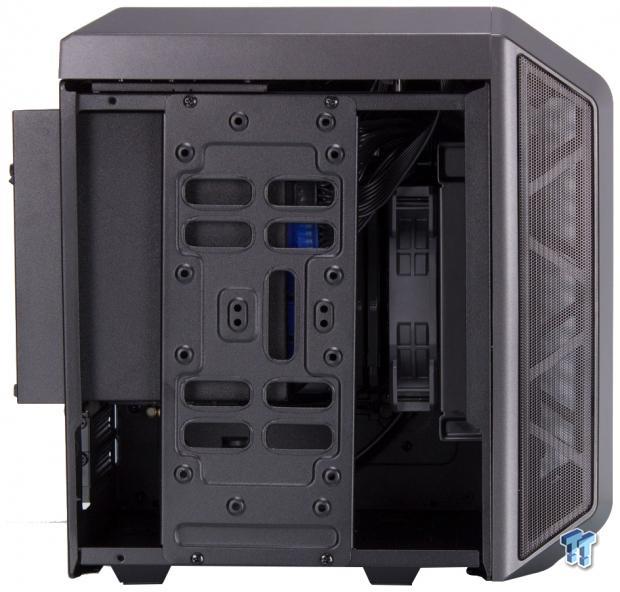
Here we see the internals of the build completed. Unfortunately, we did not have a single GPU that would fit in this tight space, which means this is an infrequent occurrence, and we have no choice but to run this chassis on an iGPU, which is not a situation we experience very often. If we had a low profile enough cooler, we could have potentially shoehorned a GPU in place, but in reality, I now see why Cooler Master specifies the H100 as being an APU focused chassis. We did use the short cable kit from SilverStone for our chassis, and I am happy I did as a full cable kit, I am not sure where exactly we would hide the cables as the lack of cable management is an issue.
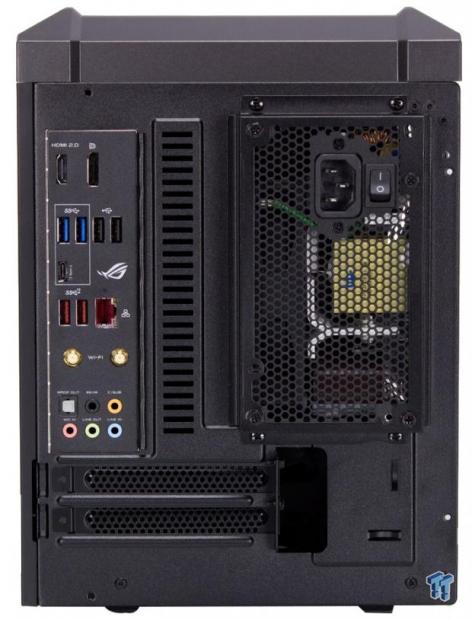
Here we have the rear I/O area, and you can see the motherboard and PSU installed in place. Unfortunately for the first time in recent memory, the expansion slots are left unused due to the tight limitations on GPU size for the H100.

One thing the H100 has going for it is that when the build is complete, there is not much different. The MasterCase H series styling is refined enough that many users, even non-gamers, could enjoy the aesthetic. The chassis massive front fan does stand out a bit, but overall this chassis, if we omit the RGB could easily fit well as an HTPC build or even a compact office PC.
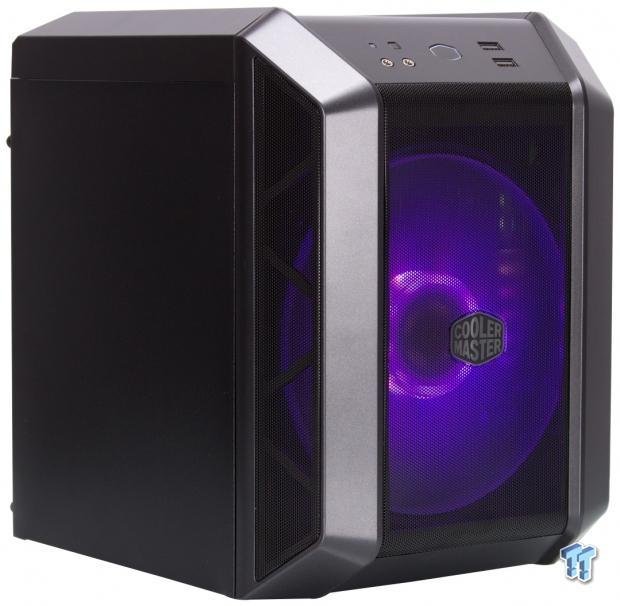
With the H100 system powered up, the bright RGB front fan shines through the mesh well and helps make the H100 look quite mean. If you can find a competent GPU to fit in here, I could now see the H100 as being a competent tiny gaming build.
Final Thoughts
When first hearing of the H100 from Cooler Master, I was excited and thought an excellent high airflow chassis at an ultra-compact form factor would be a very welcome addition. I, however, misjudged this scenario, and when Cooler Master briefed on the chassis, the fact that they mentioned the target of the H100 as an APU chassis started not to look as attractive. Adding to this that a full ATX PSU fitment is in place now raises some huge design decisions in my mind.
Testing the MasterCase H100, we observed an ambient of 22.6 with an RH of 44%. The CPU showed an average delta of 53.4C over ambient, which is a surprisingly decent result for the CPU thermals, but you must keep in mind there is no GPU adding to thermals here. However, it was as capable as some of the best ITX chassis we have tested. Except for the SilverStone LD03, which pulled an almost 7C advantage over the H100. The H100 falls in line with chassis such as the TU150 with no additional fans, although adding a fan to the TU150 likely would outpace the H100 readily.
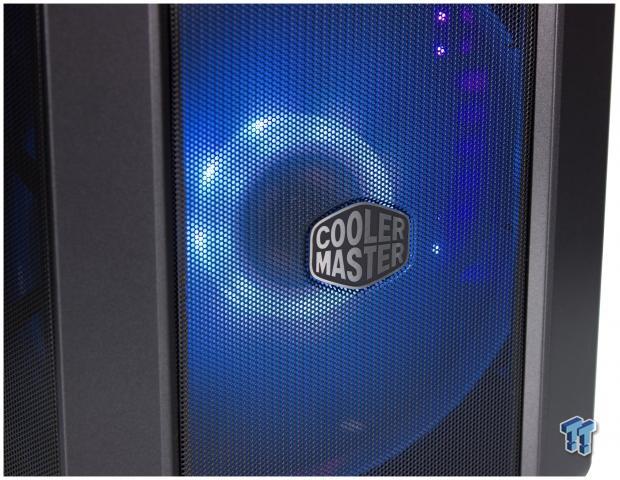
Now we look at what we like about the H100 and why. First up, the aesthetic carries well here, and the H100 looks like you cut it straight from an H500P chassis or similar. The RGB massive fan moves air well here. The drive fitment is quite useful for such a small enclosure. The addition of ATX compatibility means you can likely find a much cheaper PSU to power a mini rig versus the sometimes more pricey SFX units.
Now let's look at what we don't care for as much or would like to see improved. First up is the ATX PSU, while it may be advantageous in some fringe scenarios, I would much rather see the H100 equipped for SFX/SFX-L as this would have a multi-faceted advantage. First up, an SFX mounting would allow far more room for fitment of CPU cooling along with more room overall for adjusting the chassis for more GPU clearance. Now the base chassis, I think, would be acceptable to all SFF users if it was a little bigger to offer more compatibility, especially from the GPU front. Also, widening the chassis just a little bit would allow for proper cable management gaps between the rear panel and allow for cleaner overall builds, along with opening up the main chamber as SSD's could mount back there.
Looking at the price point of the H100, I cannot help but feel that Cooler Master has made a solid chassis but left a lot on the table based on strange design decisions. If you are looking for a chassis strictly for a stock cooled APU situation, the H100 could be a good option, but for any enthusiasts looking to build a small and powerful rig, there simply are better options. Namely, the Thermaltake Core V1, while more prominent, simply offers far more compatibility.
Shannon's Chassis Test System Specifications
- Motherboard: ASUS ROG Strix Z390-i (buy from Amazon)
- CPU: Intel Core i7 8700K (buy from Amazon)
- Cooler: Corsair Hydro Series H60 (buy from Amazon)
- Cooler: Corsair H100i Pro RGB (buy from Amazon)
- Memory: Corsair Vengeance Pro RGB CMW32GX4M4C3000C15 (buy from Amazon)
- Video Card: MSI GeForce RTX 2060 Gaming Z (buy from Amazon)
- Storage: SanDisk M.2 256GB
- Power Supply: SilverStone Strider Platinum 1000W (buy from Amazon)
- OS: Microsoft Windows 10 Home 64-bit (buy from Amazon)

