
The Bottom Line
Introduction, Specifications, and Pricing
Today we have the launch of the newest in the H series lineage from NZXT. The H series has been the key identifier and brand icon, which cemented NZXT as a brand. I should say that is my opinion, but I stick to it as previous to the H series, NZXT had various cases from the Phantom to the Manta, but nothing that defined NZXT as an identifiable chassis brand.
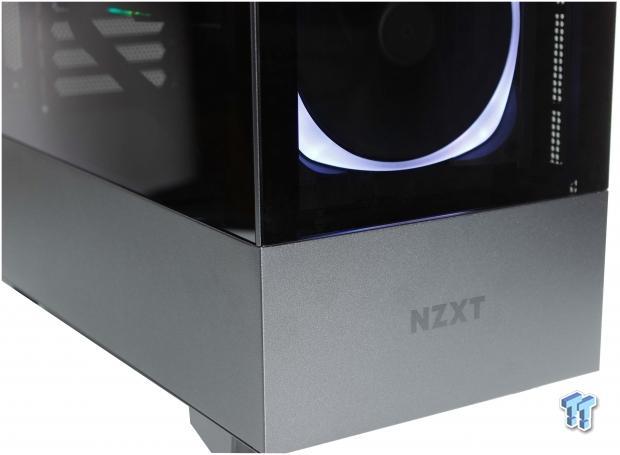
The H Series has always been a blend of form and function. Today the H510 Elite takes that a step further by attempting to keep the H series ease of use while upping the form side of the equation with the addition of a tempered glass front panel. NZXT then highlights this design choice with Aer RGB 2 fans.
The H510 Elite's key features would start of course with the front glass panel which is set to make for a much stronger visual aesthetic with the capability of users to adjust it to their style via the Aer RGB fans. The improved Cam powered smart device, similar to the other H series chassis we looked at, the H210i. They both employ the new version smart device which has a faster MCU to ensure a much more responsive experience when working with the RGB and fan controller.
The chassis we have today is the H510 Elite, bearing the MPN of CA-H500E-B1, at least for our model which B1 means Black. There will be other color options as well, we know NZXT will have white as they always do, but I will be interested to see how the options evolve as the line progresses. The H510 Elite measures in the same as the H500i we looked at just recently, and that's not a big surprise since the base chassis is the same. If you need a refresher, the measurements are 435mm high, 428mm deep, and 210mm wide. This once again fits it well within the mid-tower definition.
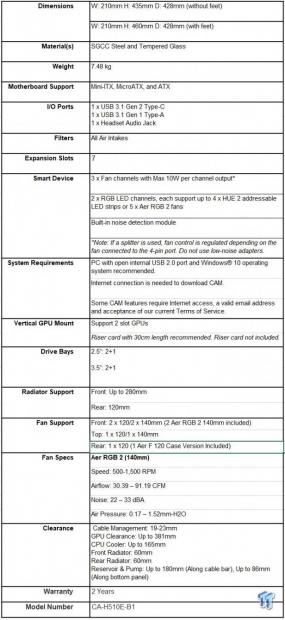
The H510 Elite has all of the same fitment capabilities of the previous H500 series chassis. This includes 3.5" drives which can mount up to 2+1 or 2.5 with the same 2+1 fitment. This will be dependent on which you choose to use the +1 it will be either a 2.5 or 3.5, but not both for a total of up to 5 drives possible. The PSU fitment is large enough for any standard PSU sizes, my main 160mm unit wits without issues. The PSU shroud of the H500 carries over to the H510 Elite and offers the same pass-through capability for GPU cables and close to board connections for front panel cables.
Cooling fitment in the H510 Elite fits the same up to 280mm radiator in the front and 120mm rear. Fans come preinstalled as dual Aer 2 RGB 140mm fans in the front as intake. Exhaust duties are handled by an Aer case edition 120mm fan which comes preinstalled in the rear. The top and front can fit 120mm and 140mm based fans while the rear is limited to 120mm. The slotted adjustability in the front and rear fan slots means you can adjust the vertical cooling positioning to fit your performance or fitment needs best.
The launch price for the H510 Elite will be $169.99 for USA customers, while the global price for anywhere outside the USA will have an MSRP of $149.99. This is due to the USA imposed tariffs. That being said, I have to show how the H510 Elite stacks up in its price category and putting an extra 20 bucks makes things a little shakier. In the USA the H510 Elite will be running a bit over the Fractal Design R6 which is a tough competitor for sure.
Then add to that also the Corsair 570X and the Enthoo evolve from Phanteks. The H510 Elite is a good chassis don't get me wrong, but it may be punching a bit above its weight class. Pricing outside of USA is a little more favorable as a 20 dollar price reduction is always welcome. Here it would fall to a comparison around a Silverstone PM-02, Corsair SPEC-OMEGA and a Thermaltake View 37 which are far easier to beat in my opinion.
Shannon's Chassis Test System Specifications
- Motherboard: MSI MPG Z390 Gaming Edge AC Z390 (buy from Amazon)
- CPU: Intel Core i7 8700K (buy from Amazon)
- Cooler: Corsair H100i Pro RGB (buy from Amazon)
- Memory: GeIL Super Luce RGB GLS416GB3600C16ADC
- Video Card: MSI GeForce RTX 2060 Gaming Z (buy from Amazon)
- Storage: SanDisk M.2 256GB
- Power Supply: Silverstone Strider Platinum 1000W (buy from Amazon)
- OS: Microsoft Windows 10 Home 64-bit (buy from Amazon)
Packaging
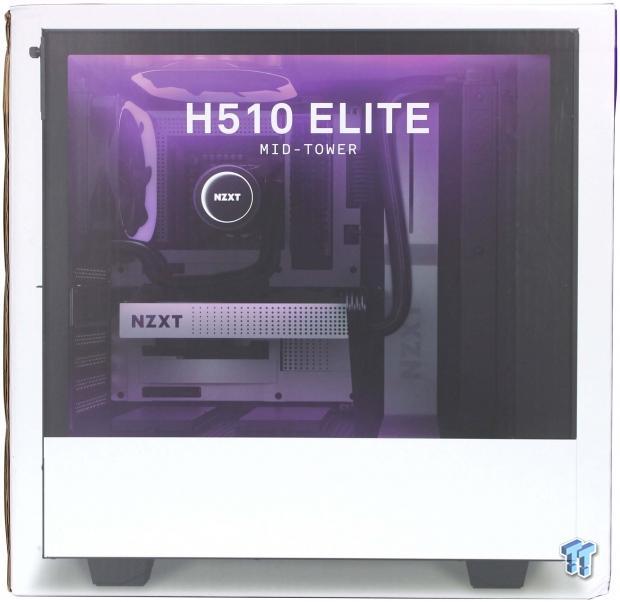
The first wide side of the box is NZXT standard with a full side shot of the new chassis. Honestly, it does not at all look any different than what I am used to seeing from an H series since the H510 Elite is an H500 style base chassis with enhancements. The script carries the model name and the mid-tower designation.
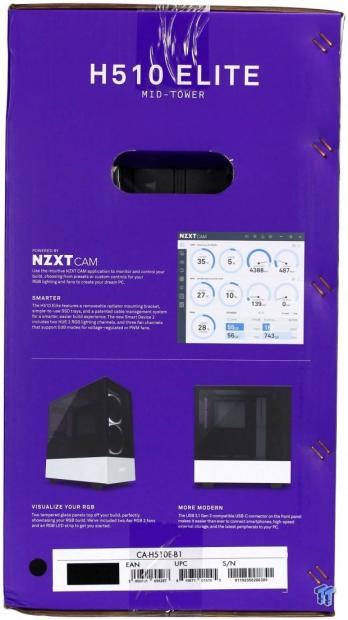
The first of the thinner sides of the box shows the CAM compatibility and an overview of what CAM can do. Then the features below such as the 'Visualize Your RGB,' and they show a ¾ shot of the chassis with the front Aer 2 RGB fans illuminated. Then they have a 'More Modern' designator which is supposed to showcase the inclusion of the new USB 3.2 Gen 2 Type-C connector for extreme external device speed capabilities. But, they chose to show a full side shot of the case rather than an angled shot of the front I/O which would be more relevant. Lastly would be the MPN label which shows the color, the UPC, and other applicable codes for sales use.
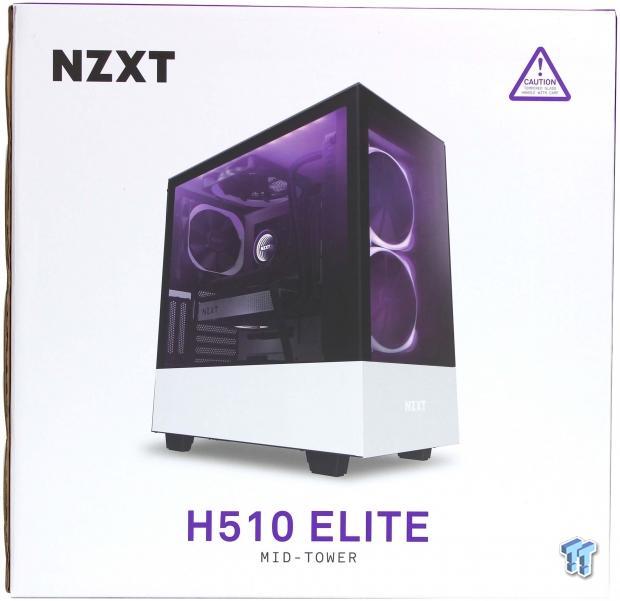
The opposing wide side of the packaging shows an angled shot of the fully built system and now the highlight piece, the front tempered glass, comes into view. I think this is the image you need to know what this case is about; it's about having your cake and eating it too. I mean that in the sense that if you love the H series of cases from NZXT, but wish it had a little more flash, the H510 Elite is trying to deliver on that desire. Of course, this side lists the name and the size along with the telltale purple warning triangle since the case has fragile tempered glass.
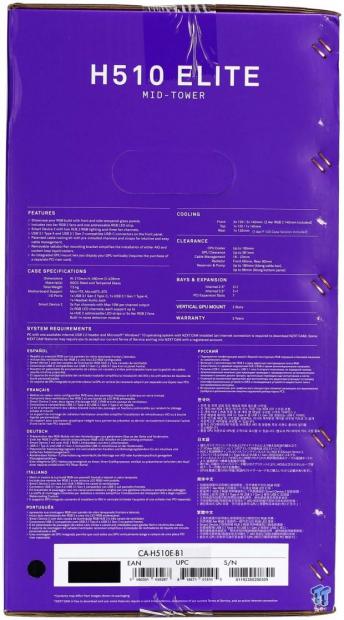
The final side of the box, is, of course, another thin side, or it would be a very weirdly shaped box, but how about we don't go down explaining that rabbit hole now. This side of the packaging lists the key feature call outs along with the spec sheet in multiple languages. And finally, much like the opposing side, we have the UPC and other code labels.
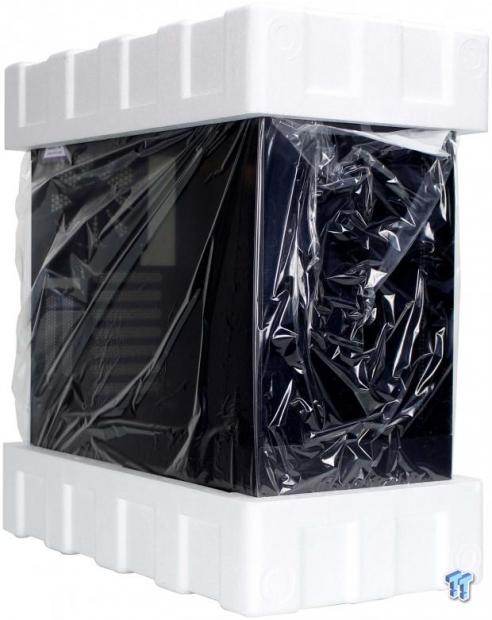
The H510 Elite comes wrapped in a plastic bag and uses hard Styrofoam end caps to envelop the chassis. Once unwrapped all of the tempered glass panels have a film to protect them. No film was needed internally to the panels as the cables, and ancillary parts were fastened to avoid the chance of damage.
NZXT H510 Elite Mid-Tower Chassis
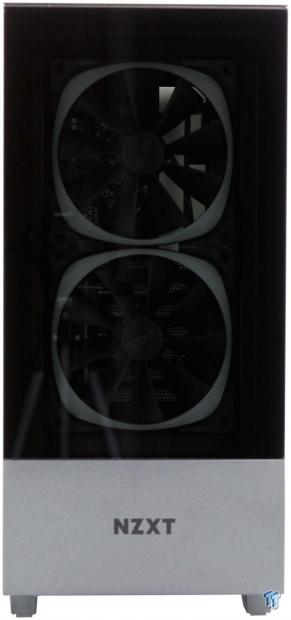
The front of the H510 Elite is quite the departure from what I am used to with an H series chassis from NZXT. The tempered glass is smoked but light enough you can see the opaque surrounds of the dual Aer 2 RGB fans in the front panel. The lower quarter of the front is still the blank slate which holds the NZXT logo centered both vertically and horizontally.
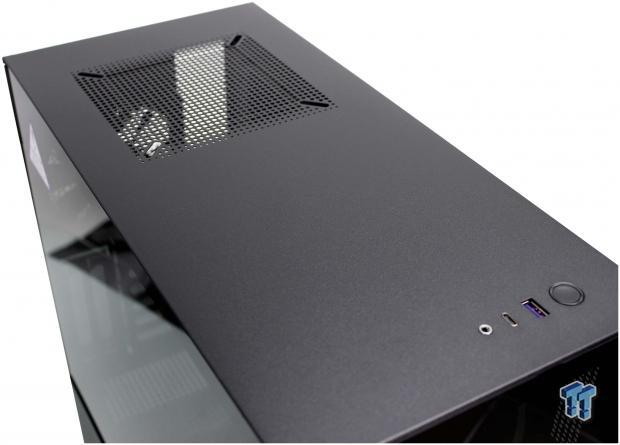
The top of the H510 Elite is very similar to what we have seen before with an open fan port for up to a 140mm fan but is left empty in the Elite since the dual front, and single rear come preinstalled. Toward the front, we have the I/O which we will look at now.
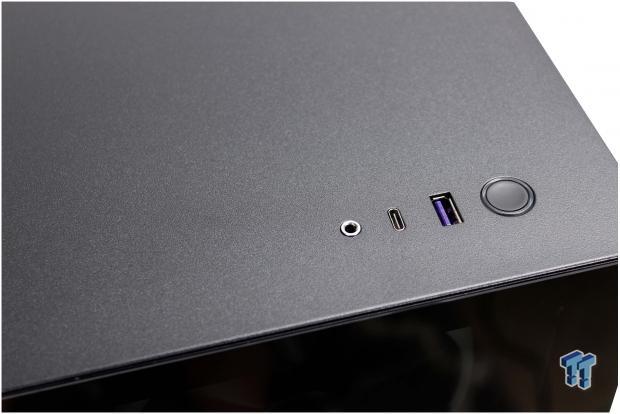
The I/O is found in the top front of the H510 Elite at the right edge. This same I/O is shared on all of the HX10 series of cases and is quite scant or minimalist I guess would be the nice way to say it. From left to right, the I/O contains the following.
- Four pole combo Headphone/Mic 3.5mm Jack (Adapter is included in accessories)
- USB Type-C Supporting up to USB 3.2 Gen 2 speeds
- USB Type-A Supporting up to USB 3.2 Gen 1 speeds
- Power button with integrated power and HDD LEDs
I am going to say the same thing I said in the H210i Review, which also launched today. This is a simple yet functional I/O, but the way it is implemented is wasteful in regards to the connectivity used on the board. I will go into that more when we look at the front panel cables.
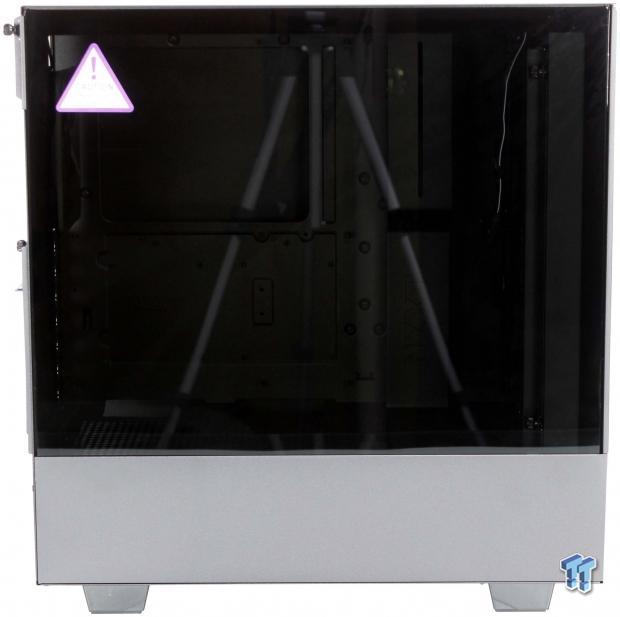
The main chassis panel is Tempered glass and is smoked, which means that without some light, you get a more dim view of the interior. The lower quarter much like the front is still body color metal as it is, in essence, the outer layer of the PSU shroud. The lower feet look like the panel quality even though they are, in fact, plastic.
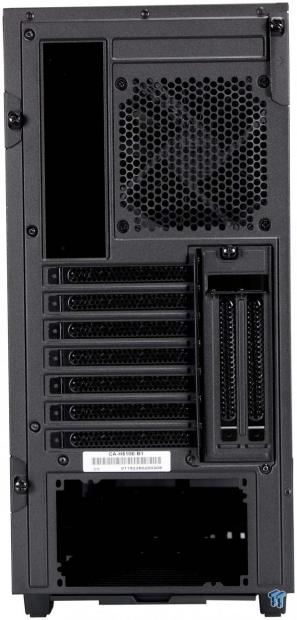
The rear of the H510 Elite is similar to the previous H500i version. The motherboard I/O cutout along with the adjacent 120mm fan mount. Below that we have seven expansions slots, with two extra vertically for mounting the GPU to show it off. At the lowest edge, we have the PSU mounting which is standard, and we do see at the very bottom a pull tab for a removable dust filter.
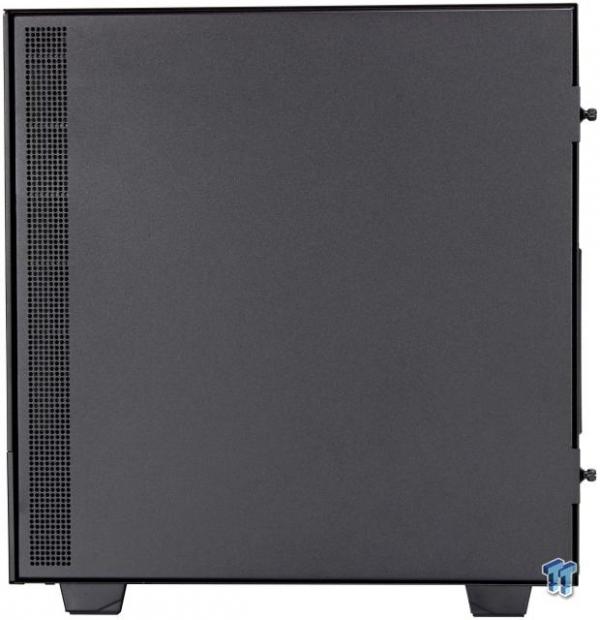
The cable management side of the chassis has a flat slate of a panel. Once again, it is the same black body color steel with only the front ventilation mesh holes breaking the appearance as you approach the front panel. We also see the two thumbscrews which attach the panel hanging off of the back edge. The rear panel swings out like a door which makes closing it with a large bundle of cables much easier should you run into that situation.
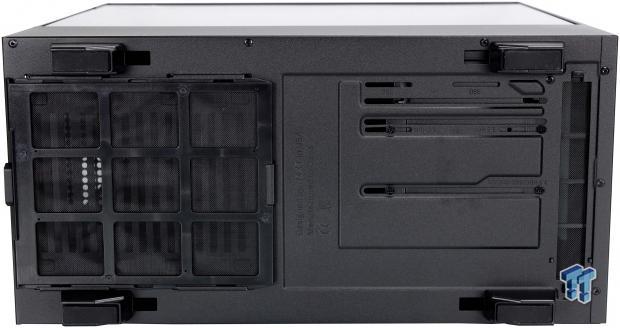
The bottom of the H510 Elite is the standard fare with the main things of note are first the previously mentioned PSU dust filter. It pulls out from the rear and overs about 40% length of the back of the chassis which means it should cover pretty much any commercially available PSU fan. The front-most area with the slotted mounting comes with an HDD cage preinstalled into it.
However, you can opt to remove the cage entirely and use this place for hard mounting a drive, SSD, or even a liquid cooling pump depending on your needs. The front-most area, you can see a ventilation hole with a small removable dust filter as this area allows air to be ingested from underneath into the front fan intakes. The plastic rectangular feet have long full-length rubber pads or shoes on them to make sure your H510i doesn't skid around or move on flat smooth surfaces.
Inside the H510 Elite Mid-Tower
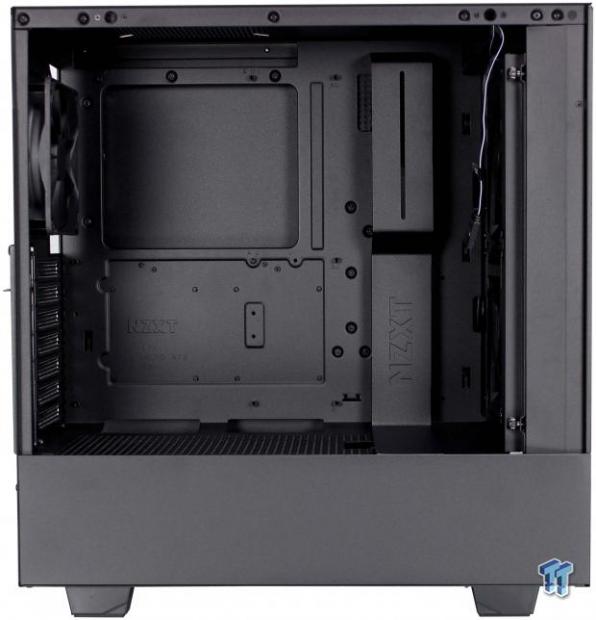
The H510 Elite has a pretty wide-open expanse with the telltale vertical cable management bar. The full ATX motherboard tray has a large CPU cooler backplate cutout which should easily meet the needs of any cooler I have seen. You can see upfront the thumbscrews that are used to fix the front cooling tray where you can mount fans or radiators in place.
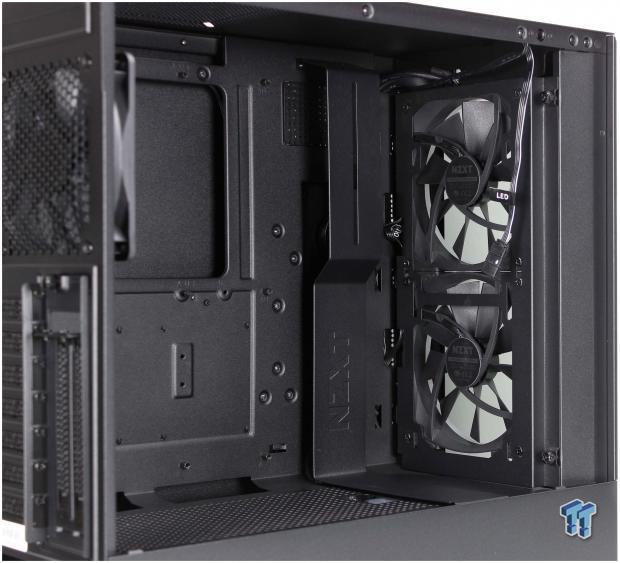
Here we look at the front which generally in an H series case would be a solid panel in front of the fan mounting. The H510 Elite with its glass front panel we can now see past the preinstalled dual Aer 2 RGB 140mm fans. This tray is suitable for mounting either 120 or 140mm based fans or radiators with radiator max being 280mm.
At this angle we also get a peek at the pass-through behind the vertical cable management bar which can be much wider to allow a more accessible cable pass through. That vertical bar you will also notice has a vertical slot cut into the middle of it, this is designed to allow mounting of cylindrical liquid cooling reservoirs.
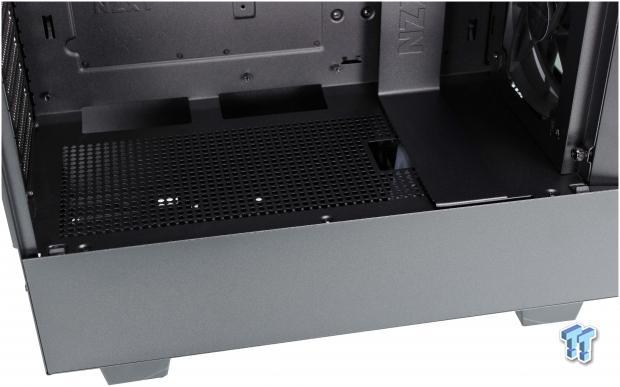
The PSU shroud on the H510 Elite is solid on the outer edge as it is the case exterior on the outward-facing side. The top is a ventilation mesh through the majority of the surface. There is cable pass-through at the base of the motherboard to allow easy front panel case wiring. There is also another pass-through for cables which is mid-way out on the PSU shroud and directly next to the cable management bar. This hole is for passing a power cable to a GPU which would make for a much cleaner run.
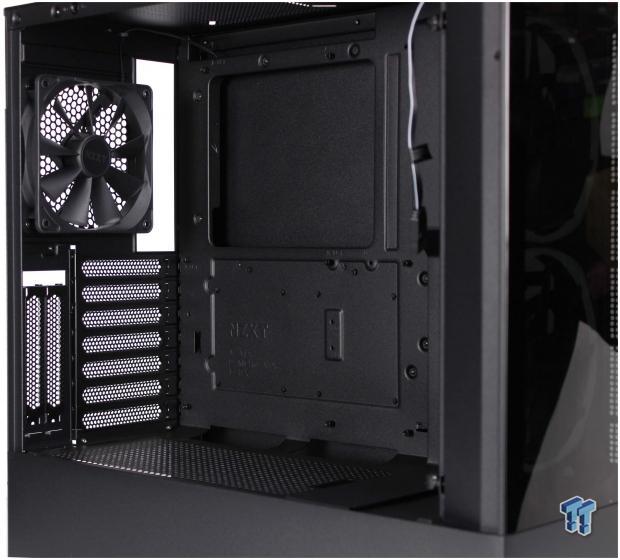
We now get an inside look at the rear I/O area and the installed fan. The rear fan is a 120mm Aer case edition model and comes pre-routed to be controlled by the CAM powered smart device same as the front Aer 2 RGB fans. The expansion slot covers each have their own screw to secure it to the chassis, but first, the vertical bracket must be removed. The vertical I/O bracket runs double duty here as it is also used to secure the slot covers or installed add-in cards from coming loose with it in place.
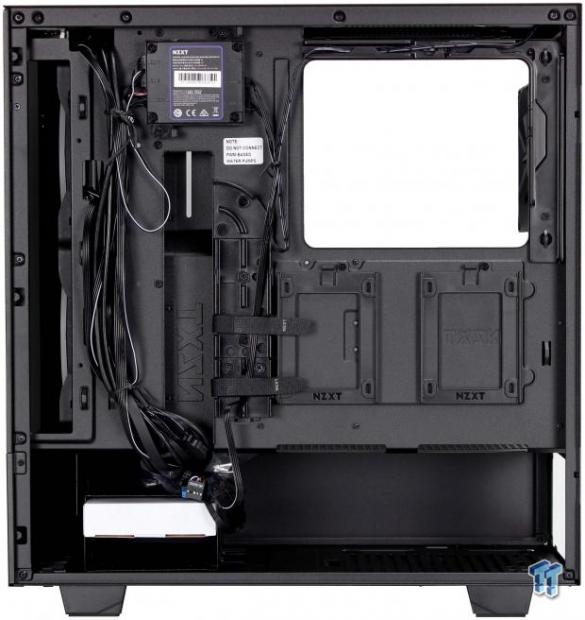
The Cable management area here once again with its inclusion of the cable management guide is a very welcome sight. While cable management can be done very well in a chassis, it can be monumentally easier when a chassis design has this area built with the idea of being truly a builder focused design. Features like the guide and even placement of tie-downs and clearance below the panel to fit larger bundles of cables all make the H510 Elite a much more enjoyable experience to build in.
The CPU backplate cut out has dual 2.5" SSD trays in place directly below it with the other drive mounting being available in the cage found below in the area under the PSU shroud. If you look up front, you can see the side of the opaque rings on the Aer 2 RGB fans mounted behind the glass panel. This is the pass-through area where the rear panel we looked at earlier had venting feeding here with a dust filter directly on the side panel.
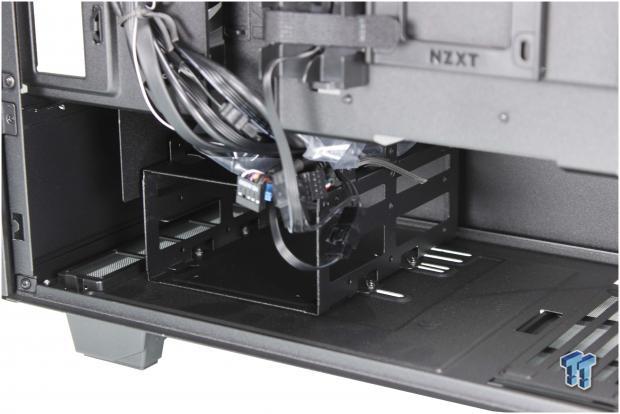
Here we now look at the HDD cage area in the lower section of the H510 Elite. The cage is the same as we have seen on previous H series models such as the H500i. It allows screw mounting of two 3.5" HDD internal to the cage with a third being mounted to the tabs coming from the top of the HDD cage. You can also install a 3rd SSD to this cage if you have three 2.5" drives and still have two 3.5" mounting available. This cage is fully removable, but that would knock down your drive mounting to a single 3.5" drive, and that would be hard-mounted to the chassis floor.
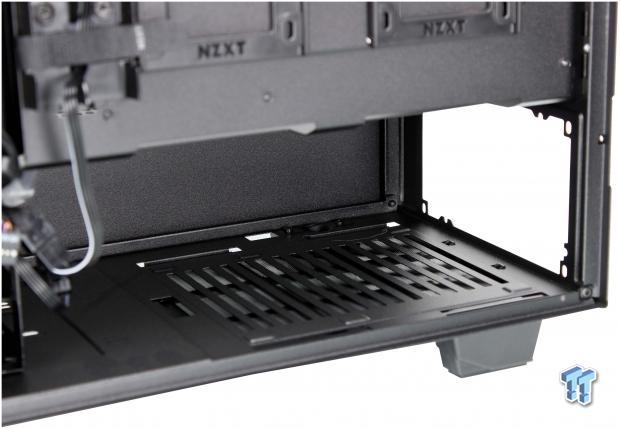
Here we have the PSU area below the PSU shroud. The PSU is installed by sliding it through this side and is fastened to the rear. The floor of the PSU area has pass-through slats which have a duck filter below them. The floor also has pads the PSU can rest on which are metal and do not have any rubber or foam padding we have seen on several chassis. This is typically used to isolate vibrations and give the PSU support to rest on while not being metal to metal contact. The fact that the pads are finished paint means it's not likely to be abrasive, but still far less protected than having a pad there.
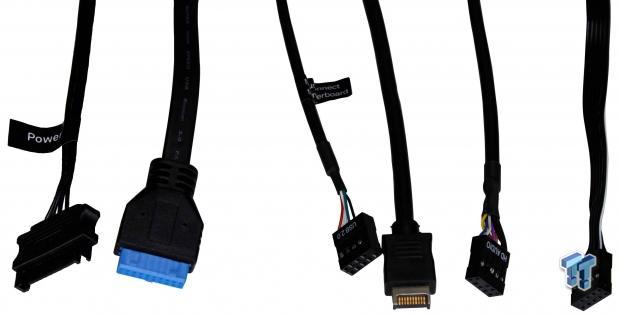
The front cables are where I will be sharing a rant between the H210i and this chassis. From what I see, all of the HX10 series of cases will share this feature, which I consider a less than optimal solution.
The front panel I/O we know is quite limited and that is because with the X10 series NZXT chose to modernize the I/O by changing from a Dual Type-A USB port to a Type-A and a Type-C.
Here is the layout from left to right:
- SATA Power plug - For CAM powered smart device
- USB 3.2 Gen 1 20 pin plug - For front Type-A port
- USB 2.0 10 pin plug - For communication of the Cam powered smart device
- USB 3.2 Gen 2 plug - For front Type-C port
- HD Audio Header - For front 3.5mm jack
- Front Panel Block - For front panel power button and LEDs
The front panel layout in itself is not necessarily bad. But, then when you take into account that now the Type-C has its own USB 3.2 Gen 2 internal connector, the single Type-A port uses a 20-pin connector which wastes a full USB 3.2 Gen 1 connection and the smart device uses only one of two available ports on the USB 2.0 header.
This to me is pretty wasteful when NZXT could have integrated the USB 2.0 4 wire interface from the appropriate pins on the 20 pin USB 3.2 Gen 1 connector, therefore, utilizing both available interfaces form the pin header. This would also free up a sometimes valuable USB 2.0 header as many devices such as NZXT's own Kraken coolers use the same interface. Some motherboards have only one USB 2.0 header, and therefore you could run into the need to buy an extra USB internal hub to install your rig depending on component choice.
Hardware & Documentation
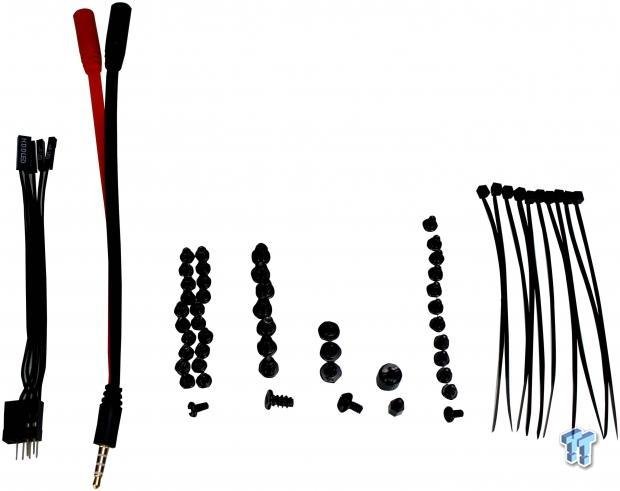
The included accessories are plentiful, and we will look at them from left to right:
- Front panel wiring block to separate headers (For use on nonstandard front panel layouts)
- 4 Pole Headphone/Mic adapter to independent headphone/microphone ports
- 21 screws for mounting the motherboard and HDD
- Eight screws for mounting fans
- Four hexagonal head screws for mounting PSU
- One standoff and standoff tool
- 12 SSD mounting screws
- Ten zip ties
This accessory pack has everything you would need to install your components in the H510 Elite and even wholly fill it with every mounting point used. I do like that NZXT consolidated the headphone to a single port so that users can use the adapter if necessary, but it makes for a nicer looking and cleaner I/O.
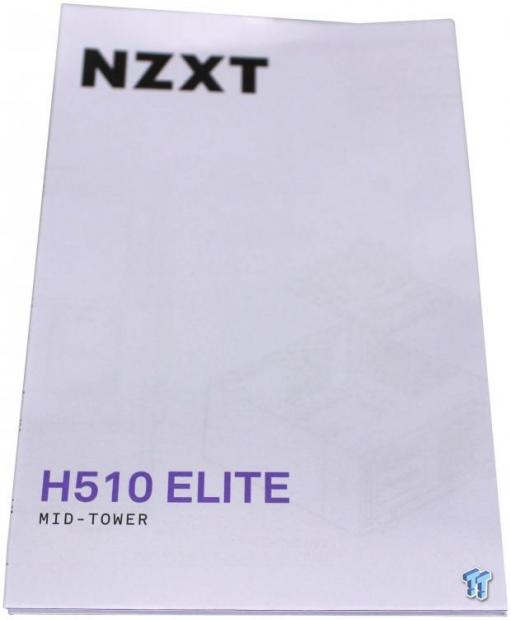
The manual is a large multi-fold single page which has useful pictograms of installing virtually anything into the H510 Elite. The list of parts including screws are exceptional listing every screw type and even how many are installed in the chassis vs. in the accessory kit. Then you have helpful short wording where needed, but otherwise, you could understand how to build in the H510 Elite without ever reading any words and only observing the images.
Case Build & Finished Product
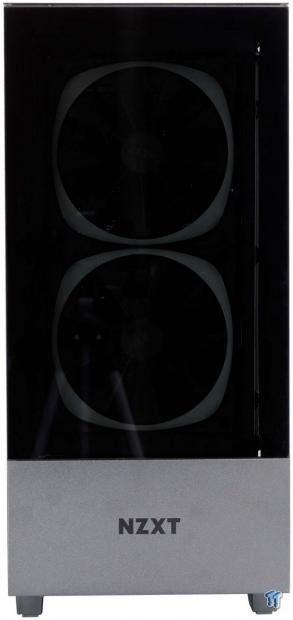
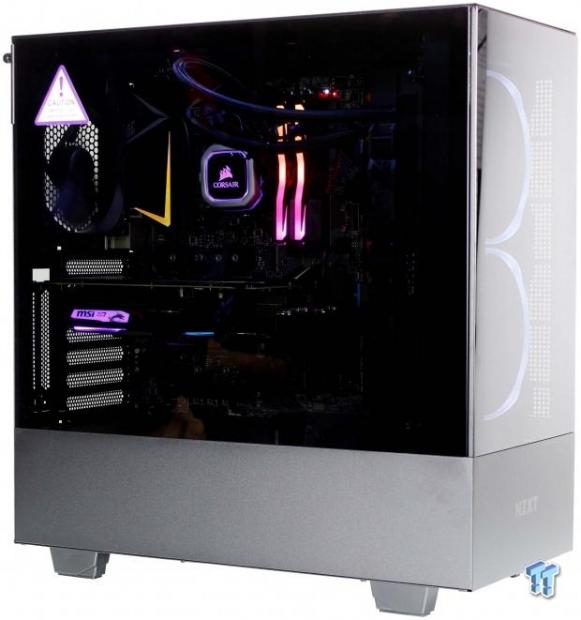
The tempered glass front does not look any different than when we fit photographed it. For pictures, I put the radiator for our AIO behind these fans as I wanted to show the LED effect in the front of the chassis, but our AIO is 120mm based. Do note that for performance testing we installed the H100i fans in place of the Aer 2 RGB fans which was admittedly sad as we lost the visually awesome appeal of the front-lit fans.
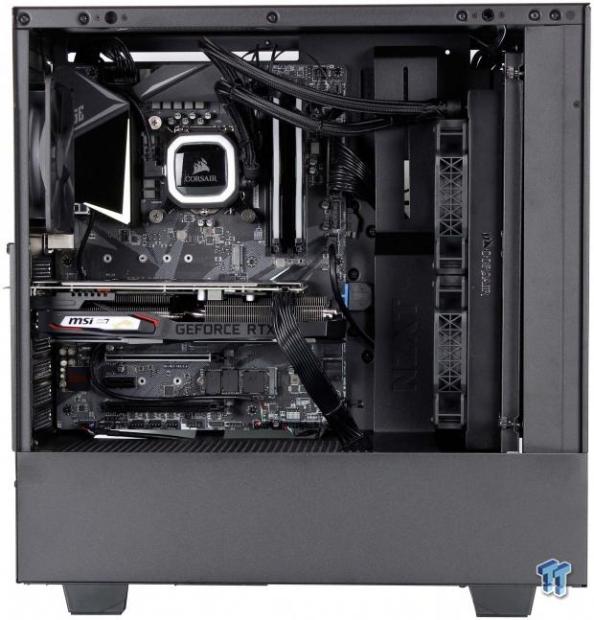
Installation of parts into the H510 Elite was quite painless and an overall pleasant experience same as we experienced with the H500i previously. The motherboard and GPU went in without a fuss.
The radiator as you see I wedged in to fit with the Aer fans in place for photography but I do not recommend trying to run it this way simply based on the fact that the air baffling and potential for noise would be bad as you would have the Aer 2 RGB 140mm fans blowing air over the radiator. Not just that but it does not fit well as you have to put some decent pressure on the cable management bar, once again not recommended. These are the things I do to capture pretty images for you guys.
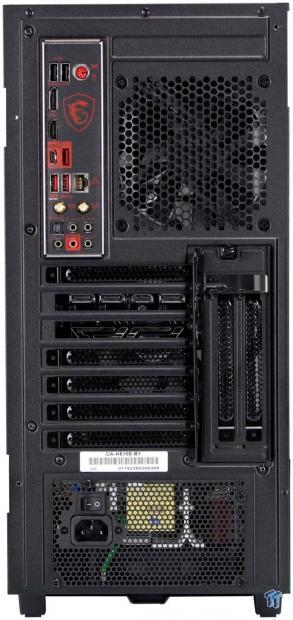
The rear looks the same, but all the gaps are now filled. Everything went in as expected and with no special effort required. I do kind of wish the H510 Elite came with the vertical GPU cable as I think that would have been cool to be able to showcase the GPU since the front now has a view for the intake fans.
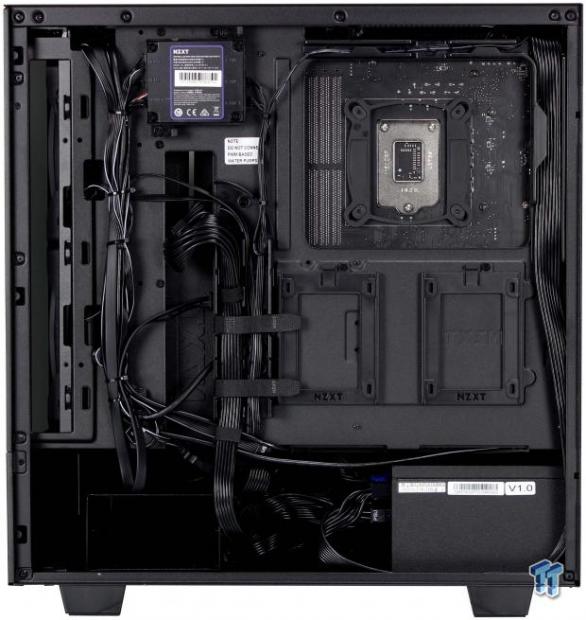
Cabling the H510 Elite was nice, for the most part, the tray for cable routing works very well. There are some occasions where the freedom to use zip tie loops may be preferred, but since you have both, you can mix and match to make the cables to run the way you need. The front panel cables had plenty of lent to be well managed while not having to hide a bunch. The addition of the smart device made things a bit more challenging as it has cables which add to the clutter but with some zip ties and a little time and love we made it something that is well managed.
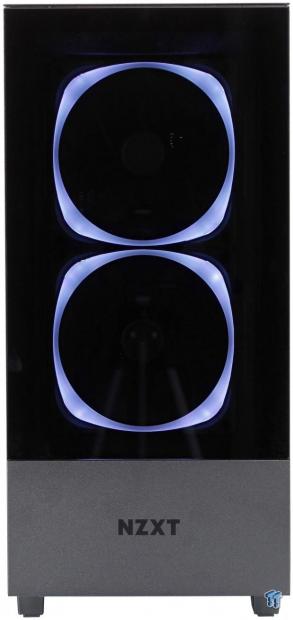
Here we see the final 'system on' shot to showcase the lighting. Unfortunately to proper test the H510 Elite I had to remove the two fans to fit the radiator in the chassis properly. But, before we move to the standard corsair non-lighted fans, can we just appreciate the aesthetic NZXT pulled off with the Aer 2 RGB 140mm fans in the front of the H510 Elite.

Here we see the system with all components and RGB powered on. I did really like the appearance of the H500i, with its flat slate front and TG main-panel. The H510 Elite I feel puts it on another level entirely as you have the RGB of the front Aer fans along with the internal components and it creates a new visual aesthetic for the H series chassis.
Final Thoughts
When I first saw the H510 Elite, I was not sure what to expect as NZXT had such a functional formula with the cable management and airflow, I was a bit worried they could push it the wrong direction in the pursuit of aesthetic. I am happy to report that NZXT made some meaningful improvements with an updated CAM controller, more LED channels which enables the front-firing LED fans, and just overall for the most part improved on the H5XX experience.
The performance when testing with our standard test bench, the H510 Elite tested within the margin for error in comparison to the H500i we recently tested. The CPU saw a stress load temperature 46.3C average over ambient. The GPU saw similar as well with a 40.9C average over ambient.
The H510 Elite we undoubtedly like based on the fact that it's an H500i with some tweaks and nothing significant has been changed that will functionally hinder the chassis in comparison except for the front I/O allocation I mentioned earlier. The addition of the tempered glass front paired with the Aer 2 RGB fans is a killer combo that gives excellent visual results. The addition of the upgraded smart controller means snappier response when using CAM to adjust the chassis. The addition of USB 3.2 Gen 2 Type-C gives the most current connectivity to the new HX10 series of chassis from NZXT.
Now we address some of the quarrels I have with the H510 Elite. Unfortunately, there's not much juicy here except for something we discussed at length in the front panel cabling section. But, it does bear repeating. The waste of two potential functional ports especially the USB 2.0 variety which is sought after by most AIOs and other devices for the internal cam controller seemed unnecessary when it could have been integrated into the cabling for the front panel Type-A port.
At the global price of $149.99, I think the H510 Elite is a killer deal and an excellent chassis for the price. The $169.99 price tag imposed on USA purchases due to Tariffs puts it in rougher territory, as there are many more potent options with the tack on of twenty dollars. I still think the H510 Elite is a stellar case, but its adoption in the USA with the tariff adjusted price may hit some rough waters.
Overall NZXT made some worthwhile improvements to the H series chassis with high speed I/O and the H510 Elite which takes the unique performance heritage and steps up the visual game in a significant way.
Shannon's Chassis Test System Specifications
- Motherboard: MSI MPG Z390 Gaming Edge AC Z390 (buy from Amazon)
- CPU: Intel Core i7 8700K (buy from Amazon)
- Cooler: Corsair H100i Pro RGB (buy from Amazon)
- Memory: GeIL Super Luce RGB GLS416GB3600C16ADC
- Video Card: MSI GeForce RTX 2060 Gaming Z (buy from Amazon)
- Storage: SanDisk M.2 256GB
- Power Supply: Silverstone Strider Platinum 1000W (buy from Amazon)
- OS: Microsoft Windows 10 Home 64-bit (buy from Amazon)
Performance |
94% |
Quality |
99% |
Features |
95% |
Value |
90% |
Overall |
95% |
Overall NZXT made some worthwhile improvements to the H series chassis with high speed I/O and the H510 Elite which takes the unique performance heritage and steps up the visual game in a significant way.

Similar Content
Related Tags

