The Bottom Line
Introduction, Specifications, and Pricing
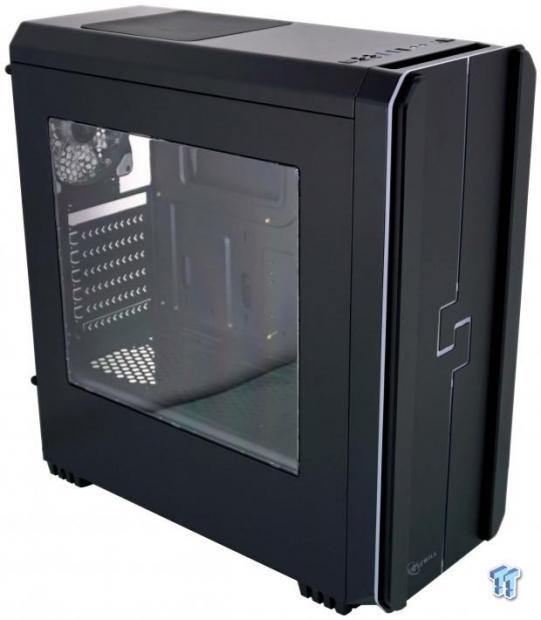
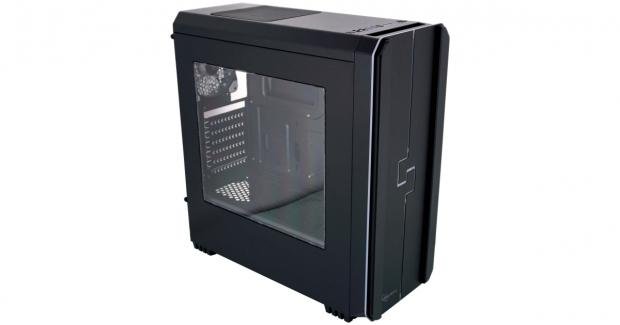
Rosewill's Orbit-Z1 is an RGB mid-tower chassis is aesthetically pleasing from the front, the LED lighting options are kind of cool to watch and look at, but behind that is an updated aging design. What could be virtually equated as a chassis for builders has been all dolled up, as well as taken on a price bump, for Rosewill to deliver the Orbit-Z1 as you are about to see it.
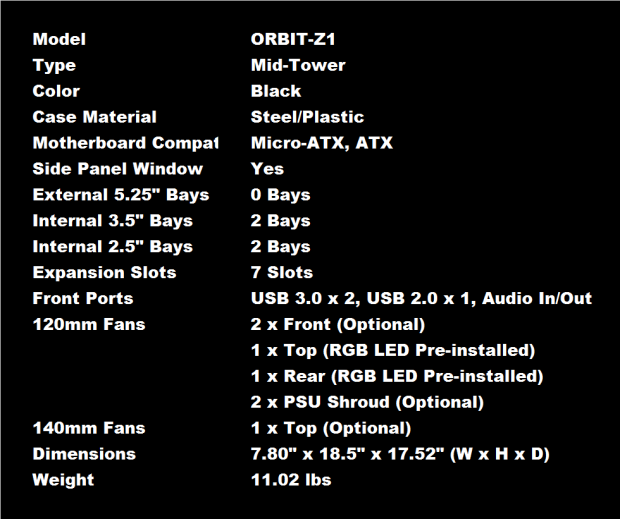
In the specifications, we see that Rosewill defines the Orbit-Z1 as a black mid-tower chassis, which is made of steel and plastic. The chassis will house Mini-ITX Micro-ATX, and ATX motherboards, although only the last two are shown as compatible. The Orbit-Z1 does offer a clear window in the left side panel. On the top of the chassis is the front I/O panel consisting of two USB 3.0 ports, a single USB 2.0 port, HD Audio jacks, an LED button, two fan control switches, a power button, and a reset button. The Orbit is 198mm wide, it is 470mm tall, it is 445mm deep, and all told, weighs in at slightly more than eleven pounds.
Inside of the case, we find that there are no 5.25" bays in the case, which also means the bezel is solid. There is a pair of 3.5" drive bays in a cage, but they do not use removable trays. When it comes to locations for 2.5" drives, there are two, which are found on the motherboard tray. In the back of the case, there are seven expansion slots, and six of them break away for use, but there is a single replaceable cover sent in the box.
Cooling is somewhat limited in the Orbit-Z1. The front of the case has room for a pair of 120mm fans, none are installed there, but there is room for water cooling in this area. The top of the case can use a 120mm or 140mm fan, but as it is shipped, there is a 120mm RGB fan present in this location. The rear of the case also has an RGB 120mm fan in place, and no options for 140mm fan mounting. The PSU shroud also offers a pair of locations for 120mm fans, but they have to be installed on top, hardware allowing.
You are asked to shell out $99.99 for this case. The reality is, we feel that this is a $40 case with fancy fans, some switches, a decorative front bezel, and some RGB LED lighting. In our mind, we do not see how that deserves another $60 in cost. One plus to the whole thing is that currently it is listed at Newegg for $79.99, which may be the saving grace, but we will let you decide after we show you what the Orbit-Z1 is all about.
Chad's Chassis Test System Specifications
- Motherboard: GIGABYTE GA-Z68X-UD4-B3
- CPU: Intel Core i7 2600K (buy from Amazon)
- Cooler: Corsair H80i GT (buy from Amazon)
- Memory: G.Skill Ripjaws F3-12800CL6D-4GBXH
- Video Card: ZOTAC GeForce GTX 970 AMP. Extreme Edition (buy from Amazon)
- Storage: SuperSpeed 128GB SSD
- Power Supply: SilverStone SST-ST85F-G (buy from Amazon)
- OS: Microsoft Windows 7 Ultimate 64-bit (buy from Amazon)
Packaging
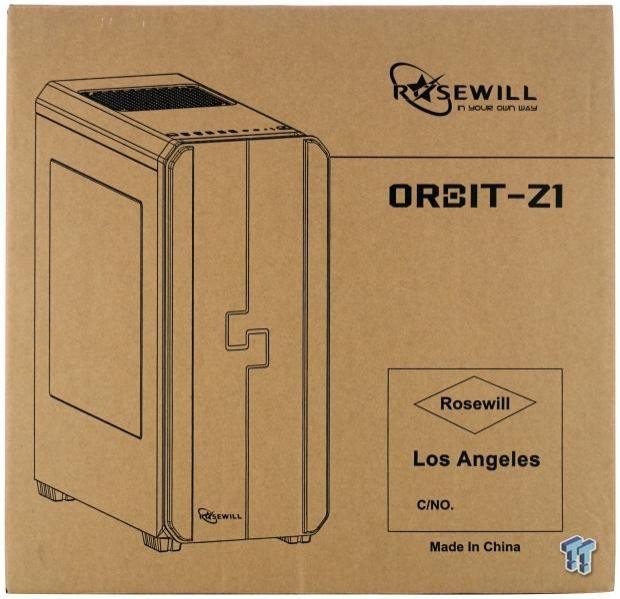
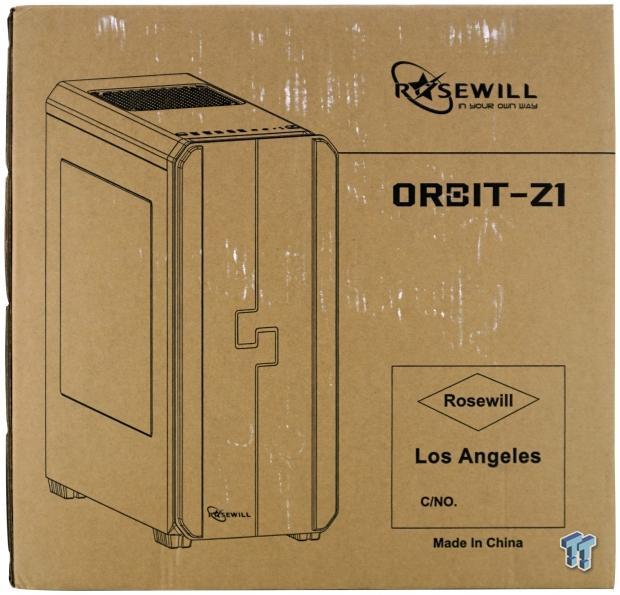
For the investment, we do not even get a fancy looking box. The Orbit-Z1 is shipped in a plain cardboard box, where on the front panel, we see a rendering of the case along with the company and product name. We also see that while Rosewill is based in California, the case is made in China.
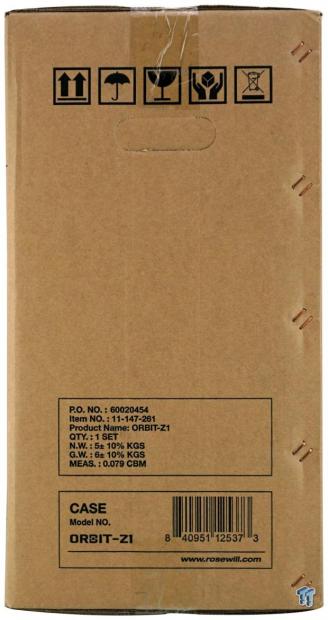
Iconography tops the side panel, just above the handle to carry the box around. All the way down at the bottom, we see two boxes, one with technical information and the second with the chassis name and bar code.
The back of the box is identical to what we saw on the front, except this side appears to have had a rougher trip than the other. We would have liked some features or something on the back, but Rosewill stuck to the essentials.
Down to every last detail, the side panels are identical too. No effort made to add anything, no specs, no features, nothing but what we already saw.
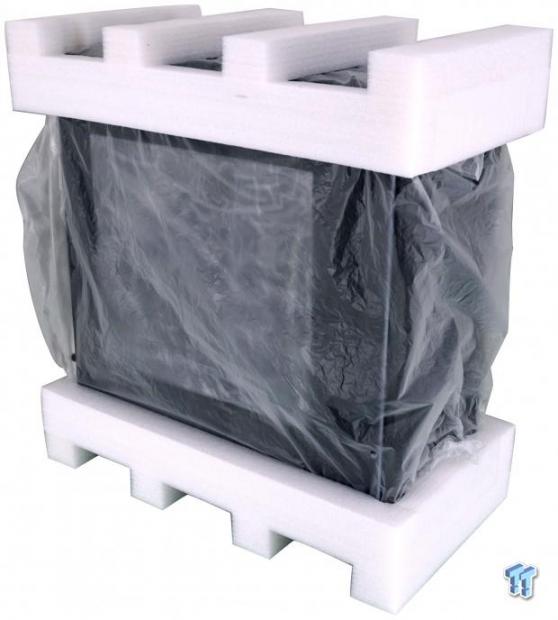
To be blunt, we do find it strange that this light chassis did not use Styrofoam caps on both ends. Instead, Rosewill opted for dense open celled foam, cut and glued to fit the chassis, with a plastic bag inside of it to protect the paint and side window. This particular Orbit-Z1 was delivered in excellent shape, though.
Rosewill Orbit-Z1 Mid-Tower Chassis
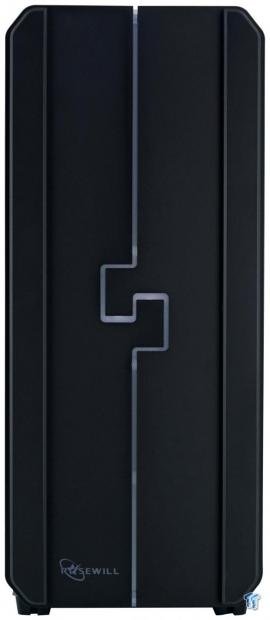
The front of the Orbit-Z1 delivers a black plastic bezel with lines inset on either side, running vertically. Down the middle is a light strip with deviated away from the center in the middle of the bezel for added style, and ends at the bottom near the Rosewill name and logo, which has been painted onto the chassis.
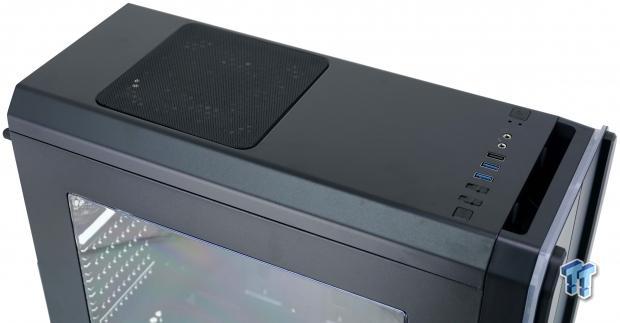
The top of the case has one fan location, currently covered with a magnetic dust filter, near the back. The rest of the top panel is steel, with the I/O panel near the gap behind the bezel, where the air is drawn into the front of the case.
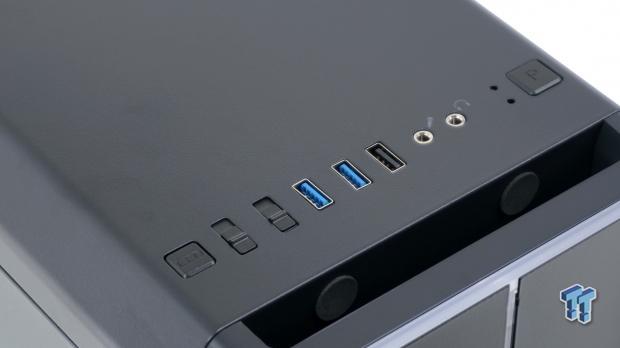
In the front I/O, we see the LED button, a pair of three position fan control switches, a pair of USB 3.0 ports and a single USB 2.0 port as we get to the center. To the right of center is the pair of HD Audio 3.5mm jacks, the power LED and HDD LED, and then we make it to the power button.
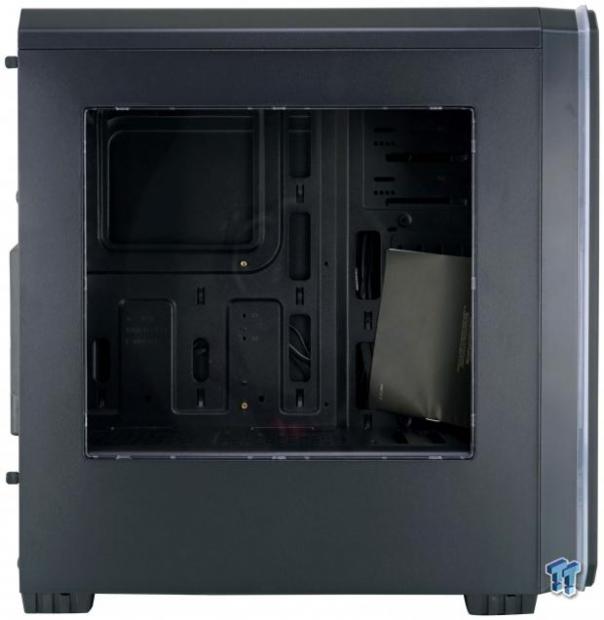
The left side of the case looks pretty standard for days gone by. A typical acrylic window in a steel door panel, with a hand hold at the back, covers most of the left side. The body lines are tight, but it does deliver an old school vibe aesthetically.
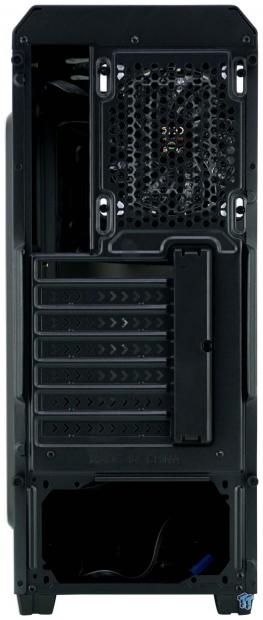
The back of the Orbit-Z1 is nothing special. The fan can be adjusted slightly next to the rear I/O. There are six covers in the expansion slots, which are externally accessed, and are covered with a bulky hunk of plastic. At least the PSU goes in at the bottom.
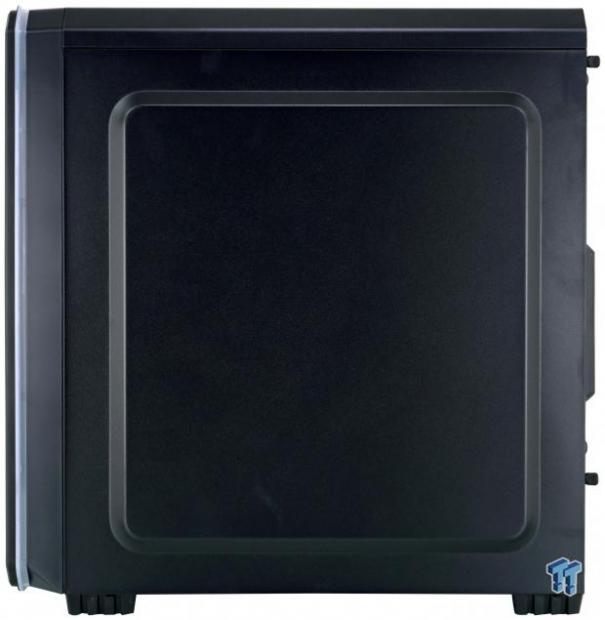
The right side of the Orbit-Z1 has a large bumped out section for wire management. As you will see soon enough, it is needed with this chassis, where many others have the room built into the frame as not to have the gaudy bump out here.
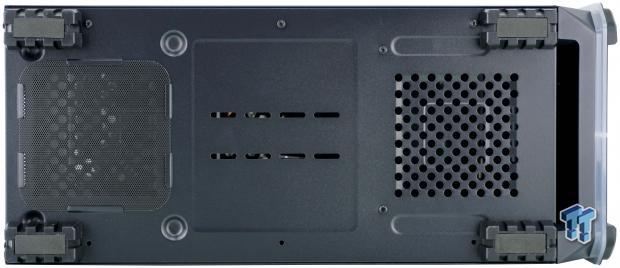
Under the chassis, we find rectangular plastic feet with thin rubber pads for grip. There is a removable dust filter where the PSU is to be installed, some random slits in the bottom of the chassis, and ventilation under where the HDDs are to go.
Inside the Orbit-Z1
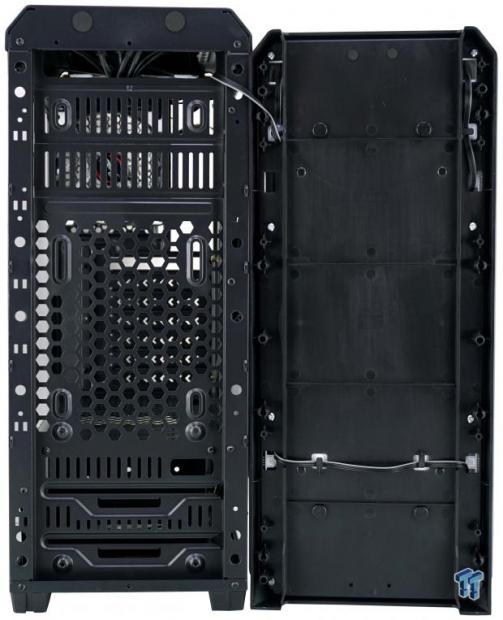
The bezel is easy to remove and allows the addition of fans to the front of the case. However, we noticed odd foam pads at the top of the frame which serves no purpose, and we also found out that the bezel is permanently wired to the chassis, with very little left even to swing the bezel out as we have it here.
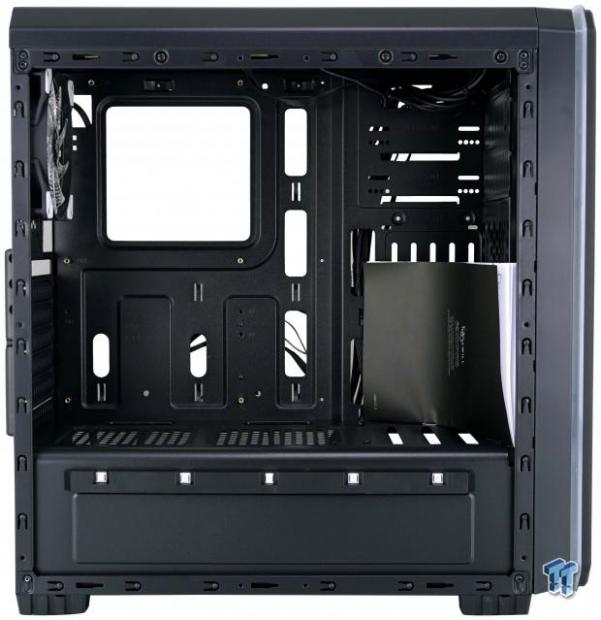
The first glance at the interior allows us to cover two things. This is where the manual is located, and we are somewhat excited to see a PSU shroud with five LEDs in it. This could make for a cool lighting effect.
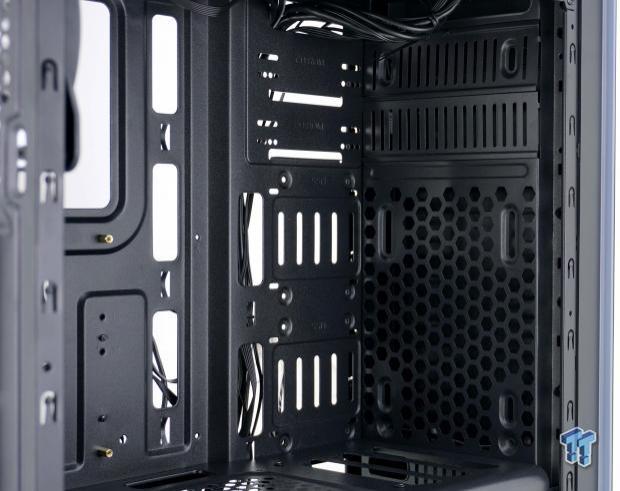
Since this is an older design, the chassis still has break-outs for the 5.25" bays, and we can also see rails in the motherboard tray for them. There is room for up to two 120mm fans to go here, and we can also see the SSD screw holes to the left of that.
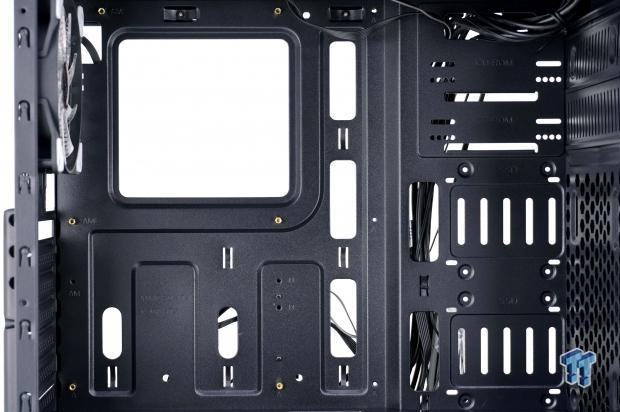
The motherboard tray lacks holes across the top of the motherboard tray, but there is the one off to the left of the CPU cooler access. Around the motherboard there are seven holes for wires, none of them have grommets, and there are eight places to tie wires.
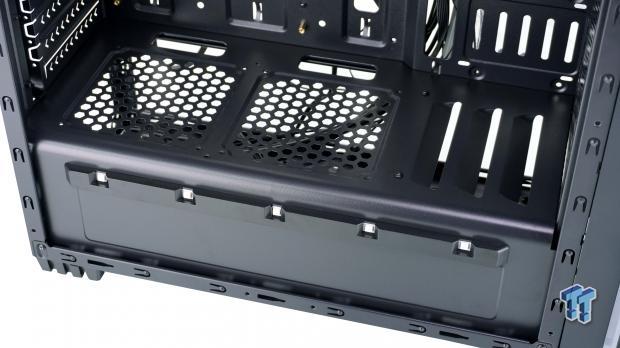
The PSU shroud is louvered at the front to help remove heat from the HDDs, while the rest of the top section is made to have fans sitting on it. The left side is not seen through the window, so the five LEDs can only illuminate the window, not the interior of the chassis.
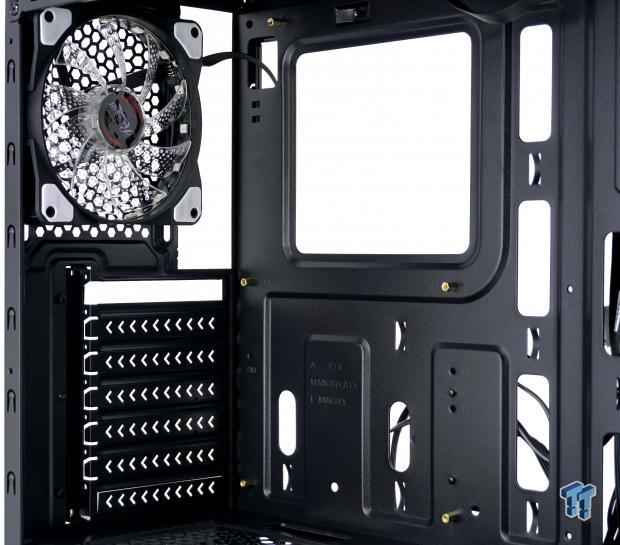
The fan at the back of the chassis is identical to the one found in the top of the case. Both are RGB lit, they have rubber pads on the corners, and are both wired to a control board. While you could hang a radiator in the back, the top of the case will not allow for it.
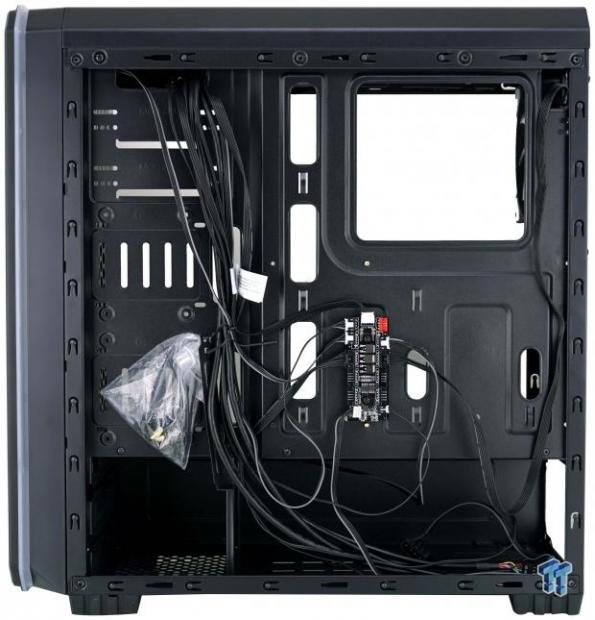
Behind the motherboard tray, we are first drawn to the mass of wires that this chassis has here. We do find the hardware tied to the motherboard tray, and we get a look at the control board for the LED lighting, the fan lighting, as well as for the fans speed control too.
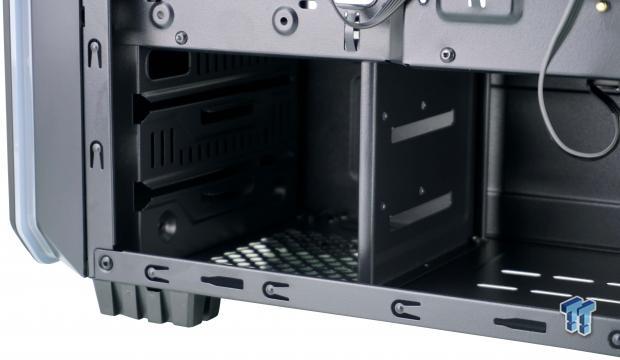
If hard drives are needed for the build, you slide them into this cage. On the left is a small rail which supports the left side of the drive, as you use thumbscrews to secure the right side of the drives into the cage.
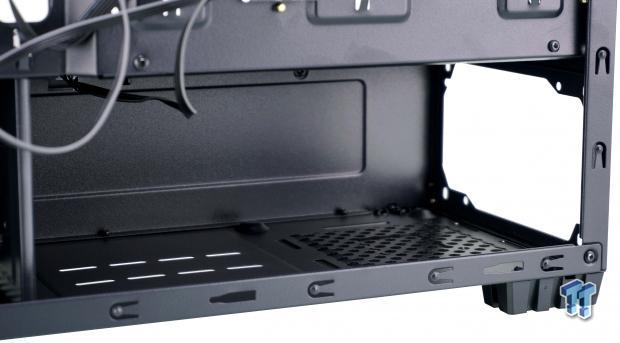
The rest of the floor of the Orbit-Z1 is left for the PSU and wires. The PSU sits on raised steel bumps and is screwed to the back of the case, but be sure to watch the LED power wire, as it does tend to get in the way at times.
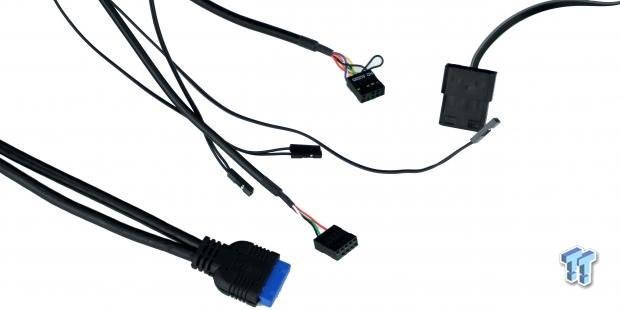
We will say that we appreciate the length of all of the cables, except when it comes time to make them look good with wire management. There is a native USB 3.0 cable, the USB 2.0 cable; the HDD LED wire, the Power LED wire and the power switch wire. That leaves the HD Audio lead and the 4-pin Molex connection which powers the controller board.
Hardware & Documentation
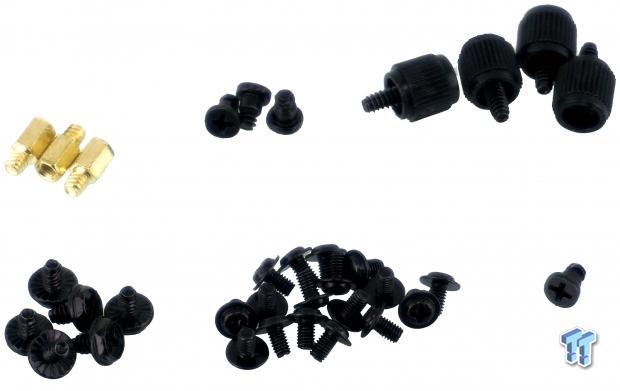
In the small bag of hardware, we found the mounting goodies. There are three standoffs, three of the four left side HDD screws we were supposed to get, and the four right-side HDD thumb screws at the top. Across the bottom, we run into the six hex head screws for the PSU and two for the expansion slots, seventeen M3 screws for the motherboard and SSDs, and a single screw to lock in the expansion slot cover on the outside of the case.
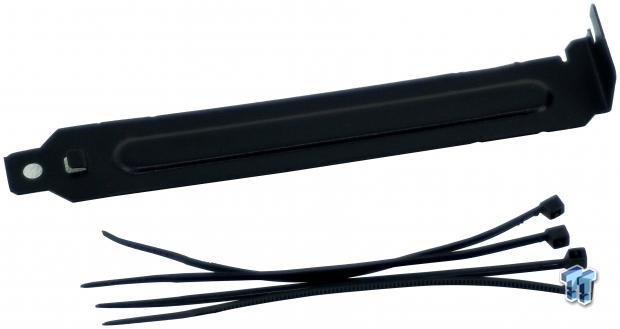
We also found that there is a single replaceable expansion slot cover. Since the top expansion slot does not have a cover in it, this can be used to block that hole if the top PCI-e slot is not what you want to use. While glad to see zip-ties, sending four of them to contain all of that wiring, is almost a joke.
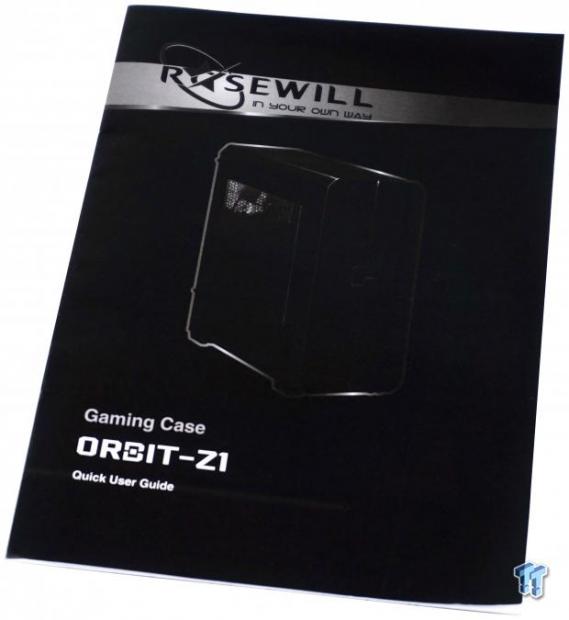
The quick user guide starts out with an almost exploded diagram of the case, moves quickly into what the front I/O contains, and then shows us a parts list. After that, there is step-by-step instruction to installing principal components, as it ends with a chart of the specifications.
Case Build & Finished Product
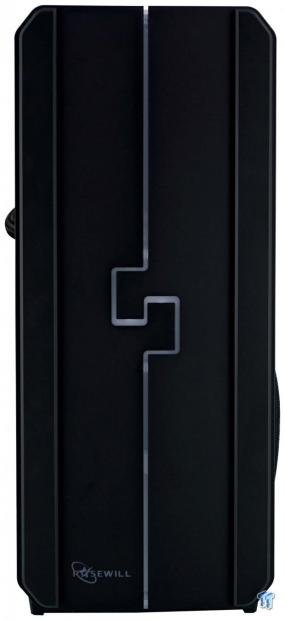
From the front, if it weren't for a bit of the tubes and a hint of the 240-pin cable on the other side, the Orbit-Z1 would look identical to what it did when we started. Even if you do not appreciate the design, we will say this view does improve when lit.
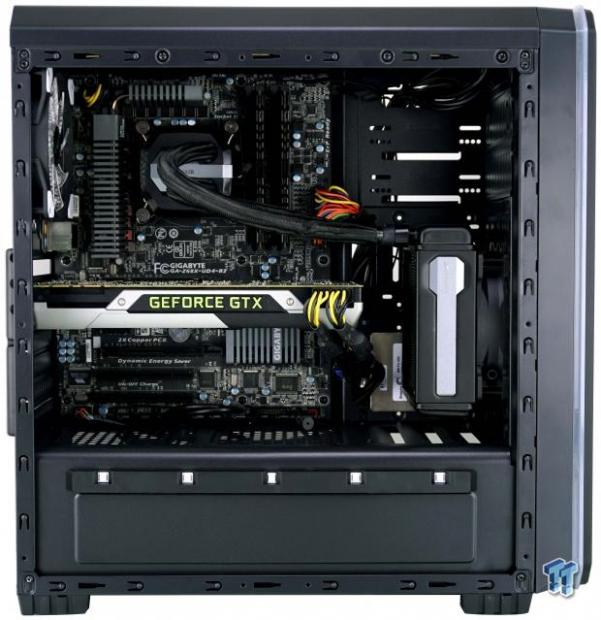
Rather than to hide the SSD behind the motherboard tray, we opted to use one of the wire management holes and have it visible through the window. Our AIO fits without issue, but we did have to stick to an FE card. The motherboard was also tricky to install, as the hole for the fan wire was used to pass the 8-pin through, and it caused misalignment and is why we would suggest a flat cable PSU in this case.
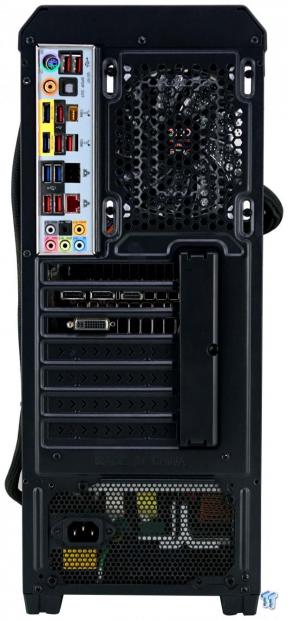
At the back, we snapped out the expansion slot covers we needed to use, but with only two screws for the expansion slots, we used them for the cards support, not to cover the gap above it. The PSU fits well at the bottom, and the dust shield went in easily; as long as you keep the fan wire out of the way.
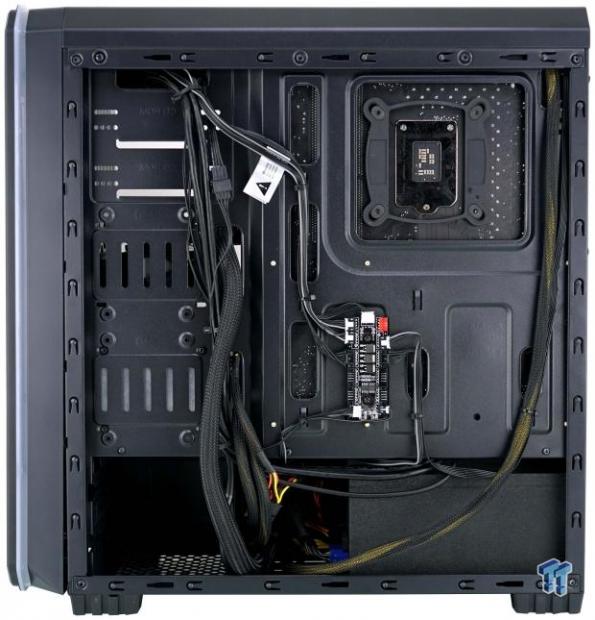
Wiring the chassis just to this extent took way too much time in our opinion. With eight wires to run to the hub, the five leads from the front of the case, and with only basic cables used for the build, we found the wire management holes to be small, and the tie points to be lacking, not only in location but the amount of them.
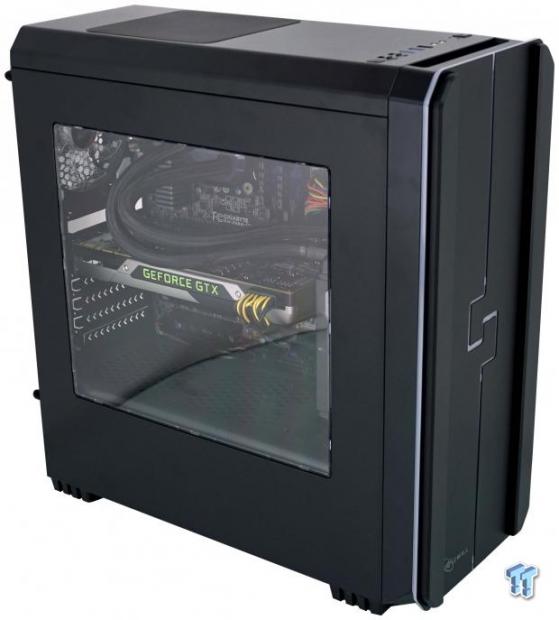
Even though many have gone to tempered glass at this point, we can appreciate that the side panel window is clear and free from any tint. This allows for an unimpeded view of the interior and is likely the best feature of this design.
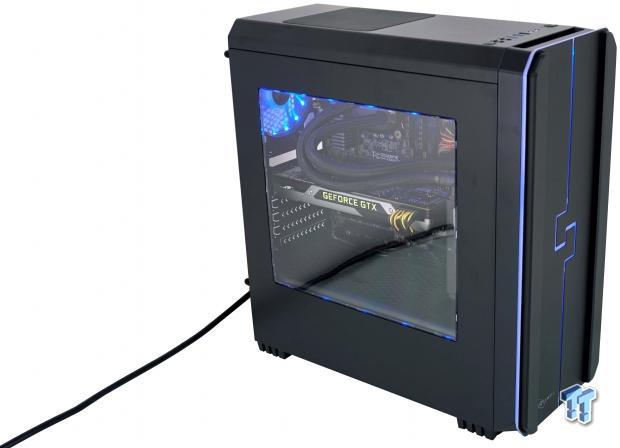
We chose blue to showcase the chassis and fan RGB LEDs. The LED button works them all in unison, and cycles through options of color, or turns them off. The cycle of options includes a slow pulse of shifting RGB colors, and pulsing light in solid colors of red, blue, green, yellow, purple, or teal. You also have solid color choices of red, green, blue, purple, teal, yellow, white, and one last option is a cycle of RGB colors which is fast in its color changes.
Final Thoughts
While we did enjoy cycling through the LED lighting, playing with the modes and color options, we soon got bored of it and realized we liked the solid color options better. The fans do help the flood the interior with colored light, but the five LEDs on the shroud only help to add points of light on the top and bottom edges of the acrylic window. We would have much rather just had a Rosewill logo we could see through the window if the shroud needed lighting at all.
Beyond that, we are dealing with a modified older design. While it may be cheaper for the company to adjust tooling rather than to replace it, we feel this layout and what the inside of the case has to offer is a bit behind the times. Great for builders or beginners, but the Orbit-Z1 is not a case that will continue to adapt to your needs as many other similarly priced cases do.
The fan speed control switches are nice and delivered 24 dB in low, 29 dB in medium, and 40 dB in high modes, with just the pair of installed fans being measured. We feel the SSD locations are conveniently hidden, but the proximity to the motherboard tray does not leave much room for powering the devices, as many PSUs do not have the wires at the end of the connection, but rather from the side. We were shorted a screw for the HDD cages, which means one of the hard drives could vibrate inside of the case, there are break out slots, not enough screws for a card and the extra slot cover, and not enough room for radiators in our opinion. As you can see, the lights and fan switches only got us so far. We are finding many more reasons why not to appreciate the Orbit-Z1 than we are ones to persuade you that this is the case of your desires.
What kicks the Orbit-Z1 down has to be the MSRP. As we mentioned earlier, just the case, without all the fancy do-dads is worth maybe $40. Add in two fans, a PSU shroud, and some low-range RGB LED lighting without any motherboard connectivity support, we cannot see the reason to pay the additional $60 to get to the $99.99 MSRP. With a market flooded as deeply as mid-tower cases is, you have to be on the top of the trends and desires of the masses to succeed there. Rosewill's Orbit-Z1 is just not enough to deliver the goods at this price, plain and simple. If you find this case on sale in the $65 to $75 range, by all means, try it out, but at nearly $100, the competition killed this case before it ever left the factory.
Thankfully, upon introduction, Newegg offering the Orbit-Z1 at $79.99 will make some itchy to click on the "buy" button, and at that price, we are more behind recommending it. It's still a tad rich for our blood, but we can see many liking it anyway and giving it a try.
Chad's Chassis Test System Specifications
- Motherboard: GIGABYTE GA-Z68X-UD4-B3
- CPU: Intel Core i7 2600K (buy from Amazon)
- Cooler: Corsair H80i GT (buy from Amazon)
- Memory: G.Skill Ripjaws F3-12800CL6D-4GBXH
- Video Card: ZOTAC GeForce GTX 970 AMP. Extreme Edition (buy from Amazon)
- Storage: SuperSpeed 128GB SSD
- Power Supply: SilverStone SST-ST85F-G (buy from Amazon)
- OS: Microsoft Windows 7 Ultimate 64-bit (buy from Amazon)

